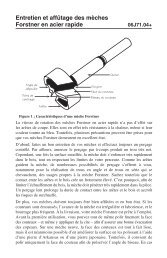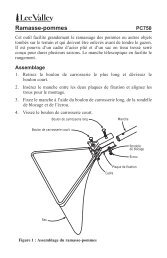
Print article - Lee Valley Tools
Print article - Lee Valley Tools
Print article - Lee Valley Tools
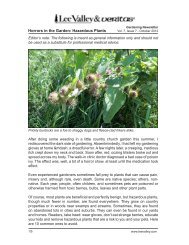
- No tags were found...

Create successful ePaper yourself
Turn your PDF publications into a flip-book with our unique Google optimized e-Paper software.
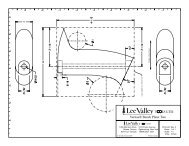
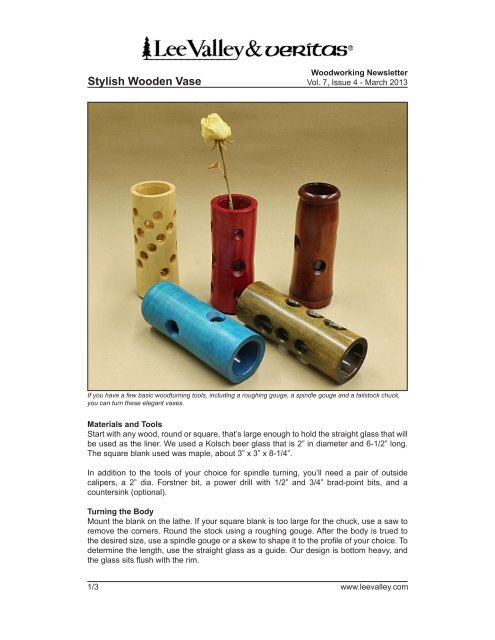
Stylish Wooden VaseWoodworking NewsletterVol. 7, Issue 4 - March 2013If you have a few basic woodturning tools, including a roughing gouge, a spindle gouge and a tailstock chuck,you can turn these elegant vases.Materials and <strong>Tools</strong>Start with any wood, round or square, that’s large enough to hold the straight glass that willbe used as the liner. We used a Kolsch beer glass that is 2” in diameter and 6-1/2” long.The square blank used was maple, about 3” x 3” x 8-1/4”.In addition to the tools of your choice for spindle turning, you’ll need a pair of outsidecalipers, a 2” dia. Forstner bit, a power drill with 1/2” and 3/4” brad-point bits, and acountersink (optional).Turning the BodyMount the blank on the lathe. If your square blank is too large for the chuck, use a saw toremove the corners. Round the stock using a roughing gouge. After the body is trued tothe desired size, use a spindle gouge or a skew to shape it to the profile of your choice. Todetermine the length, use the straight glass as a guide. Our design is bottom heavy, andthe glass sits flush with the rim.1/3 www.leevalley.com
Stylish Wooden VaseWoodworking NewsletterVol. 7, Issue 4 - March 2013Use the outside calipers, set to 2-1/4” or so, to check and guide the turning so that the body’snarrowest part is at least 2-1/4”. A simple narrowing of the middle can give a pleasing look.After the body has been shaped, work on the bottom and top according to your design.Sand the vase up to 400 grit.If the stock is too large for yourchuck, saw off the cornersDon’t measure – use the selectedglass to determine the vase lengthAdd details to the bottom and top,as well as a gentle curve to thebodyDrilling the HolesThe holes on the body can be of any size and pattern. You can draw the pattern on acardboard roll to visualize the design. To make holes such as the ones shown here, followthese steps:1.2.3.4.5.Draw four equidistant lines that run the length of the vase.Place a pencil on the tool rest to draw three equally spaced lines around the vase byrotating the body or turning it on the lathe. The lines should be about 2” from the bottomand 1” from the rim.Use 1/2” and 3/4” dia. brad-point bits to create 3/4” deep holes at the intersectingpoints.Put a chamfer on the holes using a 1-1/2” countersink (or use a rasp or sandpaperinstead).Sand the body up to 400 grit.Draw lines to help you determinethe hole placementDo not drill the holes all the waythrough, as it can cause blow-outsto the patternUse a countersink to soften theedges and accentuate the holes2/3 www.leevalley.com
Stylish Wooden VaseWoodworking NewsletterVol. 7, Issue 4 - March 2013Hollowing the BodyCheck and tighten the body in the chuck. Mount a 2” dia. Forstner bit in the tailstock. (Usea Maxi-Cut bit if you have one, as it clears chips better and runs cooler.) Drill the hole 6-1/2”deep. Keep a vacuum hose nearby to extract the shavings and allow you to check yourprogress.Check the fit of the glass after the hole has been bored. If necessary, enlarge the holeusing a drum sander or sandpaper wrapped around a dowel. Alternatively, use a 2-1/16”dia. Forstner bit to avoid such a concern.Finally, use a spindle gouge to undercut the base and create a bevel to add stability. Partoff the vase.Bore a hole deep into the body to accommodate theglassA concave bottom adds stabilityFinishingYou can apply an oil finish of your choice. To make colored maple vases like ours, use awater-based aniline dye mixed in equal parts with General Finishes Wood Turner’s Finishfor the first two coats. Then apply two to three coats of the finish only. The application stepsare as follows:1.2.3.Liberally apply the first coat of the dye / finish mixture to the inside and outside of thevase and wipe off the excess. Let it sit for an hour.Apply a second coat of the mixture, as above.Apply two to three coats of the finish only. Lightly sand between coats.After these steps are complete, your vase is ready. You now have another reason to bringflowers home to your loved ones.Text and photos by Charles Mak and Neill MathiesonCharles Mak is a businessperson in Alberta, Canada, and an enthusiastic hobby woodworker,teacher, writer and tipster. He works part-time at his local <strong>Lee</strong> <strong>Valley</strong> <strong>Tools</strong> store.Neill Mathieson is a full-time <strong>Lee</strong> <strong>Valley</strong> employee who enjoys many aspects of woodworking.He also teaches, among other seminars, a wooden-vase class.3/3 www.leevalley.com