MiniPlex-Lite NMEA-0183 multiplexer Manual - Y-tronic
MiniPlex-Lite NMEA-0183 multiplexer Manual - Y-tronic
MiniPlex-Lite NMEA-0183 multiplexer Manual - Y-tronic
- No tags were found...

Create successful ePaper yourself
Turn your PDF publications into a flip-book with our unique Google optimized e-Paper software.
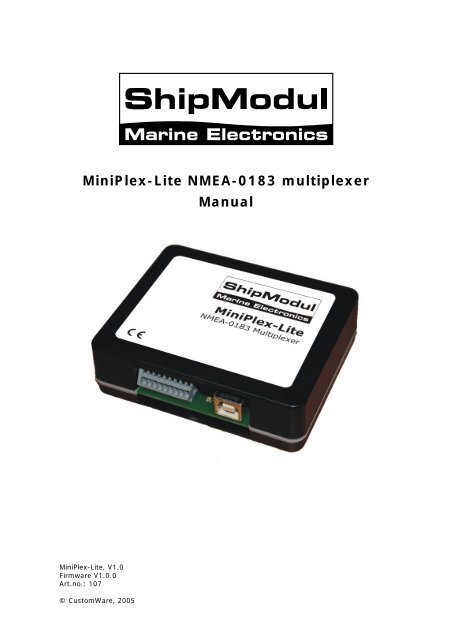
<strong>MiniPlex</strong>-<strong>Lite</strong> <strong>NMEA</strong>-<strong>0183</strong> <strong>multiplexer</strong><strong>Manual</strong><strong>MiniPlex</strong>-<strong>Lite</strong>, V1.0Firmware V1.0.0Art.no.: 107© CustomWare, 2005
IntroductionThe <strong>MiniPlex</strong>-<strong>Lite</strong> is a three-channel <strong>NMEA</strong> <strong>multiplexer</strong>, enabling the connection of multiple <strong>NMEA</strong>-<strong>0183</strong> instruments to a computer. Available are three <strong>NMEA</strong> inputs (listener-ports), one <strong>NMEA</strong>output (talker-port) and one USB port for connection with a computer.Specifications:Supply voltage:Current consumption:Inputs:Input resistance:Outputs:Buffers:<strong>NMEA</strong> Out:Speed <strong>NMEA</strong> in:Speed over USB channel:Speed <strong>NMEA</strong> out:Indicators:Dimensions:Housing:5V DC from USB bus.30 mA (80 mA max. with fully loaded talker port).3 x <strong>NMEA</strong>-183/RS-422, galvanically isolated.>800 Ohm.1 x USB, 1 x <strong>NMEA</strong>-183/RS-422.4 buffers of 128 characters (3 x <strong>NMEA</strong>, 1 x USB).Data from computer.4800 Baud.57600 Baud, regardless of setting on computer.4800 Baud.Data.98 x 79 x 28 mm.Flame retardant, automotive grade ABS.OperationThe <strong>MiniPlex</strong>-<strong>Lite</strong> reads <strong>NMEA</strong> sentences from the listener ports and stores them in a buffer, one foreach input. The sentences are then read from the buffers in a round robin fashion and sent to thecomputer via then USB port. Sentences that are received from the computer, are sent to the <strong>NMEA</strong>talker port (<strong>NMEA</strong> Out) , which can be used to control an autopilot.Since the internal speed of the USB port is much higher than the speed of the talker port,sentences will be discarded when the computer sends a new sentence, while the current sentenceis still being transmitted from the talker port. In normal situations where the computer sends anautopilot control sentence (XTE, cross track error), this will not be a problem since these sentencesare usually sent only once a second. But when waypoints are uploaded to a connected GPS, all butthe first waypoint sentence will be discarded because the transmission of the first sentence is stillin progress. To prevent this situation, find the com port settings of your navigation software andenable “Hardware Flow Control”. With this option on, the <strong>MiniPlex</strong>-<strong>Lite</strong> will will stop the flow of datatemporarily after receiving a sentence, just to enable it again after the sentence has beentransmitted from the talker port.Connections<strong>NMEA</strong> Listener PortsThe <strong>MiniPlex</strong>-<strong>Lite</strong> has three listener ports, ‘In 1’to ‘In 3’. Each listener port should be connected toone instrument only. These inputs are galvanically isolated from the <strong>multiplexer</strong>, as specified in the<strong>NMEA</strong>-<strong>0183</strong> standard.<strong>NMEA</strong> In1a1b2a2b3a3babComConnect the ‘a’and ‘b’terminals of the listener port on the <strong>MiniPlex</strong>-<strong>Lite</strong> to the ‘a’and ‘b’terminalsof the talker port on the instrument. Other designations used are ‘Data +’and ‘Data -’, ‘TX+’and‘TX-’or ‘Out +’and ‘Out –’.Some instruments have single ended talker ports, with only one data terminal. Connect thisterminal to the ‘a’terminal on the <strong>MiniPlex</strong>-<strong>Lite</strong>, and connect the ‘b’terminal on the <strong>MiniPlex</strong>-<strong>Lite</strong>with the instrument ground.2
Out A / +In ATXIn AOut B / -In BGNDIn BInstrument Multiplexer Instrument MultiplexerDifferentialSingle-ended<strong>NMEA</strong> Talker PortThe talker port can be connected to up to four instruments and/or an autopilot. Connect the ‘a’and‘b’terminals of the talker port on the <strong>MiniPlex</strong>-<strong>Lite</strong> to the ‘a’and ‘b’terminals of the listener port(s)on the instrument(s). Other designations used are ‘Data +’and ‘Data -’, ‘RX+’and ‘RX-’or‘In +’and ‘In –’.Some instruments have single ended listener ports, with only one data terminal. Connect thisterminal to the ‘a’terminal on the <strong>MiniPlex</strong>-<strong>Lite</strong>, and leave the ‘b’terminal on the <strong>MiniPlex</strong>-<strong>Lite</strong>unconnected. Connect the ‘Com’terminal on the <strong>MiniPlex</strong>-<strong>Lite</strong> with the instrument ground.Out AIn A / +Out ARXOut BIn B / -Out BGNDGNDGNDMultiplexer Instrument Multiplexer InstrumentDifferentialSingle-endedOut AIn A / +In A / +RXOut BIn B / -In B / -GNDGNDMultiplexerInstrumentInstrumentInstrumentMultiple instrumentsUSB PortThe <strong>MiniPlex</strong>-<strong>Lite</strong> can be connected directly with the USB port of a computer or a USB hub with thesupplied cable. The first time the <strong>MiniPlex</strong>-<strong>Lite</strong> is connected, the computer will detect new hardwareand ask for a driver CD. Insert the driver Cd into the drive and click OK. Follow the directions onthe screen to complete the installation. The installation on Windows 2000 and XP is a two stepprocess. First, the driver for the <strong>MiniPlex</strong>-<strong>Lite</strong> will be installed. Next, Windows will detect a USBSerial device and will install a driver for that.Power SupplyThe <strong>MiniPlex</strong>-<strong>Lite</strong> operates from the power supplied by the USB port. There is no external supplyconnection needed.Driver InstallationThe <strong>MiniPlex</strong>-<strong>Lite</strong> needs a device driver for proper operation which is supplied on the accompanyingCD. When the <strong>MiniPlex</strong>-<strong>Lite</strong> is connected for the first time, Windows will detect new hardware andask for a driver disk. Insert the CD into the drive and follow the instructions on your screen. The3
installation on Windows 2000 and XP is a two step process. First, the driver for the <strong>MiniPlex</strong>-<strong>Lite</strong>will be installed. Next, Windows will detect a USB Serial device and will install a driver for that.The installed driver will provide a virtual serial port, which can be used by existing applications likeany normal serial port. This port will be named ‘COMx’were ‘x’is the first number available afterthe existing serial ports. If for instance COM1 and COM2 are already present, the created virtualserial port will be named COM3.To determine the number of the newly created port, go to the ‘Device Manager’and open thebranch ‘Ports (COM & LPT)’. The port for the <strong>multiplexer</strong> is listed as ‘USB Serial Port (COMx)’where‘COMx’is the name of the newly created serial port.To change this port number, double click on the ‘USB Serial Port (COMx)’entry to open theproperty page of this port. Next, select the ‘Port Settings’tab and click on the ‘Advanced…’button.In the appearing window the used port number can be changed. Do not change any other setting inthis window.It is possible to select a port number that is already present on the computer, like COM1. Theoriginal COM1 port will then be disabled als long as the <strong>MiniPlex</strong>-<strong>Lite</strong> is connected to the computer.This feature allows the port number to be set in a low range from COM1 to COM4, to accommodatesoftware that only allows COM1 to COM4 to be selected.More than one <strong>MiniPlex</strong>-<strong>Lite</strong> can be connected at the same time. Every new unit will create a newvirtual serial port. The number of this port will always be assigned to the same unit.Windows allows a maximum of 256 virtual serial ports. Not all software may be compatiblehowever, with serial ports numbered above COM9.When installing updated drivers, uninstall the original drivers first with the ‘Add/Remove Programs’icon in the Control Panel or use the ‘Update Driver’button on the ‘Driver’page of the ‘USB SerialPort’property-page.When the driver installation is complete, the <strong>MiniPlex</strong>-<strong>Lite</strong> is ready for use. No further configurationis necessary.LED IndicatorThe <strong>MiniPlex</strong>-<strong>Lite</strong> has one green LED which indicates the reception of valid <strong>NMEA</strong> data on thelistener ports or the USB port. The LED only blinks on valid <strong>NMEA</strong> sentences that start with a ‘$’or‘!’and end with a LF character, thus indicating a proper connection and polarity of the connectedinstrument. In case of a reverse polarity, the green LED will not blink.MountingThe <strong>MiniPlex</strong>-<strong>Lite</strong> is not waterproof. It should be mounted at a dry place, like behind the instrumentpanel, on a flat surface.4
Declaration of ConformityWe,CustomWareRoggehullen 89403 WG AssenThe NetherlandsTel.: +31 592 375700Fax: +31 592 375550Declare under our sole responsibility that the productShipModul <strong>MiniPlex</strong>-<strong>Lite</strong>to which this declaration relates is in conformity with the following specifications:EN/IEC61000-6-1:1997 and EN/IEC61000-6-3:1996FCC Title 47 CFR, Part 15 Class BThe product herewith complies with the requirements of the EMC Directive 89/336/EEC and carriesthe CE-marking accordingly.Assen, 18-9-2005M. SprangThis device complies with Part 15 of the FCC Rules. Operation is subject to the following conditions:(1) This device may not cause harmful interference, and (2) this device must accept anyinterference received, including interference that may cause undesired operation.5
ShipModul / CustomWareRoggehullen 89403 WG AssenThe NetherlandsTel.: +31 592 375700Fax: +31 592 375550web: www.shipmodul.come-mail: info@ shipmodul.com6