SHR Series Woodburning Fireplace - Sweepsusa.net
SHR Series Woodburning Fireplace - Sweepsusa.net
SHR Series Woodburning Fireplace - Sweepsusa.net

Create successful ePaper yourself
Turn your PDF publications into a flip-book with our unique Google optimized e-Paper software.
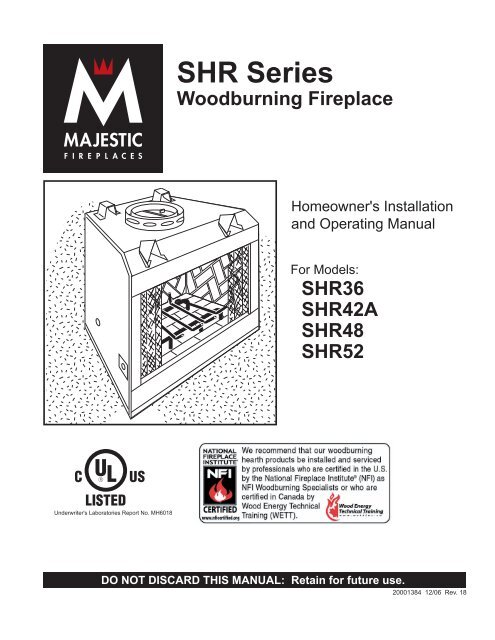
<strong>SHR</strong> <strong>Series</strong><strong>Woodburning</strong> <strong>Fireplace</strong>Homeowner's Installationand Operating ManualFor Models:<strong>SHR</strong>36<strong>SHR</strong>42A<strong>SHR</strong>48<strong>SHR</strong>521384<strong>SHR</strong> cover5/27/99 djtUnderwriter's Laboratories Report No. MH6018DO NOT DISCARD THIS MANUAL: Retain for future use.20001384 12/06 Rev. 18
<strong>SHR</strong> <strong>Series</strong> <strong>Woodburning</strong> <strong>Fireplace</strong>Safety InformationPLEASE READ THIS MANUAL BEFORE INSTALLING AND USING FIREPLACE.IMPORTANT: Read all instructions and warnings carefully before starting installation. Failure tofollow these instructions may result in a possible fire hazard and will void the warranty.DescriptionThe <strong>SHR</strong> <strong>Series</strong> fireplaces are solid fuel, woodburningfireplaces. The <strong>SHR</strong>36/42A/48 (Super Hearth) areclean-face fireplaces.2PrecautionsCFM Corporation fireplaces and component parts havebeen highly tested and will operate safely when installedin accordance with instructions provided in thismanual. Carefully read and understand all instructionsbefore beginning installation.If you notice any damage to fireplace or componentparts, immediately report damage to your Majestic<strong>Fireplace</strong>s dealer.Only use CFM Corporation components or the warrantywill be voided and a fire hazard may be created.CFM Corporation warranty will be voided by and CFMCorporation disclaims any responsibility for the followingactions:• Installation of any damaged fireplace or chimneycomponent;• Modification of fireplace, chimney assemblyor any component parts thereof; (except forchase flashings as detailed in the ChimneyTop installation instructions).• Installation other than as instructed by CFMCorporation; or• Installation and/or use of any component partnot manufactured or approved by CFM Corporationin combination or assembly with a CFMCorporation fireplace system, notwithstandingany independent testing laboratory orother third party approval of such componentparts or accessory.Any such action may possibly cause a fire hazard.Consult local building codes to ensure that you are incompliance before installing the fireplace.<strong>Fireplace</strong>s must be vented to the out-of-doors.Do not obstruct or modify air inlets/outlets in anymanner.Do not install combustible materials on any of theblack fireplace surround.Burn only solid wood fuel or gas logs.Do not install a solid fuel burning insert or otherproducts not specified for use with this fireplace.Proposition 65 Warning: Fuels used in gas, woodburningor oil fired appliances, and the products ofcombustion of such fuels, contain chemicals knownto the State of California to cause cancer, birth defectsand other reproductive harm.California Health & Safety Code Sec. 25249.6WARNING: Check with your electronics manufacturerbefore installing a television or other electronicdevice above this fireplace.DraftsThe fireplace should not be located in areas that createdrafts (ie: frequently opened doors and central heatingair inlets/outlets) that hamper the normal flow of air intothe fire.Gas LogsIf you plan to install a gas log, the gas line should beinstalled before framing the fireplace. The gas line mustbe installed by a certified gas line installer.<strong>SHR</strong>36 / <strong>SHR</strong>42A / <strong>SHR</strong>48 / <strong>SHR</strong>52ListedUL 127 / ULC-S610Standard for Factory Built <strong>Fireplace</strong>s<strong>SHR</strong>36 units: FH30R0<strong>SHR</strong>42A units: GH40R0<strong>SHR</strong>48 units: HH30R0<strong>SHR</strong>52 units: IH10R0Table of ContentsSafety Information . . . . . . . . . . . . . . . . . . 2Specifications and Framing . . . . . . . . . . 3Parts Identification . . . . . . . . . . . . . . . . . 5Chimney Requirements . . . . . . . . . . . . . 6Planning Information . . . . . . . . . . . . . . . . 7Installation . . . . . . . . . . . . . . . . . . . . . . . 8Replacement Parts . . . . . . . . . . . . . . . . 20Accessories . . . . . . . . . . . . . . . . . . . . . 2120001384
<strong>SHR</strong>36 <strong>Series</strong> <strong>Woodburning</strong> <strong>Fireplace</strong><strong>SHR</strong> <strong>Series</strong> <strong>Woodburning</strong> <strong>Fireplace</strong>s57" (1472mm)""57" (1472mm)"(1056mm)" (19mm)" (2080mm)OutsideAir""(397mm)Rough " (19mm)OpeningDepth"(2264mm)"(680mm)RoughOpeningHeight48"(1226mm)44"(1118mm)" (737mm)Rough Opening Width 47"(1213mm)36"(914mm)13" Dia.(340mm)11" Dia.( 279mm)12"(318mm)"(610mm)Gas LineAccess13"(349mm) 7"(197mm)"(189mm)"(368mm)Gas Line Access46" (1175mm)FP526AFig. 1 <strong>SHR</strong>36 <strong>Series</strong> specifications and framing.65" (1654mm)""65" (1654mm)"(1172mm)" (19mm)OutsideAir" (2340mm)<strong>SHR</strong>42A <strong>Series</strong> <strong>Woodburning</strong> <strong>Fireplace</strong>"19"(489mm)Rough " (19mm)OpeningDepth"(267mm)"(743mm)RoughOpeningHeight48"(1222mm)54"(1378mm)FP546A<strong>SHR</strong>36 Specs5/18/99 djt" (826mm)Rough Opening Width 53"(1365mm)42" (1067mm)13" Dia.(340mm)11" Dia.(279mm)12"(311mm)28"(724mm)Gas LineAccess14"(362mm) 9"(229mm)10"(258mm)Gas Line Access52" (1327mm)"(189mm)FP546AFig. 2 <strong>SHR</strong>42A <strong>Series</strong> specifications and framing.20001384FP546A<strong>SHR</strong>42 specs6/15/99 djt3
CFig. 4a Hearth dimensions.FP1531Chase Installation hearth dimensionsInsulation methods shown 9/04 are optional djtfor cold climate, not a requirement for unitoperation.BAFP1531<strong>SHR</strong> <strong>Series</strong> <strong>Woodburning</strong> <strong>Fireplace</strong>sFront Width Back Width DepthA B C<strong>SHR</strong>36 35³⁄₄" 22" 20³⁄₈"(908 mm) (559 mm) (516 mm)<strong>SHR</strong>42A 41⁷⁄₈" 26⁵⁄₈" 23³⁄₈"(1064 mm) (676 mm) (594 mm)<strong>SHR</strong>48 47³⁄₄" 34" 20¹⁄₄"(1213 mm) (864 mm) (514 mm)<strong>SHR</strong>52 52" 34¹⁄₂" 25¹⁄₄"(1321 mm) (876 mm) (641 mm)Termination CapStorm CollarPan FlashingBatt Insulation(cut out aroundfirestop)FirestopDraftstopCeiling LevelLedge BracketSurroundDamper ControlGas Line Access(both sides)Gas Line Knockout(both sides)ScreenGrateOutside AirCover PlateFig. 5 <strong>Fireplace</strong> and chase parts identification. (<strong>SHR</strong>48 shown)Metal SafetyStrips (1,2 or 3)FireboxFP554A20001384 FP554ASH <strong>Series</strong>1/28/99 djt5
Planning Information<strong>SHR</strong> <strong>Series</strong> <strong>Woodburning</strong> <strong>Fireplace</strong>sPreplanning an installation is very important to ensuresafety and to save time and money. An installer mustpredetermine where a fireplace will be set and how thechimney system will be run.Mounting the <strong>Fireplace</strong>A fireplace may only be mounted on the following surfaces:1. A flat combustible surface.2. A raised wooden platform.3. A concrete block or other solid object placed beneatheach of the four (4) corners of the fireplace.The fireplace must be spaced 3/4 inch from a combustibleback wall and 3/4 inch from a combustible sidewall or support. (Fig. 20, Page 14)Planning the Chimney RunDetermine how the chimney will be run, length of runand chimney components required to complete thejob. (Fig. 6) Never install a chimney below minimumheights.L T11CFChimneyModel No.TotalLength(L T )InstalledLength(L 1 )The Ten Foot RuleMajor U.S. building codes specify a minimum chimneyheight above the roof top. The “Ten Foot Rule” is a firesafety rule and not a draft rule. To ensure proper draft,it is recommended that you always meet or exceed the“Ten Foot Rule,” especially when installing a terminationon a high pitch roof. (Fig. 8)The key points of the "Ten Foot Rule" are:1. If the horizontal distance from the chimney to thepeak of the roof is 10' (3m) or less, the top of thechimney must be at least 2' (610mm) above the peakof the roof, but never less than 3' (914mm) in heightabove the highest point where it passes through theroof.2. If a horizontal distance from the chimney to the peakof the roof is more than 10' (3m), a chimney heightreference point is established that is on the surfaceof the roof a distance of 10' (3m) from the chimney ina horizontal plane. The top of the chimney must beat least 2' (610mm) above the reference point, butnever less than 3' (914mm) in height above the highestpoint where it passes through the roof.0 To 10'L 1L 111CF111CF1811CF311CF4""""""""2' Min.3'Min.0 To 10'2' Min.3'Min.Fig. 7 Installed lengths of chimney sections.FP288bFP288BIn planning a chimney system, it is important 11CF to know:<strong>SHR</strong> SERIES1. The height of a chimney is measured from the hearth5/11/99 djtto the exit point on the termination.2. A chimney cannot be offset more than 30 degreesfrom a vertical plane.3. A chimney may run straight up or it may be necessaryto offset it to avoid obstructions.4. The maximum length of an angled run (total chimneysystem) is 20 feet.5. No more than 2 offsets (4 total 30˚ elbows in) perfireplace may be used.6. A guy wire stabilizer is required for chimneys extendingmore than 6 feet above a roof line.ReferencePointFig. 8 Ten Foot Rule illustration.AC2464/1/96AC246200013847
<strong>SHR</strong> <strong>Series</strong> <strong>Woodburning</strong> <strong>Fireplace</strong>Chimney SupportsThe chimney system is supported by the fireplace forvertical chimney heights less than 30 feet above thehearth. Chimney supports are required if the verticalheight exceeds 30 feet with 11CF chimneys. Locatechimney supports at ceiling holes or other structuralframing at 30 foot heights. Spacing between chimneysupports must not exceed 30 feet. Use ChimneySupport Model 11CS. (NOTE: The 11CS can not bemounted directly to the fireplace.) Support providedby elbow straps fulfills the support requirement only ifthey are spaced as previously described. (A chimneysupport is 2¹⁄₂" long when installed.)Angled chimney runs require a support every six (6)feet in addition to the elbow straps. Chimney supportsare used for this function. (Fig. 9)Chase InstallationA chase is a vertical boxlike structure which enclosesthe fireplace and/or chimney. Chases are typically builton the outside of the house with fireplace opening cutinto the outer wall of a room. (Page 5, Fig. 5)If you need help in determining fireplace location or howthe chimney system should be run, contact your Majestic<strong>Fireplace</strong>s dealer for assistance.InstallationInsulating <strong>Fireplace</strong>Enclosure for Cold ClimatesIf you live in a cold climate, it is not required buthighly recommended that you insulate the fireplaceenclosure to eliminate cold air pe<strong>net</strong>ration as muchas possible.Insulate base of fireplace with a noncombustibleinsulation rated for a minimum of 300° F. Insulatingis very important for outside wall installations overa concrete slab. If fireplace is installed on a platform,insulation should be placed on top of the platformbefore fireplace is set. (Fig. 10)When a fireplace is installed in a chase or on anoutside wall, enclosure should be treated like anyoutside wall in a home. Insulation should be installedon the inside wall as well as the outside wall(s). Ina chase, it is also a good idea to install a firestop atthe first ceiling level above the fireplace and enclosethe chase with sheeting material. Insulation maythen be installed above sheeting material to assurethe space around the fireplace is totally protected.(Fig. 5)CAUTION: WHEN INSTALLING A FIREPLACE INAN INSULATED ENCLOSURE, BE SURE ALL RE-QUIRED AIR SPACES ARE MAINTAINED. (Page15, Fig. 19)Chimney SupportStrap11CSFP284Fig. 9 Chimney support installationIWF284MBUF5/25/96820001384
<strong>SHR</strong> <strong>Series</strong> <strong>Woodburning</strong> <strong>Fireplace</strong>CAUTION: REPORT TO YOUR DEALER ANY PARTSDAMAGED IN SHIPMENT, SPECIFICALLY CHECKTHE END CONNECTION OF CHIMNEY SECTIONSAND ELBOWS.NOTE: <strong>SHR</strong> <strong>Series</strong> <strong>Fireplace</strong>s must use CFM Corporationmodel 11CF, 11 inch, 2 wall chimney systems. Theinstallation procedure described in this manual appliesonly to the 11CF system, chimney components maynot be mixed.Straight-Up Chimney InstallationTo mark the centerline of the flue, put the fireplace infinal position and measure out from the wall 11¹⁄₈". Marka spot on the ceiling directly above the fireplace. Drawa line parallel to the back wall through this mark. (Fig.13)Using a plumb bob positioned directly over center pointof fireplace flue collar, mark the ceiling to establish thechimney center point. (Fig. 13)Offset InstallationIn order to clear an obstruction, it may be necessaryto offset chimney from vertical. This is accomplishedby using CFM Corporation elbows. Use the 30˚ OffsetElbow table on Page 6 to determine proper offset andparts required.Each offset requires two (2) elbows. The second elbowis equipped with support straps. It is very important toinstall the second elbow in each offset as close to theceiling or support as possible so the elbow straps canbe secured to framing members to help support theweight of the chimney.Determine offset distance of your chimney arrangementfrom centerline of fireplace to centerline of chimneywhere it is to pass through ceiling.Locate center point of the chimney on ceiling as thougha straight up chimney arrangement is to be used. Measureyour offset dimension from straight up chimneycenter point on ceiling.Ceiling Chimney Hole/Possible ObstructionsThe size of the hole in ceiling will vary with the angle atwhich the chimney passes through ceiling.Drive a nail up through ceiling at marked chimneycenter point. Go to floor above and see where holewill be cut. Check to see where existing ceiling joistsand other possible obstructions are located...i.e. wiring,plumbing etc... If necessary, reposition chimney and/orfireplace to avoid obstructions.FP556<strong>SHR</strong>Actual CenterpointChimney Centerline11¹⁄₈"(283 mm)Plumb LinePlumb BobImaginaryCenterpointFig. 13 Locate centerline of chimney with plumb line.Frame the ceiling chimney hole as shown in Figure15. It is good practice to use framing FP556<strong>SHR</strong> lumber that is the<strong>SHR</strong>same size as the ceiling joists; this is a requirement atLOCATE CENTER LINEattic level.5/11/99 djtThe following table gives firestop spacer model numbers:CHIMNEY HOLE SIZEAngle of Chimney at CeilingSize of Chimney Vertical 30˚11" CF 2-WallCutting the HoleCover fireplace collar opening and cut proper sizedchimney hole in chimney. (Fig. 14 & 15)Framing the Ceiling HoleFS2A17" x 17"(445 x 445 mm)FS6A17" x 29"(454 x 753 mm)Fig. 14 Ceiling chimney hole size necessary for installingfirestop spacer.10FP 548b<strong>SHR</strong>5/11/99 djt20001384
<strong>SHR</strong> <strong>Series</strong> <strong>Woodburning</strong> <strong>Fireplace</strong>sThe inside dimension of the frame must be the sameas the hole size selected from Figure 11 in order toprovide the required 2 inches of air space between theoutside diameter of the chimney and the edges of theframed ceiling hole.Metal Safety Strips(1, 2 or 3 pieces)ExistingCeilingJoists17¹⁄₂"(445 mm)17¹⁄₂"(445 mm)ChimneyHole"1/2" Min.OverlapFP557aFig. 16 Safety strip installation.Platform<strong>Fireplace</strong>"Z" SafetyStrip(not supplied)Hearth Ext.New FramingMembersFP557a<strong>SHR</strong>5/11/99 djtFP551bFig. 15 Typical frame for ceiling chimney holePositioning, Safety Strips,Securing the FP551b <strong>Fireplace</strong><strong>SHR</strong>Slide fireplace into position.5/11/99 djtLift the fireplace front slightly and slide the metal safetystrips under front bottom edge about 1¹⁄₂ inches, allowingthe remainder to extend in front of firebox. Overlapstrips at least 1/2 inch to provide a positive joint. (Flatsafety strips are packed with fireplace.) (Fig. 16)Safety strips are used to ensure that any combustiblematerials in front of the fireplace are protected eventhough a noncombustible hearth extension is required.If fireplace is to be elevated above the floor, a “Z”shaped metal safety strip must be fabricated and usedto protect combustible surfaces in front of the fireplace.This “Z” shaped safety strip is not provided but mustbe fabricated of metal with each horizontal leg at least1¹⁄₂ inches wide and equal in length to the metal stripsprovided with the fireplace.Note: Safety strips are not required over noncombustiblefloors where all supports at the base of the fireplaceare noncombustible.Four (4) nailing flanges are supplied with the fireplace(found on the fireplace hearth). To level the box andsecure it firmly in place, remove the nailing flanges fromthe hearth and install at the sides of the fireplace asshown in Figure 17.Fig. 17 Fasten fireplace in position.FP5499/29/97BR/BCInstalling Outside Air KitNail SidenailingFlangesFP549An outside air damper assembly is installed in all <strong>SHR</strong><strong>Series</strong> <strong>Fireplace</strong>s. If desired, or if local codes mandatethe use of an air kit, then an AK-MST is required tocomplete the installation (from air damper assemblyto the outdoors). If the outside air kit is to be used, theAK-MST MUST be installed BEFORE the fireplace isenclosed. Refer to the AK-MST instructions for fieldinstallation. The outside air control lever is located inthe center, just above the left side brick. To 'open', pushcontrol lever up and back. To 'close', pull lever forwardand down. (Fig. 18)2000138411
<strong>SHR</strong> <strong>Series</strong> <strong>Woodburning</strong> <strong>Fireplace</strong>ClosedOpenSupport StructureElbow Strap(must be tight)ELBOW STRAPCeilingHoleFramingFig. 18 Outside air operation.12Installing the Chimney SystemStart by attaching the first chimney section to the collaron top of the fireplace.FP710aInstall the pipe as <strong>SHR</strong> pictured OUTSIDE AIR in LEVER Figure 19. When youWOOD FIREPLACES10/21/99get a good lock, you will hear the pipe clearly snaptogether. Once sections are snap-locked in place, it isextremely difficult to get them apart. Make sure thepipe is firmly snapped and locked together as eachpipe section is mounted.When installing elbows, only outer pipe will snap- lock.Middle pipes simply slide into position. Be sure toalways attach straps on upper elbow to a structuralframing member. (Fig. 20)Continue installing the pipe as required until pipe isinstalled up through the ceiling. At this point, you mustinstall a firestop spacer.Inner Pipe SectionUPPipeRimPipeRimHemLanceFig. 19 Install pipe, listening for the snap-lock to fasten.FP710aFP558<strong>SHR</strong>ANGLED STRAPAngle FirestopChimney SupportStrapFP270/271(must be tight)FP270/271Fig. 20 Attach straps to a structural framing CR <strong>Series</strong> member.2/19/99 djtInstalling the Firestop Spacerin the Ceiling HoleA firestop spacer is used to keep pipe spaced properlyand required for safety.Nail the firestop spacer (at each corner) to the framingmembers of the ceiling hole. Note: A firestop spacer isnot required at the roof.Hole sizes listed in Figure 14 for angled firestop spacersprovide minimum required air space to chimneypipe for ceiling thickness up to eight (8) inches. Whencombined thickness of ceiling material, ceiling joists andflooring material exceeds eight (8) inches, adjustmentsmust be made in framing to assure that minimum airspaces to chimney are maintained.Proper Firestop Spacer InstallationFigure 21 shows different installation procedures forboth an area that is an attic and an area that is not anattic.If the area above the ceiling is not an attic, position thefirestop spacer with the flange on the ceiling side andthe angled portion extending up into the hole.If the area above the ceiling is an attic, position thefirestop spacer with the flange on the top of the framedhole and the angled portion extending down into thehole.Firestop spacers are not available for, nor are theyrequired on, vertical walls.The chimney components (CF11) used on the <strong>SHR</strong>series fireplaces have been tested and approved withthe area where the outer pipe slides through the firestopspacer sealed with a noncombustible caulk if desired,or left completely open with no sealant. This sealingonly applies to the <strong>SHR</strong> series fireplace.20001384FP558<strong>SHR</strong>
<strong>SHR</strong> <strong>Series</strong> <strong>Woodburning</strong> <strong>Fireplace</strong>sAttic InstallationCeiling InstallationNails (4)Firestop SpacerJoistJoistFirestopSpacerFlange Down Into HoleNails (4)Fig. 21 Installing firestop spacer.Continue Installing Pipe to Complete RunContinue attaching pipe sections to complete systemto next level always being careful that the pipe is firmlysnap locked in place before proceeding to next pipesection.Chimney SupportsIf chimney supports are required, they are installed thesame as elbows. Nail chimney support straps to adjacentstructural framing, as shown in Figure 8, Page8. Bend straps as necessary and make sure they aresecure so they will support the weight of the chimney. Achimney support is 2¹⁄₂" long when installed. Considerthis dimension when determining how many straightchimney sections are needed.Note: Chimney supports are generally used in longruns in a chase installation.Additional CeilingsIf you encounter additional ceilings, repeat same stepsrequired for first ceiling installation. Refer to firestopillustration in Figure 21.Pe<strong>net</strong>rating the RoofRun pipe to roofline. Since chimney system must bevented to the out-of-doors, you must use an approvedtermination.If a chase is used, refer to the installation manual providedwith the termination cap.Locate Chimney Centerpoint on RoofUse same procedure detailed in locating center point ofthe flue system.Drive a nail up through roof at the center point. This willdetermine center point on outside of the roof.Flange Up Into HoleIWF285mbuf5/25/96FP285Cut and Frame Roof HoleSize of roof hole varies with the type of chimney terminationinstalled. Refer to installation instructions providedwith the chimney termination to find correct sizeroof hole.There must be a 2" (52 mm) air space between outermostportion of chimney sections and any adjacentcombustible surfaces. (Combustible surfaces includeburnable materials such as: ceiling members, joists,flooring, combustible insulation and roof structures.)WARNING: DO NOT PACK REQUIRED AIR SPACESWITH INSULATION OR OTHER MATERIALS.Mark an outline of the roof hole around the centerpointof the nail. NOTE: Hole dimensions given in the chimneytop installation instructions are horizontal dimensions;therefore, the hole size must be marked on theroof accordingly.Cover the opening of the installed chimney so debriscannot get into the system.Cut and frame the hole. It is good practice to use framinglumber that is the same size as the rafters. Installthe frame securely because the chimney top and flashinganchored to the frame must be able to withstandheavy winds.Install Remainder of Chimney SectionsSince you have already preplanned the height of yourtermination according to the Ten Foot Rule, continue toinstall pipe to the predetermined height.Check the chimney top installation instructions fordetails on how high above the roof top the chimney sections(all pipes) should extend.Installing Top Housing or TerminationFollow the installation instructions provided with thechimney termination you have selected.2000138413
<strong>SHR</strong> <strong>Series</strong> <strong>Woodburning</strong> <strong>Fireplace</strong>Installing Chimney in a ChaseRefer to Page 5, Figure 4 for an illustration of a typicalchase installation.CAUTION: Treatment of firestop spacers and constructionof chase may vary with type of building. Theseinstructions are not a substitute for local building codes.You must check your local building codes to determinespecific requirements for your city or state. NOTE:Other building materials may be required in addition toFirestop Spacers.FinishingCAUTION: All joints between the finished wall andthe fireplace surround (top/sides) must be sealed withnoncombustible material to prevent cold air leakage intothe room. Only noncombustible material may be appliedto the facing of the fireplace surround. (Black paintedarea) (Fig. 22)The <strong>SHR</strong>52 has a framing shield between the frontstandoffs that may be used to attach finish material.(Fig. 24)Finish WallFinish the wall with material of your choice. Do notinstall a combustible mantel shelf less than 12"(305 mm) from the top of the fireplace opening. Donot install a mantel face plate less than 6" (159 mm)from top of fireplace opening. (Fig. 28) If a combustiblematerial is used below a flat mantel shelf, consultyour local building codes for minimum clearance fromtop of fireplace opening to bottom of mantel shelf.All joints (top, bottom and sides) where wall or decorativefacing material meets fireplace surround mustbe completely sealed with a noncombustible material.(Figs. 23-28)NOTE: No side wall protection is required for fireplacesinstalled at 45° to two (2) side walls (corner installation).Air Space ClearancesCombustible framing material MUST NOT pe<strong>net</strong>rateAIR SPACE (shaded areas)2"³⁄₄" Air Spaceto SidesFront ViewWallShieldOnly noncombustible materialmay be applied as facing tothe black fireplace surround.StandoffFig. 22 Minimum clearances to combustibles.Side ViewFirestopFP559<strong>SHR</strong><strong>SHR</strong> air spaces5/12/99 djt³⁄₄" Air Spaceto Back³⁄₄" Air Spaceto Sides0" Clearance to FloorHearth ExtensionFP559<strong>SHR</strong>1420001384
Combustible Manteland TrimMantel Clearance -No Noncombustible Facing Material12"(305mm)Max.1"Finished WallHeaderCombustibleMantel and Trim<strong>SHR</strong> <strong>Series</strong> <strong>Woodburning</strong> <strong>Fireplace</strong>sMantel Clearance -with Noncombustibel Facing Material12"(305mm)Max.1"Finished WallHeader12"(305mm)min.Ledge BracketNoncombustibleMaterial12"(305mm)min.Ledge BracketNoncombustibleMaterial*SurroundFace6"(159mm)Min.SurroundFaceNoncombustible FacingMaterial* Minimum width fromtop of surround to bottomof screen rail<strong>Fireplace</strong> OpeningMust be sealed with noncombustiblematerial<strong>Fireplace</strong> OpeningFinished WallLedge Bracket1"2 x 4 StudFinished WallFig. 23 Mantel clearance.Must be sealed withnoncombustiblematerialFP531Finished WallFinished Wall NoncombustibleDecorativeFacingStud2 x 4 HeaderFraming ShieldMust besealed withnoncombustiblematerialMust be Sealed withNoncombustibleMaterialLedge BracketSurroundFP1166Fig. 25 <strong>Fireplace</strong> surround flush with finished wall.20001384FP1277Fig. 24 <strong>SHR</strong>52 framing shield may be used to attach finishmaterial.FP1166surround flushwith finished wall12/20/01 djt15
<strong>SHR</strong> <strong>Series</strong> <strong>Woodburning</strong> <strong>Fireplace</strong>Finished WallStudNoncombustibleDecorative Facing2 x 4 FinishedHeaderCovered WallMust be Sealed withNoncombustibleMaterialLedge BracketCAUTION: Do NotPlace Finishing MaterialBeyond TheseEdges or Cover AirInletsScreen RailHearthSurroundFP1167FP1168Fig. 26 Facing on fireplace surround flush with finished wall.Fig. 27 Finishing front of fireplace.FP1167facing flushwith finished wall12/20/01 djtFP1168finishing front12/20/01 djtFace Plate*1"Ref.* ** 12" from top of fireplace opening.** 6" from top of fireplace opening. (Noncombustiblematerial must separate the black facesurround of the fireplace and any combustiblemantel material)Combustible materials arepermitted within a shaded areashown in Figure 31 titledMinimum Wall Clearances.MA81Fig. 28 Combustible mantel clearances.MA81rev. 8/5/97rev. 4/18/011620001384
<strong>SHR</strong> <strong>Series</strong> <strong>Woodburning</strong> <strong>Fireplace</strong>sSide Wall ProtectionAdjacent combustible side walls that are within dimensionsshown in Figure 29 of fireplace opening must beprotected with Wall Shield Model SP40 or a specificallybuilt wall shield described in Figure 28.The special wall shield design described in Figure 26 isan alternate method of adding protection to side wallsand can be used in place of the SP40 with the samewall clearances specified for the SP40. Rt must =1.85minimum.Examples of wall shield insulation:1. Manville - CERAFORM 126, K=.27,1/2 inches thick2. CFM Corporation - EH2416, K = .458,1 inch thick required.FP83840"Min.Decorative NoncombustibleRigidCoveringFP838Wall shield5/25/99 djt40" Min.Noncombustible InsulationRT = 1.85 Min.(Manville Ceraform 126- 1/2" Thick or CFMCorporation EH2416 - 1"Thick)Fig. 29 Noncombustible wall shield dimensions.Hearth InstallationA hearth extension is required to protect a combustiblefloor in front of the fireplace. Refer to Figure 29 forminimum dimensions and mounting detail.NOTE: Hearth Extension must not cover the airinlet opening of a fireplace.The hearth extension described in Figure 31 must be adurable noncombustible material with a minimum (total)Rt value of 1.09; refer to Figure 30 for examples. Theoverall height (above a combustible floor), depth andwidth must be as indicated, with the extension centeredto the fireplace opening.The top of insulation must be covered with a noncombustibledecorative covering or a piece of .018” minimumsheet metal, to protect hearth extension material.(Fig. 31)Secure the hearth extension to the floor to preventshifting, using trim molding or other similar means atthree (3) outer edges. Seal crack between the fireplacehearth and hearth extension with a noncombustiblematerial. (Figs. 31-34)WARNING: HEARTH EXTENSION MUST BE IN-STALLED IN ACCORDANCE WITH FIGURE 26.Alternate noncombustible materials may be used providingthe (total) thermal resistance (Rt value) of the alternatematerial employed is greater than or equal to R= 1.09. Thermal resistance (R) or thermal conductivity(K), may be obtained from manufacturer of the material.Factors are related by the formula K = 1/R. (Fig. 30)T = given thicknessR = thermal resistance for a given thickness (T)K = thermal conductivityNoncombustible material with a lower R value maybe used, provided thickness of material is sufficientlygreater to maintain an equivalent (total) thermal resistance(Rt).Example of DeterminingHearth Extension EquivalentsTo determine the thickness required for any new material:NEW K of new material (per inch) thicknessrequired =X of listedthickness K of listed material (per inch) materialExample for Common BrickT (new) = 5.0/0.458 x 0.50 in. = 5.46 in. (new requiredthickness).Common Materials And FactorsMaterial K* RMinimumThicknessEH2416 0.458 1.09 0.50 in.**Common Brick 5.00.10 5.46 in.**R Value is for inch.* Units of K = BTU/SQ FT/HR/˚F/IN** Thickness of Listed MaterialFig. 30 Hearth extension material factors.FP533ADD20001384FP533ADDAddendum6/1/99 djt8/4/99 changed .2 to .1one inch to 1/2 inch djt17
<strong>SHR</strong> <strong>Series</strong> <strong>Woodburning</strong> <strong>Fireplace</strong>Minimum Wall ClearancesWITHNoncombustibleSurround Facing4" Brick(Example material)WITHOUTNoncombustibleSurround FacingShaded area starts1/2" away fromedge of unit4"Minimum Hearth Extension Dimensions(for On-Site Construction)HGJGEC**SideWallF**FireboxOpeningA - Min. clearanceto combustibleperpendicular wallB - Min. clearanceSideto combustibleWallperpendicular wall whenusing noncombustible wall shield*Combustible material permitted within shaded area.* Noncombustible wall shield requires 1" CFM CorporationEH2416 insulation (minimum R Value = 1.85) betweendecorative noncombustible rigid covering and combustible wall.Minimum height and width is 40" x 40".** Dimension/degree of angle will vary depending on thicknessof noncombustible surround facing.Fig. 31 Combustible side wall protection and hearth extension dimensions.EDMay installnoncombustibledecorativecoveringOR .018" min.sheet metal4" Min.CombustibleFloorSeal cracksbetween thefireplaceand hearthextension withnoncombustiblematerialMinimumInsulationValue "R":<strong>Fireplace</strong>HearthSafety stripsmust overlap" minimumA B C D E F G H J<strong>SHR</strong>36 20" 12" 35° 42° 18" 14" 8" 16" 52"(508 mm) (305 mm) (457 mm) (356 mm) (203 mm) (406 mm) (1321 mm)<strong>SHR</strong>42A 22" 18" 32¹⁄₂° 39¹⁄₂° 18" 14" 12" 20" 66"(559 mm) (457 mm) (457 mm) (356 mm) (305 mm) (508 mm) (1676 mm)<strong>SHR</strong>48 28" 18" 26¹⁄₂° 33° 18" 14" 10" 24" 68"(711 mm) (457 mm) (457 mm) (356 mm) (254 mm) (610 mm) (1227 mm)<strong>SHR</strong>52 30" 20" 33¹⁄₂° 38¹⁄₂° 24" 20" 14" 24" 80"(762 mm) (508 mm) (610 mm) (508 mm) (356 mm) (610 mm) (2032 mm)FP532<strong>SHR</strong>NoncombustibleDecorative CoveringMay be Installedor.018" MinimumSheet Metal2¹⁄₂" Min.CombustibleFloorSeal Cracks Between<strong>Fireplace</strong> and HearthExtension with NoncombustibleMaterialLower Surround<strong>Fireplace</strong>HearthSeal Cracks Between <strong>Fireplace</strong> and HearthExtension with Noncombustible MaterialNoncombustibleMaterial 7⁷⁄₁₆" Max.ThicknessCombustibleFloorLowerSurroundNoncombustibleMaterial<strong>Fireplace</strong>HearthMin. Thickness(Refer to Table 4)Minimum InsulationValue R-3.28(Refer Table 4)Majestic SafetyStrips Must beOverlapped 1/2"Min.FP11691/4" Min.ThicknessMinimum InsulationValue R-0.94Majestic SafetyStrips Must beOverlapped 1/2"Min.FP1170Fig. 32 Protection of adjacent combustible side walls and hearth extension dimensions.18FP1169Type A floor12/20/01 djt20001384
20001384Wall CoveringFig. 22 or 23Hearth ExtensionHearthExtension InsulationMolding used toFasten HearthExtensionin PlaceFP1171Majestic Safety Strips Mustbe Overlapped 1/2" Min.Fig. 33 Sealing detail.Wall CoveringNoncombustibleDecorative FacingSeal All CracksBetween <strong>Fireplace</strong>Surround and WallMaterials withNoncombustibleMaterialNoncombustibleDecorative CoveringHearthExtensionMajestic Safety Strips Mustbe Overlapped 1/2" Min.Fig. 34 Sealing detail.FP1171sealing detail12/20/01 djt2 x 4 Header- Do Not Notch atLedge BracketsSeal Crack Between<strong>Fireplace</strong> and HearthExtension withNoncombustible MaterialFig. 242 x 4 Header- Do Not Notch atLedge BracketsSeal Crack Between <strong>Fireplace</strong>and Hearth Extensionwith NoncombustibleMaterialFP1172Installing Line for Gas LogsCFM Corporation fireplaces FP1172 are designed to accept a 1/2inch gas line for installation of an approved gas appliance.(CFM Corporation manufactures a wide variety ofsealing detail 212/20/01 djtgas logs for use in CFM Corporation fireplaces.)Be sure to have the appliance installed in accordancewith building codes.Gas connection may enter from either left or right side ofthe fireplace.Locate appropriate gas line in the outer casing of fireplaceand remove insulation from gas line tube. (Fig. 35)From inside the fireplace, locate the knockout on the firebrick-- be sure you are on the appropriate or "gas line"side of the fireplace. Using a flat bladed screwdriver orsmall chisel and hammer, carefully tap around the knockoutuntil it loosens and falls out.Install 1/2 inch certified gas pipe through opening. Aftergas pipe installation is complete, use insulation that was<strong>SHR</strong> <strong>Series</strong> <strong>Woodburning</strong> <strong>Fireplace</strong>sremoved from gas line tube to repack space around thepipe. Material should be inserted from outside of thefireplace and packed tightly to totally seal between thepipe and tube.Note: Gas pipe should not come in contact with anywood structures until it has reached a point at leastone (1) inch away from fireplace side.NOTE: When installing an ANSI Z21.11.2 ventless appliance,the finishing material used for the mantel must berated at 250°F or greater.BTU input of a gas appliance installed in fireplace shouldbe rated less than 100,000 BTU/Hr.Gas pipe installation is intended for connection to a decorativegas appliance only when (1.) incorporating an automaticshutoff device and (2.) complying with the Standardfor Decorative Gas Appliances for Installation in Vented<strong>Fireplace</strong>s (ANSI Z21.60) or CSA draft requirementsfor Gas-Fired Log Lighters for <strong>Woodburning</strong> <strong>Fireplace</strong>s(Draft No. 4, August 1993).Decorative gas appliance should be installed in accordancewith the National Fuel Gas Code, ANSI Z223.1/NFPA 54 (latest edition).CAUTION: WHEN USING DECORATIVE GASAPPLIANCE, FLUE DAMPER MUST BE SETIN FULLY OPEN POSITION. IF YOU HAVEGLASS DOORS ON THE FIREPLACE, THEYMUST ALSO BE FULLY OPENED.WARNING: DO NOT OPERATE ANUNVENTED GAS LOG SET IN THIS FIRE-PLACE WITH THE CHIMNEY REMOVED.WARNING: WHEN INSTALLING ANUNVENTED GAS LOG SET, THE CFMCORPORATION MODEL AH3244BK ORAH3244PB 4" ADJUSTABLE HOOD MUST BEUSED.Hole inOuter CasingHole in Outer CasingGas LineTubingCeramicKnockoutFP560<strong>SHR</strong>Fig. 35 Gas line access.1"Min.If installing an unvented gas log set, refer to statement below:Only unvented gas log sets which have been found to comply withthe Standard for Unvented Room Heaters, ANSI Z21.11.2, are to beinstalled in this fireplace.1/2"FP560<strong>SHR</strong><strong>SHR</strong> series5/12/99 djtSupply LineRepack InsulationCeramic Knockout(both sides)19
<strong>SHR</strong> <strong>Series</strong> <strong>Woodburning</strong> <strong>Fireplace</strong>1121327b8cda6954311CFM Corporation reserves the right to make changes in design, materials, specifications, prices and discontinue colors and products at any time,without notice.<strong>SHR</strong>36/42A/48/52 <strong>Woodburning</strong> <strong>Fireplace</strong>For units FH30RO, GH40RO, HH30RO, IH10RO1384 ptsreplacement parts5/27/99 djt7/14/99 removed clips,added push nutItem/Model Number <strong>SHR</strong>36 <strong>SHR</strong>42A <strong>SHR</strong>48 <strong>SHR</strong>521. Damper Weld Assembly RP210 RP210 RP210 n/a2. Damper Handle 20001418 20001418 20001418 200053223. Screen Rail 20001429 20006021 20001431 200055694. Screen Rod (two per fireplace) 7554181 7554199 20001428 200057905. Screen (two per fireplace) 7554295 20001723 20001723 200052786. Screen Pull (two per fireplace) 5584139 5584139 5584139 55841397. Push Nut (two per fireplace) 7512167 7512167 7512167 75121678a. Firebrick - Hearth 20001272 20005611 20001172 200053038b. Firebrick - Back 20004165 20005610 20004147 200052938c. Firebrick - Left Side 20004166 20005612 20004154 200053028d. Firebrick - Right Side 20004167 20005613 20004148 200053049. Firebrick Retainers (three per fireplace) 20001432 20001432 20001432 2000143210. Basket Grate 20004203 20004203 20004311 2000543311. O.S.A. Assy. 20003076 20003076 20003076 2000576212. Damper Blade Assy n/a n/a n/a 2000753613. Pivot Rod n/a n/a n/a 20005772102020001384
Accessories<strong>SHR</strong> <strong>Series</strong> <strong>Woodburning</strong> <strong>Fireplace</strong>sThe following accessories for this appliance are available from your local Majestic <strong>Fireplace</strong>s distributor. Should youneed additional information beyond what your distributor can furnish, contact: CFM Corporation, 2695 MeadowvaleBlvd., Mississauga, Ontario, Canada L5N 8A3 Attn: Technical Services.CAUTION: This fireplace and chimney assembly is a highly engineered system, and, as such, must be operatedonly with CFM Corporation approved components. If you use an unapproved component to make anymodifications, you may create a possible fire hazard and will void the CFM Corporation warranty. In addition,such action may void the coverage provided by the owner’s insurance.AccessoryGlass Enclosure KitOutside Air KitHearth ExtensionHearth Patching KitWall ShieldFirestopChimney SupportDescriptionDesigned to enclose the fireplace openingwith glass doors allowing the fire to remainvisible. Available in Polished, BrushedBrass, Black and PewterProvides outside air for fuel conbustionin the firebox. This accessory must beinstalled before fireplace is installed.Located on the floor in front of fireplaceto protect the floor from heat, hot embers,ashes, etc.Used to patch cracks in hearth.Used to protect walls adjacent to the fireplace.Required at each floor level and attic onmulti-story installation.Used to support the chimney at each 30feet of vertical height above the hearth andat every 6 feet of inclined chimney run.Each support adds 2¹⁄₂" to chimney length.Model No.36SHGDKDP/BB/BK/S42SHGDKT/BB/BK/S48SHGDKDP/BB/BK/S52SHGDK/BB/BK/SAK-MSTEH2416HPC1SP40FS2A (straight flue)FS6A (30° inclined flue)11CS (11" flue)2000138421
<strong>SHR</strong> <strong>Series</strong> <strong>Woodburning</strong> <strong>Fireplace</strong>Accessory Description Model No.Contemporary FlashingRequired for contemporary top terminationon the roof to prevent rain entry.8-6-12(0 to 6/12 pitch)8-12-12(6/12 to 12/12 pitch)Contemporary Chase Top TerminationContemporary Round Top TerminationExtended Round TopChimney SectionsChimney ElbowsTop Housing withUpper BaffleAttic Insulation ShieldUsed to terminate chimney at the top of achase. Adapter kit is included, flashing isnot included.For use with CFM Corporation Type"11CF" Chimney Systems.Used to terminate chimney on the roof.Flashing not included.For use with CFM Corporation Type"11CF" Chimney Systems.Used to terminate chimney at top ofchase. Adapter kit included. Flashing notincluded.Used to build "11CF" chimney systems.Used to develop 30° offset chimney systems.(Elbows packed 2 per carton - upperand lower elbow set)Gives traditional chimney top look usingsimulated brick in red, tan or white color.Brick pattern is embossed into galvanizedsteel unit. Roof flashing is included. Appropriateadapter is required. Must be usedwith upper baffle.Used to prevent insulation from coming sincontact with the chimney system. For usewith CF11 pipe.SLTCF11RLTCF11RLTCF11L11" flue11CF1 (1' long)11CF18 (1¹⁄₂' long)11CF3 (3' long)11CF4 (4' long)11CF30-2(11" 30° flue)S20BR/BT/BWS20UB (Upper Baffle)FS2100-HT2220001384
<strong>SHR</strong> <strong>Series</strong> <strong>Woodburning</strong> <strong>Fireplace</strong>sLIMITED WARRANTY & 30 YEAR PROTECTION PLANFor MAJESTIC FIREPLACES ® PRE-ENGINEERED <strong>Fireplace</strong> SystemsCFM Corporation warrants its MAJESTIC FIREPLACES® Pre-Engineered<strong>Fireplace</strong> (“<strong>Fireplace</strong>”) and the CFM Corporation suppliedfiregrate, glass doors, outside air system, fan motor, and liners tobe free from defects in material or workmanship, as follows:A. <strong>Fireplace</strong> and Chimney Components: (exclusive of CFMCorporation-supplied firegrate, glass doors, outside air system, fanmotor, and liners all of which are covered by separate warrantiesunder paragraphs B through D below): At its option for a periodof thirty (30) years from the date the <strong>Fireplace</strong> is installed, CFMCorporation will;(1) For a period of five (5) years from the date the <strong>Fireplace</strong> isinstalled, CFM Corporation, at its option, will repair or replace anydefective part without charge.(2) Thereafter, through the 10th year after the date the <strong>Fireplace</strong> isinstalled, if replacement parts are available, CFM Corporation willprovide a replacement for any defective part without charge for thepart itself. The consumer must pay for everything else other thanthe part.(3) Thereafter, through the 30th year after the date the <strong>Fireplace</strong>is installed, if replacement parts are available,CFM Corporationwill provide a replacement for any defective part at a cost to theconsumer of CFM Corporation then current list price, FOB CFMCorporation factory.B. Firegrate, Glass Doors, Outside Air System:For a period of 90 days from the date the <strong>Fireplace</strong> is installed CFMCorporation, at its option, will provide a replacement for any defectivepart, without charge for the part itself, FOB CFM Corporationfactory, (The consumer must pay for everything else other than thepart,).C. Fan Motor:(1) For a period of one (1) year from the date the <strong>Fireplace</strong> isinstalled, CFM Corporation, at its option, will repair or replace anydefective part without charge.(2) Thereafter, through the 30th year after the date the <strong>Fireplace</strong> isinstalled CFM Corporation, at its option, if replacement parts areavailable, will provide a replacement for any defective part at a costto the consumer of CFM Corporation then current list price, FOBCFM Corporation factory.D. Liners (Refractory or Metal):(1) For a period of two (2) years from the date the <strong>Fireplace</strong> isinstalled, CFM Corporation, at its option, will repair or replace anydefective part without charge.(2) Thereafter, through the 30th year after the date the <strong>Fireplace</strong>is installed CFM Corporation, if replacement parts are available,will provide a replacement for any defective part at a cost to theconsumer of CFM Corporation then current list price, FOB CFMCorporation factory.This warranty is subject to the following conditions and limitations:(1) This warranty is extended only to a <strong>Fireplace</strong> installed in thecontinental United States, the state of Alaska and Canada; only ifand so long as the <strong>Fireplace</strong> is installed according to the installationinstructions furnished with the <strong>Fireplace</strong>, and operated at all timesunder normal conditions, use and service according to the operativeinstructions furnished with the <strong>Fireplace</strong>, and only if and solong as the <strong>Fireplace</strong> is not removed from its original installation.(2) This warranty is non-transferrable, and is made to the originalowner, provided that the purchase was made through an authorizedsupplier of the Company.(3) The sole and exclusive remedies for breach of any warrantieshereunder shall be for the repair, replacement or provision of areplacement part at CFM Corporation then current list price, FOBCFM Corporation factory, for any defective part as specified inparagraphs A through D.(4)CFM Corporation shall not be liable for damage from anysmoking of a MAJESTIC FIREPLACES Pre-Engineered <strong>Fireplace</strong>System related to environmental geographic conditions (such as,for example, nearby structures or roof peaks, trees, hills, or mountains),inadequate ventilation, or negative air pressure in the placewhere the <strong>Fireplace</strong> system is installed, related to any mechanicalsystem (such as, for example, furnaces, fans, air conditioners,clothes dryers, etc.)(5) Except as otherwise expressly specified in paragraphs Athrough D, NONE OF THESE WARRANTIES COVER, AND CFMCORPORATION SHALL NOT BE RESPONSIBLE FOR, ANYCONSTRUCTION, INSTALLATION, LABOR, TRANSPORTATIONOR OTHER COSTS OR EXPENSES ARISING FROM A DEFEC-TIVE PART, ITS REPAIR OR REPLACEMENT OR OTHERWISE,NOR SHALL CFM CORPORATION IN ANY EVENT BE RESPON-SIBLE FOR ANY INDIRECT, INCIDENTAL OR CONSEQUENTIALDAMAGES EXCEPT TO THE EXTENT REQUIRED BY LAW.Some states do not allow the exclusion or limitation of incidentalor consequential damages, so this exclusion or limitation may notapply to you.NO IMPLIED WARRANTIES, INCLUDING THE IMPLIED WAR-RANTIES OF MERCHANTABILITY AND FITNESS FOR A PARTIC-ULAR PURPOSE, SHALL REMAIN IN EFFECT AFTER THE EXPI-RATION OF THE WARRANTIES SET FORTH IN PARAGRAPHS ATHROUGH D. Some states do not allow limitations on how long animplied warranty lasts, so this limitation may not apply to you.In order to obtain performance of any of the above warranty obligationswrite to CFM Corporation at this address:CFM Corporation2695 Meadowvale Blvd.Mississauga, Ontario, Canada L5N 8A3Attention: Director of Warranty ServicesSince local building requirements may vary greatly throughout thecountry, users of CFM Corporation products should determine inadvance whether there are any building code restrictions on theuse of a specific product. CFM CORPORATION MAKES NO REP-RESENTATION OR WARRANTY REGARDING, AND SHALL NOTBE RESPONSIBLE FOR, ANY BUILDING CODE COMPLIANCE.The foregoing warranties give you specific legal rights and you mayalso have other rights which vary from state to state.2000138423
CFM Corporation2695 Meadowvale Blvd. • Mississauga, Ontario, Canada L5N 8A3800-668-5323 • www.cfmcorp.com© CFM Corporation