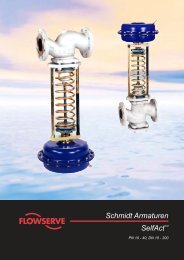
Worcester Large 3-Piece Cryogenic Valves - Fagerberg
Worcester Large 3-Piece Cryogenic Valves - Fagerberg
Worcester Large 3-Piece Cryogenic Valves - Fagerberg

Create successful ePaper yourself
Turn your PDF publications into a flip-book with our unique Google optimized e-Paper software.
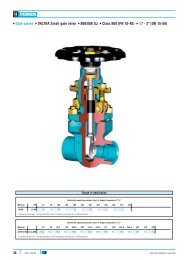
9 REFURBISHMENT INSTRUCTIONS (cont.)9.2 REBUILDINGa) Before rebuilding, ensure the repair kit and/or components used are suitable for the valve requirement.b) Rebuilding: Fit the thrust seal to the lower stem portion and position into the stem bore through the valvecavity. Insert the upper stem portion through the top of the housing and screw the two sections together untilthe pin holes align, then refit the 'Drivelok' pin.c) To the top of the stem, fit the gland components, stop plate and gland nut.d) Using the wrench (or other means) to prevent the stem from turning, gradually tighten the gland nutand operate the stem several times until the stem operating torques figures specified in Section 10 areachieved. Over-tightening the gland nut will only reduce the life of the stem assembly.e) The gland nut locking clip must be fitted correctly: either across the corners or the flats of the glandnut. The gland nut can be tightened to the next position to correctly locate the clipf) Turn the stem to the closed position (wrench / stem flats across the pipeline).g) Insert the ball into position by sliding it onto the stem tang. The pressure relief hole must be on theupstream side of the valve relative to the flow direction arrow on the side of the valve. Turn the valve to theopen position to stop the ball from falling out and from fouling the end connectors when the valve isplaced back into the pipeline.h) The seat retaining ring, new seats and body seals can now be fitted.The application of a little suitable lubricant (such as mineral oil, a silicon based lubricant or cleangrease such as petroleum jelly) to the seats and seals will help hold them in position and aid'bedding-in' of the completed valve assembly. NOTE: ensure that the lubricant used is compatible withthe pipeline media.i) The body connectors must have their faces cleaned before refitting of the valve can proceed.As with removal, the body connectors must be sprung apart slightly to get the body assembly intoposition and avoid damaging the seats, seals and sealing faces.j) Centralise the body, replace the body bolts and tighten diagonally and evenly to the torque specified inSection 10.k) If practical, check for leak tightness and operating torque.