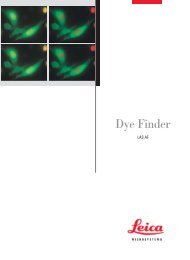
FRET with TCS SP5
FRET with TCS SP5
FRET with TCS SP5

You also want an ePaper? Increase the reach of your titles
YUMPU automatically turns print PDFs into web optimized ePapers that Google loves.
<strong>FRET</strong> Sensitized Emission<strong>FRET</strong> Sensitized Emission – Step by StepStep 1: Setting of experimental conditionsBegin the imaging set-up <strong>with</strong> the <strong>FRET</strong> sample <strong>with</strong> all fluorescenceinformation (donor, <strong>FRET</strong> and acceptor) in the same specimen. Defineimaging conditions for donor, <strong>FRET</strong> and acceptor fluorescence by followingthe workflow. You may start your experiment <strong>with</strong> previouslysaved imaging conditions. Use the Load and Save options ➀. If youwant to establish imaging conditions yourself you must start out inthe Beam Path Settings➂.1. Image acquisition of donor, <strong>FRET</strong> and acceptor will automaticallybe done in a line by line sequential scan mode, after the definitionof donor, <strong>FRET</strong> and acceptor. Start defining the donor and the <strong>FRET</strong>detection (Donor + <strong>FRET</strong>) ➁ via the Beam Path Settings window➂. Begin by simultaneous excitation and detection of the donorand acceptor (e.g.: Donor = CFP excitation 458nm; emission 462-510nm; Acceptor = YFP excitation 514nm; emission 518-580nm).This enables you to assess the fluorescence intensities, PMT gain,and laser dose for each label. Make all adjustments by using theLive button ➃. Check for appropriate imaging resolution. You maychange the zoom factor via the control panel or <strong>with</strong> the toolsunder Acquisition➄.2. Reduce now the laser light of the acceptor down to 0% ➅. Re-adjustthe acceptor PMT to be slightly below saturation. You are nowexciting only selectively for the donor and have properly definedyour conditions for the donor and <strong>FRET</strong> imaging.3. Continue by defining the acceptor set-up ➁ via the Beam PathSettings window ➂. Turn the donor excitation light down to 0%.Choose a new LUT for the directly excited acceptor signal (e.g.:light blue = donor; yellow = <strong>FRET</strong>; orange = acceptor) for betterdiscrimination. Start Live Scan➃.4. The images you see in the viewer are generated by means of a lineby line sequential scan. The first sequence A + B consists ofdonor (light blue) and <strong>FRET</strong> (Yellow). The excitation wavelength isselectively chosen for donor excitation. The second sequencecontains acceptor fluorescence (orange). The excitation light isselective for acceptor excitation.C5. Slowly increase the excitation light of the acceptor (in our example514 nm) until the signal of the acceptor (orange) is just belowsaturation. Do not change the PMT gain or offset as this willalso change the imaging conditions for the <strong>FRET</strong> (yellow) signaldetection!6. Define the number of averages for best imaging conditions. Thedesired acquisition mode may be chosen <strong>with</strong> the tools underAcquisition➄.7. Proceed to the next step Corr. Images to acquire control images ofthe specimen for calibration.Step 2: Acquire image sequences of controls for calibration1. In step 2 you may first take an image set of your <strong>FRET</strong> samplesince it is already under the scope and nicely set-up. Acquire thesequence via Capture Image ➀. The image set will be automaticallynamed ‘<strong>FRET</strong>’.2. Continue <strong>with</strong> the measurements of the controls (Donor only andAcceptor only) ➁. To keep track of the specimen choose thecorrect radio button for the according specimen.3. If controls are on separate slides you will now change specimen.For a better field of vision you may want to go back to zoom 1 to beable to find adequate cells to properly match the intensities and toavoid saturated regions. Use the function button Search Specimen➂. You now have access to all the acquisition tools needed.When you exit Search Specimen you will automatically return tothe zoom factor and resolution conditions of all previous measurementsin the experiment.4. Proceed from Corr. Images to the next step Corr. Factors to generatecalibration factors.Confocal Application Letter 5