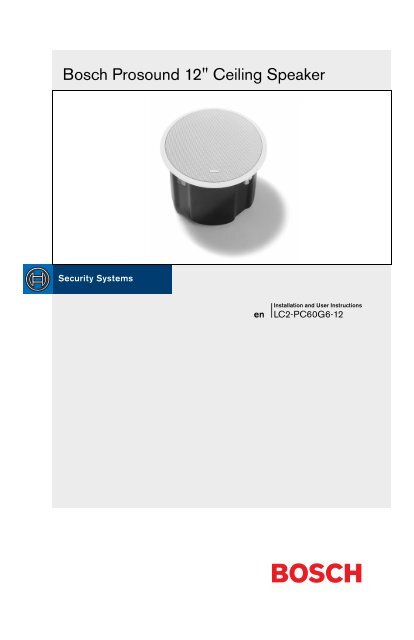
Bosch Prosound 12" Ceiling Speaker - Bosch Security Systems
Bosch Prosound 12" Ceiling Speaker - Bosch Security Systems
Bosch Prosound 12" Ceiling Speaker - Bosch Security Systems

You also want an ePaper? Increase the reach of your titles
YUMPU automatically turns print PDFs into web optimized ePapers that Google loves.
Table of ContentsTable of Contents ............................................................................................................. TOCSafety First ....................................................................................................................... TOCPacking List ............................................................................................................................ 1<strong>Bosch</strong> LC2-PC60G6-12 Models ............................................................................................ 2Product Feature Identification ............................................................................................... 2Open <strong>Ceiling</strong> Installation ......................................................................................................... 3<strong>Ceiling</strong> Tile Installation ............................................................................................................ 4Step 1 - Cut the Hole ..................................................................................................... 4Step 2 - Install C-Ring and Tile Rails .............................................................................. 4Step 3 - Attach Wiring to the Ceramic Connector ......................................................... 5Step 4 - Mount the <strong>Speaker</strong> into the <strong>Ceiling</strong> .................................................................. 6Step 5 - Connect an Auxilary Support Line .................................................................. 6Step 6 - Adjust Tap Selector .......................................................................................... 7Step 7 - Insert the Grille ................................................................................................. 7Appendix A - Painting the <strong>Speaker</strong> ........................................................................................ 8Appendix B - Specifications .................................................................................................. 9Notes .................................................................................................................................... 11Safety FirstSuspending any object is potentially dangerous and should only be attempted by individualswho have a thorough knowledge of the techniques and regulations of rigging objectsoverhead. <strong>Bosch</strong> strongly recommends that all speakers be suspended taking intoaccount all current national, federal, state and local regulations. It is the responsibility ofthe installer to ensure that all speakers are safely installed in accordance with all suchregulations. When speakers are suspended, <strong>Bosch</strong> strongly recommends that the systembe inspected at least once a year. If any sign of weakness or damage is detected,remedial action should be taken immediately. The user is responsible for making sure thatthe supporting surfaces, and any additional hardware used, is capable of supporting theloudspeaker. Any hardware used to suspend a loudspeaker array that is not providedby/associated with <strong>Bosch</strong> is the responsibility of others.<strong>Bosch</strong> <strong>Security</strong> <strong>Systems</strong> | 2008-05
Step 4: Mount the <strong>Speaker</strong> Into the <strong>Ceiling</strong> (Figure 8)Push the speaker into the ceiling hole until the front baffle rim is flush with the ceiling.Tighten the mounting tabs by turning the screw clockwise until the speaker is secure.Please note that the first clockwise quarter turn rotates the attachment tabs outward.The remaining turns tighten the tabs down onto the back of the ceiling surface (seeFigure 9).Installation Note:See Page 3 for possible installation methods. If 3/8” threaded rod is to be used in aceiling tile installation, the threaded rod must be installed to the threaded rigging pointbefore installing into the ceiling.Installation Note: MountingTabsFor each attachment screw, first turnone half turn counterclockwise torelease the counting tab from its guide.Figure 8: Mount <strong>Speaker</strong> into<strong>Ceiling</strong>Figure 9: Tighten Mounting Tabs<strong>Bosch</strong> <strong>Security</strong> <strong>Systems</strong> | 2008-05 6
Step 5: Adjust Tap Selector(Figure 10)The tap selector switch is located on thefront baffle. Adjust the speaker to theappropriate tap setting before installing thegrille. In some 70V/100V constant voltageinstallations it is advisable to leave thegrilles off if final speaker audio levelbalance adjustments are to be made later.After the levels are adjusted the grilles canthen be installed.Figure 10: Adjust Tap SelectorStep 6: Attach the Grille (Figure 11)Installation Note: Grille SafetyFeature<strong>Bosch</strong> grilles features a unique safetytether to prevent the grille from falling ifthe grille is removed or comes looseafter installation.First, install the grille’s safety tether bypushing the grille fastener into the hole inthe front of the baffle (see Figure 11).Second, press the grille into place until thefront of the grille is flush with the rim of thebaffle. Make sure the grille is securelyseated to prevent it from vibrating loose. Ifyou need to remove the grille, the easiestway is to insert two bent paper clips orother pointed objects into holes in thegrille, then apply slow even pressure topull down on the grille until that section ofthe grille comes out slightly. Continue thesame procedure around the perimeter ofthe grille, loosening a portion at a timeuntil the grille is removed.Figure 11: Attach the Grille<strong>Bosch</strong> <strong>Security</strong> <strong>Systems</strong> | 2008-05 7
Appendix A - Painting the <strong>Speaker</strong>If the speaker is installed in an area where the interior design requires a color match, the<strong>Bosch</strong> LC2-PC60G6-12 is simple to paint. The speaker can accommodate almost anytype of latex or oil based paint. The bezel/rim can be painted before installation or aftermounting into the ceiling.Painting ProcessClean the rim and grille with mineral spirits orother light solvent. Do not use harsh solventssuch as gasoline, kerosene, acetone, orother chemicals. If you use these cleanersyou may permanently damage the enclosure.Also, don’t use abrasives products such assandpaper or steel wool. Either by rolling orspraying, apply two or more thin coats ofpaint. If you are spraying, hold the spray canat the angles shown in Figure 13. If you arepainting the grille also, you must first removethe internal grille cloth. Spray painting isstrongly recommended. If the grille is rolledor brush painted, the grille may becomeclogged with paint and the sound quality willsuffer. After the paint has dried, replace theinternal grille cloth. If you wish to paint thespeaker along with the ceiling afterinstallation, insert a plastic or cardboard paintshield into the front of the speaker (seeFigure 12) to mask the drivers and internalbaffle, paint the speaker, then remove theshield.PaintShield<strong>Speaker</strong>Figure 12: Installing Paint ShieldBefore Painting180°45° 45°Baffle180°Can(do notpaint)Figure 13: Spray-Painting Angles<strong>Bosch</strong> <strong>Security</strong> <strong>Systems</strong> | 2008-05 8
Appendix B - SpecificationsFigure 14: Dimension DrawingsDimensions(Depth x Diameter):333mm x 414mm(13.12" x 16.31")C utout Diameter:386mm (15.20")Weight:13.3 kg (29.3 lbs)Cabinet Construction:Transducer:Mounting System:Powdercoated Steel Enclosure and UL94V-0 RatedBaffle and Bezel920-8B, 12 in. (305 mm)High-Efficiency Coaxial DriverIntegrated 4-Point Toggle Anchors, Integrated 3-PointPendant Mount, Additonal Secondary MountAvailableColors: White Baffle (Paintable Surface) with Black Rear CanGrilleConstruction: Powder Coated Steel with Safety TetherAcoustic Design:Ported Cabinet, Two-Way Design, Internally Damped,Passive Crossover, 64W Transformer with ASCFrequencyResponse:75 Hz - 20 kHzPowerHandling (8 ohms):100W RMSPowerHandling (70V):Up to 64WPowerHandling (100V):Up to 64WSensitivity(SPL 1W/1m):100 dBInputConfiguration:8 Ohm; 70V/100V70V Power Taps:4W, 8W, 16W, 32W, 64W100V Power Taps:8W, 16W, 32W, 64WAccessories:Tile Bridge, Mounting Ring<strong>Bosch</strong> <strong>Security</strong> <strong>Systems</strong> | 2008-05 9
Notes<strong>Bosch</strong> <strong>Security</strong> <strong>Systems</strong> | 2008-05 10
Notes<strong>Bosch</strong> <strong>Security</strong> <strong>Systems</strong> | 2008-05 11
For more information visitwww.boschsecuritysystems.com© <strong>Bosch</strong> <strong>Security</strong> <strong>Systems</strong> B.V.Data subject to change without notice2008-05 | en