InSitu Analysis of Pipeline Metallurgy - dnV
InSitu Analysis of Pipeline Metallurgy - dnV
InSitu Analysis of Pipeline Metallurgy - dnV
You also want an ePaper? Increase the reach of your titles
YUMPU automatically turns print PDFs into web optimized ePapers that Google loves.
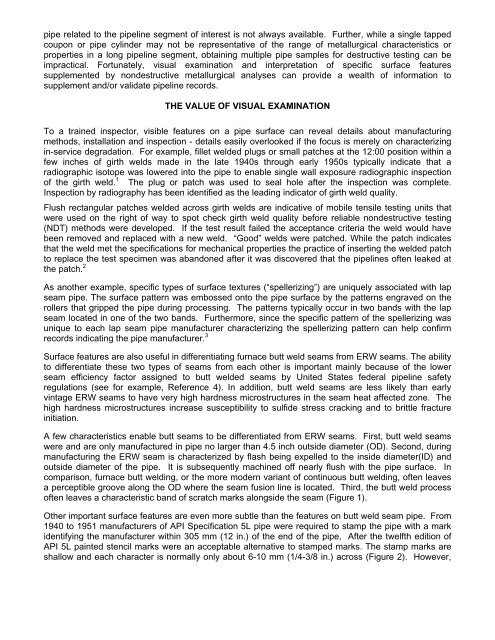
pipe related to the pipeline segment <strong>of</strong> interest is not always available. Further, while a single tappedcoupon or pipe cylinder may not be representative <strong>of</strong> the range <strong>of</strong> metallurgical characteristics orproperties in a long pipeline segment, obtaining multiple pipe samples for destructive testing can beimpractical. Fortunately, visual examination and interpretation <strong>of</strong> specific surface featuressupplemented by nondestructive metallurgical analyses can provide a wealth <strong>of</strong> information tosupplement and/or validate pipeline records.THE VALUE OF VISUAL EXAMINATIONTo a trained inspector, visible features on a pipe surface can reveal details about manufacturingmethods, installation and inspection - details easily overlooked if the focus is merely on characterizingin-service degradation. For example, fillet welded plugs or small patches at the 12:00 position within afew inches <strong>of</strong> girth welds made in the late 1940s through early 1950s typically indicate that aradiographic isotope was lowered into the pipe to enable single wall exposure radiographic inspection<strong>of</strong> the girth weld. 1 The plug or patch was used to seal hole after the inspection was complete.Inspection by radiography has been identified as the leading indicator <strong>of</strong> girth weld quality.Flush rectangular patches welded across girth welds are indicative <strong>of</strong> mobile tensile testing units thatwere used on the right <strong>of</strong> way to spot check girth weld quality before reliable nondestructive testing(NDT) methods were developed. If the test result failed the acceptance criteria the weld would havebeen removed and replaced with a new weld. “Good” welds were patched. While the patch indicatesthat the weld met the specifications for mechanical properties the practice <strong>of</strong> inserting the welded patchto replace the test specimen was abandoned after it was discovered that the pipelines <strong>of</strong>ten leaked atthe patch. 2As another example, specific types <strong>of</strong> surface textures (“spellerizing”) are uniquely associated with lapseam pipe. The surface pattern was embossed onto the pipe surface by the patterns engraved on therollers that gripped the pipe during processing. The patterns typically occur in two bands with the lapseam located in one <strong>of</strong> the two bands. Furthermore, since the specific pattern <strong>of</strong> the spellerizing wasunique to each lap seam pipe manufacturer characterizing the spellerizing pattern can help confirmrecords indicating the pipe manufacturer. 3Surface features are also useful in differentiating furnace butt weld seams from ERW seams. The abilityto differentiate these two types <strong>of</strong> seams from each other is important mainly because <strong>of</strong> the lowerseam efficiency factor assigned to butt welded seams by United States federal pipeline safetyregulations (see for example, Reference 4). In addition, butt weld seams are less likely than earlyvintage ERW seams to have very high hardness microstructures in the seam heat affected zone. Thehigh hardness microstructures increase susceptibility to sulfide stress cracking and to brittle fractureinitiation.A few characteristics enable butt seams to be differentiated from ERW seams. First, butt weld seamswere and are only manufactured in pipe no larger than 4.5 inch outside diameter (OD). Second, duringmanufacturing the ERW seam is characterized by flash being expelled to the inside diameter(ID) andoutside diameter <strong>of</strong> the pipe. It is subsequently machined <strong>of</strong>f nearly flush with the pipe surface. Incomparison, furnace butt welding, or the more modern variant <strong>of</strong> continuous butt welding, <strong>of</strong>ten leavesa perceptible groove along the OD where the seam fusion line is located. Third, the butt weld process<strong>of</strong>ten leaves a characteristic band <strong>of</strong> scratch marks alongside the seam (Figure 1).Other important surface features are even more subtle than the features on butt weld seam pipe. From1940 to 1951 manufacturers <strong>of</strong> API Specification 5L pipe were required to stamp the pipe with a markidentifying the manufacturer within 305 mm (12 in.) <strong>of</strong> the end <strong>of</strong> the pipe, After the twelfth edition <strong>of</strong>API 5L painted stencil marks were an acceptable alternative to stamped marks. The stamp marks areshallow and each character is normally only about 6-10 mm (1/4-3/8 in.) across (Figure 2). However,


