Windows Movie Maker Guide for Digitizing VHS Video in the IRN
Windows Movie Maker Guide for Digitizing VHS Video in the IRN
Windows Movie Maker Guide for Digitizing VHS Video in the IRN

You also want an ePaper? Increase the reach of your titles
YUMPU automatically turns print PDFs into web optimized ePapers that Google loves.
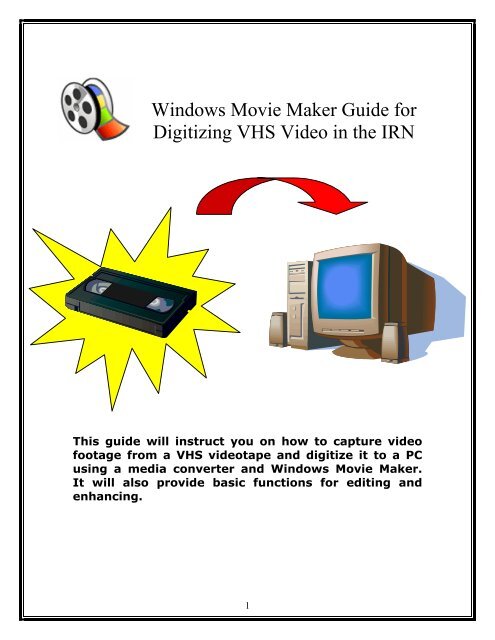
<strong>W<strong>in</strong>dows</strong> <strong>Movie</strong> <strong>Maker</strong> <strong>Guide</strong> <strong>for</strong><strong>Digitiz<strong>in</strong>g</strong> <strong>VHS</strong> <strong>Video</strong> <strong>in</strong> <strong>the</strong> <strong>IRN</strong>This guide will <strong>in</strong>struct you on how to capture videofootage from a <strong>VHS</strong> videotape and digitize it to a PCus<strong>in</strong>g a media converter and <strong>W<strong>in</strong>dows</strong> <strong>Movie</strong> <strong>Maker</strong>.It will also provide basic functions <strong>for</strong> edit<strong>in</strong>g andenhanc<strong>in</strong>g.1
<strong>Digitiz<strong>in</strong>g</strong> <strong>VHS</strong> <strong>Video</strong>Instructions <strong>for</strong> digitiz<strong>in</strong>g video will vary greatlydepend<strong>in</strong>g on <strong>the</strong> equipment one is us<strong>in</strong>g, <strong>the</strong>re<strong>for</strong>e…These <strong>in</strong>structions were specificallywritten <strong>for</strong> use <strong>in</strong> <strong>the</strong> <strong>IRN</strong> at <strong>the</strong> WISD.Do you have what you need o<strong>the</strong>r than <strong>the</strong> <strong>IRN</strong> equipment? <strong>VHS</strong> video tapes with movie footage A flash/thumb drive or CD to transfer <strong>the</strong>completed movie to so that you may takeit with youCaptur<strong>in</strong>g1. Insert your <strong>VHS</strong> video tape <strong>in</strong>to <strong>the</strong> VCR and cue it where youwould like to beg<strong>in</strong> digitiz<strong>in</strong>g footage (a couple of seconds of leadtime is helpful).2. Toggle <strong>the</strong> MODE SELECTOR on <strong>the</strong> Dazzle media converter(see pictures below) until <strong>the</strong> light on <strong>the</strong> front <strong>in</strong>dicates A TO D(<strong>for</strong> analog to digital). Don’t worry about <strong>the</strong> o<strong>the</strong>r connections;<strong>in</strong> <strong>the</strong> <strong>IRN</strong> <strong>the</strong>y should already be appropriately connected. Thelight will be orange/red until a signal is be<strong>in</strong>g transmitted (whenyou press play) at which time it will turn green.A to D label is on<strong>the</strong> side of <strong>the</strong>converter2
3. Open <strong>W<strong>in</strong>dows</strong> <strong>Movie</strong> <strong>Maker</strong> by click<strong>in</strong>g on <strong>the</strong> START button<strong>the</strong>n ALL PROGRAMS/ACCESSORIES/WINDOWS MOVIEMAKER4. In <strong>the</strong> <strong>Movie</strong> Tasks pane,under CAPTURE VIDEO, clickCAPTURE FROM VIDEODEVICEThis MOVIE TASKPANE has all of <strong>the</strong>important tasks at aglance. There areeven help topics!If you receive an error message <strong>in</strong>dicat<strong>in</strong>g that <strong>Movie</strong><strong>Maker</strong> is not detect<strong>in</strong>g <strong>the</strong> capture source <strong>the</strong>n unplug and replug<strong>the</strong> FIREWIRE cable from <strong>the</strong> back of <strong>the</strong> Dazzle converter.<strong>Movie</strong> <strong>Maker</strong> should cont<strong>in</strong>ue with step five below…5. In <strong>the</strong> VIDEOCAPTURE WIZARDenter <strong>the</strong> name youwould like to giveyour movie and select<strong>the</strong> location whereyou want your videoto be saved byclick<strong>in</strong>g BROWSE toselect <strong>the</strong> location<strong>the</strong>n NEXT3
6. On <strong>the</strong> VIDEOSETTING page,choose BESTQUALITY FORPLAYBACK ON MYCOMPUTER <strong>the</strong>nNEXT7. On <strong>the</strong> CAPTUREMETHOD page, clickCAPTURE PARTS OFTHE TAPEMANUALLYConfirm <strong>the</strong> SHOWPREVIEW DURINGCAPTURE box ischecked <strong>the</strong>n clickNEXT4
8. Press PLAY on <strong>the</strong> VCR to start your movie.9. To beg<strong>in</strong> captur<strong>in</strong>g video, click START CAPTURE.IMPORTANT NOTE!!You will see your movie <strong>in</strong> <strong>the</strong> PREVIEW WINDOW but you will no<strong>the</strong>ar sound. The audio is be digitized along with <strong>the</strong> video, <strong>the</strong><strong>Movie</strong> <strong>Maker</strong> <strong>in</strong>terface just doesn’t play <strong>the</strong> sound while digitiz<strong>in</strong>g.When <strong>the</strong> tape reaches <strong>the</strong> po<strong>in</strong>t at which you want to stop captur<strong>in</strong>g,click STOP CAPTURE. Repeat <strong>the</strong>se steps <strong>for</strong> each part of <strong>the</strong> videotape you want to capture.When you’ve f<strong>in</strong>ished captur<strong>in</strong>g, click FINISH to close <strong>the</strong> VIDEOCAPTURE WIZARD. The captured content will be imported <strong>in</strong>to anew collection with <strong>the</strong> same name as <strong>the</strong> specified video file. Thismay take a few seconds.Now you’re readyto edit your movie!5
Edit<strong>in</strong>gTo edit clips:If you are <strong>in</strong> STORYBOARD view click here to change to TIMELINEviewTrimm<strong>in</strong>g a clip –1. Drag <strong>the</strong> media clips to <strong>the</strong> timel<strong>in</strong>e to beg<strong>in</strong> mak<strong>in</strong>g a movie2. Once your clips are on <strong>the</strong> timel<strong>in</strong>e, click on <strong>the</strong> clip you’d like totrim3. In <strong>the</strong> PREVIEW w<strong>in</strong>dow, drag <strong>the</strong> scroll bar to <strong>the</strong> po<strong>in</strong>t whereyou want to trim <strong>the</strong> clip4. On <strong>the</strong> CLIP menu click SET START TRIM POINT5. Now cont<strong>in</strong>ue to drag <strong>the</strong> scroll bar until you reach <strong>the</strong> desiredend po<strong>in</strong>t of your clip6. On <strong>the</strong> CLIP menu click SET END TRIM POINT – you will nowhave your trimmed clipSplitt<strong>in</strong>g a clip -- You can split a video clip <strong>in</strong>to two clips. This isuseful if you want to <strong>in</strong>sert ei<strong>the</strong>r a picture or a video transition <strong>in</strong> <strong>the</strong>middle of a clip.1. Click on <strong>the</strong> clip you would like to split2. In <strong>the</strong> PREVIEW w<strong>in</strong>dow, drag <strong>the</strong> scroll bar to <strong>the</strong> po<strong>in</strong>t whereyou want to trim <strong>the</strong> clip3. On <strong>the</strong> CLIP menu click SPLIT – your orig<strong>in</strong>al clip is now twoseparate clips6
Add<strong>in</strong>g Audio –1. In <strong>the</strong> Taskpane,click onIMPORTAUDIO ORMUSIC2. Navigate to <strong>the</strong>music track youwould like toadd to yourmovie3. Click IMPORT4. The music trackwill appear <strong>in</strong>yourCOLLECTIONview5. Drag yourmusic to <strong>the</strong> Audio/Music level of <strong>the</strong> TIMELINEYour music track can be edited with <strong>the</strong> sametechniques as with your video clips!Us<strong>in</strong>g <strong>Video</strong> Transitions, <strong>Video</strong> Effects and TitlesYou can enhance your movies by add<strong>in</strong>g different elements to yourmovie, such as <strong>the</strong> follow<strong>in</strong>g:• <strong>Video</strong> transitions - A video transition controls how your movieplays from one video clip or picture to <strong>the</strong> next. You can add atransition between two pictures, video clips, or titles, <strong>in</strong> anycomb<strong>in</strong>ation, on <strong>the</strong> storyboard/timel<strong>in</strong>e. The transition playsbe<strong>for</strong>e <strong>the</strong> one clip ends and while <strong>the</strong> o<strong>the</strong>r clip starts to play.• <strong>Video</strong> effects - A video effect determ<strong>in</strong>es how a video clip,picture, or title displays <strong>in</strong> your project and f<strong>in</strong>al movie. <strong>Video</strong>effects let you add special effects to your movie. A video effect isapplied <strong>for</strong> <strong>the</strong> entire duration that <strong>the</strong> video clip, picture, or titledisplays <strong>in</strong> your movie.• Titles and credits - Titles and credits let you enhance yourmovie by add<strong>in</strong>g text-based <strong>in</strong><strong>for</strong>mation to your movie. You canchange <strong>the</strong> appearance of <strong>the</strong> title or credit, <strong>in</strong> addition tochang<strong>in</strong>g <strong>the</strong> title animation, which determ<strong>in</strong>es how your title orcredit displays <strong>in</strong> your movie.7
Sav<strong>in</strong>g and Shar<strong>in</strong>g <strong>Movie</strong>sThere are a few options <strong>for</strong> shar<strong>in</strong>g yourcompleted movie.My Computer – Suggested SelectionThis option is best <strong>for</strong> movies you will use <strong>in</strong>o<strong>the</strong>r applications such as PowerPo<strong>in</strong>t.1. Click on SAVE TO MY COMPUTER from <strong>the</strong> TASKPANE2. Enter a name <strong>for</strong> your saved movie3. Select BEST QUALITY FOR PLAYBACK ON MY COMPUTER4. Click NEXT and that’s it!Your movie has been saved! It can be foundby navigat<strong>in</strong>g to where you’ve saved it.Now you can save it to your thumb drive orburn it to a CD to use on ano<strong>the</strong>r computer.Done!GreatJob!8