
Create successful ePaper yourself
Turn your PDF publications into a flip-book with our unique Google optimized e-Paper software.
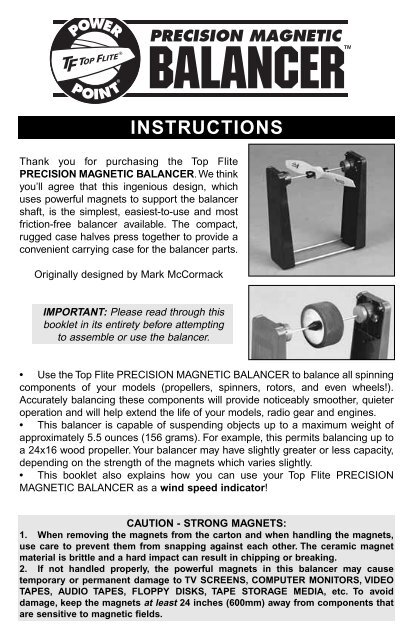
F®INSTRUCTIONSThank you for purchasing the Top FlitePRECISION MAGNETIC BALANCER. We thinkyou’ll agree that this ingenious design, whichuses powerful magnets to support the balancershaft, is the simplest, easiest-to-use and mostfriction-free balancer available. The compact,rugged case halves press together to provide aconvenient carrying case for the balancer parts.Originally designed by Mark McCormackIMPORTANT: Please read through thisbooklet in its entirety before attemptingto assemble or use the balancer.• Use the Top Flite PRECISION MAGNETIC BALANCER to balance all spinningcomponents of your models (propellers, spinners, rotors, and even wheels!).Accurately balancing these components will provide noticeably smoother, quieteroperation and will help extend the life of your models, radio gear and engines.• This balancer is capable of suspending objects up to a maximum weight ofapproximately 5.5 ounces (156 grams). For example, this permits balancing up toa 24x16 wood propeller. Your balancer may have slightly greater or less capacity,depending on the strength of the magnets which varies slightly.• This booklet also explains how you can use your Top Flite PRECISIONMAGNETIC BALANCER as a wind speed indicator!CAUTION - STRONG MAGNETS:1. When removing the magnets from the carton and when handling the magnets,use care to prevent them from snapping against each other. The ceramic magnetmaterial is brittle and a hard impact can result in chipping or breaking.2. If not handled properly, the powerful magnets in this balancer may causetemporary or permanent damage to TV SCREENS, COMPUTER MONITORS, VIDEOTAPES, AUDIO TAPES, FLOPPY DISKS, TAPE STORAGE MEDIA, etc. To avoiddamage, keep the magnets at least 24 inches (600mm) away from components thatare sensitive to magnetic fields.
tubes in the plastic balancer cases.When installed in the magnet tubes,the magnets must be positioned sothey attract, not repel. Secure each ofthe magnets in the magnet tubes witha thumb screw. Do not over-tightenthe screws, as this can deform theplastic and put the magnets out ofalignment. Slight screw pressure is allthat is required. NOTE: The 6-32threads will self-tap into the plastic, butyou may cut threads with a 6-32 tap,making the thumb screw easier toadjust with your fingertips.shaft between the two magnets. Thebalancer shaft will touch one magnetand the other end will be suspended inthe magnetic field. For the lowestpossible friction, adjust the magnetsby loosening the thumb screws andsliding the magnets in or out until thegap is very small (approximately 1/32"[0.8mm]) at the shaft end. Secure themagnets in this position with the thumbscrews. NOTE: The smaller gapprovides lower friction and greaterload-carrying capability.HOW TO USE YOUR TOP FLITEPRECISION MAGNETIC BALANCER❑ 5. Push and twist the two long baserods into the sockets in one of the casehalves. Assemble the second casehalf to the other ends of the base rods.Press firmly to seat the rods. Stand theassembly up as shown.CAUTION: Do not allow the balancerrod ends to snap hard against themagnets, as this will damage the rodends or the plastic discs.The general principle of balancing isto determine the “heavy side” of anobject and then to either removematerial from the heavy side, or addweight to the light side (see safetyprecautions below). Because theTop Flite PRECISION MAGNETICBALANCER is so nearly frictionless,you’ll wait a long time for a propellerto stop swinging; therefore, youshould help the object to nearly stopby applying light friction to thebalancer shaft with your finger. Anobject is perfectly balanced if it canbe stopped and will remainstationary in any position.❑ 6. Slide the balancing cones ontothe balancer shaft. Place the balancerHow to balance SMALL AND MEDIUMSIZE PROPELLERS: Slide the conesonto the balancer shaft with the taperedends facing each other, trapping thepropeller between the cones. The object3
does not hold the object as securely, socheck the cones frequently to makesure they are tight against the objectwhile balancing.BALANCING SUGGESTIONS: Tobalance a spinner, balance thebackplate first. Mark the light side (up),then remove material from the heavyside by drilling several shallow holes inthe backplate. Don’t drill through thebackplate and don't drill where it willweaken the structure. Repeat by trialand error, until the backplate balancesperfectly. If the spinner cone has a fronthole, you can now join the backplate andthe cone on the balancer, to determinethe balance of the cone. To balance thecone, carefully remove material from theinside of the cone with a piece ofmedium-grit sandpaper, being carefulnot to remove so much material in oneplace that it would weaken the cone.NOTE: Spinners that do not have a holein the front of the cone do not lendthemselves to balancing, so in this casejust balance the backplate.balancer using the method describedabove and doing so will make a bigdifference in the smoothness andhandling of your car. Certain car wheelswhich have large diameter holes (suchas 1/10 scale on-road rear wheels) willalso require the use of an inexpensiveadapter, such as the DuraTrax ®#DTXC9581 BBS Wheel Adapter(available from your hobby dealer),which reduces the center hole to a sizethat this balancer can accommodate.Another way to balance rear on-roadwheels is to mount them to an extra leftdiff side from your model.When balancing car wheels,safety is of utmost importance.Do not attempt to balance carwheels by sticking pins into therubber, as these can come loose.Also, a spinning wheel with anyprotruding metal can be veryhazardous to a person holding thecar. Self-adhesive lead tape worksgreat for balancing wheels. Checkwith your hobby dealer or a golfsupply store for this type of tape.Consult with your local hobby dealerand track owner for methods thatare acceptable in your area.TIPS FOR ULTRA-PRECISIONBALANCING:If you need to balance small objects withhigh precision, such as boat propellers,you can follow this procedure toincrease the precision of your balancer:How to balance CAR WHEELS: Mostcar wheels can be balanced with this1. Examine the balancer shaft endswith a magnifying glass. The shaft endsshould be concentric with the shaftcenterline and should not be blunt orscratched. If a careful inspection of theshaft ends reveals any imperfections,you may carefully true up the points with5
a knife-sharpening stone, then polish thepoints with 600-grit sandpaper followedby rubbing compound. The smoother thepoints, the less friction. However, don’tsharpen the points too much. Leave avery small polished radius at the tip.2. Before using the balancer, spread avery thin film of oil on the magnet ends.3. Check the balancer shaft forstraightness by rolling it slowly on a pieceof clean, dust-free plate glass. If the shaftit bent, you’ll be able to see light underthe shaft as you roll it on the glass. If theshaft has any significant bend, it will notbalance accurately. Straighten the shaftby carefully bending it.You can check thetrueness of the shaft by placing it on thebalancer without the cones.4. Balance each individual balancercone, one at a time.5. Your balancer is now ready to beused for high precision work.PROPER CARE OFYOUR BALANCER• If the balancer parts becomeexposed to water, dry them thoroughly.Do not close the balancer case halvestogether with metal parts inside if thereis moisture in the case, as this canresult in corrosion of the metal parts.• Do not drop the magnets, or allowthe magnets to snap together. NOTE: Ifyou should happen to break a magnet,you may glue the magnet pieces backtogether with epoxy or CA glue, withvery little reduction in magnet strength.• Handle the balancer shaft withcare. It is made of soft steel (for highmagnetic attraction) which will bendeasily if handled roughly. When pushingthe shaft into the storage slots in thecase, push down near both ends of theshaft, rather than at the middle. Also,when removing the shaft from the case,pull up near the ends. Don’t let the shaftsnap hard against the magnets, as thiswill blunt and deform the shaft ends.• When disassembling the balancer,gently twist the base rods as you pullthem out.• Always open the case halves bypopping both ends open with a coin.Don’t try to force the halves open fromone end only.• Place all components into the casehalves in the positions shown in thephoto. Press on the ends of the rods(not in the middle) when storing, toprevent bending. We recommendstoring one base rod in each case half,for minimum case distortion.• Do not subject the balancer to hightemperatures, above 120°F (49°C),such as on the dashboard of a closedautomobile on a hot, sunny day, as hightemperatures may deform the plasticand permanently reduce the strength ofthe magnets.• If you need more friction or “holdingpower” between the shaft and the cones(for balancing heavy objects), trycleaning the shaft with rubbing alcohol orsolvent. If you still need additional6
friction, try roughening the plated surfaceof the shaft with 320-grit sandpaper.MODIFICATIONPROCEDUREMount the 11 x 8 Power Point prop onthe balancer shaft and place the shaftbetween the magnets. Adjust themagnets if necessary until the shaft istouching only one magnet. For strongerwinds, adjust the Magnets so theytouch both ends of the shaft.In the years since its introduction, usershave informed us of various usefulmodifications they have discovered. Oneparticularly useful one is to drill out theBase Rod holes in one of the balancercases with a 3/16" drill bit, allowing thetwo halves of the case to be positionedcloser together. Doing this makes itpossible to suspend a <strong>Great</strong> PlanesFingertip Prop Balancer (GPMQ5000),which has a threaded shaft that will holdsome items more securely.HOW TO USE YOUR BALANCER ASA WIND SPEED INDICATOR(ANEMOMETER)A unique feature of the PrecisionMagnetic Balancer is its ability to readthe wind speed. Because of its nearlyfriction-free design, it can determinethe wind speed to within 2 mph. All youneed is a photocell tachometer and abalanced Top Flite 11 x 8 Power Pointprop. Any tachometer will work to readthe wind speed, but the HobbicoDigital Mini Tach is ideal. You cantemporarily mount it on the balancerwhich will allow you to set the unit downand read the wind speed withouthaving to hold any of the components.Place the balancer unit on a flat surface(or hold it) in free flowing air so theback of the prop is facing the directionthe wind is coming from. Turn on thetach and read the wind speed. Thewind speed with the 11 x 8 Power Pointprop will be the RPM divided by 100.The Hobbico Digital Mini Tach readsRPM in thousands so the wind speedwill be in tens. For example, a readingof 0.5 on the tach is 5 mph. A readingof 18.8 on the tach is 188 mph (in whichcase you should not fly) and so on.To temporarily mount the Hobbico DigitalMini Tach on the balancer, use a piece of7
2" length of self-adhesive Velcro ® nearthe middle of one balancer case half.Position another piece of Velcro ® on theHobbico Digital mini-tach so that thesensor faces the propeller blade.NOTE: The Top Flite 11 x 8 PowerPoint prop is the best prop we havefound that will give an accurate windspeed reading without having to use acalculator. Other props will work butyou will have to use the followingformula to determine the wind speed.The accuracy may also be affected dueto the different efficiencies of propdesigns and pitches, but the results willbe reasonably close for approximatingthe wind speed.Wind Speed (in MPH) = RPM x Pitch ofthe prop(in inches) x .00114PARTS LISTPART # UNITS DESC.NYLON92 ...........2 ...............Case HalfWIRES80............1........Balancer ShaftMETAL058 ..........2 ...................MagnetWIRES81............2 ...............Base RodSCRW102...........2 .........Thumb ScrewNYLON97 ...........2.......................ConePSDC001............2...............Clear DiskVisit our website for prices andordering information:www.top-flite.com/manuals/index.htmlWe accept Visa and MasterCard.Note: Parts and prices subject tochange without notice.Top Flite Model Mfg.P.O. BOX 788, Urbana, IL 61803Phone (217) 398-8970, ext. 1FAX (217) 398-7721E-mail: partssupport@top-flite.comCopyright © 2003 TOPZP01 V2.0