Tanaka 35cc engine service manual - Gas Scooters
Tanaka 35cc engine service manual - Gas Scooters
Tanaka 35cc engine service manual - Gas Scooters

Create successful ePaper yourself
Turn your PDF publications into a flip-book with our unique Google optimized e-Paper software.
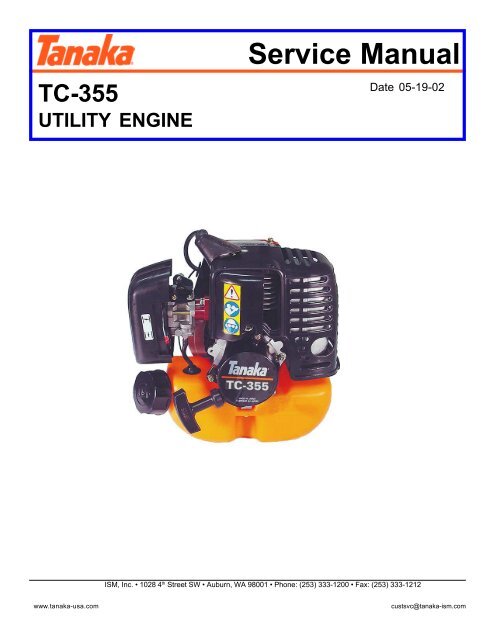
TC-355UTILITY ENGINEService ManualDate 05-19-02ISM, Inc. • 1028 4 th Street SW • Auburn, WA 98001 • Phone: (253) 333-1200 • Fax: (253) 333-1212www.tanaka-usa.comcustsvc@tanaka-ism.com
TC-355Service ManualTable of ContentsSpecification Chart & Torque LimitsTrouble ShootingSafety and Shop PracticesRoutine MaintenanceDiagnostic ToolsGeneral InspectionEngine RepairWarranty Statement………..……………………….2………………………………...3………………………………...4………………………………...4………………………………...5………………………………6-8……………….……………9-17………………….……………18www.tanaka-usa.com 1 custsvc@tanaka-ism.com
TC-355Service ManualTrouble ShootingEngine Will Not StartCheck Function of:Page No.Rewind Starter ………………6, 10, 11Ignition System: No Spark …………...7, 8, 11, 12Fuel System : Fuel Tank ………….…….6, 8, 13Fuel System : Carburetor …………..8, 13, 14,15Air Filter……………………….6Exhaust System …………………..7, 15Compression……………………….7Engine Idles PoorlyCheck Function of:Page No.Clutch System……………………….9Ignition System: Spark Plug …………………….7, 8Ignition System: Poor Spark ………………8, 11, 12Fuel System : Fuel Tank ………….…….6, 8, 13Fuel System : Carburetor …………..8, 13, 14,15Air Filter……………………….6Exhaust System ………………7, 14, 15Compression……………………….7Engine Lacks PowerCheck Function of:Page No.Clutch System……………………….9Ignition System: Poor Spark …………...7, 8, 11, 12Fuel System : Fuel Tank ………….…….6, 8, 13Fuel System : Carburetor …………..8, 13, 14,15Air Filter……………………….6Exhaust System ………………7, 14, 15Compression……………………….7Engine Stops SuddenlyCheck Function of:Page No.Ignition System: No Spark …………...7, 8, 11, 12Fuel System : Fuel Tank ………….…….6, 8, 13Fuel System : Carburetor …………..8, 13, 14,15Compression……………………….7www.tanaka-usa.com 3 custsvc@tanaka-ism.com
TC-355Service ManualSafety & Shop PracticesoooooooooooThe most successful and profitable <strong>service</strong> shops consistently seem to maintain the best habits of safety,cleanliness, and orderly procedure. The following information is intended as a guide towards developing habitsthat are necessary to accomplish satisfactory <strong>service</strong> work.Maintain a clean and orderly work area that is well lighted and adequately ventilated.Tools, instruments, and parts needed for work should be clean and readily available before any job is started.(Special tools available for servicing TANAKA equipment are listed in this <strong>manual</strong>.)Equipment should be cleaned before repair work starts. Cleaning will often help reveal a source of trouble.Before attempting to repair or operate any equipment, read and understand all information provided by theinstruction <strong>manual</strong> for the equipment.Never attempt to <strong>service</strong> an <strong>engine</strong> that is running or still heated from running unless it is specifically required bythe manufacturer’s instructions.Wipe-up all spilled liquids immediately. Use non-flammable solvents for cleaning. Clean all parts beforereconditioning or reassembling.Thoroughly inspect all parts for wear or damage. Replace all parts that show damage or excessive wear.Always recondition and /or repair equipment strictly according to the Manufacturer’s specifications.Be sure all shields and safety devices are correctly installed before performing any final operating tests.After completion of any <strong>service</strong> or repair, the equipment should be thoroughly cleaned.Routine Maintenance GuideEach Use 20 Hrs. 25 Hrs. 100 Hrs.Air Filter Clean OAll FastenersCheckTightnessOCooling Fins Clean OSpark Arrestor Clean OFuel Filter Clean OSpark Plug Clean OMuffler & Exhaust Ports CleanOwww.tanaka-usa.com 4 custsvc@tanaka-ism.com
TC-355Service ManualDiagnostic ToolsCompression GaugePart No. 27286Pressure TesterPart No. 070-2000W-500Ohmmeter (Digital Type)Engine Tachometer (Digital Type)Part No. 001-29000-000Three Point Spark TesterDisassembly & Assembly ToolsPin RemoverPart No. 009-29326-00Flywheel Remover Set1. Handle (006-29326-002)2. Center Bolt (007-29326-000)3. Flywheel Puller (006-2932-002)4. Bolts (021-29355-00)www.tanaka-usa.com 5 custsvc@tanaka-ism.com
TC-355General InspectionService ManualOnce the <strong>engine</strong> is removed from the equipment, this is an ideal time to inspect for damage as well as potentialareas that may require repair. Some of the diagnostic evaluation cannot be effectively performed afterdisassembly has begun.Cover, Shroud, Fan CaseInspect covers, shrouds, and fan case to identify damage or cracks due tovibration, ground contact, etc. All of the shroud components are designed forrouting the flow of cooling air around the <strong>engine</strong>. Any broken or missingcomponents could lead to over heating of the <strong>engine</strong> during operation. Orderreplacements as need.Inspect the rubber spark plug boot for any damage that may cause a potentialshock hazard.Ensure that the fuel tank is not damaged in any way due to possible groundcontact, excessive vibration, etc.Any potential fuel leaks may be apparent during this initial inspection, as theexposed fuel on the <strong>engine</strong> components may attract dirt. This provides a goodvisual reference.Recoil StarterEnsure that the <strong>engine</strong> turns freely when the recoil starter is pulled, andthat the recoil starter rope retracts positively into the starter housing.FuelIf gasoline is present in the fuel tank, take the opportunity to empty itinto a clear container. This may reveal contamination such as water,(as depicted in the photo – phase separation of gasoline and water isvery obvious), sediment, or the lack of two-cycle oil/fuel mixture.Air CleanerRemove the air cleaner cover (A), and inspect the air cleaner element(D). Ensure that it is clean and lightly oiled. Make sure the inside of thehousing that accommodates the cleaner element is free of dirt and dust.The vented area of the crankcase, visible in the photo between the fueltank and the air cleaner body (B), allows air from the flywheel fins (C) tobe circulated to the exterior of the <strong>engine</strong> and is critical to propercooling. Ensure that there is no debris within the vent fins that wouldimpede the circulation of air.www.tanaka-usa.com 6 custsvc@tanaka-ism.com
TC-355Service ManualGeneral Inspection Cont.Choke LeverCheck to ensure that the choke lever (A) is able to rotate freelywithin the air cleaner body, and that it has not been bent as toprevent a good seal when closing over the air intake.Spark PlugRemove the spark plug rubber protection boot and high-tension lead,and remove/inspect the spark plug.Picture A depicts a spark plug that has a broken insulator. Picture Bdepicts a spark plug that has fouled due to a rich fuel/oil mixture.Picture C depicts a plug that has fouled due to carbon build-up. All ofthese conditions will prevent the spark plug from functioning properly,and will require replacement.Picture D depicts a plug characteristic of healthy running conditions.The electrode should have a golden/tan color, and no damage ispresent.Whenever the integrity of a spark plug comes into question, it shouldbe replaced. Whether the plug to be installed is new, used or cleaned,it should be checked for correct electrode gap, which is .024”.Cylinder CompressionInsert a compression gauge into the empty spark plug hole andpull the recoil starter handle briskly several times, until theneedle on the gauge stops climbing. This reading represents thecompression in the cylinder, and is a good gauge of the pistonrings ability to hold pressure. The unit will struggle to run withcompression less than approximately 90 psi. Such low readingsindicate the need for <strong>service</strong> to the cylinder, piston or pistonrings.www.tanaka-usa.com 7 custsvc@tanaka-ism.com
TC-355Service ManualGeneral Inspection Cont.Spark TestingWhile the rubber spark plug boot / high-tension lead are removed from thespark plug, this is an ideal time to test the quality of the current beingdelivered to the spark plug. Insert a three point spark tester into the sparkplug boot and briskly pull the recoil starter. The tester should reveal a strongspark with a blue color. Lack of spark, weak spark, or yellow spark mayindicate a problem with another electrical component within the <strong>engine</strong>.Ignition Coil TestingConnect an ohmmeter to the ignition coil with one lead inserted into the sparkplug boot and the other making contact with the cylinder fins of the <strong>engine</strong>(as shown).Secondary resistance, when tested this way, should indicate 4.2 (+/- 1) KΩ.If the reading is not within this range, replace with a new coil, (previous testsfor spark using a three point tester should have indicated a weak spark ornone at all).If the reading is within range, and still weak or no spark is evident, replacethe ignition coil.FastenersCheck to ensure that all fasteners are tight prior to disassembly.Loosening of fasteners on the carburetor side may cause erratic runningconditions, or even <strong>engine</strong> failure.It’s always best to know if fasteners are properly torqued prior to <strong>engine</strong><strong>service</strong>, as problematic running conditions may be the result.Fuel FilterUsing a hooked wire, reach into the filler neck of the fuel tank, and grasp thefuel line. Gently pull the fuel line, with the fuel filter attached, through the fillerneck. The filter should be white in color and should be compressible betweentwo fingers. If it appears discolored or hard, replace with a new one.www.tanaka-usa.com 8 custsvc@tanaka-ism.com
TC-355Service ManualEngine RepairENGINE SERVICETroubleshooting should alert you to problem areas, and these problem areascan be addressed as major sub-components of the <strong>engine</strong>:• Centrifugal Clutch• Recoil Starter• Electrical System• Fuel System Components• Exhaust System• Crank CaseIt is important to properly identify which areas of the <strong>engine</strong> require <strong>service</strong> toavoid any unnecessary tear down of components not requiring <strong>service</strong>.CLUTCH SYSTEMCAUTION: Never attempt to run the <strong>engine</strong> with the clutch exposed. The clutch is designed to overcome the force of thespring, thus allowing contact with the clutch drum, ultimately providing drive to the PTO side of the equipment. If the clutchis not contained within the clutch drum while the <strong>engine</strong> is running, the clutch components may come detached from the<strong>engine</strong> and pose a risk of flying objects.The clutch system is made up of the clutch shoes, clutch spring, and the boltsand washers (flat and waved) securing them to the flywheel.Using an impact wrench or a sharp blow to a socket wrench, remove the bolts securingthe clutch to the flywheel (right hand threaded, counter-clockwise for removal.) Thiswill enable all of the components to be inspected. Check for any signs of damage toclutch shoes or excessive wear on the lining of the shoes. When new, the shoes haveapproximately two millimeters of lining. Order spares as needed.Inspect the wave washers mounted between the bolt and the clutch shoes to ensurethat they are not cracked and still provide spring tension. Ensure that the spring is notcracked or broken. Replace as needed.When re-installing the clutch components, attach the spring between the shoes thenadd the bolts with the wave washers. Hold in place with the flat washers between thebackside of the clutch arms and the flywheel, and tighten the stepped bolts to185 in.-lbs.www.tanaka-usa.com 9 custsvc@tanaka-ism.com
TC-355Service ManualEngine Repair Cont.RECOIL STARTERCAUTION: The recoil spring is wound with significant force. When removed from the starter body, itwill rapidly unwind. It is recommended that you wear gloves and eye protection when removing thestarter spring.The recoil starter is made up of the rope, spool and rewind spring. On the <strong>engine</strong> sideis the starter pawl and the nut securing it to the crankshaft.If the recoil starter fails to retract the rope, or if the rope is broken or frayed, it will benecessary to disassemble the starter.Remove the small screw located in the center of the rope spool that secures the spoolto the starter body. This will expose all of the starter components.Inspect the spool for any sign of warping, cracks or chips. Replace as necessary.Ensure that the rope is not frayed and is tightly secured with knots to both the starterhandle and the spool. Inspect the starter body for any cracks or other damage.Replace as needed.Inspect the starter pawl cup and the spring-loaded pawl located within the cup. Thepawl pivots on a spring, and should have constant tension keeping it in place. If thestarter pawl spring is broken, it will be necessary to replace the pawl cup.The spring is retained within the starter body by the spool as well as clips formed inboth ends of the spring. Check to ensure that the spring is not broken, and that theends are properly installed in the starter body. If the spring shows no signs ofbreakage, it may not be necessary to remove it from the starter body.When installing a new spring, use caution, as it is wound with significant force.New replacement springs come pre-wound and wrapped with tie-wire.Carefully grasp the spring with needle nosed pliers and hold it oriented in placeprior to removal of the tie-wire. With the tie-wire carefully removed, it will bepossible to insert the spring into the starter housing.Ensure that the outside end of the spring (A) is properly positioned in the recoilstarter housing, and when the spool is placed over the top of the spring, the tabon the inside of the spring (B) is properly located in the provision on the spool.Prior to placing the spool over the rewind spring, apply a small amount ofgrease to the inner wall of the center hole on the spool.Wind the rope on the spool about three turns counterclockwise, as viewed fromthe starter pawl side. Install the starter spool into the case, making sure thatthe spool engages with the inner end of the rewind spring.Install washer and screw holding starter spool in the case.Recoil Starter cont.www.tanaka-usa.com 10 custsvc@tanaka-ism.com
TC-355Service ManualEngine Repair Cont.Recoil Starter cont.It is necessary to increase the spring tension in the starter prior to use.Rotate the spool counterclockwise several times with the rope hookedinto notch (A).Hold the spool to prevent it from rewinding and pull the starter grip outto take up the rope slack. Let the starter rewind slowly.Pull starter several times to check the spring rewind tension. If thestarter is not rewinding fully, repeat the process described above.ELECTRICAL SYSTEMThe electrical system includes the flywheel (1), the coil (2), hightension lead assembly (3) and the spark plug (4).To remove the flywheel, it is first necessary to effectively stop thepiston from moving within the cylinder. This is easiestaccomplished by rotating the crankshaft until the piston is on adownward stroke, then inserting several inches of starter rope intothe spark plug hole. Upon rising in the cylinder, the piston willcontact the rope, and will not be allowed to complete its cycle orcrankshaft rotation. This will allow the flywheel-mounting nut to beremoved. The flywheel nut is right hand threaded. Removal is inthe counter clock-wise direction.Electrical Systems cont.www.tanaka-usa.com 11 custsvc@tanaka-ism.com
TC-355Service ManualEngine Repair Cont.Electrical Systems cont.With the flywheel nut removed, a flywheel puller can be attachedto separate it from its’ press fit to the crankshaft. Align the centerbolt of the puller with the indent in the end of the crankshaft, andthread at least two carrier bolts through the puller and into theflywheel. Make sure that at least several threads are utilized inattaching the carrier bolts, as they will bear the load of pulling theflywheel loose. Damage to these threads will require replacing theflywheel itself. With the puller properly attached to the flywheel,use the T-handle to turn the center pivot point until the flywheelcomes loose from the crankshaft.Remove the flywheel (refer to page 11 for disassemblyprocedure), and inspect the integrity of the flywheel keyway, thecrankshaft keyway and the key itself. Any deformation of the keyor keyway will require replacement of those components.After identifying the integrity of the coil (refer to page 8 for coiltesting procedure), or replacing it with a new one, check the airgap between the coil and flywheel (A).Gap should be measured with a feeler gauge and set at 0.014”.www.tanaka-usa.com 12 custsvc@tanaka-ism.com
TC-355Service ManualEngine Repair Cont.FUEL SYSTEMThe fuel system consists of the carburetor (1), fuel tank (2), fuelsupply line (3), and fuel filter (4).The carburetor is held in place between the air cleaner body and theheat insulator block with two screws that are accessed on theexterior of the cleaner body (with the cover and cleaner elementremoved).After removing the carburetor, inspect the gasket that mountsbetween the carburetor and insulator block. Often times acompromised gasket will show signs that it has allowed fuel toescape. Replace all mounting gaskets when servicing the carburetor.Using a straight edge such as a metal ruler, check the carburetorinsulator for any possible warping. If the insulator shows sign ofwarping replace it with a new one.Using a carburetor pressure tester, test the pressure-holding abilityof the carburetor. Attach the tester line to the intake fitting of thecarburetor (not to be confused with the fitting that accommodatesthe purge bulb return line). The carburetor should hold 7 PSI.Readings less than this indicate a problem within the carburetor.Fuel Systems cont.www.tanaka-usa.com 13 custsvc@tanaka-ism.com
TC-355Service ManualEngine Repair Cont.Fuel Systems cont.The pump body of the carburetor is held together with four screws.With these screws removed, it will be possible to inspect all of thepump components of the carburetor.Inspect all gaskets and diaphragms to ensure that they have not losttheir pliability, and show no signs of cracking or drying. If any ofthese components are in question, replace all of them with acarburetor repair kit (650-25124-90). Pay careful attention to theirposition in the carburetor during re-assembly.www.tanaka-usa.com 14 custsvc@tanaka-ism.com
TC-355Service ManualCARBURETOR SERVICEThe main body of the carburetor consists of the carburetor body (A), thethrottle shaft (B) and the throttle wire receiver (C). Two screws secure thethrottle wire receiver and the throttle shaft to the carburetor body. While it’s notnecessary to remove the throttle valve for inspection, rotate it by hand toensure that it is able to freely rotate with the carburetor body and that it canreach the full range of motion permitted between the idle adjustment screwand the full RPM stopper on the carburetor body. Any binding should beaddressed by blowing forced air into the throttle valve/body area. If it still doesnot rotate freely, the entire carburetor will need to be replaced.Also ensure that the o-ring mounted to the carburetor body on the air cleanerside is not torn or dried. Replace as necessary. (The o-ring is a componentcontained within the carburetor repair kit.)The fuel tank is mounted to the crankcase with three screws that extend fromunderneath the tank, and through the tank-mounting bracket. Additionally,there are three small spacers that fit within the bolt holes in the fuel tank itself.Inspect the tank, tank cap, tank vent and fuel lines for any signs of leakage ordamage. Replace as needed.With the fuel supply line disconnected from the carburetor it is possible tocheck the integrity of the fuel filter. With the tank cap securely tightened, gentlyshake the tank while partially filled with gasoline. If the filter is allowing gas toflow, the agitation of the fuel in the tank will force fuel up and out of the fuelline. If the fuel filter is in question, replace it.EXHAUST SYSTEMThe exhaust system consists of the muffler / muffler gasket (1),and heat shield (2).The muffler is a sealed, non-<strong>service</strong>able unit. If the muffler isdamaged, the entire unit needs to be replaced.Remove the shroud covering the muffler and cylinder. Removethe muffler and inspect the exhaust port and mating portion ofmuffler for any build of carbon. Carbon build up is a normaloccurrence in a two-cycle <strong>engine</strong>, and removal is a matter ofroutine maintenance.www.tanaka-usa.com 15 custsvc@tanaka-ism.com
TC-355Service ManualEngine Repair Cont.CRANKCASE / ENGINEWhen re-assembling the muffler components, be sure that the heatshield is properly installed with the muffler locator tabs properlyinserted. The heat shield is crucial to the cooling of the <strong>engine</strong>, andimproper installation can lead to overheating of the <strong>engine</strong>.The <strong>engine</strong> components include the crankcase, crankshaft / connectingrod, cylinder, piston and piston rings. Further, the crankcase alsocontains the main crankshaft support bearings and the crankshaftseals.The cylinder is attached to the crankcase with four screws, which areaccessed from the top of the cylinder. With the screws removed, thecylinder will slide off of the crankcase and piston/rings.The piston is attached to the connecting rod with a press-fit wrist pin.Removal of this pin first requires the removal of the piston pin retainingcirclips installed in the side of the piston, at either end of the pin. Theseare removed with a pair of needled nose pliers, and are not re-usable.New spares should be installed upon re-assembly.Crankcase / Engine cont.www.tanaka-usa.com 16 custsvc@tanaka-ism.com
TC-355Service ManualEngine Repair Cont.Crankcase / Engine cont.With the <strong>engine</strong> taken down to this level, it is generally accepted that the pistonrings should be replaced. They provide the <strong>engine</strong> with the proper amount ofcompression, and due to their inaccessibility, it’s best to re-assemble with newrings. However, if servicing requires the removal of the piston, fitting of newrings to the piston should not be done until the piston has been re-assembledto the connecting rod, as the piston pin remover tool can cause damage to therings.Using a piston pin remover, loop the strap end around the piston with the holealigned to allow the passage of the piston pin. It may be necessary to insert asmall screw between the remover and the piston pin, as the remover may havea smaller diameter than the inside of the piston pin.The crankcase halves are joined with four screws. Removing thesescrews will allow the entire contents of the crankcase to be exposed.Inspect the main support bearings, if they are in question replace them.Upon re-assembly, install a new crankcase gasket between the halves.Carefully inspect the crankshaft, paying particular attention to theamount of play between the connecting rod and the crankshaft pin.Side-to-side play (A) is normal. However, any detectable play in an upand-downmotion (B) is unacceptable. This indicates the need for areplacement crankshaft. The connecting rod and crankshaft are one,non-<strong>service</strong>able part.www.tanaka-usa.com 17 custsvc@tanaka-ism.com