Ball Valves Sizes 06 - 50 KHB, KHM, and KHB3K ... - HYDAC USA
Ball Valves Sizes 06 - 50 KHB, KHM, and KHB3K ... - HYDAC USA
Ball Valves Sizes 06 - 50 KHB, KHM, and KHB3K ... - HYDAC USA

Create successful ePaper yourself
Turn your PDF publications into a flip-book with our unique Google optimized e-Paper software.
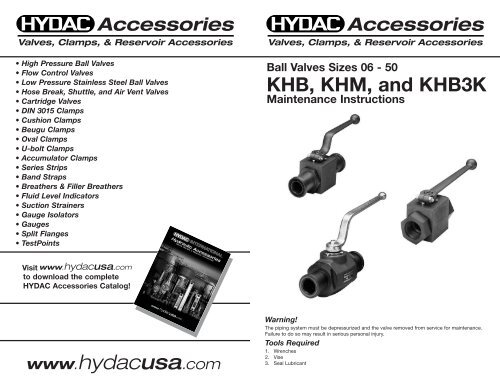
• High Pressure <strong>Ball</strong> <strong>Valves</strong>• Flow Control <strong>Valves</strong>• Low Pressure Stainless Steel <strong>Ball</strong> <strong>Valves</strong>• Hose Break, Shuttle, <strong>and</strong> Air Vent <strong>Valves</strong>• Cartridge <strong>Valves</strong>• DIN 3015 Clamps• Cushion Clamps• Beugu Clamps• Oval Clamps• U-bolt Clamps• Accumulator Clamps• Series Strips• B<strong>and</strong> Straps• Breathers & Filler Breathers• Fluid Level Indicators• Suction Strainers• Gauge Isolators• Gauges• Split Flanges• TestPoints<strong>Ball</strong> <strong>Valves</strong> <strong>Sizes</strong> <strong>06</strong> - <strong>50</strong><strong>KHB</strong>, <strong>KHM</strong>, <strong>and</strong> <strong>KHB</strong>3KMaintenance InstructionsVisitto download the complete<strong>HYDAC</strong> Accessories Catalog!Warning!The piping system must be depressurized <strong>and</strong> the valve removed from service for maintenance.Failure to do so may result in serious personal injury.Tools Required1. Wrenches2. Vise3. Seal Lubricant
ProcedureDisassemble the Valve1. Make sure that the valve is in the openposition.2. Remove the two connection adapters (2).3. Remove the o-rings (11) <strong>and</strong> the backup rings (15) (for sizes 32 through <strong>50</strong> only).4. Remove the ball seal (5).5. Remove the control h<strong>and</strong>le (12).6. Remove the spring retainer (7) <strong>and</strong> limitwasher (8) from the control spindle (4).7. Turn the valve to the closed position <strong>and</strong>remove the ball (3).8. Remove the spindle (4) by pushing itinto the valve body (1).9. Remove the o-ring (10), the backup ring(9), <strong>and</strong> thrust washer (13) from thespindle (4).Connection Adapter TorqueValveInstallationSizeTorque (ft-lbs)<strong>06</strong> <strong>50</strong>10 11016 13520 18525 23532 295Reassemble the Valve1. Clean all parts of the valve.2. Inspect the valve parts for damage.Replace any worn or damaged parts.3. Install the new o-ring (10), the backupring (9), <strong>and</strong> thrust washer (13) on thespindle (4).4. Install the spindle (4) in the valve body (1)from inside the valve body.5. Install o-rings (11), <strong>and</strong> for sizes 32through <strong>50</strong>, back up rings (15) on theconnection adapters (2).6. Install one connection adapter (2) <strong>and</strong>one ball seal (5) into the valve body.7. Rotate the spindle (4) to the closedposition as indicated by the slot on theend of the spindle.8. Align the groove in the ball with thetongue of the spindle (4) <strong>and</strong> insert theball (3) so that it fully engages the spindletongue <strong>and</strong> ball seal.9. Install the second ball seal <strong>and</strong>connection adapter. Torque bothconnection adapters to the torquevalues listed in table.10. Install the limit washer (8), springretainer (7), <strong>and</strong> control h<strong>and</strong>le (12).11. Turn the control h<strong>and</strong>le to check operationof the valve. It should turn smoothly.Install the valve in the system <strong>and</strong>check for leaks.<strong>KHB</strong> / <strong>KHM</strong> sizes <strong>06</strong>-25 (size <strong>06</strong> w/ 6mm spindle)7 8 1264642 1 3 5 11<strong>KHM</strong> sizes 32-<strong>50</strong>147 82 1 3 51291013Detail AADetail BBDetail AA91013Detail BB11 1540 370<strong>50</strong> 445Parts List<strong>KHB</strong>3K sizes 10-258 7612Item Quantity Description Item Quantity Description1 1 Valve Body 9* 1 Spindle Backup Ring2 2 Connection Adapter 10* 1 Spindle O-Ring3 1 <strong>Ball</strong> 11* 2 Connection Adapter O-Ring4 1 Spindle 12 1 Control H<strong>and</strong>le5* 2 <strong>Ball</strong> Seal 13* 1 Spindle Thrust Washer6 1 Stop Pin 14 1 Control H<strong>and</strong>le Fasteners7 1 Spring Retainer 15* 2 Connection Adapter Backup Ring8 1 Limit Washer*Item included in seal kit1342 1 3 5 119102 <strong>Ball</strong> <strong>Valves</strong>1-877-GO <strong>HYDAC</strong><strong>Ball</strong> <strong>Valves</strong>3