14 Different Vehicles 12 LifeLike Tracks 120 Adjustable Features 14 ...
14 Different Vehicles 12 LifeLike Tracks 120 Adjustable Features 14 ...
14 Different Vehicles 12 LifeLike Tracks 120 Adjustable Features 14 ...

You also want an ePaper? Increase the reach of your titles
YUMPU automatically turns print PDFs into web optimized ePapers that Google loves.
7. Click “Finish” to complete this portion of the<br />
software installation procedure. RealRace still<br />
needs to finalize the software installation. For<br />
information on how to do so, please see the<br />
Final Installation/Starting the RealRace<br />
Generation 2 Program section which follows.<br />
Final Installation/Starting the<br />
RealRace Generation 2 Program<br />
1. Make sure that no other programs are currently<br />
running.<br />
2. With the RealRace CD-ROM in the CD-ROM<br />
drive, click on the RealRace icon located on your<br />
desktop.<br />
3. The program will now guide you through the<br />
final installation steps and the calibration of your<br />
controller.<br />
4. Upon completion of these final steps, RealRace<br />
Generation 2 will start the program with a<br />
default vehicle and a default track.<br />
For information on the details and features found<br />
in RealRace G2, please refer to the complete<br />
manual located on the hard drive of your PC. To<br />
access this manual, click the “Start” button in the<br />
Windows Taskbar. Then, move your cursor to<br />
“Programs” and then to “RealRace.” Choose<br />
“RealRace Control Panel”. This should open the<br />
RealRace Control Panel on your computer screen.<br />
In the Control Panel, select the “RealRace G2.doc”<br />
from the pull-down menu located next to the<br />
“Read Document” button.<br />
3<br />
First Run- Changing <strong>Vehicles</strong> and <strong>Tracks</strong><br />
To begin the first run with the RealRace program,<br />
click on the icon located on the desktop. The<br />
program will initialize the necessary items and will<br />
then start using the pre-set defaults (including<br />
driving perspective, site and vehicle).<br />
Upon completing the initialization process, the<br />
program will display the Controller Calibration<br />
window. Follow the onscreen prompts to calibrate<br />
your RealRace controller. Using the default vehicle,<br />
an Axis , briefly drive around to ensure that<br />
RealRace G2 is functioning correctly. If you are<br />
new to radio control, please refer to the<br />
“Introduction to Radio Control” section of this<br />
manual. It is located on pages 4 and 5.<br />
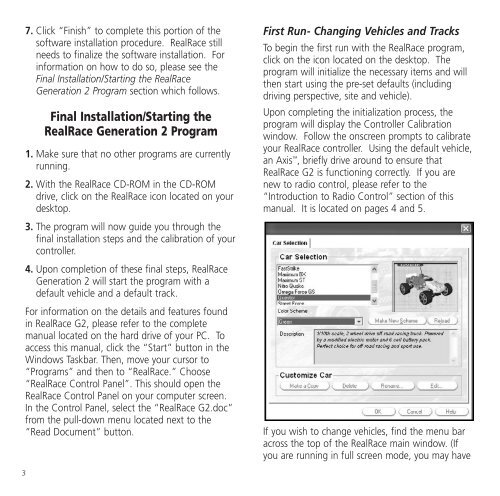
If you wish to change vehicles, find the menu bar<br />
across the top of the RealRace main window. (If<br />
you are running in full screen mode, you may have