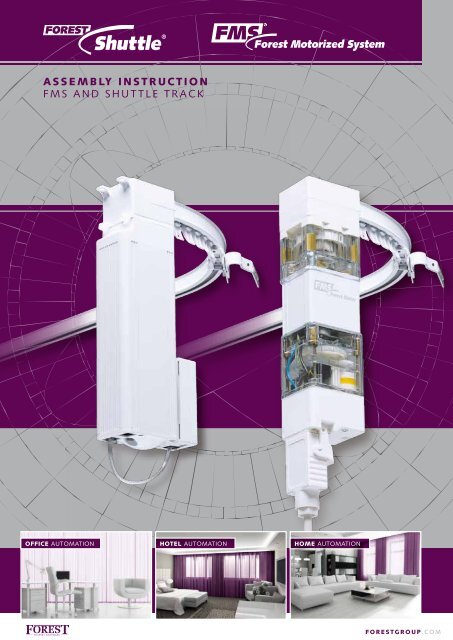
ASSEMBLY INSTRUCTION FMS and Shuttle track - Forest Group
ASSEMBLY INSTRUCTION FMS and Shuttle track - Forest Group
ASSEMBLY INSTRUCTION FMS and Shuttle track - Forest Group

Create successful ePaper yourself
Turn your PDF publications into a flip-book with our unique Google optimized e-Paper software.
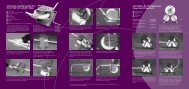
STEP BY STEP <strong>ASSEMBLY</strong>OF THE <strong>FMS</strong> <strong>and</strong> <strong>Shuttle</strong> <strong>track</strong>Step 1Step 2Slide the belt through the <strong>track</strong> by using the<strong>FMS</strong> belt connector (1).Cut the belt under an angle to remove the1st tooth. This ensures a smooth slidingthrough the <strong>FMS</strong> Return Pulley.Step 3Step 4Take off the cord connector <strong>and</strong> push thebelt through the <strong>FMS</strong> Return Pulley (2) untilthe above figure is achievedCut off the remaining part of the 1st tooth,then attach the belt connector <strong>and</strong> put thebelt back into the other <strong>track</strong>channel untilabove figure is achieved (3).Step 5Now pull the belt throug the <strong>track</strong> <strong>and</strong> takeoff the belt connector at the end.
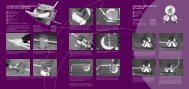
STEP BY STEP <strong>ASSEMBLY</strong>OF THE <strong>FMS</strong> <strong>and</strong> <strong>Shuttle</strong> <strong>track</strong>Step 17Step 18Now reposition the end pulley onto the <strong>track</strong><strong>and</strong> fasten the screw.Place the metal <strong>FMS</strong> clip inside the <strong>track</strong>,put the motor pulley on the <strong>track</strong> again <strong>and</strong>place the metal clip over the motor pulley, toensure a good fixation.Step 19Step 20Now tighten all thescrews of the motorpulley again.In order to ensure a smooth running of all the components inside the<strong>track</strong>, it is necessary to lubricate the <strong>track</strong>, the pulleys <strong>and</strong> the mastercarriers with the special <strong>Forest</strong> lubrication spray.Step 21Step 22Finally position the <strong>FMS</strong> Carriers onto the<strong>track</strong> <strong>and</strong> click them into the <strong>track</strong>, by usingyour thumbs. Remove the plastic strip.The basic assembly of the <strong>track</strong> is nowcomplete, the system is ready to be installedwith the motor.