PENDOLINO - Hornby
PENDOLINO - Hornby
PENDOLINO - Hornby

Create successful ePaper yourself
Turn your PDF publications into a flip-book with our unique Google optimized e-Paper software.
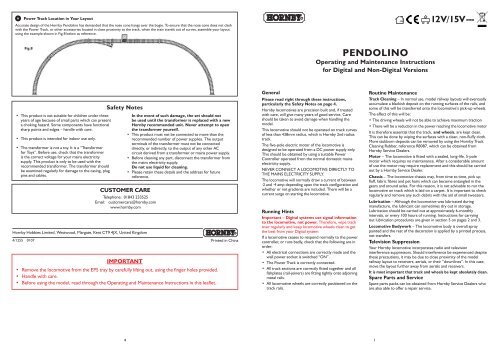
6 Power Track Location in Your LayoutAccurate design of the <strong>Hornby</strong> Pendolino has demanded that the nose cone hangs over the bogie. To ensure that the nose cone does not clashwith the Power Track, or other accessories located in close proximity to the track, when the train travels out of curves, assemble your layoutusing the example shown in Fig 8 below as reference.12V/15VFig.8<strong>PENDOLINO</strong>Operating and Maintenance Instructionsfor Digital and Non-Digital Versions• This product is not suitable for children under threeyears of age because of small parts which can presenta choking hazard. Some components have functionalsharp points and edges – handle with care.• This product is intended for indoor use only.• The transformer is not a toy. It is a “Transformerfor Toys”. Before use, check that the transformeris the correct voltage for your mains electricitysupply. This product is only to be used with therecommended transformer. The transformer shouldbe examined regularly for damage to the casing, plugpins and cables.Safety NotesCUSTOMER CARETelephone: 01843 233525Email: customercare@hornby.comwww.hornby.com<strong>Hornby</strong> Hobbies Limited, Westwood, Margate, Kent CT9 4JX, United KingdomIn the event of such damage, the set should notbe used until the transformer is replaced with a new<strong>Hornby</strong> recommended unit. Never attempt to openthe transformer yourself.• This product must not be connected to more than therecommended number of power supplies. The outputterminals of the transformer must not be connecteddirectly, or indirectly, to the output of any other ACcircuit derived from a transformer or mains power supply.• Before cleaning any part, disconnect the transformer fromthe mains electricity supply.Do not use liquid for cleaning.• Please retain these details and the address for futurereference.4/1255 0107 Printed in ChinaIMPORTANT• Remove the locomotive from the EPS tray by carefully lifting out, using the finger holes provided.• Handle with care.• Before using the model, read through the Operating and Maintenance Instructions in this leaflet.GeneralPlease read right through these instructions,particularly the Safety Notes on page 4.<strong>Hornby</strong> locomotives are precision built and, if treatedwith care, will give many years of good service. Careshould be taken to avoid damage when handling themodel.This locomotive should not be operated on track curvesof less than 438mm radius, which is <strong>Hornby</strong> 2nd radiustrack.The five-pole electric motor of the locomotive isdesigned to be operated from a DC power supply only.This should be obtained by using a suitable PowerController operated from the normal domestic mainselectricity supply.NEVER CONNECT A LOCOMOTIVE DIRECTLY TOTHE MAINS ELECTRICITY SUPPLY.The locomotive will normally draw a current of between·2 and ·4 amp depending upon the track configuration andwhether or not gradients are included. There will be acurrent surge on starting the locomotive.Running HintsImportant – Digital systems use signal informationto the locomotive, not power. Therefore, wipe trackover regularly and keep locomotive wheels clean to getthe best from your Digital system.If a locomotive ceases to respond normally to the powercontroller, or runs badly, check that the following are inorder:• All electrical connections are correctly made and thewall power socket is switched “ON”.• The Power Track is correctly connected.• All track sections are correctly fitted together and allfishplates (rail-joiners) are fitting tightly onto adjoiningmetal rails.• All locomotive wheels are correctly positioned on thetrack rails.Routine MaintenanceTrack Cleaning – In normal use, model railway layouts will eventuallyaccumulate a blackish deposit on the running surfaces of the rails, andsome of this will be transferred onto the locomotive’s pick-up wheels.The effect of this will be:• The driving wheels will not be able to achieve maximum traction• There will be a reduction in the power reaching the locomotive motorIt is therefore essential that the track, and wheels, are kept clean.This can be done by wiping the surfaces with a clean, non-fluffy cloth.More stubborn deposits can be removed by using the <strong>Hornby</strong> TrackCleaning Rubber, reference R8087, which can be obtained from<strong>Hornby</strong> Service Dealers.Motor – The locomotive is fitted with a sealed, long-life, 5-polemotor which requires no maintenance. After a considerable amountof use the motor may require replacement and this should be carriedout by a <strong>Hornby</strong> Service Dealer.Chassis – The locomotive chassis may, from time to time, pick upfluff, fabric fibres and pet hairs which can become entangled in thegears and around axles. For this reason, it is not advisable to run thelocomotive on track which is laid on a carpet. It is important to checkregularly and remove any such debris with the aid of small tweezers.Lubrication – Although the locomotive was lubricated duringmanufacture, the lubricant can sometimes dry out in storage.Lubrication should be carried out at approximately 6-monthlyintervals, or every 100 hours of running. Instructions for carryingout lubrication procedures are given in section 5 on pages 2 and 3.Locomotive Bodywork – The locomotive body is overall spraypainted and the rest of the decoration is applied by a printed process,not transfers.Television SuppressionYour <strong>Hornby</strong> locomotive incorporates radio and televisioninterference suppressors. Should interference be experienced despitethese precautions, it may be due to close proximity of the modelrailway layout to receivers, aerials, or their “downlines”. In this case,move the layout further away from aerials and receivers.It is most important that track and wheels be kept absolutely clean.Spare Parts and ServiceSpare parts packs can be obtained from <strong>Hornby</strong> Service Dealers whoare also able to offer a repair service.41
1 Coupling Sequence Additional coaches are available to complete the 9 car train. Contact your <strong>Hornby</strong> Service Dealer or visit the <strong>Hornby</strong> website for information. Packs will be marked with the relevant keys shown in the chart for easy identification and to enable coupling in the correct sequence.Key DescriptionDMKFOMFODDriving Motor Kitchen First OpenMotor First Open Disabled4-Car TrainPTFO Pantograph Trailer First OpenDMKFO PTFO MFO DMSOMFO Motor First OpenTSO Trailer Standard Open9-Car TrainMSO (A) Motor Standard Open (A)PTSRMB Pantograph Trailer Standard Restaurant Miniature BuffetDMKFO MFD PTFO MFO TSO MSO(A) PTSRMB MSO(B) DMSOMSO (B) Motor Standard Open (B)DMSO Driving Motor Standard Open2 Coupling3Body Removal – Power CarWith one hand, gently squeeze the body sides together where shown in Fig 2, whilst easing the underframe assembly from the body with the other hand.Ease the front of the body downwards as shown in Fig 3, taking care that the front of the underframe does not catch on the sides of the nose cone (Fig 4). Slide underframe forward, making sure that the coupling mechanism clears the slot in the rear of the body.To re-assemble, reverse the above procedure, making sure that the coupling mechanism is located through the slot in the rear of the body (Fig 5) before easing the underframe back into place.Fig.1Fig.2Fig.3Fig.4Fig.54 Decoder Location5Your model will have either a pre-fitted decoder (Fig 6) or a 'DCC Ready' socket (Fig 7).LubricationFig.8Fig.6Fig.7IMPORTANT – Only apply small single drops of light machine oil to the places indicated in red in Fig.8. This is best achieved by making a simple oil “dropper”as illustrated in Fig.9. Insert a straightened paper clip into a cork and use a bottle cap as a container for the oil. A small drop of oil can then be picked up by thedropper and applied in exactly the right place. Immediately wipe off any excess oil, especially from the locomotive body. Only lubricate moving parts.Fig.923