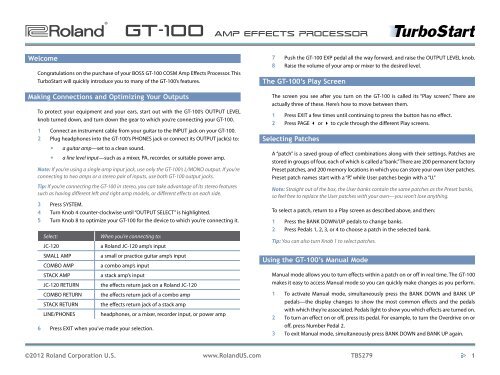
Roland GT-100 TurboStart
Roland GT-100 TurboStart
Roland GT-100 TurboStart
Create successful ePaper yourself
Turn your PDF publications into a flip-book with our unique Google optimized e-Paper software.
®ÂØÒňΠ®<br />
Welcome<br />
<strong>GT</strong>-<strong>100</strong> Amp Effects Processor<br />
Congratulations on the purchase of your BOSS <strong>GT</strong>-<strong>100</strong> COSM Amp Effects Processor. This<br />
<strong>TurboStart</strong> will quickly introduce you to many of the <strong>GT</strong>-<strong>100</strong>’s features.<br />
Making Connections and Optimizing Your Outputs<br />
To protect your equipment and your ears, start out with the <strong>GT</strong>-<strong>100</strong>’s OUTPUT LEVEL<br />
knob turned down, and turn down the gear to which you’re connecting your <strong>GT</strong>-<strong>100</strong>.<br />
1 Connect an instrument cable from your guitar to the INPUT jack on your <strong>GT</strong>-<strong>100</strong>.<br />
2 Plug headphones into the <strong>GT</strong>-<strong>100</strong>’s PHONES jack or connect its OUTPUT jack(s) to:<br />
• a guitar amp—set to a clean sound.<br />
• a line level input—such as a mixer, PA, recorder, or suitable power amp.<br />
Note: If you’re using a single amp input jack, use only the <strong>GT</strong>-<strong>100</strong>’s L/MONO output. If you’re<br />
connecting to two amps or a stereo pair of inputs, use both <strong>GT</strong>-<strong>100</strong> output jacks.<br />
Tip: If you’re connecting the <strong>GT</strong>-<strong>100</strong> in stereo, you can take advantage of its stereo features<br />
such as having different left and right amp models, or different effects on each side.<br />
3 Press SYSTEM.<br />
4 Turn Knob 4 counter-clockwise until “OUTPUT SELECT” is highlighted.<br />
5 Turn Knob 8 to optimize your <strong>GT</strong>-<strong>100</strong> for the device to which you’re connecting it.<br />
Select: When you’re connecting to:<br />
JC-120 a <strong>Roland</strong> JC-120 amp’s input<br />
SMALL AMP a small or practice guitar amp’s input<br />
COMBO AMP a combo amp’s input<br />
STACK AMP a stack amp’s input<br />
JC-120 RETURN the effects return jack on a <strong>Roland</strong> JC-120<br />
COMBO RETURN the effects return jack of a combo amp<br />
STACK RETURN the effects return jack of a stack amp<br />
LINE/PHONES headphones, or a mixer, recorder input, or power amp<br />
6 Press EXIT when you’ve made your selection.<br />
7 Push the <strong>GT</strong>-<strong>100</strong> EXP pedal all the way forward, and raise the OUTPUT LEVEL knob.<br />
8 Raise the volume of your amp or mixer to the desired level.<br />
The <strong>GT</strong>-<strong>100</strong>’s Play Screen<br />
The screen you see after you turn on the <strong>GT</strong>-<strong>100</strong> is called its “Play screen.” There are<br />
actually three of these. Here’s how to move between them.<br />
1 Press EXIT a few times until continuing to press the button has no effect.<br />
2 Press PAGE 3 or 4 to cycle through the different Play screens.<br />
Selecting Patches<br />
A “patch” is a saved group of effect combinations along with their settings. Patches are<br />
stored in groups of four, each of which is called a “bank.” There are 200 permanent factory<br />
Preset patches, and 200 memory locations in which you can store your own User patches.<br />
Preset patch names start with a “P,” while User patches begin with a “U.”<br />
Note: Straight out of the box, the User banks contain the same patches as the Preset banks,<br />
so feel free to replace the User patches with your own—you won’t lose anything.<br />
To select a patch, return to a Play screen as described above, and then:<br />
1 Press the BANK DOWN/UP pedals to change banks.<br />
2 Press Pedals 1, 2, 3, or 4 to choose a patch in the selected bank.<br />
Tip: You can also turn Knob 1 to select patches.<br />
Using the <strong>GT</strong>-<strong>100</strong>’s Manual Mode<br />
Manual mode allows you to turn effects within a patch on or off in real time. The <strong>GT</strong>-<strong>100</strong><br />
makes it easy to access Manual mode so you can quickly make changes as you perform.<br />
1 To activate Manual mode, simultaneously press the BANK DOWN and BANK UP<br />
pedals—the display changes to show the most common effects and the pedals<br />
with which they’re associated. Pedals light to show you which effects are turned on.<br />
2 To turn an effect on or off, press its pedal. For example, to turn the Overdrive on or<br />
off, press Number Pedal 2.<br />
3 To exit Manual mode, simultaneously press BANK DOWN and BANK UP again.<br />
©2012 <strong>Roland</strong> Corporation U.S. www.<strong>Roland</strong>US.com TBS279<br />
1
®ÂØÒňΠ®<br />
Using EZ TONE<br />
<strong>GT</strong>-<strong>100</strong> Amp Effects Processor<br />
1 Start with any patch.<br />
2 Press EZ TONE.<br />
You can create an entirely new patch, customize the current COSM amp sound, or<br />
customize an OD/DS stomp box pedal sound.<br />
3 Turn Knob 4 to highlight “PATCH CREATE,” “AMP CUSTOM,” or “OD/DS CUSTOM.”<br />
4 Turn Knob 5 to choose a basic tone or type.<br />
Tip: In the Patch Create screen, you can press PAGE 4 to reveal a tone grid. Turn Knobs 5<br />
and 6 to move the cursor horizontally and vertically around the grid, and then dial in the<br />
desired tone. Turn Knob 8 to adjust the ambience.<br />
5 When you’re finished with EZ Tone, press EXIT.<br />
Editing a Patch<br />
Within a <strong>GT</strong>-<strong>100</strong> patch, any effect and/or amp model can be edited to sound exactly the<br />
way you want. Here’s how to do this.<br />
1 Press the EFFECT button.<br />
2 Turn Knob 4 to select an effect.<br />
3 Once the desired effect is highlighted:<br />
• Turn Knob 3 to toggle the effect on or off.<br />
• Turn Knob 1 to change its location in the effects chain.<br />
• Turn Knobs 5 through 8 to adjust the parameters of that effect.<br />
Tip: Press PAGE 3 or 4 to reveal more parameters.<br />
Writing Patches<br />
Once you’ve edited a patch, you can store it in any of the 200 User patch locations.<br />
1 Press WRITE.<br />
2 Turn Knob 5 to choose a User patch memory location from U01-1 to U50-4.<br />
3 Press WRITE again to finish saving your patch.<br />
Using the <strong>GT</strong>-<strong>100</strong>’s Phrase Looper<br />
1 Select the patch you want to use as you record your loop.<br />
2 Press and hold the PHRASE LOOP pedal for at least 2 seconds until its red LED<br />
flashes, and then release the pedal.<br />
3 When you’re ready to record, press and release the PHRASE LOOP pedal—”REC”<br />
appears briefly on the screen to indicate that the <strong>GT</strong>-<strong>100</strong> is recording.<br />
Note: You can record for up to 38 seconds.<br />
4 When you’re finished recording, press and release PHRASE LOOP again—”PLAY”<br />
appears briefly on the screen. Playback of your loop begins immediately. You can<br />
now play or practice over your loop without adding to it.<br />
5 When you’re ready to record, or “overdub,” press and release PHRASE LOOP again—<br />
“DUB” appears briefly on the screen.<br />
6 Press and release PHRASE LOOP again to stop overdubbing. You can repeat the<br />
overdubbing process as many times as you wish.<br />
7 To stop looping, press the pedal twice in quick succession—“STOP” appears briefly<br />
on the screen.<br />
8 In its current state, the Phrase Looper is now ready to record a new loop. If you’re<br />
done looping, press and hold PHRASE LOOP for at least two seconds to turn the<br />
Phrase Looper off.<br />
Using the <strong>GT</strong>-<strong>100</strong>’s Accel Features<br />
The <strong>GT</strong>-<strong>100</strong> has a new, unique feature called “Accel.” When it’s turned on, you can use<br />
the ACCEL/CTL pedal to apply the S-Bend, Laser Beam, Ring Mod, Twist, Warp, and<br />
Feedbacker specialty effects. There are several Preset patches that utilize these effects.<br />
Here are a few examples.<br />
1 Press EXIT a few times to return to the Play screen.<br />
2 For a Warp Accel effect, select Patch P50-4 ACCEL WARP.<br />
3 While you play, press and hold the ACCEL/CTL pedal to activate the Warp effect.<br />
4 For a Laser Beam effect, select patch P50-2 ACCEL LSR BEAM.<br />
5 For a Twist effect, select Patch P49.<br />
©2012 <strong>Roland</strong> Corporation U.S. www.<strong>Roland</strong>US.com TBS279<br />
2


