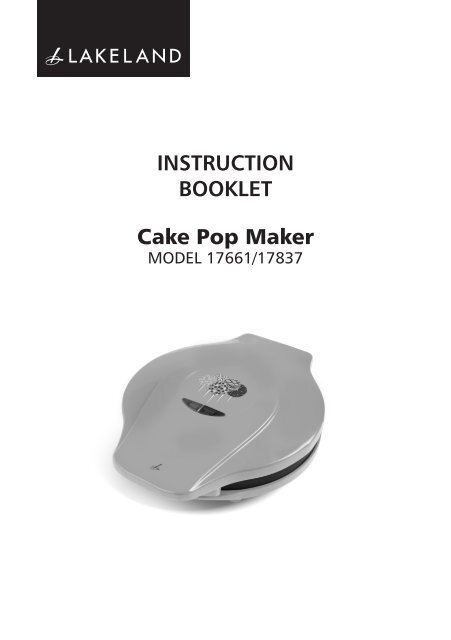
12 Hole Cake Pop Maker Instructions - Lakeland
12 Hole Cake Pop Maker Instructions - Lakeland
12 Hole Cake Pop Maker Instructions - Lakeland
Create successful ePaper yourself
Turn your PDF publications into a flip-book with our unique Google optimized e-Paper software.
CARROT CAKE POPSMakes 24IngredientCarrots, peeledSelf-raising flourSoft brown sugarBicarbonate of sodaGround mixed spiceEgg, beaten 1Vegetable oilQuantity100g100g85g½ tsp½ tsp75ml1. Finely grate the carrots and place in a mixing bowl.2. Sift the flour into the bowl then add the soft brown sugar, bicarbonate of soda and mixedspice.3. Add the egg and vegetable oil and beat well until the mixture is smooth.4. Preheat the <strong>Cake</strong> <strong>Pop</strong> <strong>Maker</strong> for 2 minutes and when the green READY light illuminates,grease the moulds lightly with vegetable oil then add a heaped teaspoon of mixture into eachof the <strong>12</strong> moulds.5. Close the lid and cook for 4 minutes or until the cake pops are well risen, golden and springback when touched. Continue to bake until all of the mixture is used.6. Turn off the <strong>Cake</strong> <strong>Pop</strong> <strong>Maker</strong> and leave the cakes to cool for about 1 minute then carefullyremove and leave on a wire rack to cool.7. Place the cake pops onto sticks and decorate with a cream cheese frosting and orangesprinkles.Another fantastic idea when using your cake pop maker is to make mini doughnuts. They can beserved coated in sugar like this recipe or try adding flavours such as lemon zest or cinnamon. For ajam doughnut just warm some seedless raspberry jam and inject into the doughnut using a syringeor piping bag with plain nozzle.MINI DOUGHNUTSMakes 24IngredientPlain flourBaking powderButter, softenedCaster sugar, plus extra for coatingEgg, beaten 1MilkQuantity1. In a large bowl mix together the flour and baking powder then add the butter and rub in untilthe mixture resembles fine breadcrumbs.2. Stir in the sugar.3. In a jug lightly whisk the egg and milk then gradually add the liquid to the flour mixture115g1 tsp60g60g75mlbeating well during each addition until the mixture is creamy and smooth.4. Preheat the <strong>Cake</strong> <strong>Pop</strong> <strong>Maker</strong> for 2 minutes and when the green READY light illuminates,grease each mould lightly with vegetable oil then add a heaped tablespoon of mixture intoeach of the <strong>12</strong> moulds.5. Close the lid and cook for 4 minutes or until the doughnuts are golden and spring back whentouched.6. Turn off and unplug the <strong>Cake</strong> <strong>Pop</strong> <strong>Maker</strong> then allow the doughnuts to cool for a minute thencarefully remove the doughnuts and toss in the sugar then leave on a wire rack to cool.14 15
DECORATING CAKE POPSTo create a variety of cake pops you will need the following equipment and a selection of decoratingingredients:• Lollipop sticks – you can buy sticks from <strong>Lakeland</strong>.• <strong>Cake</strong> pop stand – when the cake pops are setting they need to be upright so it is best to standthem in a polystyrene block, a piece of oasis or even a tall glass.TROUBLESHOOTINGFollowing are some common problems that can occur when using the <strong>Lakeland</strong> <strong>Cake</strong> <strong>Pop</strong> <strong>Maker</strong>.Please revue the problems, their possible cause and any corrective action that should be taken toensure successful bakingProblem Possible cause SolutionReduce the amount of sugar• Candy Melts – these are small coloured candy discs that can be easily melted to coat the cakepops. <strong>Lakeland</strong> stocks a number of these.• Chocolate or cake covering – melted white, plain, milk or flavoured chocolate or cake coveringscan be used to coat the cake pops, although it is a bit more difficult to handle as the chocolateis runnier than the candy melts.• Sprinkles – there are a wide variety of sprinkles available.The <strong>Cake</strong> <strong>Pop</strong>s are browningtoo quickly.Too much sugar in the recipeor the <strong>Cake</strong> <strong>Pop</strong> <strong>Maker</strong> is toohotor the <strong>Cake</strong> <strong>Pop</strong> <strong>Maker</strong> is notfilled correctlySwitch the <strong>Cake</strong> <strong>Pop</strong> <strong>Maker</strong>off after 30 minutes andallow to cool before addingmore mixture.Ensure that all <strong>12</strong> moulds arefilled with mixture.• Glitter – edible glitter can be added to cake pops to add some extra sparkle.HOW TO DECORATE A CAKE POP• The cake pops should be completely cool before decorating.The mixture is overflowingonto the plate.Too much mixture beingaddedThe mixture is too wet.Use one heaped teaspoonof mixture ensuring that themould is no more than ¾full.Add less liquid to the mixtureto ensure a stiffer cake mix.• Melt some candy melts, chocolate or cake covering and then dip 1cm of a lollipop stick into themelted chocolate and then insert the stick into the cake pop. Repeat with the remaining cakepops then set aside until the chocolate has set and the stick is cake pop is securely attached tothe cake pop.• If using chocolate or cake covering it is advisable to chill the cake pops as the chocolate will setmore easily.The <strong>Cake</strong> <strong>Pop</strong>s are not risingvery wellThe <strong>Cake</strong> <strong>Pop</strong> <strong>Maker</strong> isproducing smoke when turnedon.Not enough mixture beingadded.The plates are not cleanedcorrectlyFill the cake pop moulds to aminimum of ½ full.Clean the plates thoroughly• If using candy melts and the mixture becomes thick just add some vegetable oil and mix wellto produce a thinner consistency.• To coat the cake pop hold the end of the stick and dip the cake pop into the chocolate until itis completely covered. Gently twirl the cake pop to remove any excess chocolate.• Shake the sprinkles or decoration over the cake pop whilst the chocolate is still wet thentransfer to a polystyrene block or other suitable container to hold the cake pop upright until itsets.• To store the cake pops cover in cellophane and keep in a cool dry place. Do not store the cakepops in the fridge as the covering will sweat. <strong>Cake</strong> pop gift boxes can also be purchased tomake them easy to carry and present as gifts.The <strong>Cake</strong> <strong>Pop</strong> <strong>Maker</strong> isproducing smoke duringcooking.The <strong>Cake</strong> <strong>Pop</strong>s are takinglonger to cook than suggestedin the recipe.The plates are not clean andmixture has spilled over.The lid is being left uprightfor too long and mixture isbeing added before the greenReady light is on.Turn the machine off andallow to cool, and then cleanthe plates with a clean drycloth or kitchen roll beforemaking another batch.Ensure that the lid is keptclosed until adding themixture and wait for thegreen light to illuminatebefore adding any mixture.16 17
CARE AND CLEANING• Before the first use and after every use, clean each part thoroughly.• Switch off at the wall and unplug the <strong>Cake</strong> <strong>Pop</strong> <strong>Maker</strong> and allow to cool completely beforecleaning. There are no parts to disassemble for cleaning.• The cooking plates should be conditioned with oil before each use by lightly coating eachmould with vegetable oil, using a heat resistant silicone or plastic soft pastry brush.• Periodically check all parts before reassembly.• Never immerse the appliance in water or other liquidsELECTRICAL CONNECTIONSTHIS APPLIANCE MUST BE EARTHEDThis appliance is fitted with a fused three-pin plug to BS1363 which is suitable for use in all homesfitted with sockets to current specifications. If the fitted plug is not suitable for your socket outlets,it should be cut off and carefully disposed of. To avoid an electric shock, do not insert the discardedplug into a socket.Fitting a new plugIf for any reason you need to fit a new plug, the flexible mains lead must be connected as shownhere. The wires in the mains lead fitted to this appliance are coloured in accordance with thefollowing code:• Never place the <strong>Cake</strong> <strong>Pop</strong> <strong>Maker</strong> in the dishwasher• Always use plastic, nylon or silicone spatulas etc. – metal tools will damage non-stick coatings.• Never immerse the unit in water or any other liquid.• To clean the unit and control panel, wipe with a clean, damp cloth and dry before storing.• Do not use abrasive cleaners, steel wool or abrasive materials or cleansers.• Always clean the outside of the cake <strong>Pop</strong> <strong>Maker</strong> and the top and bottom cooking plates aftereach use to prevent a build-up of baked-on foods.Neutral(blue)Earth(green/yellow)EL13amp FUSENLive(brown)13amp fuse• Store the <strong>Cake</strong> <strong>Pop</strong> <strong>Maker</strong> with the power cable loosely coiled around base. Never wrap ittightly around the appliance.• Ensure that the <strong>Cake</strong> <strong>Pop</strong> <strong>Maker</strong> is cooled, clean and dry before storing do not place anythingon top of the <strong>Cake</strong> <strong>Pop</strong> <strong>Maker</strong> when storing.RECYCLING YOUR ELECTRICALSAlong with many other high street retailers, <strong>Lakeland</strong> has joined a scheme whereby customers cantake their unwanted electricals to recycling points set up around the country.Visit www.recycle-more.co.uk to find your nearest recycling point.Connect BLUE to Neutral (N)Connect GREEN & YELLOW to Earth (E)Connect BROWN to Live (L)13 amp fuse to be usedIf the colours of the wires in the mains lead of this appliance do not correspond with the colouredmarkings identifying the terminals in your plug, proceed as follows. The wire which is colouredgreen and yellow MUST be connected to the terminal which is marked with the letter E (Earth)or coloured green. The wire which is coloured blue MUST be connected to the terminal which ismarked with the letter N (Neutral) or coloured black. The wire which is coloured brown MUST beconnected to the terminal which is marked with the letter L (Live) or coloured red.Before refitting the plug cover, check that there are no cut or stray strands of wire inside the plug.Use a 13 amp BS1362 fuse. Only BSI or ASTA approved fuses should be used. If you are at all unsurewhich plug or fuse to use, always refer to a qualified electrician.Note: after replacing or changing a fuse on a moulded plug which has a fuse cover, the cover mustbe refitted to the plug; the appliance must not be used without a fuse cover. If lost, replacementfuse covers can be obtained from an electrical shop. This appliance complies with the followingEEC Directives: 2006/95/EC (Low Voltage Directive) and 89/336 EEC (EMC Directive)18 19
<strong>Lakeland</strong>Alexandra Buildings, Windermere, Cumbria LA23 1BQTel: 015394 88100 Web: www.lakeland.co.uk


