
You also want an ePaper? Increase the reach of your titles
YUMPU automatically turns print PDFs into web optimized ePapers that Google loves.
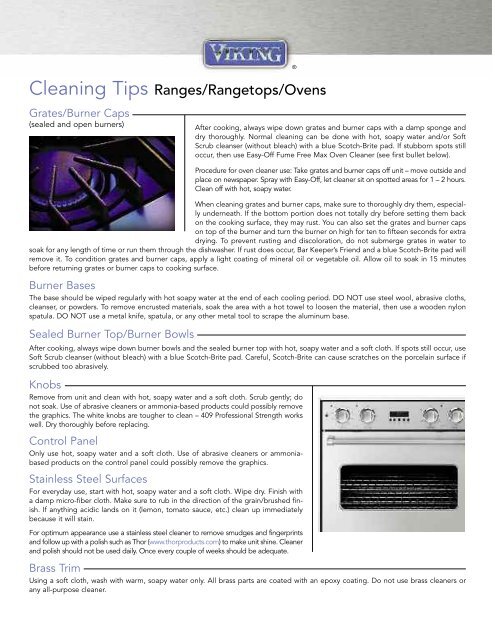
<strong>Cleaning</strong> <strong>Tips</strong> Ranges/Rangetops/Ovens®Grates/Burner Caps(sealed and open burners)After cooking, always wipe down grates and burner caps with a damp sponge anddry thoroughly. Normal cleaning can be done with hot, soapy water and/or SoftScrub cleanser (without bleach) with a blue Scotch-Brite pad. If stubborn spots stilloccur, then use Easy-Off Fume Free Max Oven Cleaner (see first bullet below).Sealed Burner Top/Burner BowlsProcedure for oven cleaner use: Take grates and burner caps off unit – move outside andplace on newspaper. Spray with Easy-Off, let cleaner sit on spotted areas for 1 – 2 hours.Clean off with hot, soapy water.When cleaning grates and burner caps, make sure to thoroughly dry them, especiallyunderneath. If the bottom portion does not totally dry before setting them backon the cooking surface, they may rust. You can also set the grates and burner capson top of the burner and turn the burner on high for ten to fifteen seconds for extradrying. To prevent rusting and discoloration, do not submerge grates in water tosoak for any length of time or run them through the dishwasher. If rust does occur, Bar Keeper’s Friend and a blue Scotch-Brite pad willremove it. To condition grates and burner caps, apply a light coating of mineral oil or vegetable oil. Allow oil to soak in 15 minutesbefore returning grates or burner caps to cooking surface.Burner BasesThe base should be wiped regularly with hot soapy water at the end of each cooling period. DO NOT use steel wool, abrasive cloths,cleanser, or powders. To remove encrusted materials, soak the area with a hot towel to loosen the material, then use a wooden nylonspatula. DO NOT use a metal knife, spatula, or any other metal tool to scrape the aluminum base.After cooking, always wipe down burner bowls and the sealed burner top with hot, soapy water and a soft cloth. If spots still occur, useSoft Scrub cleanser (without bleach) with a blue Scotch-Brite pad. Careful, Scotch-Brite can cause scratches on the porcelain surface ifscrubbed too abrasively.KnobsRemove from unit and clean with hot, soapy water and a soft cloth. Scrub gently; donot soak. Use of abrasive cleaners or ammonia-based products could possibly removethe graphics. The white knobs are tougher to clean – 409 Professional Strength workswell. Dry thoroughly before replacing.Control PanelOnly use hot, soapy water and a soft cloth. Use of abrasive cleaners or ammoniabasedproducts on the control panel could possibly remove the graphics.Stainless Steel SurfacesFor everyday use, start with hot, soapy water and a soft cloth. Wipe dry. Finish witha damp micro-fiber cloth. Make sure to rub in the direction of the grain/brushed finish.If anything acidic lands on it (lemon, tomato sauce, etc.) clean up immediatelybecause it will stain.For optimum appearance use a stainless steel cleaner to remove smudges and fingerprintsand follow up with a polish such as Thor (www.thorproducts.com) to make unit shine. Cleanerand polish should not be used daily. Once every couple of weeks should be adequate.Brass TrimUsing a soft cloth, wash with warm, soapy water only. All brass parts are coated with an epoxy coating. Do not use brass cleaners orany all-purpose cleaner.
Oven InteriorAll ovens should be cleaned frequently with hot, soapy water.Non self-cleaning ovens• Oven door: For non self-cleaning ovens, use Easy-Off Fume Free Max Oven Cleaner. Apply oven cleaner with a damp sponge.• Oven racks and rack supports: Clean with hot, soapy water or Soft Scrub cleanser. Remove before self-cleaning.• Oven interior surfaces: Use Easy-Off Fume Free Max Oven Cleaner. Follow manufacturer’s directions. For self-cleaning ovens,remove oven racks and rack supports and follow self-clean instructions in the Use and Care Manual.• Never line the oven cavity with aluminum foil. It will melt on and permanently damage the surface.Self-cleaning ovens• Oven interior surfaces: Remove oven racks and rack supports (VGSC Ranges only) and follow self-cleaning instructions in the Use andCare Manual.• The infrared broiler should never be cleaned. Any cleaner can damage the special mesh screen and/or the igniter.Char-GrillGriddle/Simmer PlateConstructed of machined steel with blanchard finish.This cleans most efficiently while still hot.Grill grate: May be cleaned immediately after cooking is complete and before turning off theflame. Use a soft bristle brush to scrub the grill grate. Dip the brush frequently into a bowl ofwater. Steam is created as the water contacts the hot grate. The steam assists the cleaningprocess by softening the food particles. For thorough cleaning of the grill grate, use grill cleaneraccording to manufacturer’s directions and then soak 15 to 20 minutes in a hot water andmild detergent solution. After soaking, scrub with a blue Scotch-Brite pad. Do not use a steelwool pad or abrasive cleaners, for risk of damaging the porcelain finish. Dry thoroughly.Flavor-generator plates: Scrape off all burned on debris. Soak 15-20 minutes in a hot waterand mild detergent solution. After soaking, scrub with a blue Scotch-Brite pad. Flavor-generatorplates are also dishwasher safe.First time use: Scrub griddle with mixture of one quart warm water and 1 ⁄4 cup white vinegar, usingblue Scotch-Brite pad. Dry thoroughly. Wash griddle with warm, soapy water. Rinse off and dry thoroughly.Season griddle by thinly coating the surface with approximately 1 ⁄2 to 1 teaspoon unsaltedvegetable oil. Apply to entire griddle using a paper towel or clean cloth. Let oil sit on griddle forabout one hour and then wipe down with a clean cloth to soak up any residual oil. The griddle is nowready to be used.• It is not necessary to wash your griddle after every use. When light cooking is performed, simplywipe down the surface with a clean cloth or paper towel. The oils in the food in which wascooked on the surface will naturally season the griddle.• After heavy cooking is done and the griddle is still warm, you can pour some room temperatureclub soda directly on the griddle. Using a metal spatula, pull oils and excess food towards thegrease trough. Wipe entire surface with a paper towel. Follow up with the seasoning process.• Keeping your griddle well seasoned will prevent your griddle from surface rust. If your griddle isnot used for a period of time, it must be re-seasoned. Every time your griddle is washed, it mustbe re-seasoned.• It is normal for the griddle to darken over time, possibly unevenly.• Non-stick cooking sprays are not recommended, considering their high water content they have a tendency to burn on.• Corn oil is not recommended due to their high sugar level. It will caramelize and burn on the surface making it very difficult toremove.• After using the griddle, always remove the grease trough located in the front. Simply pull the trough towards you and lift out. Thetrough or tray trap needs to be cleaned after each use. Wash the trough in hot soapy water. If grease is permitted to accumulate, a firehazzard could occur.IMPORTANT: Never flood a hot griddle with cold water. This promotes griddle warping and can cause the griddle to crack if continuedover a period of time.For heavy duty cleaning, <strong>Viking</strong> offers a Griddle <strong>Cleaning</strong> Kit (GCK). This fast and easy commercial grade cleaning system will cleanyour griddle in a matter of minutes. To order, contact your local <strong>Viking</strong> dealer or order on the <strong>Viking</strong> Web Site at vikingrange.com –Accessories – Cooking Accessories – Gas and Dual Fuel Accessories.<strong>Viking</strong> Range Corporation111 Front Street • Greenwood, Mississippi 38930 • 662-4<strong>55</strong>-1200For product information, call 1-888-VIKING1 (845-4641) or visit the <strong>Viking</strong> Web Site at vikingrange.comF1809FMS1010