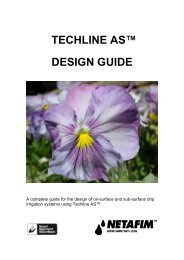
Design Guide - Netafim
Design Guide - Netafim
Design Guide - Netafim

You also want an ePaper? Increase the reach of your titles
YUMPU automatically turns print PDFs into web optimized ePapers that Google loves.
Land Application<strong>Design</strong> <strong>Guide</strong>
Contents | Land Application <strong>Design</strong> <strong>Guide</strong>INTRODUCTION ............................................................................................................................. 4BASIC ASSUMPTIONS ..................................................................................................................... 5WASTEWATER FLOW DETERMINATION .................................................................................... 7SITE CONSIDERATIONS ............................................................................................................... 9SOIL CONSIDERATIONS ............................................................................................................. 11SAMPLE COLLECTION .................................................................................................................. 11DETERMINING SOIL TEXTURE ....................................................................................................... 11RESTRICTIVE LAYERS .................................................................................................................. 12NATIVE VS DISTRIBUTED SOILS .................................................................................................... 13SOIL HYDRAULIC LOADING RATE .................................................................................................. 13SYSTEM DESIGN ......................................................................................................................... 15SYSTEM COMPONENTS ................................................................................................................ 15Dripperline ............................................................................................................................. 16Pumps ................................................................................................................................... 16Filtration ................................................................................................................................ 17Zone Valves .......................................................................................................................... 18Air/ Vacuum Release ............................................................................................................ 18Check Valves ........................................................................................................................ 19Supply Manifold .................................................................................................................... 19Dripperline ............................................................................................................................. 19Flush Manifold ....................................................................................................................... 19ZONE REQUIREMENTS ................................................................................................................. 20PIPING LAYOUT ........................................................................................................................... 20DRAIN BACK CONSIDERATIONS ..................................................................................................... 20OPERATIONAL DESIGN PRINCIPLES ....................................................................................... 22DOSING AND CONTROLS .............................................................................................................. 22HOW TO DOSE ............................................................................................................................. 23FILTER OPTIONS .......................................................................................................................... 24Filter Cleaning ....................................................................................................................... 24FIELD FLUSH ............................................................................................................................... 24INSTALLATION ............................................................................................................................ 26SITE PREPARATION ...................................................................................................................... 26DRIP TUBING INSTALLATION ......................................................................................................... 26MANIFOLD TO DRIPPERLINE CONNECTION ..................................................................................... 27START-UP ................................................................................................................................... 28ROUTINE MAINTENANCE .............................................................................................................. 28TYPICAL LAYOUTS ....................................................................................................................... 29Opposing Manifold Layout .................................................................................................... 30Single Trench Layout ............................................................................................................ 32Multiple Zone Layout ............................................................................................................. 33PERFORMANCE SPECIFICATION SAMPLES ........................................................................... 35UNIBIOLINE CNL (COMPENSATED NON-LEAKAGE) ......................................................................... 35Description ............................................................................................................................ 35Construction .......................................................................................................................... 35Operation .............................................................................................................................. 35Page 2
Contents | Land Application <strong>Design</strong> <strong>Guide</strong>Maximum Run Length Charts ............................................................................................... 36UNIBIOLINE CNL FITTINGS ........................................................................................................... 38Description ............................................................................................................................ 38Construction .......................................................................................................................... 38Operation .............................................................................................................................. 38BIOLINE AS (COMPENSATED ANTI-SIPHON) .................................................................................... 39Description ............................................................................................................................ 39Construction .......................................................................................................................... 39Operation .............................................................................................................................. 39Maximum Run Length Charts ............................................................................................... 40BIOLINE AS FITTINGS ................................................................................................................... 42Description ............................................................................................................................ 42Construction .......................................................................................................................... 42Operation .............................................................................................................................. 42TECHFILTER ................................................................................................................................ 43Description ............................................................................................................................ 43Construction .......................................................................................................................... 43Operation .............................................................................................................................. 43DISC FILTER ................................................................................................................................ 44Description ............................................................................................................................ 44Construction .......................................................................................................................... 44Operation .............................................................................................................................. 44AIR/ VACUUM RELEASE VALVE ..................................................................................................... 46Description ............................................................................................................................ 46Construction .......................................................................................................................... 46Operation .............................................................................................................................. 46DETAILED DRAWINGS ................................................................................................................ 47SINGLE ZONE LAYOUT ................................................................................................................. 47MULTI ZONE LAYOUT ................................................................................................................... 48AIR/ VACUUM RELEASE .............................................................................................................. .. 49FILTER ASSEMBLY ....................................................................................................................... 50FLUSH VALVE .............................................................................................................................. 51SUB-SURFACE TURF/ ON-SURFACE GARDENS .............................................................................. 52REGULATIONS AND LEGISLATION .......................................................................................... 53DISCLAIMER ................................................................................................................................ 53Page 3
Land Application <strong>Design</strong> <strong>Guide</strong>INTRODUCTIONThe purpose of this design manual is to detail the equipment and design considerationsnecessary for the effective application of drip technology to domestic onsite landapplications systems.Drip technology was originally developed for the agricultural industry as a technique toimprove the efficient delivery of water to plants, especially in environments where thewater supply was limited. The technique involves delivering water that plants actuallyuse directly into the root zone and relying on horizontal as well as vertical movementthrough the soil to disperse the water evenly. <strong>Netafim</strong> is the world leader in dripapplications and its drippers, filters, valves, automation and other products have becomethe industry standard in over 110 countries.Sub-surface drip is the most efficient method of dispersing wastewater effluent into thesoil which presents the designer a superior option for all soil types.Drip The has the ability of drip to deliver effluent in the shallow subsurface and in theroot zone of plants, plant uptake of nutrient, and slow dispersal into the soil medium forfurther treatment.Government authorities in each state across Australia and regional councils across NewZealand have recognized that domestic onsite treatment systems is a permanentalternative to traditional centralised systems which aren’t always feasible. Increasingpublic concern about issues related to the effective and reliable treatment and dispersalof wastewater effluent has created a climate for change beyond conventional septictanks and drain fields. The onsite industry has responded with improved technology forwastewater treatment and regulations have become more explicit and scientificallybased. These are the key reasons why interest in drip dispersal within the onsitewastewater treatment industry has rapidly increased.As the demand increases for residential development in rural areas and in less thanoptional conditions for traditional onsite wastewater dispersal, the importance ofalternative technologies increases. Advanced onsite wastewater treatment with dripdispersal is the best available strategy for a wide variety of the most demanding onsitewastewater design considerations.Page 4
Land Application <strong>Design</strong> <strong>Guide</strong>Subsurface drip dispersal has a number of benefits;ooooWith proper design, drip technology can be applied in almost any climate or soilconditionsInstallation does not require major disruption to the drain field area, takingadvantage of the natural or modified landscape plansWater can be re-used for dispersal of lawns, shrubs, or treesBeneficial wastewater nutrients are available for plant uptake.This design manual provides basic guidelines for drip system design, installation,maintenance and operation. However, because such designs are subject to state andlocal regulations for all onsite systems, any regulatory specification must be givenprecedence over the recommendations included here. If local regulations allow designparameters which are more liberal than those expressed in this manual, the designershould bear in mind that the following conservative recommendations are based onactual design experience and analysis of both properly functioning and failed onsitesystems.Basic AssumptionsThis design guide assumes highly pre-treated domestic strength effluent, 30/30 (ppm)BOD/TSS or lower with fats, oils and grease (FOG) less than 20 ppm and a design flowless than 7000 litres per day. This quality of effluent can be produced by a number ofadvanced onsite treatment technologies, including fixed-film system, bio-filter,constructed wetlands, mechanical aeration, peat filter, rotating biological contactor, sandfilter, trickling filter, etc.Effluent normally leaves one of the mentioned treatment devices and enters into anadequately designed storage tank. Storage tanks should allow for both a working leveland reserve capacity above the high water level alarm. The drip system is designed todistribute the wastewater uniformly over the drip field and throughout a 24 hour day.Since dripperline requires pressure to function, this design manual is built aroundcommonly available pressure pumps, that operate at 30- 80 litres per minute andgenerally utilize a 240V, 50Hz, 1Kw motor. These pumps are generally larger than thetraditional pumps (generally twin impeller) sold into treatment systems.The dripperline is frequently installed at a depth of 50mm but 100mm to 150mm isrecommended to minimize the human contact potential and ensure proper dispersal.Cold climates may require even deeper burial, or additional cover based on localconditions.Page 5
Land AMost critical to a proper design is matching the soil capacity to absorb water with thehydraulic application rates and the demand for dispersal of the design high flow. In thisregard the designer must take into account; pplication <strong>Design</strong> <strong>Guide</strong>oooooWater flow over, into, and through the soilSoil morphology (structure, texture)Storage of water in the soil columnThe loss of water to the air through evaporationExchange to the air through plant transpirationThis design guide shows how accurate information about daily wastewater flow, alongwith proper soil analysis and site evaluation, can lead to a properly sized, complete, andsuccessful and cost-effective drip dispersal system.Page 6
WASTEWATER FLOW DETERMINATIONLand Appgn <strong>Guide</strong>A drip dispersal system must accommodate the volume of wastewater effluentgenerated. The following table from the AS/ NZS 1547:2000 Onsite domesticwastewatermanagement can be used for estimating the daily wastewater product ratesfor various activities. Actual water usage data or other methods of calculatingwastewater usage rates must be used by the system designer if it is determined that, forwhatever reason, quantities may exceed standard estimates. In any case, estimatesused for onsite wastewater treatment designs must be approved by local regulatoryauthories. The following table from the Australian/ New Zealand standards is widelyused for wastewater flow estimations.Table 1Typical Domestic Wastewater Flow <strong>Design</strong> AllowancesSourceTypical Wastewater Flow Allowancein L/person/day (see Note 1)ReticulatedOn-site RoofCommunity orWater Tanka Bore-waterSupplySupplyHouseholds with standard fixtures (including automaticwashing machine)140 180Households with standard water reduction fixtures(see Note 2)115 145Households with full water-reduction facilities (seeNote 3)80 110Households with extra wastewater producing facilities 170 220Households (blackwater only) 50 60Households (greywater only) 90 120Motels/hotels- guests, resident staff- non-resident staff- reception rooms- bar trade (per customer)- restaurant (per diner)Community halls- banqueting- meetingsRestaurants (per diner)- dinner- lunchTea rooms (per customer)- without restroom facilities- with restroom facilitiesSchool (pupils plus staff)Rural factories, shopping centresCamping grounds- fully serviced- recreation areas1403020202020102015101530301005018040302530301530251525405013065Page 7
Notes:1 These flows are minimum rates unless actual flows from past experience can be demonstrated.2 Standard water-reduction fixtures include dual flush 11/5.5 litre water closets, shower-flowrestrictors, aerator faucets (taps) and water-conserving automatic washing machines.3 Full water-reduction fixtures include the combined use of reduced flush 6/3 litre water closets,shower-flow restrictors, aerator faucets, front-load washing machines and flow/pressure controlvalves on all water-use outlets.Additionally, water reduction may be achieved by treatment of greywater and recycling for watercloset flushing (reclaimed water cycling). 11 AS/ NZS 1547:2000 Onsite domestic-wastewater management Appendix 4.2D TypicalDomestic-wastewater Flow <strong>Design</strong> AllowancesPage 8
Land ASITE CONSIDERATIONSpplication <strong>Design</strong> <strong>Guide</strong>Before doing any detailed design specification, it is necessary to evaluatespecific site features. This assessment should include the following;o Site Boundaries: Most state/ regional rules will have regulations as tohow close dripperlines may be placed to property lines, home foundations,and other permanent property features. Follow local rules for set backsfrom these boundaries.o Special features: Community water distribution lines, property and utilityeasements, bores, treatment systems, water lines from bores etc requiresetbacks; 30m is typical. Surface water, including ditches, ponds, lakes,streams, and even intermittent water courses also require specificsetbacks. Follow local regulations for set backs.o Prior Land Use: Research should be conducted to determine if therewere any prior activities on the proposed site that would affect soilcharacteristics. These effects include compaction, foreign soils, buriedmaterials etc.o Future Land Use Restrictions: The drip field can be installed under apermanent lawn, among trees, or other landscape features, provided setbacks are followed. Any future permanent structure that will affect soiltexture and water flow through the soil must be avoided over a drip field,including but not limited to the following: out-buildings, parking areas,swimming pools, tennis courts, home additions, decks, etc. The designershould consult with the property owner regarding any anticipatedimprovements to the property and avoid these areas.o Precipitation and Landscape Position: If the site is in an area thatexperiences seasonal, intensive, or even short duration precipitationevents which cause collection of water from surrounding areas or pondingof water on the surface, then special attention should be directed towardregarding the soil surface to encourage direct precipitation run-off.o Slopes: Drip dispersal encourages lateral not just vertical movementthroughout the soil. This does not restrict dispersal fields to level areas,especially with the use of pressure compensating emitters and flowzoning.Page 9
Land AFigure 1 - Showing it is desirable to increase the run length with fewerlaterals over a slope rather than increase run of laterals and shorter runs.Additional considerations about slopesinclude;o Whether there is a natural or artificialbarrier down-slope from the proposedsite that might provide opportunities forthe water to run-off. (such as cuts inslopes or retaining walls)o Whether the dripperline can be laid outon the contours of the slopeo Whether system geometry can be usedthat minimises linear loading rateo Whether the design can incorporate airrelease valves, check valves, zones,and other means to equalize flow andto prevent drain backs.Other options when designing on sloping sites is CNL (compensated nonleakage)dripperlines which shut off the water inside the dripperline when thesystem stops. The standard option has the ability to hold 1.4m of head when thesystem is off... The dripperline has the added advantage of when the systemstarts all drippers open at the same time thus not having to wait for thedripperline to pressurise and fill before all dripper are equal in flow. In turn, thisreduces pressure and wear on the pump and reduces the prospects of run-offfrom the dripperline.With considerations of the above issues, and any similar issues that the designerbelieves may affect soil absorption rates, the designer is now ready to evaluatethe specific soil characteristics.Page 10
Land ASOIL CONSIDERATIONSppAfter the drip dispersal area has been identified, the designer must undertake athorough study of the specific soil characteristics of the proposed field. Particularfocus must be given to:o Textureo Site uniformityo Compactiono Native vs disturbed soilso Soil depth to restrictions or water tableo Clay mineralogySample CollectionAn accurate representation of the overall site conditions requires a determinationof the underlying soil characteristics. A minimum of two samples per proposedzones is strongly recommended. The samples should be three dimensional soilcore sample which extends into the soil a minimum of 600mm deeper than theproposed location of the dripperline. The analysis of the soil core must establishthe morphology, structure and texture, determination of the presence of groundwater, seasonal high water table, restrictive layers, etc. Soil maps or locallyavailable geological maps should be consulted to determine consistencybetween observed and referenced conditions. Any inconsistencies should leadthe designer to undertake further investigations of the site particulars and history.Determining Soil TextureAccurate analysis of several samples collected across the proposed site is criticalto determining the absorptive capacity of the soil. If the samples from thedifferent locations of the proposed site are different, the design must be based onthe most restrictive sample. The system designer should always consult with aregistered soil scientist, site evaluator or soil structure laboratory for assistance indetermining an accurate soil texture classification.The following Soil Texture Triangle chart, Figure 2, should serve as an outline todetermining soil composition and texture, leading to suggested loading rates.Page 11
Land AFigure 2Soil Texture Triangle ChartRestrictive LayersMany soil evaluators are surrounded by other soils with less desirablecharacteristics. It should be recognized that water movement through multiplesoil types will be determined by characteristics of the restrictive types. Therefore,whenever these restrictive types are encountered in a proposed drip field, theyshould provide the operative design criteria. In particular, soil absorptivecapacities should be based on those of restrictive layers rather than those of themore absorptive soils. If the restrictive layers are present within 600mm belowthe dripperline, then the designer should use the reduced loading rates of therestrictive layer. The greater the soil depth to a restrictive layer, the better.Considering the area 500mm to 1000mm below the tubing: if there is a soilclassification change of one class or more, or if a restrictive boundary layer exists(rock, tight clays, etc) then the dispersal area should be increased.Page 12
Land ANative Vs Distributed SoilsNative, non distributed soils are always the most pp desirable medium for dripapplication. However, if the soils are very poor, or the site conditions (e.g.available space) are so limited, then the designer may consider the introductionof fill material, if the regulations permit.If the proposed drip field employs soil fill material, artificially compacted soils, ormixed soils, special considerations apply. Although the fill material may have agreater soil absorptive capacity, a design should not rely on the better soilclassification if the underlying poor soil is still present and utilised in the dripsystem design. Mixing or tilling of the soil may increase the soil absorptivecapacity. However, adding Class II soils to a Class IV site does NOT yield aClass III absorptive capacity. A proper analysis by a soil laboratory is necessaryto determine the new soil characteristics. Any time a drip field is constructed withadded soil, the overall field should be larger than otherwise called for in thedesign, and the loading rate should be determined by the restrictive layers andother site conditions rather than by the constructed soils.Soil Hydraulic Loading RateThe success of a drip dispersal system is largely due to how accurately the doserate is matched to the ability of the wastewater to be hydraulically conveyedthrough the soil. The maximum hydraulic loading per unit area of soil should bedetermined by many different factors, including structure, slope, depth ofrestriction, and soil texture. As an estimation, we will consider soil texture andstructure classification as the determinant for soil hydraulic loading rate.However, it is recommended that a more though analysis, including depth andslope, be incorporated into the design considerations. Different soil textures havedifferent porosities and therefore enable different quantities of water to passthrough the soil. In drip dispersal, the goal is shallow dispersal, not deeppercolation or surfacing. Therefore soil textures both at the surface and beloware important to enable wastewater flow both horizontally and vertically. Load thesoil at an even rate in the biologically active zone near the surface. This willimprove treatment (through better oxygenation), and enhance plant uptakethrough evapotranspiration. The recommended loading rates for each soilclassification are in the AS/ NZS 1547:2000 Onsite domestic-wastewatermanagement, Table 2.Page 13
Land ATable 2Soil TextureLoading Rates for Each Soil ClassificationppSoil StructureDispersalRate mm/weekDispersalRate mm/dayAreaRequiredper 1L/ dayGravel / Sand Structureless Massive 35 5 0.200m²Sandy Loams Weakly Structured 35 5 0.200m²Massive 35 5 0.200m²Loams Highly/ Moderately Structured 28 4 0.250m²Weakly Structures or Massive 28 4 0.250m²Clay Loams Highly/ Moderately Structured 25 3.5 0.285m²Weakly Structured 25 3.5 0.285m²Massive Structured 25 3.5 0.285m²Light Clays Strongly Structured 20 2.9 0.345m²Moderately Structured 20 2.9 0.345m²Weakly Structured or Massive 20 2.9 0.345m²Medium /Heavy ClaysStrongly Structured 15 2.14 0.467m²Moderately Structured 15 2.14 0.467m²Weakly Structured or Massive 15 2.14 0.467m²Some local authorities may have regulations specifying loading rates that aresometimes more and sometimes less restrictive than the above standard. Thedesigner must follow regulations, but otherwise should opt for the moreconservative designs.The basic rule for drip dispersal is:Application Area= Daily Flow / Loading RateThe designer should take into account that the proposed loading rates are theoptimal soil conditions and any site- specific special circumstances including butnot limited to: specific features, precipitation, slopes, prior and adjacent landuses, depth to limitation, vegetation etc., must be considered in the design. Whenit comes to design the more conservative the approach, the better. Remember,the least expensive part of the overall drip system is the dripperline itself.Page 14
Land ASYSTEM DESIGNSystem ComponentsppA simple schematic design for onsite wastewater dispersal using drip follows:Figure 3Standard Layout of a Drip Dispersal SystemResidenceAir/ VacuumReleaseSecondary Treatment and StorageDisc Filter/ TechfilterSupply LineDripperlineFlush ValveFlush LinePage 15
Land Application <strong>Design</strong> <strong>Guide</strong>DripperlineFigure 4View of the inside of UniBioline CNL Dripperline showing theemitterThe dripperline is low volume tubing with integral andevenly spaced emitters at specific intervals. The twodripperline for this market are either;1. UniBioline CNL (pressure compensating nonleakage)2. Bioline AS (pressure compensating antisiphon)These products are specifically manufactured for theuse with onsite systems and are the heart of thesystem.PumpsThe pump duties required to operate the dripperline and account for all frictionloss are generally larger than the standard submersible sump pumps sold intotreatment systems. Typically the duty is requires between 30 to 80litres perminute at 20m pressure. Figure 4 shows a list of pump manufacturers andmodels which are generally suited with a drip dispersal system. It is criticalhowever in all cases that the exact pump duty is determined before sizing apump.Considerations when sizing the pump are:o static head (height from pump to highest point on drip field),o pressure loss in sub-mains, filters, dripperline and fittingso operating pressure of dripperline (UniBioline requires 10m minimum)o flow rate of the blockPump Manufacturer ModelDaveyD42AGrundfosHi LiftClaytech BlueDiver 20, BlueDiver 30 & BlueDiver 40Onga Pentair Water Tank BuddyPage 16
Land Application <strong>Design</strong> <strong>Guide</strong>FiltrationEvery drip system must include a filter to prevent introduction of sediments andsuspended organic materials into the dripperline. Without proper filtration,sediment can accumulate over time and cause plugging. A 130 micron disc filter(120 mesh) is strongly recommended for all <strong>Netafim</strong> UniBioline Dripperlines.Figure 525mm Disc Manual FilterTechfilterThe greatest threat to a subsurface irrigationsystem is the intrusion of roots into the drippers. Aknown preventative measure against root intrusioninvolves the application of small amounts ofTrifluralin to the soil around the drippers. <strong>Netafim</strong>have developed the Techfilter that has filtrationdisks containing Trifluralin which is slowly releasedin minute quantities (parts per billion) into the soilimmediately around the dripper. The Techfilter is arenewable, controllable and safe way of releasingTrifluralin into the soil around the dripper. Thiscreates the required protection barrier preventingroots from impregnating the dispersal system andpossibly causing damage.The nature of Trifluralin is such that it does not move very far in the soil. TheTrifluralin reacts to soil particles around the dripper. This is the key aspect of thenature of Trifluralin that makes this system so effective in protecting the drippersfrom root intrusion.<strong>Netafim</strong> do not and will not recommend the Techfilter for any other applicationthan the one described above, that is the protection of subsurface dripperlinesystems against root intrusion. The life expectancy of the Techfilter cartridge ordisk element is 24 months under expected or average conditions and run times inAustralia/ New Zealand. This is not to say that in some conditions it will not lastlonger or shorter periods of time given specific site conditions and flow ratesthrough the filter.It is important to note that the Techfilter is not required if the dripperline is laid ontop of the soil profile in garden area’s as there is little chance of root intrusion.Page 17
Land Application <strong>Design</strong> <strong>Guide</strong>Figure 6Techfilter and Techfilter CartridgeZone ValvesWhen multiple zones are used, indexing valves are customarily used to turnzones on and off. These indexing valves have various zone capacity and inletthread sizes.Air / Vacuum ReleaseDrip system design should include a minimum of one air/ vacuum release valveper zone. Their purpose is to relieve the vacuum created on the system at theend of the dose cycle; this will minimise soil particles from being aspirated intothe emitters.They function to release the air at the beginning of the dose cycle to eliminateair-binding in the piping and to help ensure a more rapid filling of the lines.UniBioline has the added advantage of an anti- siphon mechanism in eachdripper so this also ensures air can be released when the dosing cycle stops.They should be located at the highest point of the zone and placed in a lilac lidvalve box lined with gravel for protection.Page 18
Land Application <strong>Design</strong> <strong>Guide</strong>Check ValvesIn cases wear the dripperline excess’s a maximum variation in slope from theextreme highest point of the system to the lowest a check valve can be installed.The <strong>Netafim</strong> DNL valve is a check valve and will hold water upstream once thesystem turns off. When the system starts the DNL opens at a critical level(number of models available) and allows water to pass. These are generallyplaced on the start of each dripperline lateral a critical points up the slope. TheDNL features eliminate the need for the irrigation system refill at the beginning ofeach irrigation cycle by holding pressure in the irrigation lines and thus keepingthem filled. This ensures the system reaches operating pressure in the minimumof time at the next irrigation cycle.Supply ManifoldThe supply manifold delivers water to each row of dripperline from the treatmentplant. 25mm Purple LDPE is recommended however MDPE, HDPE and PVC canbe used. It is recommended it is buried a minimum of 100mmm and lilac pipe isused to indicate effluent contained within the pipe.System pressure drop must be minimised to ensure that a sufficient flushingvelocity is maintained. The connections to the supply and flush manifolds shouldbe minimised for system efficiency.DripperlineEffluent flows through the UniBioline dripperline and out into the soil throughemitters (drippers). These emitters each have a specific flow rate of 1.6, 2.3 and3.5l/hr at either 0.3, 0.4, 0.5, 0.6 or 1.0m spacings. These limited flow rates aredesigned to prevent overloading of the soil. The standard dripperline combinationused is 1.6l/hr at 0.4m spacing. The lower the flow rate per emitter and morefrequent the emitters along the dripperline the better the distribution andtherefore reducing the hydraulic load on the soil.Flush ManifoldThe characteristics of the flush manifold are the same as the supply, with limitedand equal number of connections. It is typical to use the same diameter pipe sizeas the supply manifold.The flush manifold terminates either at the front end of the treatment system orinto the dosing tank or in the field in a flush valve assembly. If it permeates intothe dosing tank, periodic cleaning of the tank is recommended. The destination ofthe flush line is sometimes dictated by local regulations.The flush line should have a conveniently placed manual valve to activate thefield flush.Page 19
Land AZone RequirementsIf total system flow exceeds 80 litres per minute pp per pump, or if gtherearesignificant topographic or other site constraints, it is recommended that multiplezones be considered in order to have sufficient system capacity for field flushing.For the most cost effective results, the designer should consider the use ofmechanical or solenoid valves to dose different zones.When using multiple zones, try to balance the zoned dispersal fields to equiliseflows for both dosing and flushing.Piping LayoutThe basic principle of field layout is to arrange the tubing so the drip tube lengthsare roughly equal and approximately maximum of 100m in length. (Please referto pages 28 and 29 for maximum lengths runs for specific UniBioline Models)Lengths greater than these will require pumps to create more head and flow thanthe typical pumps outlined in the pump section previously. Horizontal spacingbetween tubes of 600mm to 1000mm is required by the Australian/ New ZealandStandards.A standard, recommended pipe size to optimise flow and friction loss for dripdistribution systems up to 1600 litres per hour is 25mm LDPE for supply andflush manifolds.Drain Back ConsiderationsWhen the dispersal cycle ends, much of the effluent which remains in the systemwill drain out through the drip tubing. Effluent will drain to the lowest elevations ofthe system, and even on nominal slopes this can cause local soil overloading.Therefore, to design the system accordingly, it is important to anticipate wherethe effluent will flow when the dosing event is completed and pressure isreleased. There are a variety of design approaches that address this issue,several which follow:Non-leakage Dripperline: <strong>Netafim</strong> offers a CNL (compensated non-leakage)dripperlines which shuts off the water inside the dripperline when the systemstops. The standard option has the ability to hold 1.4m of head when the dosinghas completed. The dripperline has the added advantage of when the systemstarts all drippers open at the same time thus not having to wait for thedripperline to pressurise and fill before all drippers are equal in flow. In turn, thisreduces the back pressure on the pumps and the prospects of run-off from thedripperline.Page 20
Land Application <strong>Design</strong> <strong>Guide</strong>Installed with the contour: Tubing must be installed along the contour of theslope (as level as possible), not up and down the slope. Otherwise, all theeffluent in the drip tube (assuming CNL are not used) will drain rapidly to thelowest elevation emitters, which can overload the soil.Feed from the bottom of the field: As a general rule, drip fields on a slopeshould be fed from the bottom and flushed from the top. This strategy will preventthe main lines and manifolds from draining to the field during rest periods. Thisstrategy assumes that the filed is uphill from the supply line. The supply manifoldshould ‘stair step’ through a series of check valves (DNL’s), with a limited numberof lines between each check valve. Check valves limit the down gradient flow ofthe water when the pump shuts down.Increase the spacings between dripperlines at bottom of slope: Byincreasing the spacing between dripperlines, there will be a decrease in theloading rate of the soil, therefore providing additional absorption potential for thewater that does drain through the lower elevation dripperlines.Increase drip field sizing: Where allowed, decreasing the overall loading rateby increasing the drip field size will actually result in the elevations receivingcloser to their actual maximum daily loading rate once drain back flow isconsidered.Less frequent, longer doses: In more highly permeable soils, with no restrictiveconditions, longer dosing duration and decreased frequency of dosing canminimise the effects of drain back by a reduction in the number of cycles per day.Zone valves: To prevent mainline and submain drainage into dosing fields, zonevalves can be installed as close as possible to the distribution field to minimisethe volume of water subject to drain back. Zoning prevents water from mains andsubmains from draining into the drip fields during periods of rest.Deeper line burial: In the context of drain back issues, deeper tubing van be astrategy to minimise surfacing.Page 21
Land Application <strong>Design</strong> <strong>Guide</strong>OPERATIONAL DESIGN PRINCIPLESIn addition to describing the key system components, it is necessary to discussfundamental operational principals. These pertain to dosing, filtration, fieldflushing, and control of root intrusion. This is a general discussion. Othermethodologies and engineering practices may achieve the goals of theseoperational principles.Dosing and ControlsThe fundamental principle of drip distribution is to take full advantage of theentire application area, over the course of the entire day. Although mostwastewater flows have peaks and valleys, the goals of the effective distributionare to:o Minimise soil saturationo Encourage lateral (ie capillary) rather than gravitational flowo Achieve uniform distributiono Utilize the entire day (18- 24 hours)All of these goals are accomplished through effective dosing controls of anintegrated system. A sophisticated dosing system is especially important on tight,shrink- swell clay soils, since they are very sensitive to overloading.The function and complexity of the control system will be determined both thewastewater demand and the limitations of the soil. The control system needs totake into account:o Unusual loading conditionso Storage capacityo Emergency storage/ malfunctionA simple demand system configuration will generally be suitable; for example, afloat switch with a 200 litre tether. The system must have adequate capacity toreceive the flow and distribute it evenly over the course of a day, rather thanmerely distribute the effluent as it enters the system. This is the essence of timedosing, rather than demand dosing: pumping the effluent out at specifiedintervals throughout the day rather than simply letting it flow out for dispersal atthe same time it is generated.Page 22
Land Application <strong>Design</strong> <strong>Guide</strong>How to DoseThe following analysis provides the conceptual basis for sizing the drip field andsetting up zones if required for delivering the desired quantities of wastewater tothe desired places over the desired time periods.1. How many litres per day is the wastewater load? Refer to Table 1Typical Domestic Wastewater Flow <strong>Design</strong> Allowances. Ensure figure isbased on the recommended flow per person x the number of persons forthat dwelling.2. What is the soil loading rate in litres per m² per day? Refer to Table 2Loading rates for each classification of soil. Make sure you refer to thecolumn Dispersal Rate mm/hr.3. Calculate Dispersal Area: Litres per day/ loading rate per day4. Calculate total lineal meters of dripperline: Divide the Application areaby lateral spacing between dripperlines. The standards suggest between600mm on sandy soils to 1000mm heavy clays.5. Select dripper flow rate and spacings based on soil types: Thestandard flow and spacing available is 1.6l/hr @ 0.4m spacing.6. Calculate total flow rate of all dripperline: Flow rate of dripper x totallineal length / dripper spacing. For example UniBioline 1.6l/hr @ 0.4mspacing between drippers: for 1000m total of dripperline, the flow ratewould be 1.6 x 1000 / 0.4 = 4000 litres per hour = 66.6 litres per minute.7. Determine the number of zones needed by pump sizeconsiderations: As mentioned previously generally pumps operatebetween 30- 80 litres per minute. It is recommended to check pump chartsto select correct pump for the duty required.8. Calculate total flow per zone in litres per minute: Total flow rate of allthe dripperline / number of zones.9. Calculate number of minutes of total run time based on daily flow:Total daily load / pump flow rate (refer to pump chart)10. Calculate number of minutes per zone: Total minutes / number of zonesPage 23
Land Application <strong>Design</strong> <strong>Guide</strong>Land Application <strong>Design</strong> <strong>Guide</strong>Filter OptionsThe filter is designed to capture particles larger than that which can safely passthrough the drip emitter. Over time, particles will build up and cause the filter toclog. There are several filtration systems and methods that can be used to cleanand restore the filter to normal flow.Manual Filter: A filter is placed in the supply line after the treatment system,downstream of the dosing pump and upstream of the UniBioline. Cleaning thefilter requires that the cartridge be removed and the disc and housing manuallycleaned.Timed Backflush: This is a more sophisticated filtration system which normallyhas multiple filters and valves used in a configuration to clean one anotherautomatically. The frequency of the back wash is controlled using a timer clock ordosing counter to automatically flush the filter. Filtered water is sent throughanother filter backwards, therefore dislodging particles captured between thefilter discs. This backwash water is then returned to the treatment system andreprocessed.Pressure Differential Backflush: This system is similar to the timed backflushsystem, but has an added component, a pressure differential switch or sensor.As the filter starts to clog, the pressure differential across the filter increases. Apre-set pressure difference across the filter triggers an automatic backflush. Thiscan be the primary trigger for the system backflush, or a back-up option for aregularly timed backflush.Filter CleaningAll filters from time to time require that the filter be taken apart, inspected, andcleaned if necessary. Each disc surface has grooves that capture particles asthey try to pass through the filter. Therefore, it is necessary to separate the discsand clean the entire filter element using a garden hose, or pressurised stream ofwater. If deposits form on the discs that cannot be removed by mechanicalmeans, acid can be used (in 10:1 ratio of water to acid, following safetyinstructions on the acid container).Field FlushDrip tubing is designed to last the lifetime of the system (twenty years, or more).Although filtration is taking place, small particles (under 130 microns) can stillenter the tubing. Over time these particles may accumulate. Therefore, it isrecommended to field flush the system.Page 24
Land Application <strong>Design</strong> <strong>Guide</strong>Field flush is accomplished by periodically opening the flush line from the dripfield to the pre-treatment, dosing tank or atmosphere. In this process, the velocityof water moving through the tubing should be at least 0.4 metres per second atthe distal end of the flush manifold (to be consistent with the recommendations ofmost practitioners). The dirtier the water, the higher the recommended flushvelocity. To prevent an accumulation of debris in the dripperline, it isrecommended that field flushing take place on a regular basis. Field flushingshould de done at least a few times per year. The required rate will depend onmany factors. Among these are:o Effluent quality and characteristicso Filtration efficiencyo Length of tubing in each zoneo Local regulations for maintenancePage 25
Land Application <strong>Design</strong> <strong>Guide</strong>INSTALLATIONSite PreparationThe drip field should be viewed as a wastewater dispersal filed and many of thesame considerations for conventional septic drains fields should apply. Theselimitations should include:- No future expectation of building(s), decks, or other impervious surfaces- No long term storage of equipment or vehicles over the site- A permanent vegetative coverDrip Tubing InstallationThe drip tubing should be installed 50mm to 150mm below the soil surface.Colder climates may require deeper placement or additional cover to avoidfreezing during periods of inactivity.Some local authorities may allow on-surface installation. In that case, stakes arerecommended to be used every 1.5m along the lateral lines to ensure they arefixed in place.Dig the manifold trenches wide enough to provide sufficient working room to cutand fit connectors between manifold and tubing. Give yourself enough room towork. Always avoid installing drip tubing in wet soil.There are three common ways to install the UniBioline tubing:1. P lowing: Installed the same way as telecommunication cable, plowingrefers to the method of knifing, or using a vibratory plow, to insert the driptubing. This method is increasing common as the equipment becomesmore widely available. The use of a ripper inserting the UniBioline by asmall machine such as a Dingo is an alternative to the vibrating plow.Either way this is the preferred method of installation due to the minimumimpact on existing soil structure and texture.2. Trenching : This method uses a commonly available chain trenchingmachine to cut a narrow trench for tubing installation. The advantages ofthis method are that these machines are widely available and easy to use.The disadvantage is that the trench may leave wall surfaces that are‘slicked’ and therefore less receptive to horizontal water flow. The trenchmust be filled with original materials and watered in from the top down.Page 26
Land Application <strong>Design</strong> <strong>Guide</strong>3. F ill: In this method, tubing is laid on the ground and fill material is placedover it. If there is any vegetative cover, it should be removed and theoriginal soil scarified (plowed or deep raked) to minimise anyinhomogeneity between soil types. If soils of different textures are used,the constraints discussed in the Soils Section must apply. It isrecommended that the fill material be the same as the original, if possible.For all methods of drip tube installation, it is very important that the disturbed soilabove the dripperline be the approximate texture and compaction as the soilaround the dripperline to avoid creating a preferential pathway of the effluent tothe surface. Some careful, manual compaction of the soil above the dripperlinemay be advisable when the tube has been trenched or plowed in (local codespermitting).Every effect must be made to avoid excessive mechanical stress on thetubing before, during and after installation. Sharp rocks should also not beplaced next to the dripperline.Manifold to Dripperline ConnectionThe supply and flush lines are installed using standard techniques for LDPE (lowdensity Polyethylene), MDPE (Medium density Polyethylene- commonly knownas Rural B), HDPE (High density Polyethylene commonly known as Metric Poly)or PVC piping.When using PVC medium body (not fast dying) cement is generallyrecommended. When using PVC, HDPE or MDPE a grommet and take-off is thepreferred method to connect the manifold to the dripperline. The installer shoulduse a good quality ratcheting type PVC/ HDPE/ MDPE cutter to prevent theintroduction of PVC/ HDPE/ MDPE filings to the distribution lines. It is alsorecommended the correct size hole saw is used with the correct grommet takeoff.A minimum outside dimension of 40mm is recommended when usinggrommets to allow for the outside curve in the pipe to seal against the grommet.If the manifold is LDPE a punch tool can be used to punch a hole into the LDPE.The fitting then is pushed directly into the LDPE and over the dripperline. It isimportant the LDPE is a minimum of 25mm to allow the fitting to seal and theability of flow to easily pass through the fitting. It is also recommended thatstraight take-offs are installed perpendicular to the manifold again to ensure aseal.Page 27
Land Application <strong>Design</strong> <strong>Guide</strong>Start-upThe designer should take special precautions to troubleshoot the system andinsure that it is working properly over an initial start-up period, typically 2-3weeks.Do not start the system with a massive dose. This can cause preferential waterpassages, or chimneys, to the surface and saturate the soil and it could take along time to recover the drip field.o Construction debris (Mainline/ flush line scraps, soil, etc) found in the pipenetwork after the initial assembly need to be flushed. It is recommendedthat the initial flushing not be done through the dripperline to avoidplugging with large, unfiltered particles. If the dripperlines must be used forflushing, do not exceed the scheduled dosing cycle in the process.o The pump tank or treatment system may be full of water after installation.Do not simply run it out through the drip tube. Either use the dosingschedule to empty the tank, or set up a sprinkler.o If the dosing field is extremely dry, it can be advantageous to run asprinkler on the surface for a while to initially dampen the field.Routine MaintenanceOther service and maintenance of the system can be coordinated with regulatoryrequirements for monitoring of the onsite wastewater treatment system. Moststates/ regions have regulations that specify a routine maintenance schedule foradvanced wastewater treatment systems.When a drip distribution system is properly sized, designed, and installed, itshould operate with little maintenance and easy monitoring. In addition to thefundamental design considerations already outlined, several other installationsteps will simplify maintenance. These are as follows:o Provide simple nipples for Schrader valves (tire gauge stems) on criticalpiping elements (pump output, supply and flush manifolds, inlet and outletof filters, etc.) in valve boxes to provide easy measurement of systempressure.o Maintain access to a short length of drip tubing for inspectiono Keep a detailed as constructed drawing readily accessibleo Establish a service record chart to recordPage 28
Land Application <strong>Design</strong> <strong>Guide</strong>o Pressure at:• Pump• Supply manifold• Flush manifold• Other critical pointso Schedule• Dosing• Filter flushing• Field flushingo Monitoring any changes in the number, activities, and water usagepatterns of members of the household.With this information framework, a system inspector can quickly and easilydetermine if the system is operating within specifications. If problems areidentified by changes in pressure or flow, they can be located and correctedeasily using information in the plans and locations of valve boxes.Typical LayoutsThe layout for a typical domestic onsite system is made-up of severalcomponents. In the following illustrations, each design scenario will contain all orpart of the following components and systems:o Secondary treatment system- aeration treatment unit, recirculationsand filter, peat system, fixed film, or wetland system, etc.o Dosing pumpo Automatic or manual disc filter (130 micron) set in a buried valve boxthat is capable of automatic backflushing or manual cleaningo Air/ vacuum relief valveso Zone control valves- water actuated, motor driven or solenoid activatedhydraulic valveso Underground LDPE, MDPE, HPDE or PVC piping, typically minimum25mm or largero Dripperline connectors to mainlines and flush manifoldso Check valveso UniBioline dripperlinePage 29
Land Application <strong>Design</strong> <strong>Guide</strong>The following layouts illustrate the various ways that drip dispersal fields might belaid out at a domestic onsite system. These are too used as guides only. Eachindividual system will have special requirements that will require the designer tomodify these typical layouts in the order to adapt to the site. The following arebasic considerations that should be taken prior to beginning any design:o Shape of the proposed drain fieldo General slope or direction of rise and fall of the siteo Location of property lines, buildings, trees, bores, water lines, buriedpower lines, swimming pools etc.o Soil type including profiling to determine depth to most restrictive layerand or water tableo Location of the treatment planto Location of power outletso Location of old drain field if new system is a retrofitOpposing Manifold LayoutRectangular field with supply and flush manifold at opposite ends of thedripperline;oCan be used where UniBioline lengths will be long and drip field isnarrow.Page 30
Land Application <strong>Design</strong> <strong>Guide</strong>Figure 4Opposing Manifold LayoutResidenceAir/ VacuumReleaseSecondary Treatment and StorageDisc Filter/ TechfilterSupply LineDripperlineFlush ValveFlush LinePage 31
Land Application <strong>Design</strong> <strong>Guide</strong>Single Trench LayoutRectangular field with supply and flush manifold on the same side in the sametrench;o Locate supply and flush manifold in same trench.o Dripperlines are looped at the end opposite the supply and flush manifoldso The longest UniBioline length should not exceed maximum recommendedrun lengths.Figure 5Single Trench LayoutResidenceAir/ VacuumReleaseFlush LineSecondary Treatment and StorageDisc Filter/ TechfilterSupply LineFlush ValveDripperlinePage 32
Land Application <strong>Design</strong> <strong>Guide</strong>Multiple Zone LayoutMulti- zone system with looping laterals;o Should be used when single zone accumulated UniBioline length exceedspump duty capabilities.o Should be used when soil require additional resting time between doses.o Should be used when there is a potential need for expansion of thesystem, which is common in commercial systems. Second zone may beleft out until needed.o Additional check valves are needed to isolate each zone on the flush lineside.o Zone changes are typically accomplished using a electronic valve with acontroller or index valve.o Zone layouts must be parallel systems or may follow any of the scenariosdiscussed.o Zones should have similar flow when possible.Page 33
Land Application <strong>Design</strong> <strong>Guide</strong>Figure 6Multi- Zone LayoutResidenceAir/ VacuumReleaseSupply LineSecondary Treatment and StorageDisc Filter/TechfilterZone ValvesDripperlineCheck ValvesFlush ValveFlush LinePage 34
Land Application <strong>Design</strong> <strong>Guide</strong>PERFORMANCE SPECIFICATION SAMPLESUniBioline CNL (Compensating Non-Leakage)DescriptionUniBioline CNL is low volume dripperline with integral and evenly spacedpressure compensating, non leakage drippers welded to the inside of the tubingat specified intervals.UniBioline CNL is available with drippers in four discharge rates (1.0, 1.6, 2.3, 3.5litres per hour LPH) evenly spaced at 0.3, 0.4 or 0.5m centres. UniBioline CNL isavailable in 200m coils. The standard options are 1.6l/hr at 0.4m, 1.6l/hr at 0.5m,2.3l/hr at 0.6m and 3.5l/hr at 1.0m spacings in 100m and 200m coils.ConstructionUniBioline CNL shall consist of 17mm, nominal sized low-density linearpolyethylene tubing with pressure compensating, continuously self-cleaning,integral drippers with internal check valve at a specified spacing, (0.3, 0.4 or0.5m centres). The tubing shall be lilac in colour and conform to an outsidediameter (O.D.) of 17mm and an inside diameter (I.D.) of 14.4mm.Individual pressure compensating drippers shall be welded to the inside wall ofthe tubing as an integral part of the tubing assembly. These drippers shall beconstructed of a 2-piece plastic dripper housing containing a continuously selfflushingsilicone diaphragm capable of flushing any dirt or debris that may enterthe dripper, extending the full length of the dripper. The dripper shall have abuilt-in check valve that will hold the pressure exerted by 1.4m to ensure thattubing will not drain water on zone shutdown, or allow outside contaminants toenter the dripperline through reverse siphonage. The dripper shall have its waterinlet located in the centre of the tubing to ensure it draws water from the centre ofthe water stream thereby ensuring the dripper is always drawing water from thecleanest part of the stream of water flowing through the tubing.The dripper shall also have a built-in physical root barrier whereby the water shallexit the dripper from one location and shall exit the tubing from a second location.This physical barrier shall create an air gap inside the tubing.OperationEach dripper shall have the ability to independently regulate discharge rates, withan inlet pressure of ten to thirty five (10- 35) meters (m), at a constant flow andwith a manufacturer’s coefficient of variability (Cv) of 0.03 or less.Recommended operating pressure shall be between 10- 35m.Page 35
Land Application <strong>Design</strong> <strong>Guide</strong>The dripper discharge rate shall be 1.0, 1.6, 2.3 or 3.5 litres per hour (LPH)ulitising a combination turbulent flow/reduced pressure compensation cellmechanism and a diaphragm. The drippers shall be capable of continuouslycleaning themselves while in operation. The dripperline shall be available with0.3, 0.4 or 0.5m spacing between drippers unless otherwise specified. Maximumsystem pressure shall be 35m. Filtration shall be 120 mesh or finer. Bendingradius shall be 175mm.For on-surface or under mulch installations, 150mm metal wire staples shall beinstalled 1000mm to 1500mm on centre, (depending on soil type) and twostaples shall be installed over every change-of-direction fitting.UniBioline CNL 1.6l/hr at 0.4m spacing shall be <strong>Netafim</strong> Model Number 14110-003400 in 200m coils and Model Number 14110-003350 in 100m coils.UniBioline CNL 1.6l/hr at 0.5m spacing shall be <strong>Netafim</strong> Model Number 14110-003500 in 200m coils and Model Number 14110-003680 in 100m coils.UniBioline CNL 2.3l/hr at 0.6m spacing shall be <strong>Netafim</strong> Model Number 14110-006700 in 200m coils and Model Number 14110-066800 in 100m coils.UniBioline CNL 3.5l/hr at 1.0m spacing shall be <strong>Netafim</strong> Model Number 14110-007200 in 200m coils and Model Number 14110-007180 in 100m coils.Maximum Run Length ChartsAt 11m inlet pressure on flat ground0.3m 0.4m 0.5m 0.6m 1.0m1.0l/hr 65m 83m 100m 116m 172m1.6l/hr 48m 61m 74m 85m 127m2.3l/hr 38m 48m 58m 68m 101m3.5l/hr 29m 37m 45m 52m 77mAt 15m inlet pressure on flat ground0.3m 0.4m 0.5m 0.6m 1.0m1.0l/hr 113m 145m 175m 202m 303m1.6l/hr 83m 106m 129m 149m 223m2.3l/hr 65m 84m 102m 118m 177m3.5l/hr 50m 64m 77m 90m 135mAt 20m inlet pressure on flat ground0.3m 0.4m 0.5m 0.6m 1.0m1.0l/hr 143m 184m 222m 257m 386m1.6l/hr 109m 140m 169m 196m 294m2.3l/hr 86m 110m 133m 155m 233m3.5l/hr 65m 84m 102m 118m 178mPage 36
Land Application <strong>Design</strong> <strong>Guide</strong>At 25m inlet pressure on flat ground0.3m 0.4m 0.5m 0.6m 1.0m1.0l/hr 165m 211m 255m 296m 445m1.6l/hr 121m 155m 188m 218m 328m2.3l/hr 95m 122m 148m 173m 260m3.5l/hr 72m 93m 113m 131m 198mAt 30m inlet pressure on flat ground0.3m 0.4m 0.5m 0.6m 1.0m1.0l/hr 182m 233m 282m 328m 492m1.6l/hr 134m 172m 208m 241m 363m2.3l/hr 105m 135m 164m 191m 287m3.5l/hr 80m 103m 125m 145m 219mAt 35m inlet pressure on flat ground0.3m 0.4m 0.5m 0.6m 1.0m1.0l/hr 196m 252m 305m 354m 532m1.6l/hr 144m 185m 224m 261m 393m2.3l/hr 113m 146m 177m 206m 310m3.5l/hr 86m 111m 135m 157m 237mPage 37
Land Application <strong>Design</strong> <strong>Guide</strong>UniBioline CNL FittingsDescriptionUniBioline CNL fittings shall be constructed in one of the following endconfigurations:- Barbed insert fittings only,- Male pipe threads (BSP) with barbed insert fittings, or- Female pipe threads (FPT) with barbed insert fittings.ConstructionAll fittings shall be constructed of injection molded, plastic having a nominalinside dimension of 14.4mm. Female and male threaded ends shall be capableof mating to standard PVC pipe with tapered threads.OperationUniBioline CNL fittings shall be mated with <strong>Netafim</strong> UniBioline CNL dripperline bypushing the fitting into the tubing while twisting side to side until the tubing abutsto either adjoining tubing or a fitting stop.Maximum system pressure without clamps shall be 35m.UniBioline fittings shall be <strong>Netafim</strong> Model Numbers;o Start connector w/-Grommet (PVC, MDPE & HDPE) 32500-013770o 16mm hole saw for grommet take-offs 45000-003200o Start Connector (LDPE) 32500-013750o Elbow start connector (LDPE) 00005-011500o Punch Tool for LDPE Start Connector (LDPE) 45000-001650o Joiner 32500-003800o Elbow 32500-022400o Tee 32500-023600o Ratchet clamp 00005-002300Page 38
Land Application <strong>Design</strong> <strong>Guide</strong>Bioline AS (Compensated Anti-Siphon)DescriptionBioline AS is low volume dripperline with integral and evenly spaced pressurecompensating, anti-siphon drippers welded to the inside of the tubing at specifiedintervals.Bioline AS is available with drippers in five discharge rates (1.0, 1.6, 2.0, 3.0 &3.8 litres per hour LPH) evenly spaced at 0.5, 0.6 or 1.0m centres. Bioline ASavailable in 100m and 200m coils. The standard options are 1.6l/hr at 0.5m,2.0l/hr at 0.6m and 3.0l/hr at 1.0m spacings in 100m and 200m coils.ConstructionBioline AS shall consist of 15.4mm, nominal sized low-density linear polyethylenetubing with pressure compensating, continuously self-cleaning, integral dripperswith anti siphon mechanism at a specified spacing, (0.5, 0.6 or 1.0m centres).The tubing shall be lilac in colour and conform to an outside diameter (O.D.) of15.4mm and an inside diameter (I.D.) of 13.0mm.Individual pressure compensating drippers shall be welded to the inside wall ofthe tubing as an integral part of the tubing assembly. These drippers shall beconstructed of a 2-piece plastic dripper housing containing a continuously selfflushingsilicone diaphragm capable of flushing any dirt or debris that may enterthe dripper, extending the full length of the dripper. The dripper shall have itswater inlet located in the centre of the tubing to ensure it draws water from thecentre of the water stream thereby ensuring the dripper is always drawing waterfrom the cleanest part of the stream of water flowing through the tubing.The dripper shall also have a built-in physical root barrier whereby the water shallexit the dripper from one location and shall exit the tubing from a second location.This physical barrier shall create an air gap inside the tubing.OperationEach dripper shall have the ability to independently regulate discharge rates, withan inlet pressure of five to twenty five (5- 25) meters (m), at a constant flow andwith a manufacturer’s coefficient of variability (Cv) of 0.03 or less.Recommended operating pressure shall be between 5- 25m.Page 39
Land Application <strong>Design</strong> <strong>Guide</strong>The dripper discharge rate shall be 1.0, 1.6, 2.0, 3.0 or 3.8 litres per hour (LPH)ulitising a combination turbulent flow/reduced pressure compensation cellmechanism and a diaphragm. The drippers shall be capable of continuouslycleaning themselves while in operation. The dripperline shall be available with0.5, 0.6 or 1.0m spacing between drippers unless otherwise specified. Maximumsystem pressure shall be 25m. Filtration shall be 120 mesh or finer. Bendingradius shall be 175mm.For on-surface or under mulch installations, 150mm metal wire staples shall beinstalled 1000mm to 1500mm on centre, (depending on soil type) and twostaples shall be installed over every change-of-direction fitting.Bioline AS 1.6l/hr at 0.5m spacing shall be <strong>Netafim</strong> Model Number 17390-002020 in 200m coils and Model Number 17390-002010 in 100m coils.Bioline AS 2.3l/hr at 0.6m spacing shall be <strong>Netafim</strong> Model Number 17390-002510 in 200m coils and Model Number 17390-002500 in 100m coils.Bioline AS 3.5l/hr at 1.0m spacing shall be <strong>Netafim</strong> Model Number 17390-003700 in 200m coils and Model Number 17390-003690 in 100m coils.Maximum Run Length ChartsAt 11m inlet pressure on flat ground with 7m end pressure0.3m 0.4m 0.5m 0.6m 1.0m1.6l/hr 63m 81m 98m 114m 171m2.0l/hr 54m 70m 85m 98m 148m3.0l/hr 42m 54m 65m 76m 114m3.8l/hr 36m 46m 56m 64m 98mAt 15m inlet pressure on flat ground with 7m end pressure0.3m 0.4m 0.5m 0.6m 1.0m1.6l/hr 80m 103m 125m 145m 217m2.0l/hr 69m 89m 107m 125m 188m3.0l/hr 53m 68m 83m 97m 145m3.8l/hr 45m 58m 71m 82m 124mPage 40
Land Application <strong>Design</strong> <strong>Guide</strong>At 20m inlet pressure on flat ground with 7m end pressure0.3m 0.4m 0.5m 0.6m 1.0m1.6l/hr 95m 122m 148m 172m 258m2.0l/hr 81m 105m 127m 148m 223m3.0l/hr 63m 81m 98m 114m 172m3.8l/hr 53m 69m 84m 97m 147mAt 25m inlet pressure on flat ground with 7m end pressure0.3m 0.4m 0.5m 0.6m 1.0m1.6l/hr 106m 136m 165m 192m 289m2.0l/hr 91m 117m 142m 165m 250m3.0l/hr 70m 90m 110m 127m 192m3.8l/hr 60m 77m 94m 109m 165mPage 41
Land Application <strong>Design</strong> <strong>Guide</strong>Bioline AS FittingsDescriptionBioline AS fittings shall be constructed in one of the following end configurations:o Barbed insert fittings only,o Male pipe threads (BSP) with barbed insert fittings, oro Female pipe threads (FPT) with barbed insert fittings.ConstructionAll fittings shall be constructed of injection molded, plastic having a nominalinside dimension of 13mm. Female and male threaded ends shall be capable ofmating to standard PVC pipe with tapered threads.OperationBioline AS fittings shall be mated with <strong>Netafim</strong> Bioline AS dripperline by pushingthe fitting into the tubing while twisting side to side until the tubing abuts to eitheradjoining tubing or a fitting stop.Maximum system pressure without clamps shall be 35m.Bioline AS fittings shall be <strong>Netafim</strong> Model Numbers;o Start Connector (LDPE) 00005-003450o Elbow start connector (LDPE) 00005-011400o Punch Tool for LDPE Start Connector (LDPE) 45000-001650o Joiner 00005-003500o Elbow 00005-004100o Tee 00005-005500o Ratchet clamp 00005-001900Page 42
Land Application <strong>Design</strong> <strong>Guide</strong>TechfilterDescriptionTechfilter is the incorporation of a disc filter and a chemical root intrusionpreventer (Trifluralin) with a required amount of UniBioline dripperline. Techfilteris available in 4 filter sizes, (19mm, 25mm, 40mm and 50mm). The mesh ratingshall be 120, and maximum system pressure is 100m.ConstructionThe filter shall be a multiple disc filter with Trifluralin incorporated into thereplaceable disk ring assembly inside the filter housing. The disc filter body shallbe molded of black plastic with male pipe threads for both inlet and outlet. Thedisc filter shall be capable of periodic servicing and replacement of thechemically treated disk ring set by unscrewing a threaded cap or unlatching theband.OperationWhen water passes through the filter, a very low concentration of Trifluralin (partsper billion) is transmitted throughout the UniBioline piping network. This providesfor precise and even distribution of Trifluralin throughout the piping network andeffectively inhibits root growth into the dripper outlets.The Trifluralin-treated filter ring set shall be replaced every two (2) years, or twohundred (200) hours of operation, whichever occurs first.Flow rates that suit each model are as follows;o 19mm Techfiltero 25mm Techfiltero 40mm Techfiltero 50mm Techfilter0-2,000 l/hr2,000- 6,000 l/hr6,000- 8,000 l/hr8,000- 15,000 l/hrThe Techfilter system shall be <strong>Netafim</strong> Model Number;o 19mm Techfilter 33500-001000o 25mm Techfilter 33500-001200o 40mm Techfilter 33500-001300o 50mm Techfilter 33500-001400Page 43
Land Application <strong>Design</strong> <strong>Guide</strong>Disc FilterDescriptionThe purpose of the Disc Filter is to capture and retain water-transported debris orsediment.ConstructionThe filter shall be a multiple disc filter with color-coded filter elements indicatingthe mesh size of the element being used. The discs shall be constructed ofchemical-resistant thermoplastic for corrosion resistance.The disc filter body shall be molded of black plastic with male pipe threads forboth inlet and outlet. The disc filter shall be capable of periodic servicing byunscrewing a threaded cap or unlatching the band.Disc filter ring color-coding shall be: Yellow (80 Mesh / 200 Micron), Red (120Mesh / 130 Micron), Black (140 Mesh / 100 Micron), or Green (200 Mesh / 70Micron). It is recommended when using UniBioline a Red (120 Mesh / 130Micron) cartridge is installed.OperationInstallation of the Disc Filter shall be as detailed. Disc filters can be installeddownstream of the remote control valve to allow for periodic servicing when theremote control valve is not operating. It can be installed upstream of the remotecontrol valve if the disc filter is specified with manual shut-off valve or when aline-sized shut-off valve is also specified to allow for periodic servicing with apressurized main line. Recommended installation of disc filters shall be asspecified. It may be installed below grade positioned in a valve box large enoughto remove the disk filter cap and internal disc element, or above grade. A gravelsump in the bottom of the valve box is recommended.Flow rates that suit each Red (120 Mesh / 130 Micron) model are as follows;o 19mm Disc Filtero 25mm Disc Filtero 40mm Disc Filtero 50mm Disc Filter0-2,000 l/hr2,000- 6,000 l/hr6,000- 8,000 l/hr8,000- 15,000 l/hrPage 44
Land Application <strong>Design</strong> <strong>Guide</strong>The Red (120 Mesh / 130 Micron) Disc Filter shall be a <strong>Netafim</strong> Model Number;o 19mm 120 Mesh Disc Filter 70640-001200o 25mm 120 Mesh Disc Filter 70640-002000o 25mm 120 Mesh Disc Filter (super) 70640-002450o 40mm 120 Mesh Disc Filter 70640-003400o 50mm 120 Mesh Disc Filter (Leader) 70640-005340Page 45
Land Application <strong>Design</strong> <strong>Guide</strong>Air / Vacuum Release ValveDescriptionThe air/vacuum relief valve serves two purposes:- To evacuate air from the UniBioline laterals during system start-up and,- To prevent a vacuum from occurring after the remote control valve hasclosed thus avoiding debris intrusion into the drippers at the higherlocations in the zone.ConstructionThe air/vacuum relief valve shall be constructed of black or gray plastic with a13mm male pipe thread capable of mating with a threaded PVC reductionbushing.Operation<strong>Design</strong> and installation techniques require that these valves be installed at thehighest elevation in each zone (some zones may require more than one) in orderto expel air and relief vacuum. In a zone where the highest elevation occursbetween the intake and the exhaust headers (such as a mound), an air/valverelief lateral shall interconnect the UniBioline dripperlines to avoid the necessityof installing one air relief valve on each UniBioline lateral. Valves can be installedbelow grade in valve boxes to allow for periodic inspection.The air/vacuum relief valve shall be <strong>Netafim</strong> Model Number 71000-016700.Page 46
Land Application <strong>Design</strong> <strong>Guide</strong>DETAILED DRAWINGSSingle Zone LayoutPage 47
Land Application <strong>Design</strong> <strong>Guide</strong>Multi Zone LayoutLand Application <strong>Design</strong> <strong>Guide</strong>Page 48
Land Application <strong>Design</strong> <strong>Guide</strong>Air / Vacuum ReleasePage 49
Land Application <strong>Design</strong> <strong>Guide</strong>Filter AssemblyPage 50
Flush ValveLand Application <strong>Design</strong> <strong>Guide</strong>Page 51
Sub-Surface Turf / On-Surface GardensLand Application <strong>Design</strong> <strong>Guide</strong>Page 52
Land Application <strong>Design</strong> <strong>Guide</strong>REGULATIONS AND LEGISLATIONEach state and council has regulations and by-laws concerning the dispersal ofeffluent which must be strictly complied with. This manual is intended to be anaid to installers and end users of the land application dispersal systems andaccording to local, state or federal law and regulation shall take precedence overthis manual. You are accordingly advised and requested to check with your owncouncil and state government as to their specific requirements for the installationof land application dispersal systems. Furthermore, the user of the landapplication dispersal systems is subject to all local conditions that prevail at thesite and further subject to any appropriate expert tests including but not limited tosoil tests and water tests, which may be required prior to the installation todetermine the fitness for use.In addition, other factors must be considered to determine fitness for useincluding but not limited to slope and landscape contours and acceptablehydraulic loading rates.DisclaimerThe information contained in this manual is intended to act as commentary and generalinformation and is not intended to be advice or contain any representations that shouldbe relied upon by the reader or recipient. The reader or recipient should not rely uponany statement of potential performance, productivity or efficiency as these matters willdepend on the individual circumstances of the reader/recipient and the reader/recipientshould conduct their own independent investigations and enquiries in respect of thesematters.Any technical information is generic and should not be relied on by the reader orrecipient. Furthermore, <strong>Netafim</strong> does not warrant or make any representation regardingthe information contained in this manual or the reliability of the information and thereader or recipient should not rely upon any statement or representation made in thismanual. The reader or recipient should obtain advice tailored to their particularcircumstances and should not rely upon information contained in this manual for anypurpose.If the reader or recipient acquires goods or services from <strong>Netafim</strong> the relationshipbetween <strong>Netafim</strong> and the reader/recipient will be governed by <strong>Netafim</strong>'s supply termsand conditions.The reader or recipient warrants that this manual is received subject to these conditionsand that the reader or recipient will not provide this manual to any person who <strong>Netafim</strong>has not expressly authorised to receive this manual. If, after obtaining Netafirm'sexpress authority, this manual is provided to any other person by the reader or recipientit shall be provided to that person on the same terms set out in this disclaimer.Page 53
Contact<strong>Netafim</strong> Australia213 – 217 Fitzgerald Road Laverton Vic 3026PO Box 248 Laverton Vic 3028tel. (03) 8331 6500 fax. (03) 9369 3865email. netinfo@netafim.com.au web. www.netafim.com.au<strong>Netafim</strong> New Zealand13a Aintree Ave, Airport Oaks 2022PO Box 53139 Airport Mail Centre Manukau City 2150tel. (09) 256 2551 fax. (09) 256 2552email. auckland@netafim.co.nz web. www.netafim.co.nz