Biovalve Safe - Vygon (UK)
Biovalve Safe - Vygon (UK)
Biovalve Safe - Vygon (UK)

You also want an ePaper? Increase the reach of your titles
YUMPU automatically turns print PDFs into web optimized ePapers that Google loves.
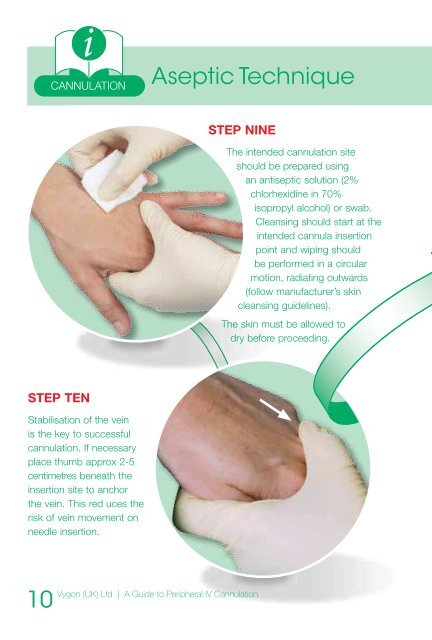
CANNULATIONAseptic TechniqueCannulationSTEP NINESTEP ELEVENThe intended cannulation siteshould be prepared usingan antiseptic solution (2%chlorhexidine in 70%isopropyl alcohol) or swab.Cleansing should start at theintended cannula insertionpoint and wiping shouldbe performed in a circularmotion, radiating outwards(follow manufacturer’s skincleansing guidelines).The skin must be allowed todry before proceeding.STEP TWELVEInsert the needle cannulaassembly through the skin atan angle of 25-35°.STEP TENStabilisation of the veinis the key to successfulcannulation. If necessaryplace thumb approx 2-5centimetres beneath theinsertion site to anchorthe vein. This red uces therisk of vein movement onneedle insertion.10<strong>Vygon</strong> (<strong>UK</strong>) Ltd | A Guide to Peripheral IV CannulationPenetrate the skin and advancethe needle cannula assemblyinto the vein. Successful entryinto the vein is confirmed byfree flow of blood into theflashback chamber.Slightly lower the needleuntil it is almost flushwith the skin. This anglereduces the risk of passingthe needle through thevein (transfixion). Advancethe entire needle and cannulaassembly a further half centimetreinto the vein.<strong>Vygon</strong> (<strong>UK</strong>) Ltd | A Guide to Peripheral IV Cannulation11