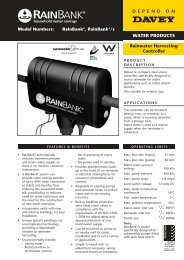

You also want an ePaper? Increase the reach of your titles
YUMPU automatically turns print PDFs into web optimized ePapers that Google loves.
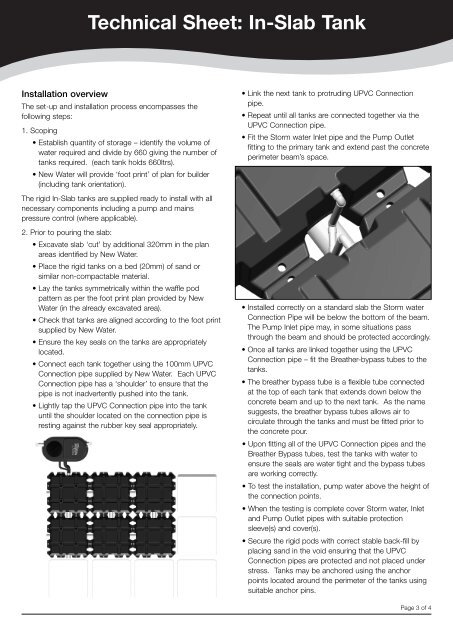
Technical Sheet: <strong>In</strong>-<strong>Slab</strong> <strong>Tank</strong><strong>In</strong>stallation overviewThe set-up and installation process en<strong>com</strong>passes thefollowing steps:1. Scoping• Establish quantity of storage – identify the volume ofwater required and divide by 660 giving the number oftanks required. (each tank holds 660ltrs).• New Water will provide ‘foot print’ of plan for builder(including tank orientation).The rigid <strong>In</strong>-<strong>Slab</strong> tanks are supplied ready to install with allnecessary <strong>com</strong>ponents including a pump and mainspressure control (where applicable).2. Prior to pouring the slab:• Excavate slab ‘cut’ by additional 320mm in the planareas identified by New Water.• Place the rigid tanks on a bed (20mm) of sand orsimilar non-<strong>com</strong>pactable material.• Lay the tanks symmetrically within the waffle podpattern as per the foot print plan provided by NewWater (in the already excavated area).• Check that tanks are aligned according to the foot printsupplied by New Water.• Ensure the key seals on the tanks are appropriatelylocated.• Connect each tank together using the 100mm UPVCConnection pipe supplied by New Water. Each UPVCConnection pipe has a ‘shoulder’ to ensure that thepipe is not inadvertently pushed into the tank.• Lightly tap the UPVC Connection pipe into the tankuntil the shoulder located on the connection pipe isresting against the rubber key seal appropriately.• Link the next tank to protruding UPVC Connectionpipe.• Repeat until all tanks are connected together via theUPVC Connection pipe.• Fit the Storm water <strong>In</strong>let pipe and the Pump Outletfitting to the primary tank and extend past the concreteperimeter beam’s space.• <strong>In</strong>stalled correctly on a standard slab the Storm waterConnection Pipe will be below the bottom of the beam.The Pump <strong>In</strong>let pipe may, in some situations passthrough the beam and should be protected accordingly.• Once all tanks are linked together using the UPVCConnection pipe – fit the Breather-bypass tubes to thetanks.• The breather bypass tube is a flexible tube connectedat the top of each tank that extends down below theconcrete beam and up to the next tank. As the namesuggests, the breather bypass tubes allows air tocirculate through the tanks and must be fitted prior tothe concrete pour.• Upon fitting all of the UPVC Connection pipes and theBreather Bypass tubes, test the tanks with water toensure the seals are water tight and the bypass tubesare working correctly.• To test the installation, pump water above the height ofthe connection points.• When the testing is <strong>com</strong>plete cover Storm water, <strong>In</strong>letand Pump Outlet pipes with suitable protectionsleeve(s) and cover(s).• Secure the rigid pods with correct stable back-fill byplacing sand in the void ensuring that the UPVCConnection pipes are protected and not placed understress. <strong>Tank</strong>s may be anchored using the anchorpoints located around the perimeter of the tanks usingsuitable anchor pins.Page 3 of 4