SL8500 Modular Library System - ISD Home Page
SL8500 Modular Library System - ISD Home Page
SL8500 Modular Library System - ISD Home Page

Create successful ePaper yourself
Turn your PDF publications into a flip-book with our unique Google optimized e-Paper software.
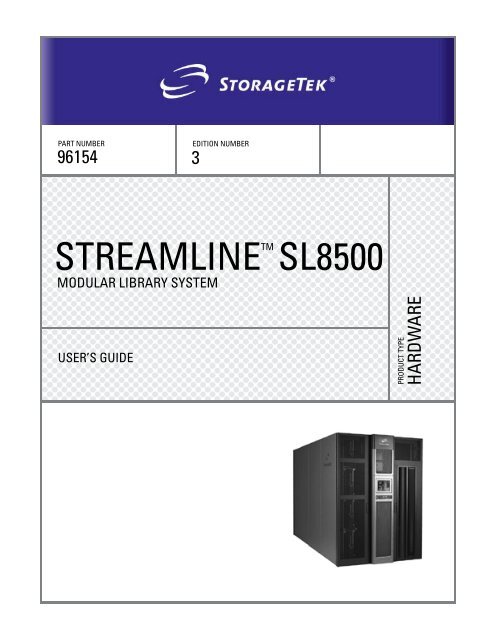
PART NUMBER96154 3EDITION NUMBERSTREAMLINETM<strong>SL8500</strong>MODULAR LIBRARY SYSTEMUSER’S GUIDEPRODUCT TYPEHARDWARE
StreamLine TM<strong>SL8500</strong> <strong>Modular</strong><strong>Library</strong> <strong>System</strong>User’s Guide
We welcome your feedback. Please contact the Global Learning Solutions Feedback <strong>System</strong> at:GLSFS@Stortek.comorGlobal Learning SolutionsStorage Technology CorporationOne StorageTek DriveLouisville, CO 80028-3256USAPlease include the publication name, part number, and edition number in your correspondence if theyare available.Export Destination Control StatementThese commodities, technology or software were exported from the United States in accordancewith the Export Administration Regulations. Diversion contrary to U.S. law is prohibited.Disclaimer of Warranties and Limitation of LiabilityStorage Technology Corporation has no liability for your use of this publication or any associatedhardware, software or spare parts. You are responsible for any damage resulting from use of thispublication, and any associated hardware, software or spare parts, including loss of data. You areresponsible for backing up your data. Use of this publication, and the associated hardware, softwareand spare parts, should be in accordance with this publication and all other product specificationsand instructions and in compliance with all applicable terms, conditions, laws, rules and regulations.STORAGETEK MAKES NO WARRANTIES OF ANY KIND AND EXPRESSLY DISCLAIMS ALLEXPRESS AND IMPLIED WARRANTIES, INCLUDING IMPLIED WARRANTIES OFMERCHANTABILITY OR FITNESS FOR A PARTICULAR PURPOSE. STORAGETEK SHALL NOTBE LIABLE FOR ANY DIRECT, INDIRECT, SPECIAL, CONSEQUENTIAL, INCIDENTAL ORPUNITIVE DAMAGES RESULTING FROM USE OF THIS PUBLICATION OR ANY ASSOCIATEDHARDWARE, SOFTWARE OR SPARE PARTS, INCLUDING LOSS OF DATA, EXCEPT FORPERSONAL INJURY DIRECTLY CAUSED BY USE OF THIS PUBLICATION.First Edition (May 2004)This edition contains 159 pages. See “Summary of Changes” on page iii for the revision history andsummary of changes made to this publication.StorageTek, StreamLine TM , StreamLine TM HandBot TM , StreamLine TM RaceTrack TM ,StreamLine TM <strong>Library</strong> Console TM , and the StorageTek logo are trademarks or registeredtrademarks of StorageTek Technology Corporation. Other products and names mentioned hereinare for identification purposes only and may be trademarks of their respective companies.©2004 by Storage Technology Corporation. All rights reserved.ii Third Edition 96514
Summary of ChangesEC Date Edition Description111906 May 2004 First Initial Release111920 July 2004 Second Refer to this edition for the list ofchanges111945 November 2004 Third Safety: Added statement pertaining toproducts that require a groundconnection at the wall outlet. See“EN60950-1:2001 Statement” onpage xxii.Chapter 1: Updated the physicaldimensions of the library. See “<strong>Library</strong>Specifications” on page 16.Chapter 2: Added additional informationabout the the dynamic World WideName (dWWN) feature. See “DynamicWorld Wide Name” on page 23.Chapter 3: Updated the safetyprecautions for the Manaul Mode ofOperations to ensure that the library istaken offline before entering. See“Precautions” on page 40.96514 Third Edition iii
Summary of Changesiv Third Edition 96514
ContentsSummary of Changes . . . . . . . . . . . . . . . . . . . . . . . . . . . . . . . . . . . . . . . . . . . . . . . iiiContents. . . . . . . . . . . . . . . . . . . . . . . . . . . . . . . . . . . . . . . . . . . . . . . . . . . . . . . . . . .vFigures . . . . . . . . . . . . . . . . . . . . . . . . . . . . . . . . . . . . . . . . . . . . . . . . . . . . . . . . . . . xiTables . . . . . . . . . . . . . . . . . . . . . . . . . . . . . . . . . . . . . . . . . . . . . . . . . . . . . . . . . . . xiiiPreface . . . . . . . . . . . . . . . . . . . . . . . . . . . . . . . . . . . . . . . . . . . . . . . . . . . . . . . . . . .xvOrganization . . . . . . . . . . . . . . . . . . . . . . . . . . . . . . . . . . . . . . . . . . . . . . . . . . . . . . . . . . xvAlert Messages . . . . . . . . . . . . . . . . . . . . . . . . . . . . . . . . . . . . . . . . . . . . . . . . . . . . . . . xviConventions . . . . . . . . . . . . . . . . . . . . . . . . . . . . . . . . . . . . . . . . . . . . . . . . . . . . . . . . . .xviRelated Publications . . . . . . . . . . . . . . . . . . . . . . . . . . . . . . . . . . . . . . . . . . . . . . . . . . xviiAdditional Information . . . . . . . . . . . . . . . . . . . . . . . . . . . . . . . . . . . . . . . . . . . . . . . . . xviiiStorageTek’s External Web Site . . . . . . . . . . . . . . . . . . . . . . . . . . . . . . . . . . . . . . . xviiiCustomer Resource Center . . . . . . . . . . . . . . . . . . . . . . . . . . . . . . . . . . . . . . . . . . xviiie-Partners Site . . . . . . . . . . . . . . . . . . . . . . . . . . . . . . . . . . . . . . . . . . . . . . . . . . . . . xixHardcopy Publications . . . . . . . . . . . . . . . . . . . . . . . . . . . . . . . . . . . . . . . . . . . . . . . xixSafety . . . . . . . . . . . . . . . . . . . . . . . . . . . . . . . . . . . . . . . . . . . . . . . . . . . . . . . . . . . xxiElectrostatic Discharge Damage Prevention . . . . . . . . . . . . . . . . . . . . . . . . . . . . . . . . . xxiFiber-optic Safety . . . . . . . . . . . . . . . . . . . . . . . . . . . . . . . . . . . . . . . . . . . . . . . . . . . . . . xxiLaser Product Label . . . . . . . . . . . . . . . . . . . . . . . . . . . . . . . . . . . . . . . . . . . . . . . . xxiiEN60950-1:2001 Statement . . . . . . . . . . . . . . . . . . . . . . . . . . . . . . . . . . . . . . . . . . . . . xxii<strong>Library</strong> Safety . . . . . . . . . . . . . . . . . . . . . . . . . . . . . . . . . . . . . . . . . . . . . . . . . . . . . . . . xxiiiMechanical Access Door Mechanisms . . . . . . . . . . . . . . . . . . . . . . . . . . . . . . . . . xxiii<strong>SL8500</strong> Door Interlocks . . . . . . . . . . . . . . . . . . . . . . . . . . . . . . . . . . . . . . . . . . . . . xxiiiService Safety Door . . . . . . . . . . . . . . . . . . . . . . . . . . . . . . . . . . . . . . . . . . . . . . . . xxiii<strong>SL8500</strong> Servo Power Interrupt . . . . . . . . . . . . . . . . . . . . . . . . . . . . . . . . . . . . . . . . xxivSmoke Detection . . . . . . . . . . . . . . . . . . . . . . . . . . . . . . . . . . . . . . . . . . . . . . . . . . xxivEmergency Robotics Stop Switches . . . . . . . . . . . . . . . . . . . . . . . . . . . . . . . . . . . xxivFront Access Door Switches . . . . . . . . . . . . . . . . . . . . . . . . . . . . . . . . . . . . . . . . . xxivInterior Lighting . . . . . . . . . . . . . . . . . . . . . . . . . . . . . . . . . . . . . . . . . . . . . . . . . . . xxvNotices . . . . . . . . . . . . . . . . . . . . . . . . . . . . . . . . . . . . . . . . . . . . . . . . . . . . . . . . . .xxvUnited States FCC Compliance Statement . . . . . . . . . . . . . . . . . . . . . . . . . . . . . . . . . xxv96514 Third Edition v
ContentsCISPR 22 and EN55022 Warning . . . . . . . . . . . . . . . . . . . . . . . . . . . . . . . . . . . . . . . . xxvJapanese Compliance Statement . . . . . . . . . . . . . . . . . . . . . . . . . . . . . . . . . . . . . . . . xxviTaiwan Warning Label Statement . . . . . . . . . . . . . . . . . . . . . . . . . . . . . . . . . . . . . . . . xxviInternal Code License Statement . . . . . . . . . . . . . . . . . . . . . . . . . . . . . . . . . . . . . . . . xxvii1: Introduction . . . . . . . . . . . . . . . . . . . . . . . . . . . . . . . . . . . . . . . . . . . . . . . . . . . . .1<strong>Library</strong> Overview . . . . . . . . . . . . . . . . . . . . . . . . . . . . . . . . . . . . . . . . . . . . . . . . . . . . . . . 1Single Physical <strong>SL8500</strong> <strong>Library</strong>—Base . . . . . . . . . . . . . . . . . . . . . . . . . . . . . . . . . . . 1Single Physical <strong>SL8500</strong> <strong>Library</strong>—Options . . . . . . . . . . . . . . . . . . . . . . . . . . . . . . . . . 2<strong>Library</strong> Complex . . . . . . . . . . . . . . . . . . . . . . . . . . . . . . . . . . . . . . . . . . . . . . . . . . . . . 3<strong>Library</strong> Modules . . . . . . . . . . . . . . . . . . . . . . . . . . . . . . . . . . . . . . . . . . . . . . . . . . . . . . . . 4Drive and Electronics Module . . . . . . . . . . . . . . . . . . . . . . . . . . . . . . . . . . . . . . . . . . . . . 5Tape Drives . . . . . . . . . . . . . . . . . . . . . . . . . . . . . . . . . . . . . . . . . . . . . . . . . . . . . . . . 5T9x40 . . . . . . . . . . . . . . . . . . . . . . . . . . . . . . . . . . . . . . . . . . . . . . . . . . . . . . . . . 5LTO Ultrium . . . . . . . . . . . . . . . . . . . . . . . . . . . . . . . . . . . . . . . . . . . . . . . . . . . . . 6Super DLT . . . . . . . . . . . . . . . . . . . . . . . . . . . . . . . . . . . . . . . . . . . . . . . . . . . . . . 6Electronics Control Module . . . . . . . . . . . . . . . . . . . . . . . . . . . . . . . . . . . . . . . . . . . . 6HBK Card . . . . . . . . . . . . . . . . . . . . . . . . . . . . . . . . . . . . . . . . . . . . . . . . . . . . . . . 6Configuration . . . . . . . . . . . . . . . . . . . . . . . . . . . . . . . . . . . . . . . . . . . . . . . . . 6Firmware Versions . . . . . . . . . . . . . . . . . . . . . . . . . . . . . . . . . . . . . . . . . . . . . 6Features . . . . . . . . . . . . . . . . . . . . . . . . . . . . . . . . . . . . . . . . . . . . . . . . . . . . . 6HBM Card . . . . . . . . . . . . . . . . . . . . . . . . . . . . . . . . . . . . . . . . . . . . . . . . . . . . . . . 7HBC Card . . . . . . . . . . . . . . . . . . . . . . . . . . . . . . . . . . . . . . . . . . . . . . . . . . . . . . . 7HBT Card . . . . . . . . . . . . . . . . . . . . . . . . . . . . . . . . . . . . . . . . . . . . . . . . . . . . . . . 7Robotics Interface Module . . . . . . . . . . . . . . . . . . . . . . . . . . . . . . . . . . . . . . . . . . . . . . . 8HandBot Numbering . . . . . . . . . . . . . . . . . . . . . . . . . . . . . . . . . . . . . . . . . . . . . . . . . 10Customer Interface Module . . . . . . . . . . . . . . . . . . . . . . . . . . . . . . . . . . . . . . . . . . . . . . 10Keypad . . . . . . . . . . . . . . . . . . . . . . . . . . . . . . . . . . . . . . . . . . . . . . . . . . . . . . . . . . . 11Operator Panel . . . . . . . . . . . . . . . . . . . . . . . . . . . . . . . . . . . . . . . . . . . . . . . . . . . . . 12Touch-Screen Operator Control Panel . . . . . . . . . . . . . . . . . . . . . . . . . . . . . . . . 12Remote Operator Console . . . . . . . . . . . . . . . . . . . . . . . . . . . . . . . . . . . . . . . . . 12Cartridge Storage Slots . . . . . . . . . . . . . . . . . . . . . . . . . . . . . . . . . . . . . . . . . . . . . . 13Cartridge Access Port (CAP) . . . . . . . . . . . . . . . . . . . . . . . . . . . . . . . . . . . . . . . . . . 13Elevator Assemblies . . . . . . . . . . . . . . . . . . . . . . . . . . . . . . . . . . . . . . . . . . . . . . . . . 14Standard HBZ Card . . . . . . . . . . . . . . . . . . . . . . . . . . . . . . . . . . . . . . . . . . . . . . . . . 14Storage Expansion Modules . . . . . . . . . . . . . . . . . . . . . . . . . . . . . . . . . . . . . . . . . . . . . 14Power . . . . . . . . . . . . . . . . . . . . . . . . . . . . . . . . . . . . . . . . . . . . . . . . . . . . . . . . . . . . . . . 14Power Consumption . . . . . . . . . . . . . . . . . . . . . . . . . . . . . . . . . . . . . . . . . . . . . . . . . 15Power Configurations . . . . . . . . . . . . . . . . . . . . . . . . . . . . . . . . . . . . . . . . . . . . . . . . 15N+1 Base Power Configuration . . . . . . . . . . . . . . . . . . . . . . . . . . . . . . . . . . . . . 152N Power Configuration . . . . . . . . . . . . . . . . . . . . . . . . . . . . . . . . . . . . . . . . . . . 16<strong>Library</strong> Specifications . . . . . . . . . . . . . . . . . . . . . . . . . . . . . . . . . . . . . . . . . . . . . . . . . . . 16vi Third Edition 96514
Embedded Firmware . . . . . . . . . . . . . . . . . . . . . . . . . . . . . . . . . . . . . . . . . . . . . . . . . . . 17Security . . . . . . . . . . . . . . . . . . . . . . . . . . . . . . . . . . . . . . . . . . . . . . . . . . . . . . . . . . 17Operating Firmware . . . . . . . . . . . . . . . . . . . . . . . . . . . . . . . . . . . . . . . . . . . . . . . . . 18Host <strong>Library</strong> Interfaces . . . . . . . . . . . . . . . . . . . . . . . . . . . . . . . . . . . . . . . . . . . . . . . . . . 18<strong>Library</strong> Management Software . . . . . . . . . . . . . . . . . . . . . . . . . . . . . . . . . . . . . . . . . . . . 19Host Software Component . . . . . . . . . . . . . . . . . . . . . . . . . . . . . . . . . . . . . . . . . . . 19ACSLS . . . . . . . . . . . . . . . . . . . . . . . . . . . . . . . . . . . . . . . . . . . . . . . . . . . . . . . . . . 192: Configuration Information . . . . . . . . . . . . . . . . . . . . . . . . . . . . . . . . . . . . . . . .21Installing StreamLine <strong>Library</strong> Console . . . . . . . . . . . . . . . . . . . . . . . . . . . . . . . . . . . . . . 21Activating Password . . . . . . . . . . . . . . . . . . . . . . . . . . . . . . . . . . . . . . . . . . . . . . . . . . . . 21To Activate your User Account: . . . . . . . . . . . . . . . . . . . . . . . . . . . . . . . . . . 22Verifying Configuration Entries . . . . . . . . . . . . . . . . . . . . . . . . . . . . . . . . . . . . . . . . . . . . 22Dynamic World Wide Name . . . . . . . . . . . . . . . . . . . . . . . . . . . . . . . . . . . . . . . . . . . . . . 23Upgrading Firmware . . . . . . . . . . . . . . . . . . . . . . . . . . . . . . . . . . . . . . . . . . . . . . . . . . . . 24Upgrading the Remote <strong>Library</strong> Console . . . . . . . . . . . . . . . . . . . . . . . . . . . . . . . . . . . . . 253: <strong>Library</strong> Operation. . . . . . . . . . . . . . . . . . . . . . . . . . . . . . . . . . . . . . . . . . . . . . . .27Automated Mode of Operation . . . . . . . . . . . . . . . . . . . . . . . . . . . . . . . . . . . . . . . . . . . . 27Mounting and Dismounting of Cartridges . . . . . . . . . . . . . . . . . . . . . . . . . . . . . . . . . 27Mount Sequence . . . . . . . . . . . . . . . . . . . . . . . . . . . . . . . . . . . . . . . . . . . . . . . . 27Dismount Sequence . . . . . . . . . . . . . . . . . . . . . . . . . . . . . . . . . . . . . . . . . . . . . . 28Performing CAP Activities . . . . . . . . . . . . . . . . . . . . . . . . . . . . . . . . . . . . . . . . . . . . 28Cartridge Slot Locations . . . . . . . . . . . . . . . . . . . . . . . . . . . . . . . . . . . . . . . . . . . 29Importing Cartridges . . . . . . . . . . . . . . . . . . . . . . . . . . . . . . . . . . . . . . . . . . . . . . 31Exporting Cartridges . . . . . . . . . . . . . . . . . . . . . . . . . . . . . . . . . . . . . . . . . . . . . . 33Monitoring <strong>Library</strong> Events . . . . . . . . . . . . . . . . . . . . . . . . . . . . . . . . . . . . . . . . . . . . 34Cleaning of Drives . . . . . . . . . . . . . . . . . . . . . . . . . . . . . . . . . . . . . . . . . . . . . . . . . . 35Manual Mode of Operation . . . . . . . . . . . . . . . . . . . . . . . . . . . . . . . . . . . . . . . . . . . . . . 35Precautions . . . . . . . . . . . . . . . . . . . . . . . . . . . . . . . . . . . . . . . . . . . . . . . . . . . . . . . 36Safety Precautions . . . . . . . . . . . . . . . . . . . . . . . . . . . . . . . . . . . . . . . . . . . . . . . 36Physical Restrictions . . . . . . . . . . . . . . . . . . . . . . . . . . . . . . . . . . . . . . . . . . . . . 36Placing the <strong>Library</strong> Offline . . . . . . . . . . . . . . . . . . . . . . . . . . . . . . . . . . . . . . . . . . . . 37Determining the <strong>Library</strong> is Not in Automatic Mode . . . . . . . . . . . . . . . . . . . . . . . . . 37Entering the <strong>Library</strong> . . . . . . . . . . . . . . . . . . . . . . . . . . . . . . . . . . . . . . . . . . . . . . . . . 37Locating a Cartridge and Drive . . . . . . . . . . . . . . . . . . . . . . . . . . . . . . . . . . . . . . . . 39To locate a cartridge: . . . . . . . . . . . . . . . . . . . . . . . . . . . . . . . . . . . . . . . . . . 39To locate a drive: . . . . . . . . . . . . . . . . . . . . . . . . . . . . . . . . . . . . . . . . . . . . . 39Moving the Robot . . . . . . . . . . . . . . . . . . . . . . . . . . . . . . . . . . . . . . . . . . . . . . . . . . 39Mounting a Cartridge . . . . . . . . . . . . . . . . . . . . . . . . . . . . . . . . . . . . . . . . . . . . . . . . 41Dismounting a Cartridge . . . . . . . . . . . . . . . . . . . . . . . . . . . . . . . . . . . . . . . . . . . . . 42Exiting the <strong>Library</strong> . . . . . . . . . . . . . . . . . . . . . . . . . . . . . . . . . . . . . . . . . . . . . . . . . . 4296514 Third Edition vii
ContentsPlacing the Drives to Online . . . . . . . . . . . . . . . . . . . . . . . . . . . . . . . . . . . . . . . . . . 43T9840/T9940 Drive Display . . . . . . . . . . . . . . . . . . . . . . . . . . . . . . . . . . . . . . . . 43LTO Ultrium Drives . . . . . . . . . . . . . . . . . . . . . . . . . . . . . . . . . . . . . . . . . . . . . . . 44Placing the <strong>Library</strong> Online . . . . . . . . . . . . . . . . . . . . . . . . . . . . . . . . . . . . . . . . . . . . 44Maintenance Mode of Operation . . . . . . . . . . . . . . . . . . . . . . . . . . . . . . . . . . . . . . . . . . 444: Cartridge Information . . . . . . . . . . . . . . . . . . . . . . . . . . . . . . . . . . . . . . . . . . . .45Cartridge Requirements . . . . . . . . . . . . . . . . . . . . . . . . . . . . . . . . . . . . . . . . . . . . . . . . . 45Cartridge Labels . . . . . . . . . . . . . . . . . . . . . . . . . . . . . . . . . . . . . . . . . . . . . . . . . . . . . . . 46Non-labeled Cartridges . . . . . . . . . . . . . . . . . . . . . . . . . . . . . . . . . . . . . . . . . . . . . . 46Upside Down Cartridges . . . . . . . . . . . . . . . . . . . . . . . . . . . . . . . . . . . . . . . . . . . . . 46LTO Cartridges . . . . . . . . . . . . . . . . . . . . . . . . . . . . . . . . . . . . . . . . . . . . . . . . . . 46T9x40 Drives . . . . . . . . . . . . . . . . . . . . . . . . . . . . . . . . . . . . . . . . . . . . . . . . . . . 47Ordering Cartridges/Labels . . . . . . . . . . . . . . . . . . . . . . . . . . . . . . . . . . . . . . . . . . . . . . 47T9840 Cartridges . . . . . . . . . . . . . . . . . . . . . . . . . . . . . . . . . . . . . . . . . . . . . . . . . . 47T9940 Cartridges . . . . . . . . . . . . . . . . . . . . . . . . . . . . . . . . . . . . . . . . . . . . . . . . . . 48VolSafe Cartridges . . . . . . . . . . . . . . . . . . . . . . . . . . . . . . . . . . . . . . . . . . . . . . . . . . 48LTO2 Cartridges . . . . . . . . . . . . . . . . . . . . . . . . . . . . . . . . . . . . . . . . . . . . . . . . . . . 49Cleaning Cartridges . . . . . . . . . . . . . . . . . . . . . . . . . . . . . . . . . . . . . . . . . . . . . . . . 49Preparing Cartridges . . . . . . . . . . . . . . . . . . . . . . . . . . . . . . . . . . . . . . . . . . . . . . . . . . . 49Handling a Cartridge . . . . . . . . . . . . . . . . . . . . . . . . . . . . . . . . . . . . . . . . . . . . . . . . 49Inspecting and Identifying a Cartridge . . . . . . . . . . . . . . . . . . . . . . . . . . . . . . . . . . . 50StorageTek Cartridges . . . . . . . . . . . . . . . . . . . . . . . . . . . . . . . . . . . . . . . . . . . . 50T9840 Cartridge . . . . . . . . . . . . . . . . . . . . . . . . . . . . . . . . . . . . . . . . . . . . . . 50T9940 Cartridge . . . . . . . . . . . . . . . . . . . . . . . . . . . . . . . . . . . . . . . . . . . . . 51VolSafe Cartridges . . . . . . . . . . . . . . . . . . . . . . . . . . . . . . . . . . . . . . . . . . . . 52LTO Ultrium Cartridge . . . . . . . . . . . . . . . . . . . . . . . . . . . . . . . . . . . . . . . . . . . . 53LTO Ultrium Generation 2 (Gen2) Fibre Channel Drives . . . . . . . . . . . . . . . . . . 53Super DLTtape II . . . . . . . . . . . . . . . . . . . . . . . . . . . . . . . . . . . . . . . . . . . . . . . . 54Applying Labels to Cartridges . . . . . . . . . . . . . . . . . . . . . . . . . . . . . . . . . . . . . . . . . 55Setting the Write Protect Switch . . . . . . . . . . . . . . . . . . . . . . . . . . . . . . . . . . . . . . . . 58Setting the T9840 Write Protect Switch to Read-Only . . . . . . . . . . . . . . . . . . . . 58Setting the T9840 Write Protect Switch to Read/Write . . . . . . . . . . . . . . . . . . . . 58Setting the T9940 Write Protect Switch to Read-Only . . . . . . . . . . . . . . . . . . . 59Setting the T9940 Write Protect Switch to Read/Write . . . . . . . . . . . . . . . . . . . . 59Setting the LTO Ultrium Write Protect Switch to Read-Only . . . . . . . . . . . . . . . . 60Setting the LTO Ultrium Write Protect Switch to Read/Write . . . . . . . . . . . . . . . 60Cleaning the Cartridge Exterior . . . . . . . . . . . . . . . . . . . . . . . . . . . . . . . . . . . . . . . . 61Using Cleaning Cartridges . . . . . . . . . . . . . . . . . . . . . . . . . . . . . . . . . . . . . . . . . . . 61Repairing a Detached Leader Block . . . . . . . . . . . . . . . . . . . . . . . . . . . . . . . . . . . . 62Cartridge Label Examples . . . . . . . . . . . . . . . . . . . . . . . . . . . . . . . . . . . . . . . . . . . . 62Maintaining Cartridges . . . . . . . . . . . . . . . . . . . . . . . . . . . . . . . . . . . . . . . . . . . . . . . . . . 64viii Third Edition 96514
T9840 Cartridge Specifications . . . . . . . . . . . . . . . . . . . . . . . . . . . . . . . . . . . . . . . . 64T9940 Cartridge Specifications . . . . . . . . . . . . . . . . . . . . . . . . . . . . . . . . . . . . . . . . 65LTO Ultrium Cartridge Specifications . . . . . . . . . . . . . . . . . . . . . . . . . . . . . . . . . . . 66SDLT Cartridge Tape Specifications . . . . . . . . . . . . . . . . . . . . . . . . . . . . . . . . . . . . 67Storing of Cartridges . . . . . . . . . . . . . . . . . . . . . . . . . . . . . . . . . . . . . . . . . . . . . . . . 685: Troubleshooting and Diagnostics . . . . . . . . . . . . . . . . . . . . . . . . . . . . . . . . . .69Troubleshooting the <strong>Library</strong> . . . . . . . . . . . . . . . . . . . . . . . . . . . . . . . . . . . . . . . . . . . . . . 70Drive Tray LEDs . . . . . . . . . . . . . . . . . . . . . . . . . . . . . . . . . . . . . . . . . . . . . . . . . . . . . . . 72Diagnostic Utilities . . . . . . . . . . . . . . . . . . . . . . . . . . . . . . . . . . . . . . . . . . . . . . . . . . . . . 81Reports . . . . . . . . . . . . . . . . . . . . . . . . . . . . . . . . . . . . . . . . . . . . . . . . . . . . . . . . . . . 81Event Monitors . . . . . . . . . . . . . . . . . . . . . . . . . . . . . . . . . . . . . . . . . . . . . . . . . . . . . 82Utilities . . . . . . . . . . . . . . . . . . . . . . . . . . . . . . . . . . . . . . . . . . . . . . . . . . . . . . . . . . .83Loading Code . . . . . . . . . . . . . . . . . . . . . . . . . . . . . . . . . . . . . . . . . . . . . . . . . . . 83Performing Audits . . . . . . . . . . . . . . . . . . . . . . . . . . . . . . . . . . . . . . . . . . . . . . . . 83Performing <strong>Library</strong> Self Test . . . . . . . . . . . . . . . . . . . . . . . . . . . . . . . . . . . . . . . . 84Working with the Search Utility . . . . . . . . . . . . . . . . . . . . . . . . . . . . . . . . . . . . . . 84Modifying the CAP Locked Status . . . . . . . . . . . . . . . . . . . . . . . . . . . . . . . . . . . 846: Obtaining Maintenance Support. . . . . . . . . . . . . . . . . . . . . . . . . . . . . . . . . . . .85Customer Initiated Maintenance . . . . . . . . . . . . . . . . . . . . . . . . . . . . . . . . . . . . . . . . . . 85StorageTek’s Worldwide Offices . . . . . . . . . . . . . . . . . . . . . . . . . . . . . . . . . . . . . . . . . . . 86A: Cartridge Slot Locations . . . . . . . . . . . . . . . . . . . . . . . . . . . . . . . . . . . . . . . . . .87<strong>Library</strong> Walls . . . . . . . . . . . . . . . . . . . . . . . . . . . . . . . . . . . . . . . . . . . . . . . . . . . . . . . . .87Reserved Slots . . . . . . . . . . . . . . . . . . . . . . . . . . . . . . . . . . . . . . . . . . . . . . . . . . . . . . . . 87Cartridge Address . . . . . . . . . . . . . . . . . . . . . . . . . . . . . . . . . . . . . . . . . . . . . . . . . . . . . 88<strong>SL8500</strong> Address . . . . . . . . . . . . . . . . . . . . . . . . . . . . . . . . . . . . . . . . . . . . . . . . . . . . 88HLI-PRC Address . . . . . . . . . . . . . . . . . . . . . . . . . . . . . . . . . . . . . . . . . . . . . . . . . . 100<strong>Library</strong> Storage Module (LSM) . . . . . . . . . . . . . . . . . . . . . . . . . . . . . . . . . . . . . 100Panel Designations . . . . . . . . . . . . . . . . . . . . . . . . . . . . . . . . . . . . . . . . . . . . . 100Row . . . . . . . . . . . . . . . . . . . . . . . . . . . . . . . . . . . . . . . . . . . . . . . . . . . . . . . . . 101CAP . . . . . . . . . . . . . . . . . . . . . . . . . . . . . . . . . . . . . . . . . . . . . . . . . . . . . . . . . 101Examples of CAP Behavior: . . . . . . . . . . . . . . . . . . . . . . . . . . . . . . . . . . . . 101Elevators . . . . . . . . . . . . . . . . . . . . . . . . . . . . . . . . . . . . . . . . . . . . . . . . . . . . . 101Operational Considerations . . . . . . . . . . . . . . . . . . . . . . . . . . . . . . . . . . . . . . . 102B: Drive Bay Locations . . . . . . . . . . . . . . . . . . . . . . . . . . . . . . . . . . . . . . . . . . . .103<strong>SL8500</strong> Drive Bay Address . . . . . . . . . . . . . . . . . . . . . . . . . . . . . . . . . . . . . . . . . . . . . 103<strong>SL8500</strong> Address . . . . . . . . . . . . . . . . . . . . . . . . . . . . . . . . . . . . . . . . . . . . . . . . . . . . . 105HLI-PRC Address . . . . . . . . . . . . . . . . . . . . . . . . . . . . . . . . . . . . . . . . . . . . . . . . . . . . . 106<strong>System</strong> Address . . . . . . . . . . . . . . . . . . . . . . . . . . . . . . . . . . . . . . . . . . . . . . . . . . . . . . 107Manually Locating a Drive Bay . . . . . . . . . . . . . . . . . . . . . . . . . . . . . . . . . . . . . . . . . . . 10796514 Third Edition ix
ContentsGlossary. . . . . . . . . . . . . . . . . . . . . . . . . . . . . . . . . . . . . . . . . . . . . . . . . . . . . . . . .109Index. . . . . . . . . . . . . . . . . . . . . . . . . . . . . . . . . . . . . . . . . . . . . . . . . . . . . . . . . . . . 117x Third Edition 96514
FiguresFigure 1. <strong>Library</strong> Modules . . . . . . . . . . . . . . . . . . . . . . . . . . . . . . . . . . . . . . . . . . . . . . . . . . .3Figure 2. Base <strong>Library</strong> with One Storage Expansion Module . . . . . . . . . . . . . . . . . . . . . . . . 4Figure 3. HandBot (Detail) . . . . . . . . . . . . . . . . . . . . . . . . . . . . . . . . . . . . . . . . . . . . . . . . . . .9Figure 4. HandBot on the Power Rail . . . . . . . . . . . . . . . . . . . . . . . . . . . . . . . . . . . . . . . . . . 9Figure 5. Keypad . . . . . . . . . . . . . . . . . . . . . . . . . . . . . . . . . . . . . . . . . . . . . . . . . . . . . . . . . 11Figure 6. CAP A Unlocked . . . . . . . . . . . . . . . . . . . . . . . . . . . . . . . . . . . . . . . . . . . . . . . . . . 28Figure 7. StreamLine <strong>Library</strong> Console – CAP . . . . . . . . . . . . . . . . . . . . . . . . . . . . . . . . . . . 30Figure 8. Placement of Cartridges with the Magazine Inside the CAP . . . . . . . . . . . . . . . . 31Figure 9. Placement of Cartridges with the Magazine Outside the CAP . . . . . . . . . . . . . . . 32Figure 10. <strong>Library</strong> Front View (Access Doors Open) . . . . . . . . . . . . . . . . . . . . . . . . . . . . . . 38Figure 11. Moving the HandBot . . . . . . . . . . . . . . . . . . . . . . . . . . . . . . . . . . . . . . . . . . . . . . 40Figure 12. Drive Panel . . . . . . . . . . . . . . . . . . . . . . . . . . . . . . . . . . . . . . . . . . . . . . . . . . . . .41Figure 13. Manually Inserting a Tape Cartridge (L202_039) . . . . . . . . . . . . . . . . . . . . . . . . 42Figure 14. Emergency Robotic Stop Switch . . . . . . . . . . . . . . . . . . . . . . . . . . . . . . . . . . . . . 43Figure 15. A T9840 Cartridge . . . . . . . . . . . . . . . . . . . . . . . . . . . . . . . . . . . . . . . . . . . . . . . 51Figure 16. A T9940 Cartridge . . . . . . . . . . . . . . . . . . . . . . . . . . . . . . . . . . . . . . . . . . . . . . . 52Figure 17. An LTO Ultrium Cartridge . . . . . . . . . . . . . . . . . . . . . . . . . . . . . . . . . . . . . . . . . . 53Figure 18. SDLTtape II Cartridge Tape . . . . . . . . . . . . . . . . . . . . . . . . . . . . . . . . . . . . . . . . 54Figure 19. Applying Cartridge Label to SDLT Cartridge . . . . . . . . . . . . . . . . . . . . . . . . . . . . 57Figure 20. Applying Cartridge Label to T9840 Cartridge . . . . . . . . . . . . . . . . . . . . . . . . . . . 57Figure 21. Applying Cartridge Label to T9940 Cartridge . . . . . . . . . . . . . . . . . . . . . . . . . . . 58Figure 22. Setting the T9840 Cartridge Write Protect Switch . . . . . . . . . . . . . . . . . . . . . . . 59Figure 23. Setting the T9940 Cartridge Write Protect Switch . . . . . . . . . . . . . . . . . . . . . . . 60Figure 24. Setting the LTO Ultrium Cartridge Write-Protect Switch (L203_464) . . . . . . . . . 61Figure 25. Sample Permanent Report . . . . . . . . . . . . . . . . . . . . . . . . . . . . . . . . . . . . . . . . . 82Figure 26. Cartridge and Drive Locations – Internal Firmware (1 of 8) . . . . . . . . . . . . . . . . 89Figure 27. Cartridge and Drive Locations – Internal Firmware (2 of 8)(L203_591) . . . . . . . 90Figure 28. Cartridge and Drive Locations – Internal Firmware (3 of 8)(L203_592) . . . . . . . 91Figure 29. Cartridge and Drive Locations – Internal Firmware (4 of 8)(L203_593) . . . . . . . 92Figure 30. Cartridge and Drive Locations – Internal Firmware (5 of 8)(L203_594) . . . . . . . 93Figure 31. Cartridge and Drive Locations – Internal Firmware (6 of 8)(L203_595) . . . . . . . 94Figure 32. Cartridge and Drive Locations – Internal Firmware (7 of 8)(L203_596) . . . . . . . 95Figure 33. Cartridge and Drive Locations – Internal Firmware (8 of 8)(L203_597) . . . . . . . 96Figure 34. <strong>Library</strong> Console (Drives Data) . . . . . . . . . . . . . . . . . . . . . . . . . . . . . . . . . . . . . 10896514 Third Edition xi
Figuresxii Third Edition 96514
TablesTable 1. Supported Drives . . . . . . . . . . . . . . . . . . . . . . . . . . . . . . . . . . . . . . . . . . . . . . . . . . .5Table 2. Keypad Switches, Buttons, and Indicators . . . . . . . . . . . . . . . . . . . . . . . . . . . . . . . 11Table 3. <strong>SL8500</strong> Capacity Variations . . . . . . . . . . . . . . . . . . . . . . . . . . . . . . . . . . . . . . . . . . 13Table 4. <strong>Library</strong> Specifications . . . . . . . . . . . . . . . . . . . . . . . . . . . . . . . . . . . . . . . . . . . . . . . 16Table 5. <strong>Library</strong> Configuration Entries . . . . . . . . . . . . . . . . . . . . . . . . . . . . . . . . . . . . . . . . . 22Table 6. Drive Configuration Entries . . . . . . . . . . . . . . . . . . . . . . . . . . . . . . . . . . . . . . . . . . 23Table 7. T9840 Cartridge Part Numbers and Feature Codes . . . . . . . . . . . . . . . . . . . . . . . 47Table 8. T9940 Cartridge Part Numbers and Feature Codes . . . . . . . . . . . . . . . . . . . . . . . 48Table 9. 9940 VolSafe Cartridge Part Numbers and Feature Codes . . . . . . . . . . . . . . . . . . 48Table 10. 9840 VolSafe Cartridge Part Numbers and Feature Codes . . . . . . . . . . . . . . . . . 48Table 11. LTO Gen 2 Cartridge Part Numbers and Feature Codes . . . . . . . . . . . . . . . . . . 49Table 12. Cleaning Cartridge Part Numbers and Feature Codes . . . . . . . . . . . . . . . . . . . . 49Table 13. Cartridge Codes . . . . . . . . . . . . . . . . . . . . . . . . . . . . . . . . . . . . . . . . . . . . . . . . . . 55Table 14. Ultrium Cartridge Models . . . . . . . . . . . . . . . . . . . . . . . . . . . . . . . . . . . . . . . . . . . 55Table 15. Label Examples—Data Cartridges . . . . . . . . . . . . . . . . . . . . . . . . . . . . . . . . . . . 62Table 16. Label Examples—Cleaning and Diagnostic Cartridges . . . . . . . . . . . . . . . . . . . . 63Table 17. T9840 Cartridge Tape Specifications . . . . . . . . . . . . . . . . . . . . . . . . . . . . . . . . . . 64Table 18. T9940 Cartridge Tape Specifications . . . . . . . . . . . . . . . . . . . . . . . . . . . . . . . . . . 65Table 19. LTO Cartridge Tape Specifications . . . . . . . . . . . . . . . . . . . . . . . . . . . . . . . . . . . . 66Table 20. SDLT Cartridge Tape Specifications . . . . . . . . . . . . . . . . . . . . . . . . . . . . . . . . . . . 67Table 21. Troubleshooting Table . . . . . . . . . . . . . . . . . . . . . . . . . . . . . . . . . . . . . . . . . . . . . 70Table 22. HP Single-LED Patterns . . . . . . . . . . . . . . . . . . . . . . . . . . . . . . . . . . . . . . . . . . . . 73Table 23. HP Multi-LED Patterns . . . . . . . . . . . . . . . . . . . . . . . . . . . . . . . . . . . . . . . . . . . . . 74Table 24. IBM LTO Drive Buttons and Indicators . . . . . . . . . . . . . . . . . . . . . . . . . . . . . . . . . 75Table 25. IBM LTO Drive Codes and Meaning . . . . . . . . . . . . . . . . . . . . . . . . . . . . . . . . . . . 75Table 26. Reserved Slots . . . . . . . . . . . . . . . . . . . . . . . . . . . . . . . . . . . . . . . . . . . . . . . . . . . 88Table 27. Cartridge Locations (1 of 3) . . . . . . . . . . . . . . . . . . . . . . . . . . . . . . . . . . . . . . . . . 97Table 28. Cartridge Locations (2 of 3) . . . . . . . . . . . . . . . . . . . . . . . . . . . . . . . . . . . . . . . . . 98Table 29. Cartridge Locations (3 of 3) . . . . . . . . . . . . . . . . . . . . . . . . . . . . . . . . . . . . . . . . . 99Table 30. Rail Numbering . . . . . . . . . . . . . . . . . . . . . . . . . . . . . . . . . . . . . . . . . . . . . . . . . . 100Table 31. Hardware Drive Address . . . . . . . . . . . . . . . . . . . . . . . . . . . . . . . . . . . . . . . . . . 104Table 32. Firmware Drive Address . . . . . . . . . . . . . . . . . . . . . . . . . . . . . . . . . . . . . . . . . . . 105Table 33. Host Software Drive Address . . . . . . . . . . . . . . . . . . . . . . . . . . . . . . . . . . . . . . . 10696514 Third Edition xiii
Tablesxiv Third Edition 96514
Preface■ OrganizationThis guide, while intended primarily for users of the library, also containsinformation that can be used by system administrators. Most of the informationpertains to the library hardware and related operations. For specific driveinformation or for client-generated software commands and consolemessages, refer to your drive or software documentation.The organization of this guide is:Chapter 1Chapter 2Chapter 3Chapter 4Chapter 5Chapter 6Appendix AAppendix B“Glossary”Index“Introduction” provides an overview of the <strong>SL8500</strong> modularlibrary system.“Configuration Information” describes how to activate your siteuser account, verify the library and drive configuration entries,and upgrade firmware.“<strong>Library</strong> Operation” describes the tasks you can perform whilethe library is operating in automated and manual modes.“Cartridge Information” describes how to handle, inspect, andmaintain cartridges.“Troubleshooting and Diagnostics” describes how to correctproblems with the library and the attached devices (drives,CAP, robots, and elevators). It also describes some of thediagnostic utilities.“Obtaining Maintenance Support” describes how to contactCustomer Support for assistance if problems occur with thetape library.“Cartridge Slot Locations” explains the locations andnumbering schemes of the cartridge slots in the library.“Drive Bay Locations” explains the locations and numberingschemes of the drive bays in the library.The “Glossary” defines new or special terms and abbreviationsused in this manual.The “Index” helps you find information in this manual.96154 Third Edition xv
Preface■ Alert MessagesAlert messages call your attention to information that is especially important orthat has a unique relationship to the main text or graphic.Note: A note provides additional information that is of special interest. A notemight point out exceptions to rules or procedures. A note usually, butnot always, follows the information to which it pertains.CAUTION:WARNING:A caution informs the reader of conditions that might result indamage to hardware, corruption of data, corruption ofapplication software, or long-term health problems in people. Acaution always precedes the information to which it pertains.A warning alerts the reader to conditions that might result ininjury or death. A warning always precedes the information towhich it pertains.■ ConventionsTypographical conventions highlight special words, phrases, and actions inthis publication.Item Example Description of ConventionButtons MENU Font and capitalization followslabel on productCommands Mode Select Initial capDocument titles<strong>System</strong> Assurance Italic fontGuideEmphasis not or must Italic fontFile names fsc.txt Monospace fontHypertext links Figure 2-1 on page 2-5 Blue (prints black in hardcopypublications)Indicators Open Font and capitalization followslabel on productJumper names TERMPWR All uppercaseKeyboard keys orFont and capitalization followslabel on product; enclosed withinangle bracketsMenu names Configuration Menu Capitalization follows label onproductParameters and variables Device = xx Italic fontxvi Third Edition 96154
Related PublicationsItem Example Description of ConventionPath names c:/mydirectory Monospace fontPort or connector names SER1 Font and capitalization followslabel on product; otherwise, alluppercasePositions for circuitbreakers, jumpers, andswitchesScreen text (includingscreen captures, screenmessages, and user input)ONdownloading■ Related PublicationsFont and capitalization followslabel on product; otherwise, alluppercaseMonospace fontSwitch names Power Font and capitalization followslabel on productURLshttp://www.storagetek.comBlue (prints black in hardcopypublications)The following publications relate to the <strong>SL8500</strong> Tape <strong>Library</strong> are listed below.Tape Drive DocumentationHewlett Packard Ultrium Tape Drive ManualIBM Ultrium Tape Drive ManualSeagate Ultrium Tape Drive Product ManualPart NumberCD included withdriveCD included withdriveCD included withdriveSuper DLT600 Product ManualCD included withdriveT9840 Tape Drive User’s Reference Manual 95739T9940 Tape Drive Operator’s Guide 95989Software PublicationsPart NumberAutomated Cartridge <strong>System</strong> <strong>Library</strong> Software (ACSLS)ACSLS <strong>System</strong> Administrator’s Guide 3134648ACSLS Messages 3134649ACSLS Quick Reference 313465096154 Third Edition xvii
PrefaceHost Software Component (HSC) MVS PublicationsHSC Operator’s Guide 312531101HSC Messages and Codes Guide 312531301Other PublicationsPart NumberAmerican National Standard Dictionary forANSI X3/TR-1-82Information Processing <strong>System</strong>sFibre Optics User's Guide 9433■ Additional InformationStorageTek offers several methods for you to obtain additional information.StorageTek’s External Web SiteStorageTek’s external Web site provides marketing, product, event, corporate,and service information. The external Web site is accessible to anyone with aWeb browser and an Internet connection.The URL for the StorageTek external Web site is http://www.storagetek.comCustomer Resource CenterStorageTek’s CRC is a Web site that enables members to resolve technicalissues by searching code fixes and technical documentation. CRCmembership entitles you to other proactive services, such as HIPERsubscriptions, technical tips, answers to frequently asked questions, addendato product documentation books, and online product support contactinformation. Customers who have a current warranty or a current maintenanceservice agreement may apply for membership by clicking on the RequestPassword button on the CRC home page.The URL for the CRC is http://www.support.storagetek.com.xviii Third Edition 96154
Additional Informatione-Partners SiteStorageTek’s e-Partners site is a Web site that provides information aboutproducts, services, customer support, upcoming events, training programs,and sales tools to support StorageTek’s e-Partners. Access to this site,beyond the e-Partners Login page, is restricted. On the e-Partners Loginpage, current partners who do not have access can request a login ID andpassword and prospective partners can apply to become StorageTekresellers.The URL for the e-Partners site is http://members.storagetek.com.Hardcopy PublicationsContact a StorageTek sales or marketing representative to order additionalpaper copies of this publication or to order other StorageTek customerpublications in paper format.96154 Third Edition xix
Prefacexx Third Edition 96154
SafetyThe following pages describe common practices concerning electrostaticdischarge, fiber optics, and library safety.■ Electrostatic Discharge Damage PreventionBefore you touch any internal components in the library, including drives, youmust take precautions against electrostatic discharge (ESD).CAUTION:Components are sensitive to static electricity: Even a smallelectrostatic discharge can damage an electrical componentthat is inside the library. A damaged component might not failimmediately, but over time, it will become worse and mighteventually cause an “intermittent” problem. Be sure that youtouch an unpainted metal surface of the library before youreach inside the library or touch the drives or optional interfaceequipment.Before you touch any internal components:1. With your finger, touch an unpainted metal surface of the library. In somelibraries, you can touch the library’s frame. In other libraries, you mighthave to touch a bolt on the wall or on the door frame.2. Keep your body movement to a minimum as you touch the drives or thelibrary components.Antistatic wrist straps that have clip-on ends are commercially available.■ Fiber-optic SafetyWARNING:Eye hazard. Never look directly into a fiber-optic cable, a fiberopticconnector, or a laser transceiver module. Hazardousconditions might exist from laser power levels that are capableof causing injury to the eye.Be especially careful when using optical instruments with thisequipment. Such instruments might increase the likelihood of eyeinjury.The laser transceivers in fiber-optic equipment can pose dangers to personalsafety. Ensure that anyone who works with this StorageTek equipmentunderstands these dangers and follows safety procedures. Ensure that the96154 Second Edition xxi
Safetyoptical ports of every laser transceiver module are terminated with an opticalconnector, a dust plug, or a cover.Each fiber-optic interface in this StorageTek Fibre Channel equipmentcontains a laser transceiver that is a Class 1 Laser Product. Each lasertransceiver has an output of less than 70 µW. StorageTek’s Class 1 LaserProducts comply with EN60825-1:1994+A1+A2 and with sections 21 CFR1040.10 and 1040.11 of the Food and Drug Administration (FDA) regulations.CAUTION:Use of controls or adjustment or performance of proceduresother than those specified herein might result in hazardousradiation exposure.The following translations are for users in Finland and Sweden who wish toidentify laser safety and classification:Laser Product LabelCLASS 1 LASERLUOKAN 1 LASERLAITEKLASSE 1 LASER APPARATIn accordance with safety regulations, a label on each StorageTek FibreChannel product identifies the laser class of the product and the place anddate of the manufacturer. The label appears on top of a Fibre Channel tapedrive and near the Fibre Channel connectors on a Fibre Channel tape library.A copy of the label is shown here:CLASS 1 LASER PRODUCTLASER KLASSE 1APPAREIL A LASER DE CLASSE 1COMPLIES WITH 21 CFR 1040.10 AND 1040.11■ EN60950-1:2001 StatementThe following statement pertains to products that require a ground connectionat the wall outlet.Norway:Apparatet må tilkoples jordet stikkontaktFinland:Laite on liitettävä suojamaadoituskoskettimilla varustettuun pistorasiaanSweden:Apparaten skall anslutas till jordat uttagDenmark:For tilsluting af de øvrige ledere, se medfølgende installationsvejledningxxii Second Edition 96154
<strong>Library</strong> Safety■ <strong>Library</strong> SafetyIt is essential that safety procedures are followed. Be sure you are familiarwith all the precautions in this section before you attempt to enter the library.Interlocks, robotics emergency robotics stop switches, and smoke detectorsare provided to assure safety throughout the library.Mechanical Access Door MechanismsOn the rear of each door lock, a mechanism (painted yellow) is available torelease the door lock from the inside of the library. This is a non-electricalsafeguard against being locked inside the library.Should an access door be shut and locked from the outside, someone insidethe library need only push on the mechanism to unlock and open the door.<strong>SL8500</strong> Door InterlocksSafety interlocks are on the:• Door frames of the customer interface module has two switches behindeach front access door• Service safety doorThese interlocks are monitored by the HBN card, which also removes powerduring an emergency robotics stop condition.When two libraries are connected by a pas-thru port (PTP), entering theinterior of either library will automatically suspends pass-thru operations.Operations within the library with the open door also stop, while the otherlibrary’s operation continue.Service Safety DoorThe service safety door is a sliding door that is activated by a maintenancekey. The maintenance key is controlled only by service representatives and isused only when a failing HandBot is to be replaced. Operation of the servicesafety door is controlled by the HBZ card on the elevator and turntableassembly.The maintenance area is the space between the two front access doors andthe service safety door. Within a library that contains redundant HandBots, adefective HandBot that is unable to move into the maintenance area is pushedinto this maintenance area by the other, functional HandBot on the same rail.The service safety door moves either to the left or right, depending upon whichmaintenance lock is opened. When the maintenance key is inserted into itslock and turned, the service safety door activates to separate the forwardmaintenance area from the library interior. This allows the service96154 Second Edition xxiii
Safetyrepresentative to replace an HandBot while the remainder of the library is fullyoperational.<strong>SL8500</strong> Servo Power InterruptSmoke DetectionAn additional safety feature is the servo power interrupt (SPI). If a librarymotor is determined to be out-of-range, the processor generates an SPI toturn off drive voltage to the faulty motor. This prevents a servo runawaycondition until the cause of the problem can be determined.A smoke detector is present within the library. If the detector senses smoke,the library performs an emergency power-off (EPO) procedure, removing all(AC and DC) power from the library.The smoke detector is in the upper right section of the drive and electronicsmodule, as seen from the rear of the machine.The <strong>SL8500</strong> does not ship with a Fire Suppression <strong>System</strong> but StorageTek'sProfessional Services can install one on site. Contact you servicerepresentative for more information.Emergency Robotics Stop SwitchesIn case of a condition that requires an immediate power-off of the library, thereare two Emergency Robotics Stop switches for the library:• One interior, lighted switch on the left side of the drive area, as seen fromthe front of the machine• One non-illuminated, covered switch on the front operator key panelActuating an emergency robotics stop switch immediately disconnects DCpower to the power rails. After it is determined that it is safe to restore power,the switch is reset by pressing it again.Front Access Door SwitchesFour door switches monitor the state of the access doors; should a door open,the switches also initiate an emergency robotics stop to the HandBots withinthe library.The HBN card shuts down power to the rails and front power buses in case anemergency robotics stop or unauthorized entry into the library occurs.xxiv Second Edition 96154
<strong>Library</strong> SafetyInterior LightingDuring normal operation, the interior of the library is illuminated by whiteLEDs. If either access door is opened, however, yellow LEDs are provided toassist maintenance personnel.If either front access door is opened by an operator, the yellow LEDs flash on/off to indicate that one or both front access doors are opened. If a servicerepresentative initiates a maintenance activity, however, the LEDs remain onto aid the person entering the maintenance area of the library.After exiting the library, the door is closed and locked. Following a doorclosure, the yellow LEDs flashes on/off for approximately 10 seconds, alertinganyone who may still be inside the library that library startup is about to begin.96154 Second Edition xxv
Safetyxxvi Second Edition 96154
United States FCC Compliance StatementNoticesPlease read the following compliance and warning statements for this product.CAUTION:Potential equipment damage: Cables that connect peripheralsmust be shielded and grounded; refer to descriptions in thecable instruction manuals. Operation of this equipment withcables that are not shielded and not correctly grounded mightresult in interference to radio and TV reception.Changes or modifications to this equipment that are not expresslyapproved in advance by StorageTek will void the warranty. Inaddition, changes or modifications to this equipment might cause itto create harmful interference.■ United States FCC Compliance StatementThe following compliance statement pertains to Federal CommunicationsCommission Rules 47 CFR 15.105:Note: This equipment has been tested and found to comply with the limits fora Class A digital device pursuant to part 15 of the FCC Rules. Theselimits are designed to provide reasonable protection against harmfulinterference when the equipment is operated in a commercialenvironment. This equipment generates, uses, and can radiate radiofrequency energy and, if not installed and used in accordance with theinstruction manual, may cause harmful interference to radiocommunications. Operation of this equipment in a residential area islikely to cause harmful interference in which case the user will berequired to correct the interference at his or her own expense.■ CISPR 22 and EN55022 WarningThis is a Class A product. In a domestic environment this product may causeradio interference in which case the user may be required to take adequatemeasures.96154 Second Edition xxv
Notices■ Japanese Compliance StatementThe following compliance statement in Japanese pertains to VCCI EMIregulations:English translation: This is a Class A product based on the TechnicalRequirement of the Voluntary Control Council for Interference by InformationTechnology (VCCI). In a domestic environment, this product may cause radiointerference, in which case the user may be required to take correctiveactions.■ Taiwan Warning Label StatementThe following warning label statement pertains to BSMI regulations in Taiwan,R.O.C.:English translation: This is a Class A product. In a domestic environment,this product may cause radio interference, in which case, the user may berequired to take adequate measures.xxvi Second Edition 96154
Internal Code License Statement■ Internal Code License StatementThe following is the Internal Code License Agreement from StorageTek:NOTICEINTERNAL CODE LICENSEPLEASE READ THIS NOTICE CAREFULLY BEFORE INSTALLING AND OPERATINGTHIS EQUIPMENT. THIS NOTICE IS A LEGAL AGREEMENT BETWEEN YOU (EITHERAN INDIVIDUAL OR ENTITY), THE END USER, AND STORAGE TECHNOLOGYCORPORATION (“STORAGETEK”), THE MANUFACTURER OF THE EQUIPMENT. BYOPENING THE PACKAGE AND ACCEPTING AND USING ANY UNIT OF EQUIPMENTDESCRIBED IN THIS DOCUMENT, YOU AGREE TO BECOME BOUND BY THE TERMSOF THIS AGREEMENT. IF YOU DO NOT AGREE WITH THE TERMS OF THISAGREEMENT, DO NOT OPEN THE PACKAGE AND USE THE EQUIPMENT. IF YOU DONOT HAVE THE AUTHORITY TO BIND YOUR COMPANY, DO NOT OPEN THEPACKAGE AND USE THE EQUIPMENT. IF YOU HAVE ANY QUESTIONS, CONTACT THEAUTHORIZED STORAGETEK DISTRIBUTOR OR RESELLER FROM WHOM YOUACQUIRED THIS EQUIPMENT. IF THE EQUIPMENT WAS OBTAINED BY YOUDIRECTLY FROM STORAGETEK, CONTACT YOUR STORAGETEK REPRESENTATIVE.1. Definitions: The following terms aredefined as followed:a. “Derivative works” are defined asworks based upon one or morepreexisting works, such as atranslation or a musical arrangement,or any other form in which a work maybe recast, transformed, or adapted. Awork consisting of editorial revision,annotations, elaboration, or othermodifications which, as a whole,represent an original work ofauthorship, is a Derivative work.b. “Internal Code” is Microcode that (i) isan integral part of Equipment, (ii) isrequired by such Equipment toperform its data storage and retrievalfunctions, and (iii) executes below theuser interface of such Equipment.Internal code does not include otherMicrocode or software, including datafiles, which may reside or execute inor be used by or in connection withsuch Equipment, including, withoutlimitation, Maintenance Code.c. “Maintenance Code” is defined asMicrocode and other software,including data files, which may resideor execute in or be used by or inconnection with Equipment, andwhich detects, records, displays, and/or analyzes malfunctions in theEquipment.d. “Microcode” is defined as a set ofinstructions (software) that is eitherimbedded into or is to be loaded intothe Equipment and executes belowthe external user interface of suchEquipment. Microcode includes bothInternal Code and MaintenanceCode, and may be in magnetic orother storage media, integratedcircuitry, or other media.96154 Second Edition xxvii
Internal Code License Statement2. The Equipment you have acquired bypurchase or lease is manufactured by orfor StorageTek and contains Microcode.By accepting and operating thisEquipment, you acknowledge thatStorageTek or its licensor(s) retain(s)ownership of all Microcode, as well as allcopies thereof, that may execute in or beused in the operation or servicing of theEquipment and that such Microcode iscopyrighted by StorageTek or itslicensor(s).3. StorageTek hereby grants you, the enduser of the Equipment, a personal,nontransferable (except as permitted inthe transfer terms below), nonexclusivelicense to use each copy of the InternalCode (or any replacement provided byStorageTek or your authorizedStorageTek distributor or reseller) whichlicense authorizes you, the end user, toexecute the Internal Code solely toenable the specific unit of Equipment forwhich the copy of Internal Code isprovided to perform its data storage andretrieval functions in accordance withStorageTek’s (or its licensor’s) officialpublished specifications.4. Your license is limited to the use of theInternal Code as set forth above. Youmay not use the Internal Code for anyother purpose. You may not, for example,do any of the following:(i) access, copy, display, print, adapt,alter, modify, patch, prepare Derivativeworks of, transfer, or distribute(electronically or otherwise) or otherwiseuse the Internal Code;(ii) reverse assemble, decode, translate,decompile, or otherwise reverse engineerthe Internal Code (except asdecompilation may be expresslypermitted under applicable European lawsolely for the purpose of gaininginformation that will allow interoperabilitywhen such information is not otherwisereadily available); or(iii) sublicense, assign, or lease theInternal Code or permit another person touse such Internal Code, or any copy of it.If you need a backup or archival copy ofthe Internal Code, StorageTek, or yourauthorized StorageTek distributor orreseller, will make one available to you, itbeing acknowledged and agreed that youhave no right to make such a copy.5. Nothing in the license set forth above orin this entire Notice shall convey, in anymanner, to you any license to or title to orother right to use any Maintenance code,or any copy of such Maintenance Code.Maintenance Code and StorageTek’sservice tools and manuals may be kept atyour premises, or they may be suppliedwith a unit of Equipment sent to you and/or included on the same media asInternal Code, but they are to be usedonly by StorageTek’s customer servicepersonnel or those of an entity licensedby StorageTek, all rights in and to suchMaintenance Code, service tools andmanuals being reserved by StorageTek orits licensors. You agree that you shall notuse or attempt to use the MaintenanceCode or permit any other third party touse and access such Maintenance Code.6. You, the end user, agree to take allappropriate steps to ensure that all ofyour obligations set forth in this Noticeare extended to any third party havingaccess to the Equipment.7. You may transfer possession of theInternal Code to another party only withthe transfer of the Equipment on which itsuse is authorized, and your license to usethe Internal Code is discontinued whenyou are no longer an owner or a rightfulpossessor of the Equipment. You mustgive such transferee all copies of theInternal Code for the transferredEquipment that are in your possession,along with a copy of all provisions of thisNotice.96154 Second Edition xxviii
Internal Code License StatementAny such transfer by you is automatically(without further action on the part of eitherparty) expressly subject to all the termsand conditions of this Notice passing infull to the party to whom such Equipmentis transferred, and such transfereeaccepts the provisions of this license byinitial use of the Internal Code. Youcannot pass to the transferee of theEquipment any greater rights thangranted under this Notice, and shall holdStorageTek harmless from any claim tothe contrary by your transferee or itssuccessors or assigns. In addition, theterms and conditions of this Notice applyto any copies of Internal Code now inyour possession or use or which youhereafter acquire from either StorageTekor another party.8. You acknowledge that copies of bothInternal Code and Maintenance Codemay be installed on the Equipment beforeshipment or included with the Equipmentand other material shipped to you, all forthe convenience of StorageTek’s servicepersonnel or service providers licensedby StorageTek, and that during thewarranty period, if any, associated withthe Equipment, and during periods inwhich the Equipment is covered under amaintenance contract with StorageTek orservice providers licensed by StorageTek,both Internal Code and MaintenanceCode may reside and be executed in orused in connection with such Equipment,and you agree that no rights toMaintenance Code are conferred uponyou by such facts.StorageTek or the licensed serviceprovider may keep Maintenance Codeand service tools and manuals on yourpremises but they are to be used only byStorageTek’s customer service personnelor those of service providers licensed byStorageTek. You further agree that upon(i) any termination of such warrantyperiod or maintenance contract period; or(ii) transfer of possession of theEquipment to another party, StorageTekand its authorized service providers shallhave the right with respect to the affectedEquipment to remove all service toolsand manuals and to remove or disable allMaintenance Code and/or replaceMicrocode which includes both InternalCode and Maintenance Code withMicrocode that consists only of InternalCode.96154 Second Edition xxix
Noticesxxx Second Edition 96154
Introduction1This chapter introduces the major hardware components and provides thelibrary specifications for the StreamLine TM <strong>SL8500</strong> modular library system,which is referred to as the <strong>SL8500</strong> library or just the “library” throughout thismanual. For software information and drive information, refer to thepublications that pertain to these specific topics.The library is a robotic system that mounts cartridges into storage slots or intodrives for read/write operations. It also moves cartridges between thecartridge access port (CAP) to storage slots or between slots.■ <strong>Library</strong> OverviewThe <strong>SL8500</strong> <strong>Library</strong> is a fully automated cartridge tape storage and retrievalsystem.The base library stands 2.37 m (7.76 ft.) tall, 1.7 m (5.6 ft.) wide, and 2.76 m(9.1 ft.) deep. Depending on the model and features selected, one <strong>SL8500</strong>library can store from 1,448 to 6,632 cartridge tapes and house from four to 64tape drives.A library complex, consists of two or more libraries that connect with pass-thruports (PTPs) and contains over 200,000 customer usable cartridges and 1,984tape drives.The approximate speed of each robot (termed StreamLine HandBot highperformance robotics) is from 2 m (75 in.) to 2.5 m (100 in.) per second.Single Physical <strong>SL8500</strong> <strong>Library</strong>—BaseThe minimum <strong>SL8500</strong> library configuration is composed of:• A Drive and Electronics Module, containing from four to 64 tape drives andthe controlling circuit cards for the library• One Robotics Interface Module, containing up to 800 cartridge storageslots• Multiple HandBots (four – eight) that service four rails. They movehorizontally along rails and vertically along their individual Z axes. Theyretrieve cartridges from both inner and outer walls (and the elevator andturntable assembly or CAPs) by pivoting 180 degrees96154 Third Edition 1
Introduction• One Customer Interface Module that provides storage for 648 cartridgesand contains an LED display• A remote “operator panel” (StreamLine <strong>Library</strong> Console TM software thatprovides an operator panel display on the customer’s personal computer[PC])• An elevator assembly located in the front (Customer Interface Module),that transfers cartridges vertically across rail boundaries (elevator) or fromone side of the library to the other (by passing them to either HandBotusing a turntable)• A standard cartridge access port (CAP) that allows up to 39 cartridges tobe entered/ejected at one timeSingle Physical <strong>SL8500</strong> <strong>Library</strong>—OptionsOptions for each stand-alone <strong>SL8500</strong> library are:• A maximum of three additional storage expansion modules, providing1,728 cartridge storage slots each, to a maximum cartridge storagenumber of 6,632 cartridges within one library• A touch-panel operator control in the middle of the Customer InterfaceModule, between the two access doors• An optional second CAP (CAP B) is also available• Redundant HandBots (maximum of four) that provide redundancy shouldone robot encounter a failure.An view of a library with one expansion frame is shown in Figure 2 on page 4.2 Third Edition 96154
<strong>Library</strong> OverviewFigure 1. <strong>Library</strong> Modules (L203_009)1652341. Drive and electronics module1. Robotics interface module2. Storage expansion module2. CAPs A and B (shown on front, right door)3. Left front door4. Customer Interface Module<strong>Library</strong> ComplexA library complex is composed of two or more libraries connected by pass-thruports (PTPs).The maximum size library complex possible consists of either:• 32 libraries for Host Software Component (HSC) systems, connectedthrough PTPs, containing over 200,000 cartridge slots and 2,048 tapedrives• 31 libraries for Automated Cartridge <strong>System</strong> <strong>Library</strong> Software (ACSLS)connection, connected through PTPs, containing over 200,000 cartridgeslots and 1,984 tape drives96154 Third Edition 3
Introduction■ <strong>Library</strong> ModulesThe base library consists of three modules:1. Drive and Electronics Module2. Robotics Interface Module3. Customer Interface ModuleBesides the three modules, up to three Storage Expansion Modules may beadded per library to increase capacity. These expansion modules are installedbetween the Robotics Interface Module and the Customer Interface Module.With a PTP installed between two or more libraries, all libraries can share theircartridges and effectively act as a single system.Figure 2. Base <strong>Library</strong> with One Storage Expansion Module (L203_007)1 2 3 4L203_0071. Drive and electronics module (rear)2. Robotics Interface module3. Optional Storage Expansion Module (upto three can be installed)4. Customer interface module4 Third Edition 96154
Drive and Electronics Module■ Drive and Electronics ModuleTape DrivesT9x40The major components of this module include:• From one to 64 tape drives• Primary and redundant Electronic Control Modules (ECMs)• Load Sharing Power Supplies for the tape drives and robots• Accessory racks (2 or 4)• Power Distribution Units- main and N+1 (standard) or main plus 2N(optional)<strong>SL8500</strong> library supports from 1 to 64 drives. The interface to these drives isfiber-optic based; meaning Fibre Channel, FICON 1 , or ESCON 2 attachments.The following table lists the supported vendors, drives types, and interfaces.Table 1. Supported DrivesVendor Drive Type Host Interface TypeT9840AFibre Channel, ESCONStorageTekT9840BFibre Channel, FICON, ESCONT9840CFibre Channel, FICON, ESCONT9940BFibre Channel, VSM ESCONHP (Gen2) Linear Tape-Open (LTO) Fibre ChannelIBM (Gen2) Linear Tape-Open (LTO) Fibre ChannelQuantum Super DLT (SDLT600) Fibre ChannelStorageTek’s T9x40 tape drives are high-performance drives designed forenterprise and client-server environments. There are two models available:T9840The access-centric T9840 Tape Drive is ideal for applicationsthat demand high data throughput and fast recall. These drivesgive you access to data at an average of 8 seconds, store up to40 GB, with transfer rates of up to 30 MB/s.1. Short for Fiber Connection, or Fiber Connectivity—IBM’s fiber optic channel technologythat extends the capabilities ESCON. FICON supports full duplex data transfers overlonger distances.2. Short for Enterprise <strong>System</strong>s Connection, or Enterprise <strong>System</strong>s Connectivity—an IBMfiber optic channel technology that supports half duplex data transfers up to 200 Mb/s.96154 Third Edition 5
IntroductionT9940 The T9940 Tape Drives are designed for high-capacity storageapplications. They use a single reel cartridge tape for highercapacities of up to 200 GB with transfer rates of up to 30 MB/s.LTO UltriumLinear Tape-Open (LTO) is a set of tape data format standards created toenable data interchange among different LTO Ultrium tape drive vendors.These LTO Ultrium standards allow data cartridges to be shared.The LTO Ultrium Generation 2 tape drives store up to 200 gigabytes of nativedata on a single cartridge. These drives are a single reel, thread-and-loaddrive with a native transfer rate of 30-35 MB/s with capacities of up to 200 GB.Super DLTThe Super DLT (SDLT) is a standard for mid-range UNIX and Windowsplatforms. The SDLT 600 incorporates an advanced tape recording technologyfor high capacity tapes, up to 300 GB, with transfer rates of up to 35 MB/s.Electronics Control ModuleEach library contains an electronics control module.HBK CardThe HBK card contains flash memory and feature upgrade controls; it resideson a separate logic card within the control module. It contains theconfiguration, firmware versions, and features for the library.Configuration<strong>Library</strong> configuration is retained on the flash memory card. This savessignificant time in cases where an HBC card must be replaced, because thenew card fetches the configuration from flash memory instead of requiringmanual re-configuration by a service representative.Firmware VersionsFlash memory holds both the most recently activated firmware version and theprevious firmware version. Therefore, if there is a requirement to returnmachine control to a previous version, a service representative merely reactivatesthe previous version and places the now-deactivated version into the“previous” state.FeaturesWhen features are added to a library, they are tracked to the machine’s serialnumber 3 . Any upgrade must be matched to the serial number before6 Third Edition 96154
Drive and Electronics ModuleHBM CardHBC CardHBT Cardactivation. The upgrade process is accomplished over the command lineinterface (CLI) by the service representative.The HBM backplane provides CompactPCI Bus card slots and proprietarycard slots for the tape drive interface card (HBT).The HBC card is the library controller, responsible for coordinating allcomponent operations within the library. It is the interface between the hostand the library. One HBC card can control a library’s operation, but a secondHBC is available to assure redundancy. Operating voltage for HBC cards is+3.3 VDC.In addition to the cards in the electronics control module, the HBC cardinterfaces with the following cards and components:• Ethernet hubs (<strong>Library</strong>-to-library LANs, tape drive service LAN)• TCP/IP/Web host interface• HBS cards (robots)• Power, smoke, and environmental monitoring circuits throughout thelibrary• Flash memoryThe HBT card translates commands from the HBC controller card into uniquedrive commands, transferred across differential RS422 lines. The HBT cardcontain 66 Universal Asynchronous Receiver/Transmitters (UARTs); 64 areresponsible for the parallel-to-serial conversion for the tape drives and theremaining two communicate with the tape environmental monitor card (HBDcard).3. Machine serial numbers are on the ceilings of each library.96154 Third Edition 7
Introduction■ Robotics Interface ModuleThe robots move cartridges between storage slots, between slots and tapedrives, and between the CAP and slots.There are four robotic rail assemblies in the library that provide both powerand communications to the four or eight robots. Each robot can service up to16 tape drives. Robots consists of:• Rail, brush, and HandBot assemblies• A Z-mechanism for vertical motion of the hand• A wrist-mechanism for lateral or horizontal motion• A bar-code scanner for both targeting and reading cartridge labels• A proximity sensor for detection of empty slots and unlabeled cartridges• A belt-driven gripper mechanism for gripping the sides of the cartridgesImportant:Because of the four individual rails, each robotic assembly is considered alibrary storage module (LSM). So the architecture of the <strong>SL8500</strong> provides fourseparate and unique LSMs within a single library.To optimize system performance, the HandBots automatically implement theFast Load capability. Once a HandBot successfully inserts a tape cartridgeinto a drive, it is immediately available for the next request and does not waituntil the drive reports that the cartridge has been loaded. The <strong>SL8500</strong> librarycontrol electronics waits to return the response to the mount request until itdetects that the tape drive has successfully loaded the cartridge tape.Two HandBots can service a single rail section within the library, providingredundancy. Each HandBot has two motors, if one fails, the other motor ispowerful enough to move the defective HandBot into the forward service area.If both the motors fail for a HandBot, then the redundant HandBot moves thedefective HandBot into the forward service area thus continuing HandBotoperations.8 Third Edition 96154
Robotics Interface ModuleFigure 3. HandBot (Detail)3241L203_5781. Lower pulley2. Pre-load assembly3. Gripper4. HBB cardOne robotics interface module contains up to 800 cartridge storage slots.Figure 4. HandBot on the Power Rail (L203_010)96154 Third Edition 9
IntroductionHandBot NumberingRails are numbered from 1 (top rail) to 4 (bottom rail). They are alsodesignated as separate library storage modules (LSMs) within a library.As examples:• Rails 1 and 2 can be designated LSMs for HSC, while rails number 3 and 4can be designated LSMs for ACSLS.• If only one host exists, all rails become separate LSMs for that host.See Appendix A, “Cartridge Slot Locations” for more details.HandBot have the following numbering:1. <strong>Library</strong> number (within a library complex)2. Rail number – Rails are numbered 1 through 4, rail 1 is the top rail3. Column number – Columns are “signed” numbers referenced from thecustomer interface module, where +1 is right of the center of the drivebays and -1 is to the left of the drive bays4. Side number – Outer wall = 1, Inner walls = 2Note: Side numbers for HandBots are numbered according to their endstops: 1 (left HandBot stop) and 2 (right HandBot stop).5. Row number – Numbered consecutively, from the top downNote: Because HandBot hands are not storage slots, their rownumbering is 0.As examples:• Location 1, 1, 0, 1, 0 = the HandBot on rail 1 (top rail) that encounters thestop on the left side of the customer interface module• Location 1, 1, 0, 2, 0 = the HandBot on rail 1 (top rail) that encounters thestop on the right side of the customer interface module• Location 1, 2, 0, 1, 0 = the HandBot on rail 2 (next rail down) thatencounters the stop on the left side of the customer interface module■ Customer Interface ModuleThe customer interface module consists of the following components:• Keypad• Touch screen operator controlpanel (optional)• Cartridge storage slots• Cartridge access port (CAP)• Elevator assembly• End stops• Service safety door10 Third Edition 96154
Customer Interface ModuleKeypadFigure 5. Keypad8CAP ACAP B1 2 3 4 5 6 7L203_4701. Emergency robotics stop switch2. Left service safety door key3. CAP A button4. <strong>Library</strong> active indicator5. CAP B button6. Service required indicator7. Right service safety door key8. CAP unlocked indicatorsThe keypad has the following buttons, switches, and indicators:Table 2. Keypad Switches, Buttons, and IndicatorsEmergency roboticsstop switchActuate the emergency robotics stop switch todisconnect DC power to the power rails. When it issafe to restore power, press the switch to restorepower to the rails.CAP A button Press to open and close CAP A.CAP B button Press to open and close CAP B.<strong>Library</strong> activeindicatorCAP unlockedindicatorsService requiredindicatorService safety doorkeys (left and rightdoors)The green indicator flashes when the library isperforming a task.The amber LED light is On when the CAP isunlocked, and Off when locked.When the light is On and blinking, manualintervention required. Open the CAP and make surethe cartridges in the CAP slots are properly seated.This red indicator is lit when operator intervention isrequired.Allows the service representatives to place the libraryin maintenance mode.96154 Third Edition 11
IntroductionOperator PanelIn the <strong>SL8500</strong>, the StreamLine TM <strong>Library</strong> Console TM software is the operatorpanel software application capable of execution on both a touch-screenoperator control panel (resident within the <strong>SL8500</strong> frame), as well as a remoteoperator console (network PC).The <strong>Library</strong> Console runs a JAVA application that provides the graphical userinterface (GUI) for the library. The <strong>Library</strong> Console communicates to the librarycontroller (HBC) through an Ethernet connection. In compliance with section508 of the Americans with Disabilities Act, the touch-panel is accessible froma sitting or standing position.The keypad interface of the software for the touch-panel enablesalphanumeric data entry to the operator panel application from the localoperator panel. The local operator panel does not contain either a keyboard ora mouse.Use the <strong>Library</strong> Console to:• View and modify status, statistics, and properties of the library and theassociated devices (drives, CAP, robots, and elevators)• Perform library audit and code load• Display standard reports• Display standard events• Manage securityTouch-Screen Operator Control PanelThe touch screen operator control panel is an optional feature on the front ofthe library. This panel consists of a flat screen display with a touchableinterface.The local operator panel has the following features:• 12.1 inch flat panel display• Touch screen interface (no keyboard/mouse option)• Resident within the library frame• Ethernet interface• JAVA application that provides the Graphical User Interface (GUI) for thelibraryRemote Operator ConsoleThe remote operator console is a standard feature that displays the operatorpanel application on a personal computer (PC). A CD containing the <strong>Library</strong>Console software is supplied with each library that you can use to install theapplication.12 Third Edition 96154
Customer Interface ModuleCartridge Storage SlotsA basic library can store up to 1448 data cartridges. This total does not includecartridges in the cartridge access port (CAP) or the reserved slots. A total of192 slots are dedicated to diagnostic and cleaning cartridges that are notlocated in the data cartridge slots. See Chapter A, “Cartridge Slot Locations”for information on slot locations.There are also eight drop-off slots in the library, two for each robot. These slotsare used in the event of a robotic failure when there is still a cartridge in thehand.Table 3 lists the capacity variations for the <strong>SL8500</strong> library.Table 3. <strong>SL8500</strong> Capacity VariationsModule TypeCartridgeCapacityCartridge Access Port (CAP)Total inStorageexpansionmodulesDrive and Electronics 1 0 0Robotic Interface 800 0Total CartridgesCustomer Interface 2 648 0Basic library 1448 0 1448First storage expansionmodule1728 1728 3176Second storage expansionmodule1728 3456 4904Third storage expansionmodule1728 5184 66321 There are no cartridge storage locations in the Drive and Electronics Module.2 The Customer Interface Module contains 192 storage slots for cleaning anddiagnostic cartridges .CAPs allow operators to enter cartridges and eject cartridges from the library.A total of 39 cartridges can be imported or ejected at one time through eachCAP. <strong>SL8500</strong> library CAPs are installed on the right access door (Figure 1 onpage 3). See Chapter 3, “<strong>Library</strong> Operation” for information on CAP operation.Note: A CAP will not operate unless the library is in Automated mode.96154 Third Edition 13
IntroductionElevator AssembliesTwo standard elevator assemblies are used to transport up to four cartridgesat a time across rail boundaries. The elevator assembly is located in the frontportion of the customer interface module. The elevator assembly is poweredby +48 VDC, routed from the drive and electronics module, and an HBV cardat the rear of the assembly. Operation is controlled by the HBZ card.Elevator assemblies in the <strong>SL8500</strong> library are belt-driven and are therefore notcounterweighted.Standard HBZ CardThe standard elevator and turntable assembly controller (HBZ, on the left) isdesignated 1. It controls operation of:• Both elevators• Standard CAP A• Service safety door■ Storage Expansion Modules■ PowerBesides the basic configuration, up to three Storage Expansion Modules maybe added per library to increase capacity. These expansion modules areinstalled between the Robotics Interface Module and the Customer InterfaceModule.Each Storage Expansion Module increases the depth of the library by 1 m(3.125 ft.) per module and can contain up to 1,728 data cartridge slots.There are five (5) power grids that distribute power throughout the library.Two of the power grids carry 220 VAC; the other three carry 48 VDC.• The two AC power grids distribute 220 VAC to the different Load SharingPower Supplies, Electronics Control Module (ECM), and accessory racks.• The three DC power grids supply 48 VDC to the tape drives, robots, andfront frame components.- The Drive Power Grid supports up to 64 tape drives (with the propernumber of Load Sharing Power Supplies). A single tape drive powersupply provides power for up to 8 tape drives, so at least 8 powersupplies are required for 64 tape drives (in an N+1 configuration).- The Robot and Pass-thru Port (PTP) Power Grid supplies power to therobots and the four pass-thru ports (PTP). A single power supply can14 Third Edition 96154
Powerpower up to four robots, so two power supplies are required for eightrobots.- The Front Frame Power Grid is powered by a single Load SharingPower Supply that supplies 48 VDC power to the two Cartridge AccessPorts if present, one Turntable, two Elevators, and the Safety Door.Note: The power supply for the Front Frame Power Grid is in the CustomerInterface Module. All the other Load Sharing Power Supplies arelocated in the Drive and Electronics Module.Power ConsumptionPower consumption for the library is as follows:• Single phase configurations- 24 Amps per phase (minimum) – 13.0kW, 44,382 Btu/hr- 768 Amps per phase (maximum) – 416 kW, 1.4 M Btu/hr• Three phase configurations- 40 Amps per phase (minimum) – 13.0 kW, 44,382 Btu/hr- 280 Amps per phase (maximum) – 416 kW, 1.4 M Btu/hrNote: Power cabling must be done by a licensed electrician.Power ConfigurationsTwo power configurations are available for the <strong>SL8500</strong> library:1. N+1 base power configuration2. 2N power configurationN+1 Base Power ConfigurationThe base power configuration contains one system power distribution unit(PDU) and one N+1 PDU.• The system PDU, connected directly to the branch circuit, provides ACpower to three DC power grids and the electronics control module.• The N+1 PDU supplies added +48 VDC load sharing power to each of thethree DC power grids and an extra AC-to-DC power supply for theelectronics control module.The base power configuration provides power to the:• Tape drive power supplies• Robotic rail power supplies• Customer Interface Module power supplies• Electronics control module power supplies96154 Third Edition 15
IntroductionNote: The base power configuration does not offer redundant AC power.2N Power ConfigurationThe 2N power configuration contains the base power configuration (PDU 1)and a second PDU, PDU number 2.This configuration provides power to the same components as N+1, pluspower for:• Optional, redundant load sharing power supplies• Two additional accessory racks for customer components• Redundant controller cardsNote: The 2N PDU is required for the 2N drive power, 2N robotic power, andalso for the additional rack installed.■ <strong>Library</strong> SpecificationsTable 4. <strong>Library</strong> SpecificationsPhysical• Height• Width• Depth (Base <strong>Library</strong>)- With 1 expansion module- With 2 expansion modules- With 3 expansion modules2.37 m (236.6 cm) or 7.76 ft (93.15 in.)1.7 m (170.8 cm) or 5.6 ft (67.25 in.)2.8 m (276.9 cm) or 9.1 ft (109 in.)3.7 m (372.1 cm) or 12.2 ft (146.5 in.)4.7 m (467.4 cm) or 15.3 ft (184 in.)5.6 m (562.6 cm) or 18.5 ft (221.5 in.)• Weights- Base <strong>Library</strong>- With 1 expansion module- With 2 expansion modules- With 3 expansion modules• Weight distribution per pad<strong>Library</strong> only:1954 kg (4,309 lb)2392 kg (5,274 lb)2830 kg (6,239 lb)3396 kg (7,487 lb)454 kg (1,000 lb )• Service Clearances- Customer Interface Module- Drive & Electronics Module- Pass-thru port (between)• Temperature- Operating- Shipping- Storing• Wet bulb (operating)66 cm (26 in.)85 cm (33.5 in.)15 cm (6 in.)+16 to +32°C (+60 to +90°F)-30.5 to +49°C (-23 to +120°F)+4.4 to +32°C (+40 to +90°F)+25.6°C (+78°F) maximum, non-condensing16 Third Edition 96154
Embedded FirmwareTable 4. <strong>Library</strong> SpecificationsPhysical• Humidity- Operating- Shipping- Storing20% to 80%5% to 90%20% to 80%• Operating Heat Output 44,380 Btu/hr (maximum loading**)Calculation for this is: 3.41214 x Watts =Btu/hr• Power ConsumptionSingle phase configuration andthree phase configurations13.0 kW (maximum loading**)13.7 kVAkVA = kWatts ÷ Power factorThe power factor for the <strong>SL8500</strong> = 0.95**Maximum loading includes 64 tape drives, 4 fully loaded racks, 8 HandBots, allthe front frame components (CAPs, service door, and elevators), plus redundantcontrol modules.■ Embedded FirmwareSecurityTape Drive Weights without Tray• T9840 = 3.9 kg (8.5 lb)• T9940 = 6.8 kg (15.0 lb)• IBM LTO = 2.5 kg (5.5 lb)• HP LTO = 2.5 kg (5.5 lb)• Drive Tray = 4.3 kg (9.5 lb)Tape Drive Weights with Drive TrayT9840 = 8.2 kg (18.0 lb)T9940 = 11 kg (24.3 lb)IBM LTO = 6.9 kg (15 lb)HP LTO = 6.9 kg (15 lb)• Cartridge Tape Weights are approximately 227 g (8.0 oz) or 0.227 kg (0.5 lb)Operating firmware is resident on the HBC card from the factory. The featuresof the firmware are explained in the following sections.Access to the <strong>Library</strong> Console is secured by a fixed set of user accounts at thesite. The site user accounts include the customer administrator, StorageTekcustomer service engineer (CSE), and third party field service technician.The <strong>Library</strong> Console security system requires activation of the site useraccounts with an activation password. See “Dynamic World Wide Name” onpage 23 for more information.96154 Third Edition 17
IntroductionOperating FirmwareSome key features of the <strong>SL8500</strong> firmware are:1. Two firmware versions may be held on the HBC card. When firmware isupgraded, the earlier image of firmware remains in memory and may berestored if required.2. Auto Discovery of additional tape drives3. Auto Discovery of new cartridge slots and added libraries4. Automatic handling of dynamic World Wide Name (dWWN) assignments■ Host <strong>Library</strong> InterfacesAlthough an <strong>SL8500</strong> may be installed on a network, it is preferable that libraryactivity be isolated from regular network traffic. Therefore, three distinctnetworks are present:• Public network – handling all customer-attached networking for the publicsystem controller ports, such as:- Web- <strong>Library</strong>-to-host commands• Private network – handling all internal library networking for the privatesystem controller ports, such as:- CAP- Elevator and turntable assembly- Drive TTI- PTP- Operator panel• Multi-library network – handling all library-to-library networking betweenthe dedicated system controller ports.Two Ethernet ports are supplied on the HBC card for the multi-library andprivate networks; up to four more ports—two for public and two for privatenetworks—are available.Available host software are:• ACSLS 7.1• HSC 6.0.1Drive interfaces can be Fibre Channel, ESCON, or FICON.The host interface connection to the <strong>SL8500</strong> library is through the TCP/IPprotocol over an Ethernet 10/100-baseT. This connection scheme supports18 Third Edition 96154
<strong>Library</strong> Management Softwareenterprise-level system attachments and uses a Host Software Component(HSC) to manage and communicate with the library.■ <strong>Library</strong> Management SoftwareThe library management software controls the library hardware to mount anddismount cartridges on drives and move the robot. When the library is inautomated mode, these operations occur without manual intervention. Thesoftware determines the location of the cartridge by accessing the audit datauploaded from the library. The software then allocates the drive to receive thecartridge.These application maintain a database that tracks volume serial numbers(VOLID) of cartridges and their current locations in the library.Host Software ComponentACSLSWhen an <strong>SL8500</strong> library is in a configuration with a Multiple Virtual Storage(MVS) host, the host must run a version of the StorageTek Host SoftwareComponent (HSC) along with the Storage Management Component (SMC).StorageTek’s HSC and SMC:• Influence allocations• Intercept mount and dismount messages• Receive requests from the interface and translates them into commandsHSC resides in the MVS host, but is invisible to the actual operating system.HSC 6.0 or higher is required for host control. However, for new drives, higherlevels of HSC may be required.ACSLS is a software package that manages library contents and controlslibrary hardware for the mounting and dismounting of cartridges.Note: ACSLS 7.1 or higher is required.This application provides library management services such as cartridgetracking, pooling, reports, and library control.96154 Third Edition 19
Introduction20 Third Edition 96154
Configuration Information2This chapter describes how to verify the library and drives configurationentries for operation.Some configuration values, such as drive locations, capacity, and drive typesare set through an automatic configuration process that occurs during an IPL.However, before the library is fully operational, some of the configurationvalues must be verified and entered manually.Typically, your service representative will configure your library duringinstallation, during firmware upgrade, or after drives are added. If you mustchange the library’s configuration, you may enter the values through the<strong>Library</strong> Console. <strong>Library</strong> configuration also includes setting up cleaningoptions using the library management software.■ Installing StreamLine <strong>Library</strong> ConsoleStreamLine <strong>Library</strong> Console is a software application that provides all of thefunctions to test, monitor, and operate the library. You should also obtain andactivate this software before installing the library.StreamLine <strong>Library</strong> Console is contained on a compact disk (PN 3139995xx).This software is loaded first to your personal computer, then customers mustalso load this on to their remote personal computer.To install the software on your PC:1. Run the <strong>Library</strong> Console installer from the CD.Note: Make sure to select the remote option as the installation type.2. Follow the guided instructions to complete the installation.■ Activating PasswordIf you are logging on to the <strong>Library</strong> Console for the first time you must activateyour user account (admin) with an activation password.The <strong>Library</strong> Console security system requires activation of your site useraccount with an activation password. This activation password is valid for onetime use only. After the initial login with the activation password, the systemprompts you to setup a new password for the user account. You can then96154 Third Edition 21
Configuration Informationshare the new password with other users requiring access to the <strong>Library</strong>Console using the same user account.Your service representative will retrieve the Activation Password for thecustomer administrator account.To Activate your User Account:1. Logon to the <strong>Library</strong> Console by entering your site user ID (service, admin,or oem), activation password, and the library name.Note: The activation password is case sensitive. You must type thispassword exactly as it was issued by the Activation PasswordRequest application. If you there is a mismatch, you have to obtainanother password from the Activation Password Requestapplication.2. The system authenticates the user ID and the activation password for thelibrary.3. If the authentication is not successful, the system displays the followingerror message:.“account is not activated. Contact customer Support for an activation password.”4. If the logon process is successful, the system directs you to the changepassword screen to do the following:a. Type a new password.b. Retype the new password to confirm.Note: It is mandatory to assign a new password to your user ID for futureaccess to the <strong>Library</strong> Console.■ Verifying Configuration EntriesTo verify or enter configuration details using the <strong>Library</strong> Console, access the<strong>System</strong> Details module and then select the ? button for the online help.Complete or verify the following fields to make the library and the drivesoperational:Table 5. <strong>Library</strong> Configuration EntriesFields Valid Values DescriptionOperationalStateOfflineOnlineOffline indicates that the library is in the manualmode.Online indicates that the library is in the automaticmode.22 Third Edition 96154
Dynamic World Wide NameTable 6. Drive Configuration EntriesFields Valid Values DescriptionPort X Enabled TrueSetting this value will turn on or off the physical portFalse(A or B) on the drive.OperationalStateOfflineOnline■ Dynamic World Wide NameIf you select False then the communication channelbetween the host software and the drive is disabled.Offline indicates that the drive is not available forhost activity.Online indicates that the drive is available for hostactivity.To correct re-configuration problems within a customer’s Fibre Channelnetwork, library firmware includes the dynamic Worldwide Name (dWWN)enhancement. Without the dWWN feature, if a device (for example, adefective tape drive) requires replacement, the new device is detected by thenetwork as “unknown” and re-configuration of the network is required.When enabled, dWWN assigns names to library drive slots rather thandevices. When a drive is replaced, the new drive receives the same name asthe one it replaced, thereby eliminating the need for system re-configurationThere are three World wide Names reserved for each drive bay: Node, Port A,and Port B.CAUTION:Changing the dWWN feature must be coordinated with thesystem administrator. The feature is usually enabled atinstallation time.A record of the configuration should be kept; this is not onlysomething that should always be done, but it absolutelyessential with the dWWN feature to eliminate system issues inthe case of an failure.<strong>System</strong> problems: When enabling dWWN, all drives must be atthe proper firmware level. If a drive has down level firmware, itwill remain in the “configuring” state and is unavailable for hostuse.Important:Tape drives that are migrated from other libraries will be assigned a differentWWN when installed in an <strong>SL8500</strong> library. The existing storage area networkwill not associate this new WWN with the originally assigned name. A bestpractice is to configure all drive bay slots in the library and verify that the tapedrive data path is bound correctly over the network.96154 Third Edition 23
Configuration Information■ Upgrading FirmwareThe initial library code is factory-installed on all new libraries and resideswithin the flash memory on the HBC card.Use the <strong>Library</strong> Console to download new firmware to the library.There are two types of firmware packages (image files) for the library:• <strong>SL8500</strong> code for the library controllers and the associated devices• <strong>Library</strong> Console application code for the local operator consoleNotes: You can download code using only the remote operator console andnot the local optional touch screen operator control panel. So, if thelibrary has the optional touch screen panel, you can load updates tothe <strong>Library</strong> Console application using the remote operator console.The <strong>SL8500</strong> code does not contain the code for the different drivetypes.Before launching the code load utility, download the firmware upgradepackage from the customer resource center (CRC) at http://www.support.storagetek.com to a folder on your PC.Note: The firmware package is a .jar file. The firmware package for the<strong>SL8500</strong> library firmware is <strong>SL8500</strong>.jar and for the touch screenoperator control panel is SLConsoleLocalDist.jar.Upgrading firmware is a three-step process:1. Download the firmware package2. Activate the downloaded firmware currently residing in the library complex3. Reboot the library to make the firmware operationalNote: The library has two versions of the image file residing in the flashmemory. After the library completes the reboot process, the latestimage becomes active and the earlier version that serves as a backupmay be restored if required.For instructions on loading new code, refer to the online help documentationaccessible through the application.24 Third Edition 96154
Upgrading the Remote <strong>Library</strong> Console■ Upgrading the Remote <strong>Library</strong> ConsoleTo upgrade the Remote <strong>Library</strong> Console application installed on your PC:1. Download the appropriate <strong>Library</strong> Console code installer file from thecustomer resource center (CRC) at http://www.support.storagetek.com toa folder on your PC.Microsoft Windows installer file: SLConsoleWindowsSTK.exeSun Solaris installer file: SLConsoleSolarisSTK.binNote: You may want to uninstall the previous version of the applicationbefore launching the installer program.2. Run the <strong>Library</strong> Console installer to install the application on your PC.Note: Make sure to select the remote option as the installation type.3. Follow the guided instructions to complete the installation.96154 Third Edition 25
Configuration Information26 Third Edition 96154
<strong>Library</strong> Operation3The library has three modes of operation, automated, manual, andmaintenance. These modes are defined and explained in the followingsections.■ Automated Mode of OperationThe automated mode of operation is active when a library system or librarycomplex is automatically mounting/dismounting cartridges without physicalintervention by a person.General automated library operations consist of the following activities:• “Mounting and Dismounting of Cartridges”• “Performing CAP Activities”• “Monitoring <strong>Library</strong> Events”• “Cleaning of Drives”These activities are explained in the following sections.Mounting and Dismounting of CartridgesThe central function of the library or library complex is the automatedmounting and dismounting of cartridges. Host mount/dismount commands areaccepted by the library’s central processor and translated into roboticcommands that are performed by the robots.Mount SequenceA simplified mount sequence involves:• A host requests that a specific volume serial number (VOLID) for acartridge be mounted in a drive.• The library transmits to the host that the VOLID is located within the libraryand a drive is available to satisfy the mount request.• The library assumes responsibility for the mount.• The host command is translated by the library controller into motioncommands for the robot.• The cartridge is taken from its slot and placed in the drive.• The library returns status to the host that the mount operation iscompleted.• The drive then performs the read/write activity directed by the host.96154 Third Edition 31
<strong>Library</strong> OperationDismount SequenceA simplified dismount sequence involves the following:• A host requests that a specific VOLID be dismounted from a drive.• The library transmits to the host that the VOLID is located in the drive andthe library is available to satisfy the dismount request.• The library assumes responsibility for the dismount.• The host command is translated by the library controller into mechanicalcommands for the robot.• The cartridge is taken from the drive and placed into its home slot.• The library returns status to the host that the dismount operation iscompleted.The library then awaits another activity directed by the host or continues thoseactivities waiting in the library’s queue of commands.Performing CAP ActivitiesThe CAP door contains a standard CAP A (on the left, as viewed from thefront); an additional CAP (CAP B, on the right) is also available. CAPs allowyou to import (enter) cartridges and export (eject) cartridges from the library.Figure 1. CAP A Unlocked (L203-473)12L203_4731. CAP slot 2. Three magazines with 13 slots each32 Third Edition 96154
Automated Mode of OperationA single CAP contains three magazines; each magazine contains 13 cells,allowing import/export of up to 39 cartridges at a time. The magazines can beremoved from the CAP to import cartridges in a batch mode. Rotation of theCAP is accomplished through a motor. CAP operations are controlled by theHBZ logic card.The CAP magazines span the lower three rails and on the right side of thelibrary only. If a cartridge is required to be imported to or exported from the toprail on the right side, an HandBot places the cartridge in an elevator slot toaccomplish the move.To open the CAP:1. Logon to the <strong>Library</strong> Console and select Tools > Utilities.2. Select the CAP and then change the Locked status to False, and thenselect Apply. See the online help documentation accessible through the<strong>Library</strong> Console application.Note: The LED light is on when you unlock the CAP and the CAP statuschanges to “unlocked” in the host library management software.3. Press the appropriate CAP Unlocked button (CAP A or CAP B) on theoperator keypad (Figure 5 on page 11).Note: This action causes the CAP to rotate outward and present themagazines to load or unload cartridges.To close the CAP:1. Press the appropriate CAP Unlocked button (CAP A or CAP B) on theoperator keypad.Note: The above action causes the CAP to rotate inward for roboticaccess.CAUTION:Possible Equipment Damage. DO NOT manually force theCAP to open or close.2. From the <strong>Library</strong> Console, select Tools > Utilities.3. Select the CAP and then change the Locked status to False, and thenselect Apply. See the online help documentation accessible through the<strong>Library</strong> Console application.Cartridge Slot LocationsSlot locations within the CAPs have the following addressing:1. <strong>Library</strong> number (within a library complex)2. Rail number – Rails are numbered 1 through 4, rail 1 is the topmost rail.96154 Third Edition 33
<strong>Library</strong> OperationNote: CAP slots begin numbering at rail 2.3. Column number – Columns are “signed” numbers as seen from the frontof the library, where +1 is right of the drive bays and -1 is to the left of thedrive bays.Note: Both CAPs are column signed as 23.4. Side number – Outer wall = 1, Inner wall = 2Note: For CAPs, side number -1 = CAP A and side number +1 = CAP B.5. Row number – Numbered consecutively, from the top downNote: CAP slots begin with row number 0, which is the magazine handle.CAP slots are not considered as storage slots.An example of how this notation appears on the operator panel is shown inFigure 2.Figure 2. StreamLine <strong>Library</strong> Console – CAP34 Third Edition 96154
Automated Mode of OperationImporting CartridgesWhen a cartridge is imported, the VOLID is read by the HandBot hand’s barcodeline scanner and the cartridge is assigned a home slot by the librarycontroller or mounted on a drive, depending upon the purpose for which it wasimported. The location of a stored cartridge is recorded in library memory,designated in the form of library number, rail, column, side, and row numbers(see Appendix A, “Cartridge Slot Locations”). The location is also transmittedto the host and stored in its cartridge database.Cartridges must be properly labeled (see “LTO Ultrium Generation 2 (Gen2)Fibre Channel Drives” on page 53) and correctly placed in the CAP slots.Insert the cartridges so that the customer label (if present) is facing up, thehub gear is facing down, and the VOLID label is facing you. Cartridges may beplaced in any CAP slot, in any order; the HandBot audits all CAP slots uponclosure of the CAP door. See “Cartridge Labels” on page 46 for properlabeling and placement information.Figure 3. Placement of Cartridges with the Magazine Inside the CAP L203_449)123L203_4491. Customer label (9x40 only)2. Magazine slots3. Volume serial number label96154 Third Edition 35
<strong>Library</strong> OperationFigure 4. Placement of Cartridges with the Magazine Outside the CAP L203_474)2314L203_4741. CAP2. CAP magazine removed3. Magazine slots4. Inserting cartridge with hub downWhen a CAP is in automated mode, it is unlocked unless it is currently beingused to import cartridges.To import cartridges using the CAP:1. Make sure that the CAP is unlocked (see Table 2 on page 11 for adescription of CAP indicators).2. Press the appropriate CAP Unlocked button (CAP A or CAP B) on theoperator key pad.Note: This action causes the CAP to rotate outward and present themagazines to load cartridges.3. With the CAP open, you may enter the cartridges into the magazines whilethe magazines are in the CAP; or you may remove the magazines from theCAP, insert cartridges into the magazines, and then replace the cartridgefilledmagazines into the CAP.Note: Cartridges may be placed in any CAP slot, in any order; the libraryaudits all CAP slots when the CAP door closes.36 Third Edition 96154
Automated Mode of OperationCAUTION:Possible Media Damage. While cartridges that do notcontain external labels or are placed upside-down can beentered, this is not advisable. It presents problems when anaudit is performed. Likewise, cartridges that containunreadable or damaged labels should not be entered.4. Press the appropriate CAP Unlocked button (CAP A or CAP B) on theoperator key pad.Note: This above action causes the CAP to rotate inward for roboticaccess.5. Make sure that the CAP is locked (see Table 2 on page 11 for a descriptionof CAP indicators).CAUTION:Possible Equipment Damage. DO NOT manually force theCAP to open or close.Exporting CartridgesWhen a cartridge is exported, you must specify the VOLIDs of the cartridgeyou wish to remove from the library. The VOLID location is then retrieved fromthe librarys’ memory, the HandBot moves to the cartridge, removes it from itsslot, and the cartridge is placed into the CAP slot. A total of 39 cartridges maybe exported at one time through each CAP.After the CAP is opened, the location of the cartridge is erased from thelibrarys’ memory and the host database. This is especially important whenexporting cleaning cartridges from a library; if the cleaning cartridge is notremoved from the CAP and the CAP is closed, the library treats the cartridgeas “new” and the expired cleaning cartridge is used again.To export cartridges using the CAP:1. Type the eject command at the console. Refer to your library managementsoftware publication for the command syntax.2. The robot places cartridges into the CAP slots until all the specifiedcartridges are in the CAP. Refer to your library management softwarepublication for the console messages.3. Press the appropriate CAP Unlocked button (CAP A or CAP B) on theoperator key pad.Note: This action causes the CAP to rotate outward and present themagazines with the exported cartridges.4. With the CAP open, remove the exported cartridge either by removing thecartridges from the magazine inside the CAP, or by removing themagazine from the CAP and then taking the cartridges from the magazineoutside the CAP.96154 Third Edition 37
<strong>Library</strong> OperationIf you remove the magazine, replace the empty magazine inside theappropriate CAP (CAP A or B).5. Press the appropriate CAP Unlocked button (CAP A or CAP B) on theoperator key pad.CAUTION:Possible Equipment Damage. DO NOT manually force theCAP to open or close.6. If more cartridges need to be exported, the robot continues filling the CAP.Wait until the CAP door is unlocked and repeat steps 3 through 5.Note: The export operation ends automatically when all specified cartridgeshave been exported.Monitoring <strong>Library</strong> Events<strong>Library</strong> operations are continually monitored by the HBC controller. All eventsassociated with these operations are logged by the HBC card and can beretrieved by operators and service representative for examination.<strong>Library</strong> events are accessible from the <strong>Library</strong> Console (see “Event Monitors”on page 62). Events are represented by the following codes:• Action codes (what command was issued, such as “load drive”)• Result codes (what was the result of the action requested)• Known service plan (KSP) diagnosis (what mechanism or component isresponsible for the task or fault)See “Working with the Search Utility” on page 64 to lookup on a result code.Events are stored under three headings:• Communication events (host-to-library, library-to-library, and library-todrive).Data for these events include:- Date/time stamp- <strong>Library</strong> identifier- Drive identifier- Requestor- Interface protocol- Communication type• Error events, which include:• Date/time stamp• Drive identifier• Operation type• Four-digit (hexadecimal) Action Code• Interrupt level (generated by the hardware or software)• VOLID for media-related events38 Third Edition 96154
Manual Mode of OperationCleaning of Drives• Warning events, which indicate a loss of performance or events that maybe indicative of future, fatal errors. The data for these are the same as inerror events.The automatic mounting of cleaning cartridges can be enabled in one of twoways:• By installing cleaning cartridges in the reserved slots (see Appendix A,“Cartridge Slot Locations”). You can schedule a clean using your librarymanagement software. Refer to your library management softwarepublication for command syntax.• By importing a cleaning cartridge through a CAP during normal operations.See “Performing CAP Activities” on page 32.■ Manual Mode of OperationManual mode of operation is used when the library (or library complex) isunavailable for system use or human intervention is required. An example ofthis situation would be when a library experiences an unrecoverable error,making automated mounts/dismounts impossible.In the case of a failure of a non-redundant component (for example, a singleHBC controller card for the entire library), the library is said to be “unavailable”to the system. In this case, the entire library must be placed offline until therepair is accomplished.A library’s inability to automatically perform cartridge mounts/dismounts doesnot, however, stop cartridge tape activity—mount and dismount requests bythe host continue to be generated.To perform the cartridge activities, someone might be required to physicallyenter the library and manually perform the mount/dismount activitiespreviously done by the robot. The location of the cartridge to be mounted issupplied by the software and the slot location must be determined by thecoordinates shown in Appendix A, “Cartridge Slot Locations”.96154 Third Edition 39
<strong>Library</strong> OperationPrecautionsManual operations include:• “Placing the <strong>Library</strong> Offline”• “Determining the <strong>Library</strong> is Not in Automatic Mode”• “Entering the <strong>Library</strong>”• “Locating a Cartridge and Drive”• “Moving the Robot”• “Mounting a Cartridge”• “Dismounting a Cartridge”• “Placing the <strong>Library</strong> Online”• “Placing the Drives to Online”When you enter a library to manually mount and dismount cartridges, youmust strictly observe safety precautions and pay attention to the physicalspace restrictions.Safety PrecautionsIn manual mode, you must observe the following safety precautions. Be sureto always:• Ensure the library is offline.• Leave both the front access doors open whenever you work inside thelibrary. There are switches on each door frame that disconnect DC powerand signal lines to the library’s robotic motors when either access door isopened.Physical RestrictionsThe library design is optimized for high density, so there is not much free roomfor movement. Be careful not to:• Snag your clothing on the arrays that house the cartridges (only0.4 m [18 in.] of aisle clearance).• Bump your head or body against the arraysYou might also have to move a robot to gain access to a cartridge, in whichcase, you must avoid damaging the robot’s mechanical or electroniccomponents. See “Moving the Robot” on page 43).If you are manually loading or unloading a cartridge, your hands must remainclear of the drive’s mechanical and electronic load components.40 Third Edition 96154
Manual Mode of OperationPlacing the <strong>Library</strong> OfflinePlace the library offline using your library management software. Refer to youlibrary management software publication for the command syntax and consolemessages.Notes:1. Wait for the message confirming the library is offline. If the librarydoes not come offline, enter the command to display the status ofthe library.2. Wait for the outstanding processes to complete or type thecommand to force the library offline to all hosts.The library remains offline until you issue a command to place the libraryonline.Determining the <strong>Library</strong> is Not in Automatic ModeThe following conditions indicate that the library is not functioning in automaticmode:• One or both the library access doors are open.• The robot does not automatically mount and dismount cartridges.• The device tree in the StreamLine <strong>Library</strong> Console indicates that there is aproblem with the library.Entering the <strong>Library</strong>WARNING:Physical Injury. You can be injured if you do not follow thecorrect procedure to enter the library.To prevent personal injury, follow these precautions:1. Make sure that the library is offline (see “Placing the <strong>Library</strong> Offline” onpage 41).2. Do not attempt to override any of the electrical or mechanical safetydevices in the library.3. Do not enter the library without informing someone in the immediate area.4. Make sure both the front access doors are open.96154 Third Edition 41
<strong>Library</strong> OperationFigure 5. <strong>Library</strong> Front View (Access Doors Open) (L203_563)L203_5631 2 31. Left access door2. Robots3. Right access doorTo open the door:1. Insert the key and unlock the access door.2. Pull the paddle handle to activate the opening mechanism and open theaccess door. Opening the access door activates a switch, whichautomatically causes a software interrupt and stops the robot. Take thekey with you so that no one can close the door while you are inside, andthen enter the library.42 Third Edition 96154
Manual Mode of OperationLocating a Cartridge and DriveThe library management software provides the location and the VOLID of thecartridge and also the drive bay address available for the manual mount.Before you enter the library, write down the VOLID, cartridge location, and thedrive bay location.To locate a cartridge:1. Logon to the <strong>Library</strong> Console.2. Select Tools > Utilities and then select the Search tab.3. From the pull-down menu select Cartridge Location as the Search Type.4. Enter the VOLID of the cartridge you are trying to locate.5. Select the Requester as default from the pull-down menu.Note: The default requester displays the physical slot location address(see “<strong>SL8500</strong> Address” on page 68) of the cartridge. If you select alibrary management software as a requester, the system displaysthe HLI-PRC address (see “HLI-PRC Address” on page 80).6. Select the Cartridge Type (data, clean, unreadable label, duplicate label).7. Select Search button from the top right corner.The <strong>Library</strong> Console application displays the physical slot location address ofthe cartridge. See Figure 11 through Figure 18 on page 76 for pictorial maps.To locate a drive:Moving the RobotSee “Manually Locating a Drive Bay” on page 87.You might have to move the robot to:• Locate the cartridge from the slots.• Access the drive panel and identify the drive to perform a manual mount/dismount.WARNING:To prevent physical injury and damage to components, followthe instructions carefully.To move the robot, follow these precautions:1. Do not enter the library or move any of the HandBot mechanisms if youhave any reason to suspect they are enabled.2. Do not touch any shiny polished surfaces. Body oils can destroy thelubrication on these surfaces.96154 Third Edition 43
<strong>Library</strong> OperationWARNING:If all four HandBots are parked near each other, before youenter the library, move the HandBots out of your way one at atime starting at the lowest rail. You could trip over the HandBotson the lower rails or injure your head with the HandBots on theupper rails.3. Do not touch any lubricated parts.4. Hold the HandBot carriage handle to push or pull as shown in Figure 6.5. The HandBot should move freely. Do not force the HandBot if movement isrestricted. Before you close the library access doors, look inside the libraryand ask in a loud voice if anyone is inside the library.Figure 6. Moving the HandBot (L203_565)1. HandBot handle (hold the handle to move the HandBot)6. Leave the library only when you are certain that the HandBots can movefreely in all directions.CAUTION:Damage to Robot. Make sure no extra material (manuals,eyeglasses, tools) are left inside. These objects would causethe robot to stop and could damage it.44 Third Edition 96154
Manual Mode of OperationMounting a CartridgeFigure 7. Drive Panel (L202_015)1L203 5661. Drive bayTo manually mount a cartridge, follow these instructions:1. Whether you manually insert a T9x40 cartridge or an LTO Ultriumcartridge, the VOLID label must be facing you, with the numeric charactersabove the bar code.2. Do not force the cartridge into the tape drive. If you feel some resistanceas you insert the cartridge, make sure you are installing the cartridge intothe appropriate tape drive.3. T9840 and T9940 tape drives look very similar, but you cannot put 9840cartridges in a T9940 tape drive, nor put 9940 cartridges in T9840 tapedrive.Never attempt to insert an LTO Ultrium cartridge in a T9x40 tape drive.However, you can insert an LTO Ultrium cartridges in either an IBM or HPUltrium tape drive.Figure 8 shows manual insertion of a T9840 cartridge.96154 Third Edition 45
<strong>Library</strong> OperationFigure 8. Manually Inserting a Tape Cartridge (L202_039)L203_472For more information on manually mounting a cartridge into a drive, refer tothe relevant tape drive publication.Dismounting a CartridgeAll T9x40 and LTO Ultrium tape drives have a unload button on the operatorpanel.1. Make sure that the tape drive is not in use by the system.2. Press the UNLOAD switch. One of the following conditions occurs:• After the tape rewinds, the cartridge is ejected from the drive. Removethe cartridge from the drive.• The cartridge is not ejected after the tape rewinds. Refer to your drivedocumentation for more information.For more information on manually dismounting a cartridge from a drive, referto the relevant tape drive publication.Exiting the <strong>Library</strong>Before you leave the library, make sure that no tools or foreign objects are left,and no cartridges are outside the cartridge slots. Then:1. Return the cartridges that your removed to do a manual mount/dismount totheir slots.2. Step outside the library.WARNING:Before you close the library access door, look inside thelibrary and ask in a loud voice if anyone is inside the library.3. Close the front access door.46 Third Edition 96154
Manual Mode of OperationCAUTION:Equipment/Media Damage. Do not slam the door. Youcould damage the door or cause cartridges to fall onto thefloor. The robot cannot recover cartridges that fall onto thefloor.4. Insert the key and lock the access door. Keep the key in a safe place.In the unlikely event that someone becomes locked inside and the systembegins to start up, lights flash for 30 seconds before the robot starts to move.This provides enough time to push the emergency robotic stop switch on theCAP door (Figure 9 on page 47). This actions stops any further roboticmovement.Figure 9. Emergency Robotic Stop Switch (L203_471)1L203_4711. Emergency robotics stop switchPlacing the Drives to OnlineThe following pages describe how to varying the drives online:T9840/T9940 Drive DisplayTo verify that the T9840/T9940 drives are ready and online, press the MENUswitch—the display should now read Online.If the drive displays Offline, press the SELECT switch once to place it online.• If the drive message indicates Online, the transition to online completed.• If the Onl Pend message appears, the online state is pending due tocompletion of diagnostic tests.• If other messages appear, refer to either the T9840/T9840 Tape DriveUser’s Reference Manual, PN 95739, or T9940 Tape Drive Operator’sGuide, PN 95989.96154 Third Edition 47
<strong>Library</strong> OperationLTO Ultrium DrivesLTO Ultrium drives are automatically placed online when you place the libraryonline.Placing the <strong>Library</strong> OnlineYou can vary the library online using your library management software. Referto library management software publication for the command syntax andconsole messages.■ Maintenance Mode of OperationMaintenance mode is active when a service representative enters the accessdoor to perform maintenance or to replace a component.An example of this would be the replacement of a defective HandBot when aredundant or operational HandBot is available. Each HandBot has two motors,if one fails, the other motor is powerful enough to move the defective HandBotinto the forward service area. If both the motors fail for a HandBot, then theredundant HandBot moves the defective HandBot into the forward servicearea thus continuing HandBot operations. The service representative thenrequests that the library be made available for maintenance entry on the sidewhere the HandBot is positioned. The maintenance key (available only to aservice person) is inserted, a service safety door moves to the side selected(partitioning the service area from operational library activity) and the HandBotis replaced.During the replacement, the library continues to function. Because there arecartridge arrays in the forward portion of the Customer Interface Module,these slots are reserved for diagnostic and cleaning cartridges only. A mountrequest for a cartridge in the slot closer to the side (left or right) where theservice safety door is engaged may be inhibited until the maintenance activityis completed. The reserved slots on the other side of the service area may stillbe accessed if the service safety door is not engaged on that side as well.After the maintenance activity is completed, the access door is closed andlocked and the service safety door moves to the center, clearing the area forHandBot operations. The HandBots then resume their full service.48 Third Edition 96154
Cartridge Information4This chapter describes how to handle, inspect, and maintain cartridges.■ Cartridge RequirementsCartridges must meet specifications defined in American National StandardMagnetic Tape and Cartridge for Information Interchange.Refer to your drive vendor’s publication and Web site for specific cartridgerequirements and specifications.Colored cartridges are approved only if the measured reflection density isgreater than 0.1 as measured by an X-rite 404G color reflection densitometer.For more information about colored cartridges, contact your StorageTekmarketing representative.Colored measurements are:BandwidthMeasuring rangeAccuracyRepeatabilityAperture diameterANSI Status T Wide band (380 to 780 nm)Density (0.00 to 2.50) D±0.02 D±0.01 D3.4 mm (0.13in.)For more information about colored cartridges, contact your StorageTekmarketing representative.96154 Third Edition 45
Cartridge Information■ Cartridge LabelsThe <strong>SL8500</strong> library supports three types of barcode labels:• For T9x40 drives, 1/2-inch labels supplied by Trioptic (Engineered DataProducts/Colorflex) or Tricode (American Eagle/Writeline). Both versionsrequire a separate Media ID Type, which is one character.• For LTO drives, labels with eight characters, the last two of which are therequired Media ID Domain and the Media ID Type characters.• For SDLT drives, labels with seven characters, the last of which is therequired Media ID character.Notes:Non-labeled Cartridges3. Pre-labeled cartridges are available from StorageTek. Forinformation on ordering these cartridges, see “Ordering Cartridges/Labels” on page 47.4. StorageTek does not supply cartridge labels. For a supplier oflabels only, see “Ordering Cartridges/Labels” on page 47.5. Cleaning and diagnostic kits have one labeled cleaning cartridgeand one labeled diagnostic cartridge with a volume serial numberof 0 (zero) for each. Extra cleaning and diagnostic labels are sentwith each library.Non-labeled cartridges are not supported in the <strong>SL8500</strong> library. If non-labeledcartridges are left inside the library and a software audit (such as HSC) isinitiated, the cartridges will be ejected through the CAP.Upside Down CartridgesInserting a cartridge upside down can cause damage to the HandBot and tothe cartridge.The behavior for upside down cartridges is explained in the following sections.LTO CartridgesFor upside down LTO cartridges, the label can be recognized and may beplaced into a cartridge slot.When the library tries to load the cartridge into a drive:• the drive will not allow the upside down cartridge to be inserted,• the cartridge is returned to its original slot, and• the drive posts a load error message on the host console.46 Third Edition 96154
Ordering Cartridges/LabelsThe operator should verify if there is an upside down condition by ejecting thecartridge through the CAP.T9x40 DrivesCaution:Equipment and cartridge damage: An upside down 9x40 cartridgecan cause damage to both the HandBot and the cartridge. Makesure the customer is aware of the problems this can cause.CAP Entry:If you insert a 9x40 cartridge upside down into a CAP slot, the cartridge willnot seat correctly within the slot and the CAP can not close.Manual Array Slot Entry:If you insert a 9x40 cartridge upside down into a storage slot, the cartridge willextend from the slot and damage can occur to both the HandBot and thecartridge.■ Ordering Cartridges/LabelsT9840 CartridgesContact your authorized StorageTek Selling Agent for labeled cartridges.For cartridge labels, contact EDP/Colorflex at:• Phone: 1.888.438.8362 (domestic and international)• Web site: http://www.colorflex.comFor technical questions, contact StorageTek Sales Support at:• Phone: 1.800.275.4785• E-mail: sales_support@storagetek.coThe following tables list StorageTek part numbers for labeled tapes.Table 7. T9840 Cartridge Part Numbers and Feature CodesDescription Part Number Quantity / Feature CodeLabeled, EDP 310323201 01 PK / EBLABlack cartridge, EBCDIC, EDP 310323301 01 PK / IEBC, EBLABlack cartridge, ASCII, EDP 310323401 01 PK / IASC, EBLABlack cartridge, UNISYS, EDP 310323501 01 PK / IUNI, EBLABlack cartridge, Cray, EDP 310323701 01 PK / ICRA, EBLABlack cartridge, AS/400, EDP 310323801 01 PK / IAS4, EBLAVanilla cartridge 310671501 01 PK / UN0196154 Third Edition 47
Cartridge InformationT9940 CartridgesTable 8. T9940 Cartridge Part Numbers and Feature CodesDescription Part Number Quantity / Feature CodeVanilla cartridge 312868001 01PK, UN01Cartridge, labeled, EDP 312868201 01PK,EBLACartridge, EBCDIC, EDP 312868301 01PK,EBLA,IEBCCartridge, ASCII, EDP 312868401 01PK,EBLA,IASCCartridge, UNISYS, EDP 312868501 01PK,EBLA,IUNICartridge, Cray, EDP 312868701 01PK,EBLA,ICRACartridge, AS/400, EDP 312868801 01PK,EBLA,IAS4VolSafe CartridgesTable 9. 9940 VolSafe Cartridge Part Numbers and Feature CodesDescription Part Number Quantity / Feature CodeVolSafe EBCDIC, EDPC 313497601 VLSF, IEBC, EVLAVolSafe ASCII, EDP 313497701 VLSF, IASC, EVLAVolSafe EDP 313497801 VLSF, EVLA20 GB Raven Black, VolSafe 313498001 VLSF,Table 10. 9840 VolSafe Cartridge Part Numbers and Feature CodesDescription Part Number Quantity / Feature CodeVolSafe EBCDIC, EDPC (A/B) 313335501 VLSF, IEBC, EVLAVolSafe ASCII, EDP (A/B) 313335601 VLSF, IASC, EVLAVolSafe EDP (A/B) 313488701 VLSF, EVLA20 GB Raven Black, VolSafe (A/B) 313336901 VLSF, UN01VolSafe, EBCD1C, EDP, C 312565401 VLSC, IEBC, EVLAVolSafe, ASCII, EDP, C 312565501 VLSC, IASC, EVLAVolSafe, EDP, C 312565601 VLSC, EVLA20 GB Raven Black, VolSafe (C) 312565301 VLSC, UN0148 Third Edition 96154
Preparing CartridgesLTO2 CartridgesTable 11. LTO Gen 2 Cartridge Part Numbers and Feature CodesDescription Part Number Feature Code10 Count, 200 GB, LTO2, Vertical label 312528401 2C10, EVLA, VLBL20 Count, 200 GB, LTO2, Vertical label 312528501 2C20,EVLA,VLBL10 Count, 200 GB, LTO2, Horizontal label 312528601 2C10, EVLA, HLBL20 Count, 200 GB, LTO2, Horizontal label 312528701 2C20, EVLA, HLBL200 GB diagnostic, LTO2, Vertical label 312528801 L2DG, VLBL, EVLA20 Count, 200 GB, LTO2, Unlabeled 311627001 20NL20 Count, 200 GB, LTO2, Horizontal label 311627101 20LB, HLBL20 Count, 200 GB, LTO2, Vertical label 311627201 20LB, VLBL10 Count, 200 GB, LTO2, Horizontal label 311628501 10LB, HLBL10 Count, 200 GB, LTO2, Vertical label 311628601 10LB, VLBLCleaning CartridgesTable 12. Cleaning Cartridge Part Numbers and Feature CodesDescription Part Number Feature Code9840 Cleaning Cartridge, Black 310324601 98CL9940 Cleaning Cartridge 312869601 99CLSDLT Cleaning Cartridge, Labeled 313745701 SDLCLTO Universal Cleaning Cartridge, Labeled 313793301 UNCL■ Preparing CartridgesThe following pages describe how to prepare a cartridge for use in the tapelibrary.Handling a CartridgeImproper handling of cartridges can result in a loss of data or damage to alibrary component.Improper handling of cartridges can result in a loss of data or damage to amachine component.To handle a cartridge correctly:• Do not carry several cartridges loosely in a container. The leader blockscan snag on other cartridges and become unlatched.96154 Third Edition 49
Cartridge InformationNote: T9940 and LTO Ultrium cartridges have leader blocks. T9840cartridges do not.• Make sure that the leader block is latched every time you pick up acartridge.• Keep cartridges clean.• Inspect a cartridge before each use and never put a damaged cartridgeinto a drive or library.• Never release a leader block and pull tape from a cartridge.• Never open a cartridge.• Do not handle tape that is outside the cartridge; the tape edge might bedamaged.• Do not expose the tape or cartridge to direct sunlight or moisture.• Do not expose a recorded cartridge to magnetic fields; this might destroydata on the tape.Inspecting and Identifying a CartridgeA defective or dirty cartridge can damage a drive. Always inspect a cartridgebefore you insert it into a drive or into a tape library. See Figure 15 on page 51through Figure 17 on page 53. Look for:• Cracked or broken cartridge• Broken leader• Broken tape access door• Damaged file-protect selector or write-protect switch• Liquid in the cartridge• Labels not firmly attached or extending over the cartridge edge• Any other obvious damageAll the cartridges you use in a <strong>SL8500</strong> library are similar, but they havesignificant differences.StorageTek CartridgesThe T9840 and T9940 Tape Drives use a cartridge tape that is the samephysical size; however, they are not interchangeable.T9840 CartridgeThe T9840 tape cartridge has two reels between which the tape travels(Figure 15). It does not have a leader block. It cannot be used in a T9940 orLTO Ultrium tape drive.50 Third Edition 96154
Preparing CartridgesFigure 15. A T9840 Cartridge (L203_453)123WRITEPROTECT7654REAR VIEW8439BOTTOM VIEWFRONT VIEWL203 4531. Manufacturer’s label2. Customer’s label3. Tape access door4. Write-protect switch5. Finger grips6. VOLID label7. Media ID label (R=data, U=cleaning,yellow for VolSafe)8. Media ID (machine identifiable)9. Manufacturer Part IDNote: The manufacturer and media identification labels are yellow (9840A/B), green(9840C). The write-protect switch is yellow (9840A/B), green (9840C).T9940 CartridgeThe T9940 cartridge has a single reel and a leader block that the T9940 tapedrive uses to move the tape across the tape drive head (Figure 16). A T9940cartridge cannot be used in a T9840 or LTO Ultrium tape drive.96154 Third Edition 51
Cartridge InformationFigure 16. A T9940 Cartridge (L203_454)12 345656REAR VIEWBOTTOM VIEW78FRONT VIEW7L203 4541. Manufacturer’s label (yellow for VolSafe)2. Customer’s label3. Manufacturer’s part ID4. Media ID label (P=data, W=cleaning)5. VOLID label6. Finger grips7. Tape leader block8. Write-protect switch (yellow for VolSafe)VolSafe CartridgesVolSafe (volume safe) is a special StorageTek feature that provides writeonce, read many (WORM) technology to VolSafe designated tape cartridges.VolSafe permits new data to only append the tape media, while it preventserasure or overwrite of previously written data.The T9840 and T9940 Tape Drives each use a unique cartridge and you canidentify the VolSafe cartridge by colored areas on the cartridge.52 Third Edition 96154
Preparing CartridgesThe manufacturer and media identification labels are yellow (9840A/B and9940), green (9840C). The write-protect switch is yellow (9840A/B and 9940),green (9840C). See Figure 15 on page 51and Figure 16 on page 52.LTO Ultrium CartridgeAn LTO Ultrium cartridge has a single reel and a leader block (Figure 17),which makes it similar to a T9940 cartridge, but it cannot be used in place of aT9940 cartridge. Ultrium cartridges follow the linear tape open (LTO) formatthat allows them to be used in Ultrium tape drives made by any manufacturer,such as Hewlett-Packard, IBM, or Certance. In the past, cartridges could beused only in tape drives from the same manufacturer as the tape.Figure 17. An LTO Ultrium Cartridge (L203_455)51432L203_4551. Tape access door2. Finger grips3. VOLID label4. Media ID label5. Write protect switchLTO Ultrium Generation 2 (Gen2) Fibre Channel DrivesThe Gen2 cartridge specifics include:1. Use of standard Ultrium cartridges2. Ability to read/write to Gen1 tape media3. A new model code for Gen2 drives—LTO2001 and new feature code—IBFC4. Cartridge Media ID for Gen2 drives is “L2” (200 GB)The major improvements seen with the Gen2 drives are:96154 Third Edition 53
Cartridge Information• Increased native capacity of 200 GB or up to 400 GB compressed• Data transfer rate of 40–80 MB/secSuper DLTtape IIThe Super DLTtape II cartridge like other high capacity cartridges has only thesupply reel inside the cartridge. The take-up reel is inside the tape drive.The Super DLTtape I and DLTtape VS1 are both readable on the SDLT 600Tape Drive.Figure 18. SDLTtape II Cartridge Tape12L203_4501. Write-protect switch2. VOLID label54 Third Edition 96154
Preparing CartridgesApplying Labels to CartridgesCartridge labels reflect the cartridge media and usage. Cleaning cartridgeshave CLN in the VOLID; diagnostic cartridges have DG in the VOLID. Themedia ID label correlates to the tape drive or transport capable of using thecartridge:Table 13. Cartridge CodesDrive Type Media ID UsageRDataT9840UCleaningT9940 P DataWCleaningHP GEN2C 1 plus CLN CleaningLTO UltriumIBM GEN2 C 2 plus CLN CleaningLTO UltriumHP and IBMC uUniversal cleaning cartridgeGEN2 LTOUltriumHP and IBMGEN2 LTOUltriumSDLT 600L 2Data.Table 14. Ultrium Cartridge ModelsDescriptionUltrium media cartridgeUniversal cleaning cartridgeRequired feature code:20-count 100 GB data cartridgesUniversal cleaning cartridgeEDP Vivid Color LabelsHorizontal labelsVertical labelsModel NumberMEDLTOMMEDCLNT1C20UNCLEVLAHLBLVLBL96154 Third Edition 55
Cartridge InformationTo apply the label on a cartridge:1. Make sure that the cartridge has been at room temperature for at least 24hours.2. Clean the surface where the label will be placed using a cleaning solutionmade for this purpose. See “Cleaning the Cartridge Exterior” on page 61.3. Peel the backing from the VOLID label.4. Lay the cartridge flat, in the position you would use to insert the cartridgein a tape drive.5. Position the VOLID label with the bar-code characters below thealphanumeric characters. Press it into place.Note: On LTO Ultrium VOLID labels, the alphanumeric characters can beeither vertical or horizontal.6. If the cartridge has a customer label, place the label in the area and pressit into place.7. Repeat Steps 2 through 5 for the media ID label.The label must be within the indented area of the cartridge so that the edgesof the label are parallel to the edges of the cartridge. The label should be closeto the inside edge of the indented area but must never overlap the edge of thisarea. Figure 19 through Figure 21 illustrates labeling and the locations of theSDLT, the T9840 and T9940 cartridges. See Figure 17 for the LTO Ultriumcartridge and label.Notes:1. Make sure that the label is not placed elsewhere on the cartridgesurface.2. Make sure that the edges of the label do not curl up; curling causesthe cartridge to stick in the drive loader.3. Use labels that do not leave a residue when they are removed.4. Make sure that the label contains a VOLID.56 Third Edition 96154
Preparing CartridgesFigure 19. Applying Cartridge Label to SDLT Cartridge (L203_450)12L203_4501. SDLT cartridge2. VOLID labelFigure 20. Applying Cartridge Label to T9840 Cartridge (L203_459)132L203_4591. Customer Label2. VOLID label3. Media ID label (“R” = data, “U” = cleaning)96154 Third Edition 57
Cartridge InformationFigure 21. Applying Cartridge Label to T9940 Cartridge (L203_460)132L203 4601. Customer label2. VOLID label3. Media ID label (“R” = data, “U” = cleaning)Setting the Write Protect SwitchThe following sections provide information about setting the write protectswitch on the tape cartridges. The switch location and design varies slightlybetween cartridge types.Setting the T9840 Write Protect Switch to Read-OnlyYou can set the T9840 write protect switch so that the cartridge is read-only(nothing can be written on the tape). Slide the switch (Figure 22) to the front ofthe cartridge. In this position, the drive can only read data from the tape andcannot write data.Setting the T9840 Write Protect Switch to Read/WriteYou can set the T9840 write protect switch so that the cartridge is writeenabled.Slide the switch (Figure 22) to the rear of the cartridge. In thisposition, the drive can write as well as read data. This setting is recommendedwhen you enter cartridges into the library.Note: Some software has a feature called virtual thumb wheel, allowing readonlyaccess to a cartridge that is not physically write-protected.58 Third Edition 96154
Preparing Cartridges.Figure 22. Setting the T9840 Cartridge Write Protect Switch (L203_462)12L203_4621. Write enable position2. Write protect positionSetting the T9940 Write Protect Switch to Read-OnlyYou can set the T9940 write protect switch so that the cartridge is read-only(nothing can be written on the tape). Slide the switch (Figure 23 on page 60) tothe write protect position. In this position, the drive can only read data from thetape and can not write data.Setting the T9940 Write Protect Switch to Read/WriteYou can set the T9940 write protect switch so that the cartridge is writeenabled.Slide the switch (Figure 23) to the write enabled position. In thisposition, the drive can write as well as read data. This setting is recommendedwhen you enter cartridges into the library.Note: Some software has a feature called virtual thumb wheel, allowing readonlyaccess to a cartridge that is not physically write-protected.96154 Third Edition 59
Cartridge InformationFigure 23. Setting the T9940 Cartridge Write Protect Switch (L203_463)123L203_4631. Write enable position2. Write protect position3. Write protect switchSetting the LTO Ultrium Write Protect Switch to Read-OnlyYou can set the LTO Ultrium write protect switch so that the cartridge is readonly(nothing can be written on the tape). Slide the switch (Figure 24) so thatthe “closed lock” is revealed. In this position, the drive can only read data fromthe tape and can not write data to it.Setting the LTO Ultrium Write Protect Switch to Read/WriteYou can set the LTO Ultrium write protect switch so that the cartridge iswrite-enabled. Slide the switch (Figure 24) so that the “open lock” isrevealed. In this position, the drive can write as well as read data. Thissetting is recommended when you enter cartridges into the library.60 Third Edition 96154
Preparing CartridgesFigure 24. Setting the LTO Ultrium Cartridge Write-Protect Switch (L203_464)231L203 4641. Write protect switch (data=red, cleaning=gray)Cleaning the Cartridge ExteriorCAUTION:CARTRIDGE DAMAGE: Certain solvents can damage thecartridges. DO NOT USE ACETONE, TRICHLOROETHANE,TOLUENE, XYLENE, BENZENE, KETONE, METHYL ETHYLKETONE, METHYLENE CHLORIDE, ETHYLDICHLORIDE,ESTERS, ETHYL ACETATE, OR SIMILAR CHEMICALS TOREMOVE LABELS OR TO CLEAN CARTRIDGES.Wipe all dust, dirt, and moisture from the cartridge with a lint-free cloth.Use StorageTek Tape Cleaner Wipes, PN 4046289-01 to clean the cartridges.These wipes are saturated with isopropyl alcohol. Do not let any solution touchthe tape or get inside the cartridge.Using Cleaning CartridgesCleaning cartridges have a media ID label that identifies the type of tape drivein which it can be used (see Table 13 on page 55).These cartridges can not be used as scratch cartridges or initialized bysoftware utilities.CAUTION:PROCEDURE ERROR: When you enter a cleaning cartridge,the software considers it to be new, and sets the usage counterto zero. DO NOT RE-ENTER A CLEANING CARTRIDGETHAT LIBRARY HAS EJECTED.96154 Third Edition 61
Cartridge InformationRepairing a Detached Leader BlockWhen a T9940 or LTO Ultrium cartridge tape is damaged, use a backup tape ifpossible. If a cartridge leader block is detached, there is no backup tape, andthe cartridge or tape has no obvious damage, you may repair the leader blockusing a repair kit provided by the tape supplier. You can use the tape one timeto copy the data onto another tape.Cartridge Label ExamplesTable 15 and Table 16 on page 63 show examples of the various cartridgelabels used by the drives in the library. Be sure to use the proper labels foreach drive type.Table 15. Label Examples—Data CartridgesSDLT LTO Ultrium T9940 T984089CSP8N5272 JL6 HU 8M2L1 43E9A1ZRL203 468Media ID Labels62 Third Edition 96154
Preparing CartridgesThe SDLT Media IDis incorporated intothe tape label, andincludes:S = Super DLTSDLT LTO Ultrium T9940 T9840The LTO Media ID isincorporated at the endof the tape label, andincludes:C1 = HP cleaningC2 = IBM cleaningCU = UniversalLx = Data cartridge:L2 = 200GBL1 = 100 GBLA = 50 GBLB = 30 GBLC = 10 GBThe Media IDlabel for theT9940 is at theend of the tapelabel, andincludes:P = DataW = CleaningTable 16. Label Examples—Cleaning and Diagnostic CartridgesThe Media ID labelfor the T9840 is atthe end of the tapelabel, andincludes:R = DataU = CleaningSDLT Diagnostic LTO Cleaning T9940 Diagnostic T9840 CleaningD C1D RL GD NG00001C202CLN000UL203 567DG = DiagnosticPlus the Media IDlabel to identify thetype of cartridge.CLN = CleaningDiagnostic and Cleaning Cartridge Label IdentifiersThe cleaning MediaID labels include:C1 = HPC2 = IBMCU = UniversalDG = DiagnosticPlus the Media IDlabel: P = DataCLN = Cleaning plusW = CleaningCLN = Cleaning plusU = CleaningDG = DiagnosticPlus the Media IDlabel: R = Data96154 Third Edition 63
Cartridge Information■ Maintaining CartridgesThe following pages list cartridge specifications, describe how to store andclean cartridges, use cleaning cartridges, and repair a detached leader block.T9840 Cartridge SpecificationsThe StorageTek 9840 cartridge tape was designed to provide fast access todata and storage of up to 20 gigabytes of uncompressed data with an averageaccess time of just 12 seconds. Table 17 lists the specifications of the 9840cartridge with the T9840x Tape Drives.Table 17. T9840 Cartridge Tape SpecificationsPerformance T9840A T9840B T9840CCapacity, native20 GB 20 GB 40 GB(uncompressed)Read/Write speed 2.0 m/s (79 ips) 4.0 m/s (158 ips) 3.4 m/s (134 ips)Search/Rewind speed 11.0 m/s (440 ips)FormulationAdvanced metal particle (AMP)Coercivity1625+/-75 Oersteds (130+/16.0 KA/m)SubstratePolyethylene naphthalate (PEN)Archival life15–30 yearsUncorrected bit error rate 1x10(-18)Permanent errors 0CompatibilityT9840A, T9840B, T9840CNumber of tracks 288 288Form factor Half inch, 3480/3490EHeight25.4 mm (1.0 in.)Width109.0 mm (4.29 in.)Weight262.0 g (9.17 oz)Drop strength1.0 m (38.4 in.)HumidityOperating 20%–80%Storage (archive) 30%–40%Shipping 5%–80%Temperature (non-condensing)Operating+15° to +32°C (+60° to +90°F)64 Third Edition 96154
Maintaining CartridgesTable 17. T9840 Cartridge Tape SpecificationsStorage (archive)ShippingWet bulb maximum+15° to +25°C (+59° to +77°F)-23° to +49°C (-10° to +120°F)26°C (78°F)T9940 Cartridge SpecificationsThe StorageTek 9940 tape cartridge was designed to store up to 200gigabytes of uncompressed data, or up to 400 gigabytes with 2:1 datacompression, on a single cartridge. Table 18 lists the specifications of the9940 cartridge with the T9940x Tape Drives.Table 18. T9940 Cartridge Tape SpecificationsPerformance T9940A T9940BCapacity, native60 GB 200 GB(uncompressed)Read/Write speed 2.0 m/s (79 ips) 2.4 m/s (95 ips)Search/Rewind speed11.0 m/s (440 ips)FormulationAdvanced metal particle (AMP)Coercivity1625+/-75 Oersteds (130+/16.0 KA/m)SubstratePolyethylene naphthalate (PEN)Archival life15–30 yearsUncorrected bit error rate 1x10 (-18)Permanent errors 0CompatibilityT9940A, T9940BNumber of tracks 288 576Form factor Half inch, 3480/3490EWidth109.0 mm (4.29 in.)Length125.0 mm (4.92 in.)Height25.4 mm (1.0 in.)Weight:262.0 g (9.17 oz)Drop strength1.0 m (39.3 in.)HumidityOperating 20%–80%Storage (archive) 30%–40%Shipping 5%–80%96154 Third Edition 65
Cartridge InformationTable 18. T9940 Cartridge Tape SpecificationsTemperature (non-condensing)OperatingStorage (archive)ShippingWet bulb maximum+15° to +32°C +60° to +90°F+15° to +25°C +59° to +77°F-23° to +49°C -10° to +120°F26°C (78°F)LTO Ultrium Cartridge SpecificationsLTO Generation 2 technology stores up to 200 gigabytes of uncompresseddata on a single cartridge, or up to 400 gigabytes with 2:1 data compression.StorageTek offers Ultrium tape cartridges manufactured by MaxellCorporation.Table 19. LTO Cartridge Tape SpecificationsPerformance LTO Generation 2Capacity, native (uncompressed) 200 GB; 400 GB (with 2:1 compression)Read and write tape speed 5.9 m/sSearch and rewind speed 7.0 m/sFormulationMetal particle (MP)Coercivity1850+/-75 Oersteds (147,218 A/m)SubstratePolyethylene naphthalate (PEN)Archival life15-30 yearsUncorrected bit error rate 1x10 (-17)Permanent errors 0Tape drive compatibility LTO Generation 1, LTO Generation 2Number of tracks 512Form factorHalf inchWidth105.4 mm (4.15 in.)Length102.0 mm (4.02 in.)Depth21.5 mm (0.85 in.)Weight210.0 g (0.463 lb)HumidityOperating 20%-80%66 Third Edition 96154
Maintaining CartridgesTable 19. LTO Cartridge Tape SpecificationsPerformance LTO Generation 2Storage (archive) 20%-80%Shipping 20%-80%Temperature (non-condensing)Operating10 to 40°C (50 to 104°F)Shipping-23 to 49°C (-10 to 120°F)Wet bulb maximum26°C (78°F)SDLT Cartridge Tape SpecificationsSDLT tape cartridges store up to 300 gigabytes which makes SDLT cartridgesideal for storing, archiving and backing up large volumes of information.StorageTek offers SDLT tape cartridges in a partnership with QuantumCorporation.Table 20. SDLT Cartridge Tape SpecificationsPerformanceDLTtape IICapacity, native (uncompressed) 300 GBRead and write tape speedSearch and rewind speedFormulationeMP60CoercivitySubstrateSuper PETArchival life30 yearsUncorrected bit error ratePermanent errors 0Tape drive compatibilitySDLT600Number of tracksForm factorHalf inchWidth105.6 mm (4.16 in.)Length105.3 mm (4.15 in.)Depth25.4 mm (1.0 in.)Weight222.5 g (7.85 oz)Humidity 20%-80%96154 Third Edition 67
Cartridge InformationTable 20. SDLT Cartridge Tape SpecificationsPerformanceOperatingStorage (archive)ShippingTemperature (non-condensing)OperatingShippingWet bulb maximumDLTtape II10° to 40°C (50° to 104°F)26°C (78°F)Storing of CartridgesWhen you store a cartridge:• Do not take a cartridge out of its protective wrapping until you are ready touse it. Use the tear string, not a sharp instrument, to remove the wrapping.• Store cartridges in a clean environment that duplicates the conditions ofthe room in which they are used.• Before using a cartridge, make sure that it has been in its operatingenvironment for at least 24 hours.• Archival storage is 1 to 10 years for 9x40 cartridge tapes and 15 to 30years for LTO Ultrium cartridge tapes.68 Third Edition 96154
Troubleshooting andDiagnostics5This chapter describes how to correct problems with the library and theattached devices (drives, CAP, robots, and elevators). It also includes some ofthe diagnostic procedures you can perform using the StreamLine <strong>Library</strong>Console.If you encounter any problems with the library, you should take several stepsbefore you contact the Technical Excellence Center (TEC).If you must contact the TEC, see Chapter 6 for more information.96154 Third Edition 49
Troubleshooting and Diagnostics■ Troubleshooting the <strong>Library</strong>The following table describes a few of the troubleshooting tips:Table 1. Troubleshooting TableProblemService Required(red) LED isconstantly lit.What to doPerform the following procedure:Use the <strong>Library</strong> Console to check the health of the libraryand the attached devices (drives, CAP, robots, andelevators).To perform a health check:1. Launch the StreamLine <strong>Library</strong> Console application.2. Access the <strong>System</strong> Detail module (Tools > <strong>System</strong>Detail).3. Check the device tree for the following indicators:Device HealthDevice ErrorNote: The device tree is on the left panel that providesa list of devices attached to the library (drives,CAP, robots, elevator).The Status (for example, online/offline) and Statistics (forexample, uptime, downtime, errors and warnings) optionstabs provide more information on the health of the libraryand devices. For more information, see the online helpdocumentation accessible through the <strong>Library</strong> Consoleapplication.Other checks:• Make sure that all cartridges are fully seated andproperly oriented in their slots.CAP unlocked LEDis lit and blinking.• Inspect the library floor for any foreign objects or debris;remove any objects you find.Open the CAP and make sure the cartridges in the CAPslots are properly seated. See “To open the CAP:” onpage 33.50 Third Edition 96154
Troubleshooting the <strong>Library</strong>Table 1. Troubleshooting Table (Continued)ProblemThe client computercannotcommunicate withthe library or drives.The StreamLine<strong>Library</strong> Consoledoes not displaymodified data orinformation remainsstatic.The StreamLineConsole cannotcommunicate withthe library.What to doMake sure that all cables are securely attached to theirconnectors on the rear of the library, the drives, and theclient computer.• Select the Refresh button to update the screen.• Check the heartbeat monitor icon of the <strong>Library</strong>Console.The heartbeat monitor icon is on the status line ofthe <strong>Library</strong> Console screens that flashesperiodically indicating that the library and serverare communicating:If the heartbeat monitor stops blinking heartbeatmonitor icon on status line changes to the warningicon. The warning icon indicates that the <strong>Library</strong>Console has lost communication with the library.When the library looses communication with theserver, after about 30 to 60 seconds, the warningicon is replaced by an error icon and the systemdisplays the following error message:“Heartbeat message not received from theserver.”Select Problem Details to obtain possible causes andsuggested actions about the error message.Note: When there is a communication failure, you MUSTlog off from the <strong>Library</strong> Console and then log onagain to restore communication between the libraryand server.For more information, see the online help documentationaccessible through the StreamLine <strong>Library</strong> Consoleapplication.The version of the <strong>Library</strong> Console is not compatible withthe library controller code.1. Download a different version of the application. See“Upgrading Firmware” and “Upgrading the Remote<strong>Library</strong> Console” on page 25.2. Restart the <strong>Library</strong> Console.3. Logon again to the <strong>Library</strong> Console.96154 Third Edition 51
Troubleshooting and DiagnosticsTable 1. Troubleshooting Table (Continued)ProblemDrive is unable toeject a cartridge.Unable to find acartridge VOLID.What to doSee “Dismounting a Cartridge” in the “Manual Mode ofOperation” on page 39.Perform a library audit using the <strong>Library</strong> Console.The <strong>Library</strong> Console offers two types of audits:Entire library audit: to verify the cartridge database (storedin the HBC car) for the VOLID and location of all thecartridges in the library.Physical audit: to verify the VOLID from the slot locations ofthe cartridge in the library. The system then updates thecartridge database with the results of the physical audit.This audit will help resolve any discrepancies between thelibrary and the cartridge database.For more information, see the online help documentationaccessible through the StreamLine <strong>Library</strong> Consoleapplication.■ Drive Tray LEDsThe LED on the back of each tray indicates that a drive, power supply orenvironmental fault exists. This indicator is used to locate a defective tapedrive.52 Third Edition 96154
Drive Tray LEDsNote: The information in the HP tables was taken from the Hewlett-Packarddocumentation.Table 2. HP Single-LED PatternsLED Status and Cause Action RequiredReady (green) • Lit steadily when tapedrive is receiving powerand ready but no activityis occurringNone• Flashing when tape driveis engaged in activitysuch as Read, Write, orSpace; being cleaned; orperforming a self-test• Flashing quickly whendownloading softwareNoneNone• Off when tape drive ispowered-off or self-testfailedDrive Error (orange) • Lit when tape drive has aproblemTape Error (orange)• Flashing whenunrecoverable hardwarefailure occurs.Flashing when tape drivethinks it contains a faulty tapeClean (orange) • Lit steadily whensupported cleaningcartridge is cleaning tapedrive• Flashing when tape driveneeds to be cleaned withsupported cleaning tape.Check power switch and cableconnectionPower cycle or successful tape loadturns off LED, but LED startsflashing again if same operation isperformed and fault is present.Remove and make sure that youhave the correct type of cartridge.Reload the cartridge. If flashingoccurs again, get rid of cartridge.Place a known, good cartridge intotape drive.NoneIf still flashing after tape drive iscleaned and a new or known data isloaded, call for service96154 Third Edition 53
Troubleshooting and DiagnosticsTable 3. HP Multi-LED PatternsSequence Cause Action RequiredAll LEDs off Tape drive not have powerTape drive faultyMake sure that power switch is inON positionCheck power cable connection andOccurs just after tape drivereplace if necessaryhas been switched on orresetPower cycle the tape drivesReady and CleanoffDrive Error andTape Error areflashingReady is off, allothers are lit.Ready flashes andother LEDS aresteadily litReady is flashingand Clean is litTape is ejectedimmediately andTape Error isflashing or DriveError flashes onunloading tapeDrive Error, TapeError, ReadyflashingReady and DriveError lit and TapeError and Clean off,alternating with.Tape Error andClean lit and Readyand Drive Error offTape drive has failed toexecute power-on self-test(POST)Firmware is beingreprogrammed.Firmware is beingdownloadedTape drive is being cleanedCartridge memory might befaulty.Firmware download problemFirmware errorCall for servicePower cycle or reset tape driveCall for serviceNone. Do not reset or power cycletape drive.None. If a problem occurs, Ready issteadily lit and Tape Error flashesuntil tape load is started.None. Cleaning cartridge will ejectwhen cleaning is completed.Cleaning cycle can take up to 5minutes.Slide the red switch on the cartridgeto the write-protect position. Loadthe cartridge for a Read operation.Recover the data, then destroy thecartridge.Insert cartridge to clear LEDsequence. Tape Drive uses oldfirmware.Power cycle or reset tape drive. Ifcontinues, upgrade firmware.54 Third Edition 96154
Drive Tray LEDsNote: The information in the IBM tables was taken from the IBMdocumentation.Table 4. IBM LTO Drive Buttons and IndicatorsButtons/IndicatorRed displayBlue buttonLEDDescriptionFor code numbers and their meanings seeTable 5.Used to unload the tape cartridgeIndicator• Yellow when initializing• Green when ready• Red when problem occursTable 5. IBM LTO Drive Codes and MeaningCode Status and Cause Action Required0 No error occurred. This code No action is required.displays• When power is cycled(turned off, then on) to thetape drive.• When diagnostics havefinished running and noerror occurred.Note: The single-characterdisplay is blank duringnormal operation ofthe tape drive.96154 Third Edition 55
Troubleshooting and DiagnosticsTable 5. IBM LTO Drive Codes and Meaning (Continued)Code Status and Cause Action Required1 The tape drive detected thatthe recommended operatingtemperature was exceeded.The error code clears whenyou power-off the tape driveor place it in maintenancemode.2 The tape drive detected thatthe externally supplied poweris either approaching thespecified voltage limits (thedrive is still operating) or isoutside the specified voltagelimits (the drive is notoperating).The error code clears whenyou power-off the tape driveor place it in maintenancemode.1. If a fan is present in theenclosure, ensure that it isrotating. If not, replace the fan.2. Remove any blockage thatprevents air from flowing freelythrough the tape drive.3. Ensure that the operatingtemperature and airflow is withinthe specified range.4. If the operating temperature iswithin the specified range andthe problem persists, replace thetape drive.5. The error code clears when youpower-off the tape drive or placeit in maintenance mode.1. Ensure that the power connectoris properly seated.2. Ensure that the proper DCvoltages are being applied withinthe tolerances allowed (refer tospecifications in your UltriumLTO manual).3. Replace tape drive.4. The error code clears when youpower-off the tape drive or placeit in maintenance mode.56 Third Edition 96154
Drive Tray LEDsTable 5. IBM LTO Drive Codes and Meaning (Continued)Code Status and Cause Action Required3 The tape drive determinedthat a firmware erroroccurred.1. Collect a drive dump. Refer toyour LTO Ultrium manual forinformation about drive dumps.Note: Do not force a drive dump;the tape drive has alreadycreated one.2. Power the tape drive off and on,then retry the operation thatproduced the error.3. If the problem continues,download new firmware andretry the operation.4. The error code clears when youpower-off the tape drive or placeit in maintenance mode.4 The tape drive determinedthat a firmware or tape drivehardware failure occurred.5 The tape drive determinedthat a tape path or read/writeerror occurred.1. Collect a drive dump. Refer toyour LTO Ultrium manual forinformation about drive dumps.2. Power the tape drive off and on,then retry the operation thatproduced the error. The errorcode clears when you power-offthe tape drive or place it inmaintenance mode.3. Download new firmware andretry the operation.4. Replace the tape drive.1. Cycle power to the tape drive offor place it in maintenance mode.2. Replace the tape drive.Note: The tape drive will notallow you to insert acartridge if the currentcartridge wassuccessfully ejected.96154 Third Edition 57
Troubleshooting and DiagnosticsTable 5. IBM LTO Drive Codes and Meaning (Continued)Code Status and Cause Action Required6 Problem occurred while thetape drive was writing data tothe tape.If the problem occurs withmultiple tape cartridges.Retry the operation with a differentcartridge:• If the operation succeeds, theoriginal cartridge was defective.Copy data from the defectivecartridge and discard it.• If the operation fails and anothertape drive is available, insert thecartridge into the other tapedrive and retry the operation.• If operation fails, discard thedefective cartridge.• If the operation succeeds, inserta scratch cartridge into the firstdrive and run the tape drivediagnostics (refer to your LTOUltrium manual). If thediagnostics fail, replace thedrive.1. if you do not know the tapecartridge’s volume serialnumber, run the tape drivediagnostics (refer to your LTOUltrium manual).• If the diagnostics fail, replace thetape drive.• If the diagnostics succeed, runthe Test Head diagnostic (referto your LTO Ultrium manual). Ifthe Test Head diagnostic fails,replace the tape drive. If the TestHead diagnostic succeeds,replace the cartridges that causethe problem.The error code clears when youremove the tape cartridge or placethe tape drive in maintenance mode.58 Third Edition 96154
Drive Tray LEDsTable 5. IBM LTO Drive Codes and Meaning (Continued)Code Status and Cause Action RequiredThe problem occurred whilethe tape drive was readingdata from the tape.If the problem occurs withmultiple tape cartridges or ifyou do not know the tapecartridges volume serialnumber.1. If you know the volume serialnumber of the tape cartridge.Insert the cartridge into anavailable drive and retry theoperation.• If the operation fails, discard thedefective cartridge.• If the operation succeeds, inserta scratch cartridge into the firstdrive and run the tape drivediagnostics (refer to your LTOUltrium manual).• If the diagnostic fails replace thedrive.• If the diagnostics succeed,discard the cartridge.2. If another drive is not available,insert a scratch cartridge into thedrive and run the tape drivediagnostics (refer to your LTOUltrium manual).• If the diagnostics fail, replace thedrive.• If the diagnostics succeed,discard the cartridge.Run the tape drive diagnostics(refer to your LTO Ultrium manual).• If the diagnostics fail, replace thetape drive.• If the diagnostics succeed, runthe Test Head diagnostics. (referto your LTO Ultrium manual)• If the Test Head diagnostic fails,replace the tape drive.• If the Test Head diagnosticsucceeds, replace the cartridgesthat caused the problem.96154 Third Edition 59
Troubleshooting and DiagnosticsTable 5. IBM LTO Drive Codes and Meaning (Continued)Code Status and Cause Action Required7 The tape drive determinedthat an error occurredbecause of a faulty tapecartridge.8 Tape drive or SCSI Busfailed.Fibre Channel detects lightthrough the fiber cable butcannot perform datacommunication properly.9 The tape drive determinedthat a failure occurred in thetape drive hardware or in theLDI (RS-422) connection.o,c,b or hABNo error or messageassigned. There may be aproblem with the singlecharacterdisplay.The tape drive determinedthat a problem occurredwhich degraded theoperation of the tape drive,but it did not restrictcontinued use.No error or message isassigned.1. Insert another tape cartridge. Ifthe problem occurs with multipletape cartridges see resolvingMedia-Related problems in yourUltrium LTO manual.2. The error code clears when youremove the tape cartridge orplace the drive in maintenancemode.1. Refer to fixing SCSI Bus Errorsin your LTO Ultrium manual.1. Refer to fixing Fibre ChannelErrors in your Ultrium LTOmanual.1. Run the LDI or RS-422 wraptest. Refer to function codes inyour Ultrium LTO manual.2. If diagnostics fails replace thetape drive.3. If the diagnostics runssuccessfully, the problem is withthe enclosure or the cable to theenclosure.4. The error clears when you placethe tape drive in maintenancemode.1. Turn the power off, then on anddetermine weather all segmentson the single-character displayare lit.2. Refer to the latest version ofcode and documentation.1. Replace the tape drive.2. The error code may clear whenyou clean the tape drive or placeit in maintenance mode.1. Refer to the error code chart inyour Ultrium LTO manual.60 Third Edition 96154
Diagnostic UtilitiesTable 5. IBM LTO Drive Codes and Meaning (Continued)Code Status and Cause Action RequiredCdDEFThe tape drive needs to becleaned.Fibre Channel AL_PAconflict. More than onedevice has the sameaddress.No error or messageassigned.The tape drive’s FibreChannel port has beenplaced offline by anotherdevice or by an operator.No light is being receivedover the Fibre Channel.1. Clean the tape drive. Refer toCleaning the Drive Head in yourUltrium LTO manual.1. Set each tape drive to have itsown unique AL_PA address.Refer to Setting the ArbitratedLoop Physical Address in yourUltrium LTO manual.1. See Error Code 0 in this table.1. This code is set when the Offlinecommand is received fromanother device on the FibreChannel interface. Determinewhy the device at the other endof the Fibre Channel (the server,switch or other device) placedthe tape drive offline.2. Reset the tape drive.3. The tape drive is placed offlinewhen it receives the Onlinecommand from the FibreChannel interface.Refer to Fixing Fibre Channel Errorsin your Ultrium LTO manual.Place the tape drive in Maintenancemode.■ Diagnostic UtilitiesReportsThe StreamLine <strong>Library</strong> Console provides utilities, reports, and monitors tohelp diagnose a problem with the library and the attached devices (drives,CAPs, robots, and elevators).The reports from the StreamLine <strong>Library</strong> Console provide static information onthe library and the associated devices (for example, drives, robots, elevators,and CAPs), events, and tape cartridges.96154 Third Edition 61
Troubleshooting and DiagnosticsPermanent reports are predefined and built into the <strong>Library</strong> Consoleapplication. These reports are useful when you need to access the reportutility and quickly select an existing report template to generate relevant datato view, e-mail, print, or save to a file. This can help the service representativediagnose a problem remotely. For example, the service representative mightwant a summary report of all the cartridges after an audit. You can quicklyaccess the Reports module and select the Cartridge Summary report from thePermanent reports folder and display it on screen. Figure 10 is a samplereport providing a summary of all the cartridges in the library.Figure 10. Sample Permanent ReportEvent MonitorsEvent monitors are setup to collect information about the library and theassociated devices when specific events occur. For example, mounting acartridge on a drive can be an event that causes an event monitor to track thenumber of reads on the drive.Event monitors help service representatives to easily identify and resolveproblems to minimize unscheduled machine downtime.Permanent monitors are predefined and built into the <strong>Library</strong> Consoleapplication. These monitors are useful to quickly select an existing event62 Third Edition 96154
Diagnostic Utilitiesmonitor template to capture the data associated with the event. For example,a service representative has to resolve a problem with the tape drive inphysical location (1,2,1,1,1) that has been logging read errors. Diagnosis ofthis problem requires monitoring the different events associated with the drivestarting with the drive mount. The service representative selects thepermanent monitor designed to collect this information as soon as the eventoccurs. The system starts displaying the different activities related to the eventmonitor.UtilitiesThe <strong>Library</strong> Console provides the following utilities to:• Load code• Perform audits• Perform a library self test• Search for a cartridge, result code, or operation code• Modify the CAP locked statusLoading CodeSee “Upgrading Firmware” on page 24 for information on code load.Performing AuditsThe audit process performs the inventory synchronization with the physicallibrary.During initialization, the library audits the location and VOLID of all cartridgesin the storage and reserve slots. The library also performs an audit when you:• Open and close the library access doors• Make a request at the host console to audit the tape library• Make a request from the <strong>Library</strong> ConsoleThe <strong>SL8500</strong> maintains a cartridge database in the HBC card. The cartridgedatabase contains the following information for all the cartridges in the library:• VOLID• <strong>SL8500</strong> slot locationYou can perform a virtual or physical audit. See the online help documentationaccessible through the <strong>Library</strong> Console application.96154 Third Edition 63
Troubleshooting and DiagnosticsPerforming <strong>Library</strong> Self TestUse the self-test utility to verify proper operation of the library after a newinstallation, service activity, or to just validate the operational state of thelibrary and the associated devices (drives, CAPs, elevators, and robots.You can perform a partial or full self test:The partial self test is non-disruptive and does not require the library to betaken offline. The routine does not affect the library operations currently active.The test verifies the network connectivity of the library and the associateddevices (drives, CAPs, elevators, and robots).The full self test performs a partial self test and also audits the library. See theonline help documentation accessible through the <strong>Library</strong> Console application.WARNING:The library has to be takes offline to perform a full self-test. So,make sure to end all the library operations that are currentlyactive before performing a full self test.Working with the Search UtilityThe search utility provides a convenient way to look up information on thefollowing:• Cartridge locations• Result codes (the result of the action requested)• Operation codes.Note: You can lookup a cartridge location either in the hardware format(physical location) or HLI-PRC format based on the librarymanagement software. See “<strong>SL8500</strong> Address” and “HLI-PRCAddress” in Appendix A.See the online help documentation accessible through the <strong>Library</strong> Consoleapplication.Modifying the CAP Locked StatusBefore attempting to enter or eject cartridges using a CAP, you must unlockthe CAP and then open it. See “Performing CAP Activities” on page 32. The<strong>Library</strong> Console provides the functionality to lock and unlock the CAPs.See the online help documentation accessible through the <strong>Library</strong> Consoleapplication.64 Third Edition 96154
Obtaining Maintenance Support6This chapter describes what to do if problems occur with the tape library. Insome cases, you might be able to correct the problem. In other cases, youmust contact your service representative, as described in this chapter.When the problem is caused by cartridge tapes, see Chapter 4, “CartridgeInformation.” When the problem is caused by cartridge tape drives, refer toyour tape drive operator’s guide.■ Customer Initiated MaintenanceCustomer initiated maintenance begins with a telephone call from you to theStorageTek Technical Excellence Center (TEC). You receive immediateattention from qualified StorageTek personnel, who record probleminformation and respond with the appropriate level of support.To contact the TEC about a problem:1. Use the telephone to call the StorageTek customer service at:800.525.0369 (within the United States)303.673.4056 (outside the United States)2. Describe the problem to the call taker. The call taker will ask severalquestions and will either route your call to or dispatch a servicerepresentative.If you have the following information when you place a service call, theprocess will be much easier:Account nameSite location numberContact nameTelephone numberEquipment model numberDevice addressDevice serial number (if known)Urgency of problemProblem description96154 Third Edition 65
Obtaining Maintenance Support■ StorageTek’s Worldwide OfficesYou may contact any of StorageTek’s worldwide offices to discuss completestorage, service, and support solutions for your organization. You can findaddress and telephone number information on StorageTek’s external Web siteat:http://www.storagetek.com/global66 Third Edition 96154
Cartridge Slot LocationsA■ <strong>Library</strong> WallsThe <strong>SL8500</strong> library has two walls:The Inner walls has 14 slot arrays.The Outer walls use various sizes of arrays consisting of:• 13 cartridge slots (allowing space for the robotic rails)• 8-slot arrays placed within the future PTP areas and underneath the stopbrackets for the service safety door• 4-slot arrays used on sections that are cutout for each future PTP• 3-slot arrays at the ends of all rails; these slots are reserved for robotic endstop labels (top slot), proximity calibration (middle slot), and drop-off slot(bottom slot)There are also 4-slot arrays for each elevator and turntable assembly.Service areas are located on each, front side of the customer interfacemodule; these areas are reserved for non-functioning HandBots and do notinterfere with cartridge GET or PUT operations by the functioning HandBots.Currently, arrays installed within the service areas (198 slots) are reserved fordiagnostic and cleaning cartridges only.Cartridges placed in arrays lie flat, hub down, and parallel to the floor. Toprevent slippage, cartridges are held in their slot by internal retainer clips.Each array has two targets centered vertically to accommodate the differentsizes and depths of cartridges.Aisle space between arrays is limited to 0.5 m (18 in.). Due to the built-inredundancy of components, entry into the library beyond the maintenancearea should be infrequent.■ Reserved SlotsThere are a total of 230 slots within the library that are reserved (that is, not tobe used for data cartridge storage); these are listed in Table 6.96154 Third Edition 67
Cartridge Slot LocationsTable 6. Reserved SlotsSlots Use Location198Front section of Customer Interface ModuleDiagnostic or Cleaning(separated from data cartridge cells by theCartridgesService Safety Door area)24 3-cell arrays:■ Cartridge Address<strong>SL8500</strong> Address• endstop label (top)• proximity sensing(middle)• drop-off slot for singleHandBot (bottom)8 Drop-off slot for secondHandBotTotal = 230You have to understand two types of addressing scheme to manually locate acartridge:• <strong>SL8500</strong> address• HLI-PRC (Host LMU Interface - Panel, Row, Column) addressThere are significant difference between the two addressing schemes.The <strong>SL8500</strong> library firmware designates cartridge locations with a five-digitnumber as viewed from the front of the library, <strong>Library</strong>, Rail, Column, Side, andRow represented as L,R,C,S,W.<strong>Library</strong> number: The number within a library or library complexRail number: Rails are numbered 1 through 4; Rail 1 is the top railColumn number: Columns are “signed” numbers referenced from thecustomer interface module, where +1 is right of the center of the drive baysand -1 is to the left of the drive baysSide number: Outer walls = 1, inner walls = 2Front section of Customer Interface ModuleTop cell under the PTP areaRow number: Numbered consecutively, from the top (1) downSee “Locating a Cartridge and Drive” on page 43 to locate a cartridge usingthe <strong>Library</strong> Console.68 Third Edition 96154
Cartridge AddressFigure 11. Cartridge and Drive Locations – Internal Firmware (1 of 8) (L203_590)96154 Third Edition 69
Cartridge Slot LocationsFigure 12. Cartridge and Drive Locations – Internal Firmware (2 of 8)(L203_591)70 Third Edition 96154
Cartridge AddressFigure 13. Cartridge and Drive Locations – Internal Firmware (3 of 8)(L203_592)96154 Third Edition 71
Cartridge Slot LocationsFigure 14. Cartridge and Drive Locations – Internal Firmware (4 of 8)(L203_593)72 Third Edition 96154
Cartridge AddressFigure 15. Cartridge and Drive Locations – Internal Firmware (5 of 8)(L203_594)96154 Third Edition 73
Cartridge Slot LocationsFigure 16. Cartridge and Drive Locations – Internal Firmware (6 of 8)(L203_595)74 Third Edition 96154
Cartridge AddressFigure 17. Cartridge and Drive Locations – Internal Firmware (7 of 8)(L203_596)96154 Third Edition 75
Cartridge Slot LocationsFigure 18. Cartridge and Drive Locations – Internal Firmware (8 of 8)(L203_597)76 Third Edition 96154
Cartridge AddressTable 7. Cartridge Locations (1 of 3)Rail 1Rail 2Rail 3Rail 4Rail Row CustomerModuleRowsRowsRowsRowsLeft Outer Wall (1)Robotics ModuleLeftDrive ModuleColumns-11 -10 -9 -8 -7 -6 -5 -4 -3 -2 -11131131131113113113111311311311131131131113113113113 13 13 13 13 13 13 13 13 4 4Notes: Negative numbering starts from the left, center column of drives within the drivemodule. If an expansion module is added, numbering will be consecutive, startingwith column -9 for the expansion module.Column -6 is a PTP area and therefore contains 8-cell arrays, numbered 6 – 13. Slot6 is designated a drop-off slot.If an storage expansion module is added, column numbering will be consecutive,starting from column -9.61361361361131131131113113113111311311311414141141414196154 Third Edition 77
Cartridge Slot LocationsTable 8. Cartridge Locations (2 of 3)Right Outer Wall (1)Rail Row Right DriveRobotics Module Customer ModuleModuleColumns+1 +2 +3 +4 +5 +6 +7 +8 +9 +10 +11Rail 1Rail 2Rail 3Rail 4RowsRowsRowsRows14141411414141113113113111311311316131131134 4 13 13 13 13 13 13 13 13 13Notes: The positive numbering starts from the right, center column of drives within thedrive module. If an expansion module is added, numbering will be consecutive,starting from Column +9 for the next expansion module.1Column +6 is a PTP area and therefore contains 8-cell arrays, numbered 6 – 13.Slot 6 is designated a drop-off slot.If an storage expansion module is added, column numbering will be consecutive,starting from Column +9.11361361361131131131113113113111311311311131131131113113113178 Third Edition 96154
Cartridge AddressTable 9. Cartridge Locations (3 of 3)Rail Row Left Side(Customer Module)Rail 1Rail 2Rail 3Rail 4RowsRowsRowsRowsExample One:As viewed from the front of the library, cartridge location 1, 4, -3, 1, 13 wouldbe the slot next to drive number one (lower left drive). Listing this locationbreaks down as follows:1 = <strong>Library</strong> number4 = Bottom rail-3 = The first cartridge column to the left of the drive bay area1 = Side number (outer wall)13 = Bottom row, next to the bottom, left driveExample Two:Inner Walls (2)Wall OppositeDrive ModuleCartridge location 1, 1, 3, 2, 1 would be the slot next to drive number 61 (top,left drive):1 = <strong>Library</strong> number1 = Top rail3 = The first cartridge column to the right of the drive bay area1 = Side number (outer wall)1 = Top row, opposite the top, right driveRight Side(Customer Module)Columns-11 -10 -9 -2 -1 +1 +2 +9 +10 +11114114114111411411411141141141114114114114 14 14 14 14 14 14 14 14Note: Inner walls begin their numbering from -9 on the left, and +9 on the right.1141141141If a storage expansion module is added, column numbering will be consecutive,starting from column -3 on the left and +3 on the right.114114114111411411411141141141114114114111411411411496154 Third Edition 79
Cartridge Slot LocationsHLI-PRC AddressHLI-PRC (Host LMU Interface - Panel, Row, Column) address is a four digitcomma-separated value (L,P,R,C) representing LSM, Panel, Row, Column.This addressing scheme is used by HLI (Host LMU Interface) clients, includingACSLS and HSC, to represent library components accessible to those HLIclients.The slot location appears in the following format:where:ll: LSM number (0-3)pp: Panelrr: Row in the panelcc: Column in the rowSee “Locating a Cartridge and Drive” on page 43 to locate a cartridge usingthe <strong>Library</strong> Console.Although the library management software follows a five digit numberingscheme as that of the <strong>SL8500</strong> address there are significant differences in slotdesignations, CAP behavior, and other operational considerations asdescribed below.<strong>Library</strong> Storage Module (LSM)The <strong>SL8500</strong> library has four rails on which robots travel. The host softwareconsiders each <strong>SL8500</strong> rail as a separate LSM. From top to bottom, <strong>SL8500</strong>rails are numbered from 1 - 4 while the host LSMs are numbered from 0 - 3.For example, <strong>SL8500</strong> rail 1 is Host LSM 0.Panel Designationsl l p p r r c cTable 10. Rail NumberingHost<strong>SL8500</strong> FirmwareLSM 0 Rail 1LSM 1 Rail 2LSM 2 Rail 3LSM 3 Rail 4• Panel 0 = cartridge access port (CAP)• Panel 1 = drive panel• The data cartridge slots start their numbering after the drive bay (Panel 1)forward.80 Third Edition 96154
Cartridge AddressRowWithin each LSM (rail) rows are numbered consecutively from the top down.These start with 1 for the <strong>SL8500</strong> and 0 for host.CAPElevatorsThe CAP behavior controlled by host software is as follows:• The CAPs service all the LSMs in the library.• CAPs span across three LSMs (1-3).• Each CAP has three magazines with 13 slots each. Each magazine isadjacent to a separate rail, and can only be accessed by robots on thatrail. There is no adjacent section in the CAP for the top LSM (1), whichrequires pass-thru operations with the elevator.• When loading cartridges in the CAP, slots can be skipped or magazinesmissing.• The CAP is treated as an independent component, and does not belong toany one rail.Examples of CAP Behavior:• A CAP can be online and operational even though the LSM (rail) identifiedin the CAP ID is offline or not operational.• If an LSM is offline, the associated CAPs are not automatically offline.• If an LSM is online, the associated CAP is not automatically placed online.• Even if LSMs 1 through 3 are offline, CAPs can be used to enter/ejectcartridges for LSM 0.Elevators are considered a type of pass-thru port. Each elevator has threepass-thru operations per rail. Each rail can pass-thru to the other three railsand operate as such.96154 Third Edition 81
Cartridge Slot LocationsOperational ConsiderationsTo optimize HandBot operations:• Mount scratch tapes- Selects cartridges based on the LSM (rail)• Enter cartridges from the CAP to the closest LSM with free slots• The software tries to enter the cartridge to an LSM (rail) adjacent to theCAP.• The software also tries to eject the cartridge to the CAP adjacent to theLSM.Note: When HandBot optimization is not possible by the host, the librarycontroller manages the moving of cartridges using a pass-thruoperation (elevator).82 Third Edition 96154
Drive Bay LocationsBThe <strong>SL8500</strong> library features automatic detection of drives that are added orreplaced.There are four types of addressing schemes for drives:• <strong>SL8500</strong> drive bay address (the physical location)• <strong>SL8500</strong> address (assigned by the library firmware)• HLI-PRC (Host LMU Interface - panel, row, column address assigned bythe host software)• <strong>System</strong> addresses (assigned by the operating system)■ <strong>SL8500</strong> Drive Bay AddressThe drive bay address is a two-digit number (01-64) representing the physicallocations into which drive tray assemblies are inserted. The bay number of adrive is strictly internal to the library, defined by a drive’s position within a drivearray. A drive is automatically assigned a number from 1– 64 by the librarycontroller after the drive is installed and the library is re-initialized.A decal on the rear of the Drive and Electronics Module depicts the baynumbers, as shown in Table 11 on page 84. The bay numbers indicate thephysical location of drives. You have to be familiar with the bay numbers tolocate a drive to perform a manual mount (see “Manual Mode of Operation” onpage 39).96154 Third Edition 83
Drive Bay LocationsTable 11. Hardware Drive AddressRailNumber1RailNumber2RailNumber3RailNumber4Drive Bay Assembly Number 4Drive 61 Drive 62 Drive 63 Drive 64Drive 57 Drive 58 Drive 59 Drive 60Drive 53 Drive 54 Drive 55 Drive 56Drive 49 Drive 50 Drive 51 Drive 52Drive Bay Assembly Number 3Drive 45 Drive 46 Drive 47 Drive 48Drive 41 Drive 42 Drive 43 Drive 44Drive 37 Drive 38 Drive 39 Drive 40Drive 33 Drive 34 Drive 35 Drive 36Drive Bay Assembly Number 2Drive 29 Drive 30 Drive 31 Drive 32Drive 25 Drive 26 Drive 27 Drive 28Drive 21 Drive 22 Drive 23 Drive 24Drive 17 Drive 18 Drive 19 Drive 20Drive Bay Assembly Number 1Drive 13 Drive 14 Drive 15 Drive 16Drive 9 Drive 10 Drive 11 Drive 12Drive 5 Drive 6 Drive 7 Drive 8Drive 1 Drive 2 Drive 3 Drive 4Note: Numbers shown are referenced from the rear of the tape drive andelectronics module.84 Third Edition 96154
<strong>SL8500</strong> Address■ <strong>SL8500</strong> AddressThe <strong>SL8500</strong> address is a five-digit comma-separated value (L,R,C,S,W)representing <strong>Library</strong>, Rail, Column, Side, Row, viewed from inside the libraryfacing the drive bays. This addressing scheme is used by the <strong>SL8500</strong>firmware and internal communications to represent all devices and locationswithin the library.<strong>Library</strong> number (within a library complex)Rail number: Rails are numbered 1 through 4, rail 1 is the top railColumn number: Columns, where +1 is right of the center of the drive baysand -1 is left of the center of the drive baysSide number: Outer walls = 1, inner walls = 2 (all drives are side 1, the outerwalls)Row number: Numbered consecutively, from the top (1) downFirmware numbering is listed in Table 12.Table 12. Firmware Drive AddressRailNumber123RowNumberDriveColumn -2DriveNumberDriveColumn -1DriveNumberDriveColumn 1DriveNumberDriveColumn 2DriveNumber1 x, 1, -2, 1, 1 x, 1, -1, 1, 1 x, 1, 1, 1, 1 x, 1, 2, 1, 12 x, 1, -2, 1, 2 x, 1, -1, 1, 2 x, 1, 1, 1, 2 x, 1, 2, 1, 23 x, 1, -2, 1, 3 x, 1, -1, 1, 3 x, 1, 1, 1, 3 x, 1, 2, 1, 34 x, 1, -2, 1, 4 x, 1, -1, 1, 4 x, 1, 1, 1, 4 x, 1, 2, 1, 41 x, 2, -2, 1,1 x, 2, -1, 1, 1 x, 2, 1, 1, 1 x, 2, 2, 1, 12 x, 2, -2, 1, 2 x, 2, -1, 1, 2 x, 2, 1, 1, 2 x, 2, 2, 1, 23 x, 2, -2, 1, 3 x, 2, -1, 1, 3 x, 2, 1, 1, 3 x, 2, 2, 1, 34 x, 2, -2, 1, 4 x, 2, -1, 1, 4 x, 2, 1, 1, 4 x, 2, 2, 1, 41 x, 3, -2, 1, 1 x, 3, -1, 1, 1 x, 3, 1, 1, 1 x, 3, 2, 1, 12 x, 3, -2, 1, 2 x, 3, -1, 1, 2 x, 3, 1, 1, 2 x, 3, 2, 1, 23 x, 3, -2, 1, 3 x, 3, -1, 1, 3 x, 3, 1, 1, 3 x, 3, 2, 1, 34 x, 3, -2, 1, 4 x, 3, -1, 1, 4 x, 3, 1, 1, 4 x, 3, 2, 1, 496154 Third Edition 85
Drive Bay LocationsTable 12. Firmware Drive Address1 x, 4, -2, 1, 1 x, 4, -1, 1, 1 x, 4, 1, 1, 1 x, 4, 2, 1, 14 2 x, 4, -2, 1, 2 x, 4, -1, 1, 2 x, 4, 1, 1, 2 x, 4, 2, 1, 23 x, 4, -2, 1, 3 x, 4, -1, 1, 3 x, 4, 1, 1, 3 x, 4, 2, 1, 34 x, 4, -2, 1, 4 x, 4, -1, 1, 4 x, 4, 1, 1, 4 x, 4, 2, 1, 4Note: Perspective is from the front of the Customer Interface Module. “x” = library #As examples:DriveColumn -2• Drive firmware number 1, 4, -2, 1, 4 is the bottom, left drive in rail 1, asviewed from inside the library looking at the drive bays.• Drive firmware number 1, 1, 2, 1, 1 is the top, right drive in rail 1, as viewedfrom inside the library looking at the drive bays.■ HLI-PRC AddressDriveColumn -1DriveColumn 1DriveColumn 2The HLI-PRC addressing is a four-digit comma-separated value (L,P,R,C)representing <strong>Library</strong>, Panel, Row, and Column. The HLI (Host LMU Interface)clients (ACSLS, HSC) use this addressing scheme to represent librarycomponents accessible to the host.The tape drives are associated with and belong to each LSM (numbered 0-3).Each LSM is assigned 16 drives (0-15). Panel 1 is designated as the drivepanel. To mount a cartridge tape in a different LSM, the cartridge must gothrough an internal pass-thru port (the elevator) to the drive.Table 13. Host Software Drive AddressLSMNumber01Host Software NumberDrive 0 Drive 4 Drive 8 Drive 12Drive 1 Drive 5 Drive 9 Drive 13Drive 2 Drive 6 Drive 10 Drive 14Drive 3 Drive 7 Drive 11 Drive 15Drive 0 Drive 4 Drive 8 Drive 12Drive 1 Drive 5 Drive 9 Drive 13Drive 2 Drive 6 Drive 10 Drive 14Drive 3 Drive 7 Drive 11 Drive 1586 Third Edition 96154
<strong>System</strong> AddressTable 13. Host Software Drive Address23Drive 0 Drive 4 Drive 8 Drive 12Drive 1 Drive 5 Drive 9 Drive 13Drive 2 Drive 6 Drive 10 Drive 14Drive 3 Drive 7 Drive 11 Drive 15Drive 0 Drive 4 Drive 8 Drive 12Drive 1 Drive 5 Drive 9 Drive 13Drive 2 Drive 6 Drive 10 Drive 14Drive 3 Drive 7 Drive 11 Drive 15■ <strong>System</strong> AddressThe operating system also assigns system addresses to drives. BecauseFibre Channel is the operating mode for drives within a <strong>SL8500</strong> library, youcan minimize a network re-configuration resulting from the replacement of adefective drive by enabling dynamic World Wide Name (dWWN) through thelibrary configuration process. See “Dynamic World Wide Name” on page 23. Asystem address, once assigned, is automatically re-assigned when a drive isreplaced.■ Manually Locating a Drive BayIf you need to perform a manual mount to a drive, the <strong>Library</strong> Consoleprovides mapping of the hardware, firmware, and software mapping for all thedrives attached to a library.To locate a drive:1. Logon to the <strong>Library</strong> Console.2. Select Tools > <strong>System</strong> Detail.3. From the device tree, select the Drive folder.Note: The device tree is the left panel that provides a list of devicesattached to the library (drives, CAP, robots, elevator)The status screen displays the <strong>SL8500</strong> address, the corresponding drive bay,and the HLI-PRC addresses. For more information on the <strong>System</strong> Detailsmodule, see the online help documentation accessible through the <strong>Library</strong>Console application.96154 Third Edition 87
Drive Bay LocationsFigure 19. <strong>Library</strong> Console (Drives Data)88 Third Edition 96154
GlossaryNumerics2N A power configuration that gives theProduct Name library full AC and DC powerredundancy. This configuration allows ACline cords on two separate circuits, either ofwhich can power the entire system. See alsoN+1.Aaccess door A door on either side of thefront facade through which servicepersonnel can enter the library. OptionalCAPs are attached to the right access door.accessory rack An area of the drive andelectronics module that is used for ProductName library electronic and powerequipment and for other standard 19-inchrack-mount electronic equipment. Up to fourracks are permitted in the electronics/driveassembly. Rack-mount equipment must beon the approved equipment list.ACSLS See Automated Cartridge <strong>System</strong><strong>Library</strong> Software.addressing schemes See the following:• <strong>SL8500</strong> address• <strong>SL8500</strong> drive bay• HLI-PRC addressAny Cartridge Any Slot technologyThe StorageTek technology that allowsseamless sharing of different media typesand drives without hard partitions.array A partitioned unit that holds multipleobjects, such as cartridges or tape drive trayassemblies.asynchronous (ASYNC) Notsynchronized; not occurring at regular,predetermined intervals. Asynchronoustransmissions send one data character at atime, at irregular intervals, rather than in onesteady stream; a start bit and a stop bit notifythe receiver when the transmission beginsand ends. Contrast with synchronous.audit See host audit and security audit.Automated Cartridge <strong>System</strong> <strong>Library</strong>Software (ACSLS) Software that managesACS library contents and controls ACSlibrary hardware to mount and dismountcartridges on ACS drives.automation bezel A tape drive attachmentwith a locator target for positioning gets andputs to the tape drive.Bbackplane The main circuit board insideelectronic equipment that contains thecentral processing unit, the bus, memorysockets, expansion slots, and othercomponents.bar-code line scan camera A componentof the robot that is used for cartridgeidentification and position calibration.blind mate connector A connector thatallows hot plugging instead of manuallyplacing a cable between two fixedconnectors.96154 Third Edition 89
Glossarybulk load Manually loading cartridges intothe library, for example, during libraryinstallation.Ccamera In an Product Name library, one oftwo types:• The bar-code line scanner that is partof the robot hand assembly.• The two LibCam monitoring camerasthat display activity inside the libraryon the touch screen operator controlpanel.CAP See cartridge access port.card Synonymous with printed wireassembly.cartridge access port (CAP) A device inthe library that allows an operator to insert orremove cartridges during library operations.Synonymous with import/export mail slot inSCSI and open system libraries.See also unlocked.cartridge array An array that holds multiplecartridges.Product Name arrays contain 8, 13, or 14slots, depending on their location.cartridge bias Left or right justification of acartridge within a storage slot, CAP, or tapedrive.cartridge mover See robot.cartridge proximity detector Acomponent that determines if a slot is emptyor contains an unlabeled cartridge during alabel reading error recovery procedure.Synonymous with empty slot detector.CCD (1) Charge couple device.(2) Cell contents database.CIM controller The module that houses thecontrols for the elevators, CAPs, turntables,and service safety door.cleaning cartridge A tape cartridge thatcontains special material to clean the tapepath in a transport or drive.CLI Command line interface.cold swap To remove and replace asystem component (typically one such as alogic board that has no redundant backup)after system operations have been stoppedand system power has been disabled.Contrast with hot swap.CompactPCI (cPCI®) Industry standardbus used for card-to-card bus expansion.cPCI See CompactPCI.customer interface module The frontmodule of the <strong>SL8500</strong> library at which thecustomer has access to the touch screenoperator panel and CAPs, and servicepersonnel have access to the library andservice bay.Ddata cartridge A term used to distinguish acartridge onto which a tape drive may writedata from a cartridge used for cleaning ordiagnostic purposes.diagnostic cartridge A data cartridge witha “DG” label that is used for diagnosticroutines.DLE Data link escape.drive and electronics module The modulein an Product Name library that contains theelectronics control module, powerdistribution units (PDUs), power supplies,accessory racks and equipment, and tapedrives for the library.drive array assembly An array that isinstalled in the drive and electronics modulefor mounting tape drive tray assemblies. The90 Third Edition 96154
drive and electronics module holds up tofour array assemblies, and each array holdsup to 16 tape drive tray assemblies.drive bay A partitioned section of the tapedrive array assembly that holds one tapedrive tray assembly.drop-off slots Slots used to hold acartridge in the event of a robot failure thatoccurs while a cartridge is in the robot hand.EECM See electronics control module.electronics control module The assemblythat:• Processes commands from a hostsystem• Coordinates the activities of robots,elevators, pass-thru ports, and tapedrives• Monitors status inputs from sensorsand switcheselevator The device that transportscartridges vertically, across rail boundaries.emergency power-off (EPO) (1) A safetyscheme that allows a “power down” of asubsystem or a system as a whole insteadof powering it down component-bycomponent.(2) A safety switch on a machine or in a datacenter that allows a user to immediatelypower down a machine or a data centerpower supply by cutting off the externalsource power.See also Emergency Robotics Stop.Emergency Robotics Stop A button onthe Customer Interface Module keypad thatremoves power to the robotics power grid,leaving the remaining library power on.Enterprise <strong>System</strong>s Connection(ESCON) A set of fiber-optic basedproducts and services developed by IBMthat allows devices within a storageenvironment to be dynamically configured. Achannel-to-control unit I/O interface thatuses optical cables as a transmissionmedium.environmental monitors A collective termfor the sensors that track temperatures, fanspeeds, and the status of various othermechanism within a library.EPO See emergency power-off.ESCON See Enterprise <strong>System</strong>sConnection.Ethernet A local-area, packet-switchednetwork technology. Originally designed forcoaxial cable, it is now found running overshielded, twisted-pair cable. Ethernet is a10- or 100-megabytes-per-second LAN.export The action in which the libraryplaces a cartridge into the cartridge accessport so that the operator can remove thecartridge from the library. Synonymous witheject.Ffailover The act of moving to a secondaryor redundant path when the primary pathfails.FFC Flat flexible cable.Fibre Channel A bidirectional, full-duplex,point-to-point, serial data channel structuredfor high performance capacity. The FibreChannel is an interconnection of multiplecommunication ports, called N_Ports. TheseN_Ports are interconnected by a switchingnetwork, called a fabric, to a point-to-pointlink, or an arbitrated loop. Fibre Channel is ageneralized transport mechanism with noprotocol of its own. A Fibre Channel doesnot have a native input/output command set,but can transport existing Upper LevelProtocols (ULP) such as SCSI and IPI. Fibre96154 Third Edition 91
GlossaryChannel operates at speeds of 100 MB persecond (full speed), 50 MB per second (halfspeed), 25 MB (quarter speed), or 12.5 MB(eighth speed). Fibre Channel operates overdistances of up to 100 m over copper mediaor up to 10 km over optical links.fibre connection (FICON) An IBM S/390-based channel architecture that provides upto 256 channels in a single connection, eachhaving a capacity of 100 MB per second.FICON See fibre connection.front facade The external portion of thecustomer interface module, between theaccess doors, that holds the:G• Membrane keypad• Product logos• Optional touch screen operatorcontrol panelget An activity in which a robot obtains acartridge from a slot or drive.gripper (1) The portion of the handassembly that grasps the cartridge.(2) The part of the hand assembly thatgrasps and holds a cartridge duringtransport.Hhand assembly A part of the library robotwhose function is to grasp cartridges andmove them between storage slots anddrives. A bar-code line scan camera on thehand assembly reads cartridge volumelabels.HandBot High performance small robot.Four or eight HandBots are used in an<strong>SL8500</strong> library. Contrast with TallBot.The full name is StreamLine HandBothigh performance robotics.HBZ module See CIM Controller.HLI-PRC address A four-digit, commaseparatedvalue (L,P,R,C) that representsLSM, Panel, Row, and Column. Thisaddressing scheme is used by host LMUinterface (HLI) clients, including ACSLS andHSC, to represent library componentsaccessible to those HLI clients.host audit The process of updating thecartridge VOLIDs and locations (collected bya security audit) in a host CDS. This audit isinitiated by a host command.hot swap Removal and replacement of asystem component while system powerremains on and system operations continue.Contrast with cold swap. Contrast with hotpluggable.Synonymous with online servicing.hot-pluggable The capability that allows aservice representative to replace FRUswhile power to the FRU is maintained. Thisfeature allows hardware maintenanceactions and hardware upgrades to proceedwithout disrupting subsystem availability.Contrast with hot swap.Iimport The process of placing a cartridgeinto the cartridge access port so that thelibrary can insert it into a storage slot.Synonymous with enter.interlock switch A switch that disconnectspower to library mechanisms, excluding tapedrives, when the front door is opened.initial program load (IPL) (1) A processthat activates a machine reset and loadssystem programs to prepare a computersystem for operation. Processors havingdiagnostic programs activate theseprograms at initial program load execution.Devices running firmware usually reload thefunctional firmware from a diskette or disk92 Third Edition 96154
drive at initial program load execution.Synonymous with initial microprogram load(IML).(2) The initialization procedure that activatesa machine reset, initiates wake-updiagnostics (from EPROMs) and loadsfunctional code.IPL See initial program load.Kkeypad interface See membrane keypad.LLibCam Monitoring A feature that providestwo cameras, one for each leg of thehorseshoe, for viewing activity inside thelibrary. The touch screen operator controlpanel is required. Not available at this time.Do not use this definition.library complex (1) Two or more ProductName libraries attached to each other withPTPs.(2) Two Product Name libraries attached toeach other with PTPs in which one library isthe Master library and the other is theStandby library for pass-through purposes.library console See Streamline <strong>Library</strong>Console.library controller (LC) The HBC cardwithin the Product Name library that controlsoperations and communicates with theoperator panel.library operator panel See touch screenoperator control panel.library storage module (LSM) A termused to identify each level of the <strong>SL8500</strong>,including the rail assembly, robotics, tapedrives, power supplies, electronics modules,and accessory rack. The LSMs arenumbered top-to-bottom, 0–3.logical library A virtual representation of aphysical library. Synonymous with virtuallibrary partition.Mmagazine A removable array that holdscartridges and is placed into the cartridgeaccess port (CAP).Each <strong>SL8500</strong> CAP holds up to threemagazines, each of which holds up to 13cartridges.master (pass-thru port) The side of apass-thru port (PTP) that contains theelectronics that control the actions of thePTP. See also standby (pass-thru port).membrane keypad A keypad mounted onthe front facade used to monitor the status ofthe <strong>SL8500</strong> library and to operate the CAPs.NN+1 A power configuration that provides ACpower and redundant DC power by adding asecond DC power supply to each DC bus.See also 2N.Oonline replacement Replacement orservice of a module while the library remainsoperational. The service person may berequired to power off the module beforeremoving or replacing it. Synonymous withhot swap.operator panel See touch screen operatorcontrol panel.Ppass-thru port (PTP) A mechanism thatenables a cartridge to pass through fromone library to another in a multiple modularlibrary complex.PCI Peripheral component interconnect.96154 Third Edition 93
GlossaryPDU See power distribution unit.physical library A single Product Namelibrary consisting of a customer interfacemodule, robotics interface module, and adrive and electronics module, with one tothree storage expansion modules optional.See also logical library.PLC Power line communications.PLI See primary library interface.power distribution unit (PDU) A devicefor the distribution of AC line power from oneinlet to multiple outlets. Multiple PDUsprovide higher availability because thepower continues if one PDU (or itsalternating current [AC] source if the PDUsuse separate AC sources) loses power.power grid A power circuit that minimizespower failures that cause the library to ceaseoperations.An Product Name library has five powergrids, two for AC power and three for DCpower.power/communication bus rail A rail thatsits on the robot track to provide 48 VDCpower and communication to the robot.primary library interface (PLI) Thecommunication path between the operatorpanel and the library controller (the HBCcard.) This consists of Ethernet with TCP/IPand XML.PTP See pass-thru port.put An activity in which a robot places acartridge into a slot or drive.PWA Printed wiring assembly.RRaceTrack architecture The design andimplementation of the <strong>SL8500</strong> library’smultiple high performance robotics.rail That portion of the upper robot trackassembly that provides power andcommunication to the robot.rail assembly The mechanism on whichthe robot travels between cartridge arraysand tape drives.reach mechanism A component of therobot that moves the gripper to get or put acartridge at a designated location.RealTime Growth capability Thecapability to add pass-thru ports dynamicallywhile the library is operating.remote operator console The customer’soperator panel that interfaces with the PLI.See also security software layer.reserved slots Cartridge slots that areused only for cleaning and diagnosticcartridges and as drop-off slots.robot A mechanism that moves horizontallyalong a track in the Product Name totransport tape cartridges to and from otherlocations in the library. Also called anHandBot or TallBot.robotics interface module The modulecontaining the curved rails and pass-throughport (PTP) assemblies. See alsoStreamLine RaceTrack.Ssecurity audit The process of reading andstoring in Product Name library memory theVOLIDs and locations of all cartridges in thelibrary. See also host audit.security software layer (SSL) Thecommunication path between the PLI andthe remote operator console.service area An area between the accessdoors of the customer interface assemblyand the service safety door in which aninoperable robot is stored for service and94 Third Edition 96154
other mechanisms can be repaired orreplaced.service safety door A motor-driven barrierthat separates the service areas of the frontinterface assembly from the rest of thelibrary so that service personnel can safelyrepair or replace failed library mechanismswhile the library continues normaloperations. Synonymous with safety barrier.<strong>SL8500</strong> See StreamLine <strong>SL8500</strong><strong>Modular</strong> <strong>Library</strong> <strong>System</strong>.<strong>SL8500</strong> address A five-digit, commaseparatedvalue (L,C,R,S,W) that represents<strong>Library</strong>, Rail, Column, Side, and Row. Thisaddressing scheme is used by <strong>SL8500</strong>firmware and internal communications torepresent all devices and locations withinthe library.<strong>SL8500</strong> drive bay A two-digit integer(01–64) that represents the physicallocations into which drive tray assembliesare inserted.slot The location in the library in which atape cartridge is stored. Synonymous withcell.SSi <strong>System</strong> Server infrastructure.standby (pass-thru port) The side of apass-thru port (PTP) that operates inresponse to actions initiated by the masterside of the PTP. See also master (pass-thruport).storage cell See slot.storage expansion module An optionalmodule for the Product Name library thatprovides up to 1728 additional cartridgestorage slots. Up to three modules can beattached to each <strong>SL8500</strong> library.StreamLine <strong>Library</strong> Console Theoperator panel software application used forthe <strong>SL8500</strong>.StreamLine RaceTrack The designand implementation of the <strong>SL8500</strong> library’smultiple high performance robotics.StreamLine RealTime Growth Thecapability to add pass-thru ports dynamicallywhile the library is operating.StreamLine <strong>SL8500</strong> <strong>Modular</strong> <strong>Library</strong><strong>System</strong> An automated tape librarycomprised of:T• Customer interface module• Robotics interface module• Drive and electronics module• Storage expansion module (optional)TallBot High capacity tall robot. One ortwo TallBots are used in an <strong>SL8500</strong> library.Contrast with HandBot.The full name is StreamLine TallBothigh capacity robotics.tape cartridge A container holdingmagnetic tape that can be processedwithout separating the tape from thecontainer.The library uses data, diagnostic, andcleaning cartridges. These cartridges are notinterchangeable.tape drive An electromechanical devicethat moves magnetic tape and includesmechanisms for writing and reading data toand from the tape.tape drive tray assembly The mechanicalstructure that houses a tape drive, fanassembly, power and logic cards, cables,and connectors for data and logic cables.Synonymous with drive tray assembly.tape storage area The area in the ProductName library where cartridges are stored.96154 Third Edition 95
Glossarytape transport interface (TTI) An interfaceto control/monitor tape movement.touch screen operator control panel Anoptional feature consisting of a flat-paneldisplay with a touch screen interface and apanel mount computer. This feature isattached to the front facade.track The horizontal path upon which arobot travels.track drive mechanism The componentthat moves the robot along the trackbetween the storage arrays, CAPs, and tapedrives.TTI See tape transport interface.turntable A mechanism that transferscartridges between the aisles within a singlelibrary.(2) A component of the hand assembly thatrotates the hand horizontally.UU A standard unit of measurement ofvertical space inside a rack-mount cabinetequal to 44.5 mm (1.75 in.).unlocked In the <strong>SL8500</strong>, status indicatingthat software has made a CAP available foroperator use. An LED is lit when a CAP isunlocked.UART Universal asynchronous receiver/transmitter.Vvacancy plate A plate that covers anunused bay, such as a drive bay or powersupply bay.Wwrist (1) A mechanism in the robotassembly that allows the robot to access theouter and inner storage walls.96 Third Edition 96154
IndexNumerics2N power configurationdescribed, 169840 cartridge, 509940 cartridge, 51AACSLSdescribed, 19maximum library size, 3version, 19action codes, 34addressingCAP, 29drivesbay, 103HLI-PRC, 106<strong>SL8500</strong>, 105system, 107HandBot, 10agreement, internal code, xxviialert messages in manual, xviAmerican Eagle, cartridge labels by, 46arrays, 87auditCAP, 33library, 83auto discoveryadded library, 18cartridge slots, 18drives, 18automated modedescribed, 27determining state, 37returning the library to, 43Bbay address, 103CCAPaudit, 33automatic mode, 33exporting cartridges, 33importing cartridges, 31magazines, 29manual mode, 33priority cell, 33cartridgedrop-off slots, 88exporting, 33identifying cartridge type, 50importing, 31inspecting, 50mounting, 41repairing detached leader block, 62reserved slots, 88upside down placement, 46cartridge access port. See CAPcartridge specificationsLTO Gen2, 66SDLT, 67T9840, 64cartridge tapes9840, 51applying labels, 55cleaning cartridge usage, 61exterior cleaning, 61handling, 49identifying, 50label examples, 62labels, 46LTO, 53LTO Gen2, 53non-labeled, 46ordering, 47requirements, 45SDLT, 54storage, 68T9840, 5096154 Third Edition 117
IndexT9940, 51weights, 17cartridgescolor specifications, 45placement in cells, 87requirements, 45cautionslubrication, 39messages in manual, xvimoving robotleaving objects inside, 40mechanical stop, 40position, 40reentering cleaning cartridge, 61shielded cables, xxvsolvents for cleaning a cartridge, 61static electricity, xxiCE compliance statement, xxvcleaning cartridgesfeature codes, 49label examples, 63part numbers, 49color cartridge specifications, 45Colorflex, labels by, 46communicationHBC controller, 7host, 18complex, library, 3compliance statementsCE, xxvFCC, xxvJapanese, xxviTaiwan, xxviconfigurationAC power options, 15discussed, 22drives, 23dWWN, 23flash memory, 6library, 22physical, 1consumption, power, 15contacting StorageTek, 85conventions in manual, xviCustomer Initiated Maintenance (CIM), 85customer interface module, 10Customer Resource Center (CRC), xviiiDdata cartridgeslabel example, 62LTO Gen2part numbers, 49T9840part numbers, 47VolSafe cartridge part numbers, 48T9940part numbers, 48depths of the library, 16detectionadded library, 18cartridge slots, 18drives, 18diagnostic cartridgelabel example, 63diagnostic cartridge, label example, 63digital linear tape. See SDLTdisclaimer, iiDrive Tray weight, 17Drive Weights, 17drives2N power configuration, 15addressingfirmware, 105auto discovery, 18base power configuration, 15configuration, 23detection, 18firmware numberingillustrated, 105locations, 89models supported, 5N +1 power configuration, 15numberingdrive bay, 103hardware, 106HLI-PRC, 106host software, 106<strong>SL8500</strong>, 105system, 107drop-off slotslocations, 88dWWNautomatic handling, 18drive addressing, 107118 Third Edition 96154
dynamic World Wide Naming. See dWWNEelectronics moduleHBC card, 7HBM card, 7HBT card, 7emergency power-off. See emergency roboticsstopemergency robotic stopswitch location, 11usage, 43emergency robotics stopcauses, xxivcontrol card (HBN), xxivEN60950-1 statement, xxiiEngineered Data Products, labels by, 46entering the library, 37e-Partners Web site, xixESD prevention, xxievent logging, types, 34exiting the library, 42exporting cartridges, 33exporting, cartridges, 33Ffault symptom code (FSC), 34FCC compliance statement, xxvfeatures, upgrading, 2Fibre Channelconfiguration, 23firmwaredrive numbering, 105event logging, 34features, 18flash memory versions, 6flash memory, discussed, 6frame serial numbers, location, 7GgroundingEN60950-1 statement (Scandinavia)statement, xxiiHHandBotillustrated, 9non-functioning (service area), 87numbering, 10hardcopy publications from StorageTek, xixHBC card, 7HBK card, 6HBT card, 7HBV card, 14heat output, 17height of the library, 16HLI-PRC, drive numbering, 106host library interfaces, 18HSCdescribed, 19maximum library size, 3storage management componentrequirement, 19version, 19humidity requirements, 17Iimporting cartridges, 31importing, cartridges, 33interfaceCLI, 7GUI, 17HBT (tape) card, 7host, 18host-to-library, 7interlock, safety, xxiiiinterlocksdoors, xxiiisafety, xxiiiinternal code license, xxviiJJapanese compliance statement, xxviKkeylocation96154 Third Edition 119
Indexleft service safety door, 11right service safety door, 11maintenance, 44opening the front access doors, 38known service plan (KSP), 34Llaser product label, xxiileader block, detached, 62liability, iilibraryACSLS requirement, 19audit, 83configuration, 22determining library not in automatedmode, 37entering the library, 37entry precautions, 37exiting, 42firmwarefeatures, 18heat output, 16height and weight, 16interfaces, 18mounting a cartridge, 41placing in manual mode, 37placing online, 44power consumption, 16returning to automated mode, 43specifications, 16temperature, 16troubleshooting, 70library complexdefined, 3illustrated, 3<strong>Library</strong> Consoleconfiguration entries, 21described, 12generating reports, 81locating VOLIDs, 39monitoring events, 34performing audits, 83performing library self test, 84remote operator console, 12touch-screen, 12verifying library status, 37library management softwareACSLS, 19described, 19HSC, 19library, single, 1license, internal code, xxviilogic cardsHB, 7HBC, 7HBM, 7HBV, 14LTOcartridgesdescribed, 53specifications, 66universal cleaning cartridge, 55upside down placement, 46write protect switch, 60drives,described, 6Gen2cartridge part numbers, 49Gen2 cartridge tape specifications, 66Gen2 drives, 53label examples, 63repairing detached leader block, 62Mmaintenancearea, xxiiiobtaining StorageTek support, 85maintenance key, 44manual modedetermining library not in automatedmode, 37entering the library, 37exiting the library, 42mounting a cartridge, 41moving the robot, 39physical restrictions, 36placing the library in manual mode, 37returning the library to automated mode,43safety precautions, 36modulecustomer interface, 10drive, 5electronicsHBC card, 7120 Third Edition 96154
HBM card, 7HBT card, 7robotic interface, 8mounting a cartridge, 41moving the robot, 39NN+1 power configurationdescribed, 15networkdWWN entries, 23non-labled cartridges, 46numberingcartridge slots, 88HandBot, 10tape drivesfirmware, 105host software, 106Ooperating heat output, 17operationsinspecting cartridges, 50operator paneldescribed, 12GUI interface, 17remote, 2, 12StreamLine <strong>Library</strong> Console, 2touch-panel option, 2touch-screen, 12optionsAC power configurations, 15library, 2ordering cartridges, 47organization of this guide, xvouter walls, 87PPDUs, 15physical configurations, 1physical specifications, 16placing the library in manual mode, 37powerACconfigurations, 15options, 15consumption, 15, 17distribution, 15rail distribution, 15priority cell, CAP, 33Rrailillustrated, 9, 28, 87remote operator console, 12repairing detached leader block, 62reserved, slots, 88restrictions, library interior, 36result codes, 34returning the library to automated mode, 43robot, moving manually, 39robotic interface module, 8SsafetyESD prevention, xxifiber optics, xxigrounding, EN60950-1 statement (Scandinavia),xxiiinterlocks, xxiiilaser product label, xxiimanual mode precautions, 36service safety door, xxiiisafety areaservice safety door, xxiiiScandinavia, grounding statement, xxiiSDLTcartridgesapplying labels, 57described, 54environmental specifications, 64label examples, 63specifications, 67drives,described, 6ordering cartridges, 46security, 17serial numbers, locations on frame, 7service areadefined, 87service safety door, xxiii96154 Third Edition 121
Indexservice safety doordescribed, xxiiiservo power interrupt. See SPI<strong>SL8500</strong> address, 105slotsinternal firmware numbering, 89reserved, 88specifications, 16color cartridge, 45library, 16LTO cartridges, 66SDLT cartridges, 64T9840, 64T9940, 65SPIdoor interlock generated, xxivHBC card generated, xxivSSLillustrated, 32static electricity safety, xxistorage management component, 19StorageTekCustomer Resource Center (CRC), xviiie-Partners site, xixhardcopy publications, xixTEC telephone number, 85Web site, xviiiworldwide offices, 86storing cartridges, 68TT9840cartridgesapplying labels, 57described, 50label examples, 63part numbers, 47specifications, 64upside down placement, 47VolSafe, 52drives,described, 5T9940cartridgesapplying labels, 58described, 51label examples, 63part numbers, 48specifications, 65upside down placement, 47VolSafe, 52write protect switch, 59drives,described, 6repairing detached leader block, 62Taiwan warning statement, xxviTape Drive Weights, 17tape drivesLTO, 6mounting a cartridge, 41SDLT, 6T9x40, 5telephone number, StorageTek TEC, 85temperature, 16touch-screen panel, 12Tricode, labels by, 46troubleshooting, library and drives, 70UUltriumcartridgesmodel/feature codes, 55universal cleaning cartridge, 55VVolSafe cartridgesdescribed, 52part numbers, 48Wwallscartridge arrays, 87described, 87illustrated, 89slot numbering, listed, 97warningeye hazard from laser, xximessages in manual, xviwarning statement, Taiwan, xxviwarningsentering the library procedures, 37exiting the LSM, 40warranties, ii122 Third Edition 96154
weightof the library, 16weights, tape drives with drive tray, 17wet bulb, 16width of the library, 16World Wide Name. See dWWNwrite protect switchLTO, 60T9940, 59Writeline, labels by, 4696154 Third Edition 123
Index124 Third Edition 96154
NEED MORE INFORMATION?www.storagetek.comABOUT STORAGETEKStorage Technology Corporation (NYSE: STK)is a $2 billion global company that enablesbusinesses, through its information lifecyclemanagement strategy, to align the cost of storagewith the value of information. The company’sinnovative storage solutions manage thecomplexity and growth of information, lowercosts, improve efficiency and protect investments.For more information, visit www.storagetek.com,or call 1.800.275.4785 or 01.303.673.2800.WORLD HEADQUARTERSStorage Technology CorporationOne StorageTek DriveLouisville, Colorado 80028 USA1.800.525.0369© 2004 Storage Technology Corporation, Louisville, CO.All rights reserved. Printed in USA. StorageTek and theStorageTek logo are registered trademarks of StorageTechnology Corporation. Other names mentioned may betrademarks of Storage Technology Corporation or othervendors/manufacturers.StorageTek equipment is manufactured from new parts, ornew and used parts. In some cases, StorageTek equipmentmay not be new and may have been previously installed.Regardless, StorageTek's standard warranty terms apply,unless the equipment is specifically identified by StorageTekas “used” or “refurbished.”Replacement parts provided under warranty or anyservice offering may be either new or equivalent-to-new,at StorageTek’s option. Specifications/features may changewithout notice.