Waipoua Theme Documentation - Elmastudio
Waipoua Theme Documentation - Elmastudio
Waipoua Theme Documentation - Elmastudio

Create successful ePaper yourself
Turn your PDF publications into a flip-book with our unique Google optimized e-Paper software.
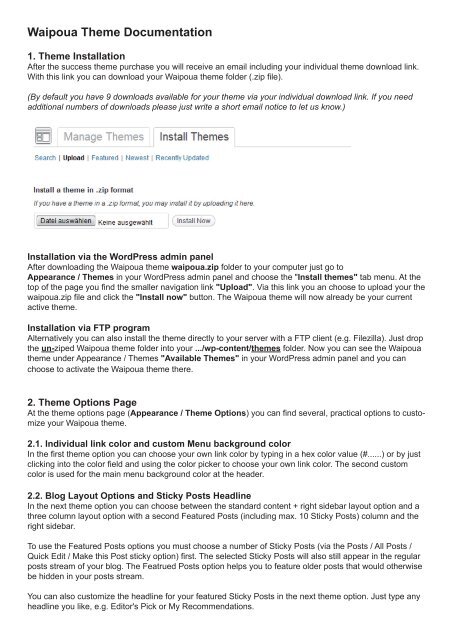
<strong>Waipoua</strong> <strong>Theme</strong> <strong>Documentation</strong>1. <strong>Theme</strong> InstallationAfter the success theme purchase you will receive an email including your individual theme download link.With this link you can download your <strong>Waipoua</strong> theme folder (.zip file).(By default you have 9 downloads available for your theme via your individual download link. If you needadditional numbers of downloads please just write a short email notice to let us know.)Installation via the WordPress admin panelAfter downloading the <strong>Waipoua</strong> theme waipoua.zip folder to your computer just go toAppearance / <strong>Theme</strong>s in your WordPress admin panel and choose the "Install themes" tab menu. At thetop of the page you find the smaller navigation link "Upload". Via this link you an choose to upload your thewaipoua.zip file and click the "Install now" button. The <strong>Waipoua</strong> theme will now already be your currentactive theme.Installation via FTP programAlternatively you can also install the theme directly to your server with a FTP client (e.g. Filezilla). Just dropthe un-ziped <strong>Waipoua</strong> theme folder into your .../wp-content/themes folder. Now you can see the <strong>Waipoua</strong>theme under Appearance / <strong>Theme</strong>s "Available <strong>Theme</strong>s" in your WordPress admin panel and you canchoose to activate the <strong>Waipoua</strong> theme there.2. <strong>Theme</strong> Options PageAt the theme options page (Appearance / <strong>Theme</strong> Options) you can find several, practical options to customizeyour <strong>Waipoua</strong> theme.2.1. Individual link color and custom Menu background colorIn the first theme option you can choose your own link color by typing in a hex color value (#......) or by justclicking into the color field and using the color picker to choose your own link color. The second customcolor is used for the main menu background color at the header.2.2. Blog Layout Options and Sticky Posts HeadlineIn the next theme option you can choose between the standard content + right sidebar layout option and athree column layout option with a second Featured Posts (including max. 10 Sticky Posts) column and theright sidebar.To use the Featured Posts options you must choose a number of Sticky Posts (via the Posts / All Posts /Quick Edit / Make this Post sticky option) first. The selected Sticky Posts will also still appear in the regularposts stream of your blog. The Featrued Posts option helps you to feature older posts that would otherwisebe hidden in your posts stream.You can also customize the headline for your featured Sticky Posts in the next theme option. Just type anyheadline you like, e.g. Editor's Pick or My Recommendations.
The <strong>Waipoua</strong> theme options page.2.3. Custom logo imageYou can also include your own logo image (jpg or transparant png) via the theme options page. You can uploadyour custom logo image using the WordPress Media Uploader (see link in theme options). The sizeof your logo is optional, but is recommended to be approximately 400x100 pixel.After uploading your logo, you copy your logo file URL and paste the URL into the theme options text fieldDon't forget to save your settings.2.4. Custom favicon and Apple Touch IconTo include your own favicon you need to create a 16x16 pixel jpg image and generate a .ico favicon fileusing and online favicon generator (like faviconr.com) . Now you just have to upload the favicon.ico file intoyour <strong>Waipoua</strong> theme folder via FTP and paste the favicon URL into the "Custom Favicon" text field on yourtheme options page.<strong>Waipoua</strong> also supports an Apple touch icon, so your blog can be nicely saved on an iPhone or iPad Home
screen. Just create an 128x128 png image and upload your image using the Media Uploader. Copy andpaste the file URL into the Custom Apple Touch Icon text field. You don't need to create rounded corners orany glossy effects for your icon since Apple renders your icon automatically with these effects.2.5. Custom footer credit textIf you like to change the footer text of your blog, you can paste your individual footer text into the „CustomFooter credit text“ text field. You can use HTML code like link text here.2.6. Share buttons (Twitter, Google+, Facebook)In the theme options you can also activate the official Twitter, Google+ and Facebook share buttons. Optionalyou can choose to show the buttons on your blogs front page and on single post pages, only on singlepost pages and/or on your blogs pages.3. Custom MenusIn the admin panel under Appearance / Menus you can set up custom menus for your main PrimaryNavigation (appears at the top of your header) and the optional Footer Navigation. The optional footernavigation does not support sub menus.You can create your custom menus by adding any number of custom links, pages and categories and savingthem to your created menus. Now you can choose the menus theme location at the"<strong>Theme</strong> Locations" field.Choosing the Menu locations in the theme.4. Custom BackgroundYou can also customize the background of your blog with a different background color or by uploading acustom background image. You can find the option in the admin panel under Appearance / Background.You can either choose a background image (e.g. a pattern image) or a color as your background. If youchoose a background image you should make sure that the file size of your image is not too large so that itwill not take too long to load your website into the browser.It's a good idea to use a smaller image like 100x100 px and repeat the image using the Display options(choose tile below the background image preview).
(Social Links in the "Header Widget Area").6. WordPress Post FormatsIn the <strong>Waipoua</strong> theme you can all WordPress post formats: Aside, Status, Link, Quote, Image, Gallery,Video, Audio and Chat.You can choose a post format in the field "Format" while writing or editing your posts. With post formatsyou can create a more exciting reading experience for your blog readers by including single videos, quotesor images as blog posts.Using the post formats:6.1. QuoteTo create a quote you can use the "Blockquote" symbol in the Visual text editor or the b-quote button inthe HTML editor. Then your code should look like this:Your quote text here...If you want to include the quote author (maybe with a link) you can add the cite-tag in the following format:Your quote text here...author name
6.2. VideoTo post a video just select the video post format and paste the embed code (ifame) from a YouTube orVimeo video into your post.If you have trouble embedding the iframe code (in some cases the iframe code gets deleted after savingor editing a video post) you can install the Iframe WordPress plugin (http://wordpress.org/extend/plugins/iframe/). The plugin enables iframe shortcodes like [iframe src="http://player.vimeo.com/video/3261363"width="100%" height="480"] so you just have to add the shortcode including your width and height and theURL of your video.6.3. LinkTo use the link post format your can include your link into the post and add a CSS class of "link" in theHTML editor:Das ist der LinktextThe arrow at the end of a link text will be included automatically.6.4. GalleryFor the gallery post format you can just upload a number of images to your post using the WordPresssMedia Uploader button "Upload/Insert". Inside the media upload windoe you can choose all images as agallery. The WordPress gallery shortcode [gallery] will be included automatically into your post.If you like all your thumbnail images to have the same width and height, go to Settings/Media in youradmin panel and choose a size like 250x250 pixel for your thumbnail images. You also should choose the"Crop thumbnail to exact dimensions" option and save your settings.For further options using the WordPress image gallery please have a look at the official WordPress codex:http://codex.wordpress.org/Gallery_Shortcode6.5. ImageTo use the Image post format just include an image in your post as usual using the "Upload/Insert" mediauploader.By default your images will not have an image border. If you want to use a border for your images you canadd the class of "img-border" to the img-tag.(This option will work for all you image not only the ones inside the image post format.)6.6. AudioFor audio posts you can use the Soundcloud iframe widget from soundcloud.com (of course you can alsochoose any other audio player). The Soundcloud widget is easy to use and also has a WordPress pluginoption for soundcloud shortcodes (http://wordpress.org/extend/plugins/soundcloud-shortcode/). The iframesoundcloud code works in responsive layouts and is also compatible for iOS devices (iPhone, iPad).7. Additional Text StylesNext to standard text styles like quotes (blockquote) or list elements (ul and ol) you can use some additionaltext styles in the <strong>Waipoua</strong> theme:To use a justified text paragraph you can add the CSS class "justify" to the p-tag:Your text here...
To show text as an intro text at the beginning of a post add the CSS class "intro" to the p-tag:Your intro text here...8. Full Width Page TemplateTo use a page in fullwidth without the sidebar you can choose the "Full Width" template in your"Page Attribute" Template option.9. Author info on single postsIf you want to show an author description text at the end of every standard post you only need to fill out theBiographical Info in the User profile. You can also insert links (in the format linktext).10. Threaded Comments<strong>Waipoua</strong> sup ports WordPress thre aded com ments. Readers will see a reply button for every com ment toreply directly. If the button does not show up automatically you might have to enable the thre aded commentsoption under Settings / Discussion / Other com ments options first.11. Supported external WordPress plugins11.1. FormsTo include forms (like a contact form) to your blog, you can install the Contact Form 7 plugin (http://wordpress.org/extend/plugins/contact-form-7/).11.2. Archive PageIf you want to include an special archives page for a list of all posts on your blog (like you can see in the<strong>Waipoua</strong> theme demo), you can use the WordPress plugin „Smart Archives Reloaded“ (http://wordpress.org/extend/plugins/smart-archives-reloaded/). After activating the plugin you just need to add the shortcode[smart_archives] to a new page.11.3. Including CodeIf you want to show code in your posts or pages, it's best to use the plugin „Syntax Highlight Evolved“.By using the plugin your code snippets will also display correctly on mobile devices (http://wordpress.org/extend/plugins/syntaxhighlighter/).11.4. Optimized Page NavigationTo show an advanced page navigation you can install the WP Pagenavi plugin (http://wordpress.org/extend/plugins/wp-pagenavi/).In the plugins setting you shouold deactivate the CSS provided by the plugin,since <strong>Waipoua</strong> is prepard with CSS styles already. You also don‘t have to change any code in the themetemplate files anymore.11.5. Additional Widget via JetpackYou can also use the Jetpack for WordPress plugin (http://wordpress.org/extend/plugins/jetpack/) to useadditional widgets like an Image widget, a Twitter widget, a Blog Subscription widget or a FacebookLike Box widget in the <strong>Waipoua</strong> theme.12. Shortcodes (for multicolumn text, info boxes and buttons)You can find all shortcodes ready to copy/paste at the following <strong>Waipoua</strong> live demo page:http://themes.elmastudio.de/waipoua/shortcodes/To set text into two columns use the following shortcodes in your posts or pages: