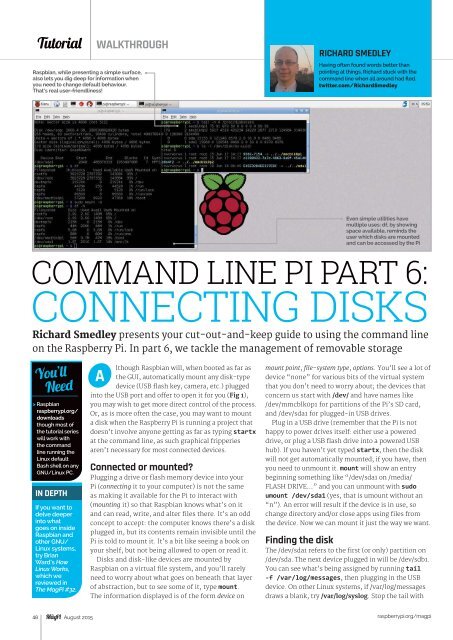
TutorialWALKTHROUGHRaspbian, while presenting a simple surface,also lets you dig deep for information whenyou need to change default behaviour.That’s real user-friendliness!RICHARD SMEDLEYHaving often found words better thanpointing at things, Richard stuck with thecommand line when all around had fled.twitter.com/RichardSmedleyEven simple utilities havemultiple uses: df, by showingspace available, reminds theuser which disks are mountedand can be accessed by the PiCOMMAND LINE <strong>PI</strong> PART 6:CONNECTING DISKSRichard Smedley presents your cut-out-and-keep guide to using the command lineon the Raspberry Pi. In part 6, we tackle the management of removable storageYou’llNeed> Raspbianraspberrypi.org/downloadsthough most ofthe tutorial serieswill work withthe commandline running theLinux defaultBash shell on anyGNU/Linux PC.IN DEPTHIf you want todelve deeperinto whatgoes on insideRaspbian andother GNU/Linux systems,try BrianWard’s HowLinux Works,which wereviewed inThe MagPi #32.Although Raspbian will, when booted as far asthe GUI, automatically mount any disk-typedevice (USB flash key, camera, etc.) pluggedinto the USB port and offer to open it for you (Fig 1),you may wish to get more direct control of the process.Or, as is more often the case, you may want to mounta disk when the Raspberry Pi is running a project thatdoesn’t involve anyone getting as far as typing startxat the command line, as such graphical fripperiesaren’t necessary for most connected devices.Connected or mounted?Plugging a drive or flash memory device into yourPi (connecting it to your computer) is not the sameas making it available for the Pi to interact with(mounting it) so that Raspbian knows what’s on itand can read, write, and alter files there. It’s an oddconcept to accept: the computer knows there’s a diskplugged in, but its contents remain invisible until thePi is told to mount it. It’s a bit like seeing a book onyour shelf, but not being allowed to open or read it.Disks and disk-like devices are mounted byRaspbian on a virtual file system, and you’ll rarelyneed to worry about what goes on beneath that layerof abstraction, but to see some of it, type mount.The information displayed is of the form device onmount point, file-system type, options. You’ll see a lot ofdevice “none” for various bits of the virtual systemthat you don’t need to worry about; the devices thatconcern us start with /dev/ and have names like/dev/mmcblk0p1 for partitions of the Pi’s SD card,and /dev/sda1 for plugged-in USB drives.Plug in a USB drive (remember that the Pi is nothappy to power drives itself: either use a powereddrive, or plug a USB flash drive into a powered USBhub). If you haven’t yet typed startx, then the diskwill not get automatically mounted; if you have, thenyou need to unmount it. mount will show an entrybeginning something like “/dev/sda1 on /media/FLASH DRIVE…” and you can unmount with sudoumount /dev/sda1 (yes, that is umount without an“n”). An error will result if the device is in use, sochange directory and/or close apps using files fromthe device. Now we can mount it just the way we want.Finding the diskThe /dev/sda1 refers to the first (or only) partition on/dev/sda. The next device plugged in will be /dev/sdb1.You can see what’s being assigned by running tail-f /var/log/messages, then plugging in the USBdevice. On other Linux systems, if /var/log/messagesdraws a blank, try /var/log/syslog. Stop the tail with48 August 2015raspberrypi.org/magpi
CONNECTING DISKSTutorialCTRL+C. Another way of seeing connected devicesthat aren’t necessarily mounted is with fdisk, a lowleveltool used to divide disks up into partitions,before creating file systems on those disks (see the“Format” boxout). Called with the list option sudofdisk -l, it performs no partitioning, but simplylists partitions on those disks connected to your Pi.It also gives file-system information, which youneed in order to mount the disk. Lastly, you need amount point (somewhere to place the device on thefile-system hierarchy) with appropriate permissions.Create one with:sudo mkdir /media/usbsudo chmod 775 /media/usbYou can then mount the disk with sudo mount -tvfat /dev/sda1 /media/usb, where vfat (or ntfs orext2) is the file-system type.File-system tableRaspbian knows which disks to mount at boot timeby reading the file-system table (/etc/fstab), and wecould put our /dev/sda1 in there, but if we start up withtwo drives plugged in, the wrong one may be selected.Fortunately, disks (or rather, disk partitions) haveunique labels known as UUIDs randomly allocatedwhen the partition is created. Find them with sudoblkid, which also helpfully tells you the label, if any,that often contains the make and model of externaldrives, or look in /dev/disk/by-uuid.For an NTFS-formatted drive, we called sudo nano/etc/fstab and added the following to the endof the file:/dev/disk/by-uuid/E4EE32B4EE327EBC /media/usb1t ntfs defaults 0 0This gives the device name (yours will be different, ofcourse), mount point, file-system type, options, andtwo numeric fields: the first of these should be zero (itrelates to the unused dump backup program), whileFig 1 Raspbian wants to mount plugged-in disks, and take careof the details for you – note that the GUI tells you it’s “Windowssoftware” – while the command line beneath has information foryou to take control when you need the job done in a particular way,telling you it’s an NTFS file systemthe second is the order of check and repair at boot: 1for the root file system, 2 for other permanentlymounted disks for data, and 0 (no check) for allothers. man mount will tell you about possible options.Editing with nanoWe touched briefly on nano in part 2 of this series.Looking in a little more depth, the first thing to beaware of is the dozen shortcuts listed across thebottom two lines of the terminal: each is the CTRLkey (represented by the caret ^) held at the sametime as a single letter key. For example, ^R forReadFile (i.e. open), ^O for WriteOut (in other words,save), and ^X for Exit. Remember those last two fornow, and you’ll be able to manage nano. However, ifyou learn more of them, you will really race throughyour editing tasks.Nano lacks the power features of Emacs and Vim,its two main command-line code editor rivals, buthas useful features such as a powerful Justify (^J),which will reassemble a paragraph of line-breakstrewn text into an unbroken paragraph, or apply linebreaks at a fixed character length.This is a legacy of itsdevelopment for email composition. ^K cuts the line oftext the cursor is on, but it isn’t just a delete function:each cut is added to a clipboard. ^U will paste the entireclipboard at the cursor position: it’s great for gatheringtogether useful snippets from a longer text.Hit ^O to save fstab, and the shortcut listing changes,with many now beginning M instead of ^ – this is shortfor Meta, which means the ALT key on your keyboard(once upon a time, some computers had severalmodifier keys, such as Super and Hyper). One “hidden”shortcut after ^O is that at this point, ^T now opens afile manager to search for the file/directory where youwant to save.After saving, exit nano; now sudo mount -a willmount the external drive at the desired mount point(Fig 2), regardless of what else is plugged in. If youhave other new entries in /etc/fstab, then sudo mount/media/usb1t (or whatever entry you put in fstab)will mount just that chosen device if you don’t want tomount any of the others.Having got inside connected disks, next timewe’ll be accessing all of the Pi, but remotely – fromanywhere on the planet with an internet connection.Fig 2 Once we’veput our removabledisk in the filesystemtable(/etc/fstab),mount -a will readthe config fromthere to mountyour disks, savingyou from havingto rememberthe detailsDISK &DISK SPACEThe dfcommandshows youspace onmounteddrives: justtype df andyou’ll alsoget a list ofconnecteddrives. It’smore readablethan mount -l,though lackingfile type info.It’s also quickerto type!FORMATCopying a diskimage negatesthe need toformat thedisk. Shouldyou need toformat a newpartition, orconvert a diskto ext4 format,read themanual: manmkfs and forindividual filesystemtypessuch as manmkfs.ext4raspberrypi.org/magpi August 2015 49