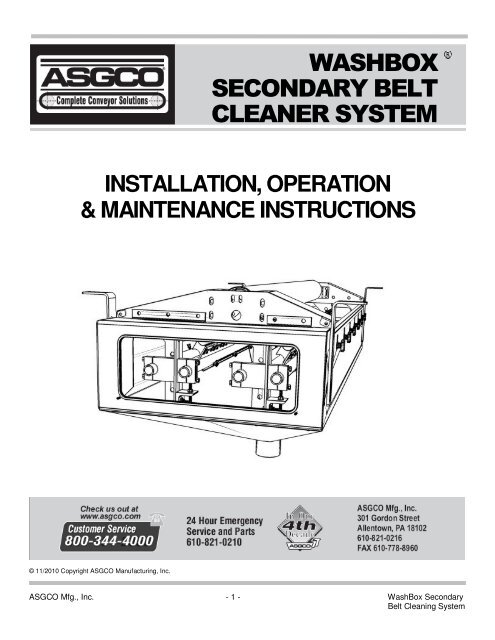
ASGCO WashBox Secondary Belt Cleaner System Operators Manu
ASGCO WashBox Secondary Belt Cleaner System Operators Manu
ASGCO WashBox Secondary Belt Cleaner System Operators Manu
- No tags were found...
You also want an ePaper? Increase the reach of your titles
YUMPU automatically turns print PDFs into web optimized ePapers that Google loves.
<strong>WashBox</strong> Frame / TankComplete Frame / Tank include the Tank Weldment, Frame Components and Box EnclosureComponents.Complete Frame / Tank Part Number: M-ASG-WB-XX-FRAME-XXX = <strong>Belt</strong> Width (Inches)X = FinishSS – Stainless SteelPC – Powder coatedG – GalvanizedExample: M-ASG-WB-36-FRAME- SSThe example designates at Frame / Tank for a 36in [900mm] belt width with a StainlessSteel finish components.Tank Weldment Part Number: M-ASG-WB-XX-TW-XXX = <strong>Belt</strong> Width (Inches)X = FinishSS – Stainless SteelPC – Powder coatedG – Galvanized32143Figure 2. Tank WeldmentTable I. Tank Weldment Parts ListItem Description Part Number Qty1 Front Panel ASG-WB-FP-XX 12 Back Panel ASG-WB-BP-XX 13 Bottom Half ASG-WB-BH-XX 24 Drain Pipe ASG-WB-DP-XX 1<strong>ASGCO</strong> Mfg., Inc. - 3 - <strong>WashBox</strong> <strong>Secondary</strong><strong>Belt</strong> Cleaning <strong>System</strong>
以 上 書 面 意 見 屬 維 修 部 份 轉 知 營 繕 組 處 理 , 其 他 意 見 將 請 林 同 棪 顧 問併 入 檢 討 及 規 劃 設 計 。5
Table VI. Four Arm Knobs per <strong>Belt</strong> Width<strong>Belt</strong> Width Qty24 [600] 230 [750] 336 [900] 342 [1050] 448 [1200] 454 [1350] 560 [1500] 566 [1650] 672 [1800] 678 [2000] 784 [2100] 790 [2300] 896 [2400] 8Note: <strong>Belt</strong> Width in Inches [Millimeters]444142, 43383734403439 363332Figure 5. SparyBar Plumbing Example<strong>ASGCO</strong> Mfg., Inc. - 7 - <strong>WashBox</strong> <strong>Secondary</strong><strong>Belt</strong> Cleaning <strong>System</strong>
Table VII. SprayBar Plumbing Parts ListItem Description Part Number Qty31 Plug, 3/4, B ASG-WB-3/4-PLUG 132 Brass Ball Valve, 3/4, B ASG-WB-VALVE 133 F 3/4 BSP to M 3/4 NPT Adapter ASG-WB-3/4-ADP 234 Bulkhead Fitting, M 3/4 BSP ASG-WB-3/4-BH 135 Wye, 3/4 NPT, B ASG-WB-3/4-Y 136 Hose, M-M, 3/4, 2 Foot ASG-WB-HOSE-2 137 Hose, M-M, 3/4, 3 Foot ASG-WB-HOSE-3 138 Quick Disconnect Coupling, Plug, B ASG-3/4-QDC-P 239 Quick Disconnect Coupling, Socket, B ASG-3/4-QDC-S 240 Reducing Elbow, 90deg, 3/4, G ASG-WB-90-ELBOW 241 <strong>WashBox</strong> Spray Bar, G, <strong>Belt</strong> Width (XX) ASG-SPRAYBAR-XX 242 Spray Nozzle, Jet and Body, B, 10 Y-1/4QJJA Table VIII43 Spray Nozzle, Strainer, B Y-12686-50 Table VIII44 End Cap, SprayBar, 1-1/2, G ASG-SB-EC 2XX = <strong>Belt</strong> Width (inches)Table VIII. Spray Nozzle / Strainer Quantity per <strong>Belt</strong> Width<strong>Belt</strong> Width Qty24 [600] 230 [750] 336 [900] 342 [1050] 448 [1200] 454 [1350] 560 [1500] 566 [1650] 672 [1800] 678 [2000] 784 [2100] 790 [2300] 896 [2400] 8Note: <strong>Belt</strong> Width in Inches [Millimeters]<strong>ASGCO</strong> Mfg., Inc. - 8 - <strong>WashBox</strong> <strong>Secondary</strong><strong>Belt</strong> Cleaning <strong>System</strong>
Table XI. Razor-Back Cushion / Blade Quantity Per <strong>Belt</strong> Width<strong>Belt</strong> Width Qty24 [600] 430 [750] 536 [900] 642 [1050] 748 [1200] 854 [1350] 960 [1500] 1066 [1650] 1172 [1800] 1278 [2000] 1384 [2100] 1490 [2300] 1596 [2400] 16Note: <strong>Belt</strong> Width in Inches [Millimeters]<strong>ASGCO</strong> Mfg., Inc. - 11 - <strong>WashBox</strong> <strong>Secondary</strong><strong>Belt</strong> Cleaning <strong>System</strong>
Install <strong>WashBox</strong> <strong>System</strong>The <strong>WashBox</strong> <strong>System</strong> is a secondary belt cleaning device and as such should be located onthe return side of the belt after the belt leaves contact with the head pulley. Preferably it shouldbe located before and after a set of return idlers to help steady the belt, in order to dampensystem vibration. This will ensure smooth and direct belt contact on the Razor-Back BladeTips. Direction of belt travel shown below, See Figure 8.BELTFigure 8. <strong>Belt</strong> Travel Through <strong>WashBox</strong>The Hangers (17) of the <strong>WashBox</strong> mount to the frame / structure of the conveyor system. TheHangers have multiple height adjustment holes. The top inside edge of the <strong>WashBox</strong> shouldbe 0 – 1” from bottom of the belt. See Figure 9. In most applications it will be necessary toremove the Hold Down Roller for installation of the <strong>WashBox</strong>. Once the <strong>WashBox</strong> has beeninstalled in the correct location, the Hold Down Roller can be reinstalled.0 -1/2”Figure 9. <strong>WashBox</strong> Install Height<strong>ASGCO</strong> Mfg., Inc. - 12 - <strong>WashBox</strong> <strong>Secondary</strong><strong>Belt</strong> Cleaning <strong>System</strong>
INTERAL CLEANER ADJUSTMENTSFigure 10. Razor-Back with Spray Bar AdjustmentRazor-Back with Spray Bar:Loosen Hex Head Bolt (50) on both tensioners, this will allow for height adjustment ofRazor-Back.Adjust height by tightening the Height Adjustment Bolt (52). It may be necessary tomove the Height Adjustment Angle (48).Once belt contact has been made, turn the Adjustment Bolt (52) until the blade tip hasmoved up a maximum of 1/8”.Make sure Spray Tube is angled 5-10 degrees into the belt travel. Tighten the tubeclamp lock bolts (50, 51).Now test run the conveyor. If chatter occurs, loosen the tube clamp bolts and rotate theblade tip about 5 degrees in the direction of the belt travel (Razorback only).If cleaning performance is unsatisfactory, slightly increase the force against the belt andtest it again. If the cleaner has about 1/8” or more of material to remove, a primarycleaner may be needed.Hold Down Roll:Lower or raise the Hold Down Roll so as there is 0 – ½” clearance between the bottomof the roll and the top of the conveyor belt. Adjustment of the Razor-Back will take upthe gap.Rubber Wipe:Raise the Rubber Wipe by loosening the 4-Arm Knobs (23) and raising the Wipe Holder(13). Then tighten the 4-Arm Knobs to lock the Rubber Wipe in place.<strong>ASGCO</strong> Mfg., Inc. - 13 - <strong>WashBox</strong> <strong>Secondary</strong><strong>Belt</strong> Cleaning <strong>System</strong>
MAINTENANCEAfter one day of operation:• Inspect the cleaner for proper belt cleaning and operation.Weekly:• Frequent inspection is the key to proper belt cleaning and easy secondary servicing.Weekly inspections are recommended, but actual service frequency may vary widelydepending on various plant operating conditions.• Wash the entire cleaner regularly to prevent excessive build up. If material tends toaccumulate on the secondary assembly then possible scraper relocation may be inorder.• Carefully inspect the wear tips of the cleaner blades. Make sure blades are not chippedor worn out.• Inspect the belt surfaces and edges for cracks, splits, tears, holes or any other worn ordamaged condition occurring on the surfaces or edges of the belt itself. If belt is wornor damaged, make necessary repairs.<strong>ASGCO</strong> Mfg., Inc. - 14 - <strong>WashBox</strong> <strong>Secondary</strong><strong>Belt</strong> Cleaning <strong>System</strong>


