Apollo V2 Twin Monochrome Mickey Instructions - Obaby
Apollo V2 Twin Monochrome Mickey Instructions - Obaby
Apollo V2 Twin Monochrome Mickey Instructions - Obaby
- No tags were found...

You also want an ePaper? Increase the reach of your titles
YUMPU automatically turns print PDFs into web optimized ePapers that Google loves.
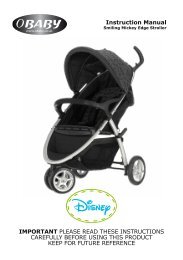
Instruction Manual<br />
<strong>Monochrome</strong> <strong>Mickey</strong> <strong>Apollo</strong><br />
IMPORTANT PLEASE READ THESE INSTRUCTIONS<br />
CAREFULLY BEFORE USING THIS PRODUCT<br />
KEEP FOR FUTURE REFERENCE
2 Safety Warnings<br />
Getting to know your Stroller 3<br />
Thank you for choosing <strong>Obaby</strong>. To ensure that your stroller is used in accordance with<br />
these instructions, please read them fully.<br />
This stroller conforms to EN 1888:2003 and is guaranteed for 12 months from the date of<br />
purchase against manufacturing defects. If, however you have any problems, please<br />
contact your <strong>Obaby</strong> retailer from whom you purchased your product, who will take<br />
appropriate action.<br />
Your child’s safety may be affected if you do not follow these<br />
instructions.<br />
WARNING: A child’s safety is your responsibility<br />
WARNING: Ensure that all locking devices are engaged before use<br />
WARNING: Children should be harnessed in at all times<br />
WARNING: Always use the crotch strap in combination with the<br />
waist belt<br />
WARNING: Any load attached to the handles affects the stability of<br />
the pram / pushchair<br />
WARNING: This product is not suitable for running or skating<br />
WARNING: It may be dangerous to leave your child unattended<br />
WARNING: The child should be clear of moving parts while making<br />
adjustments or opening or folding the stroller. Risk of serious injury<br />
(entrapment, laceration or amputation) exists<br />
• A basket is provided for the carriage of other items up to a maximum<br />
permissible weight of 3 kg. Where a hood parent pocket is provided,<br />
an additional 1kg maximum permissible weight can be used within this<br />
• This stroller is intended to carry two children from birth and up to a<br />
maximum weight of 15kg<br />
ROUTINE CARE & MAINTENANCE<br />
- This stroller requires regular maintenance by the user<br />
- It may be unsafe to use replacement parts or accessories e.g. child<br />
seats, bag hooks, rain covers, etc, other than those approved by the<br />
manufacturer or distributor.<br />
- For cleaning, use only a mild detergent and warm water<br />
- DO NOT USE BLEACH<br />
- DO NOT USE any abrasive substances<br />
- From time to time, check your stroller for loose screws, worn parts,<br />
torn material or stitching. Replace or adjust the parts as needed.<br />
Due to constant updating and improvements, some components may occasionally differ slightly from the images<br />
shown in these instructions. We reserve the rights to change the specifications of any products without prior notice.<br />
If you need any assistance please contact your <strong>Obaby</strong> retailer from whom you purchased your product, who will take<br />
appropriate action.<br />
Front swivel<br />
wheel levers<br />
Hood<br />
Harness<br />
Primary release<br />
lock<br />
Brake levers x3<br />
Hood adjustment<br />
catch<br />
Shopping<br />
basket<br />
Backrest release<br />
catch<br />
Storage clips<br />
Secondary release<br />
lock<br />
www.obaby.co.uk<br />
www.obaby.co.uk
4 Opening your Stroller<br />
Folding your Stroller 5<br />
1.Press<br />
3.Lift<br />
2.Lift<br />
Press<br />
Lift<br />
fig. 1<br />
fig. 2<br />
fig. 3 fig. 7<br />
fig. 8<br />
fig. 9<br />
Press<br />
Press<br />
“Click”<br />
fig. 4 fig. 5 fig. 6 fig. 10<br />
fig. 11<br />
fig. 12<br />
To open your stroller release the storage clips on both sides of the stroller (fig.1 & 2).<br />
Lift the handles away from the wheels (fig.3).<br />
Using your foot push down on the two primary release locks at the back of the stroller<br />
(fig.4), one at a time. Ensure the locks click into place (fig.5 & 6).<br />
WARNING: Ensure that all locking devices are engaged before use<br />
Before attempting to fold your stroller<br />
- The front wheels should be locked in place<br />
- The basket and seat unit should be empty<br />
- The hood should be folded<br />
- The seat should be fully upright<br />
To fold the stroller, release the primary lock, at the back of the stroller by pushing in the<br />
spring loaded button, while lifting the lever underneath (fig.7). Then lift the whole catch<br />
upwards slightly using your hand.<br />
Next, using your foot press down on the secondary lock at the right hand side of the<br />
stroller (fig.8). Then push the handles forwards and down towards the front wheels<br />
(fig.9), until completely folded (fig.10). Engage the storage clips on both sides of the<br />
stroller (fig.11 & 12).<br />
www.obaby.co.uk<br />
www.obaby.co.uk
6 Fitting and Removing the Front Wheels<br />
Applying the Brakes 7<br />
Lock<br />
Release<br />
fig. 13 fig. 14 fig. 15<br />
To fit the front wheels, push the wheels onto the front legs until they click into place<br />
(fig.13 & 14).<br />
To Remove, squeeze both clips, whilst pulling the wheel off the leg (fig.15).<br />
fig. 19 fig. 20<br />
To lock the brakes fully, push down on each brake lever using your foot (fig.19).<br />
To release the brakes, lift each brake lever using your foot (fig.20).<br />
Apply the brake before putting your child into the pushchair.<br />
Apply the brake when the pushchair is stationary.<br />
Using the Front Swivel Wheels<br />
Adjusting the Backrest<br />
1.Press<br />
2.Pull<br />
Release<br />
Lock<br />
fig. 16 fig. 17 fig. 18<br />
To put the wheels in swivel mode, push the lever down on the front of each front wheel<br />
(fig.16 & 17).<br />
To lock the swivel wheels, first ensure the front wheels are facing forward inline with the<br />
chassis, then lift the lever (fig.18).<br />
fig. 21 fig. 22 fig. 23<br />
To recline the backrest, press the button on the toggle and pull away from the seat to the<br />
desired height (fig.21). Lower the seat to rest on the toggle (fig.22).<br />
To put upright, grip the sides of the toggle with one hand, and the strap with the other<br />
hand and slide the toggle up the strap to the desired height (fig.23).<br />
www.obaby.co.uk<br />
www.obaby.co.uk
8 Fitting and Removing the Hood<br />
Using the Harness 9<br />
Clasp<br />
Shoulder<br />
Strap<br />
Waist<br />
Strap<br />
Crotch<br />
Strap<br />
fig. 24<br />
fig. 25<br />
fig. 26<br />
fig. 30<br />
fig. 31<br />
fig. 32<br />
To fit the hood, place the hood on the chassis, inline with the seat unit. Clip the hood<br />
catches onto each side of the chassis (fig.24).<br />
Then to prevent the hood slipping down secure with the velcro straps on either side of<br />
the hood (fig.25 & 26).<br />
To remove the hood, do the reverse of the above.<br />
Press<br />
Adjusting the Hood<br />
fig. 33<br />
fig. 34<br />
fig. 35<br />
To fasten the harness, clip each chest strap onto the waist<br />
strap (fig.30) and insert both fasteners on the waist strap<br />
into the clasp on the crotch strap (fig.31 & 32).<br />
Upper<br />
Lower<br />
To release the harness, press the centre of harness clasp<br />
(fig.33).<br />
Outer<br />
Inner<br />
Outer<br />
fig. 27<br />
fig. 28<br />
fig. 29<br />
To fold the hood, pull the hood adjusters up on both sides of the hood, as shown above.<br />
Adjust the harness length using the buckles on each strap<br />
(fig.34).<br />
‘D’ Ring<br />
The ‘D’ rings highlighted are provided for fitting a separate<br />
harness complying with BS 6684 (fig.35).<br />
Harness<br />
Positions<br />
fig. A<br />
Inner<br />
Outer<br />
When using the safety harness from birth, it may be necessary to use the lower holes for<br />
the shoulder strap and the inner holes for the waist straps and crotch strap.<br />
Higher holes for the shoulder strap and outer holes for the waist straps and crotch strap<br />
should be used when your child is of a suitable size. (See fig.A)<br />
www.obaby.co.uk<br />
WARNING: Always use the crotch strap in combination with<br />
the waist belt<br />
www.obaby.co.uk
10<br />
Fitting the Raincover<br />
fig. 39 fig. 40 fig. 41<br />
To fit the raincover, place the raincover over the stroller and allow the raincover to drape<br />
over the front of the stroller.<br />
Secure in place using the velcro tabs on the back of the raincover (fig.39) and velcro tabs<br />
onto the front legs of the stroller (fig.40 & 41).<br />
WARNING: When using the raincover, regularly check your child has adequate<br />
ventilation and is not overheating.<br />
Unless it is raining, the raincover should be removed.<br />
Adjusting the Calf Rest<br />
Press<br />
fig. 42 fig. 43 fig. 44<br />
To adjust the calf rest press the levers either side of the seat and lift or lower to the<br />
correct position.<br />
www.obaby.co.uk<br />
www.obaby.co.uk