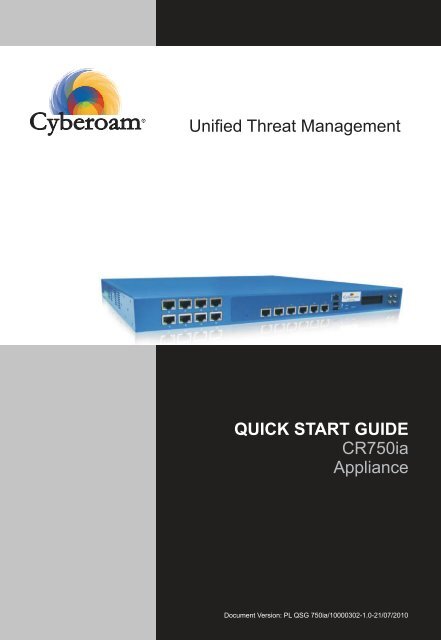
Unified Threat Management QUICK START GUIDE CR750ia Appliance
CR750ia QSG 21-07-10.cdr - Free and Open Source Software
CR750ia QSG 21-07-10.cdr - Free and Open Source Software
- No tags were found...
Create successful ePaper yourself
Turn your PDF publications into a flip-book with our unique Google optimized e-Paper software.
<strong>Unified</strong> <strong>Threat</strong> <strong>Management</strong><br />
<strong>QUICK</strong> <strong>START</strong> <strong>GUIDE</strong><br />
<strong>CR750ia</strong><br />
<strong>Appliance</strong><br />
Document Version: PL QSG 750ia/10000302-1.0-21/07/2010
DEFAULTS<br />
Default IP addresses<br />
Ethernet Port IP Address Zone<br />
A 172.16.16.16/255.255.255.0 LAN<br />
B 192.168.2.1/255.255.240.0 WAN<br />
Default Username & Password<br />
Web Admin Console<br />
*<br />
Username cyberoam<br />
*<br />
Password cyber<br />
Package Contents<br />
Checking the package contents - Check<br />
that the package contents are complete.<br />
One Cyberoam<strong>Appliance</strong><br />
One Serial Cable (Null-Modem Cable)<br />
One Straight-through Ethernet Cable<br />
OneACAdapter Cable<br />
One Crossover Ethernet Cable<br />
One Cyberoam Quick Start Guide<br />
Documentation CD<br />
CLI Console (SSH/Serial Connection)<br />
Serial Cable<br />
Straight-through<br />
Ethernet Cable<br />
AC Adapter Cable<br />
*<br />
Password<br />
admin<br />
* Username and Password are case sensitive<br />
Red Crossover<br />
Ethernet Cable<br />
Quick Start Guide<br />
Documentation<br />
CD<br />
2<br />
UNDERSTANDING THE APPLIANCE<br />
FRONT PANEL<br />
If any items from the package are missing.<br />
please contact Cyberoam Support at<br />
support@cyberoam.com<br />
Console Port<br />
Console cable connects here<br />
USB<br />
Provided for future use<br />
Ports<br />
A,B,C,D,E,F,G,H,I,J,K,L,M,N - Use these ports to connect<br />
the <strong>Appliance</strong> to the Ethernet network.<br />
If you want to bypass<br />
Cyberoam incase of power or <strong>Appliance</strong> failure when<br />
deployed as Bridge, use I and J or K and L pairs of ports.<br />
Power<br />
Outlet<br />
Power<br />
Outlet<br />
System Fans<br />
As Cyberoam does not pre-configure any ports for LAN, WAN, DMZ networks, it is not necessary to use any particular port for<br />
them. Usage of ports depends on how the physical connection is required or planned.
3<br />
PLANNING THE CONFIGURATION<br />
Before configuring, you need to plan the deployment mode of Cyberoam. Cyberoam can be placed in<br />
Bridge or Gateway/Route mode according to your requirement.<br />
To control the Internet access through Cyberoam the entire Internet bound traffic from the LAN network<br />
should pass through Cyberoam.<br />
Gateway Mode<br />
Configure as Gateway if you want to use Cyberoam as<br />
1. A firewall or replace an existing Firewall<br />
2. A gateway for routing traffic<br />
3. Link load balancer and implement gateway failover functionality<br />
Apart from configuring Gateway IP address (IP address through which all the traffic will be routed), you must<br />
also configure LAN and WAN IP addresses.<br />
Internet<br />
WAN<br />
61.10.15.17<br />
61.10.15.18<br />
10.10.10.1<br />
Cyberoam in<br />
Gateway mode<br />
Gateway mode<br />
policies controlling<br />
traffic between<br />
LAN and WAN<br />
networks.<br />
192.168.1.254<br />
DMZ Network<br />
Mail Server Web Server<br />
10.10.10.2 10.10.10.3<br />
Gateway mode<br />
policies controlling<br />
traffic between<br />
LAN & DMZ networks.<br />
LAN Network<br />
192.168.1.9<br />
192.168.1.5<br />
Bridge Mode<br />
Configure as Bridge if<br />
1. You have a private network behind an existing firewall or behind a router and you do not want to replace the<br />
firewall.<br />
2. You are already masquerading outgoing traffic.<br />
Internet<br />
Bridge mode policies<br />
controlling traffic between<br />
LAN and WAN networks<br />
192.168.1.254<br />
192.168.1.1<br />
<strong>Management</strong> IP<br />
Cyberoam<br />
in Bridge mode<br />
LAN<br />
LAN Network<br />
192.168.1.5<br />
*Cyberoam can be bypassed only if deployed as Bridge.<br />
You will be able to manage and monitor the entire Internet traffic passing through Cyberoam, control web<br />
access and apply bandwidth and application restrictions, apply antivirus and antispam policy and IPS<br />
policy in<br />
either of the modes.
4<br />
GETTING CONFIGURATION INFORMATION<br />
Use the table given below to gather ISP (Internet Service Provider) information<br />
If Internet<br />
connection<br />
is via<br />
You are probably<br />
using<br />
Get information<br />
Cyberoam<br />
configuration from<br />
Network Configuration<br />
wizard<br />
Cable modem,<br />
DSL with a<br />
Router<br />
DHCP<br />
-----------<br />
Select “Obtain an IP from<br />
DHCP”<br />
Home<br />
DSL/ADSL<br />
PPPoE<br />
Username<br />
Password<br />
Select “Obtain an IP from<br />
PPPoE”<br />
T1/E1,<br />
Static<br />
broadband,<br />
Cable or DSL<br />
with a static IP<br />
Static<br />
IP address<br />
Subnet mask<br />
Gateway IP address<br />
Primary DNS<br />
Secondary DNS<br />
Select “Use Static IP”<br />
How to get the information:<br />
From the PC connected to the Internet:<br />
open a command prompt window, type the<br />
command ipconfig.<br />
Use the tables given below to gather the information you need before proceeding to deploy the <strong>Appliance</strong>.<br />
Gateway Mode<br />
For all the required Ports<br />
Port A<br />
IP address<br />
Subnet Mask<br />
Zone Type<br />
___.___.___.___<br />
___.___.___.___<br />
LAN/WAN/DMZ<br />
Port H<br />
IP address<br />
Subnet Mask<br />
Zone Type<br />
___.___.___.___<br />
___.___.___.___<br />
LAN/WAN/DMZ<br />
Port B<br />
IP address<br />
Subnet Mask<br />
Zone Type<br />
___.___.___.___<br />
___.___.___.___<br />
LAN/WAN/DMZ<br />
Port I<br />
IP address<br />
Subnet Mask<br />
Zone Type<br />
___.___.___.___<br />
___.___.___.___<br />
LAN/WAN/DMZ<br />
Port C<br />
IP address<br />
Subnet Mask<br />
Zone Type<br />
___.___.___.___<br />
___.___.___.___<br />
LAN/WAN/DMZ<br />
Port J<br />
IP address<br />
Subnet Mask<br />
Zone Type<br />
___.___.___.___<br />
___.___.___.___<br />
LAN/WAN/DMZ<br />
Port D<br />
IP address<br />
Subnet Mask<br />
Zone Type<br />
___.___.___.___<br />
___.___.___.___<br />
LAN/WAN/DMZ<br />
Port K<br />
IP address<br />
Subnet Mask<br />
Zone Type<br />
___.___.___.___<br />
___.___.___.___<br />
LAN/WAN/DMZ<br />
Port E<br />
IP address<br />
Subnet Mask<br />
Zone Type<br />
___.___.___.___<br />
___.___.___.___<br />
LAN/WAN/DMZ<br />
Port L<br />
IP address<br />
Subnet Mask<br />
Zone Type<br />
___.___.___.___<br />
___.___.___.___<br />
LAN/WAN/DMZ<br />
Port F<br />
IP address<br />
Subnet Mask<br />
Zone Type<br />
___.___.___.___<br />
___.___.___.___<br />
LAN/WAN/DMZ<br />
Port M<br />
IP address<br />
Subnet Mask<br />
Zone Type<br />
___.___.___.___<br />
___.___.___.___<br />
LAN/WAN/DMZ<br />
Port G<br />
IP address<br />
Subnet Mask<br />
Zone Type<br />
___.___.___.___<br />
___.___.___.___<br />
LAN/WAN/DMZ<br />
Port N<br />
IP address<br />
Subnet Mask<br />
Zone Type<br />
___.___.___.___<br />
___.___.___.___<br />
LAN/WAN/DMZ<br />
The LAN IP address and Subnet Mask must be valid for the respective networks.
Bridge Mode<br />
Bridge IP address ___.___.___.___<br />
IP address Subnet Mask ___.___.___.___<br />
GENERAL SETTINGS<br />
IP address of the Default Gateway<br />
A default gateway is required for<br />
Cyberoam to route connections to the Internet.<br />
DNS IP Address<br />
System Time Zone<br />
System Date and Time<br />
Email ID of the administrator where Cyberoam<br />
will send System Alerts<br />
___.___.___.___<br />
___.___.___.___<br />
______________<br />
______________<br />
______________<br />
5<br />
CONNECTING CYBEROAM<br />
Ethernet connection<br />
1. Connect one end of the crossover cable into Port A on the Back panel of the <strong>Appliance</strong> and other<br />
end into the Ethernet Adapter port of <strong>Management</strong> computer.Change the IP address of the<br />
management computer to 172.16.16.2 and the subnet mask to 255.255.255.0.<br />
2. Connect one end of an Ethernet cable into Port B on the Back panel of the <strong>Appliance</strong> and other<br />
end to your Internet connection e.g. DSL modem or cable modem. It is possible that cable might<br />
already be connected between your computer and your modem. If so, disconnect it from your<br />
computer and connect into Port B.<br />
Internet<br />
Switch<br />
(Optional)<br />
<strong>Management</strong><br />
Computer<br />
3. Connect the AC Power connector into the Back panel of the <strong>Appliance</strong> and the other end into a<br />
standardAC receptacle & turn on the power.<br />
4. Start your management computer. Following<strong>Appliance</strong> LEDs light up:<br />
Power - Green indicating that<strong>Appliance</strong> is ON<br />
HDD - Red indicating that hard disk isActive<br />
PortA, Port B (Front panel) - Green indicating an active connection<br />
Note: If you change the LAN IP address (Gateway mode) or Bridge IP address (Bridge mode), you must use this<br />
address to reconnect to the WebAdmin Console. You might also have to change the IP address of the management<br />
computer to be on the same subnet as the new IP address.
From the management computer:<br />
1. Browse to https://172.16.16.16<br />
2. Log on to the Cyberoam Web Admin Console using default username ‘cyberoam’ and password<br />
‘cyber’.<br />
3. Click Wizard icon to launch the Network Configuration wizard.<br />
Prerequisite<br />
1. Ethernet connection between management computer and Cyberoam.<br />
2. Internet Explorer 7+ or Mozilla Firefox 1.5+ is required to access Cyberoam WebAdmin Console.<br />
<strong>Appliance</strong> LED Behavior<br />
LED<br />
Power<br />
HDD<br />
Ports -<br />
A,B,C,D,E,F,G,<br />
H,I,J,K,L,M,N<br />
(Front panel)<br />
State<br />
Green<br />
Off<br />
Flashing Red<br />
Off<br />
Flashing Amber (Left)<br />
Amber (Left)<br />
Green (Right)<br />
Off<br />
Description<br />
Cyberoam appliance in ON<br />
Cyberoam appliance in OFF<br />
Activity going on<br />
No activity<br />
Network Activity at the Port<br />
Correct cable is used and power is on port<br />
Port is connected at the 1000Mbps<br />
No link<br />
Refer to the documentation CD-ROM for information on how to control traffic, and how to configure<br />
antivirus protection, content filtering, spam filtering, intrusion prevention system (IPS), and virtual private<br />
networking (VPN).
6<br />
CONFIGURING THE CYBEROAM APPLIANCE<br />
Network Configuration Wizard will guide you step-by-step through configuration of the network parameters<br />
like IP address, subnet mask, and default gateway for Cyberoam. Use the configuration settings you have<br />
noted in section 4.<br />
Click ' Start'<br />
to start the configuration.<br />
The Identity Based<br />
UTM <strong>Appliance</strong><br />
Secure your enterprise<br />
with Cyberoam integrated<br />
Internet security<br />
CONFIGURE MODE<br />
Gateway mode<br />
To configure Cyberoam in Gateway mode, select<br />
Gateway Mode option and click button.<br />
Follow the on screen steps to configure:<br />
1. Configure DNS server address<br />
Click “Obtain an IP from DHCP” to override<br />
appliance DNS and use DNS received from<br />
the external DHCP server<br />
Bridge mode<br />
To configure Cyberoam in Bridge mode, select<br />
Bridge Mode option and click button.<br />
1. Configure Bridge IP address and subnet mask.<br />
2. Provide Gateway and DNS IP address.<br />
2. Configure Interface<br />
To enable interface for PPPoE, provide<br />
PPPoE details: Username and Password<br />
(only for WAN zone)<br />
3. Configure static IP address and subnet mask<br />
Click ‘Next’ button to repeat the above procedure<br />
for each port
PortA<br />
Obtain an IP from DHCP<br />
Obtain an IP from PPPoE<br />
Use Static IP<br />
IP Address<br />
Subnet Mask<br />
Zone<br />
192.168.13.35<br />
255.255.240.0<br />
LAN CR 500i CR 100i<br />
Gateway Details<br />
ISP Name<br />
IP Address<br />
PPPoE Details<br />
User Name<br />
Password<br />
DNS Configuration<br />
Obtain DNS from DHCP<br />
Primary DNS 192.168.1.254<br />
Secondary DNS 203.88.135.194<br />
CONFIGURE INTERNET ACCESS<br />
Configure Internet access policy for LAN to WAN traffic.<br />
'Monitor Only' policy allows LAN to WAN traffic<br />
1 2<br />
'General Internet' policy enables IPS and Virus scanning and allows LAN to WAN traffic except Unhealthy<br />
Web and Internet traffic as defined by Cyberoam. This will include sites related to Adult contents, Drugs, Crime<br />
and Suicide, Gambling, Militancy and Extremist, Violence, Weapons, Phishing and Fraud and URL Translation<br />
sites.<br />
1 2<br />
'Strict Internet' policy enables IPS and Virus scanning and allows only authenticated LAN to WAN traffic.<br />
Click<br />
button to configure the mail settings<br />
Please select policy for LAN WAN traffic<br />
Monitor Only<br />
Allows access without<br />
authentication<br />
Does not block any traffic<br />
General Internet Policy<br />
Blocks unhealthy web and<br />
Internet traffic<br />
Scan HTTP Traffic for Viruses<br />
Strict Internet Policy<br />
Does not allow access without<br />
authentication<br />
1<br />
Until Intrusion Prevention System module is subscribed, IPS scanning will not be effective.<br />
2<br />
Until Gateway Anti Virus module is subscribed, virus scanning will not be effective.
CONFIGURE MAIL SETTINGS<br />
1. Specify Administrator Email ID<br />
2. Specify Mail server IP address<br />
3. Specify email address that should be used to send the System Alerts<br />
4. Click “Authentication Required” to enable SMTP authentication, if required and specify username and<br />
password.<br />
Click<br />
button for Date and Time zone configuration<br />
Configure Email and Mail Server settings for System Notifications<br />
Send Notifications to Email Address<br />
john@cyberoam.com<br />
Mail Server IP Address - Port 203.88.35.194<br />
-<br />
25<br />
From Email Address<br />
john@cyberoam.com<br />
Authentication Required<br />
Username<br />
cyberoam<br />
Password *****<br />
CONFIGURE DATE AND TIME ZONE<br />
Set time zone and current date<br />
Enable clock synchronization with NTP server to tune Cyberoam's clock using global<br />
time servers.<br />
Click<br />
button to view the configured details. Copy the configured details for future use.<br />
Click 'Finish'. It will take few minutes to save the configuration details.
Configuring Gateway Mode<br />
Please wait...<br />
On successful configuration following page will be displayed.<br />
https://172.16.16.16 - click to access Web Admin Console<br />
Cyberoam will take time to restart, please wait for some time before clicking the URL to access the<br />
Web Admin Console. Click Close button to close the Network Configuration Wizard window<br />
Configuring Gateway Mode<br />
Wait for Sometime
Congratulations!!!<br />
This finishes the basic configuration of Cyberoam.<br />
Your network is now protected from Internet-based threats and access to Adult contents, Drugs, Crime and<br />
Suicide, Gambling, Militancy and Extremist, Violence, Weapons, Phishing and Fraud and URLTranslation<br />
sites will be blocked.<br />
7<br />
WHAT NEXT?<br />
1. Create Customer Account and register <strong>Appliance</strong><br />
Browse to http://customer.cyberoam.com and click Register and follow the on-screen steps. It will<br />
create your customer account as well as register your appliance.<br />
To subscribe for free 15-days trial subscription of Web and Application Filtering, IPS, Anti Virus and<br />
Anti Spam, browse to http://customer.cyberoam.com and login with the credential provided at the<br />
time of account creation.<br />
2. Access Cyberoam Web Admin Console<br />
Browse to https:// and log on using the default username (cyberoam) and<br />
password (cyber).<br />
Note: Internet Explorer 7+ or Mozilla Firefox 1.5+ is required to access the Cyberoam Web Admin<br />
Console.<br />
3. Go to menu System Maintenance Licensing page and synchronize the registration details.<br />
Registration and subscription details will be displayed only after synchronization.<br />
4. Configure the correct firewall rule for your Domain Name Server (DNS). You may not be able to<br />
access Internet if not configured properly.<br />
5. Go to Firewall Rule Rule and edit default firewall rules to enable virus scanning.<br />
6. For the below given steps, refer to Getting Started Guide (From Documentation CD supplied along<br />
with <strong>Appliance</strong>)<br />
- Verify Configuration<br />
- Configure Mail & Web server access.<br />
7. Set authentication parameters<br />
Go to Identity Authentication Authentication Server to define the authentication parameters.<br />
8. Access Help<br />
For accessing online help, click the Help button or F1 key on any of the screens to access the<br />
corresponding topic's help. Use the Contents and Index options to navigate through the entire online<br />
help.<br />
Additional Resources<br />
Visit following links for more information to configure Cyberoam<br />
Technical Documentation - http://docs.cyberoam.com<br />
Cyberoam Knowledge Base - http://kb.cyberoam.com<br />
Cyberoam Security Center - http://csc.cyberoam.com<br />
Cyberoam Upgrades - http://download.cyberoam.com<br />
Online Video Trainingusername:<br />
online.video@cyberoam.com<br />
https://connect.elitecore.com<br />
password: onlinevideo
Important Notice<br />
Elitecore has supplied this Information believing it to be accurate and reliable at the time of printing, but is presented without warranty of any<br />
kind, expressed or implied. Users must take full responsibility for their application of any products. Elitecore assumes no responsibility for any<br />
errors that may appear in this document. Elitecore reserves the right, without notice to make changes in product design or specifications.<br />
Information is subject to change without notice.<br />
User’s License<br />
The <strong>Appliance</strong> described in this document is furnished under the terms of Elitecore's End User license agreement. Please read these terms<br />
and conditions carefully before using the<strong>Appliance</strong>. By using this<strong>Appliance</strong>, you agree to be bound by the terms and conditions of this license.<br />
If you do not agree with the terms of this license, promptly return the unused <strong>Appliance</strong> and manual (with proof of payment) to the place of<br />
purchase for a full refund.<br />
Limited Warranty<br />
Software: Elitecore warrants for a period of ninety (90) days from the date of shipment from Elitecore: (1) the media on which the Software is<br />
furnished will be free of defects in materials and workmanship under normal use; and (2) the Software substantially conforms to its published<br />
specifications except for the foregoing, the software is provided AS IS. This limited warranty extends only to the customer as the original<br />
licenses. Customers exclusive remedy and the entire liability of Elitecore and its suppliers under this warranty will be, at Elitecore or its service<br />
center's option, repair, replacement, or refund of the software if reported (or, upon, request, returned) to the party supplying the software to the<br />
customer. In no event does Elitecore warrant that the Software is error free, or that the customer will be able to operate the software without<br />
problems or interruptions. Elitecore hereby declares that the anti virus and anti spam modules are powered by Kaspersky Labs and<br />
Commtouch respectively and the performance thereof is under warranty provided by Kaspersky Labs and Commtouch respectively. It is<br />
specified that Kaspersky Lab does not warrant that the Software identifies all known viruses, nor that the Software will not occasionally<br />
erroneously report a virus in a title not infected by that virus.<br />
Hardware: Elitecore warrants that the Hardware portion of the Elitecore Products excluding power supplies, fans and electrical components<br />
will be free from material defects in workmanship and materials for a period of One (1) year. Elitecore's sole obligation shall be to repair or<br />
replace the defective Hardware at no charge to the original owner. The replacement Hardware need not be new or of an identical make, model<br />
or part; Elitecore may, in its discretion, replace the defective Hardware (or any part thereof) with any reconditioned product that Elitecore<br />
reasonably determines is substantially equivalent (or superior) in all material respects to the defective Hardware.<br />
Disclaimer Of Warranty<br />
Except as specified in this warranty, all expressed or implied conditions, representations, and warranties including, without limitation, any<br />
implied warranty or merchantability, fitness for a particular purpose, non-infringement or arising from a course of dealing, usage, or trade<br />
practice, and hereby excluded to the extent allowed by applicable law.<br />
In no event shall Elitecore or its supplier be liable for any lost revenue, profit, or data, or for special, indirect, consequential, incidental, or<br />
punitive damages however caused and regardless of the theory of liability arising out of the use of or inability to use the product even if<br />
Elitecore or its suppliers have been advised of the possibility of such damages. In no event shall Elitecore's or its supplier's liability to the<br />
customer, whether in contract, tort (including negligence) or otherwise, exceed the price paid by the customer. The foregoing limitations shall<br />
apply even if the above stated warranty fails of its essential purpose.<br />
In no event shall Elitecore or its supplier be liable for any indirect, special, consequential, or incidental damages, including, without limitation,<br />
lost profits or loss or damage to data arising out of the use or inability to use this manual, even if Elitecore or its suppliers have been advised of<br />
the possibility of such damages.<br />
Restricted Rights<br />
Copyright 1999-2010 Elitecore Technologies Ltd.All rights reserved. Cyberoam, Cyberoam logo are trademark of Elitecore Technologies Ltd.<br />
Corporate Headquarters<br />
Elitecore Technologies Ltd.<br />
904, Silicon Tower<br />
Off C.G. Road<br />
Ahmedabad 380015<br />
Gujarat, India.<br />
Phone: +91-79-66065606<br />
Fax: +91-79-26407640<br />
Web site: www.elitecore.com<br />
Technical Support<br />
You may direct all questions, comments, or requests concerning the software you purchased, your registration status, or similar<br />
issues to Customer care/service department at the following address:<br />
Email: support@cyberoam.com<br />
Web site: www.cyberoam.com<br />
Visit www.cyberoam.com for the regional and latest contact information.<br />
<strong>Unified</strong> <strong>Threat</strong> <strong>Management</strong><br />
Toll Free Numbers<br />
USA : +1-877-777-0368<br />
India : 1-800-301-00013<br />
APAC/MEA : +1-877-777-0368<br />
Europe : +44-808-120-3958<br />
Visit: www.cyberoam.com<br />
Contact: sales@cyberoam.com


