Flow control
Flow control - 信德迈科技
Flow control - 信德迈科技
- No tags were found...

Create successful ePaper yourself
Turn your PDF publications into a flip-book with our unique Google optimized e-Paper software.
12 I Solenoid valves<br />
Piston-type solenoid valves<br />
T-Ex/K-Ex series<br />
Ex solenoid actuators<br />
Solenoid valves of type G 35-Ex, of pressureproof<br />
encapsulated design for use in explosionendangered<br />
areas, are generally equipped with<br />
a DC coil which is mounted in a pressure-proof<br />
encapsulated cast steel housing and sealed with<br />
silicone rubber.<br />
Technical data<br />
Nominal voltages<br />
Alternating current (AC):<br />
230 V, 45–60 Hz<br />
Rectifier is built into the solenoid casing<br />
Direct current (DC): 24 V, supplied without rectifier<br />
Ex-protection Pressure-proof encapsulation ( II2 G/D EEx de IIC T4 IP 65 T 125°C).<br />
Suitable for ≥ Zone 1, 21.<br />
Can be used in outdoor installations. Because of the deflagration gap specified for the<br />
solenoid, the solenoid actuator must be installed vertically.<br />
A protective hood is needed to give the solenoid additional<br />
protection against weather conditions.<br />
Mounting position<br />
Ex-solenoid valves must only be installed with the solenoid system<br />
standing vertically. Other mounting positions are not permitted.<br />
Power consumption<br />
approx. 50 VA with warm solenoid.<br />
Duty cycle<br />
100% ED. Other technical data are the same as for G 31 solenoid<br />
actuators.<br />
Connection cables<br />
Heat-resistant cables must be used to connect the Ex-solenoid<br />
actuator. The solenoid temperature must not exceed 125°C.<br />
Replacing solenoid actuators on Ex-solenoid valves G 35-Ex<br />
Solenoid actuators with the type designation G 35-Ex can also be replaced under pressure.<br />
The procedure is as follows:<br />
Removing the old solenoid<br />
1. Turn off the power and remove the connection cable.<br />
2. Loosen the three M6 Allen screws on the solenoid cover (aluminum hood), but do not remove<br />
them (2–3 turns of the screw are sufficient).<br />
3. Remove the Allen screws on the bottom mounting flange of the solenoid and carefully lift up the<br />
whole solenoid.<br />
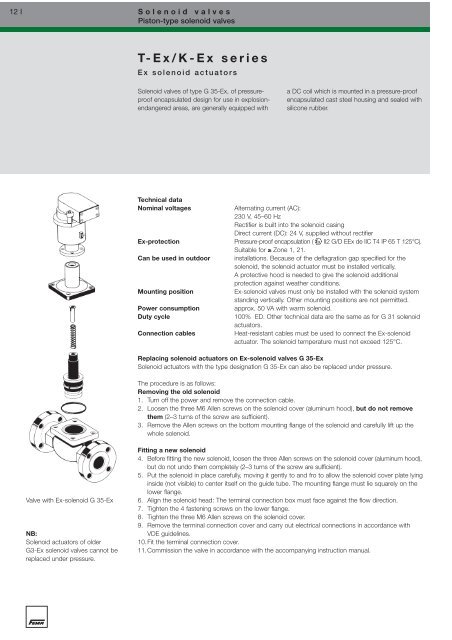
Valve with Ex-solenoid G 35-Ex<br />
NB:<br />
Solenoid actuators of older<br />
G3-Ex solenoid valves cannot be<br />
replaced under pressure.<br />
Fitting a new solenoid<br />
4. Before fitting the new solenoid, loosen the three Allen screws on the solenoid cover (aluminum hood),<br />
but do not undo them completely (2–3 turns of the screw are sufficient).<br />
5. Put the solenoid in place carefully, moving it gently to and fro to allow the solenoid cover plate lying<br />
inside (not visible) to center itself on the guide tube. The mounting flange must lie squarely on the<br />
lower flange.<br />
6. Align the solenoid head: The terminal connection box must face against the flow direction.<br />
7. Tighten the 4 fastening screws on the lower flange.<br />
8. Tighten the three M6 Allen screws on the solenoid cover.<br />
9. Remove the terminal connection cover and carry out electrical connections in accordance with<br />
VDE guidelines.<br />
10.Fit the terminal connection cover.<br />
11.Commission the valve in accordance with the accompanying instruction manual.