TRV-100 - Trigon Elektronik GmbH
TRV-100 - Trigon Elektronik GmbH
TRV-100 - Trigon Elektronik GmbH

Create successful ePaper yourself
Turn your PDF publications into a flip-book with our unique Google optimized e-Paper software.
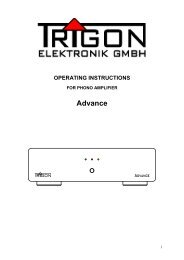
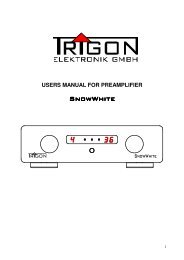
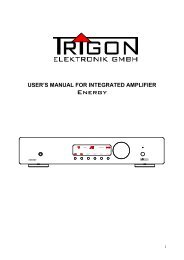
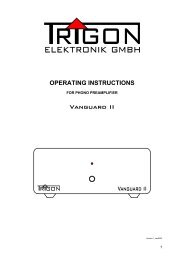
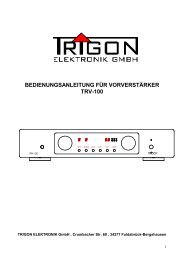
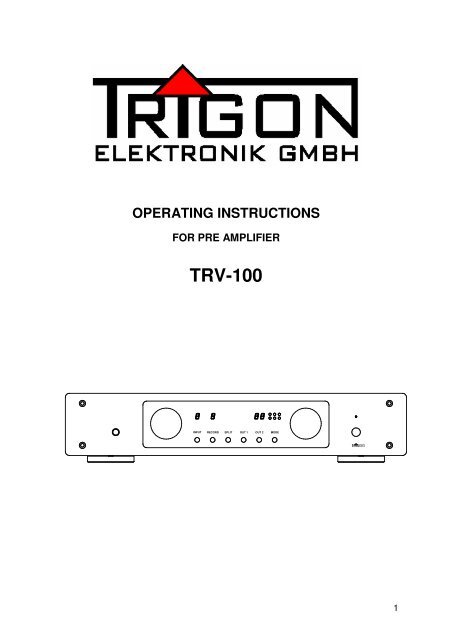
OPERATING INSTRUCTIONS<br />
FOR PRE AMPLIFIER<br />
<strong>TRV</strong>-<strong>100</strong><br />
INPUT RECORD SPLIT OUT 1 OUT 2 MODE<br />
1
Summary<br />
1 Preface<br />
2 General description of the equipment<br />
2.1 Security-advices<br />
2.2 Set-up advices<br />
2.3 Guarantee and service<br />
3 Starting<br />
3.1 The operating-elements on the front<br />
3.2 The connections on the back<br />
3.3 The Remote control<br />
4 Examples for connecting-possibilities<br />
4.1 Which equipment can be connected ?<br />
4.2 The inputs<br />
4.3 Connection of recording equipment (tape-recorder, cassette-recorder etc.)<br />
4.4 Possibilities for copying between two recording equipments<br />
4.5 The outputs<br />
4.6 Remote - socket<br />
4.7 Connection of the equalizers<br />
4.8 Connection to a surround-system<br />
5 The function MODE<br />
5.1 Adjustment of the stereo-balance<br />
5.2 Adjustment of the display-brightness<br />
5.3 Adjustment of the input-level<br />
5.4 Adjustment of the basic volume<br />
5.5 DC-Remote switch on/off<br />
5.6 Basic-adjustment from factory<br />
6 What to do if...<br />
6.1 ... nothing is working ?<br />
6.2 ... there is nothing to hear ?<br />
6.3 ... it is humming ?<br />
6.4 ... the Remote control doesn't work ?<br />
6.5 ... there is not remote-signal ?<br />
7 Technical Details<br />
2
1. Preface<br />
Dear TRIGON - client,<br />
Your made up your mind for the pre-amplifier <strong>TRV</strong>-<strong>100</strong>. This equipment was<br />
produced in response to severe production-controls and it is an excellent example for<br />
modern precision-technic.<br />
Even if you are already familiar to the handling of HIFI equipment you should study<br />
this instruction carefully and act according to the herein instructions.<br />
Please save this instruction carefully because it can surely be a good help again<br />
while running your pre-amplifier.<br />
Have a good time with your new pre-amplifier.<br />
Your TRIGON-TEAM<br />
2. General description of the equipment<br />
The <strong>TRV</strong> - <strong>100</strong> is a pre-amplifier of high quality with eight high-level-inputs and two<br />
separately switchable outputs. Two of the eight inputs as well as one output are<br />
supplied in symmetrical design. The inputs 7 and 8 can also be used as input for a<br />
tape-recorder because there are also two record-outputs belonging to these two<br />
inputs.<br />
There are also two switched low-voltage-outputs (10V DC) for the running of amplifier<br />
and active loudspeaker with DC-remote control. Further TRIGON-equipment,<br />
controlled by the <strong>TRV</strong> - <strong>100</strong> can be connected to a 3-pole-D-sub-socket.<br />
For the running of a high-ohmic head-phone there is a 6,3 mm phone plug at the<br />
front of the equipment.<br />
Further the <strong>TRV</strong> - <strong>100</strong> has got an input/output where special equipment like<br />
Surround Decoder, Equalizer etc. can be connected.<br />
The amplifier is completely controlled by a uP in consideration of a good working<br />
separation of the analogous and digital circuits.<br />
The operating of the pre-amplifier is possible at the equipment itself as well as by a<br />
IR-remote-control-unit. A clear display on th front of the pre-amplifier, which is<br />
dimable and can be switched off, informs always about current positions. In the<br />
„Stand-by Modus“the equipment can be switched-off by remote-conrol-unit.<br />
Independent from the current program the Record-circuit allows copying any<br />
program-source.<br />
The volume can be adjusted by a special D/A-converter, so it is much better than<br />
conventional volume control(Pontentiometer) in respect to sound and technology.<br />
Each of the amplifier stage is produced modulary, in the case of developments<br />
concerning the technology or the sound they can be exchanged by unplugging.<br />
The integrated toroid transformer with a „Super Silent material“ which is low magnetic<br />
field and humless runs even very well in the case of unclean voltage. Again the<br />
mains-part was very much considered. It consits mainly of four separat mains-parts<br />
3
and contains for the supply of the amplifier stage a special connection, which always<br />
allows a low sorce resistance in the case of higher frequency . That way the distortion<br />
occuring also in the high-sound-sphere wil be minimated and the sound seems to be<br />
less rough comparing to the use of usual connections.<br />
2.1 Security-advices<br />
TRIGON ELEKTONIK will not undertake liability for damages caused by inexpert<br />
handling by not handling according to the following security-advices.<br />
The pre-amplifier shouldn't be used close to hot places like heaters, chimneys, fireplaces,<br />
lights of high-power etc.<br />
The pre-amplifier shouldn't be bumped or vibrated.<br />
After transporting from a cold surrounding into a warm room the pre-amplifier<br />
shouldn't be connected to the mains-supply immediately.<br />
The pre-amplifier shouldn't be settled directly in the sun-light.<br />
Please take care for good air-circulation at the place where the equipment is installed<br />
Never spill any liquid onto the pre-amplifier. Liquids are not allowed to penetrate into<br />
the case.<br />
Never use this exquipment without the protecting cover of the case.<br />
Always unplug the plug before opening the equipment.<br />
Never span a fuse. Pleas exchange a broken fuse only with an original fuse of the<br />
same type and of the same factor.<br />
Never try to repair on your own. Any kind of maintenance and repair is only allowed<br />
to be done by authorized, extra trained staff. Defects caused by inexpert handling or<br />
by foreign treatment will lead to the expire of a possible demand for guarantee.<br />
Before unplugging or installing connecting cable please switch off the unit in any<br />
case.<br />
The <strong>TRV</strong>-<strong>100</strong> is prepared from factory for the use on 230 V supply . Should you have<br />
another voltage-supply, please contact your distributer or TRIGON in order to<br />
prepare your equipment.<br />
4
2.2 reference for nomination<br />
After unpacking at first please check the equipment upon damages caused by<br />
transnport. If you should find a damage please connect immediately your distributer.<br />
After that please control the content of the cardboard-box:<br />
Besides the <strong>TRV</strong>-<strong>100</strong> you should find the following parts:<br />
- Power-cable<br />
- IR-remote-control-unit<br />
- operating-instructions<br />
- warrantee-sheet<br />
Install the equipment horizontally at a dry place. Always take care for good airing.<br />
Strong magnetic strayfield which can be caused by power amplifier tansformers and<br />
Halogen light transformer can lead to hum and noise. Therefore pleas install the preamplifier<br />
in a distance to such equipments. Also the connecting cables shouldn't be<br />
installed parallel to light-lines. Hum and noise are also caused by luminious<br />
discharge lamps so that therefrom should be a distance of about 1 m at least. .<br />
Avoid direct sunlight and install do not install the <strong>TRV</strong>-<strong>100</strong> next to powerful heating<br />
units.<br />
2.3 Warrantee and Service<br />
With the <strong>TRV</strong>-<strong>100</strong> you bought a product of hight quality, with a well developed<br />
technology.<br />
Your TRIGON-Team takes care that in each stage of production the demands on a<br />
TRIGON-product can be assured by several quality-tests and a severe control before<br />
sending-off the products. Should there be nevertheless a fault, TRIGON-<br />
ELEKTRONIK <strong>GmbH</strong> offers a guarantee of 3 years.The guarantee consists of the<br />
repair of the defect parts as well as the wage. Further demands are excluded. The<br />
guarantee excludes any damage caused by inexpert installation, incorrect handling<br />
or repairs by not authorized distributers or private persons. Further the guarantee will<br />
expire if the identify-numbers are made unrecognizable as well as in the case of<br />
damages caused by accident or transport-damages.<br />
5
3. Start<br />
After unpacking the pre-amplifier we recommend first of all to connect the equipment<br />
to the power-line and to switch it on before connecting it to further equipment.<br />
After a short starting-phase (the sign LED is gleaming) you will hear a soft noise<br />
caused by some relays and now the now the <strong>TRV</strong>-<strong>100</strong> is ready.-<br />
Now you should get used to the operating-instruments and to the connectingsockets.<br />
Try to work with all operating-functions. You cannot destroy anything.<br />
If you tryed everthing and have understood the function of the <strong>TRV</strong>-<strong>100</strong> you can start<br />
the connection of the cables.<br />
If you have already stored within the MODE-Function it is recommended to recall the<br />
storages (keep the MODE-key pressed for ca. 5 seconds)<br />
If working at the cabling in any case you should switch off the<strong>TRV</strong>-<strong>100</strong> as well as the<br />
rest of the system.<br />
As a help please pay attention to the cabling-expample at top 4.7 and the following<br />
tops.<br />
3.1 The operation-elements on the front<br />
INPUT RECORD SPLIT OUT 1 OUT 2 MODE<br />
1 - Knob SELECTOR :<br />
If you select the INPUT-SELECTOR with key 3 (the INPUT-Signal is brighter), with<br />
the knob you will be able to choose the input you want to listen to at the moment.<br />
If you select the RECORD-SELECTOR with key 4 (the RECORD -Signal is brighter),<br />
with the knob you will be able to choose the input which is now chosen to lay at the<br />
TAPE OUTPUTS and which can be copied by a connected recorder.<br />
2 - Knob VOLUME :<br />
Using this knob the volume can be adjusted within <strong>100</strong> positions. The digital-display<br />
11 informs about the current volume.<br />
Please notice that this knob is a digital encoder without left- or right-stop.<br />
6
3 - INPUT :<br />
If you strike this key with the SELECTOR-knob you will be able to choose the input<br />
which shall reproduce. The signal 9 shows the chosen channel.<br />
4 - RECORD :<br />
If you strike this key, with the SELECTOR-knob you will be able to choose the input<br />
which shall be copied by a recorder (f.e. cassette-player, tape-recorder etc.) The<br />
signal 10 shows the chosen channel.<br />
5 - SPLIT :<br />
If you strike this key, the additonal equipment connected to the SPLIT-sockets (f.e.<br />
equalizer, surround decoder) will be smoothed into the Signal way ( Please pay<br />
attention to top 5.3 as well.)<br />
6 - OUT1 :<br />
If you strike this key the ouput 1 can be switched on- or off.<br />
7 - OUT2 :<br />
If you strike this key the output 2 can be switched on- or off.<br />
8 - Mode :<br />
If you strike this key, the MODE-Menue is switched on. The MODE-Signal is<br />
gleaming, as long as the MODE-Menue is active. With short strikes you will get to<br />
each top of the menue. A longer strike will store the chosen positions. The MODE-<br />
Signal isn't gleaming while storing..As soon as the storing is finished, the MODE-<br />
Signal starts gleaming again and you can do furhter operations.<br />
Please pay attention to the exact description of the MODE-function under top 5.<br />
9 - INPUT Display :<br />
This display shows the just chosen input which is reproduced at the moment.<br />
10 - RECORD Display :<br />
This display shows the just chosen input, which has just been connected to the<br />
TAPE-OUTPUT.<br />
11 - VOLUME Display :<br />
This display shows the volume adusted at the moment. Within the MODE- Menue it<br />
shows other level as well. Please pay attention to top 5 too.<br />
12 - LED Multifunction-display<br />
This 6 LEDs give additional information within the MODE-Menue, described more<br />
exactly under top 5.<br />
The upper LED in the middle will gleam if the pre-amplifier is adjusted onto MONO<br />
together with the remote-control-unit<br />
7
3.2 The connections on the back<br />
13 - MAIN POWER :<br />
The line-cable will be herein plugged<br />
14 - 10V DC :<br />
The sockets are connected to a 10 - voltage DC-voltage to switch-on power amplifier<br />
or active-speakers from the distance.<br />
15 - TR-LINK :<br />
nothing else<br />
16 - OUTPUT 2 :<br />
This is the symmetrical output for the pre-amplifier. Hereon a power amplifier or an<br />
active-speaker can be connected.<br />
At pin 1 is the ground<br />
At pin 2 is the uninverted signal (+)<br />
At pin 3 is the inverted signal (-)<br />
17 - OUTPUT 1 :<br />
This is the assymmetrical output of the pre-amplifier. Hereon a power amplifier or a<br />
active-box with assymetrical inputs can be connected. There is no uninverted signal.<br />
18 - SPLIT :<br />
At this in/output a special equipment (Equalizier, externe sound adjustment,<br />
Surround-Decoder) can be connected and feed in the signal path.<br />
If using a Sourround Decoder with an own volume adjustment, please pay also<br />
attention to the special-function DIRECT; described more exactly under top 5.3.<br />
TAPE OUTPUTS :<br />
These sockets are connected to the input chosen by the RECORD SELECTOR: The<br />
to this belonging input-sockets are INPUT7 (REC-1) and INPUT 8 (REC-2)<br />
8
20 - UNBALANCED INPUTS :<br />
The socket-pairs INPUT 3 to INPUT 4 are unsymmetrical inputs. Any high level<br />
equipment like Tuner, CD-Player, Tape-Set etc. can be connected.<br />
Record-Players can't be connected as they need an additonal amplifier stage<br />
Nevertheless, special Phono-pre-amplifiers for record-players can be connected to<br />
these inputs.<br />
21 - BALANCED INPUTS :<br />
INPUT 1 as well as INPUT 2 is produced as symmetrical input. Hereto equipment<br />
with symmetrical outputs can be attached.<br />
22 -Head-phone<br />
To this socket a head-phone can be attached. The impedance of this head-phone<br />
shouldn't be lower than 200 Ohm.<br />
9
3.3 The Remote-Control-Unit<br />
An IR remote-control-unit is attached to each TRIGON-pre-amplifier. This remotecontrol-unit<br />
is a system unit which can also be used in connection to further TRIGONequipment.<br />
The buttons, which can be pre-adjusted to the respective equipment are<br />
marked by a graphical frame. First press the button PREAMP in order to use the <strong>TRV</strong><br />
<strong>100</strong>. As long as you do not press another button within this marked area, the preadjustment<br />
for the pre-amplifier will be stored in the remote-control-unit.<br />
ON<br />
DAC<br />
1<br />
3<br />
5<br />
OFF<br />
PREAMP<br />
2<br />
4<br />
6<br />
VO L-<br />
PHASE/CD<br />
MONO<br />
+ 10<br />
7 8 -10<br />
9 0<br />
OUT1<br />
O UT2/FREQ<br />
< / < <<br />
PHASE/DA<br />
W/N<br />
> / >><br />
SPLIT<br />
ST ORE<br />
PLAY<br />
TRIGO N TRF- 10 0<br />
VOL+<br />
TUNER<br />
CD<br />
REPEAT<br />
PAUSE<br />
TIME<br />
MODE<br />
DISPLAY<br />
STATION<br />
CLEAR<br />
STOP<br />
Button ON: If the pre-amplifier was switched off<br />
by the remote-control-unit before it can be<br />
switched-on by this button again.<br />
Button OFF: With this button the pre-amplifier<br />
can be switched-off. But the pre-amplifier will not<br />
be separated from the power-supply. It is still in<br />
the Stand-By Position<br />
Button VOL- :With this button the volume can be<br />
reduced<br />
Taste VOL+ : With this button the volume can be<br />
raised.<br />
(The buttons VOL- and VOL + work<br />
undependently from the pre-adjustment of the<br />
unit )<br />
Button 1 - 8 : With these buttons the respectiv<br />
input can be selected.<br />
Button MONO : With this button it is possible to<br />
change between Mono and Stereo. If the<br />
amplifier is switched Mono, there will be a light<br />
within the disply of the pre-amplifier.<br />
Button +10: If you press this button, the volume<br />
will be raised by 10dB.<br />
Button -10: If you press this button, the volume<br />
will be recuced by 10 dB.<br />
Button Mode: With this button you get into the MODE-Menue. With every single<br />
press on the button there will be a further function within the MODE-Menue. As long<br />
as you are within the MODE-Menue the rexpective signal is twinkling in the display of<br />
the pre-amplifier. You'll find further advices for the MODE-Menue in chapter 5.<br />
Button 0: With this button the amplifier will be switched to Mute, that means that the<br />
volume is zero. Instead of the INPUT- and Volume-numbers you will see horizontal<br />
lines. If you press the a button 0 or another button of the pre-amplifier once again,<br />
the old situation will be restored.<br />
10
Button OUT1 : With this button the output 1 can be switched-on and-off.<br />
Button OUT2/FREQ : With this button the output 2 can be switched on and - off<br />
Button SPLIT : With this button the SPLIT-Funktion can be switched on and -off.<br />
The remote-control-unit is run with two Mignon 1,5 voltage batteries. Please control<br />
regularily the condition of the batteries in order not to destroy the remote-control-unit<br />
by leaking batteries.<br />
4. Examples for connection-possibilities<br />
4.1 Which equipment can be connected ?<br />
The <strong>TRV</strong> <strong>100</strong> is concepted as a pure high level amplifier. All units of the<br />
audioelectronic can be connected, which offer a linear, anolg signal voltage between<br />
0,2 voltage and 2 voltage. Such units are for example: Tuner, CD-Player with<br />
integrated DA-converter tape-recorders, cassette-players, HIFI-Video-recorders etc.<br />
Effect-units like equalizer, tone control amplifier, surround-decoders etc. can be<br />
connected at the socket-pair Split<br />
Microphones and record-players cannot be connected.<br />
4.2 The input-sockets<br />
The <strong>TRV</strong> <strong>100</strong> has got 8 inputs. The inputs 1 and 2 are concepted as symmetrical<br />
inputs ( Pin 1= GND, Pin 2 = + not inverted, Pin 3 = inverted).<br />
A SPLIT-input offers an extra input. If this socket is used as input, please take care<br />
that this input won't be connected onto the tape-outputs.<br />
4.3 Connection of recording units<br />
The <strong>TRV</strong> <strong>100</strong> has got 2 record-outputs (19). Hereon the record-inputs of cassetteplayers,<br />
tape-players and the analogous-inputs of a DAT or MD-recorder can be<br />
connected.<br />
11
4.4 Recording possibility between two recording-units<br />
In order to record between two recording units please connect the outputs of<br />
recording-unit A to the input 7 and the outputs of unit B to input 8. The recordinginputs<br />
of unit A should be connected to Tape outputs Rec-1 and of unit B to Tape<br />
outputs Rec-2.<br />
If you now want to record from unit A to unit B, please switch the RECORD-path on<br />
position 7. Therefore you have to switch button 4 (RECORD) and move the knob 1 to<br />
position 7. Now the recording can be started.<br />
4.5 The output sockets<br />
The <strong>TRV</strong> <strong>100</strong> has got two outputs which can be switched undependent from each<br />
other.<br />
To these outputs usually a power-amplifier or an active-speaker can be connected.<br />
With output 1 there is an asymmetrical and with output 2 a symmetrical output<br />
available.<br />
The symmetrical output is good to use in the case of very long connection-cables<br />
between pre-amplifier and amplifier.<br />
The advantage of a symmetrical cabling is that jammings going on to such lines will<br />
be effectively suppressed.<br />
The pin-engagement is as follows: Pin 1 = GND, Pin 2 = + not inverted, Pin 3 =<br />
inverted.<br />
4.6 Remote Sockets<br />
Some power amplifier and active-speakers can be switched on and off by using a<br />
DC-voltage . Therefore the <strong>TRV</strong> <strong>100</strong> has got two REMOTE-sockets with a DCvoltage<br />
of 10V as soon as the <strong>TRV</strong> <strong>100</strong> has been switched-on.. Nevertheless the DCvoltage<br />
can be switched-off within the MODE-Menue.<br />
4.7 Connection of an equalizer<br />
In order to build an equalizer into the signal-line, the <strong>TRV</strong> <strong>100</strong> has got a socketquartet<br />
with the mark SPLIT (18).<br />
Connect the output of the equalizer to the sockets INPUT and connect the output of<br />
the equalizer to the sockets OUTPUT.<br />
In order now to build the equalizer into the signal-line, you only need to press the<br />
button SPLIT at the<strong>TRV</strong> <strong>100</strong> or at the remote-control-unit.<br />
12
4.8 Connection to a surround-unit<br />
The <strong>TRV</strong> <strong>100</strong> offers the possibility to integrate a surrounddecoder into your HIFIequipment<br />
in an easy manner.<br />
In the case of a surround-unit usually at least 5 independant speakers have to be<br />
steered. In order to use the two main-speakers of the right and left channel without<br />
disconnecting, you have to connect the surrounddecoder as follows:<br />
The input of the surrounddecoder has to be connected to the sockets of SPLIT<br />
OUTPUT (18). The output-sockets for the main-channels front left and front right<br />
have to be connected to the sockets of SPLIT INPUT (18).<br />
By pressing the button SPLIT the main-speakers are now connected to the surrounddecoder<br />
by using the main power amplifier.<br />
The power amplifier for the two backward channels and of the middle channel will be<br />
directly connected to the surround-decoder.<br />
In order to adjust the total-volume at the surround-decoder you adjust the volume at<br />
the <strong>TRV</strong> <strong>100</strong> to factor 73. Now you adjust the surround-unit according to the<br />
instruction.of the surround-decoder. The volume at the <strong>TRV</strong> <strong>100</strong> shouldn't be<br />
adjusted any longer.<br />
Now the unit is adjusted for the surround-function.<br />
Here are the adjustments for the surround-function in tops:<br />
13
Example: The Videorecorder is connected to the <strong>TRV</strong> <strong>100</strong> at INPUT 5. The<br />
surround-decoder is cabled as above.<br />
1st step : switch the <strong>TRV</strong>-<strong>100</strong> on SPLIT.<br />
2st step: put the volume at <strong>TRV</strong>-<strong>100</strong> to factor 73<br />
3rd step: select input 5 at the <strong>TRV</strong>-<strong>100</strong><br />
4th step: switch the surround-decoder to input 1<br />
5th step: adjust the unit according to the instruction of the surround-decoder.<br />
6th step: start the reproduction at the video-recorder<br />
5 The FunctionMODE<br />
Some extra functions are called if calling this button. At the moment the following<br />
functions are available:<br />
- Adjustment of the stereo-balance<br />
- Adjustment of the display-brightness<br />
- level adjustment for each input<br />
- adjustment of the basic-volume<br />
- basic adjustment ex-factory<br />
If pressing the button MODE you get into the special-function-modus and the signal<br />
MODE is sparkling. With every further pressing of the button the menue changes to a<br />
further function, after the 6th pressing you will leave the MODE-Menue. If you want to<br />
store an adjustment for a longer time you'll have to keep the MODE-button pressed<br />
for an instand. During this time the sparkling of the MODE-signal stops for a short<br />
time. As soon as the signal starts sparkling again the adjustment is stored durably<br />
until it will be overwritten by another adjustment on the same way.<br />
The adjustment-possibilities are described as follows:<br />
5.1 Adjustment of the STEREO-Balance<br />
After the first pressing onto the MODE-button you'll find yourself in the modus<br />
BALANCE: The display shows the following picture, while the MODE-signal is<br />
twinkling and the upper light in the middle (LED) is shining.<br />
INPUT RECORD SPLIT OUT 1 OUT 2 MODE<br />
By turning the VOLUME-button to the left or to the right the stereo-balance can be<br />
adjusted. Dependend on the turning-direction of the balance there will be another<br />
LED shining in order to inform you about the changing of the direction.<br />
The volume-display shows the level of the changing. One changing-unit means 1dB.<br />
14
A maximum difference of <strong>100</strong>dB can be adjusted. When you have found the right<br />
adjustment it can be stored as described above. By using the MODE-button another<br />
time you will jump into the next menue. But if you want to stop the adjustments, the<br />
amplifier will leave the MODE-menue automatically after ca. 10 seconds and the<br />
MODE-signal as well as the signal-LEDs will stop shining. Again the volume-display<br />
shows the actual volume-factor.<br />
5.2 Adjustment of the display-brightness<br />
The brightness of the entire display can be pre-adjusted in three steps. In order to do<br />
this adjustment please press the MODE-button two times, so that the numeral-signal<br />
above from the RECORD-signal shows a symbolical „h“<br />
INPUT RECORD SPLIT OUT 1 OUT 2 MODE<br />
By turning the VOLUME-button you can adjust the brightness. The display shows the<br />
selected step<br />
When you found the right adjustment you can store it durably as described above.<br />
By using the MODE-button another time you'll jump to the next menue. But if you<br />
don't want to adjust any more, the amplifier will leave the MODE-menue and the<br />
MODE-signal and the signal-LEDs will stop shining as well. Again the volume-display<br />
shows the actual volume factor<br />
5.3 Adjustment of the input-level<br />
Sometimes it can occure that the equipments connected to the <strong>TRV</strong>-<strong>100</strong> have got a<br />
different volume and that there are volume-differe14nces if switching over. The<strong>TRV</strong>-<br />
<strong>100</strong> offers the possibility to adjust the sensibility of each input individually. At the third<br />
position in the MODE-modus occures the function level. With the INPUT-knob you<br />
can select the input which input-level you want to change.. With the volume-knob<br />
then you can lift the level (turning to the right) or let the l evel down (turning to the<br />
left). The volume-display shows you the degree of the lifting/sinking. With the lifting<br />
the upper LED on the left side is shining additonally, with the sinking the downer LED<br />
on the left side is shining<br />
15
INPUT RECORD SPLIT OUT 1 OUT 2 MODE<br />
Input level adjustment: INPUT 3 is selected and lifted by „4“ (2dB)<br />
Having adjusted the level the MODE-button has to be pressed for some seconds<br />
(until the MODE-signal is twinkling again) .. That way the level-adjustment for the<br />
selected input is stored.<br />
If you want to work with further input-level please select the the next entrance with<br />
the INPUT-knob and operate as described above.<br />
The adjustment-possibility overwrites+- 6dB in steps of 0,5dB, that means 12 digits<br />
up and 12 digits down.<br />
If you want to finish the adjustments, the amplifier will leave the menue automatically<br />
after 10 seconds.<br />
5.4 Adjustment of the basic-volume<br />
The <strong>TRV</strong> <strong>100</strong> has got an elctronial volume-adjustment. This operation offers a better<br />
reproduce-quality (in comparison to a convenient (Potentiometers) and advantageous<br />
extra-functions. One of them is the adjustment-possibility of the basic-volume. That is<br />
the volume-level, which adjusts itself automatically after switching on the preamplifier.<br />
Even when you have switched-off the OUTPUTS for instance in order only<br />
to listen with head-phones, the basic-volume will be adjusted automatically after<br />
switching-on again. That way it is assured that a high positioned volume-level<br />
adjusted like that before the last switching-off, will sound immediately at the output at<br />
the speaker.<br />
But the basic-volume can be pre-adjusted in the MODE-menue by yourself.<br />
Therefore you switch the MODE-button and you get at the fourth position to the<br />
adjustment-modus of the basic-volume.<br />
16
INPUT RECORD SPLIT OUT 1 OUT 2 MODE<br />
With turning the VOLUME-knob basic-volume can be changed. When you have<br />
adjusted a level again the MODE-button has to be pressed for some seconds (until<br />
the MODE-signal is twinkling again) and the basic-level-adjustment is stored.<br />
If you want to stop the adjustments, the amplifiers leaves the MODE-menue<br />
automatically after 10 seconds.<br />
5.5 DC-Remote Switch-on and-off<br />
The <strong>TRV</strong>-<strong>100</strong> has got the possibility to offer a 10 voltage DC-voltage for remote<br />
control Such a DC-voltage is demanded fron several power amplifier and activespeakers<br />
in order to get switched-on at the same time as the pre-amplifier.<br />
Sometimes it can be an advantage to switch-off this remote voltage.That happens for<br />
instance if listening only by head-phones and the power amplifier isn't needed.<br />
At the fifth position of the MODE-menue you get to the switch-on/switch-off modus.<br />
The following picture appeares:<br />
INPUT RECORD SPLIT OUT 1 OUT 2 MODE<br />
With the volume-button a factor of 00 or 01 can be adjusted. OO means, that the<br />
REMOTE-signal is switched-off an 01 means that the REMOTE-signal is switchedon.<br />
In order to store the adjustment again keep the MODE-button pressed for some<br />
seconds until the MODE-signal is twinkling again. In order to leave the MODE-menue<br />
press another time the MODE-button or wait some seconds until the amplifier leaves<br />
the MODE-menue automatically.<br />
17
5.6 Basic adjustment ex-factory<br />
Ex-factory the <strong>TRV</strong>-<strong>100</strong> is supplied with a basic-position. If you are not satisfied with<br />
the adjustments in the MODE-menue and want to reproduce the ex-factory<br />
adjustment, please keep the MODE-button pressed for some seconds (but you<br />
shouldn't be in the MODE-menue, that means that the MODE-button is not twinkling<br />
at the moment). As soon as you press the MODE-button for some seconds the<br />
MODE-signal starts twinkling sometimes and the original-adjustments are<br />
reproduced. But please take care that all your adjustments (balance. displaylightness,<br />
basic-volume etc.) will be overwritten.<br />
6. What to do if...<br />
In this chapter we want to ease for you to localize and to remove small faults<br />
6.1 ... nothing happens ?<br />
Is the plug put-in properly ? - Put-the plug regularily into the socket.<br />
Is the used socket connected to the AC-voltage or is it connected to the home fuse<br />
box. Check the home fuse box.<br />
Did the internal fuse blow? - Send the equipment to the service.<br />
6.2 ... nothing is to hear ?<br />
Did you select the right input? Select the input which shall be heared.<br />
Did you switch-on the used output? -Switch-on the output.<br />
Does the source supply a signal? Switch-over to another used input and check if this<br />
one is working. If it does, the other source has a fault. - Check this source.<br />
Is the MUTE-Function active? Press once again MUTE on the remote-control-unit or<br />
just change the volume?<br />
Is the Split-Function select though there is no extra-unit connected? Deactive the<br />
SPLIT-Function.<br />
6.3 ...it is humming ?<br />
Did you put in the connection-lines unshaky and are they fixed? - Check the<br />
connecting-cable.<br />
Sometimes there are so called huming loop caused by multiple grounding.<br />
In order to solve this problem some experience is necessary. We recommend to<br />
connect your distributer.<br />
18
It is only humming if the tuner or the video-recorder or the television-set is connected<br />
to the pre-amplifier. -All these units are connected to the aerial which itself is earthed.<br />
So there is from time to time a humming loop which in this case can easily removed<br />
by the use of a AC-filter.<br />
6.4 ... the remote-control-unit does not react ?<br />
Does the remote-control-unit operate in the pre-amplifier-modus at the moment?<br />
Press the button PREAMP on the remote-control-unit. Now the remote-control-unit is<br />
activated for the pre-amplifier.<br />
Are the batteries finished? - Put in new batteries.<br />
Is the distance too great?- Decrease the distance. IR-remote-control-units too have<br />
only got a certain reach. With well loaded batteries up to eight meters.<br />
The reach will decrease as well if too bright sunlight is disturbing. Avoid direct<br />
sunlight.<br />
6.5 ... there is no remote-signal ?<br />
Did you switch off the remote-signal? - Switch-in the remote-signal into the MODEmenue.<br />
Did you put in the connection-cable properly? - Check the connection-cable.<br />
19
7. Technical Details<br />
Bandwith : 1Hz - 200kHz (+ - 3dB)<br />
Distortion : < 0.02 %<br />
Channel separation : < 80 dB ( 1kHz )<br />
S/N : < 98 dBA<br />
Input impedance : 47kOhm<br />
max. Output-voltage : 6.5 V eff<br />
Dimensions : 440 x 89 x 340 mm ( BxHxT)<br />
Weight : 8,1 kg<br />
Inputs : 6x Cinch, 2x XLR<br />
Outputs : 1x Cinch , 1x XLR , 2x Cinch Tape<br />
Head-phone-output : 1x Phone Jack 6.3mm > 200 Ohm<br />
Additional equipment : IR remote-control-unit<br />
Guarantee : 3 years<br />
Modifications are reserved<br />
Production and construction:<br />
<strong>Trigon</strong> <strong>Elektronik</strong> <strong>GmbH</strong><br />
Crumbacher Str. 60<br />
D-34277 Fuldabrück - Bergshausen<br />
Germany<br />
Tel.: +49 (0) 561 - 20753880<br />
FAX:+49 (0) 561 - 20753888<br />
e-mail: trigon@trigon-audio.de<br />
web: www.trigon-audio.de<br />
20