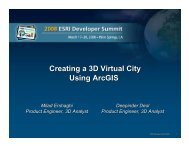
Using VBA and ArcMap to Create and Export 3D Buildings - Esri
Using VBA and ArcMap to Create and Export 3D Buildings - Esri
Using VBA and ArcMap to Create and Export 3D Buildings - Esri

Create successful ePaper yourself
Turn your PDF publications into a flip-book with our unique Google optimized e-Paper software.
<strong>Using</strong> <strong>VBA</strong> <strong>and</strong> <strong>ArcMap</strong> <strong>to</strong> <strong>Create</strong> <strong>and</strong> <strong>Export</strong> <strong>3D</strong><br />
<strong>Buildings</strong><br />
Abstract<br />
Brian Bradshaw<br />
Layers in ArcScene containing polygon features can be extruded <strong>to</strong> create <strong>3D</strong> blocks for display in the<br />
current scene. While this is useful for representing flat-roofed buildings within ArcScene it does not<br />
create a new, <strong>3D</strong> shapefile <strong>and</strong> cannot create buildings with peaked or curved roofs. A method <strong>to</strong> create<br />
<strong>3D</strong> shapefiles representing buildings with complex roofs <strong>and</strong> then export these objects <strong>to</strong> VRML was<br />
developed using a combination of <strong>VBA</strong> scripts <strong>and</strong> innovative editing of <strong>3D</strong> shapefiles in <strong>ArcMap</strong>.<br />
Introduction<br />
Visual simulation systems use <strong>3D</strong> databases composed of three main data sets: a digital elevation model<br />
(DEM) depicting the surface elevation, imagery <strong>and</strong> maps depicting the surface texture, <strong>and</strong> <strong>3D</strong> objects<br />
representing cultural features. Pho<strong>to</strong>n Research Associates (PRA) develops <strong>3D</strong> databases for a variety of<br />
high-end visual simulation systems. Various formats are used for the <strong>3D</strong> objects in these systems<br />
including our own proprietary format <strong>and</strong> OpenFlight, the de-fac<strong>to</strong> industry st<strong>and</strong>ard. While the final<br />
data is delivered <strong>to</strong> our cus<strong>to</strong>mers in the format suitable for their simulation systems, much of the<br />
development work is performed using GIS software such as ESRI's ArcGIS <strong>and</strong> ERDAS Imagine. For<br />
many of our databases our cus<strong>to</strong>mers are able <strong>to</strong> provide us with a GIS database of the area. Some of the<br />
more useful datasets from these GIS databases are polygon shapefiles representing building footprints.<br />
To take advantage of the building footprints a method was developed <strong>to</strong> convert the polygon shapefiles<br />
in<strong>to</strong> <strong>3D</strong> objects for use in simulation systems external <strong>to</strong> ArcGIS.<br />
A system was needed that could convert a single polygon shapefile representing the footprints of<br />
multiple buildings in<strong>to</strong> a set of files representing individual <strong>3D</strong> buildings in various external formats.<br />
Initially ArcScene was investigated <strong>to</strong> see if it could perform these functions. ArcScene provides the<br />
ability <strong>to</strong> extrude polygons <strong>to</strong> create <strong>3D</strong> blocks for display in the current scene. This new scene with the<br />
<strong>3D</strong> blocks can then be exported <strong>to</strong> Virtual Reality Modeling Language (VRML) format. While this<br />
technique can create simple, flat-roofed buildings it cannot create buildings with peaked or curved roofs.<br />
In addition, this technique does not create a new <strong>3D</strong> shapefile, which limits the export format <strong>to</strong> VRML.<br />
Creation of a new <strong>3D</strong> shapefile would provide the option of converting the shapefile <strong>to</strong> Drawing<br />
Exchange Format (DXF), a widely recognized format used in CAD systems. Finally, exporting the entire<br />
scene of extruded polygons from ArcScene <strong>to</strong> VRML creates a single file with all the objects. The
simulation systems used at PRA expect a separate file for each individual <strong>3D</strong> object. Furthermore, these<br />
systems expect each object <strong>to</strong> use a self-referenced coordinate system, rather than the coordinates of a<br />
projection system, with the location of each object within the scene provided in a separate file.<br />
Methodology<br />
Initially it was uncertain how, or if, ArcGIS could be used <strong>to</strong> create buildings with complex roof<strong>to</strong>ps.<br />
Investigating various methods for creating <strong>and</strong> editing <strong>3D</strong> objects in ArcGIS all seemed <strong>to</strong> lead <strong>to</strong> dead<br />
ends. <strong>3D</strong> Analyst <strong>and</strong> ArcScene provide the ability <strong>to</strong> create <strong>and</strong> view <strong>3D</strong> objects, but there is no editing<br />
capability. <strong>ArcMap</strong> provides editing but it can only display features in the x-y plane. <strong>3D</strong> Analyst<br />
provides a function for converting features <strong>to</strong> <strong>3D</strong> however, for polygons this simply creates a polygonZ<br />
feature, which is just a surface, not a true <strong>3D</strong> object. Extruding polygons up <strong>to</strong> a roof height creates a<br />
multipatch feature, which is a true <strong>3D</strong> object; however, <strong>ArcMap</strong> does not provide any functionality for<br />
editing multipatch features. Writing code <strong>to</strong> create the roofs or modify the multipatch features did not<br />
seem a viable alternative due <strong>to</strong> the complexity of the roof<strong>to</strong>ps. After discussions with ESRI tech support<br />
<strong>and</strong> further investigation the method described in this paper was conceived based on two key capabilities<br />
in ArcGIS. First, while <strong>ArcMap</strong> doesn't allow editing of multipatch features it does provide editing of<br />
polygonZ features. Second, just as polygons can be extruded upward <strong>to</strong> create flat roof buildings,<br />
polygonZ features that have been edited <strong>to</strong> define a roof can be extruded down <strong>to</strong> the ground.<br />
With these two capabilities as a foundation, a multi-step process was developed which alternates<br />
between editing shapefiles in <strong>ArcMap</strong> <strong>and</strong> running Visual Basic for Applications (<strong>VBA</strong>) scripts. The<br />
shapefile editing in <strong>ArcMap</strong> consists of verifying building footprints match the underlying imagery,<br />
modifying footprint locations as needed, digitizing new building footprints if necessary, defining<br />
building height attributes, digitizing roof features, <strong>and</strong> editing z-values of the roof features. <strong>VBA</strong> scripts<br />
were written <strong>to</strong> access the ArcObjects functionality in <strong>3D</strong> Analyst for polygon extrusion <strong>and</strong> format<br />
conversion. Included in these scripts is the separation of each building in<strong>to</strong> an individual multipatch<br />
shapefile, which can then be converted <strong>to</strong> VRML or DXF format. Upon conversion <strong>to</strong> VRML the<br />
coordinates of each object are changed from the coordinates of the shapefile projection <strong>to</strong> a selfreferenced<br />
coordinate system with the origin at the center of the object. An additional script was written<br />
<strong>to</strong> create a file with the coordinates of each building in the scene. A form was developed <strong>to</strong> access each<br />
script <strong>to</strong> improve the user interface <strong>and</strong> all the forms were placed <strong>to</strong>gether as a set of menu items on a<br />
<strong>to</strong>olbar. The <strong>to</strong>olbar with the menu items, referred <strong>to</strong> as the <strong>3D</strong> Building Genera<strong>to</strong>r, is shown as it<br />
appears in ArcScene in Figure 1.
Edit Polygon Shapefile<br />
Figure 1. <strong>3D</strong> Building Genera<strong>to</strong>r Toolbar<br />
The first step in generating <strong>3D</strong> buildings is <strong>to</strong> edit the polygon shapefiles that represent the building<br />
footprints. Most importantly, the polygons must match the location of the buildings in the imagery used<br />
in the simulation system. If a pre-existing set of data is available these footprints are compared directly<br />
<strong>to</strong> the image data <strong>and</strong> modified as necessary. When no polygon data exists, building footprints are<br />
digitized in <strong>ArcMap</strong> using the imagery. For the purpose of this paper, building polygons were digitized<br />
from a sample IKONOS image provided by Space Imaging.<br />
Next the height of the building walls <strong>and</strong> roofs must be defined as an attribute of the shapefile. These<br />
heights can be determined using shadows in the imagery or, if available, attributes in the pre-existing<br />
shapefiles. Heights can be calculated from shadow lengths using the solar elevation for the location,
time, <strong>and</strong> date of the imagery. NOAA has a convenient website, the NOAA Solar Position Calcula<strong>to</strong>r,<br />
for determining solar elevation. The user inputs latitude, longitude, date, <strong>and</strong> time <strong>and</strong> the site provides<br />
solar azimuth <strong>and</strong> solar elevation. Building height is then calculated using the equation h = s tan α,<br />
where h = building height, s = shadow length, <strong>and</strong> α = solar elevation. This technique is used <strong>to</strong><br />
determine the heights of the building walls <strong>and</strong> the heights of the roofs above the wall. These heights are<br />
then added as an attribute <strong>to</strong> the shapefile.<br />
For buildings with complex roof structures at various heights it is helpful <strong>to</strong> cut the building polygon<br />
in<strong>to</strong> several pieces. The separate polygons can then be given the proper height attributes. Figure 2 shows<br />
a set of polygons outlined in green representing the building footprints in the underlying image. The<br />
footprint of the building in the bot<strong>to</strong>m of the image consists of several polygons. Each of these polygons<br />
corresponds <strong>to</strong> a different roof structure <strong>and</strong> is assigned a different height in the attribute table based on<br />
the shadows in the imagery.
Figure 2. Edited Polygons Displayed in <strong>ArcMap</strong> (IKONOS image courtesy of Space Imaging)<br />
Convert Polygon <strong>to</strong> PolygonZ<br />
Once the polygon shapefiles representing the building footprints are completed they are converted <strong>to</strong><br />
polygonZ format. The polygonZ format enables each vertex of a polygon <strong>to</strong> have a z-value in addition <strong>to</strong><br />
the x <strong>and</strong> y values of a simple polygon. The polygonZ format does not allow multiple z-values for the<br />
same x, y position however, so it is basically a 2.5D surface like a triangulated irregular network (TIN).<br />
Conversion <strong>to</strong> polygonZ format is done using a menu item provided with the <strong>3D</strong> Analyst <strong>to</strong>olbar. This<br />
function is accessed by selecting "Convert" from the <strong>3D</strong> Analyst <strong>to</strong>olbar <strong>and</strong> then selecting "Features <strong>to</strong><br />
<strong>3D</strong>..." This same function has been added as the first menu item in the <strong>3D</strong> Building Genera<strong>to</strong>r <strong>to</strong>olbar.<br />
Figure 3 shows the form provided for this function.<br />
Figure 3. Convert Features <strong>to</strong> <strong>3D</strong> Form<br />
The form lets the user specify the 2D shapefile <strong>to</strong> use for input <strong>and</strong> the name of the "<strong>3D</strong>" shapefile <strong>to</strong> be<br />
created. Heights used for the conversion can come from a surface such as a DEM, an attribute in the<br />
shapefile, or a constant value specified by the user. For our purpose we use an attribute specific <strong>to</strong> each
polygon representing the height of the building wall. The conversion from polygon <strong>to</strong> polygonZ format<br />
assigns this same height <strong>to</strong> the z-value of each vertex in a given feature, resulting in a flat surface<br />
elevated above the ground. Figure 4 shows a set of polygons <strong>and</strong> the polygonZ features created from<br />
them in a perspective view in ArcScene <strong>to</strong> illustrate this point. The original polygon features are shown<br />
in red <strong>and</strong> the polygonZ features are shown in blue "floating" above them.<br />
Figure 4. Perspective View of Polygon <strong>and</strong> PolygonZ Features in ArcScene<br />
Edit PolygonZ Shapefile<br />
The new polygonZ files simply represent a flat surface at the <strong>to</strong>p of the building wall, or the ceiling. For<br />
a flat roof building this is sufficient <strong>to</strong> proceed <strong>to</strong> the next step, but for other buildings these polygonZ<br />
files must be edited <strong>to</strong> define the varying heights of the roof. It should be noted that the <strong>3D</strong> Building<br />
Genera<strong>to</strong>r <strong>to</strong>olbar shown in Figure 1 shows a menu item titled Add Roofs <strong>to</strong> PolygonZ Files. This menu<br />
item is simply a placeholder in anticipation of a future script that will au<strong>to</strong>mate this task. For now,<br />
editing the polygonZ files involves digitizing <strong>to</strong> create the roof structure <strong>and</strong> editing the z-values of the
vertices in the edit sketch property dialog box. Figure 5 shows an edit sketch dialog box <strong>and</strong> results from<br />
editing the polygonZ features <strong>to</strong> define the roof heights.<br />
Figure 5. Edited PolygonZ Roofs Displayed in <strong>ArcMap</strong> (IKONOS image courtesy of Space Imaging)<br />
The green outlines show the original polygons while the red lines show the editing done <strong>to</strong> the polygonZ<br />
features. The peaked roofs in the bot<strong>to</strong>m of the image are created by cutting a polygon in<strong>to</strong> two pieces<br />
<strong>and</strong> editing the z-values of the new vertices in the edit sketch properties dialog box. The curved roof of
the hangar in the <strong>to</strong>p of the image is created in a similar manner. In this case however, the original<br />
polygon was cut in<strong>to</strong> multiple pieces <strong>to</strong> create a more gradual variation in heights. Figure 5 shows the<br />
edit sketch properties dialog box for one of the new polygons of the curved roof after the z-values of the<br />
new vertices have been edited. The other buildings shown in the image all have flat roofs so these<br />
features were not edited. Figure 6 shows the polygonZ files in a perspective view in ArcScene <strong>to</strong> show<br />
the difference in the Z dimension before <strong>and</strong> after editing. These edited roof features represent one of the<br />
key elements of the process presented in this paper.<br />
Figure 6. Perspective View of PolygonZ Roof Features in ArcScene<br />
Extrude PolygonZ <strong>to</strong> Multipatch<br />
After the 2.5D polygonZ files have been edited <strong>to</strong> define the roof<strong>to</strong>ps they are ready <strong>to</strong> be extruded <strong>to</strong><br />
create true <strong>3D</strong> objects in multipatch format. A <strong>VBA</strong> script was written <strong>to</strong> perform this extrusion <strong>and</strong> the<br />
form shown in Figure 7 was created <strong>to</strong> execute this script. Code <strong>to</strong> open this form was added <strong>to</strong> the <strong>3D</strong><br />
Building Genera<strong>to</strong>r <strong>to</strong>olbar <strong>to</strong> create the Extrude PolygonZ <strong>to</strong> Multipatch menu item. This function
extrudes the polygonZ roof features from the roof<strong>to</strong>ps down <strong>to</strong> a base building height. The user specifies<br />
the polygonZ shapefile <strong>to</strong> use for input, the name of the <strong>3D</strong> multipatch shapefile <strong>to</strong> be created, <strong>and</strong> the<br />
base height of the building <strong>to</strong> extrude down <strong>to</strong>.<br />
Figure 7. Extrude PolygonZ <strong>to</strong> Multipatch Form<br />
The key elements of the <strong>VBA</strong> code written <strong>to</strong> extrude the polygonZ features are as follows:<br />
‘ Define interface for input polygon<br />
Dim pInPolyZ As IPolygon<br />
Set pInPolyZ = ‘points <strong>to</strong> geometry feature from input shapefile<br />
‘ Define interface <strong>to</strong> geometry environment <strong>to</strong> extrude features<br />
Dim pExt As IExtrude<br />
Set pExt = New GeometryEnvironment<br />
‘ Acquire interface <strong>to</strong> output multipatch <strong>and</strong> extrude input polygon feature<br />
' <strong>to</strong> dInZ (base building height on form) <strong>to</strong> create multipatch feature.<br />
Dim pOutMPatch As IMultipatch<br />
Set pOutMPatch = pExt.ExtrudeAbsolute(dInZ, pInPolyZ)
Figure 8 shows the new multipatch objects extruded from the polygonZ features shown in Figures 6 <strong>and</strong><br />
7.<br />
Figure 8. Perspective View of Multipatch Objects Extruded from PolygonZ in ArcScene<br />
(IKONOS image courtesy of Space Imaging)
<strong>Export</strong> Multipatch <strong>to</strong> VRML<br />
In order <strong>to</strong> use the newly created <strong>3D</strong> objects in a simulation system outside of ArcScene they are<br />
exported <strong>to</strong> VRML format using the <strong>Export</strong> Multipatch Features <strong>to</strong> VRML form shown in Figure 9. This<br />
form was created <strong>to</strong> execute the <strong>VBA</strong> script written <strong>to</strong> perform the export. Code written <strong>to</strong> open the form<br />
was used <strong>to</strong> create the <strong>Export</strong> Multipatch <strong>to</strong> VRML menu item on the <strong>3D</strong> Building Genera<strong>to</strong>r <strong>to</strong>olbar.<br />
This function converts a multipatch shapefile with multiple features in<strong>to</strong> a set of single feature files in<br />
both VRML <strong>and</strong> multipatch shapefile format. Defining the output on this form is done slightly different<br />
than the previous forms. The user specifies the direc<strong>to</strong>ry <strong>to</strong> create the files in <strong>and</strong> defines the file names<br />
using attributes from the input shapefile following a pre-defined naming convention. The output file<br />
names consist of the feature ID, building number, roof material, <strong>and</strong> wall material. This naming<br />
convention creates a unique file name for each building <strong>and</strong> identifies the material properties <strong>to</strong> use for<br />
that object in the simulation system. In order <strong>to</strong> use these objects in a simulation system they are<br />
converted from VRML <strong>to</strong> our own proprietary format using a C++ program. The conversion <strong>and</strong><br />
subsequent use of these objects is outside the scope of this paper.
Figure 9. <strong>Export</strong> Multipatch Features <strong>to</strong> VRML Form<br />
The key elements of the <strong>VBA</strong> code written <strong>to</strong> export the shapefiles <strong>to</strong> VRML are as follows:<br />
' Define the scene <strong>to</strong> export<br />
Dim pSxDoc As ISxDocument<br />
Dim pScene As IScene<br />
Set pSxDoc = ThisDocument<br />
Set pScene = pSxDoc.Scene<br />
' Acquire interface from VRML exporter<br />
Dim pVRML<strong>Export</strong>er As IVRML<strong>Export</strong>er<br />
Set pVRML<strong>Export</strong>er = New VRML<strong>Export</strong>er<br />
' Define VRML attributes<br />
With pVRML<strong>Export</strong>er<br />
.Indentation = True<br />
.Quality = 75<br />
.SaveOnlyVisible = False<br />
.UseElevationGrid = False<br />
.IsYUp = False<br />
.UseGeoVRML = False<br />
.MoveToOrigin = True<br />
End With<br />
' Access 3d Scene <strong>Export</strong>er methods for VRML exporter using Query Interface<br />
Dim p3d<strong>Export</strong>er As IScene<strong>Export</strong>er3d<br />
Set p3d<strong>Export</strong>er = pVRML<strong>Export</strong>er<br />
' <strong>Export</strong> scene <strong>to</strong> VRML<br />
p3d<strong>Export</strong>er.<strong>Export</strong>Scene pScene<br />
<strong>Create</strong> Object Center Coordinates File<br />
The conversion from multipatch shapefile <strong>to</strong> VRML format changes the x <strong>and</strong> y coordinates of the<br />
objects. The object coordinates are changed from a projection coordinate system <strong>to</strong> a self-referenced<br />
coordinate system for each object with the origin in the center of the object. In order <strong>to</strong> use the objects in<br />
a simulation system the location of the center of the objects in the scene must be defined. A <strong>VBA</strong> script<br />
<strong>and</strong> user form was created <strong>and</strong> added as a menu item <strong>to</strong> the <strong>3D</strong> Building Genera<strong>to</strong>r <strong>to</strong>olbar <strong>to</strong> define the<br />
object locations. The form shown in Figure 10 creates a text file that defines the center coordinates of
the features in a shapefile with reference <strong>to</strong> the background image used in the simulation system. The<br />
coordinate file has three columns: the name of the object, <strong>and</strong> the x <strong>and</strong> y coordinates of the object<br />
center. The object name uses the same naming convention used when converting the multipatch<br />
shapefile <strong>to</strong> VRML format. The object center coordinates are defined from the scene center in pixel<br />
units. In order <strong>to</strong> calculate coordinates in this manner the user specifies the resolution of the background<br />
image <strong>and</strong> the center coordinates of the image in the same projection coordinates used for the shapefile.<br />
Conclusion<br />
Figure 10. Define Feature Center Coordinates Form<br />
<strong>ArcMap</strong> <strong>and</strong> <strong>VBA</strong> scripts that access the functionality of ArcObjects can be used <strong>to</strong> generate fairly<br />
complex <strong>3D</strong> objects <strong>to</strong> represent a number of buildings over a large area, as shown in the image of
Edwards Air Force Base, CA in Figure 11. There are some limitations, however, in using this approach.<br />
<strong>ArcMap</strong> only allows editing of 2D or 2.5D features such as polygon <strong>and</strong> polygonZ features but not <strong>3D</strong><br />
multipatch features. Since <strong>ArcMap</strong> is essentially a 2D editing system it is a bit cumbersome compared <strong>to</strong><br />
<strong>3D</strong> graphic editing <strong>to</strong>ols such as CAD systems. For instance, <strong>ArcMap</strong> only provides graphic editing in<br />
the x <strong>and</strong> y dimensions. Changing a feature in the z dimension requires editing the z-value of vertices in<br />
a separate text box.<br />
Figure 11. Perspective View of <strong>Buildings</strong> in ArcScene (IKONOS image courtesy of Space Imaging)
Despite these limitations, <strong>ArcMap</strong> <strong>and</strong> ArcObjects is a useful method of creating <strong>3D</strong> objects in certain<br />
situations. When imagery with building shadows <strong>and</strong> a pre-existing set of building footprints in the form<br />
of shapefiles are available this is a reasonable approach. For dense urban areas this approach may not be<br />
as useful. For dense urban areas it may be difficult <strong>to</strong> obtain valid shadow lengths from image data.<br />
Also, the awkward process of <strong>3D</strong> editing in <strong>ArcMap</strong> may be <strong>to</strong>o inefficient for the large number of<br />
complex buildings found in an urban area.<br />
Based on the success of this technique, further development is planned <strong>to</strong> increase the capabilities <strong>and</strong><br />
improve the functionality of the <strong>3D</strong> Building Genera<strong>to</strong>r. Additional <strong>VBA</strong> scripts are planned <strong>to</strong> apply<br />
textures <strong>to</strong> the buildings, encode surface normals for smooth shading, <strong>and</strong> create simple roof structures<br />
without the need for editing in <strong>ArcMap</strong>.<br />
Acknowledgements<br />
The initial development of the <strong>to</strong>ols <strong>and</strong> processes presented in this paper was performed in support of<br />
the Small Business Innovative Research (SBIR) Phase II contract with Edwards Air Force Flight Test<br />
Center (AFFTC), contract number F04611-00-C-0053.<br />
The image of Edwards Air Force Base, CA was obtained from Imagery Samples CD version 3.1, from<br />
Space Imaging. The image is a one-meter, true color, 8-bit sample of data collected by the IKONOS<br />
satellite.<br />
Brian Bradshaw<br />
Mapping Scientist<br />
Pho<strong>to</strong>n Research Associates, Inc.<br />
5720 Oberlin Drive<br />
San Diego, CA 92121<br />
(858) 455-9741 ext. 204<br />
bradshaw@pho<strong>to</strong>n.com<br />
www.gisexpress.com<br />
www.pho<strong>to</strong>n.com