my Latex and Tex4ht cheat sheet
my Latex cheat sheet - 12000.org
my Latex cheat sheet - 12000.org

Create successful ePaper yourself
Turn your PDF publications into a flip-book with our unique Google optimized e-Paper software.
<strong>my</strong> <strong>Latex</strong> <strong>and</strong> <strong>Tex4ht</strong> <strong>cheat</strong> <strong>sheet</strong><br />
Nasser M. Abbasi<br />
November 4, 2015<br />
page compiled on November 4, 2015 at 6:07pm
Contents<br />
1 general links 2<br />
2 <strong>Latex</strong> specific HowTo 5<br />
3 TeX4ht <strong>cheat</strong> <strong>sheet</strong> 50<br />
4 Tikz notes 82<br />
5 Using Scientific word 91<br />
6 Trying latexml 93<br />
7 Trying pdf2htmlEX 94<br />
1
Chapter 1<br />
general links<br />
1.1 <strong>Latex</strong><br />
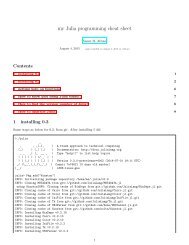
1. All of TexLive distributions since 1996<br />
2. <strong>Latex</strong> pre test http://tug.org/texlive/pretest.html<br />
3. announcements http://tug.org/texlive/<br />
4. Lualatex PDF document<br />
5. tex4ht comm<strong>and</strong> line options<br />
6. Free Graphics Software for the TeX, LaTeX, <strong>and</strong> PSTricks Community<br />
7. Google Sketchup 3D Warehouse for airplane<br />
8. Drawing on an image with TikZ<br />
9. book published by TUG<br />
10. pdf2htmlEX<br />
11. Entering bugs for htlatex<br />
12. try latex online http://arachnoid.com/latex/<br />
13. shows <strong>Latex</strong> matrices http://latex.wikia.com/wiki/Matrix_environments<br />
14. using 3D in tikz <strong>and</strong> asymptote https://tex.stackexchange.com/questions/39577/what-are-the-relative-st<br />
15. LaTeX <strong>and</strong> Friends book page. http://csweb.ucc.ie/~dongen/LAF/LAF.html<br />
16. ”This is the TeX showcase, edited by Gerben Wierda. It contains extreme examples of what you can do<br />
with TeX, ” http://www.tug.org/texshowcase/<br />
17. Asymptote: The Vector Graphics Language<br />
18. Wikipedia:LaTeX symbols<br />
19. <strong>Latex</strong> search The Springer LaTeX search lets you search through over LaTeX code snippets to find the equation<br />
you need.<br />
20. List of comm<strong>and</strong>s manipulating horizontal <strong>and</strong> vertical spaces, <strong>and</strong> holding material in boxex http:<br />
//www.personal.ceu.hu/tex/spacebox.htm<br />
21. <strong>Latex</strong> cookbook http://www.personal.ceu.hu/tex/cookbook.html<br />
2
22. TeX Live – Quick install directions http://www.tug.org/texlive/quickinstall.html<br />
23. hints to squeeze spaces in <strong>Latex</strong> http://www-h.eng.cam.ac.uk/help/tpl/textprocessing/squeeze.<br />
html<br />
24. Host math, type <strong>Latex</strong> online <strong>and</strong> see output on screen http://www.hostmath.com/<br />
25. LaTeX/Special Characters https://en.wikibooks.org/wiki/LaTeX/Special_Characters<br />
26. The AoPS Wiki , has useful <strong>Latex</strong> pages under tutorials http://www.artofproblemsolving.com/wiki/<br />
index.php/Main_Page<br />
27. Blog entry on <strong>Latex</strong> multiline equations<br />
28. list of all <strong>Latex</strong> errors http://www.eng.fsu.edu/~dommelen/l2h/errors.html<br />
29. <strong>Latex</strong> title pages templates<br />
30. Dickimaw LaTeX Books http://dickimaw-books.com/latex/index.html<br />
31. hostmath, try <strong>Latex</strong> online http://www.hostmath.com/<br />
32. Producing HTML <strong>and</strong> PDF files with LaTeX, from University of Cambridge http://www-h.eng.cam.ac.<br />
uk/help/tpl/textprocessing/makingWWWdocs.html<br />
33. notes on how to h<strong>and</strong>le images in latex http://www.artofproblemsolving.com/wiki/index.php/LaTeX:<br />
Pictures<br />
34. Hamline University Physics Department <strong>Latex</strong> Equation Editor http://sites.hamline.edu/~arundquist/<br />
equationeditor/<br />
35. Andrew Roberts tutorials on <strong>Latex</strong> http://www.<strong>and</strong>y-roberts.net/writing/latex<br />
36. LaTeX Spaces <strong>and</strong> Boxes. Comm<strong>and</strong>s manipulating horizontal <strong>and</strong> vertical spaces, <strong>and</strong> holding material in<br />
boxes: http://www.personal.ceu.hu/tex/spacebox.htm<br />
37. describes latex st<strong>and</strong>ard environments http://www.personal.ceu.hu/tex/environ.htm<br />
38. collection of <strong>Latex</strong> links http://www.personal.kent.edu/~rmuhamma/Systems/latex.html<br />
39. LATEX, MATHML, AND TEX4HT: TOOLS FOR CREATING ACCESSIBLE DOCUMENTS (A BRIEF<br />
TUTORIAL) by JACEK POLEWCZAK http://www.csun.edu/~hcmth008/mathml/acc_tutorial.pdf<br />
40. LaTeX: from quick <strong>and</strong> dirty to style <strong>and</strong> finesse More mathematics by Tony Roberts http://www.utexas.<br />
edu/ogs/etd/LaTeX/Resources/from.quick+dirty/ltxmaths.html<br />
41. User’s Guide for the amsmath Package (Version 2.0) American Mathematical Society 1999-12-13 (revised<br />
2002-02-25) ftp://ftp.ams.org/pub/tex/doc/amsmath/amsldoc.pdf<br />
42. <strong>Latex</strong>: Squeezing the Vertical White Space ”Here are some tips on how to “compress” your paper vertically<br />
by minimizing white space gaps between elements” http://www.terminally-incoherent.com/blog/<br />
2007/09/19/latex-squeezing-the-vertical-white-space/<br />
43. more on squeezing space, CAM.AC.UK article http://www-h.eng.cam.ac.uk/help/tpl/textprocessing/<br />
squeeze.html<br />
44. <strong>Latex</strong> templates<br />
45. How to find number of pages in pdf file<br />
46. https://tug.org/TUGboat/tb26-1/hoeppner.pdfStrategies for including graphics in LATEX documents<br />
3
47. class notes on using IPE <strong>and</strong> Inkscape with <strong>Latex</strong><br />
48. notes on using IPE gradphic editor for latex <strong>and</strong> how use style <strong>sheet</strong>s for it<br />
1.2 Context links<br />
1. http://www.pragma-ade.com/general/manuals/details.pdf<br />
2. main page http://wiki.contextgarden.net/Main_Page<br />
3. hello world in context http://wiki.contextgarden.net/Hello_world<br />
4. http://wiki.contextgarden.net/ConTeXt_St<strong>and</strong>alone<br />
1.3 LuaTex programming<br />
1. Lua main programming language page, manuals, etc... http://www.lua.org/<br />
2. luatex reference manual in pdf http://www.luatex.org/svn/trunk/manual/luatexref-t.pdf<br />
3. how-to-run-a-program-inside-lualatex<br />
4. what-is-a-simple-example-of-something-you-can-do-with-luatex<br />
5. http://tex.stackexchange.com/questions/17789/printf-style-number-formatting-in-latex printf-style-numberformatting-in-latex<br />
Has lua coding example<br />
6. lualatex-for-dummies-basic-directlua-use<br />
7. Writing Lua in TeX<br />
8. Programming in LuaTeX in Context<br />
9. Wiki LuaTex<br />
10. LuaTex web site<br />
11. http://wiki.luatex.org/index.php/TeX_without_TeX<br />
12. Lua for Python programmers article http://the4thwiki.com/lua/index.html<br />
13. luacode package https://www.ctan.org/pkg/luacode?lang=en the following table is from the above<br />
document.<br />
4
Chapter 2<br />
<strong>Latex</strong> specific HowTo<br />
2.1 How to use Maple style <strong>sheet</strong>s (packages) with texlive?<br />
I have $HOME/texmf <strong>and</strong> so did these steps<br />
cd $HOME/texmf/tex/latex<br />
mkdir maple<br />
cd maple<br />
cp C:\Program Files\Maple 18\etc\*.sty .<br />
%I use Vbox<br />
in other words<br />
cp /maple_location/etc/*.sty .<br />
%copy all style files over<br />
If using miketex, then use the GUI, add ROOT, <strong>and</strong> click apply.<br />
2.2 How to install <strong>and</strong> use pdf2htmlEX?<br />
To install<br />
sudo apt-get update<br />
sudo apt-get install pdf2htmlex<br />
To use<br />
pdf2htmlEX --zoom 1.3 HW2_solution.pdf<br />
To remove the side-bar which has extra TOC do<br />
pdf2htmlEX --zoom 1.3 --embed-outline 0<br />
foo.pdf<br />
pdf2htmlEX seems to use html as extension. no option to change it so use this to make it use .htm which is<br />
what I use<br />
pdf2htmlEX --zoom 1.3 --embed-outline 0<br />
foo.pdf > foo.htm<br />
One thing that I still do not underst<strong>and</strong> about this program. It converts the whole pdf file to html page.<br />
Ok. But then what is the difference between this <strong>and</strong> using the build-in pdf reader in a browser, such as with<br />
Chrome for example?<br />
I could not find how to make it split pages by sections <strong>and</strong> chapters <strong>and</strong> such as I can do with tex4ht.<br />
Without this ability, I am not sure how useful this will be for me. It is just like using the pdf itself this way.<br />
Will try to find out about this.<br />
5
2.3 How to put image in a title page?<br />
\documentclass[oneside,a4paper<br />
\usepackage{titlepic}<br />
\usepackage{graphicx}<br />
\usepackage{caption}<br />
%\usepackage{package}<br />
%\usepackage[space]{grffile}<br />
, 12 pt]{book}<br />
\begin{document}<br />
\title{<strong>my</strong> book}<br />
\author{me}<br />
\date{\today}<br />
\titlepic{<br />
\begin{figure}[t!]<br />
\centering<br />
\includegraphics[width=0.7\linewidth]{img.png}<br />
\caption{}<br />
\label{fig:img}<br />
\end{figure}<br />
}<br />
\maketitle<br />
test<br />
\end{document}<br />
6
2.4 How to convert pdf to eps?<br />
See http://tex.stackexchange.com/questions/20883/how-to-convert-pdf-to-eps This inkscape input.pdf --e<br />
works ok, but the above comm<strong>and</strong> gives errors such as these on some images:<br />
>inkscape 3d_1.pdf --export-eps=3d_1.eps<br />
** Message: Invalid glyph found, continuing...<br />
** Message: Invalid glyph found, continuing...<br />
** Message: Invalid glyph found, continuing...<br />
** Message: Invalid glyph found, continuing...<br />
** Message: Invalid glyph found, continuing...<br />
** Message: Invalid glyph found, continuing...<br />
** Message: Invalid glyph found, continuing...<br />
** Message: Invalid glyph found, continuing...<br />
While on the same file, pdf2eps below works fine.<br />
To crop pdf also (which can be useful) use this script by Herbert from above link<br />
#!/bin/sh<br />
# $Id: pdf2eps,v 0.01 2005/10/28 00:55:46 Herbert Voss Exp $<br />
# Convert PDF to encapsulated PostScript.<br />
# usage:<br />
# pdf2eps <br />
pdfcrop $2.pdf<br />
pdftops -f $1 -l $1 -eps "$2-crop.pdf"<br />
rm "$2-crop.pdf"<br />
mv "$2-crop.eps" $2.eps<br />
I wrote the following simple script prep which process all the pdf image files <strong>and</strong> generates the needed files<br />
for tex4ht.<br />
#!/bin/bash<br />
for file in $1; do<br />
filename=${file%.*}<br />
pdf2svg "$filename.pdf" "$filename.svg"<br />
pdf2eps 1 "$filename"<br />
done<br />
It is called like this prep "*.pdf" or for one file prep foo.pdf it will generate a .svg <strong>and</strong> .eps for each file.<br />
2.5 How to draw a baseline hairline for an equation?<br />
This is thanks to @egreg from Tex stackexchange:<br />
\newcomm<strong>and</strong>{\rl}{\rlap{\vrule height 0pt depth .1pt width \textwidth}}<br />
<strong>and</strong> then use \rl in the left h<strong>and</strong> sides of the equations.<br />
7
2.6 How to find what changed in TexLive?<br />
see http://tex.stackexchange.com/questions/156908/whats-new-on-tlmgr one good method is by egreg<br />
which is this comm<strong>and</strong> http://tug.org/svn/texlive/trunk/Master/texmf-dist/tex/latex/?sortby=date<br />
2.7 extracting selected pages from a pdf?<br />
To extract selected pages from a pdf into a separate pdf see http://www.linuxjournal.com/content/tech-tipextract-pages-pdf<br />
Use pdftk (free install on linux, use package manager). Here is an example<br />
pdftk A=<strong>my</strong>file.pdf cat A6-10 output result.pdf<br />
2.8 how to include files in <strong>Latex</strong><br />
see http://tex.stackexchange.com/questions/246/when-should-i-use-input-vs-include<br />
2.9 combining complete documents into one<br />
2.9.1 combining using manual sectioning<br />
Problem description: I have many st<strong>and</strong>alone <strong>Latex</strong> documents that I want to compile into documents on<br />
their own, but also I want to combine them into one main document <strong>and</strong> have the table of contents <strong>and</strong> other<br />
references work as if all documents were written as one file.<br />
Solution:<br />
Given this example layout<br />
home/main.tex<br />
home/folderA/a.tex<br />
Where main.tex <strong>and</strong> a.tex are self contained <strong>Latex</strong> files, each with its own title, table of contents <strong>and</strong> can<br />
include local resources such as images <strong>and</strong> listings.<br />
Add the package \usepackage{st<strong>and</strong>alone} in main.tex to strip all the preamble from the included latex<br />
files. Also add it to each child document, so that each child document can be compiled as st<strong>and</strong>alone as well.<br />
To use the above, make sure the master document at the top level includes all packages included by all the<br />
children.<br />
Setup main.tex<br />
8
\documentclass[12pt,notitlepage]{article}<br />
\usepackage{st<strong>and</strong>alone}%<br />
\usepackage{listings}<br />
\usepackage{import}<br />
\usepackage{lipsum}<br />
\usepackage{graphicx}<br />
\usepackage{hyperref}<br />
\makeatletter<br />
\providecomm<strong>and</strong>{\currentimportpath}{\import@path}<br />
\makeatother<br />
\begin{document}<br />
\title{This is <strong>my</strong> document home/main.tex title}<br />
\author{me}<br />
\maketitle<br />
\tableofcontents<br />
\section{this is first section in main.tex}<br />
once upon a time, <strong>and</strong> now include the other document<br />
\subimport*{folderA/}{a}<br />
\end{document}<br />
Setup a.tex as follows. This is important: remember to add \st<strong>and</strong>alonetrue after \usepackage{st<strong>and</strong>alone}<br />
in each child package. We need this to be able to compile each child package on its own <strong>and</strong> get a table of<br />
contents <strong>and</strong> title. We will us an \ifst<strong>and</strong>alone logic in each child to check if we are building it st<strong>and</strong>alone or<br />
not. When the main is build, this flag will automatically be false, hence we will not get table of content shown<br />
in each child. Little complicated, but just do it as shown:<br />
9
\documentclass[12pt,notitlepage]{article}<br />
\usepackage{st<strong>and</strong>alone}<br />
\st<strong>and</strong>alonetrue %remember this !<br />
\usepackage{listings}<br />
\usepackage{import}<br />
\usepackage{lipsum}<br />
\usepackage{graphicx}<br />
\usepackage{hyperref}<br />
\makeatletter<br />
\providecomm<strong>and</strong>{\currentimportpath}{\import@path}<br />
\makeatother<br />
\begin{document}<br />
\ifst<strong>and</strong>alone %Do this, so toc only shows when build st<strong>and</strong>alone<br />
\title{This is <strong>my</strong> document home/folderA/a.tex title}<br />
\author{me}<br />
\maketitle<br />
\tableofcontents<br />
\fi<br />
\section{first section in file a.tex}<br />
\includegraphics{a.png}<br />
\section{second section in file a.tex}<br />
\lstinputlisting{a.txt}<br />
\section{third section in file a.tex}<br />
you can find <strong>my</strong> report \href{\currentimportpath a.txt}{here}<br />
\lipsum[1]<br />
\end{document}<br />
10
Now you can compile a.texm or its own<br />
11
cd home/folderA<br />
pdflatex a.tex<br />
And the result is<br />
But when compiling main.tex cd home; pdflatex main.tex the result shows a table of contents that<br />
includes all children documents as shown<br />
12
This is the result side by side<br />
13
This zip file contains the tree shown above with all the files needed to rebuild it.<br />
2.9.2 combining using automatic sectioning<br />
One problem with the above approach, is that we had to be explicit with add \section <strong>and</strong> \subsection in<br />
the correct order in different documents in different folders.<br />
It would be better if this can be automated. Using a method shown here http://tex.stackexchange.com/<br />
questions/9024/is-there-a-program-that-allows-to-move-sections-<strong>and</strong>-automatically-adjusts-the-le<br />
<strong>and</strong> I modified it slightly, here are the files needed. First assume we have a tree like this:<br />
home/main.tex<br />
home/A/a.tex<br />
home/A/B/b.tex<br />
<strong>and</strong> we want to build main.tex, which includes a.tex, <strong>and</strong> where a.tex also includes b.tex, <strong>and</strong> where we can<br />
build each document as st<strong>and</strong>alone. These are the 3 files<br />
main.tex<br />
14
\documentclass[12pt,notitlepage]{book}<br />
\usepackage{st<strong>and</strong>alone}%<br />
\input{commonlatex}<br />
\begin{document}<br />
\title{This is <strong>my</strong> document home/main.tex title}<br />
\author{me}<br />
\maketitle<br />
\tableofcontents<br />
\begin{deeplevel}{this is first section in main.tex}<br />
once upone a time, <strong>and</strong> now include the other document<br />
\subimport*{folderA/}{a}<br />
\end{deeplevel}<br />
\end{document}<br />
the file a.tex is<br />
\documentclass[12pt,notitlepage]{article}<br />
\usepackage{st<strong>and</strong>alone}<br />
\st<strong>and</strong>alonetrue<br />
\input{commonlatex}<br />
\begin{document}<br />
\ifst<strong>and</strong>alone<br />
\setcounter{level@depth}{1}<br />
\title{This is <strong>my</strong> document home/folderA/a.tex title}<br />
\author{me}<br />
\maketitle<br />
\tableofcontents<br />
\fi<br />
\begin{deeplevel}{first section in file a.tex}<br />
\includegraphics{a.png}<br />
\subimport*{folderAB/}{b}<br />
\begin{deeplevel}{this should show up below the above}<br />
\lipsum[75]<br />
\end{deeplevel}<br />
\end{deeplevel}<br />
\begin{deeplevel}{second section in file a.tex}<br />
\lstinputlisting{a.txt}<br />
\end{deeplevel}<br />
\begin{deeplevel}{third section in file a.tex}<br />
you can find <strong>my</strong> report \href{\currentimportpath a.txt}{here}<br />
\end{deeplevel}<br />
\lipsum[1]<br />
\end{document}<br />
<strong>and</strong> the file b.tex is<br />
15
\documentclass[12pt,notitlepage]{article}<br />
\usepackage{st<strong>and</strong>alone}<br />
\st<strong>and</strong>alonetrue<br />
\input{commonlatex}<br />
\begin{document}<br />
\ifst<strong>and</strong>alone<br />
\setcounter{level@depth}{2}<br />
\title{This is <strong>my</strong> document home/folderA/folderB/b.tex title}<br />
\author{me}<br />
\maketitle<br />
\tableofcontents<br />
\fi<br />
\begin{deeplevel}{first section in file b.tex}<br />
\lipsum[75]<br />
\begin{deeplevel}{this should show up below the above}<br />
\lipsum[75]<br />
\end{deeplevel}<br />
\end{deeplevel}<br />
\begin{deeplevel}{second section in file b.tex}<br />
\lstinputlisting{b.txt}<br />
\end{deeplevel}<br />
\begin{deeplevel}{third section in file b.tex}<br />
you can find <strong>my</strong> report \href{\currentimportpath b.txt}{here}<br />
\end{deeplevel}<br />
\lipsum[1]<br />
\end{document}<br />
<strong>and</strong> the common include file is<br />
16
%======================================<br />
\makeatletter<br />
\newcounter{level@depth}<br />
\setcounter{level@depth}{-1}<br />
\newenvironment{deeplevel} %<br />
{ %<br />
\addtocounter{level@depth}{1}%<br />
\ifcase\c@level@depth<br />
\exp<strong>and</strong>after \part<br />
\or \exp<strong>and</strong>after \chapter<br />
\or \exp<strong>and</strong>after \section<br />
\or \exp<strong>and</strong>after \subsection<br />
\or \exp<strong>and</strong>after \subsubsection<br />
\or \exp<strong>and</strong>after \paragraph<br />
\or \exp<strong>and</strong>after \subparagraph<br />
\or \exp<strong>and</strong>after \subsubparagraph<br />
\else<br />
\PackageError{deeplevel}<br />
{ %<br />
Sections are too deeply nested.%<br />
} %<br />
{ %<br />
Trying to recover with \string\subsubparagraph%<br />
} %<br />
\exp<strong>and</strong>after \subsubparagraph<br />
\fi<br />
} %<br />
{%<br />
\addtocounter{level@depth}{-1}%<br />
}<br />
\makeatother<br />
Now one is able to build main.tex or a.tex or b.tex each on its own, <strong>and</strong> still get a complete document for<br />
each.<br />
2.10 how to install lyx on Linux<br />
see http://wiki.lyx.org/LyX/LyXOnUbuntu<br />
if not in the package manager PPA, then do<br />
sudo add-apt-repository ppa:lyx-devel/daily (add the PPA)<br />
sudo apt-get update (update so that apt is aware of the new PPA)<br />
sudo apt-get install lyx2.0 (install from the PPA)<br />
lyx2.0 &<br />
2.11 using hyperlinks<br />
http://biosun1.harvard.edu/~paciorek<br />
More info on pdf hyper-references is at http://www.tug.org/applications/hyperref/manual.html.<br />
17
2.12 page breaks<br />
reference: http://help-csli.stanford.edu/tex/latex-pagebreaks.shtml<br />
\pagebreak[]<br />
use to start a new page at the end of the current line. Without<br />
arguments if forces a page break. With arguments of 0,1,2,3,<br />
or 4 it suggests that this is a good place to break. 4 being<br />
equivalent to no argument <strong>and</strong> forcing the break. No extra space<br />
is put at the end of the page.<br />
\nopagebreak<br />
similar to \pagebreak except it prevents a pagebreak at the end<br />
of the current line. I rarely use it.<br />
\samepage<br />
pretty much as the latex manual says. I rarely use it.<br />
\newpage<br />
forces a break at the point <strong>and</strong> puts in space as needed at the<br />
end of the page.<br />
\clearpage<br />
similar to \newpage but figures are also printed<br />
\cleardoublepage<br />
similar to \clearpage but will force another page if needed so<br />
the next page with print is odd numbered.<br />
2.13 using tables<br />
From http://www.<strong>and</strong>y-roberts.net/writing/latex/tables<br />
18
The tabular is another such environment, designed for formatting your data into<br />
nicely arranged tables. Arguments are required after the environment declaration to<br />
describe the alignment of each column. The number of columns does not need to<br />
be specified as it is inferred by looking at the number of arguments provided.<br />
It is also possible to add vertical lines between the columns here.<br />
The following symbols are available to describe the table columns:<br />
l left-justified column<br />
c centered column<br />
r right-justified column<br />
p{width} paragraph column with text vertically aligned at the top<br />
m{width} paragraph column with text vertically aligned in the middle<br />
b{width} paragraph column with text vertically aligned at the bottom<br />
| vertical line<br />
|| double vertical line<br />
Once in the environment,<br />
& column separator<br />
\\ start new row<br />
\hline horizontal line<br />
to adjust the spacing between rows in a latex table, add square<br />
brackets <strong>and</strong> the size adjustment after the linebreak.<br />
for instance, to compress rows by 1 inch:<br />
entry1 & entry2 & entry3 \\[-1in]<br />
2.14 passing flag from comm<strong>and</strong> line to pdflatex <strong>and</strong> htlatex?<br />
for htlatex<br />
htlatex main.tex "" "" ""<br />
"\def\flag{}"<br />
for pdflatex<br />
pdflatex "\def\flag{}\input{main.tex}"<br />
<strong>and</strong> now inside main.tex write<br />
\documentclass{article}<br />
\begin{document}<br />
\ifdefined\flag<br />
yes<br />
\else<br />
no<br />
\fi<br />
\end{document}<br />
19
2.15 What levels are there? TOC configuration<br />
from http://www.emerson.emory.edu/services/latex/latex_132.html<br />
Sectioning comm<strong>and</strong>s provide the means to structure your text into units.<br />
\part<br />
\chapter (report style only)<br />
\section<br />
\subsection<br />
\subsubsection<br />
\paragraph<br />
\subparagraph<br />
\subsubparagraph (milstd <strong>and</strong> book-form styles only)<br />
\subsubsubparagraph (milstd <strong>and</strong> book-form styles only)<br />
\part -1 -----> school<br />
\chapter 0 ------> semester<br />
\section 1 ------> course<br />
\subsection 2 -------> HWs<br />
\subsubsection 3 ----> HW1,2,3....<br />
\paragraph 4 --------> part(a),(b),.....<br />
\subparagraph 5<br />
2.16 TOC related<br />
\setcounter{tocdepth}{n} where n is an integer, tells latex how deep to make TOC. n depends on the class<br />
type, see above.<br />
\setcounter{secnumdepth}{m} tells latex which entries in the TOC (which depends on the first comm<strong>and</strong><br />
above) to give it a number to the left side. default is 3 I think. But better to have numbers for all sections <strong>and</strong><br />
subsection in TOC.<br />
Do the above in preamble of document.<br />
some links on TOC in latex<br />
1. http://www.<strong>and</strong>y-roberts.net/writing/latex/contents<br />
2. http://help-csli.stanford.edu/tex/latex-sections.shtml<br />
3. http://facweb.knowlton.ohio-state.edu/pviton/support/swphtpa4.html<br />
4. To make paragraph make new entry in TOC below subsubsection, see this<br />
3.<br />
can change depth of toc using<br />
\setcounter{tocdepth}{depth} in preamble. it looks like default depth is<br />
2.17 on fonts<br />
using Fourier fonts<br />
\usepackage{fourier}<br />
\usepackage[T1]{fontenc}<br />
may be need to install. I got error<br />
20
! LaTeX Error: File `fourier.sty' not found.<br />
remember the $ texhash comm<strong>and</strong> also.<br />
try downloading it from http://www.ctan.org/pkg/fourier but I’ll wait until Tex Live 2013 is out. There are<br />
more steps to do to install it it seems.<br />
2.18 pixels <strong>and</strong> <strong>Latex</strong><br />
From David Carlisle<br />
40px is a variable size depending on screen resolution,<br />
if you take a nominal 76 dpi then it's 40/76 on 1in.<br />
2.19 on equations<br />
Need to work on this.<br />
2.19.1 using align with references<br />
see http://www.dickimaw-books.com<br />
This image below from the above page http://www.dickimaw-books.com/latex/novices/html/align.<br />
html<br />
2.20 How to upgrade latex once installed?<br />
see http://tex.stackexchange.com/questions/55437/how-do-i-update-<strong>my</strong>-tex-distribution<br />
Basically, just do<br />
sudo /usr/local/texlive/2014/bin/i386-linux/tlmgr update --self<br />
sudo /usr/local/texlive/2014/bin/i386-linux/tlmgr update --all<br />
21
2.21 Installation of texlive 2015 on Linux<br />
Download the .gz file from http://ctan.math.washington.edu/tex-archive/systems/texlive/tlnet/<br />
install-tl-unx.tar.gz<br />
Then extract<br />
gunzip install-tl-unx.tar.gz<br />
tar -xvf install-tl-unx.tar<br />
Then move to the folder created from the above <strong>and</strong> do<br />
sudo ./install-tl<br />
Make sure to change the paper type to letter. The default is A4.<br />
22
======================> TeX Live installation procedure Letters/digits in indicate menu items for comm<strong>and</strong>s or options
Options setup:<br />
use letter size instead of A4 by default: [X]<br />
execution of restricted list of programs: [X]<br />
create format files:<br />
[X]<br />
install font/macro doc tree:<br />
[X]<br />
install font/macro source tree:<br />
[X]<br />
create symlinks in st<strong>and</strong>ard directories: [ ]<br />
binaries to:<br />
manpages to:<br />
info to:<br />
Actions: (disk space required: 4061 MB)<br />
return to main menu<br />
quit<br />
Enter comm<strong>and</strong>: R<br />
I do not know what create symlinks in st<strong>and</strong>ard directories is supposed to be set to so leave it blank<br />
<strong>and</strong> add path in your .bashrc to the latex bin folder<br />
24
Enter comm<strong>and</strong>: I<br />
Installing to: /usr/local/texlive/2015<br />
Installing [0001/3068, time/total: ??:??/??:??]: 12many [376k]<br />
Installing [0002/3068, time/total: 00:07/09:58:59]: 2up [66k]<br />
Installing [0003/3068, time/total: 00:08/09:43:10]: Asana-Math [482k]<br />
Installing [0004/3068, time/total: 00:17/09:51:45]: ESIEEcv [137k]<br />
Installing [0005/3068, time/total: 00:20/10:06:31]: FAQ-en [4971k]<br />
Installing [0006/3068, time/total: 01:55/10:12:15]: GS1 [1100k]<br />
Installing [0007/3068, time/total: 02:15/10:07:53]: HA-prosper [266k]<br />
Installing [0008/3068, time/total: 02:20/10:07:44]: IEEEconf [188k]<br />
Installing [0009/3068, time/total: 02:24/10:09:36]: IEEEtran [1355k]<br />
Installing [0010/3068, time/total: 02:49/10:07:00]: MemoirChapStyles [739k]<br />
Installing [0011/3068, time/total: 03:03/10:07:07]: SIstyle [338k]<br />
Installing [0012/3068, time/total: 03:10/10:09:07]: SIunits [284k]<br />
Installing [0013/3068, time/total: 03:15/10:07:54]: Tabbing [217k]<br />
Installing [0014/3068, time/total: 03:20/10:10:39]: Type1fonts [516k]<br />
Installing [0015/3068, time/total: 03:30/10:11:13]: a0poster [119k]<br />
Installing [0016/3068, time/total: 03:32/10:10:28]: a2ping [48k]<br />
Installing [0017/3068, time/total: 03:33/10:10:45]: a2ping.i386-linux [1k]<br />
Installing [0018/3068, time/total: 03:33/10:10:44]: a4wide [133k]<br />
Installing [0019/3068, time/total: 03:35/10:09:15]: a5comb [91k]<br />
Installing [0020/3068, time/total: 03:37/10:10:03]: aastex [1292k]<br />
Installing [0021/3068, time/total: 04:05/10:18:46]: abbr [4k]<br />
Installing [0022/3068, time/total: 04:05/10:18:36]: abc [156k]<br />
Installing [0023/3068, time/total: 04:09/10:21:06]: abntex2 [4493k]<br />
.....<br />
running fmtutil-sys --no-error-if-no-engine=luajittex --all ...done<br />
running package-specific postactions<br />
finished with package-specific postactions<br />
See<br />
/usr/local/texlive/2015/index.html<br />
for links to documentation. The TeX Live web site<br />
contains updates <strong>and</strong> corrections: http://tug.org/texlive.<br />
TeX Live is a joint project of the TeX user groups around the world;<br />
please consider supporting it by joining the group best for you. The<br />
list of user groups is on the web at http://tug.org/usergroups.html.<br />
Add /usr/local/texlive/2015/texmf-dist/doc/info to INFOPATH.<br />
Add /usr/local/texlive/2015/texmf-dist/doc/man to MANPATH<br />
(if not dynamically found).<br />
Most importantly, add /usr/local/texlive/2015/bin/i386-linux<br />
to your PATH for current <strong>and</strong> future sessions.<br />
Welcome to TeX Live!<br />
Logfile: /usr/local/texlive/2015/install-tl.log<br />
><br />
Now install make4ht. Make sure it goes to ~/texmf/scripts/lua/make4ht <strong>and</strong> to set the path to point to<br />
the above as well.<br />
No need to install lua as it comes with TL<br />
Make sure to fix the pgfsysdriver to be able to use tikz, see this<br />
25
2.22 Installation of texlive 2014 on Linux<br />
Download the .gz file from http://ctan.math.washington.edu/tex-archive/systems/texlive/tlnet/<br />
install-tl-unx.tar.gz 16-Jun-2014 18:26 3.2M<br />
Then extract<br />
gunzip install-tl-unx.tar.gz<br />
tar -xvf install-tl-unx.tar<br />
Then move to the folder created from the above <strong>and</strong> do<br />
sudo ./install-tl<br />
Make sure to change the paper type to letter. The default is<br />
A4.<br />
Enter comm<strong>and</strong>: I<br />
Installing to: /usr/local/texlive/2014<br />
....<br />
TeX Live is a joint project of the TeX user groups around the world;<br />
please consider supporting it by joining the group best for you. The<br />
list of user groups is on the web at http://tug.org/usergroups.html.<br />
Add /usr/local/texlive/2014/texmf-dist/doc/info to INFOPATH.<br />
Add /usr/local/texlive/2014/texmf-dist/doc/man to MANPATH<br />
(if not dynamically found).<br />
Most importantly, add /usr/local/texlive/2014/bin/i386-linux<br />
to your PATH for current <strong>and</strong> future sessions.<br />
Welcome to TeX Live!<br />
Summary of warning messages during installation:<br />
Partial download of http://mirror.jmu.edu/pub/CTAN/systems/texlive/tlnet/archive/chletter.doc.tar.xz found, removing<br />
Logfile: /usr/local/texlive/2014/install-tl.log<br />
><br />
2.22.1 post installation for tex4ht issues<br />
I need to fix/add few things after texlive is installed for tex4ht. This is a summary of the items to do.<br />
1. When using st<strong>and</strong>alone package, this error will show up with tex4ht only<br />
(/usr/local/texlive/2014/texmf-dist/tex/generic/xkeyval/xkeyval.tex<br />
(/usr/local/texlive/2014/texmf-dist/tex/generic/xkeyval/keyval.tex)))<br />
! Extra \else.<br />
l.227 \else<br />
? x<br />
There is a patch for this. Get the updated st<strong>and</strong>alone.sty <strong>and</strong> replace the current installed one with<br />
it. The st<strong>and</strong>along.sty can be found at https://bitbucket.org/martin_scharrer/st<strong>and</strong>alone/raw/<br />
635aacfa0e8f2cba4f4086f4f15d57791b18bf64/st<strong>and</strong>alone.sty<br />
Replace the file /usr/local/texlive/2013/texmf-dist/tex/latex/st<strong>and</strong>alone/st<strong>and</strong>alone With it.<br />
Now this problem will go away.<br />
26
2. Install make4ht<br />
3. fix tex4ht.env file to improve the fonts generated when making images for math. see elsewhere here for<br />
instructions. This step is not not needed any more, since I switched to make4ht for compiling, since<br />
make4ht does not use tex4ht.env, but if you are not using make4ht, then tex4ht.env is still used by st<strong>and</strong>ard<br />
htlatex comm<strong>and</strong>.<br />
2.23 installation of TEX Live 2013<br />
This is the log from<br />
download http://mirror.ctan.org/systems/texlive/tlnet/install-tl-unx.tar.gz<br />
>ls -l<br />
total 0<br />
drwxrwxrwx 1 me me 0 Jan 16 18:34 install-tl-20140116<br />
>cd install-tl-20140116/<br />
>ls -l<br />
total 89<br />
-rwxrwxrwx 1 me me 1157 May 31 2010 index.html<br />
-rwxrwxrwx 1 me me 79388 Sep 15 15:16 install-tl<br />
-rwxrwxrwx 1 me me 2098 Sep 28 2006 LICENSE.CTAN<br />
-rwxrwxrwx 1 me me 5086 Jun 5 2011 LICENSE.TL<br />
-rwxrwxrwx 1 me me 183 Aug 9 2008 README<br />
drwxrwxrwx 1 me me 0 Jan 16 18:34 readme-html.dir<br />
drwxrwxrwx 1 me me 0 Jan 16 18:34 readme-txt.dir<br />
-rwxrwxrwx 1 me me 250 Aug 9 2008 README.usergroups<br />
-rwxrwxrwx 1 me me 360 May 29 2013 release-texlive.txt<br />
drwxrwxrwx 1 me me 0 Jan 16 18:34 texmf-dist<br />
drwxrwxrwx 1 me me 0 Jan 16 18:34 tlpkg<br />
><br />
now run the installer as root sudo ./install-tl<br />
[sudo] password for me:<br />
Loading http://mirrors.rit.edu/CTAN/systems/texlive/tlnet/tlpkg/texlive.tlpdb<br />
Installing TeX Live 2013 from: http://mirrors.rit.edu/CTAN/systems/texlive/tlnet<br />
Platform: i386-linux => 'Intel x86 with GNU/Linux'<br />
Distribution: net (downloading)<br />
Using URL: http://mirrors.rit.edu/CTAN/systems/texlive/tlnet<br />
Directory for temporary files: /tmp<br />
======================> TeX Live installation procedure Letters/digits in indicate menu items for comm<strong>and</strong>s or options
TEXMFLOCAL (directory for site-wide local files):<br />
/usr/local/texlive/texmf-local<br />
TEXMFSYSVAR (directory for variable <strong>and</strong> automatically generated data):<br />
/usr/local/texlive/2013/texmf-var<br />
TEXMFSYSCONFIG (directory for local config):<br />
/usr/local/texlive/2013/texmf-config<br />
TEXMFVAR (personal directory for variable <strong>and</strong> automatically generated data):<br />
~/.texlive2013/texmf-var<br />
TEXMFCONFIG (personal directory for local config):<br />
~/.texlive2013/texmf-config<br />
TEXMFHOME (directory for user-specific files):<br />
~/texmf<br />
options:<br />
[ ] use letter size instead of A4 by default<br />
[X] allow execution of restricted list of programs via \write18<br />
[X] create all format files<br />
[X] install macro/font doc tree<br />
[X] install macro/font source tree<br />
set up for portable installation<br />
Actions:<br />
start installation to hard disk<br />
help<br />
quit<br />
Enter comm<strong>and</strong>: I<br />
Installing to: /usr/local/texlive/2013<br />
Installing [0001/2785, time/total: ??:??/??:??]: 12many [376k]<br />
Installing [0002/2785, time/total: 00:01/01:16:21]: 2up [66k]<br />
Installing [0003/2785, time/total: 00:02/02:10:06]: Asana-Math [458<br />
.....<br />
go make coffee now <strong>and</strong> come back in 1 hr or so..<br />
...........<br />
system<br />
| lua | dumping '/usr/local/texlive/2013/texmf-var/luatex-cache/context/a86c089b384a3076dc514ba966a1fac9/<br />
resolvers | caching | 'files' compiled to '/usr/local/texlive/2013/texmf-var/luatex-cache/context/a86c089b384a3076dc<br />
mtxrun |<br />
mtxrun<br />
| runtime: 2.546 seconds<br />
done<br />
pre-generating all format files (fmtutil-sys --all), be patient...done<br />
running package-specific postactions<br />
finished with package-specific postactions<br />
See<br />
/usr/local/texlive/2013/index.html<br />
for links to documentation. The TeX Live web site<br />
contains updates <strong>and</strong> corrections: http://tug.org/texlive.<br />
TeX Live is a joint project of the TeX user groups around the world;<br />
please consider supporting it by joining the group best for you. The<br />
list of user groups is on the web at http://tug.org/usergroups.html.<br />
Add /usr/local/texlive/2013/texmf-dist/doc/info to INFOPATH.<br />
Add /usr/local/texlive/2013/texmf-dist/doc/man to MANPATH<br />
(if not dynamically found).<br />
Most importantly, add /usr/local/texlive/2013/bin/i386-linux<br />
to your PATH for current <strong>and</strong> future sessions.<br />
Welcome to TeX Live!<br />
Logfile: /usr/local/texlive/2013/install-tl.log<br />
28
Here is the logfile install-tl.log.txt<br />
To update do<br />
sudo `which tlmgr` update --self --all --reinstall-forcibly-removed<br />
[sudo] password for me:<br />
tlmgr: package repository http://ctan.mirrors.hoobly.com/systems/texlive/tlnet<br />
tlmgr: saving backups to /usr/local/texlive/2013/tlpkg/backups<br />
[1/1, ??:??/??:??] update: texlive.infra [299k] (31401 -> 31673) ... done<br />
Restarting tlmgr to complete update ...<br />
tlmgr: package repository http://ctan.mirrors.hoobly.com/systems/texlive/tlnet<br />
tlmgr: saving backups to /usr/local/texlive/2013/tlpkg/backups<br />
[ 1/293] auto-remove: lgrx ... done<br />
[ 2/293] auto-remove: gmeometric ... done<br />
[ 3/293, ??:??/??:??] update: Asana-Math [458k] (27228 -> 31750) ... done<br />
[ 4/293, 00:05/55:11] update: abntex2 [4526k] (31530 -> 32490) ... done<br />
[ 5/293, 00:10/10:08] update: achemso [469k] (31608 -> 31893) ... done<br />
[ 6/293, 00:12/11:07] update: acro [532k] (31571 -> 32450) ... done<br />
[ 7/293, 00:20/16:53] update: amiri [1637k] (30816 -> 32506) ... done<br />
[ 8/293, 00:25/16:34] update: animate [3085k] (31241 -> 31766) ... done<br />
[ 9/293, 00:28/13:12] update: autonum [379k] (30979 -> 32126) ... done<br />
......<br />
[289/293, 15:22/15:22] update: collection-plainextra [1k] (30395 -> 31683) ... done<br />
[290/293, 15:23/15:23] update: collection-pstricks [1k] (31016 -> 32514) ... done<br />
[291/293, 15:24/15:24] update: collection-publishers [1k] (31532 -> 32440) ... done<br />
[292/293, 15:24/15:24] update: collection-science [1k] (30307 -> 32182) ... done<br />
[293/293, 15:25/15:25] update: scheme-context [1k] (29997 -> 32062) ... done<br />
tlmgr: package log updated: /usr/local/texlive/2013/texmf-var/web2c/tlmgr.log<br />
running mktexlsr ...<br />
done running mktexlsr.<br />
running mtxrun --generate ...<br />
done running mtxrun --generate.<br />
running updmap-sys ...<br />
done running updmap-sys.<br />
regenerating fmtutil.cnf in /usr/local/texlive/2013/texmf-var<br />
running fmtutil-sys --no-error-if-no-format --byengine ptex ...<br />
done running fmtutil-sys --no-error-if-no-format --byengine ptex.<br />
running fmtutil-sys --no-error-if-no-format --byengine eptex ...<br />
done running fmtutil-sys --no-error-if-no-format --byengine eptex.<br />
running fmtutil-sys --no-error-if-no-format --byengine pdftex ...<br />
done running fmtutil-sys --no-error-if-no-format --byengine pdftex.<br />
running fmtutil-sys --byfmt cont-en ...<br />
done running fmtutil-sys --byfmt cont-en.<br />
running fmtutil-sys --byfmt pdfcsplain ...<br />
done running fmtutil-sys --byfmt pdfcsplain.<br />
><br />
The /usr/local/texlive/2013/texmf-var/web2c/tlmgr.log log file contains the full listing. It appends<br />
the log of each update to the last update. so the log will contain all the updates done <strong>and</strong> not just the one just<br />
done<br />
29
[Fri Jun 21 01:03:25 2013] update: dvipdfmx.i386-linux (30205 -> 30845)<br />
[Fri Jun 21 01:03:28 2013] update: dvipng.i386-linux (30088 -> 30845)<br />
[Fri Jun 21 01:03:50 2013] update: luatex.i386-linux (30739 -> 30845)<br />
.....<br />
[Tue Jan 7 17:39:02 2014] update: collection-latexextra (31599 -> 32457)<br />
[Tue Jan 7 17:39:03 2014] update: collection-metapost (30387 -> 32455)<br />
[Tue Jan 7 17:39:04 2014] update: collection-music (31524 -> 32405)<br />
[Tue Jan 7 17:39:04 2014] update: collection-pictures (31517 -> 32320)<br />
[Tue Jan 7 17:39:05 2014] update: collection-plainextra (30395 -> 31683)<br />
[Tue Jan 7 17:39:06 2014] update: collection-pstricks (31016 -> 32514)<br />
[Tue Jan 7 17:39:06 2014] update: collection-publishers (31532 -> 32440)<br />
[Tue Jan 7 17:39:07 2014] update: collection-science (30307 -> 32182)<br />
[Tue Jan 7 17:39:08 2014] update: scheme-context (29997 -> 32062)<br />
To start the tlmgr GUI, must be root, <strong>and</strong> the comm<strong>and</strong> is<br />
sudo `which tlmgr` gui<br />
got TEX Live DVD today. Here is the front <strong>and</strong> the back<br />
2.24 on using multicols<br />
1. to force a figure in a column, let includegraphics resize it using \includegraphics[width=\columnwidth]{image}<br />
2.25 How to place figures<br />
Using \begin{figure} makes images float <strong>and</strong> so hard to control the location. Instead, can use just \includegraphics{nam<br />
but to get use caption, use this method by Gonzalo Medina<br />
When this viewed in HTML, tex4ht puts one image below the other. It seems tex4ht does not support<br />
minipages.<br />
To do the same for tex4ht try the following, using multicols new support added to tex4ht<br />
\documentclass{article}<br />
\usepackage[demo]{graphicx}<br />
\usepackage{capt-of}<br />
\usepackage{lipsum}%<br />
\begin{document}<br />
\lipsum[1]<br />
\begin{center}<br />
\includegraphics{foo}<br />
\captionof{figure}{A non floating figure}<br />
\label{fig:test}<br />
\end{center}<br />
\lipsum[2]<br />
\end{document}<br />
Figure 2.1: result of the above<br />
These are different examples of placing figures<br />
30
\documentclass{article}<br />
\usepackage{subfigure}<br />
\usepackage{lipsum}<br />
\usepackage[demo]{graphicx}<br />
\usepackage[utf8]{inputenc}<br />
\begin{document}<br />
\lipsum[1]<br />
\begin{figure}[ht!]<br />
\begin{center}<br />
%<br />
\subfigure[Caption of First Figure]{%<br />
\label{fig:first}<br />
\includegraphics[width=0.4\textwidth]{FirstFigure}<br />
}%<br />
\subfigure[Caption of Second Figure]{%<br />
\label{fig:second}<br />
\includegraphics[width=0.4\textwidth]{SecondFigure}<br />
}\\ % ------- End of the first row ----------------------%<br />
\subfigure[Caption of Third Figure]{%<br />
\label{fig:third}<br />
\includegraphics[width=0.4\textwidth]{ThirdFigure}<br />
}%<br />
\subfigure[Caption of Fourth Figure]{%<br />
\label{fig:fourth}<br />
\includegraphics[width=0.4\textwidth]{FourthFigure}<br />
}%<br />
%<br />
\end{center}<br />
\caption{%<br />
The l-o-n-g caption for all the subfigures<br />
(FirstFigure through FourthFigure) goes here.<br />
}%<br />
\label{fig:subfigures}<br />
\end{figure}<br />
\lipsum[2-5]<br />
\end{document}<br />
references:<br />
1. http://tex.stackexchange.com/questions/107363/putting-multiple-images-in-a-page<br />
2.26 Finding definitions of LaTEX control sequences?<br />
use texdef -t latex <br />
For example<br />
31
texdef -t latex input<br />
\input:<br />
macro:->\@ifnextchar \bgroup \@iinput \@@input<br />
><br />
>texdef -t latex pi<br />
\pi:<br />
\mathchar"119<br />
\the\pi:<br />
281<br />
>texdef -t latex frac<br />
\frac:<br />
macro:#1#2->{\begingroup #1\endgroup \over #2}<br />
2.27 wrapping text around figures<br />
see http://tex.stackexchange.com/questions/56176/h<strong>and</strong>ling-of-wrapfig-pictures-in-latex <strong>and</strong> http:<br />
//texblog.org/tag/wrapfigure/ also there is wraptable see http://tex.stackexchange.com/questions/<br />
49300/wrap-text-around-a-tabular<br />
From the first link:<br />
\documentclass{article}<br />
\usepackage{wrapfig}<br />
\usepackage{lipsum}<br />
\begin{document}<br />
\lipsum[1-4]<br />
\begin{wrapfigure}{R}{5cm}<br />
\centering<br />
\rule{3cm}{7cm}<br />
\end{wrapfigure}<br />
\lipsum[1-6]<br />
\end{document}<br />
2.28 what tex editors to use?<br />
list of some I tried<br />
1. Texmaker (shows structure of document on left panel. Ok, but it gets confused with \Verbatim that<br />
has also <strong>Latex</strong> code in it, it think it is part of the document <strong>and</strong> shows it in the structure of the actual<br />
document as well.<br />
2. texworks<br />
3. Kyle on Linux (nice)<br />
32
2.29 How to define text block to use in more than one place?<br />
Thanks for TorbjørnT. from Tex forum for these methods.<br />
Sometimes I needed to define some text <strong>and</strong> put it in 2 different places.<br />
If the text has no verbatim in it, this method can be used<br />
\documentclass{article}%<br />
\begin{document}<br />
\newcomm<strong>and</strong>\<strong>my</strong>text{<br />
text with some with no verbatim<br />
more text here<br />
}<br />
\<strong>my</strong>text<br />
\renewcomm<strong>and</strong>\<strong>my</strong>text{<br />
more text with here<br />
more text here also.......<br />
}<br />
\<strong>my</strong>text<br />
\end{document}<br />
But if the text has verbatim in it, the above does not work. Use this method<br />
\documentclass{article}%<br />
\usepackage{filecontents}<br />
\begin{document}<br />
\begin{filecontents*}{somefile.txt}<br />
Text with \verb|Initialization| verbatim it.<br />
This would now be put in text file, then read again<br />
\end{filecontents*}<br />
\input{somefile.txt}<br />
\end{document}<br />
2.30 adjusting text, parskip, parindent<br />
From http://www.<strong>and</strong>y-roberts.net/writing/latex/tables<br />
33
There are also things known as comm<strong>and</strong> lengths, which are not<br />
fixed values as they depend on the configuration of the current<br />
document class <strong>and</strong>/or preamble. Useful ones include:<br />
* \parindent - the size of the paragraph indent<br />
* \baselineskip - vertical distance between lines.<br />
* \parskip - the extra space between paragraphs.<br />
* \textwidth - the width of a line of text in the local<br />
environment (e.g., the<br />
lines are commonly narrower in the abstract<br />
than in the normal text).<br />
* \textheight - the height of the text on the page.<br />
try this sometime<br />
%<br />
% this makes list spacing much better.<br />
%<br />
\newenvironment{<strong>my</strong>_enumerate}{<br />
\begin{enumerate}<br />
\setlength{\itemsep}{1pt}<br />
\setlength{\parskip}{0pt}<br />
\setlength{\parsep}{0pt}}{\end{enumerate}<br />
}<br />
What I do is insert this code somewhere at the top of <strong>my</strong> LaTeX document, before I need to create any<br />
enumerations. Then, later in the document, when I do want to create an enumeration, instead of using the<br />
enumerate tag, I use the <strong>my</strong>_enumerate<br />
2.31 How to reduce size of math in one place only?<br />
\text{\scriptsize $\sin(x)$}<br />
Use different size as needed, footnotesize or tiny <strong>and</strong> others.<br />
2.32 How to h<strong>and</strong> written fonts <strong>and</strong> other fonts using xelatex?<br />
This file can only be compiled by xelatex of lualatex<br />
34
\documentclass{article}<br />
\usepackage[no-math]{fontspec}<br />
\setmainfont[<br />
Ligatures=TeX,<br />
]{Architect}<br />
\begin{document}<br />
This is some TEXT.<br />
\end{document}<br />
Then compile using xelatex foo.tex. The fonts used above, called Architect was downloaded from<br />
http://www.911fonts.com/font/download_StylusITCTTRegular_66.htm<br />
See using-h<strong>and</strong>writing-font-in-proofs for more information.<br />
Some fonts utilities on linux<br />
kcharselect<br />
gfontsel<br />
xfontsel<br />
xlsfonts<br />
chkfontpath<br />
fslsfonts<br />
It seems on Linux one needs to just create $HOME/.fonts/ folder <strong>and</strong> put the .tff files there.<br />
For example, I downloaded zip file from the above, extracted it, <strong>and</strong> copied one .tff file to<br />
>pwd<br />
/home/me/.fonts<br />
>ls -l<br />
-rwxr-xr-x 1 me me 36708 Sep 22 02:09 17273_architectbold.ttf<br />
Now, make sure to rename the file above to match the actual font name as given inside the file. Double<br />
clicking on the file at least on windows, <strong>and</strong> look for the font name. do not use the file name itself. Must rename<br />
the file to match the font name. For the above, I did<br />
>mv 17273_architectbold.ttf Architect-Bold.ttf<br />
Since Architect-Bold was the actual font name.<br />
And changed the latex file to the exact file name above as follows<br />
\documentclass{article}<br />
\usepackage[no-math]{fontspec}<br />
\setmainfont[<br />
Ligatures=TeX,<br />
]{Architect-Bold}<br />
\begin{document}<br />
This is some TEXT.<br />
\end{document}<br />
35
The comm<strong>and</strong> fc-cache might be also useful to run after doing the above just in case. Use xelatex <strong>and</strong><br />
not lulatex for the above. It seems there is difference on how fonts are found depending on which one to use.<br />
The above instructions are for xelatex which is what I used. It might work with lulatex, do not know now.<br />
See fontspec-xelatex-finding-fonts-by-name-installed-or-in-texmfhome<br />
To use times package, just add the line<br />
2.33 How to use Times font for the whole document in <strong>Latex</strong>?<br />
Just add this line<br />
\usepackage{times}<br />
See how-do-you-change-the-document-font-in-latex for more information.<br />
2.34 how to pass variable to latex to change the compile content?<br />
I use this method which works ok for me. I have a file called switch.tex where the switch is set to true or false.<br />
I have to edit this file to change the switch. Then in the main latex document, I input this file. This diagram<br />
shows the process.<br />
\ifbool{switch}<br />
{.... latex code to compile when switch is true....}<br />
{.... latex code to compile when switch is false....}<br />
\usepackage{etoolbox}<br />
\newbool{switch} \setbool{private}{true}<br />
switch.tex<br />
\input{switch}<br />
\ifbool{switch}<br />
{….}<br />
{…..}<br />
To change the switch, edit<br />
switch.tex <strong>and</strong> change true<br />
to false, <strong>and</strong> recompile<br />
file.tex<br />
2.35 how to generate <strong>Latex</strong> from other programming languages?<br />
This shows how to use other environments to generate <strong>Latex</strong> code. In Mathematica<br />
s = ToString["\\documentclass[12pt,titlepage]{article}<br />
\\begin{document}<br />
It is known that $\\sin(0)=" ToString[Sin[0]] "$<br />
\\end{document}"];<br />
file = OpenWrite["C:\\tmp\\p.tex", PageWidth -> Infinity];<br />
WriteString[file, s];<br />
Close[file];<br />
36
This generates the <strong>Latex</strong> file p.tex<br />
\documentclass[12pt,titlepage]{article}<br />
\begin{document}<br />
It is known that $\sin(0)=0$<br />
\end{document}<br />
Using Python<br />
import math<br />
s=r"""<br />
\documentclass[12pt,titlepage]{article}<br />
\begin{document}<br />
It is known that $\sin(0)="""+repr(math.sin(0))+r"""$<br />
\end{document}"""<br />
text_file = open(r"C:\tmp\p.tex", "w")<br />
text_file.write(s)<br />
text_file.close()<br />
The above generates the <strong>Latex</strong> file<br />
\documentclass[12pt,titlepage]{article}<br />
\begin{document}<br />
It is known that $\sin(0)=0.0$<br />
\end{document}<br />
From C++ (needs C++11)<br />
#include <br />
#include <br />
#include <br />
using namespace std;<br />
int main()<br />
{<br />
//int r = 5;<br />
string s =R"(<br />
\documentclass[12pt,titlepage]{article}<br />
\begin{document}<br />
It is known that (a) $\sin(\pi)=)" + std::to_string(sin(M_PI)) + R"($<br />
\end{document}<br />
)";<br />
}<br />
cout
And now compile <strong>and</strong> run<br />
>g++ -Wall -std=c++0x try_string_literal.cpp<br />
>./a.out<br />
\documentclass[12pt,titlepage]{article}<br />
\begin{document}<br />
It is known that (a) $\sin(\pi)=0.000000$<br />
\end{document}<br />
2.36 how to debug <strong>Latex</strong>?<br />
Add --debug --interactive<br />
2.37 How to find history of Tex? Family tree?<br />
type texdoc tex-overview.pdf<br />
2.38 Where to put a style file that is downloaded <strong>and</strong> not part of TexLive?<br />
cd `kpsewhich -var-value=TEXMFHOME`<br />
<strong>and</strong> make directory tex/latex/<strong>my</strong>stuff/ <strong>and</strong> put the file there.<br />
Verify using kpsewhich filename.sty.<br />
Reference: answer at tex stackexchange<br />
2.39 How to convert pdf to eps?<br />
pdftops -f 1 -l 1 -eps pic.pdf<br />
2.40 what are values of extensions for images<br />
Using this:<br />
\documentclass[11pt,notitlepage]{article}%<br />
\usepackage{graphicx}<br />
\begin{document}<br />
\makeatletter<br />
\Gin@extensions<br />
\makeatother<br />
\end{document}<br />
Compiled with htlatex gives<br />
.eps,.ps,.eps.gz,.ps.gz,.eps.Z,.mps<br />
38
<strong>and</strong> compiled with pdflatex gives<br />
.png,.pdf,.jpg,.mps,.jpeg,.jbig2,.jb2,.PNG,.PDF,.JPG,.JPEG,.JBIG2,.JB2,.eps<br />
And compiled with lualatex gives<br />
.png,.pdf,.jpg,.mps,.tif,.jpeg,.PNG,.PDF,.JPG,.JPEG,.eps<br />
2.41 How to include pdf pages as is in <strong>Latex</strong><br />
The number of pages of the pdf is first found, then a loop is used to load each page. Make sure to use \clearpage<br />
before, so that the first pdf page is on a new page <strong>and</strong> make sure to clear the page also after each page in the<br />
loop.<br />
Here is an example<br />
\usepackage{tikz}<br />
\usepackage{pgffor}<br />
....<br />
\pdfximage{foo.pdf}<br />
\foreach \n in {1,...,\the\pdflastximagepages}<br />
{<br />
\begin{tikzpicture}[remember picture,overlay]<br />
\node[inner sep=0pt] at (current page.center)<br />
{<br />
\includegraphics[page=\n]{foo.pdf}};<br />
\end{tikzpicture}<br />
\clearpage<br />
}<br />
If you know the pdf file has only one page, then the following is enough<br />
\clearpage<br />
\begin{tikzpicture}[remember picture,overlay]<br />
\node[inner sep=0pt] at (current page.center)<br />
{<br />
\includegraphics[page=1,scale=0.9]{foo.pdf}<br />
};<br />
\end{tikzpicture}<br />
\clearpage<br />
2.42 How to automatically build images needed for the latex file?<br />
I put all <strong>my</strong> images needed for the document in an images/ folder below the main document folder. Using<br />
recusrive make, the document Makefile has this line at its top<br />
DIRS = images<br />
include common.mk<br />
...<br />
39
Then the Makefile in the images/ file looks like this<br />
DIRS =<br />
include common.mk<br />
FILES := $(shell ls -1 *.pdf)<br />
#$(info $$FILES is [${FILES}])<br />
TARGET = $(basename $(FILES))<br />
#$(info $$TARGET is [${TARGET}])<br />
all:: ${TARGET:=.svg}<br />
@echo "Finished building [$?]"<br />
%.svg : %.pdf<br />
prep $<<br />
.PHONY: clean<br />
clean ::<br />
-rm -f ${TARGET:=.svg}<br />
Where prep is <strong>my</strong> script I use to crop the images <strong>and</strong> generate SVG image from each. Here it is<br />
>cat `which prep`<br />
#!/bin/bash<br />
set -u<br />
set -e<br />
set -o pipefail<br />
for file in $1; do<br />
filename=${file%.*}<br />
pdfcrop --margins 10 --clip "$filename.pdf" "$filename.pdf"<br />
pdf2svg "$filename.pdf" "$filename.svg"<br />
# pdftops -f 1 -l 1 -level3 -eps "$filename.pdf"<br />
done<br />
<strong>my</strong>_courses><br />
I use pdf file for the source of all the images. The above setup takes care of updating the images if one of<br />
them changes when compiling the latex file.<br />
40
2.43 Some lualatex examples using Lua inside <strong>Latex</strong><br />
2.43.1 Making counter<br />
% !TEX TS-program = lualatex<br />
\documentclass{article}<br />
\usepackage{luacode}<br />
\usepackage{amsmath}<br />
%------------------------<br />
\begin{luacode}<br />
local x = 0<br />
function add()<br />
x = x +1<br />
tex.print(x)<br />
end<br />
function sub()<br />
x = x - 1<br />
tex.print(x)<br />
end<br />
function reset()<br />
x = 0<br />
end<br />
\end{luacode}<br />
\newcomm<strong>and</strong>\add[0]{ \directlua{add()}}%<br />
\newcomm<strong>and</strong>\sub[0]{ \directlua{sub()}}%<br />
\newcomm<strong>and</strong>\reset[0]{ \directlua{reset()}}%<br />
%-------------------<br />
\begin{document}<br />
\reset<br />
\add<br />
\add<br />
\sub<br />
\add<br />
\end{document}<br />
2.43.2 simplify fraction<br />
see http://tex.stackexchange.com/questions/253693/reducing-fraction-using-latex-3/253716#253716<br />
41
\documentclass{article}<br />
\usepackage{luacode}<br />
\usepackage{amsmath}<br />
%------------------------<br />
\begin{luacode}<br />
function simplify(a,b)<br />
local function gcd(a,b)<br />
if b ~= 0 then<br />
return gcd(b, a % b)<br />
else<br />
return math.abs(a)<br />
end<br />
end<br />
t = gcd(a, b)<br />
tex.print("\\frac{"..a/t.."}{"..b/t.."}")<br />
end<br />
\end{luacode}<br />
\newcomm<strong>and</strong>\simplify[2]{\directlua{simplify(#1,#2) }}%<br />
%-------------------<br />
\begin{document}<br />
\noindent Can I make \LaTeX{} reduce a fraction automatically?\\[\baselineskip]<br />
For example, I would like the fraction<br />
\begin{equation*}<br />
\frac{278\,922}{74\,088}<br />
\end{equation*}<br />
to be reduced to<br />
\begin{equation*}<br />
\simplify{278922}{74088}<br />
\end{equation*}<br />
\end{document}<br />
The output of the above is<br />
Can I make LATEX reduce a fraction automatically?<br />
For example, I would like the fraction<br />
to be reduced to<br />
278 922<br />
74 088<br />
6641<br />
1764<br />
2.43.3 read CVS field to <strong>Latex</strong> table<br />
This uses lua function to read the specific field in the CVS file. For example, given this CVS file in the directory<br />
42
123,Poty city,Poti,red,-295731.42857144,617222.85714285<br />
124,Lanchhuti city,Poti,red,-299217.14285715,647851.42857142<br />
125,Ozurgeti city,Poti,red,-317217.14285715,648422.85714285<br />
126,Samtredia city,Poti,red,-287502.85714287,672022.85714285<br />
<strong>and</strong> you want to insert, say field located at row 2 <strong>and</strong> column 5, which is -299217.14285715 in the above, <strong>and</strong><br />
field at row 1 <strong>and</strong> column 3, which is Poti then do<br />
\begin{tabular}{|l|l|l|l|l|}\hline<br />
1 & \getField{1}{2} & 3 & 4 & 5 \\\hline<br />
6 & 7 & 8 & \getField{2}{5} & 9 \\\hline<br />
10 & 11 & 12 & 13 & 14 \\\hline<br />
\end{tabular}<br />
The full code is below. I googled lua code to parse CVS files, there are few on the net, I found one that<br />
worked <strong>and</strong> used it. The CVS file is read automatically. Change the cvs file name in the code below <strong>and</strong> its path<br />
as needed. The latex file needs to be compiled with lualatex not pdflatex<br />
43
\documentclass[]{article}<br />
\usepackage{luacode}<br />
\begin{luacode*} -- CVS API: http://nocurve.com/simple-csv-read-<strong>and</strong>-write-using-lua/<br />
local function split(str, sep)<br />
fields={}<br />
local matchfunc = string.gmatch(str, "([^"..sep.."]+)")<br />
if not matchfunc then return {str} end<br />
for str in matchfunc do<br />
table.insert(fields, str)<br />
end<br />
return fields<br />
end<br />
function read(path, sep, tonum)<br />
tonum = tonum or true<br />
sep = sep or ','<br />
local csvFile = {}<br />
local file = assert(io.open(path, "r"))<br />
for line in file:lines() do<br />
fields = split(line, sep)<br />
if tonum then -- convert numeric fields to numbers<br />
for i=1,#fields do<br />
fields[i] = tonumber(fields[i]) or fields[i]<br />
end<br />
end<br />
table.insert(csvFile, fields)<br />
end<br />
file:close()<br />
return csvFile<br />
end<br />
local m = read('./c.cvs') -- read file csv file to local matrix m<br />
function getField(row,col) -- API to latex comm<strong>and</strong> below<br />
tex.print(m[row][col])<br />
end<br />
\end{luacode*}<br />
\newcomm<strong>and</strong>\getField[2]{\directlua{getField(#1,#2) }}%<br />
\begin{document}<br />
\begin{table}[]<br />
\centering<br />
\caption{My example}<br />
\begin{tabular}{|l|l|l|l|l|}\hline<br />
1 & \getField{1}{2} & 3 & 4 & 5 \\\hline<br />
6 & 7 & 8 & \getField{2}{5} & 9 \\\hline<br />
10 & 11 & 12 & 13 & 14 \\\hline<br />
\end{tabular}<br />
\end{table}<br />
\end{document}<br />
44
eference tex stackexchange<br />
This below reads a while CVS file to a latex table<br />
45
\documentclass[]{article}<br />
\usepackage{luacode}<br />
\begin{luacode*} -- CVS API thanks to http://nocurve.com/simple-csv-read-<strong>and</strong>-write-using-lua/<br />
local function split(str, sep)<br />
fields={}<br />
local matchfunc = string.gmatch(str, "([^"..sep.."]+)")<br />
if not matchfunc then return {str} end<br />
for str in matchfunc do<br />
table.insert(fields, str)<br />
end<br />
return fields<br />
end<br />
function read(path, sep, tonum)<br />
tonum = tonum or true<br />
sep = sep or ','<br />
local csvFile = {}<br />
local file = assert(io.open(path, "r"))<br />
for line in file:lines() do<br />
fields = split(line, sep)<br />
if tonum then -- convert numeric fields to numbers<br />
for i=1,#fields do<br />
fields[i] = tonumber(fields[i]) or fields[i]<br />
end<br />
end<br />
table.insert(csvFile, fields)<br />
end<br />
file:close()<br />
return csvFile<br />
end<br />
function getCVS(fileName)<br />
local m = read(fileName) -- read file csv1.txt to matrix m<br />
local nRow = #m<br />
local nCol = #m[1]<br />
tex.sprint("\\begin{tabular}{")<br />
for j=1,#m[1] do<br />
tex.sprint("|l")<br />
end<br />
tex.print("|}\\hline")<br />
for i = 1,nRow do<br />
for j = 1,nCol do<br />
tex.sprint(m[i][j])<br />
if j
2.43.4 reversing enumeration list<br />
Given enumeration list, where each item just uses one line, to reverse it:<br />
% !TEX TS-program = lualatex<br />
\documentclass{article}<br />
\usepackage{luacode}<br />
\usepackage{amsmath}<br />
%------------------------<br />
\begin{luacode*} -- copy the list here as is.<br />
data=[[\item 2001<br />
\item 2002<br />
\item 2003<br />
\item 2005 was a very good year<br />
\item 2006 was also a very good year<br />
\item 2007<br />
]]<br />
function string:split(sep) --http://lua-users.org/wiki/SplitJoin<br />
local sep, fields = sep or ":", {}<br />
local pattern = string.format("([^%s]+)", sep)<br />
self:gsub(pattern, function(c) fields[#fields+1] = c end)<br />
return fields<br />
end<br />
function flip()<br />
lines = data:split("\n")<br />
tex.print("\\begin{enumerate}")<br />
for i=#lines,1,-1 do<br />
tex.print(lines[i])<br />
end<br />
tex.print("\\end{enumerate}")<br />
end<br />
\end{luacode*}<br />
\newcomm<strong>and</strong>\flip[0]{ \directlua{flip()}}%<br />
\begin{document}<br />
\flip{}<br />
\end{document}<br />
Another way is<br />
47
% !TEX TS-program = lualatex<br />
\documentclass{article}<br />
\usepackage{luacode}<br />
\usepackage{amsmath}<br />
%------------------------<br />
\begin{luacode*}<br />
function split(str, pat)<br />
--http://lua-users.org/wiki/SplitJoin<br />
-- NOTE: use {n = 0} in Lua-5.0<br />
local t = {}<br />
local fpat = "(.-)" .. pat<br />
local last_end = 1<br />
local s, e, cap = str:find(fpat, 1)<br />
while s do<br />
if s ~= 1 or cap ~= "" then<br />
table.insert(t,cap)<br />
end<br />
last_end = e+1<br />
s, e, cap = str:find(fpat, last_end)<br />
end<br />
if last_end
2. 2002<br />
3. 2003<br />
Here it is flipped:<br />
1. 2003<br />
2. 2002<br />
3. 2001<br />
49
Chapter 3<br />
TeX4ht <strong>cheat</strong> <strong>sheet</strong><br />
3.1 <strong>my</strong> tex4ht setup<br />
description of <strong>my</strong> tex4ht setup<br />
3.2 Math fonts in tex4ht<br />
status of some math fonts in tex4ht<br />
3.3 tex4ht themes<br />
Before starting, here are rules of thumb to remember. Most of these rules will cover most of the common uses.<br />
1. If using the report class <strong>and</strong> if splitting is set to 2, then each chapter (<strong>and</strong> anything in it, such as sections<br />
<strong>and</strong> subsections) all go to separate one web page).<br />
2. If using the report class <strong>and</strong> if splitting is set to 3, then each section (<strong>and</strong> anything in it, such as subsections)<br />
all go to separate one web page).<br />
3. If using report class, to Force a table of content to show under each chapter add this \TocAt{chapter,section} %show<br />
4. To Force a table of content to show under each section add this \TocAt{section,subsection} %show subsections<br />
5. If using article class, then using split 2 then each section is put on its own page (including all its subsections).<br />
6. If using article class, then using split 3 will put each section on its page, <strong>and</strong> each subsection (<strong>and</strong> everything<br />
inside subsections) on its own page.<br />
The general outlines of the themes below are needed if one wants to do something more complicated than<br />
the above rules of thumb.<br />
These themes were done using the comm<strong>and</strong><br />
htlatex foo.tex "htm,3"<br />
And then adding the control of where to split pages to separate HTML pages or not, <strong>and</strong> controlling where<br />
table of contents show up right inside the latex file. This is needed since there is no other way to control which<br />
sections or chapters to split or not to split using global method, <strong>and</strong> so the logic has to be embedded inside the<br />
latex file.<br />
All logic for both pdf <strong>and</strong> htlatex is inside the same file <strong>and</strong> is controlled using \ifdefined\HCode to tell if<br />
one is running in pdf or htlatex, since only generation to HTML <strong>and</strong> PDF is done here.<br />
50
3.3.1 theme 1<br />
report class, main TOC shows only chapters. Chapter 2 has TOC <strong>and</strong> all its sections in one web page, but<br />
chapter 1 has TOC but its sections are each on separate web pagebreak<br />
This is compiled using<br />
htlatex foo.tex "htm,3"<br />
1. HTML output of this theme is HTML<br />
2. PDF output of this theme is PDF<br />
\documentclass{report}<br />
\setcounter{tocdepth}{0}<br />
\setcounter{secnumdepth}{4}<br />
\usepackage{lipsum}<br />
\usepackage{titletoc}<br />
\begin{document}<br />
51
\title{<strong>my</strong> web site}<br />
\author{me}<br />
\date{\small\today}<br />
\maketitle<br />
%tell tex4ht to make main toc show only chapters<br />
%thanks to Radhakrishnan CV for this solution<br />
\ifdefined\HCode<br />
\Configure{tableofcontents*}{chapter}<br />
\fi<br />
\tableofcontents<br />
\ifdefined\HCode<br />
\TocAt{chapter,section} %show section only in chapters TOC<br />
\TocAt{section,subsection} %show subsection only in sections TOC<br />
\fi<br />
%---------------------<br />
\chapter{chapter 1}<br />
\ifdefined\HCode<br />
\else<br />
{<br />
\startcontents[chapter]<br />
\printcontents[chapter]{}{1}{\setcounter{tocdepth}{1}}<br />
}<br />
\fi<br />
\lipsum[10]<br />
\section{section 1 in chapter 1}<br />
\lipsum[1-2]<br />
\section{section 2 in chapter 1}<br />
\lipsum[1-2]<br />
\subsection{subsection 1 in section 2 in chapter 1}<br />
\lipsum[1-2]<br />
\section{section 3 in chapter 1}<br />
\lipsum[1-2]<br />
%---------------------<br />
\ifdefined\HCode<br />
\PauseCutAt{section}<br />
\fi<br />
\ifdefined\HCode<br />
\else<br />
{<br />
\stopcontents[chapter]<br />
}<br />
\fi<br />
\chapter{chapter 2}<br />
\lipsum[10]<br />
\section{section 1 in chapter 2}<br />
52
\lipsum[1-2]<br />
\section{section 2 in chapter 2}<br />
\lipsum[1-2]<br />
\subsection{subsection 1 in section 2 in chapter 2}<br />
\lipsum[1-2]<br />
\section{section 3 in chapter 2}<br />
\lipsum[1-2]<br />
\end{document}<br />
3.3.2 theme 2<br />
There seems to be an issue somewhere, I need to resolve. This is getting complicated.<br />
1. HTML output of this theme is HTML<br />
2. PDF output of this theme is PDF<br />
\documentclass{report}<br />
\setcounter{tocdepth}{0}<br />
53
\setcounter{secnumdepth}{4}<br />
\usepackage{lipsum}<br />
\usepackage{titletoc}<br />
\begin{document}<br />
\title{<strong>my</strong> course A}<br />
\author{me}<br />
\date{\small\today}<br />
\maketitle<br />
\ifdefined\HCode<br />
\Configure{tableofcontents*}{chapter}<br />
\fi<br />
\tableofcontents<br />
\ifdefined\HCode<br />
\TocAt{chapter} %turn off TOC<br />
\fi<br />
%---------------------<br />
\chapter{chapter 1 <strong>my</strong> HWs}<br />
\begin{tabular}{|l|l|}<br />
\hline<br />
HW & grade \\\hline<br />
HW1 \ref{sec:HW1} & 100\% \\\hline<br />
HW2 \ref{sec:HW2} & 100\% \\\hline<br />
\end{tabular}<br />
\ifdefined\HCode<br />
\TocAt{section,subsection} %turn on TOC<br />
\fi<br />
\section{HW 1}<br />
\ifdefined\HCode<br />
\else<br />
{ %turn on local TOC<br />
\startcontents[section]<br />
\printcontents[section]{}{1}{\setcounter{tocdepth}{1}}<br />
}<br />
\fi<br />
\label{sec:HW1}<br />
\subsection{problem 1}<br />
\lipsum[10]<br />
\subsection{problem 2}<br />
\lipsum[10]<br />
\subsection{problem 3}<br />
\lipsum[10]<br />
\section{HW 2}<br />
\label{sec:HW2}<br />
\subsection{problem 1}<br />
\lipsum[10]<br />
\subsection{problem 2}<br />
\lipsum[10]<br />
54
\subsection{problem 3}<br />
\lipsum[10]<br />
\ifdefined\HCode<br />
\TocAt{chapter,section} %turn on TOC<br />
\PauseCutAt{section} % do not SPLIT this section<br />
\fi<br />
%------------------------------<br />
\chapter{project}<br />
\ifdefined\HCode<br />
\else<br />
{ %turn on local TOC<br />
\startcontents[chapter]<br />
\printcontents[chapter]{}{1}{\setcounter{tocdepth}{1}}<br />
}<br />
\fi<br />
\section{introduction}<br />
\lipsum[10]<br />
\section{design}<br />
\lipsum[10]<br />
\section{appendix}<br />
\lipsum[10]<br />
\end{document}<br />
3.4 Using mathjax with htlatex<br />
htlatex can be made to use mathjax to render the math. These steps show how to that.<br />
Will show two ways to do this. Is first is by telling tex4ht to generate mathml into the HTML page, then<br />
load mathjax to render the mathml. The second way, is to tell tex4ht to just pass the latex code, as is, to the<br />
HTML page, <strong>and</strong> let mathjax worry about the whole thing.<br />
The second method above is better, since tex4ht has few issues with some of the mathml code for some math<br />
symbols it generates. The current issue with this method though, is that there is no way to tell tex4ht to pass<br />
the display math latex code to the HTML page. Only in-line latex code can be passed as is to the HTML page.<br />
Hence, as of now, only the first method is really of practical use.<br />
3.4.1 method one, tex4ht generates mathml<br />
Assume the latex file is foo.tex<br />
\documentclass{article}<br />
\begin{document}<br />
$\frac{a}{b}$<br />
\end{document}<br />
The file is compiled as<br />
htlatex example1.tex "nma.cfg,htm,charset=utf-8" " -cunihtf -utf8"<br />
where nma.cfg is<br />
55
\Preamble{mathml}<br />
\Configure{VERSION}{}<br />
\Configure{DOCTYPE}{\HCode{\Hnewline}}<br />
\Configure{HTML}{\HCode{\Hnewline}}{\HCode{\Hnewline}}<br />
\Configure{@HEAD}{}<br />
\Configure{@HEAD}{\HCode{\Hnewline}}<br />
\Configure{@HEAD}{\HCode{\Hnewline}}<br />
\Configure{@HEAD}{\HCode{\Hnewline}}<br />
\Configure{@HEAD}{\HCode{%<br />
<br />
MathJax.Hub.Config({<br />
extensions: ["tex2jax.js"],<br />
jax: ["input/TeX", "output/HTML-CSS"],<br />
tex2jax: {<br />
\unexp<strong>and</strong>ed{inlineMath: [ ['$','$'], ["\\(","\\)"] ],}<br />
\unexp<strong>and</strong>ed{displayMath: [ ['$$','$$'], ["\\[","\\]"] ],}<br />
processEscapes: true<br />
},<br />
"HTML-CSS": { availableFonts: ["TeX"] }<br />
});<br />
<br />
}}<br />
\Configure{@HEAD}{\HCode{<br />
}}<br />
\Configure{@HEAD}{\HCode{<br />
.MathJax_MathML {text-indent: 0;}<br />
}}<br />
\begin{document}<br />
\EndPreamble<br />
Now the file example1.htm will display in the browser as<br />
3.4.2 method two, tex4ht generates mathml for display math, pass inline math<br />
Everything is the same as method one, just use this cfg file instead<br />
\Preamble{mathml}<br />
\Configure{VERSION}{}<br />
\Configure{DOCTYPE}{\HCode{\Hnewline}}<br />
\Configure{HTML}{\HCode{\Hnewline}}{\HCode{\Hnewline}}<br />
\Configure{@HEAD}{}<br />
\Configure{@HEAD}{\HCode{\Hnewline}}<br />
\Configure{@HEAD}{\HCode{\Hnewline}}<br />
\Configure{@HEAD}{\HCode{\Hnewline}}<br />
\Configure{@HEAD}{\HCode{%<br />
56
}}<br />
<br />
MathJax.Hub.Config({<br />
extensions: ["tex2jax.js"],<br />
jax: ["input/TeX", "output/HTML-CSS"],<br />
tex2jax: {<br />
\unexp<strong>and</strong>ed{inlineMath: [ ['$','$'], ["\\(","\\)"] ],}<br />
\unexp<strong>and</strong>ed{displayMath: [ ['$$','$$'], ["\\[","\\]"] ],}<br />
processEscapes: true<br />
},<br />
"HTML-CSS": { availableFonts: ["TeX"] }<br />
});<br />
<br />
\Configure{@HEAD}{\HCode{<br />
}}<br />
\Configure{@HEAD}{\HCode{<br />
.MathJax_MathML {text-indent: 0;}<br />
}}<br />
\begin{document}<br />
%this is used to pass latex directly to mathjax<br />
%thanks to CVR, see http://tug.org/pipermail/tex4ht/2011q2/000299.html<br />
\makeatletter<br />
\Configure{$}{}{}{\exp<strong>and</strong>after\getMath}%$<br />
\def\getMath#1${\relax$%<br />
\def\next{$#1$}%<br />
\HCode{\exp<strong>and</strong>after\strip@prefix\meaning\next}}<br />
\makeatother<br />
\EndPreamble<br />
3.5 How to make tex4ht <strong>and</strong> pdflatex work in the same file?<br />
There are number of ways to add htlatex comm<strong>and</strong>s to latex document. But the document has to still work<br />
with pdflatex.<br />
Here is one way to do it, using ifx<br />
\documentclass{report}<br />
\usepackage{hyperref}<br />
\begin{document}<br />
\tableofcontents<br />
\ifx\HCode\undefined \else<br />
\href{foo.htm}{HTML}<br />
\TocAt{chapter,section,subsection,subsubsection}<br />
\fi<br />
\chapter{chapter 1}<br />
\section{section 1 in chapter 1}<br />
\subsection{subsection 1 in section 1 in chapter 1}<br />
\subsection{subsection 2 in section 1 in chapter 1}<br />
\subsubsection{subsubsection 1 subsection 2 in section 1 in chapter 1}<br />
\end{document}<br />
57
Another way is to use HCode<br />
\documentclass{report}<br />
\usepackage{hyperref}<br />
\begin{document}<br />
\tableofcontents<br />
%---------------------<br />
\ifdefined\HCode<br />
\href{foo.htm}{HTML}<br />
\TocAt{chapter,section,subsection,subsubsection}<br />
\fi<br />
\chapter{chapter 1}<br />
\section{section 1 in chapter 1}<br />
\subsection{subsection 1 in section 1 in chapter 1}<br />
\subsection{subsection 2 in section 1 in chapter 1}<br />
\subsubsection{subsubsection 1 subsection 2 in section 1 in chapter 1}<br />
\end{document}<br />
3.6 Adding tex4ht configuration inside latex file instead of using .cfg<br />
One can use \Configure after \begin{document}<br />
These are from Michal Hoftich, a tex4ht expert on the tex4ht mailing list:<br />
(untested, just an idea):<br />
\documentclass{article}<br />
\ifdefined\HCode<br />
\newcomm<strong>and</strong>\html[1]{%<br />
\HCode{#1}%<br />
}%<br />
\else<br />
\newcomm<strong>and</strong>\html[1]{}%<br />
\fi<br />
\begin{document}<br />
\html{
3.7 removing the extra TOC on main page<br />
Problem: Running this generates an extra TOC<br />
htlatex foo.tex "htm,2"<br />
%--------------<br />
\documentclass{article}%<br />
\usepackage{ifpdf}<br />
\usepackage{lipsum}<br />
\begin{document}<br />
\title{test toc}<br />
\author{me}<br />
\date{\today}<br />
\maketitle<br />
\tableofcontents<br />
\section{section 1}<br />
\lipsum{1}<br />
\subsection{subsection 1}<br />
text<br />
\section{section 2}<br />
\lipsum{1}<br />
\section{section 3}<br />
\lipsum{1}<br />
\end{document}<br />
One solution is this:<br />
59
htlatex foo_split.tex "htm,0"<br />
-------------------------------------<br />
\documentclass{article}%<br />
\usepackage{ifpdf}<br />
\usepackage{lipsum}<br />
\begin{document}<br />
\title{test toc}<br />
\author{me}<br />
\date{\today}<br />
\maketitle<br />
\ifx\HCode\undefined \else<br />
\CutAt{section} % tell is to cut as if we did "htm,2", make<br />
\fi<br />
% section separate<br />
\tableofcontents<br />
\section{section 1}<br />
\lipsum{1}<br />
\subsection{subsection 1}<br />
text<br />
\section{section 2}<br />
\lipsum{1}<br />
\section{section 3}<br />
\lipsum{1}<br />
\end{document}<br />
another is (thanks to Radhakrishnan) is<br />
60
htlatex foo.tex "html,2,notoc*"<br />
\documentclass{article}%<br />
\usepackage{ifpdf}<br />
\usepackage{lipsum}<br />
\begin{document}<br />
\title{test toc}<br />
\author{me}<br />
\date{\today}<br />
\maketitle<br />
\tableofcontents<br />
\section{section 1}<br />
\lipsum{1}<br />
\subsection{subsection 1}<br />
text<br />
\section{section 2}<br />
\lipsum{1}<br />
\section{section 3}<br />
\lipsum{1}<br />
\end{document}<br />
3.8 Changing the depth of the main toc in HTML<br />
To change how deep the TOC is on the main page in HTML, do the following. Suppose we want to show chapter,<br />
section, subsection, <strong>and</strong> subsubsection in the TOC, then here is an example<br />
\begin{document}<br />
\title{<strong>my</strong> dynamics <strong>cheat</strong> <strong>sheet</strong>}<br />
\author{{\small Nasser M. Abbasi}}<br />
\date{{\small \today}}<br />
\maketitle<br />
\ifdefined\HCode<br />
\Configure{tableofcontents*}{chapter,section,subsection,subsubsection}<br />
\fi<br />
\tableofcontents<br />
Splitting the document (html) based on section is different. This is h<strong>and</strong>led as follows. Suppose we want to<br />
split by 2, then compile as<br />
make4ht foo.tex "htm,2,charset=utf-8,pic-align,notoc*" " -cunihtf -utf8"<br />
If you are using a htlatex .cfg file, say <strong>my</strong>.cfg, then change the above to be<br />
make4ht foo.tex "<strong>my</strong>,htm,2,charset=utf-8,pic-align,notoc*" " -cunihtf -utf8"<br />
Notice the use of notoc*<br />
61
3.9 making local TOC at some units but not in others<br />
tex4ht does not support minitoc. And could not make it to work with titletoc either.<br />
One way to simulate it, is to use \TocAt{} inside the document, like this:<br />
pdflatex foo.tex<br />
htlatex foo.tex "htm"<br />
htlatex foo.tex "htm,2"<br />
\documentclass{report}%<br />
\usepackage{ifpdf}<br />
\usepackage{lipsum}<br />
\usepackage{minitoc}<br />
\begin{document}<br />
\title{test minTOC with tex4ht}<br />
\author{me}<br />
\date{\today}<br />
\maketitle<br />
\ifdefined\HCode<br />
\else<br />
\dominitoc %only for pdf<br />
\fi<br />
\tableofcontents<br />
\ifdefined\HCode<br />
\TocAt{chapter,section,subsection}<br />
\fi<br />
%do it before chapter<br />
\chapter{chapter 1}<br />
\ifdefined\HCode<br />
\else<br />
\minitoc<br />
\fi<br />
\lipsum{1}<br />
\section{section 1 under chapter 1}<br />
text<br />
\subsection{subsection 1 under section 1 under chapter 1}<br />
text<br />
\subsubsection{subsubsection 1}<br />
\ifdefined\HCode<br />
\TocAt{chapter}<br />
\fi<br />
%RESET it to NO TOC before chapter<br />
\chapter{chapter 2}<br />
\lipsum{1}<br />
\section{section 1 under chapter 2}<br />
\end{document}<br />
62
3.10 using png for math display, no mathjax, no mathml<br />
There are some issues with using MathML <strong>and</strong> MathJax with tex4ht. See http://tex.stackexchange.com/<br />
questions/109714/conversion-issues-using-htlatex-<strong>and</strong>-mathjax-mathml-method<br />
Also, using mathjax, any latex code in verbatim environment will get rendered as math ! which is not what I<br />
want. So it is not working well.<br />
Hence I am back to using png now. To get the best result from png, this is the setup I use. First the<br />
comm<strong>and</strong> line<br />
rm -rf report<br />
mkdir report<br />
make4ht report.tex "nma,htm,charset=utf-8,pic-align,notoc*" " -cunihtf -utf8" -d report<br />
It is very important to use pic-align else big problem will show up. see http://puszcza.gnu.org.ua/<br />
bugs/?179<br />
I also add this to the preamble of the document itself (not the .cfg)<br />
\DeclareMathSizes{12}{13}{8}{8}<br />
\DeclareMathSizes{10}{12}{6}{6}<br />
\end{X310}<br />
But this is not all. It is very important to also use this .cfg file<br />
(which is nma.cfg in the above comm<strong>and</strong>). Must use these configure comm<strong>and</strong>s<br />
also here, else it will not work<br />
\begin{X311}<br />
\Preamble{html,p-width}<br />
\begin{document}<br />
\Configure{$}{\PicMath}{\EndPicMath}{}<br />
\Configure{PicMath}{}{}{}{ class="math" align="absmiddle"}<br />
\EndPreamble<br />
If you want later on to change back to mathjax, remember to remove or comment the above 2 lines, else<br />
tex4ht will make .png for the in-line math <strong>and</strong> use mathjax for the display math. So can’t have the above when<br />
using mathjax.<br />
The file /usr/local/texlive/2013/texmf-dist/tex4ht/base/unix/tex4ht.env I am currently using is<br />
tex4ht.env<br />
Use the file above for best results.<br />
Lines that are pushed all the way to the left, are the effective lines that gets used.<br />
Everything else remains the same. Only the above change is needed in tex4ht.env<br />
This is the current .cfg that I use to make png for math. Notice, this line below makes it generate png for<br />
math<br />
\Preamble{xhtml,charset="utf-8",p-width,pic-align}<br />
while this line below makes it generate mathml, not png, <strong>and</strong> no mathjax. Just mathml for native browser<br />
use.<br />
\Preamble{xhtml,mathml,charset="utf-8",p-width,pic-align}<br />
\Preamble{xhtml,charset="utf-8",p-width,pic-align}<br />
\Configure{VERSION}{}<br />
\Configure{DOCTYPE}{\HCode{\Hnewline}}<br />
\Configure{HTML}{\HCode{\Hnewline}}{\HCode{\Hnewline}}<br />
\Configure{@HEAD}{}<br />
63
\Configure{@HEAD}{\HCode{\Hnewline}}<br />
\Configure{@HEAD}{\HCode{\Hnewline}}<br />
\Configure{@HEAD}{\HCode{\Hnewl<br />
\DeclareMathSizes{12}{11}{7}{6}<br />
\DeclareMathSizes{10}{9}{5}{4}<br />
\DeclareMathSizes{11}{10}{6}{5}<br />
\begin{document}<br />
\Configure{$}{\PicMath}{\EndPicMath}{}<br />
\Configure{PicMath}{}{}{}{ class="math" align="absmiddle"}<br />
\Css{.block {<br />
padding: 1px 2px;<br />
border: 1px solid \#ccc;<br />
color: \#1c1c1c;<br />
%width: 200px;<br />
position: relative;<br />
margin: 1px auto;<br />
%box-shadow: 2px 2px 20px -5px \#bfbfbf;<br />
%-webkit-box-shadow: 2px 2px 20px -8px \#bfbfbf;<br />
%-moz-box-shadow: 2px 2px 20px -5px \#bfbfbf;<br />
border-radius: 0.1em;<br />
-moz-border-radius: 0.1em;<br />
-webkit-border-radius: 0.1em;<br />
%-moz-box-shadow: 3px 5px 14px #000000;<br />
%-webkit-box-shadow: 3px 5px 14px #000000;<br />
%box-shadow: 3px 5px 14px #000000;<br />
}}<br />
\Css{.sc{font-variant: small-caps;}}<br />
\Css{.bf{font-weight: bold;}}<br />
\Css{.tt,.verb,.fancyvrb{font-family: monospace; white-space: nowrap;<br />
color:\#000; font-size:100\%; background-color:\#fff;}}<br />
\Css{div.verbatim{font-family: monospace; white-space: nowrap;<br />
color:\#000; font-size:100\%; background-color:\#fff;}}<br />
\Css{div {float:auto;}}<br />
\Css{div.tabular {text-align: left; }}<br />
\Css{html{<br />
font-size: 100.0\%;<br />
}}<br />
\Css{body{margin-top: 1em;<br />
margin-bottom: 1em;<br />
width: 95\%;<br />
margin-left: auto;<br />
margin-right: auto;<br />
padding: 0em;<br />
color: \#444;<br />
font-family: arial, sans-serif;<br />
font-style: normal;<br />
font-size: 95.0\%;<br />
text-align:left;<br />
background: \#FFFFFF;}}<br />
\Css{ol {<br />
margin: 0px 2px 0 0;<br />
padding-top: 5px;<br />
padding-bottom: 5px;<br />
}}<br />
64
\Css{table {<br />
border-collapse: collapse;<br />
border-spacing: 0;}}<br />
\Css{h4,h5 ,h6,h3,h2{<br />
margin-bottom:5px;<br />
margin-top:5px;<br />
}}<br />
\Css{p.indent{ text-indent: 0em; }}<br />
\EndPreamble<br />
3.11 how to use tikz picture with math in htlatex?<br />
Assuming the latex file is foo2.tex<br />
\documentclass{article}<br />
\ifdefined\HCode<br />
\def\pgfsysdriver{pgfsys-tex4ht.def}<br />
\fi<br />
\usepackage{tikz,graphicx}<br />
%<br />
\usetikzlibrary{trees}<br />
\begin{document}<br />
\begin{tikzpicture}<br />
\node {root}<br />
child {node {$\frac{a}{b}$}};<br />
\end{tikzpicture}<br />
\end{document}<br />
The file is compiled as<br />
htlatex foo2.tex "<strong>my</strong>.cfg,charset=utf-8" " -cunihtf -utf8"<br />
where <strong>my</strong>.cfg is<br />
\Preamble{xhtml,mathml}<br />
\Configure{VERSION}{}<br />
\Configure{DOCTYPE}{\HCode{\Hnewline}}<br />
\Configure{HTML}{\HCode{\Hnewline}}{\HCode{\Hnewline}}<br />
\Configure{@HEAD}{}<br />
\Configure{@HEAD}{\HCode{\Hnewline}}<br />
\Configure{@HEAD}{\HCode{\Hnewline}}<br />
\Configure{@HEAD}{\HCode{\Hnewline}}<br />
\Configure{@HEAD}{\HCode{\Hnewline}}<br />
\Configure{@HEAD}{\HCode{\Hnewline<br />
.MathJax_MathML {text-indent: 0;}\Hnewline<br />
\Hnewline}}<br />
\begin{document}<br />
\EndPreamble<br />
65
Now the file foo2.html will display in the browser as<br />
notice: The math does not show up in the HTML. This is a known issue with using math+tickz+htlatex see<br />
http://tex.stackexchange.com/questions/124682/error-using-htlatex-with-tikz-forest-package-invalid-<br />
A better approach is this: Use separate latex file to make the diagram using tikz. Use st<strong>and</strong>alone class. Then<br />
generate the pdf file using pdflatex.<br />
Next convert the pdf to png, then using a separate latex file, include this image as png where it needs to go.<br />
This way htlatex <strong>and</strong> pdflatex will be able to process it ok. Here are the steps.<br />
1. make separate latex file for each diagram. For example diagram.tex<br />
\documentclass{st<strong>and</strong>alone}<br />
\usepackage{tikz<br />
}<br />
\usetikzlibrary{trees}<br />
\begin{document}<br />
\begin{tikzpicture}<br />
\node {root}<br />
child {node {$\frac{a}{b}$}};<br />
\end{tikzpicture}<br />
\end{document}<br />
2. compile the above file to pdf<br />
pdflatex diagram.tex<br />
3. convert the pdf file to png<br />
pdftoppm -png diagram.pdf > diagram.png<br />
or<br />
convert -density 200 -limit memory 64MB -limit map 128MB -colorspace RGB diagram.pdf diagram.png<br />
\begin{X311}<br />
%<br />
\item create the latex file which will use the above diagram, say \verb|main.tex|<br />
\begin{X311}<br />
\documentclass{article}<br />
\usepackage{graphicx}<br />
\begin{document}<br />
The following diagram was generated using tikz+latex in<br />
a separate file<br />
\includegraphics{diagram.png}<br />
<strong>and</strong> it is now in html<br />
\end{document}<br />
66
4. now make pdf <strong>and</strong> html files from the above<br />
pdflatex main.tex<br />
htlatex main.tex<br />
5. now the files main.pdf <strong>and</strong> main.html can be used.<br />
added 020814Some examples with math do work in htlatex. Here is a nice picture in tikz with math on it,<br />
that htlatex was able to process with no error. This is using texlive 2013 version.<br />
I did not have to use st<strong>and</strong>alone as workaround as in the above example to make the math show up. I am using<br />
the code as shown in this post http://tex.stackexchange.com/questions/158668/nice-scientific-pictures-showby<br />
Paul Gessler. Here are the steps to convert this to HTML using htlatex <strong>and</strong> the result obtained<br />
1. make the foo.tex file using your editor (copy from the above link)<br />
\documentclass{st<strong>and</strong>alone}<br />
\usepackage{tikz}<br />
% TikZ <strong>and</strong> PGF<br />
% Vector Styles<br />
\tikzstyle{load} = [ultra thick,-latex]<br />
\tikzstyle{stress} = [-latex]<br />
\tikzstyle{dim} = [latex-latex]<br />
\tikzstyle{axis} = [-latex,black!55]<br />
% Drawing Views<br />
\tikzstyle{isometric}=[x={(0.710cm,-0.410cm)},y={(0cm,0.820cm)},z={(-0.710cm,-0.410cm)}]<br />
\tikzstyle{dimetric} =[x={(0.935cm,-0.118cm)},y={(0cm,0.943cm)},z={(-0.354cm,-0.312cm)}]<br />
\tikzstyle{dimetric2}=[x={(0.935cm,-0.118cm)},z={(0cm,0.943cm)},y={(+0.354cm,+0.312cm)}]<br />
\tikzstyle{trimetric}=[x={(0.926cm,-0.207cm)},y={(0cm,0.837cm)},z={(-0.378cm,-0.507cm)}]<br />
\begin{document}<br />
\begin{tikzpicture}<br />
\node (origin) at (0,0) {}; % shift relative baseline<br />
\coordinate (O) at (2,3);<br />
\draw[fill=gray!10] (O) circle (1);<br />
\draw[fill=white] (O) circle (0.75) node[below,yshift=-1.125cm] {Signpost Cross Section};<br />
\draw[dim] (O) ++(-0.75,0) -- ++(1.5,0) node[midway,above] {$d_i$};<br />
\draw[dim] (O) ++(-1,1.25) -- ++(2,0) node[midway,above] {$d_o$};<br />
\foreach \x in {-1,1} {<br />
\draw (O) ++(\x,0.25) -- ++(0,1.25);<br />
}<br />
\end{tikzpicture}<br />
\begin{tikzpicture}[dimetric2]<br />
\coordinate (O) at (0,0,0);<br />
\draw[axis] (O) -- ++(6,0,0) node[right] {$x$};<br />
\draw[axis] (O) -- ++(0,6,0) node[above right] {$y$};<br />
\draw[axis] (O) -- ++(0,0,6) node[above] {$z$};<br />
\draw[fill=gray!50] (0,0,-0.5) circle (0.5);<br />
\fill[fill=gray!50] (-0.46,-0.2,-0.5) -- (0.46,0.2,-0.5) -- (0.46,0.2,0) -- (-0.46,-0.2,0) -- cycle;<br />
\draw[fill=gray!20] (O) circle (0.5);<br />
\draw (0.46,0.2,-0.5) -- ++(0,0,0.5) node[below right,pos=0.0] {Fixed Support};<br />
67
\draw (-0.46,-0.2,-0.5) -- ++(0,0,0.5);<br />
\draw[fill=gray!10] (O) circle (0.2);<br />
\fill[fill=gray!10] (-0.175,-0.1,0) -- (0.175,0.1,0) -- ++(0,0,4) -- (-0.175,-0.1,4) -- cycle;<br />
\draw (-0.175,-0.1,0) -- ++(0,0,4);<br />
\draw (0.175,0.1,0) -- ++(0,0,4) node[right,midway] {Steel Post};<br />
\draw (4,0,3.95) -- ++(0,0,-1);<br />
\foreach \z in {0.5,0.75,...,5} {<br />
\draw[-latex] (-2*\z/5-0.2,0,\z) -- (-0.2,0,\z);<br />
}<br />
\draw[load] (0,0,4) -- ++(0,0,-1.25) node[right,xshift=0.1cm] {$F_{z1}$};<br />
\draw[fill=gray!20] (-0.25,-0.25,5) -- (4,-0.25,5) -- (4,+0.25,5) -- (-0.25,+0.25,5) -- cycle;<br />
\draw[fill=gray!50] (+4.00,-0.25,4) -- (4,+0.25,4) -- (4,+0.25,5) -- (+4.00,-0.25,5) -- cycle;<br />
\draw[fill=gray!10] (-0.25,-0.25,4) -- (4,-0.25,4) -- (4,-0.25,5) -- (-0.25,-0.25,5) -- cycle;<br />
\draw (4.05,0,4) -- ++(1,0,0);<br />
\draw (4.05,0,5) -- ++(1,0,0);<br />
\draw[dim] (4.5,0,0) -- ++(0,0,4) node[midway,right] {$h_1$};<br />
\draw[dim] (4.5,0,4) -- ++(0,0,1) node[midway,right] {$h_2$};<br />
\draw[dim] (0,0,3.4) -- ++(4,0,0) node[midway,below] {$b_2$};<br />
\coordinate (P) at (2,-0.25,4.5);<br />
\draw (P) -- ++(0,0,0.25);<br />
\draw (P) -- ++(0.25,0,0);<br />
\draw[dim] (2.125,-0.25,4.5) -- ++(0,0,-0.5) node[midway,right] {$z_1$};<br />
\draw[dim] (2,-0.25,4.625) -- ++(-2,0,0) node[midway,below] {$x_1$};<br />
\draw[load] (2,-2.45,4.5) -- ++(0,2.2,0) node[pos=0.0,right,xshift=0.08cm] {$F_{y1}$};<br />
\draw[axis,dashed,-] (O) -- (0,0,5);<br />
\draw (0,0,5.5) -- ++(4,0,0) node[midway,above] {$w_{z}$};<br />
\foreach \x in {0,0.25,...,4} {<br />
\draw[-latex] (\x,0,5.5) -- ++(0,0,-0.5);<br />
}<br />
\draw (-0.2,0,0) -- ++(-2,0,5) node[above,xshift=0.5cm] {$w_{x}=\frac{z}{h_1+h_2} w_0$};<br />
\end{tikzpicture} %<br />
\end{document}<br />
2. compile using this his comm<strong>and</strong><br />
htlatex foo.tex "<strong>my</strong>.cfg,htm,charset=utf-8" " -cunihtf -utf8"<br />
it is important to use <strong>my</strong>.cfg because without it, you’ll get an error. The cfg file is the one shown above.<br />
Just copy that <strong>and</strong> put it in the same location as the tex file.<br />
3. here is the HTML generated by the above. HTML should display as<br />
68
3.12 how to change font for HTML math when using tex4ht<br />
To increase fonts in tex4ht<br />
if using 12 pt in document class, add this line after the \document section in the .cfg file<br />
\DeclareMathSizes{12}{14}{10}{8}<br />
\DeclareMathSizes{12}{16}{12}{10}<br />
%----> for {\Large}<br />
(note, \Large in a 12pt article is 17.28pt<br />
The size of math’s font changes also with \Large<br />
To make Math look better, see this<br />
http://tex.stackexchange.com/questions/43772/latex-xhtml-with-tex4ht-bad-quality-images-of-equat<br />
3.13 tex4ht options<br />
Example The comm<strong>and</strong> htlatex <strong>my</strong>file "<strong>my</strong>cfg,2" requests the compilation of a file named <strong>my</strong>file.tex, in the<br />
presence of a configuration file named <strong>my</strong>cfg.cfg. The configuration file might have the following content.<br />
\Preamble{html}<br />
\begin{document}<br />
\Css{body { color : red; }}<br />
\EndPreamble<br />
69
3.14 How to use tex4ht with pdf <strong>and</strong> latex in same document?<br />
use this<br />
\documentclass[titlepage]{article}%<br />
\usepackage{ifpdf}<br />
\usepackage{hyperref}<br />
\begin{document}<br />
\ifpdf<br />
\else<br />
\fi<br />
I am in pdf mode %<br />
pdflatex code,will show up in pdf only<br />
% latex code, check if htlatex is loaded <strong>and</strong> use link only then<br />
\ifdefined\HCode<br />
\href{../../index.htm}{home} % show up in HTML only<br />
\else<br />
I am in latex mode % shows up in dvi <strong>and</strong> .ps only but not in html<br />
\fi<br />
\end{document}<br />
3.15 <strong>my</strong> setup for using htlatex on linux, installing make4ht<br />
1. typed kpsewhich -var-value TEXMFHOME<br />
to find where TEX will look for files.<br />
2. edits <strong>my</strong> .basrc <strong>and</strong> added this<br />
export TEXMFHOME=$HOME/texmf<br />
export PATH=$HOME/texmf/scripts/lu/make4ht-master:$PATH<br />
3. I use now make4ht to build latex to html (new builder in place of htlatex). Downloaded it from<br />
https://github.com/michal-h21/make4ht<br />
<strong>and</strong> extracted the zip file below $TEXHMF/scripts/lua folder.<br />
>unzip make4ht-master.zip<br />
Archive: make4ht-master.zip<br />
5417507d156b01aded3371efc2d5b71074bb0afe<br />
creating: make4ht-master/<br />
inflating: make4ht-master/README.md<br />
inflating: make4ht-master/lapp-mk4.lua<br />
inflating: make4ht-master/make4ht<br />
inflating: make4ht-master/make4ht-lib.lua<br />
inflating: make4ht-master/mkparams.lua<br />
inflating: make4ht-master/mkutils.lua<br />
>cd make4ht-master/<br />
So the tree looks like this<br />
70
cd $HOME<br />
tree texmf<br />
texmf<br />
|___+ scripts<br />
|___lua<br />
|___make4ht-master<br />
|-- lapp-mk4.lua<br />
|-- make4ht<br />
|-- make4ht-lib.lua<br />
|-- mkparams.lua<br />
|-- mkutils.lua<br />
|-- README.md<br />
4. make sure you have convert, if not do sudo apt-get install imagemagick<br />
5. make sure you have lua, if not do sudo apt-get install lua5.2 (may be not needed)<br />
6. the comm<strong>and</strong> to build latex to html is<br />
make4ht foo.tex "nma.cfg,htm,charset=utf-8" " -cunihtf -utf8"<br />
"-dfoo"<br />
where nma.cfg is currently here nma.cfg<br />
7. in the latex files, I include one file in the preamble which has all the packages to use. Here it is<br />
commonlatex.tex<br />
8. example latex file will then be as this<br />
\documentclass[]{article}<br />
\input{commonlatex}<br />
\begin{document}<br />
\end{document}<br />
9. when first installing, need to fix tex4ht.env so that .png images are better quality. See http://tex.<br />
stackexchange.com/questions/43772/latex-xhtml-with-tex4ht-bad-quality-images-of-equations<br />
Use the by erasing the space before it <strong>and</strong> add space before the section.<br />
71
locate tex4ht.env<br />
/usr/local/texlive/2013/texmf-dist/doc/latex/latex-web-companion/ch4/tex4ht.env<br />
/usr/local/texlive/2013/texmf-dist/tex4ht/base/unix/tex4ht.env<br />
/usr/local/texlive/2013/texmf-dist/tex4ht/base/win32/tex4ht.env<br />
>cd /usr/local/texlive/2013/texmf-dist/tex4ht/base/unix<br />
>sudo cp tex4ht.env tex4ht.env.SAVED<br />
>sudo vi tex4ht.env<br />
><br />
>diff tex4ht.env tex4ht.env.SAVED<br />
153c153<br />
< <br />
---<br />
> <br />
170c170<br />
< <br />
---<br />
> <br />
183c183<br />
< <br />
---<br />
> <br />
185c185<br />
< Gdvipng -T tight -x 1400 -D 96 -bg Transparent -pp %%2:%%2 %%1 -o %%3<br />
---<br />
> Gdvipng -T tight -x 1400 -D 72 -bg Transparent -pp %%2:%%2 %%1 -o %%3<br />
187c187<br />
< Gdvipng -T tight -x 1400 -D 96 -bg Transparent -gif -pp %%2:%%2 %%1 -o %%3<br />
---<br />
> Gdvipng -T tight -x 1400 -D 72 -bg Transparent -gif -pp %%2:%%2 %%1 -o %%3<br />
192c192<br />
< <br />
---<br />
> <br />
><br />
3.16 how to insert HTML code inside the body of a latex document?<br />
Here is an example to insert only ONE HTML line<br />
\documentclass{article}%<br />
\input{commonlatex}<br />
\begin{document}<br />
\ifdefined\HCode<br />
\Css{body{width:70\%;}}<br />
\fi<br />
%this will be inserted in the HTML, only when using htlatex<br />
\end{document}<br />
To insert large amount of HTML code, use Radhakrishnan CV method:<br />
72
\documentclass{article}<br />
\begin{document}<br />
\ScriptEnv{html}<br />
{\NoFonts\hfill\break}<br />
{\EndNoFonts}<br />
\begin{html}<br />
This is HTML head 2 <br />
more HTML code<br />
\end{html}<br />
\end{document}<br />
reference: http://tug.org/pipermail/tex4ht/2013q3/000823.html<br />
3.17 How to control page margins in html<br />
To control page margins in html, can do it in html or css.<br />
HTML method (add code the BODY tag of your web page source code):<br />
<br />
CSS method (add code to the BODY tag of your external style <strong>sheet</strong>):<br />
body {margin-top: 10px;<br />
margin-right: 10px;<br />
margin-bottom: 10px;<br />
margin-left: 10px;}<br />
To change margins in html output of htlatex, use the following .cfg file for htlatex<br />
\Preamble{html}<br />
\begin{document}<br />
\Css {body {margin-top: 10px;<br />
margin-right: 10px;<br />
margin-bottom: 10px;<br />
margin-left: 50px;<br />
}<br />
}<br />
\EndPreamble<br />
<strong>and</strong> then type htlatex foo.tex "foo.cfg"<br />
3.18 tex4ht <strong>and</strong> table of content issues<br />
see http://tex.stackexchange.com/questions/44541/tex4ht-limit-toc<br />
I use this comm<strong>and</strong> to get table of content to be full in tex4ht<br />
73
htlatex index.tex "html,7" "" "" "\def\directbuild{}"<br />
To make table of contents in HTML have more spaces <strong>and</strong> look better, use this in the .cfg file:<br />
\begin{document}<br />
\ConfigureToc{section}<br />
{\tocNesting{1}\HCode{}}{ }{}{ }<br />
\ConfigureToc{subsection}<br />
{\tocNesting{2}\HCode{}}{ }{}{ }<br />
\ConfigureToc{subsubsection}<br />
{\tocNesting{3}\HCode{}}{ }{}{ }<br />
\Configure{tableofcontents}<br />
{} {\tocNesting{0}} {} {} {}<br />
\newcount\c<br />
\def\tocNesting#1{%<br />
\exp<strong>and</strong>after\ifx \csname level#1\endcsname\relax<br />
\ifnum #1>0 \HCode{}\fi<br />
\exp<strong>and</strong>after\def \csname level#1\endcsname{\HCode{}}<br />
\fi<br />
\c=#1 \advance\c by 1<br />
\loop<br />
\csname level\the\c\endcsname<br />
\exp<strong>and</strong>after\let \csname level\the\c\endcsname\relax<br />
\advance\c by 1<br />
\ifnum \c
\Preamble{ext=htm,pic-align}<br />
\begin{document}<br />
\EndPreamble<br />
\catcode`\:=11 \catcode`\@=11<br />
\Configure{HtmlPar}<br />
{\EndP\HCode{%<br />
}}<br />
{\EndP\HCode{%<br />
}}<br />
{{\Tg}}<br />
{{\Tg}}%<br />
\renewenvironment{multicols}[1]{\IgnorePar\EndP%<br />
\HCode{}<br />
\exp<strong>and</strong>after\ifx\csname .newspaper#1\endcsname\relax%<br />
\Css{.newspaper#1 p:first-child { margin-top: 0em; }}<br />
\Css{.newspaper#1 {<br />
-moz-column-count:#1; /* Firefox */<br />
-webkit-column-count:#1; /* Safari <strong>and</strong> Chrome */<br />
column-count:#1;<br />
-moz-column-gap:10px; /* Firefox */<br />
-webkit-column-gap:10px; /* Safari <strong>and</strong> Chrome */<br />
column-gap:10px;<br />
-moz-column-rule:1px outset \#F8F8F8 ; /* Firefox */<br />
-webkit-column-rule:1px outset \#000000; /* Safari <strong>and</strong> Chrome */<br />
column-rule:1px outset \#000000;<br />
}}<br />
\exp<strong>and</strong>after\gdef\csname .newspaper#1\endcsname{1}%<br />
\fi%<br />
\ShowPar\par}<br />
{\EndP\HCode{}}<br />
\ConfigureEnv{multicols}<br />
{\par\IgnorePar\EndP%<br />
\gHAdvance\MultiCols by 1\relax}<br />
{\ifvmode\IgnorePar\fi\EndP}<br />
{}{}<br />
\endinput<br />
<strong>and</strong> using this <strong>Latex</strong> file as an example foo.tex<br />
75
\documentclass{article}%<br />
\usepackage{lipsum}<br />
\usepackage{multicol}<br />
\setlength{\columnsep}{20pt}<br />
\setlength{\columnseprule}{0.01pt}<br />
\begin{document}<br />
\begin{multicols}{2}<br />
\begin{enumerate}<br />
\item A<br />
\item B<br />
\end{enumerate}<br />
\lipsum[1-10]<br />
\end{multicols}<br />
\end{document}<br />
<strong>and</strong> using this comm<strong>and</strong> htlatex foo.tex "<strong>my</strong>.cfg" then htlatex will generate multiple columns.<br />
Thanks goes to Jagath AR for help in greatly improving the configuration file.<br />
3.20 How to use images with htlatex <strong>and</strong> pdflatex<br />
This is what I do. Here is an template example<br />
\documentclass[12pt,notitlepage]{article}<br />
\usepackage{graphicx}<br />
\begin{document}<br />
\includegraphics[scale=0.4]{img}<br />
\end{document}<br />
I have img.png to start with, since most apps I use can generate .png images. But since htlatex wants .eps, I<br />
convert the png to eps like this<br />
convert img.png eps3:img.eps<br />
Make sure to use level3 eps to reduce the size. Note, no space between eps3: <strong>and</strong> the target file name next<br />
to it. Have to use eps for htlatex, else it will not scale the png file. htlatex can read png files, but png files have<br />
no bounding boxes, so can’t change the size if needed as in the above example.<br />
What if you do not have png image as the original? <strong>and</strong> only have eps? Then now pdflatex is not happy <strong>and</strong><br />
htlatex is happy. Ok, no problem, use this package as below. So this solution below will work for all conditions<br />
\documentclass[12pt,notitlepage]{article}<br />
\usepackage{epstopdf}%<br />
\epstopdfsetup{update}<br />
\usepackage{graphicx}<br />
\begin{document}<br />
\includegraphics[scale=0.4]{img}<br />
\end{document}<br />
76
So what will happen now, is if the file was img.eps, then pdflatex will convert it to pdf automatically <strong>and</strong><br />
use the img.pdf file for the graphics. htlatex see the eps file <strong>and</strong> is happy.<br />
So rule of thumb: If it was img.png, convert to eps first to make htlatex happy. If it was .eps, then include<br />
the above packages to make pdflatex happy. And always leave the extension off the image name in the latex file<br />
as above.<br />
It will be better to generate .eps image to start with from the app which created the images if possible, so do<br />
not have to remember to convert them each time to eps, But if not, do the above.<br />
3.21 adding white space<br />
tex4ht does not support \quad or \qquad out of the box, as it generates normal spaces in HTML for these which<br />
will be collapsed to single space. Replace this by something such as \hspace{5mm}<br />
Another work around is found here<br />
http://comments.gmane.org/gmane.comp.tex.tex4ht/86<br />
3.22 Avoid vref<br />
Watch out. Do not use \vref, <strong>and</strong> replace with \ref. Using \vref caused me many hours trying to find out<br />
why the document was cut off in HTML. <strong>Tex4ht</strong> does not work with \vref <strong>and</strong> will cause many problems. As<br />
of texlive 2014<br />
3.23 Where are the 4ht files located?<br />
They are in /usr/local/texlive/2014/texmf-dist/tex/generic/tex4ht/*.4ht<br />
3.24 Where is tex4ht.env located ?<br />
This file is in /usr/local/texlive/2014/texmf-dist/tex4ht/base/unix/tex4ht.env<br />
3.25 Patch for report style<br />
added August 10, 2014<br />
There is a bug in tex4ht as of texlive 2014. When using report style the table of content shows section even<br />
if told not to.<br />
Use the patch shown in this link. Edit your report.4ht by the patch shown<br />
here<br />
The report.4ht file is located in<br />
/usr/local/texlive/2014/texmf-dist/tex/generic/tex4ht/report.4ht<br />
This is until the fix is added to texlive.<br />
Note: The above only work if the HTML page is not split. If you are splitting it, then the bug is stil there<br />
<strong>and</strong> not fixed.<br />
3.26 Watch out for Verbatim frame not showing in Chrome<br />
added August 14, 2014<br />
To add frame around Verbatim, the framerule must be used to force the frame thickness to be at least<br />
0.8pt else it will not show in Chrome. (Thanks for Michal Hoftich for finding why the frame was not showing in<br />
Chrome).<br />
So to use a frame <strong>and</strong> having it show in all three major browsers, use something as follows (until Chrome<br />
can h<strong>and</strong>le all rule thickness.<br />
77
\documentclass[12pt]{article}<br />
\usepackage{fancyvrb}<br />
\begin{document}<br />
\begin{Verbatim}[frame=single,framerule=.8pt]<br />
text<br />
\end{Verbatim}<br />
\end{document}<br />
3.27 How to use tex4ht with SVG for math <strong>and</strong> images<br />
This is the best configuration to use. It makes the math use .svg for images instead of png, <strong>and</strong> also supports an<br />
includes pictures as svg.<br />
First thing is to edit tex4ht.env<br />
sudo vi /usr/local/texlive/2014/texmf-dist/tex4ht/base/unix/tex4ht.env<br />
<br />
G.png<br />
Gdvipng -T tight -x 1400 -D 110 -bg Transparent -pp %%2:%%2 %%1 -o %%3<br />
G.gif<br />
Gdvipng -T tight -x 1400 -D 110 -bg Transparent -gif -pp %%2:%%2 %%1 -o %%3<br />
G.<br />
%echo "dbg: got to dvi to png via dvipng"<br />
Gdvipng -T tight -x 1400 -D 72 -bg Transparent -pp %%2:%%2 %%1 -o %%3<br />
%--------- let's not use convert, to simplify mactex.<br />
% G.<br />
% Gdvips -Ppdf -mode ibmvga -D 110 -f %%1 -pp %%2 > zz%%4.ps<br />
% Gconvert -crop 0x0 -density 110x110 -transparent '#FFFFFF' zz%%4.ps %%3<br />
% Grm zz%%4.ps<br />
G.svg<br />
Gdvisvgm -n -p %%2 -c 1.2,1.2 -s %%1 > %%3<br />
<br />
Add in these 2 lines above.<br />
There were not there before<br />
The next step is to edit your .cfg <strong>and</strong> make it like this<br />
\Preamble{ext=htm,charset="utf-8",p-width,pic-align}<br />
\Configure{VERSION}{}<br />
\Configure{DOCTYPE}{\HCode{\Hnewline}}<br />
\Configure{HTML}{\HCode{\Hnewline}}{\HCode{\Hnewline}}<br />
78
\Configure{@HEAD}{}<br />
\Configure{@HEAD}{\HCode{\Hnewline}}<br />
\Configure{@HEAD}{\HCode{\Hnewline}}<br />
\Configure{@HEAD}{\HCode{\Hnewline}}<br />
\Configure{Picture}{.svg}<br />
\makeatletter<br />
\Configure{graphics*}<br />
{svg}<br />
{<br />
{\Configure{Needs}{File: \Gin@base.svg}\Needs{}}<br />
\Picture[\csname a:GraphicsAlt\endcsname]{\csname Gin@base\endcsname.svg<br />
\csname a:Gin-dim\endcsname}<br />
}<br />
%<br />
\makeatletter<br />
\Configure{graphics*}<br />
{eps}%<br />
{\Needs{"convert \csname Gin@base\endcsname.eps<br />
\csname Gin@base\endcsname.png"}%<br />
\Picture[pict]{\csname Gin@base\endcsname.png}%<br />
\special{t4ht+@File: \csname Gin@base\endcsname.png}<br />
}<br />
\begin{document}<br />
\EndPreamble<br />
Now compile your .tex file like this (where nma.cfg below is your tex4eht .cfg file.)<br />
make4ht index.tex "nma,htm,pic-align,charset=utf-8,notoc*" " -cunihtf -utf8"<br />
Make sure to inlcude \usepackage{graphicx} in your latex document! else you’ll get this error<br />
(/usr/local/texlive/2014/texmf-dist/tex/generic/tex4ht/html4-math.4ht))<br />
l.34 --- TeX4ht warning --- \Configure{graphics*}? ---<br />
! LaTeX Error: Missing \begin{document} in `nma.cfg'.<br />
Thanks goes to Michal-h21 for help in making the above instructions.<br />
3.28 converting cropped pdf page to svg<br />
After cropping part of pdf page <strong>and</strong> generating foo.pdf file, which is one page only, to convert this to svg file to<br />
include with tex4ht, do this<br />
pdf2svg p.pdf p.svg<br />
I found this works better than<br />
inkscape --without-gui --file=p.pdf --export-plain-svg=p.svg<br />
This can be used to do the conversion of all cropped pdf files in the folder<br />
79
#!/bin/bash<br />
for file in *.pdf; do<br />
filename=${file%.*}<br />
pdf2svg "$filename.pdf" "$filename.svg"<br />
done<br />
3.29 How to change image size of svg for html generation?<br />
I can’t find out why \includegraphics[scale=0.5]{pic.svg} does not work with tex4ht as it does with pdf.<br />
So to change the svg image size, simply edit the svg file with text editor, <strong>and</strong> change the first line that says<br />
something like width="500pt" height="500pt" to just with="250px" for example, <strong>and</strong> save the .svg file.<br />
3.30 How to include animated gif file in the HTML?<br />
add this in <strong>Latex</strong> file, <strong>and</strong> use normal HTML coding in there. This will only show up in the HTML <strong>and</strong> not<br />
affect the pdflatex run<br />
\ifdefined\HCode<br />
\HCode{<br />
3.33 To make .bbx files<br />
use ebb -x foo.pdf if you get an error like this<br />
* WARNING ** Streams with DecodeParams not supported.<br />
This convert the pdf to ps, then convert it back to pdf, it should now work<br />
pdf2ps foo.pdf foo.ps<br />
ps2pdf foo.ps foo.pdf<br />
ebb -x foo.pdf<br />
3.34 How to used fixed width table?<br />
tex4ht does not support fixed width using the m{} option in tabular. So this will not work<br />
\begin{tabular}{|m{2in}|m{2in}|m{2in}|}\hline<br />
The width is ignored, even if one compiles with p-width option. One way is to change m to p. Another<br />
option is to look at this post<br />
3.35 tex4ht references<br />
1. CVR web site, has lots of tex4ht information http://cvr.cc/?p=504<br />
2. main tex4ht page http://tug.org/applications/tex4ht/mn.html<br />
3. http://tug.org/applications/tex4ht/mn3.html<br />
4. http://www.cvr.cc/?p=362<br />
5. configure comm<strong>and</strong><br />
6. tex4ht options by CVR http://www.cvr.cc/?p=504<br />
7. http://tug.org/applications/tex4ht/mn14.html#mn14-1<br />
8. http://newsgroups.derkeiler.com/Archive/Comp/comp.text.tex/2010-07/msg00585.html<br />
9. thread at http://tug.org/pipermail/tex4ht/2013q3/000856.html<br />
10. commits to tex4ht source tree http://tug.org/pipermail/tex4ht-commits/<br />
11. Michal-h21 tex4ht tutorial https://github.com/michal-h21/helpers4ht/wiki/tex4ht-tutorial<br />
12. <strong>Tex4ht</strong> for SW http://facweb.knowlton.ohio-state.edu/pviton/support/swpht.html#swphtpa4.html<br />
13. http://tex.stackexchange.com/questions/69063/tex4ht-includegraphicspage-10foo-pdf shows how<br />
to include pdf pages in HTML. But I could not get it to work in Tl 2015.<br />
81
Chapter 4<br />
Tikz notes<br />
4.1 Simple tikz examples<br />
Simple tikz examples<br />
4.2 Generate SVG from tikz drawing<br />
see page 117 in tikz manual 3.0<br />
4.3 misc. notes<br />
1. tikz uses cm by default. a st<strong>and</strong>ard page in the US (letter) is 21.5 cm wide <strong>and</strong> 27.8 cm hight.<br />
82
4.4 How to inlcude pdf file using tikz picture<br />
\documentclass[11pt]{report}<br />
\usepackage{amsmath,mathtools}<br />
\usepackage{graphicx}<br />
\usepackage{pdfpages}<br />
\usepackage{tikz}<br />
\usepackage{pgffor}<br />
\begin{document}<br />
\pdfximage{file2.pdf}<br />
\foreach \index in {1,...,\the\pdflastximagepages}<br />
{<br />
\begin{tikzpicture}[remember picture]<br />
\node[inner sep=0pt] at (current page.center)<br />
{\includegraphics[page=\index]{file2.pdf}};<br />
\end{tikzpicture}<br />
}<br />
\end{document}<br />
4.5 Tikz documentation links<br />
1. tikz manual http://www.ctan.org/tex-archive/graphics/pgf/base/doc/generic/pgf/<br />
2. tikz-qtree http://www.ctan.org/pkg/tikz-qtree<br />
3. tikz-forest http://www.ctan.org/pkg/forest<br />
4. example qtree http://www.wikiprog.org/wiki/LaTeX:Arbre<br />
5. left <strong>and</strong> right trees http://tex.stackexchange.com/questions/44970/how-to-specify-left-<strong>and</strong>-right-node-<br />
6. simple example of qtree with node http://tex.stackexchange.com/questions/43924/is-there-a-library-for<br />
4.6 making loops<br />
from http://pgf-<strong>and</strong>-tikz.10981.n7.nabble.com/Draw-a-shape-use-it-many-times-td4323.html<br />
83
\documentclass{article}<br />
\input{commonlatex}<br />
\usepackage{tikz}<br />
\newcomm<strong>and</strong>{\MyChair}{<br />
\draw[fill=blue!15,thick] plot coordinates<br />
{(-2,-1)(-2,1)(-1,2)(2,3)(3,2)(3,-2)(2,-3)(-1,-2)};<br />
\draw[fill=blue!15,thick] plot coordinates<br />
{(-2.5,-1)(-2.5,1)(-3.25,2)(-3.25,-2)};<br />
}<br />
\begin{document}<br />
\begin{tikzpicture} [scale=0.125,smooth cycle]<br />
\foreach \row in {1,2,...,10}<br />
{<br />
\foreach \col in {1,2,...,4}<br />
{<br />
\begin{scope}[xshift=\row cm,yshift=\col 10 cm]<br />
\MyChair<br />
\end{scope}<br />
}<br />
}<br />
\end{tikzpicture}<br />
\end{document}<br />
4.7 How to make aligned math inside a node?<br />
see http://tex.stackexchange.com/questions/1342/aligned-equations-inside-of-tikz-node<br />
4.8 trees with tikz?<br />
1. examples http://mvngu.wordpress.com/2011/03/31/typeset-trees-using-tikzpgf/<br />
4.9 more tikz examples<br />
84
\documentclass{st<strong>and</strong>alone}<br />
\usepackage{tikz}<br />
\usepackage{tikz-qtree}<br />
\begin{document}<br />
\tikzset{font=\small}<br />
\begin{tikzpicture}<br />
\Tree [.A<br />
[.\node(B){B}; ]<br />
[.\node(C){C}; ]<br />
]<br />
\begin{scope}[xshift=0in,yshift=-2cm]<br />
\Tree [.\node(Dx){D};<br />
[.E ]<br />
[.F ]<br />
]<br />
\end{scope}<br />
PDF<br />
\draw[-] (B) -- (Dx);<br />
\draw[-] (C) -- (Dx);<br />
\end{tikzpicture}<br />
\end{document}<br />
\documentclass{st<strong>and</strong>alone}<br />
\usepackage{tikz}<br />
\begin{document}<br />
\begin{tikzpicture}<br />
\draw [] (3,0) -- (0,0) -- (0,3);<br />
\draw (0,0) rectangle (3,3);<br />
\draw [fill=lightgray] (0,2.8)--(0,0)--(2.8,0);<br />
\node [font=\Huge] at (2,2) {$0$};<br />
0<br />
\end{tikzpicture}<br />
\end{document}<br />
85
\documentclass{st<strong>and</strong>alone}<br />
\usepackage{tikz}<br />
\begin{document}<br />
\begin{tikzpicture}<br />
\draw [very thin] (1,1) rectangle (2,2);<br />
\draw [] (3,0) -- (0,0) -- (0,3);<br />
\end{tikzpicture}<br />
\end{document}<br />
\documentclass{st<strong>and</strong>alone}<br />
\usepackage{tikz}<br />
\begin{document}<br />
\begin{tikzpicture}<br />
\draw [] (3,0) -- (0,0) -- (0,3);<br />
\draw [very thin] (1,1) rectangle (2,2);<br />
\draw [fill=lightgray] (1,1)--(1.5,1)--(1,1.5);<br />
\end{tikzpicture}<br />
\end{document}<br />
\documentclass{st<strong>and</strong>alone}<br />
\usepackage{tikz}<br />
\begin{document}<br />
\begin{tikzpicture}<br />
\def\x{0}%<br />
\def\y{0}%<br />
\draw [very thin] (\x,\y) rectangle (\x+2,\x+2);<br />
\draw [fill=lightgray] (\x,\y)--(\x+1.75,\y+0)--(\x+0,\y+1.75);<br />
\node[font=\Huge] at (\x+1.25,\y+1.25) {$0$};<br />
\node at (\x+2.25,\y+1) {$+$};<br />
A<br />
=<br />
L<br />
0<br />
+<br />
0<br />
\end{tikzpicture}<br />
\end{document}<br />
86
\documentclass{st<strong>and</strong>alone}<br />
\usepackage{tikz}<br />
\begin{document}<br />
\begin{tikzpicture}<br />
\path[draw] (0,0) rectangle (2,1);<br />
\end{tikzpicture}<br />
\end{document}<br />
PDF<br />
\documentclass{st<strong>and</strong>alone}<br />
\usepackage{tikz}<br />
\begin{document}<br />
\begin{tikzpicture}<br />
\path[fill,draw] (0,0) rectangle (2,1);<br />
\end{tikzpicture}<br />
\end{document}<br />
PDF<br />
\documentclass{st<strong>and</strong>alone}<br />
\usepackage{tikz}<br />
\begin{document}<br />
\begin{tikzpicture}<br />
\path[shade,draw] (0,0) rectangle (2,1);<br />
\end{tikzpicture}<br />
\end{document}<br />
PDF<br />
\documentclass{st<strong>and</strong>alone}<br />
\usepackage{tikz}<br />
\begin{document}<br />
\begin{tikzpicture}<br />
\path[shade,top color=yellow!80!black,<br />
bottom color=white,draw] (0,0) rectangle (2,1);<br />
\end{tikzpicture}<br />
\end{document}<br />
PDF<br />
87
\documentclass{st<strong>and</strong>alone}<br />
\usepackage{tikz}<br />
\usetikzlibrary{trees}<br />
\begin{document}<br />
\begin{tikzpicture}<br />
\node {A}<br />
[edge from parent fork down]<br />
child {node {B}}<br />
child {node {C}}<br />
;<br />
\end{tikzpicture}<br />
\end{document}<br />
PDF<br />
\documentclass{st<strong>and</strong>alone}<br />
\usepackage{tikz}<br />
\usetikzlibrary{trees}<br />
\begin{document}<br />
\tikzset{every node/.style={draw,<br />
rectangle,<br />
rounded corners<br />
}<br />
}<br />
\begin{tikzpicture}<br />
\node {A}<br />
[edge from parent fork down]<br />
child {node {B}}<br />
child {node {C}}<br />
;<br />
\end{tikzpicture}<br />
\end{document}<br />
PDF<br />
88
\documentclass{st<strong>and</strong>alone}<br />
\usepackage{tikz}<br />
\usetikzlibrary{trees}<br />
\begin{document}<br />
\tikzset{level 1/.style={sibling distance=2cm},<br />
level 2/.style={sibling distance=1cm}}<br />
\begin{tikzpicture}<br />
\node {A}<br />
[edge from parent fork down]<br />
child {node {B}<br />
child {node {B1}}<br />
}<br />
child {node {C}<br />
child {node {C1}}<br />
child {node {C2}}<br />
child {node {C3}}<br />
}<br />
;<br />
\end{tikzpicture}<br />
\end{document}<br />
PDF<br />
89
see http://tex.stackexchange.com/questions/124862/<br />
how-to-draw-a-diagram-that-forks-out-then-joins-in-the-middle-then-forks-out-ag<br />
%written by Qrrbrbirlbel at Tex stackexchange<br />
\documentclass[tikz]{st<strong>and</strong>alone}<br />
\usetikzlibrary{positioning-plus,paths.ortho}<br />
\tikzset{<br />
parents/.style 2 args={<br />
@parents/.style={insert path={edge[edge from children path] (#1-##1)}},<br />
@parents/.list={#2}},<br />
edge from parent path={<br />
(\tikzparentnode\tikzparentanchor) |-| (\tikzchildnode\tikzchildanchor)},<br />
edge from children path/.style={<br />
to path={<br />
(\tikztostart\tikzchildanchor) |-| (\tikztotarget\tikzparentanchor) \tikztonodes}}<br />
}<br />
\begin{document}<br />
\begin{tikzpicture}[<br />
node distance=\tikzleveldistance <strong>and</strong> \tikzsiblingdistance,<br />
on grid,<br />
text depth=+0pt,<br />
hvvh=from center<br />
]<br />
\node (A) {A}<br />
child {node {B}}<br />
child {node {C}};<br />
\node[below=2:of A] (E) {E} [parents={A}{1,2}]<br />
[sibling distance/.exp<strong>and</strong>ed=2*\the\tikzsiblingdistance]<br />
child {node {F}<br />
child {coordinate<br />
[anchor=center,sibling distance/.exp<strong>and</strong>ed=.5*\the\tikzsiblingdistance]<br />
child {node {N}}<br />
child {node {Q}}<br />
}<br />
child {node {R}}<br />
}<br />
child {node {G}}<br />
child {node {H}};<br />
\node[below=of (E-2)(E-3)] (L) {L} [parents={E}{2,3}]<br />
child {node {M}}<br />
child {node {N}}<br />
child {node {K}}<br />
;<br />
\end{tikzpicture}<br />
\end{document}<br />
PDF<br />
90
Chapter 5<br />
Using Scientific word<br />
5.1 location of external package in Scientific word<br />
if using SW on windows <strong>and</strong> want to add a package not included by SW, then first download it from CTAN <strong>and</strong><br />
put the .sty file here<br />
C:\swp55\TCITeX\TeX\LaTeX\contrib<br />
<strong>and</strong> from inside SW, follow instructions as given here<br />
http://www.mackichan.com/index.html?techtalk/455.htm mainFrame<br />
or you can simply edit the preamble <strong>and</strong> add \usepackage{packageName}<br />
5.2 inputting <strong>Latex</strong> files into SW document<br />
This is tricky. But just do this <strong>and</strong> do not follow any other instructions given in other places, they are all very<br />
confusing. Here is the deal.<br />
When you write input{file.txt} in SW document main.tex, then it will not find file.txt becuase SW<br />
process main.tex is some other temporary folder. The easiest way to do this, is to make main.tex as a master<br />
document, then it will use the current folder.<br />
To make main.tex as master document, create a file called empty.tex in the same folder <strong>and</strong> type in it exactly<br />
the following (using a text editor)<br />
%TCIDATA{LaTeXparent=0,0,main.tex}<br />
That is all, the one line above. Now go back to main.tex, <strong>and</strong> open that in a text editor (not in SW) <strong>and</strong><br />
go to the end of the file just before end of the document, <strong>and</strong> add these lines, including the comments! this is<br />
important.<br />
91
%TCIMACRO{\QSubDoc{Include empty}{\input{empty.tex}}}%<br />
%BeginExpansion<br />
\input{empty.tex}%<br />
%EndExpansion<br />
Now, close everything. Now main.tex is a master document. Now you can write \input{file.txt} in<br />
master.tex <strong>and</strong> SW will now inlcude the file.txt (assuming of course the file is in the same folder as master.tex).<br />
So, for each latex file that is meant to include input files, we must have an empty.tex file there, <strong>and</strong> add it at<br />
the bottom of the document itself as shown above.<br />
5.3 Adding <strong>Latex</strong> code into SW so that SW do not touch it<br />
sometimes I have a need to insert <strong>Latex</strong> code into the .tex file while using SW, but do not want SW to look at<br />
this code. This is code used by htlatex for example. One way to do that is by using encapsulated tex field. This<br />
field can be added either from the SW GUI, or directly in source code. To add it in source, let assume we want<br />
to add \ifdefined\HCode\href{../../index.htm}{up} in the <strong>Latex</strong> source file. Then write<br />
%<br />
%TCIMACRO{\TeXButton{TeX field}<br />
%{ \ifdefined\HCode\href{../../index.htm}{up} }<br />
%}<br />
%BeginExpansion<br />
\ifdefined\HCode\href{../../index.htm}{up}<br />
%EndExpansion<br />
Notice what we did. The code has to be put in 2 places. In the comment <strong>and</strong> inside the BeginExpansion<br />
<strong>and</strong> %EndExpansion block.<br />
That is the only reliable way to insert <strong>Latex</strong> code for use by tex or tex4ht without having SW see it.<br />
Otherwise, SW can change it or move it around, or worst, comment it out. Now, the above can be processed OK<br />
by htlatex, since the TexField is a comment, but the code is still there in the second block.<br />
92
Chapter 6<br />
Trying latexml<br />
see http://jblevins.org/log/xml-tools for how to install <strong>and</strong> use latexml. And an online convertor<br />
for binding see http://trac.mathweb.org/LaTeXML/browser/trunk/lib/LaTeXML/Package<br />
See http://www.albany.edu/~hammond/demos/Html5/arXiv/lxmlexamples.html for examples of Math<br />
papers translated to HTML using <strong>Latex</strong>ml<br />
Tried to install version 0.8 on August 10, 2013, on linux, but getting errors from Make, something about<br />
perl, even though I followed all instructions.<br />
/usr/bin/perl -MParse::RecDescent - lib/LaTeXML/MathGrammar LaTeXML::MathGrammar<br />
Can't locate Parse/RecDescent.pm in @INC (@INC contains: /etc/perl /usr/local/lib/perl/5.14.2 /usr/local/shar<br />
BEGIN failed--compilation aborted.<br />
make: *** [blib/lib/LaTeXML/MathGrammar.pm] Error 2<br />
>make test<br />
/usr/bin/perl -MParse::RecDescent - lib/LaTeXML/MathGrammar LaTeXML::MathGrammar<br />
Can't locate Parse/RecDescent.pm in @INC (@INC contains: /etc/perl /usr/local/lib/perl/5.14.2 /usr/local/shar<br />
BEGIN failed--compilation aborted.<br />
make: *** [blib/lib/LaTeXML/MathGrammar.pm] Error 2<br />
><br />
6.1 Fixing decoration fbox<br />
When adding a frame in SW, around math equation such as displayed formula, it will add \fbox to do it. To<br />
improve how the math looks inside, added this to the preamble of the document<br />
\usepackage{amsmath}<br />
\let\latexfbox\fbox<br />
\renewcomm<strong>and</strong>{\fbox}[1]{%<br />
\latexfbox{\everymath{\displaystyle}#1}%<br />
}<br />
Thanks for http://tex.stackexchange.com/<br />
93
Chapter 7<br />
Trying pdf2htmlEX<br />
On windows, installed the binaries. Then to convert a pdf to HTML do, from a DOS window:<br />
>pdf2htmlEX --data-dir C:\pdf2htmlEX\data --dest-dir HTML<br />
--process-outline 1 --fallback 1 --bg-format svg --zoom 1<br />
--process-type3 1 report.pdf<br />
The above converts report.pdf to report.html <strong>and</strong> puts the HTML in the HTML subfolder. The foler<br />
C:\pdf2htmlEX\data is where the manifest data is, which is included when installing the application.<br />
The windows version is here.<br />
See This for more information about pdf2htmlEX<br />
94