
Create successful ePaper yourself
Turn your PDF publications into a flip-book with our unique Google optimized e-Paper software.
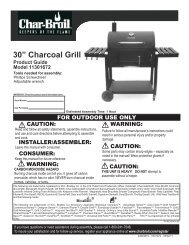
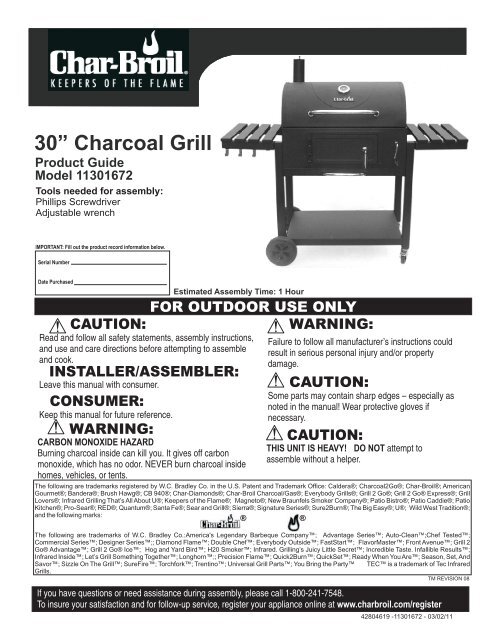
30” Charcoal Grill<br />
Product Guide<br />
Model 11301672<br />
Tools needed for assembly:<br />
Phillips Screwdriver<br />
Adjustable wrench<br />
IMPORTANT: Fill out the product record information below.<br />
Serial Number<br />
Date Purchased<br />
Estimated Assembly Time: 1 Hour<br />
CAUTION:<br />
Read and follow all safety statements, assembly instructions,<br />
and use and care directions before attempting to assemble<br />
and cook.<br />
INSTALLER/ASSEMBLER:<br />
Leave this <strong>manual</strong> with consumer.<br />
CONSUMER:<br />
Keep this <strong>manual</strong> for future reference.<br />
WARNING:<br />
CARBON MONOXIDE HAZARD<br />
Burning charcoal inside can kill you. It gives off carbon<br />
monoxide, which has no odor. NEVER burn charcoal inside<br />
homes, vehicles, or tents.<br />
FOR OUTDOOR USE ONLY<br />
WARNING:<br />
Failure to follow all manufacturer’s instructions could<br />
result in serious personal injury and/or property<br />
damage.<br />
CAUTION:<br />
Some parts may contain sharp edges – especially as<br />
noted in the <strong>manual</strong>! Wear protective gloves if<br />
necessary.<br />
CAUTION:<br />
THIS UNIT IS HEAVY! DO NOT attempt to<br />
assemble without a helper.<br />
The following are trademarks registered by W.C. Bradley Co. in the U.S. Patent and Trademark Office: Caldera®; Charcoal2Go®; Char-Broil®; American<br />
Gourmet®; Bandera®; Brush Hawg®; CB 940®; Char-Diamonds®; Char-Broil Charcoal/Gas®; Everybody Grills®; Grill 2 Go®; Grill 2 Go® Express®; Grill<br />
Lovers®; Infrared Grilling That’s All About U®; Keepers of the Flame®; Magneto®; New Braunfels Smoker Company®; Patio Bistro®; Patio Caddie®; Patio<br />
Kitchen®; Pro-Sear®; RED®; Quantum®; Santa Fe®; Sear and Grill®; Sierra®; Signature Series®; Sure2Burn®; The Big Easy®; U®; Wild West Tradition®;<br />
and the following marks:<br />
® ®<br />
The following are trademarks of W.C. Bradley Co.:America's Legendary Barbeque Company; Advantage Series; Auto-Clean;Chef Tested;<br />
Commercial Series; Designer Series;; Diamond Flame; Double Chef; Everybody Outside; FastStart; FlavorMaster; Front Avenue; Grill 2<br />
Go® Advantage; Grill 2 Go® Ice; Hog and Yard Bird; H20 Smoker; Infrared. Grilling’s Juicy Little Secret; Incredible Taste. Infallible Results;<br />
Infrared Inside; Let’s Grill Something Together; Longhorn;; Precision Flame; Quick2Burn; QuickSet; Ready When You Are; Season, Set, And<br />
Savor; Sizzle On The Grill; SureFire; Torchfork; Trentino; Universal Grill Parts; You Bring the Party TEC is a trademark of Tec Infrared<br />
Grills.<br />
TM REVISION 08<br />
If you have questions or need assistance during assembly, please call 1-800-241-7548.<br />
To insure your satisfaction and for follow-up service, register your appliance online at www.charbroil.com/register<br />
42804619 -11301672 - 03/02/11
TABLE OF CONTENTS<br />
Product Record Information . . . . . . . . . . . . . . . . . . . . . . . . . . . . 1<br />
Safety Symbols. . . . . . . . . . . . . . . . . . . . . . . . . . . . . . . . . . . . . . 2<br />
Preparing to use your Grill . . . . . . . . . . . . . . . . . . . . . . . . . . . . . 3<br />
Grill Maintenance . . . . . . . . . . . . . . . . . . . . . . . . . . . . . . . . . . . . 3<br />
Cooking Tips . . . . . . . . . . . . . . . . . . . . . . . . . . . . . . . . . . . . . . 4-5<br />
Limited Warranty. . . . . . . . . . . . . . . . . . . . . . . . . . . . . . . . . . . . . 6<br />
Parts List/ Parts Diagram . . . . . . . . . . . . . . . . . . . . . . . . . . . . . . 7<br />
Assembly . . . . . . . . . . . . . . . . . . . . . . . . . . . . . . . . . . . . . . . . 8-17<br />
Hardware List . . . . . . . . . . . . . . . . . . . . . . . . . . . . . . . . . . . . . . 18<br />
Registration Card . . . . . . . . . . . . . . . . . . . . . . . . . . . . . . . . . . . 19<br />
This instruction <strong>manual</strong> contains important<br />
information necessary for the proper<br />
assembly and safe use of the appliance.<br />
Follow all warnings and instructions when<br />
using the appliance.<br />
Safety Symbols<br />
The symbols and boxes shown below explain what each heading<br />
means. Read and follow all of the messages found throughout<br />
the <strong>manual</strong>.<br />
DANGER<br />
DANGER: Indicates an imminently hazardous situation<br />
which, if not avoided, will result in death or serious injury.<br />
WARNING: Indicates an potentially hazardous situation<br />
which, if not avoided, could result in death or serious<br />
injury.<br />
CAUTION<br />
CAUTION: Indicates a potentially hazardous situation or<br />
unsafe practice which, if not avoided, may result in minor<br />
or moderate injury.<br />
Page 2<br />
WARNING<br />
WARNING<br />
FAILURE TO READ AND FOLLOW INSTRUCTIONS FOR<br />
LIGHTING CHARCOAL MAY RESULT IN SERIOUS PERSONAL<br />
INJURY AND OR PROPERTY DAMAGE.<br />
WARNING<br />
• Most surfaces on this unit are hot when in use.<br />
Use extreme caution. Keep others away from<br />
unit. Always wear protective clothing to prevent<br />
injury.<br />
• Keep children and pets away.<br />
• Do not move this unit during operation.<br />
• Never substitute gasoline, kerosene or alcohol<br />
for charcoal starter. In some states, the use of<br />
charcoal starter is prohibited by law. In this<br />
case, paraffin-based starter cubes can be<br />
substituted for charcoal starter. Never use<br />
charcoal starter fluid with an electric starter.<br />
WARNING<br />
CALIFORNIA PROPOSITION 65<br />
1. Combustible by-products produced when using<br />
this product contains chemicals known to the State<br />
of California to cause cancer, birth defects, or<br />
other reproductive harm.<br />
2. This product contains chemicals, including lead<br />
and lead compounds, known to the State of<br />
California to cause cancer, birth defects or<br />
other reproductive harm.<br />
Wash your hands after handling this product.<br />
WARNING<br />
All surfaces can be hot during use. Use protection<br />
as required to prevent burning.<br />
Do not use this unit on or near combustible surfaces<br />
or structures such as wood decks, dry leaves or<br />
grass, vinyl or wood siding, etc.<br />
SEE OWNERS MANUAL FOR IMPORTANT SAFETY<br />
INFORMATION.<br />
CAUTION<br />
For residential use only. Do not use for commercial<br />
cooking.
PREPARING TO USE YOUR GRILL<br />
Before cooking with your grill, the following steps should be closely followed to both cure the finish and season the interior<br />
steel. Failure to properly follow these steps may damage the finish and/or impart metallic flavors to your first foods.<br />
Brush all interior surfaces including grills and grates with vegetable cooking oil.<br />
Build a small fire on the charcoal pan, being sure not to lay coals against the walls.<br />
Close lid, position butterfly dampers at approximately one quarter turn open. This burn should be sustained for at least<br />
two hours. Begin increasing the temperature by opening the butterfly dampers halfway and adding more charcoal. Your<br />
grill is now ready for use.<br />
Rust can appear on the inside of your grill. Maintaining a light coat of vegetable oil on the interior surfaces will aid in the<br />
protection of your grill. Exterior surfaces of the grill may need occasional touch up. We recommend the use of commercially<br />
available black high temperature spray paint. NEVER PAINT THE INTERIOR OF THE GRILL!<br />
Please see information regarding Uncoated Cast Iron Grates below.<br />
First Time Use:<br />
Before using a cast iron grate or other cast iron cooking tool, wash it thoroughly with a mild dishwashing liquid to remove the<br />
protective wax coating applied for shipping. Rinse with hot water and dry completely with a soft cloth or paper towel. NEVER<br />
ALLOW TO DRAIN DRY OR WASH IN A DISHWASHER. Now season the grates to prevent rust and sticking.<br />
Seasoning:<br />
A solid vegetable shortening is recommended for the initial seasoning. Spread a thin coating of solid vegetable shortening<br />
over the entire surface, including all corners, with a paper towel. Do not use salted fats such as butter or margarine.<br />
Preheat grill for 15 minutes; carefully place grates in the grill. Allow the grill to heat grates for 1 to 1 ½ hours. Allow the fire to<br />
burn out on its own, and leave cooking grates in grill until they are cool. Your cast iron cooking grates are now ready to use.<br />
To Prevent Rusting:<br />
Re-season your grates frequently, particularly when new. If rust occurs, it is an indication that the grates have not been<br />
seasoned enough or the seasoning has been burned off. Clean with a heavy brush like Char-Broil’s Brush Hawg. Reapply<br />
vegetable shortening and heat as indicated above to re-season the grates.<br />
Maintenance:<br />
Do not do a burn-off after you grill, but rather leave the cooking residues on the grates to keep a protective coating on the<br />
cast iron. Do a burn-off just before you grill. The more you use your cast iron grates, the easier the maintenance will be.<br />
Store in a dry place. If you store your grates for an extended period of time, grease very lightly with vegetable shortening,<br />
then wipe dry with a paper towel.<br />
GRILLING<br />
Charcoal is recommended, however, wood or a combination of both may be used as the fuel source for grilling with the fuel<br />
source placed and ignited on the charcoal pan. Do not build too large of a fire. We recommend starting a fire with no more<br />
than 2 pounds of charcoal (approximately 30 briquettes) and adding more as needed during cooking. After allowing the fire<br />
to burn down, place the cooking grate on the unit. Failure to read and follow instructions for lighting charcoal may result in<br />
serious personal injury and/or property damage.<br />
GRILL MAINTENANCE<br />
Frequency of clean up is determined by how often the grill is used. Make sure coals are completely extinguished before<br />
cleaning inside of the unit. Thoroughly rinse with water and allow to air dry before using again. Wipe out the interior of the<br />
unit with a cloth or paper towels.<br />
When finished cooking, and the unit has adequately cooled, clean out all remaining ashes. Ashes collect moisture, which<br />
can lead to premature rusting and decay. Periodically coating the interior surfaces with vegetable oil will aid in the protection<br />
of your unit. Also, occasional touch up of the exterior paint will be required. Black, high-temperature spray paint is<br />
recommended. NEVER PAINT THE INTERIOR OF THE UNIT.<br />
Cooking Surface: If a bristle brush is used to clean any of the grill cooking surfaces, ensure no loose bristles remain on<br />
cooking surfaces prior to grilling. It is not recommended to clean cooking surfaces while grill is hot.<br />
Page 3
COOKING TIPS<br />
Building Your Fire<br />
1.) Stack charcoal briquettes or wood into a pyramid-shaped pile on top of the charcoal grate.<br />
We recommend using 2 pounds (approximately 30 briquettes) to start your fire, adding more<br />
as needed.<br />
2.) If using lighter fluid, saturate the charcoal briquettes with lighter fluid and let it soak in for<br />
approximately 5 minutes. If using a chimney starter, electric starter, or other type of fire<br />
starter, light your fire according to the manufacturer's instructions.<br />
3.) After allowing the lighter fluid to properly soak in, light the pile of briquettes in several<br />
locations to ensure an even burn. Always light the fire with the grill lid open.<br />
Leave lid open until briquettes are fully lit. Failure to do this could trap fumes from charcoal<br />
lighter fluid in grill and may result in a flash fire when lid is opened.<br />
4.) Never add charcoal lighter fluid to hot or warm coals as flashbacks may occur causing<br />
injury.<br />
5.) You are ready to begin cooking when the pile of briquettes ashes over and produces a red<br />
glow (approximately 12 – 15 minutes).<br />
6.) Depending on your cooking method, either leave the briquettes in a pile or spread evenly<br />
across the charcoal grate using a long-handled poker.<br />
*Always use caution when handling hot coals to prevent injury.<br />
Know When Your Fire is Ready<br />
Successful charcoal grilling depends on a good fire. The general rule for knowing when your coals<br />
are ready for grilling is to make sure that 80 percent or more of the coals are ashy gray. If you<br />
have less than that, the coals are not ready, and if all of them are glowing red hot, the fire is<br />
probably too hot. Here are a few steps you can take to adjust the temperature of your fire:<br />
- If it is too hot, spread the coals out a bit more, which makes the fire less intense.<br />
- Raise or lower the adjustable charcoal grate.<br />
- Partially close the vents in the grill, which reduces the amount of oxygen that feeds the fire.<br />
- Use the indirect grilling method, with coals to either side of a drip pan and the food over the<br />
pan rather than directly over the coals.<br />
- In the event of a severe flare-up, spray the flames with water from a squirt bottle. Be<br />
careful, spraying with water tends to blow ashes around and make a mess.<br />
- Add briquettes 2 or 3 at a time to increase the burn time. Allow 10 minutes for coals to ash<br />
over before adding more.<br />
THE HEAT OF THE COALS<br />
seconds you can<br />
hold the palm of<br />
your hand 4 inches<br />
above the coals temperature range (Fº) visual cues<br />
HOT COALS 2 400 to 450 barely covered with<br />
gray ash; deep red glow<br />
MODERATELY HOT 3<br />
375 to 450 thin coating of gray<br />
TO HOT COALS<br />
ash; deep red glow<br />
MODERATELY HOT COALS 4 325 to 375 significant coating of<br />
gray ash; red glow<br />
MODERATELY COOL COALS 5 300 to 325 thick coating of gray<br />
ash; dull red glow<br />
Page 4
Direct and Indirect Grilling<br />
Direct Grilling - For most grilling, the ignited coals are spread in a single layer under the food. This<br />
is called direct grilling and is appropriate for relatively quick-cooking items such as hamburgers,<br />
steaks and most seafood. The single layer of coals emits even, steady heat, whether the grill lid is<br />
open or closed, and represents the way most people grill. For more control, pile some of the coals<br />
on one side of the grill where they will emit intense heat. You can move the food around on the grill,<br />
setting it over the very hot coals when you want to sear it or when a thick piece needs to cook a<br />
little more quickly. You can also use the adjustable charcoal grate and dampers to control the<br />
temperature in your grill.<br />
Indirect Grilling - For items that take longer to cook, you will want to use indirect grilling. This<br />
method is for long, slow cooking in a covered grill. For indirect cooking, the coals are piled two or<br />
three coals deep on one side of the grill, or divided and piled on two sides. This leaves an empty<br />
space next to the coals or between them. Food cooked over indirect heat is often started over<br />
direct heat and then moved to the cooler (empty) part of the grill for even, slow cooking. To make<br />
the heat as even as possible, construct two piles of coals. It is common to place a metal drip pan in<br />
the empty space beside or between the coals, which is filled with water, wine, beer, broth, or a<br />
combination. Place the food directly over the drip pan. This injects a little extra moisture into the<br />
cooking environment and also catches dripping juices, which makes clean-up a little easier and<br />
reduces the possibility of flare-ups. (Remember to keep a spray bottle filled with water on hand to<br />
extinguish any flare-ups.) Once you get used to the indirect method, you may prefer to use it for<br />
more grilling tasks. Although it may take a little longer, it is an excellent cooking method and a sure<br />
way to prevent the food from burning and to promote even cooking.<br />
Grilling with Wood Chips/Wood Chunks<br />
For a more robust smoke flavor while using charcoal briquettes or lump charcoal, try adding wood<br />
chips or several wood chunks to the fire. Wood chunks are available in a variety of natural flavors,<br />
and can be used alone or in addition to charcoal. As a general rule, any hardwood that bears a fruit<br />
or nut is suitable for cooking. However, different woods have very different tastes. Experiment with<br />
different woods to determine your personal favorite, and always use well-seasoned wood. Green or<br />
fresh-cut wood can turn food black, and tastes bitter.<br />
Our Recommendations:<br />
Chicken - Alder, Apple, Hickory, Mesquite, Sassafras, Grapevines<br />
Beef - Hickory, Mesquite, Oak, Grapevines<br />
Pork - Fruitwoods, Hickory, Oak, Sassafras<br />
Lamb - Fruitwoods, Mesquite<br />
Veal - Fruitwoods, Grapevines<br />
Seafood - Alder, Mesquite, Sassafras, Grapevines<br />
Vegetables – Mesquite<br />
USDA Recommended<br />
Internal Cooking Temperatures<br />
Ground Meat<br />
Beef, Pork, Veal, Lamb......................................160°F<br />
Turkey, Chicken.................................................165°F<br />
Fresh Beef, Veal, Lamb<br />
Medium Rare.......................................................145°F<br />
Medium................................................................160°F<br />
Well Done............................................................170°F<br />
Poultry<br />
Chicken & Turkey, whole.....................................165°F<br />
Poultry Parts.......................................................165°F<br />
Duck & Goose....................................................165°F<br />
Fresh Pork<br />
Medium..............................................................160°F<br />
Well Done..........................................................170°F<br />
Page 5
LIMITED WARRANTY<br />
This warranty only applies to units purchased from an authorized retailer. Manufacturer warrants to the original consumer-purchaser only that this<br />
product shall be free from defects in workmanship and materials after correct assembly and under normal and reasonable home use for the periods<br />
indicated below beginning on the date of purchase*. The manufacturer reserves the right to require that defective parts be returned, postage and or<br />
freight pre-paid by the consumer for review and examination.<br />
SCOPE OF COVERAGE PERIOD OF COVERAGE TYPE OF FAILURE COVERAGE<br />
All Parts<br />
90 days from date of purchase*<br />
PERFORATION, MANUFACTURING,<br />
AND MATERIAL DEFECTS ONLY<br />
*Note: A dated sales reciept WILL be required for warranty service.<br />
The original consumer-purchaser will be responsible for all shipping charges for parts replaced under the terms of this limited warranty.<br />
This limited warranty is applicable in the United States and Canada only, is only available to the original owner of the product and is not transferable.<br />
Manufacturer requires proof of your date of purchase. Therefore, you should retain your sales slip or invoice. Registering your product is not a<br />
substitute for proof of purchase and the manufacturer is not responsible for or required to retain proof of purchase records.<br />
This limited warranty applies to the functionality of the product ONLY and does not cover cosmetic issues such as scratches, dents, corrosions or<br />
discoloring by heat, abrasive and chemical cleaners or any tools used in the assembly or installation of the appliance, surface rust, or the<br />
discoloration of stainless steel surfaces. RUST is not considered a manufacturing or materials defect.<br />
This limited warranty will not reimburse you for the cost of any inconvenience, food, personal injury or property damage.<br />
ITEMS MANUFACTURER WILL NOT PAY FOR:<br />
1. Shipping cost, standard or expedited, for warranty and replacement parts<br />
2. Service calls to your home.<br />
3. Repairs when your product is used for other than normal, single-family household or residential use.<br />
4. Damage, failures, or operating difficulties resulting from accident, alteration, careless handling, misuse, abuse, fire, flood,<br />
acts of God, improper installation or maintenance, installation not in accordance with electrical or plumbing codes, or use<br />
of products not approved by the manufacturer.<br />
5. Any food loss due to product failures or operating difficulties.<br />
6. Replacement parts or repair labor costs for units operated outside the United States or Canada.<br />
7. Pickup and delivery of your product.<br />
8. Repairs to parts or systems resulting from unauthorized modifications made to the product.<br />
9. The removal and/or reinstallation of your product.<br />
DISCLAIMER OF IMPLIED WARRANTIES and LIMITATION OF REMEDIES<br />
Repair or replacement of defective parts is your exclusive remedy under the terms of this limited warranty. In the event of parts availability issues,<br />
the manufacturer reserves the right to substitute like or similar parts that are equally functional.<br />
Manufacturer will not be responsible for any consequential or incidental damages arising from the breach of either this limited warranty or any<br />
applicable implied warranty, or for failure or damage resulting from acts of God, improper care and maintenance, grease fire, accident, alteration,<br />
replacement of parts by anyone other than Manufacturer, misuse, transportation, commercial use, abuse, hostile environments (inclement weather,<br />
acts of nature, animal tampering), improper installation or installation not in accordance with local codes or printed manufacturer instructions.<br />
THIS LIMITED WARRANTY IS THE SOLE EXPRESS WARRANTY GIVEN BY THE MANUFACTURER. NO PRODUCT PERFORMANCE<br />
SPECIFICATION OR DESCRIPTION WHEREVER APPEARING IS WARRANTED BY MANUFACTURER EXCEPT TO THE EXTENT SET<br />
FORTH IN THIS LIMITED WARRANTY. ANY IMPLIED WARRANTY PROTECTION ARISING UNDER THE LAWS OF ANY STATE,<br />
INCLUDING IMPLIED WARRANTY OF MERCHANTABILITY OR FITNESS FOR A PARTICULAR PURPOSE OR USE, IS HEREBY<br />
LIMITED IN DURATION TO THE DURATION OF THIS LIMITED WARRANTY.<br />
Neither dealers nor the retail establishment selling this product has any authority to make any additional warranties or to promise remedies<br />
in addition to or inconsistent with those stated above. Manufacturer's maximum liability, in any event, shall not exceed the purchase price of the<br />
product paid by the original consumer.<br />
NOTE: Some states do not allow an exclusion or limitation of incidental or consequential damages, so some of the above limitations or exclusions<br />
may not apply to you. This limited warranty gives you specific legal rights as set foth herein. You may also have other rights which vary from state<br />
to state. In the state of California only, if refinishing or replacement of the product is not commercially practicable, the retailer selling this product or<br />
the Manufacturer will refund the purchase price paid for the product, less the amount directly attributable to use by the original consumer-purchaser<br />
prior to discovery of the nonconformity. In addition, in the state of California only, you may take the product to the retail establishment selling this<br />
product in order to obtain performance under this limited warranty.<br />
If you wish to obtain performance of any obligation under this limited warranty, you should<br />
write to:<br />
Consumer Relations<br />
P. O. Box 1240<br />
Columbus, GA 31902-1240<br />
Consumer returns will not be accepted unless a valid Return Authorization is first acquired. Authorized returns are clearly marked on the outside of<br />
the package with an RA number and the package is shipped freight/postage pre-paid. Consumer returns that do not meet these standards will be<br />
refused.<br />
WS_1 Rev03<br />
Page 6
PARTS LIST<br />
Key Qty Description<br />
1 1 Lid Assembly<br />
2 1 Swing-Away Grate<br />
3 3 Cooking Grate<br />
4 1 Handle, F/Clean Out Door w/Latch<br />
5 2 Air Damper<br />
6 1 Charcoal Pan w/Adjust Assembly<br />
7 2 Hinge Assembly<br />
8 1 Left Front Leg, W/Caster Socket<br />
9 1 Tool Hook<br />
10 1 Left Rear Leg, W/Caster Socket<br />
11 1 Firebox Front Panel<br />
12 1 Firebox Rear Panel<br />
13 1 Axle<br />
14 1 Handle, F/Ash Pan<br />
15 1 Right Front Leg<br />
16 1 Bottom Shelf<br />
17 2 Wheel<br />
18 2 Firebox Side Panel<br />
23<br />
23<br />
31<br />
33<br />
Key Qty Description<br />
19 1 Clean Out Door<br />
20 1 Smoke Stack<br />
21 1 Adjustable Crank Handle<br />
22 1 Lid Handle<br />
23 2 Handle Seat<br />
24 2 Caster<br />
25 1 Ash Pan<br />
26 1 Right Rear Leg<br />
27 2 Side Shelf<br />
28 1 Logo Plate<br />
29 1 Temperature Gauge<br />
30 1 Frame, F/clean out Door<br />
31 1 Damper, F/Smoke Stack<br />
32 1 Charcoal Pan (only)<br />
33 1 Spring F/ Smokestack Damper<br />
Not Pictured<br />
__ 1 Assembly Instructions, English<br />
— 1 Assembly Instructions, French<br />
— 1 Hardware Pack<br />
__ 1 Caster Wrench<br />
2<br />
7<br />
7<br />
22<br />
29<br />
20<br />
4<br />
1<br />
12<br />
28<br />
9<br />
24<br />
11<br />
3<br />
3<br />
24<br />
18<br />
25<br />
8<br />
8<br />
10<br />
26<br />
15<br />
21<br />
18<br />
17<br />
14<br />
5<br />
17<br />
5<br />
3<br />
13<br />
19<br />
16<br />
6 32<br />
27<br />
27<br />
30<br />
Page 7
ASSEMBLY<br />
1<br />
FIRST, GET A HELPER! This unit is heavy and requires a second person for lifting and moving. NEXT, pick a suitable<br />
location to work. Open the carton and slit the corners so that the carton lays flat. This will give you a protective surface<br />
during assembly.<br />
To begin assembly, Attach (2) Firebox End Panels to Front/Rear Firebox Panels using (8) 1/4-20x1/2” Screws and (8)<br />
1/4-20 Flange Nuts .<br />
1/4-20 Flange Nuts<br />
Rear Firebox Panel<br />
1/4-20x1/2”<br />
Screws<br />
Firebox End Panel<br />
1/4-20x1/2”<br />
Screws<br />
1/4-20x1/2” Screws<br />
Front Firebox Panel<br />
Firebox End Panel<br />
2<br />
Place Firebox as shown in illustration below. Attach (2) Legs with Caster Sockets to right side of Firebox using (4) 1/4-<br />
20x1/2” Screws. Attach (2) remaining Legs to left side of Firebox using (4) 1/4-20x1/2” Screws.<br />
1/4-20x1/2” Screws<br />
Left Front Leg W/O Caster Sockets<br />
Front of Firebox<br />
Right Rear Leg W/Caster Socket<br />
Left Rear Leg W/O Caster Sockets<br />
Caster Socket<br />
Side shelf mounting holes<br />
to be facing opposite legs<br />
Right Rear Leg W/Caster Socket<br />
Page 8
3<br />
Attach Bottom Shelf to Legs using (4) 1/4-20x2 3/8” Screws.<br />
1/4-20x2 3/8” Screws<br />
1/4-20x2 3/8” Screws<br />
4Turn grill upside down. Screw (2) Casters into Left Front/Rear Legs and tighten with Flat Wrench provided with grill.<br />
Caster<br />
Caster<br />
Leg<br />
Leg<br />
Page 9
5<br />
Insert a small Hair Pin Clip into the hole at one end of the Axle. Slide a Large Flat Washer and a Wheel onto the Axle.<br />
Slide the Axle through the holes at the ends of the Legs. Slide the remaining Wheel onto the Axle. Slide a Large Flat<br />
Washer onto the Axle and secure with remaining Hair Pin Clip.<br />
NOTE: WHEEL HUBS SHOULD FACE LEGS.<br />
Hair Pin Clip<br />
Wheel<br />
Hair Pin Clip<br />
Large Flat Washer<br />
Axle<br />
Large Flat Washer<br />
6<br />
Attach<br />
the Charcoal Pan Assembly to the inside front panel of the Firebox using (4) 1/4-20x1/2” Hex Bolts. Tighten securely<br />
with adjustable wrench (not provided).<br />
Charcoal Pan Assembly<br />
Front of Firebox<br />
Page 10<br />
Firebox<br />
NOTE:<br />
Mounting bracket with hole<br />
fits over threaded bushing<br />
1/4-20x1/2” Hex Bolts
7<br />
Turn grill right side up. Attach the Air Damper Wheel to the inside of the right side of Firebox using (1) #10-24x3/8”<br />
Screw, (1) 5mm Flat Washer and (1) #10-24 Reversible Lock Nut. Repeat for left side of Firebox. DO NOT<br />
FULLY TIGHTEN THE LOCK NUT. This will allow for rotation of the Air Damper Wheel.<br />
Air Damper Wheel<br />
Firebox<br />
#10-24x3/8” Screw<br />
#10-24 Reversible Lock Nut 5mm Flat Washer<br />
8<br />
Attach the Handle to the front of Ash Pan with (2) 1/4-20x1/2” Screws. Slide the Ash Pan into the bottom of the Firebox.<br />
Handle<br />
1/4-20x1/2” Screw<br />
Firebox<br />
1/4-20x1/2” Screw<br />
1/4-20x1/2<br />
Screws<br />
Page 11
9<br />
Attach Lid Handle and Handle Seats to the Lid using (2) 1/4-20x1/2” Screws.<br />
1/4-20x1/2” Screw<br />
Lid<br />
Handle Seats<br />
Lid Handle<br />
Lock Washer<br />
Flat Washer<br />
1/4-20x1/2<br />
Screws<br />
1/4-20x1/2” Screw<br />
10<br />
Attach (2) Hinge Assemblies to the rear of Lid using (4) 1/4-20x1 3/8” Screws and (4) 1/4-20 Flange Nuts. Note<br />
orientation shown in enlargement.<br />
1/4-20x1 3/8” Screws<br />
Page 12<br />
1/4-20x1 3/8” Screws<br />
Lid
11<br />
Remove Cap Nut, Spring and Damper from Smoke Stack Body. Insert Smoke Stack Body through hole in Lid. Attach<br />
Smoke Stack Body to Lid using (2) 1/4-20x1/2” Screws and (2) 1/4-20 Flange Nuts. Reinstall Damper, Spring and<br />
Lock Nut to Smoke Stack Body.<br />
Cap Nut<br />
Spring<br />
1/4-20x1/2” Screws<br />
Damper<br />
Smoke Stack Body<br />
Smoke Stack Body<br />
1/4-20 Flange Nuts<br />
Lid<br />
12<br />
Place Lid Assembly onto Firebox Assembly while aligning holes in Hinge Assemblies with holes in Firebox Rear<br />
Panel. Attach (2) Hinges Assemblies to the rear of the Firebox Assembly using (4) 1/4-20x1 5/8” Screws.<br />
Lid Assembly<br />
1/4-20x1 5/8”<br />
Screws<br />
Firebox Rear Panel<br />
1/4-20x1 5/8”<br />
Screws<br />
Page 13
13<br />
Remove Flat Washer, Door Latch, Lock Washer and 3/8-16 Nut from Handle. Attach Handle to Clean Out Door,<br />
already assembled in Front Panel, by placing a Flat Washer onto the threaded part of Handle. Insert the threaded<br />
end of Handle through hole in Clean Out Door. Place the Door Latch onto the threaded end of Handle. Place<br />
Lock Washer onto Handle and secure with (1) 3/8-16 Nut.<br />
Clean Out Door<br />
3/8-16 Nut<br />
Handle<br />
Flat Washer<br />
Door Latch<br />
Lock Washer<br />
14<br />
Attach the Tool Hooks to the underside of the Side Shelf with Threaded Inserts using (3) 1/4-20x1/2” Screws.<br />
Attach this Side Shelf Assembly to grill Left Legs using (4) 1/4-20x5/8” Shoulder Screws.<br />
1/4-20x1/2” Screws<br />
Tool Hooks<br />
1/4-20x5/8” Shoulder Screw<br />
1/4-20x1/2<br />
Screws<br />
Side Shelf W/Threaded Inserts<br />
1/4-20x5/8” Shoulder Screw<br />
Page 14
15<br />
Attach other Side Shelf to Right Legs using (4) 1/4-20x5/8” Shoulder Screws.<br />
Side Shelf<br />
Side Shelf<br />
1/4-20x5/8” Shoulder Screw<br />
1/4-20x5/8” Shoulder Screw<br />
16<br />
Screw Adjuster Crank through front of Firebox. Rotate Adjuster Crank clockwise until Adjuster Crank<br />
engages Crank Lever. Insert Hair Pin Clip into Adjuster Crank Shaft.<br />
Hair Pin Clip<br />
Crank Lever<br />
Adjuster Crank<br />
Front of<br />
Grill Body<br />
Adjuster Crank Shaft<br />
Page 15
17<br />
Insert straight wire of Swingaway Grid into one side of Lid and then into the other side. Insert angled wire into holes<br />
in Firebox. Insert (2) Hair Pin Clips onto holes in straight wire in Lid.<br />
Swingaway<br />
Grid<br />
Swingaway Grid<br />
Angled Wire<br />
Firebox<br />
Lid<br />
Firebox omitted for clarity<br />
Straight Wire<br />
Lid omitted for clarity<br />
Hair Pin Clip<br />
Lid<br />
18<br />
Place the (3) Cooking Grates into the firebox. The Cooking Grates will rest on the front and rear ledges of<br />
the firebox.<br />
Cooking Grates<br />
Lid omitted for clarity<br />
Page 16
19<br />
Remove Wingnut from Temperature Gauge. Insert Temperature Gauge through the hole in Lid and<br />
attach using Wingnut previously removed. Tighten securely.<br />
Temperature Gauge<br />
Wingnut<br />
Lid<br />
Page 17
HARDWARE LIST<br />
Hardware is shown actual size. You may have spare hardware after assembly is complete.<br />
1/4-20 x 2 3/8” Machine Screw Qty. 4<br />
1/4-20 x 1 5/8” Machine Screw Qty. 4<br />
1/4-20 x 1 3/8” Machine Screw Qty. 4<br />
1/4-20 x 1/2” Hex Bolt Qty. 4<br />
amper Wheel<br />
1/4-20 x 5/8” Shoulder Screw Qty. 8<br />
1/4-20 x 1/2” Machine Screw Qty. 25<br />
#10-24 x 3/8” Machine Screw Qty. 2<br />
Hair Pin Clip Qty. 5<br />
1/4-20 Flange Nut Qty. 14<br />
5mm Flat Washer Qty. 2<br />
10mm Flat Washer Qty. 2<br />
#10-24 Reversible Lock Nut Qty. 2<br />
Page 18
Warranty Registration Department<br />
P.O. Box 1240<br />
Columbus, GA 31902-1240<br />
REGTEMP REV02<br />
Page 19