
Create successful ePaper yourself
Turn your PDF publications into a flip-book with our unique Google optimized e-Paper software.
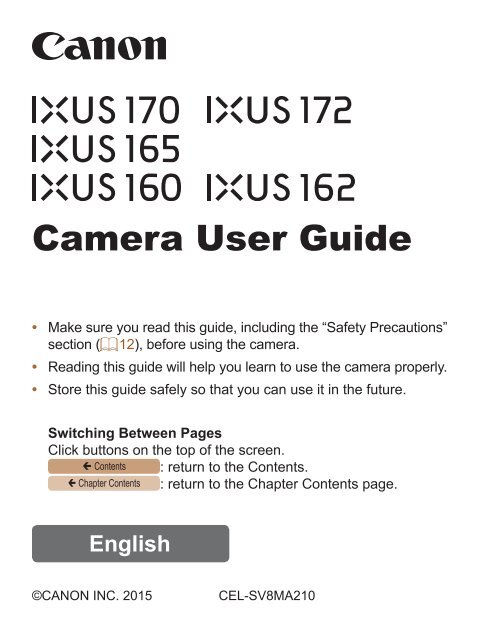
<strong>Camera</strong> <strong>User</strong> <strong>Guide</strong><br />
• Make sure you read this guide, including the “Safety Precautions”<br />
section (= 12), before using the camera.<br />
• Reading this guide will help you learn to use the camera properly.<br />
• Store this guide safely so that you can use it in the future.<br />
Switching Between Pages<br />
Click buttons on the top of the screen.<br />
ç Contents : return to the Contents.<br />
ç Chapter Contents : return to the Chapter Contents page.<br />
English<br />
©CANON INC. 2015<br />
CEL-SV8MA210
ç Contents<br />
Package Contents<br />
Before use, make sure the following items are included in the<br />
package.<br />
If anything is missing, contact your camera retailer.<br />
2<br />
<strong>Camera</strong><br />
Battery Pack<br />
NB-11LH/NB-11L<br />
Battery Charger<br />
CB‐2LF/CB‐2LFE<br />
Printed Matter<br />
Wrist Strap<br />
• A memory card is not included (= 2).<br />
Compatible Memory Cards<br />
The following memory cards (sold separately) can be used,<br />
regardless of capacity.<br />
• SD memory cards*<br />
• SDHC memory cards*<br />
• SDXC memory cards*<br />
• Eye-Fi cards<br />
* Cards conforming to SD standards. However, not all memory cards have<br />
been verified to work with the camera.
ç Contents<br />
Preliminary Notes and Legal<br />
Information<br />
3<br />
• Take and review some test shots initially to make sure the<br />
images were recorded correctly. Please note that Canon Inc., its<br />
subsidiaries and affiliates, and its distributors are not liable for<br />
any consequential damages arising from any malfunction of a<br />
camera or accessory, including memory cards, that result in the<br />
failure of an image to be recorded or to be recorded in a way<br />
that is machine readable.<br />
• Images recorded by the camera shall be for personal use.<br />
Refrain from unauthorized recording that infringes on copyright<br />
law, and note that even for personal use, photography may<br />
contravene copyright or other legal rights at some performances<br />
or exhibitions, or in some commercial settings.<br />
• For information on camera warranty or Canon Customer<br />
Support, please refer to the warranty information provided with<br />
your camera <strong>User</strong> Manual Kit.<br />
• Although the LCD monitor is produced under extremely highprecision<br />
manufacturing conditions and more than 99.99% of<br />
the pixels meet design specifications, in rare cases some pixels<br />
may be defective or may appear as red or black dots. This does<br />
not indicate camera damage or affect recorded images.<br />
• The LCD monitor may be covered with a thin plastic film for<br />
protection against scratches during shipment. If covered,<br />
remove the film before using the camera.<br />
• When the camera is used over an extended period, it may<br />
become warm. This does not indicate damage.
ç Contents<br />
4<br />
Part Names and Conventions in This<br />
<strong>Guide</strong><br />
Lens<br />
Zoom lever<br />
Shooting: /<br />
<br />
Playback: /<br />
<br />
Shutter button<br />
Microphone<br />
ON/OFF button<br />
Lamp<br />
Flash<br />
Speaker<br />
Tripod socket<br />
Memory card/battery cover<br />
Strap mount
ç Contents<br />
• Shooting modes and on-screen icons and text are indicated in<br />
brackets.<br />
• : Important information you should know<br />
• : Notes and tips for expert camera use<br />
• =xx: Pages with related information (in this example, “xx”<br />
represents a page number)<br />
• Instructions in this guide apply to the camera under default<br />
settings.<br />
• For convenience, all supported memory cards are simply<br />
referred to as the “memory card”.<br />
• The tabs shown above titles indicate whether the function is<br />
used for still images, movies, or both.<br />
Still Images : Indicates that the function is used when<br />
shooting or viewing still images.<br />
Movies : Indicates that the function is used when<br />
shooting or viewing movies.<br />
5
ç Contents<br />
6<br />
Screen (LCD monitor)<br />
AV OUT (Audio/video output)<br />
/ DIGITAL terminal<br />
button<br />
/ / Up button<br />
< > / Left button<br />
< (Help)> button<br />
Indicator<br />
Movie button<br />
FUNC./SET button<br />
/ Right button<br />
/ Down<br />
button<br />
button<br />
DC coupler cable port
ç Contents<br />
• In this guide, icons are used to represent the corresponding<br />
camera buttons on which they appear, or which they resemble.<br />
• The following camera buttons and controls are represented by<br />
icons.<br />
Up button on back Right button on back<br />
Left button on back Down button on back<br />
• The following icons are used to indicate functions that differ<br />
depending on the camera model:<br />
<strong>IXUS</strong> <strong>170</strong> : Functions and precautions for the <strong>IXUS</strong> <strong>170</strong> and<br />
<strong>IXUS</strong> <strong>172</strong><br />
<strong>IXUS</strong> <strong>165</strong> : Functions and precautions for the <strong>IXUS</strong> <strong>165</strong> only<br />
<strong>IXUS</strong> <strong>160</strong> : Functions and precautions for the <strong>IXUS</strong> <strong>160</strong> and<br />
<strong>IXUS</strong> <strong>162</strong><br />
• This guide uses <strong>IXUS</strong> <strong>170</strong> illustrations and screenshots for all<br />
explanations.<br />
7
ç Contents<br />
Table of Contents<br />
8<br />
Package Contents..................2<br />
Compatible Memory Cards.....2<br />
Preliminary Notes and Legal<br />
Information..............................3<br />
Part Names and Conventions<br />
in This <strong>Guide</strong>...........................4<br />
Table of Contents....................8<br />
Common <strong>Camera</strong><br />
Operations............................10<br />
Safety Precautions................12<br />
Basic <strong>Guide</strong>............... 17<br />
Initial Preparations................18<br />
Trying the <strong>Camera</strong> Out.........27<br />
Advanced <strong>Guide</strong>........ 34<br />
<strong>Camera</strong> Basics.................... 34<br />
On/Off...................................35<br />
Shutter Button.......................37<br />
Shooting Display Options.....38<br />
Using the FUNC. Menu.........39<br />
Using Menus.........................41<br />
Indicator Display...................43<br />
Auto Mode........................... 44<br />
Shooting with <strong>Camera</strong>-<br />
Determined Settings.............45<br />
Common, Convenient<br />
Features................................54<br />
Image Customization<br />
Features................................63<br />
Helpful Shooting Features....66<br />
Customizing <strong>Camera</strong><br />
Operation..............................67<br />
Other Shooting Modes....... 68<br />
Brightness / Color<br />
Customization<br />
(Live View Control)................69<br />
Specific Scenes....................70<br />
Applying Special Effects.......73<br />
Special Modes for Other<br />
Purposes...............................79<br />
P Mode................................. 83<br />
Shooting in Program AE<br />
([P] Mode).............................84<br />
Image Brightness<br />
(Exposure)............................85<br />
Adjusting White Balance.......90<br />
Shooting Range and<br />
Focusing...............................92<br />
Flash...................................100
ç Contents<br />
Using Eco Mode.................103<br />
Other Settings.....................104<br />
Playback Mode................. 109<br />
Viewing............................... 110<br />
Browsing and Filtering<br />
Images................................ 113<br />
Image Viewing Options....... 116<br />
Protecting Images............... 119<br />
Erasing Images...................122<br />
Rotating Images..................125<br />
Editing Still Images.............127<br />
9<br />
Functions and Menu<br />
Tables.................................192<br />
Handling Precautions..........204<br />
Specifications......................205<br />
Index...................................212<br />
Setting Menu..................... 132<br />
Adjusting Basic <strong>Camera</strong><br />
Functions............................133<br />
Accessories...................... 145<br />
System Map........................146<br />
Optional Accessories..........148<br />
Using Optional<br />
Accessories........................151<br />
Using the Software.............155<br />
Printing Images...................<strong>160</strong><br />
Using an Eye-Fi Card.........175<br />
Appendix........................... 178<br />
Troubleshooting..................179<br />
On-Screen Messages.........185<br />
On-Screen Information.......188
ç Contents<br />
Common <strong>Camera</strong> Operations<br />
10<br />
4 Shoot<br />
• zUse camera-determined settings (Auto Mode)...................... 45<br />
Shooting people well<br />
I<br />
Portraits<br />
(= 70)<br />
P<br />
Against Snow<br />
(= 71)<br />
Matching specific scenes<br />
Low Light<br />
(= 70)<br />
t<br />
Fireworks<br />
(= 71)<br />
Applying special effects<br />
Vivid Colors<br />
(= 73)<br />
Poster Effect<br />
(= 73)<br />
Fish-Eye Effect<br />
(= 74)<br />
Miniature Effect<br />
(= 75)<br />
Toy <strong>Camera</strong> Effect<br />
(= 77)<br />
Monochrome<br />
(= 78)
ç Contents<br />
11<br />
• zWhile adjusting image settings (Live View Control)............... 69<br />
• zFocus on faces........................................................... 45, 70, 94<br />
• zWithout using the flash (Flash Off)................................. 59, 101<br />
• zInclude yourself in the shot (Self-Timer).......................... 56, 79<br />
• zAdd a date stamp................................................................... 60<br />
1 View<br />
• zView images (Playback Mode)..............................................110<br />
• zAutomatic playback (Slideshow)...........................................117<br />
• zOn a TV................................................................................ 151<br />
• zOn a computer..................................................................... 155<br />
• zBrowse through images quickly............................................113<br />
• zErase images....................................................................... 122<br />
E Shoot/View Movies<br />
• zShoot movies......................................................................... 45<br />
• zView movies (Playback Mode)..............................................110<br />
c Print<br />
• zPrint pictures........................................................................ <strong>160</strong><br />
Save<br />
• zSave images to a computer................................................. 157
ç Contents<br />
Safety Precautions<br />
• Before using the product, ensure that you read the safety<br />
precautions described below. Always ensure that the product is<br />
used correctly.<br />
• The safety precautions noted here are intended to prevent<br />
you and other persons from being injured or incurring property<br />
damage.<br />
• Be sure to also check the guides included with any separately<br />
sold accessories you use.<br />
12<br />
Warning<br />
Denotes the possibility of serious injury or death.<br />
• Do not trigger the flash in close proximity to people’s eyes.<br />
Exposure to the intense light produced by the flash could damage<br />
eyesight. In particular, remain at least 1 meter (3.3 feet) away from<br />
infants when using the flash.<br />
• Store this equipment out of the reach of children and<br />
infants.<br />
A strap wound around a child’s neck may result in asphyxiation.<br />
If your product uses a power cord, mistakenly winding the cord<br />
around a child’s neck may result in asphyxiation.<br />
• Use only recommended power sources.<br />
• Do not disassemble, alter, or apply heat to the product.<br />
• Avoid dropping or subjecting the product to severe impacts.<br />
• Do not touch the interior of the product if it is broken, such<br />
as when dropped.<br />
• Stop using the product immediately if it emits smoke or a<br />
strange smell, or otherwise behaves abnormally.<br />
• Do not use organic solvents such as alcohol, benzine, or<br />
thinner to clean the product.
ç Contents<br />
13<br />
• Avoid contact with liquid, and do not allow liquid or foreign<br />
objects inside.<br />
This could result in electrical shock or fire.<br />
If the product gets wet, or if liquid or foreign objects get inside,<br />
remove the battery pack/batteries or unplug immediately.<br />
• Do not look through the viewfinder (if your model has one)<br />
at intense light sources, such as the sun on a clear day or<br />
an intense artificial light source.<br />
This could damage your eyesight.<br />
• Do not touch the product during thunderstorms if it is<br />
plugged in.<br />
This could result in electrical shock or fire. Immediately stop using<br />
the product and distance yourself from it.<br />
• Use only the recommended battery pack/batteries.<br />
• Do not place the battery pack/batteries near or in direct flame.<br />
This may cause the battery pack/batteries to explode or leak,<br />
resulting in electrical shock, fire, or injuries. If leaking battery<br />
electrolyte comes into contact with eyes, mouth, skin, or clothing,<br />
immediately flush with water.<br />
• If the product uses a battery charger, note the following<br />
precautions.<br />
- Remove the plug periodically and, using a dry cloth, wipe<br />
away any dust and dirt that has collected on the plug, the<br />
exterior of the power outlet, and the surrounding area.<br />
- Do not insert or remove the plug with wet hands.<br />
- Do not use the equipment in a manner that exceeds the rated<br />
capacity of the electrical outlet or wiring accessories. Do not<br />
use if the plug is damaged or not fully inserted in the outlet.<br />
- Do not allow dust or metal objects (such as pins or keys)<br />
to contact the terminals or plug.<br />
- Do not cut, damage, alter, or place heavy items on the<br />
power cord, if your product uses one.<br />
This could result in electrical shock or fire.
ç Contents<br />
• Turn the camera off in places where camera use is<br />
prohibited.<br />
The electromagnetic waves emitted by the camera may interfere<br />
with the operation of electronic instruments and other devices.<br />
Exercise adequate caution when using the product in places<br />
where use of electronic devices is restricted, such as inside<br />
airplanes and medical facilities.<br />
14<br />
Caution<br />
Denotes the possibility of injury.<br />
• When carrying the product by the strap, be careful not to<br />
bang it, subject it to strong impacts or shocks, or let it get<br />
caught on other objects.<br />
• Be careful not to bump or push strongly on the lens.<br />
This could lead to injury or damage the camera.<br />
• Be careful not to subject the screen to strong impacts.<br />
If the screen cracks, injury may result from the broken fragments.<br />
• When using the flash, be careful not to cover it with your<br />
fingers or clothing.<br />
This could result in burns or damage to the flash.<br />
• Avoid using, placing, or storing the product in the following<br />
places:<br />
- Places subject to direct sunlight<br />
- Places subject to temperatures above 40 °C (104 °F)<br />
- Humid or dusty places<br />
These could cause leakage, overheating, or an explosion of the<br />
battery pack/batteries, resulting in electrical shock, fire, burns, or<br />
other injuries.<br />
Overheating and damage may result in electrical shock, fire,<br />
burns, or other injuries.
ç Contents<br />
• The slideshow transition effects may cause discomfort<br />
when viewed for prolonged periods.<br />
15<br />
• When using optional lenses, lens filters, or filter adapters (if<br />
applicable), be sure to attach these accessories firmly.<br />
If the lens accessory becomes loose and falls off, it may crack,<br />
and the shards of glass may lead to cuts.<br />
• On products that raise and lower the flash automatically,<br />
make sure to avoid pinching your fingers with the lowering<br />
flash.<br />
This could result in injury.<br />
Caution<br />
Denotes the possibility of property damage.<br />
• Do not aim the camera at intense light sources, such as the<br />
sun on a clear day or an intense artificial light source.<br />
Doing so may damage the image sensor or other internal<br />
components.<br />
• When using the camera on a sandy beach or at a windy<br />
location, be careful not to allow dust or sand to enter the<br />
camera.<br />
• On products that raise and lower the flash automatically, do<br />
not push the flash down or pry it open.<br />
This may cause the product to malfunction.<br />
• Wipe off any dust, grime, or other foreign matter on the<br />
flash with a cotton swab or cloth.<br />
The heat emitted from the flash may cause foreign matter to<br />
smoke or the product to malfunction.<br />
• Remove and store the battery pack/batteries when you are<br />
not using the product.<br />
Any battery leakage that occurs may cause product damage.
ç Contents<br />
16<br />
• Before you discard the battery pack/batteries, cover the<br />
terminals with tape or other insulators.<br />
Contacting other metal materials may lead to fire or explosions.<br />
• Unplug any battery charger used with the product when not<br />
in use. Do not cover with a cloth or other objects when in<br />
use.<br />
Leaving the unit plugged in for a long period of time may cause it<br />
to overheat and distort, resulting in fire.<br />
• Do not leave any dedicated battery packs near pets.<br />
Pets biting the battery pack could cause leakage, overheating, or<br />
explosion, resulting in product damage or fire.<br />
• If your product uses multiple batteries, do not use batteries<br />
that have different levels of charge together, and do not use<br />
old and new batteries together. Do not insert the batteries<br />
with the + and – terminals reversed.<br />
This may cause the product to malfunction.<br />
• Do not sit down with the camera in your pant pocket.<br />
Doing so may cause malfunctions or damage the screen.<br />
• When putting the camera in your bag, ensure that hard objects<br />
do not come into contact with the screen. Also close the screen<br />
(so that it faces the body), if your product’s screen closes.<br />
• Do not attach any hard objects to the product.<br />
Doing so may cause malfunctions or damage the screen.
ç Contents 17<br />
Basic <strong>Guide</strong><br />
Basic information and instructions, from initial<br />
preparations to shooting and playback<br />
Initial Preparations.............18<br />
Trying the <strong>Camera</strong> Out.......27
ç Contents<br />
ç Chapter Contents<br />
Initial Preparations<br />
Prepare for shooting as follows.<br />
18<br />
Attaching the Strap<br />
• zThread the end of the strap<br />
through the strap hole ( ), and<br />
then pull the other end of the<br />
strap through the loop on the<br />
threaded end ( ).<br />
Holding the <strong>Camera</strong><br />
• zPlace the strap around your<br />
wrist.<br />
• zWhen shooting, keep your arms<br />
close to your body and hold the<br />
camera securely to prevent it<br />
from moving. Do not rest your<br />
fingers on the flash.
ç Contents<br />
Charging the Battery Pack<br />
ç Chapter Contents<br />
19<br />
Before use, charge the battery pack with the included charger. Be<br />
sure to charge the battery pack initially, because the camera is not<br />
sold with the battery pack charged.<br />
1 Insert the battery pack.<br />
• zAfter aligning the marks on<br />
the battery pack and charger,<br />
insert the battery pack by<br />
pushing it in ( ) and down ( ).<br />
CB-2LF<br />
CB-2LFE<br />
2 Charge the battery pack.<br />
• zCB-2LF: Flip out the plug<br />
( ) and plug the charger into a<br />
power outlet ( ).<br />
• zCB-2LFE: Plug the power cord<br />
into the charger, then plug the<br />
other end into a power outlet.<br />
• zThe charging lamp turns<br />
orange, and charging begins.<br />
• zWhen charging is finished, the<br />
lamp turns green.<br />
3 Remove the battery<br />
pack.<br />
• zAfter unplugging the battery<br />
charger, remove the battery<br />
pack by pushing it in ( ) and<br />
up ( ).
ç Contents<br />
ç Chapter Contents<br />
20<br />
• To protect the battery pack and keep it in optimal condition,<br />
do not charge it continuously for more than 24 hours.<br />
• For battery chargers that use a power cord, do not attach<br />
the charger or cord to other objects. Doing so could result<br />
in malfunction or damage to the product.<br />
• For details on charging time and the number of shots and recording<br />
time possible with a fully charged battery pack, see “Number of<br />
Shots/Recording Time, Playback Time” (= 207).<br />
• Charged battery packs gradually lose their charge, even when they<br />
are not used. Charge the battery pack on (or immediately before)<br />
the day of use.<br />
• The charger can be used in areas with 100 – 240 V AC power<br />
(50/60 Hz). For power outlets in a different format, use a<br />
commercially available adapter for the plug. Never use an electrical<br />
transformer designed for traveling, which may damage the battery<br />
pack.<br />
Inserting the Battery Pack and Memory Card<br />
Insert the included battery pack and a memory card (sold<br />
separately).<br />
Note that before using a new memory card (or a memory card<br />
formatted in another device), you should format the memory card<br />
with this camera (= 138).<br />
1 Open the cover.<br />
• zSlide the cover ( ) and open<br />
it ( ).
ç Contents<br />
ç Chapter Contents<br />
21<br />
2 Insert the battery pack.<br />
• zWhile pressing the battery lock<br />
in the direction of the arrow,<br />
insert the battery pack as shown<br />
and push it in until it clicks into<br />
the locked position.<br />
Terminals<br />
Battery Lock<br />
Terminals<br />
3 Check the card’s writeprotect<br />
tab and insert<br />
the memory card.<br />
• zRecording is not possible on<br />
memory cards with a writeprotect<br />
tab when the tab is in<br />
the locked position. Slide the<br />
tab to the unlocked position.<br />
• zInsert the memory card facing<br />
as shown until it clicks into the<br />
locked position.<br />
• zMake sure the memory card<br />
is facing the right way when<br />
you insert it. Inserting memory<br />
cards facing the wrong way may<br />
damage the camera.
ç Contents<br />
ç Chapter Contents<br />
22<br />
4 Close the cover.<br />
• zLower the cover ( ) and hold it<br />
down as you slide it, until it clicks<br />
into the closed position ( ).<br />
• zIf the cover will not close, make<br />
sure you inserted the battery<br />
pack facing the right way in<br />
step 2.<br />
• For guidelines on how many shots or hours of recording can be<br />
saved on one memory card, see “Number of Shots per Memory<br />
Card” (= 208).<br />
Removing the Battery Pack and Memory Card<br />
Remove the battery pack.<br />
• zOpen the cover and press the<br />
battery lock in the direction of<br />
the arrow.<br />
• zThe battery pack will pop up.<br />
Remove the memory card.<br />
• zPush the memory card in until it<br />
clicks, and then slowly release<br />
it.<br />
• zThe memory card will pop up.
ç Contents<br />
Setting the Date and Time<br />
ç Chapter Contents<br />
23<br />
Set the current date and time correctly as follows if the [Date/Time]<br />
screen is displayed when you turn the camera on. Information you<br />
specify this way is recorded in image properties when you shoot,<br />
and it is used when you manage images by shooting date or print<br />
images showing the date.<br />
You can also add a date stamp to shots, if you wish (= 60).<br />
1 Turn the camera on.<br />
• zPress the ON/OFF button.<br />
• zThe [Date/Time] screen is<br />
displayed.<br />
2 Set the date and time.<br />
• zPress the buttons to<br />
choose an option.<br />
• zPress the buttons to<br />
specify the date and time.<br />
• zWhen finished, press the <br />
button.
ç Contents<br />
ç Chapter Contents<br />
24<br />
3 Set the home time zone.<br />
• zPress the buttons to<br />
choose your home time zone.<br />
4 Finish the setup<br />
process.<br />
• zPress the button to<br />
complete the setting. The<br />
setting screen is no longer<br />
displayed.<br />
• zTo turn off the camera, press the<br />
ON/OFF button.<br />
• Unless you set the date, time, and home time zone, the<br />
[Date/Time] screen will be displayed each time you turn<br />
the camera on. Specify the correct information.<br />
• To set daylight saving time (1 hour ahead), choose [ ] in step 2<br />
and then choose [ ] by pressing the buttons.<br />
Changing the Date and Time<br />
Adjust the date and time as follows.<br />
1 Access the camera<br />
menu.<br />
• zPress the button.
ç Contents<br />
ç Chapter Contents<br />
25<br />
2 Choose [Date/Time].<br />
• zMove the zoom lever to choose<br />
the [3] tab.<br />
• zPress the buttons to<br />
choose [Date/Time], and then<br />
press the button.<br />
3 Change the date and<br />
time.<br />
• zFollow step 2 in “Setting the<br />
Date and Time” (= 23) to<br />
adjust the settings.<br />
• zPress the button to<br />
close the menu.<br />
• Date/time settings can be retained for about 3 weeks by the<br />
camera’s built-in date/time battery (backup battery) after the battery<br />
pack is removed.<br />
• The date/time battery will be charged in about 4 hours once you<br />
insert a charged battery pack or connect the camera to an AC<br />
adapter kit (sold separately, = 148), even if the camera is left off.<br />
• Once the date/time battery is depleted, the [Date/Time] screen will<br />
be displayed when you turn the camera on. Set the correct date and<br />
time as described in “Setting the Date and Time” (= 23).
ç Contents<br />
ç Chapter Contents<br />
Display Language<br />
Change the display language as needed.<br />
26<br />
1 Enter Playback mode.<br />
• zPress the button.<br />
2 Access the setting<br />
screen.<br />
• zPress and hold the <br />
button, and then press the<br />
button.<br />
3 Set the display language.<br />
• zPress the <br />
buttons to choose a language,<br />
and then press the <br />
button.<br />
• zOnce the display language has<br />
been set, the setting screen is<br />
no longer displayed.<br />
• You can also change the display language by pressing the<br />
button and choosing [Language ] on the [3] tab.
ç Contents<br />
ç Chapter Contents<br />
Still Images<br />
Trying the <strong>Camera</strong> Out<br />
Movies<br />
Follow these instructions to turn the camera on, shoot still images<br />
or movies, and then view them.<br />
27<br />
Shooting (Smart Auto)<br />
For fully automatic selection of the optimal settings for specific scenes,<br />
simply let the camera determine the subject and shooting conditions.<br />
1 Turn the camera on.<br />
• zPress the ON/OFF button.<br />
• zThe startup screen is displayed.<br />
2 Enter [ ] mode.<br />
• zPress the button several<br />
times until [ ] is displayed.<br />
• zAim the camera at the subject. The<br />
camera will make a slight clicking<br />
noise as it determines the scene.<br />
<strong>IXUS</strong> <strong>170</strong> <strong>IXUS</strong> <strong>165</strong><br />
• zIcons representing the scene<br />
and image stabilization mode<br />
are displayed in the upper right<br />
of the screen.<br />
<strong>IXUS</strong> <strong>160</strong><br />
• zA scene icon is displayed in the<br />
upper right of the screen.<br />
• zFrames displayed around any<br />
detected subjects indicate that<br />
they are in focus.
ç Contents<br />
ç Chapter Contents<br />
28<br />
3 Compose the shot.<br />
• zTo zoom in and enlarge the<br />
subject, move the zoom lever<br />
toward (telephoto), and<br />
to zoom away from the subject,<br />
move it toward (wide angle).<br />
4 Shoot.<br />
Shooting Still Images<br />
Focus.<br />
• zPress the shutter button lightly,<br />
halfway down. The camera<br />
beeps twice after focusing, and<br />
AF frames are displayed to<br />
indicate image areas in focus.<br />
Shoot.<br />
• zPress the shutter button all the<br />
way down.<br />
• zAs the camera shoots, a shutter<br />
sound is played, and in lowlight<br />
conditions, the flash fires<br />
automatically.<br />
• zKeep the camera still until the<br />
shutter sound ends.<br />
• zAfter displaying your shot,<br />
the camera will revert to the<br />
shooting screen.
ç Contents<br />
Elapsed Time<br />
ç Chapter Contents 29<br />
Shooting Movies<br />
Start shooting.<br />
• zPress the movie button. The<br />
camera beeps once as recording<br />
begins, and [ Rec] is displayed<br />
with the elapsed time.<br />
<strong>IXUS</strong> <strong>170</strong> <strong>IXUS</strong> <strong>165</strong><br />
• zBlack bars are displayed on<br />
the top and bottom edges of<br />
the screen, and the subject is<br />
slightly enlarged. The black<br />
bars indicate image areas not<br />
recorded.<br />
<strong>IXUS</strong> <strong>160</strong><br />
• zBlack bars displayed on the<br />
top and bottom edges of the<br />
screen indicate image areas not<br />
recorded.<br />
• zFrames displayed around any<br />
detected faces indicate that they<br />
are in focus.<br />
• zOnce recording begins, take<br />
your finger off the movie button.<br />
Finish shooting.<br />
• zPress the movie button again<br />
to stop shooting. The camera<br />
beeps twice as recording stops.
ç Contents<br />
Viewing<br />
ç Chapter Contents<br />
30<br />
After shooting images or movies, you can view them on the screen<br />
as follows.<br />
1 Enter Playback mode.<br />
• zPress the button.<br />
• zYour last shot is displayed.<br />
2 Browse through your<br />
images.<br />
• zTo view the previous image,<br />
press the button. To view<br />
the next image, press the <br />
button.<br />
• zPress and hold the <br />
buttons to browse through<br />
images quickly.<br />
z • Movies are identified by a<br />
[ ] icon. To play movies, go<br />
to step 3.
ç Contents<br />
ç Chapter Contents<br />
31<br />
3 Play movies.<br />
• zPress the button, press<br />
the buttons to choose<br />
[ ], and then press the <br />
button again.<br />
• zPlayback now begins, and after<br />
the movie is finished, [ ] is<br />
displayed.<br />
• zTo adjust the volume, press the<br />
buttons.<br />
• To switch to Shooting mode from Playback mode, press the shutter<br />
button halfway.<br />
Erasing Images<br />
You can choose and erase unneeded images one by one. Be<br />
careful when erasing images, because they cannot be recovered.<br />
1 Choose an image to<br />
erase.<br />
• zPress the buttons to<br />
choose an image.
ç Contents<br />
ç Chapter Contents<br />
32<br />
2 Erase the image.<br />
• zPress the button.<br />
• zAfter [Erase?] is displayed,<br />
press the buttons to<br />
choose [Erase], and then press<br />
the button.<br />
• zThe current image is now<br />
erased.<br />
• zTo cancel erasure, press the<br />
buttons to choose<br />
[Cancel], and then press the<br />
button.<br />
• You can also erase all images at once (= 123).<br />
Still Images<br />
Accessing the Help Menu<br />
Movies<br />
Access on-screen descriptions of scenes detected by the camera,<br />
shooting advice, and playback instructions as follows.<br />
• zPress the < > button to<br />
access the Help menu.<br />
• zPress the < > button again to<br />
return to the original display.
ç Contents<br />
ç Chapter Contents<br />
33<br />
• zIn Shooting mode, a description<br />
of the scene detected by the<br />
camera is displayed. Shooting<br />
advice is also displayed<br />
depending on the scene.<br />
• zIn Playback mode, press the<br />
buttons and choose<br />
an item. The zoom lever and<br />
buttons are displayed overlaying<br />
the illustration of the camera.<br />
• zChoose an item and press the<br />
button. An explanation<br />
of the item is displayed.<br />
To continue reading the<br />
explanation, press the<br />
buttons to scroll up or<br />
down the screen. Press the <br />
button to return to the left hand<br />
screen.<br />
• The Help menu can also be used in shooting modes other than<br />
[ ], and in those modes it will display the same as when in<br />
Playback mode.
ç Contents 34<br />
Advanced <strong>Guide</strong><br />
<strong>Camera</strong> Basics<br />
Other basic operations and more ways to enjoy<br />
your camera, including shooting and playback<br />
options<br />
On/Off..................................35<br />
Shutter Button....................37<br />
Shooting Display<br />
Options..............................38<br />
Using the FUNC. Menu......39<br />
Using Menus.......................41<br />
Indicator Display................43
ç Contents<br />
On/Off<br />
ç Chapter Contents<br />
35<br />
Shooting Mode<br />
• zPress the ON/OFF button to<br />
turn the camera on and prepare<br />
for shooting.<br />
• zTo turn the camera off, press the<br />
ON/OFF button again.<br />
Playback Mode<br />
• zPress the button to turn<br />
the camera on and view your<br />
shots.<br />
• zTo turn the camera off, press the<br />
button again.<br />
• To switch to Playback mode from Shooting mode, press the <br />
button.<br />
• To switch to Shooting mode from Playback mode, press the shutter<br />
button halfway (= 37).<br />
• The lens will be retracted after about one minute once the camera<br />
is in Playback mode. You can turn the camera off when the lens is<br />
retracted by pressing the button.
ç Contents<br />
ç Chapter Contents<br />
Power-Saving Features (Auto Power Down)<br />
36<br />
As a way to conserve battery power, the camera automatically<br />
deactivates the screen (Display Off) and then turns itself off after a<br />
specific period of inactivity.<br />
Power Saving in Shooting Mode<br />
The screen is automatically deactivated after about one minute<br />
of inactivity. In about two more minutes, the lens is retracted and<br />
the camera turns itself off. To activate the screen and prepare for<br />
shooting when the screen is off but the lens is still out, press the<br />
shutter button halfway (= 37).<br />
Power Saving in Playback Mode<br />
The camera turns itself off automatically after about five minutes<br />
of inactivity.<br />
• You can deactivate Auto Power Down and adjust the timing of<br />
Display Off, if you prefer (= 136).<br />
• Power saving is not active while the camera is connected to a<br />
computer (= 157).
ç Contents<br />
Shutter Button<br />
ç Chapter Contents<br />
To ensure your shots are in focus, always begin by holding the<br />
shutter button halfway down, and once the subject is in focus,<br />
press the button all the way down to shoot.<br />
In this manual, shutter button operations are described as<br />
pressing the button halfway or all the way down.<br />
37<br />
1 Press halfway. (Press<br />
lightly to focus.)<br />
• zPress the shutter button halfway.<br />
The camera beeps twice, and<br />
AF frames are displayed around<br />
image areas in focus.<br />
2 Press all the way down.<br />
(From the halfway<br />
position, press fully to<br />
shoot.)<br />
• zThe camera shoots, as a shutter<br />
sound is played.<br />
• zKeep the camera still until the<br />
shutter sound ends.<br />
• Images may be out of focus if you shoot without initially<br />
pressing the shutter button halfway.<br />
• Length of shutter sound playback varies depending on<br />
the time required for the shot. It may take longer in some<br />
shooting scenes, and images will be blurry if you move the<br />
camera (or the subject moves) before the shutter sound<br />
ends.
ç Contents<br />
ç Chapter Contents<br />
Shooting Display Options<br />
Press the button to view other information on the screen, or<br />
to hide the information. For details on the information displayed,<br />
see “On-Screen Information” (= 188).<br />
38<br />
Information is displayed<br />
No information is<br />
displayed<br />
• Screen brightness is automatically increased by the night view<br />
function when you are shooting under low light, making it easier<br />
to check how shots are composed. However, on-screen image<br />
brightness may not match the brightness of your shots. Note that<br />
any on-screen image distortion or jerky subject motion will not affect<br />
recorded images.<br />
• For playback display options, see “Switching Display Modes”<br />
(= 112).
ç Contents<br />
Using the FUNC. Menu<br />
ç Chapter Contents<br />
39<br />
Configure commonly used functions through the FUNC. menu as<br />
follows.<br />
Note that menu items and options vary depending on the shooting<br />
mode (= 194 – 197) or playback mode (= 203).<br />
1 Access the FUNC. menu.<br />
• zPress the button.<br />
Options<br />
Menu Items<br />
2 Choose a menu item.<br />
• zPress the buttons to<br />
choose a menu item, and then<br />
press the or button.<br />
• zDepending on the menu item,<br />
functions can be specified<br />
simply by pressing the or<br />
button, or another screen<br />
is displayed for configuring the<br />
function.<br />
3 Choose an option.<br />
• zPress the buttons to<br />
choose an option.<br />
• zOptions labeled with a<br />
[ ] icon can be configured by<br />
pressing the button.<br />
• zTo return to the menu items,<br />
press the button.
ç Contents<br />
ç Chapter Contents<br />
40<br />
4 Finish the setup<br />
process.<br />
• zPress the button.<br />
• zThe screen before you pressed<br />
the button in step 1 is<br />
displayed again, showing the<br />
option you configured.<br />
• To undo any accidental setting changes, you can restore the<br />
camera’s default settings (= 144).
ç Contents<br />
Using Menus<br />
ç Chapter Contents<br />
41<br />
Configure a variety of camera functions through other menus as<br />
follows. Menu items are grouped by purpose on tabs, such as<br />
shooting [4], playback [1], and so on. Note that available menu<br />
items vary depending on the selected shooting or playback mode<br />
(= 198 – 202).<br />
1 Access the menu.<br />
• zPress the button.<br />
2 Choose a tab.<br />
• zMove the zoom lever to choose<br />
a tab.<br />
• zAfter you have pressed the<br />
buttons to choose<br />
a tab initially, you can switch<br />
between tabs by pressing the<br />
buttons.
ç Contents<br />
ç Chapter Contents<br />
42<br />
3 Choose a menu item.<br />
• zPress the buttons to<br />
choose a menu item.<br />
• zFor menu items with options not<br />
shown, first press the or<br />
button to switch screens,<br />
and then press the <br />
buttons to select the menu item.<br />
• zTo return to the previous screen,<br />
press the button.<br />
4 Choose an option.<br />
• zPress the buttons to<br />
choose an option.<br />
5 Finish the setup<br />
process.<br />
• zPress the button to<br />
return to the screen displayed<br />
before you pressed the<br />
button in step 1.<br />
• To undo any accidental setting changes, you can restore the<br />
camera’s default settings (= 144).
ç Contents<br />
Indicator Display<br />
ç Chapter Contents<br />
The indicator on the back of the camera (= 6) lights up or<br />
blinks depending on the camera status.<br />
Color<br />
Green<br />
Indicator<br />
Status<br />
On<br />
Blinking<br />
<strong>Camera</strong> Status<br />
Connected to a computer (= 157), or display off<br />
(= 36, 62, 103, 136)<br />
43<br />
Starting up, recording/reading/transmitting images,<br />
or shooting long exposures (= 81)<br />
• When the indicator blinks green, never turn the camera off,<br />
open the memory card/battery cover, or shake or jolt the<br />
camera, which may corrupt images or damage the camera<br />
or memory card.
ç Contents<br />
44<br />
Auto Mode<br />
Convenient mode for easy shots with greater<br />
control over shooting<br />
Shooting with <strong>Camera</strong>-<br />
Determined Settings.........45<br />
Common, Convenient<br />
Features.............................54<br />
Image Customization<br />
Features.............................63<br />
Helpful Shooting<br />
Features.............................66<br />
Customizing <strong>Camera</strong><br />
Operation...........................67
ç Contents<br />
ç Chapter Contents 45<br />
Shooting with <strong>Camera</strong>-Determined<br />
Settings<br />
For fully automatic selection of the optimal settings for specific scenes,<br />
simply let the camera determine the subject and shooting conditions.<br />
Shooting (Smart Auto)<br />
Still Images<br />
Movies<br />
1 Turn the camera on.<br />
• zPress the ON/OFF button.<br />
• zThe startup screen is displayed.<br />
2 Enter [ ] mode.<br />
• zPress the button several<br />
times until [ ] is displayed.<br />
• zAim the camera at the subject. The<br />
camera will make a slight clicking<br />
noise as it determines the scene.<br />
<strong>IXUS</strong> <strong>170</strong> <strong>IXUS</strong> <strong>165</strong><br />
• zIcons representing the scene<br />
and image stabilization mode<br />
are displayed in the upper right<br />
of the screen (= 51, 52).<br />
<strong>IXUS</strong> <strong>160</strong><br />
• zA scene icon is displayed in<br />
the upper right of the screen<br />
(= 51).<br />
• zFrames displayed around any<br />
detected subjects indicate that<br />
they are in focus.
ç Contents<br />
Zoom Bar<br />
ç Chapter Contents<br />
46<br />
3 Compose the shot.<br />
• zTo zoom in and enlarge the<br />
subject, move the zoom lever<br />
toward (telephoto), and<br />
to zoom away from the subject,<br />
move it toward (wide<br />
angle). (A zoom bar showing the<br />
zoom position is displayed.)<br />
4 Shoot.<br />
Shooting Still Images<br />
Focus.<br />
• zPress the shutter button<br />
halfway. The camera beeps<br />
twice after focusing, and AF<br />
frames are displayed to indicate<br />
image areas in focus.<br />
• zSeveral AF frames are<br />
displayed when multiple areas<br />
are in focus.
ç Contents<br />
Elapsed Time<br />
ç Chapter Contents<br />
47<br />
Shoot.<br />
• zPress the shutter button all the<br />
way down.<br />
• zAs the camera shoots, a shutter<br />
sound is played, and in lowlight<br />
conditions, the flash fires<br />
automatically.<br />
• zKeep the camera still until the<br />
shutter sound ends.<br />
• zAfter displaying your shot,<br />
the camera will revert to the<br />
shooting screen.<br />
Shooting Movies<br />
Start shooting.<br />
• zPress the movie button.<br />
The camera beeps once as<br />
recording begins, and [ Rec] is<br />
displayed with the elapsed time.<br />
<strong>IXUS</strong> <strong>170</strong> <strong>IXUS</strong> <strong>165</strong><br />
• zBlack bars are displayed on the<br />
top and bottom edges of the<br />
screen, and the subject is slightly<br />
enlarged. The black bars indicate<br />
image areas not recorded.<br />
<strong>IXUS</strong> <strong>160</strong><br />
• zBlack bars displayed on the top<br />
and bottom edges of the screen<br />
indicate image areas not recorded.<br />
• zFrames displayed around any<br />
detected faces indicate that they<br />
are in focus.<br />
• zOnce recording begins, take<br />
your finger off the movie button.
ç Contents<br />
ç Chapter Contents<br />
48<br />
Resize the subject and<br />
recompose the shot as<br />
needed.<br />
• zTo resize the subject, repeat the<br />
operations in step 3 (= 46).<br />
However, note that the sound<br />
of camera operations will be<br />
recorded. Note that movies shot<br />
at zoom factors shown in blue<br />
will look grainy.<br />
• zWhen you recompose shots, the<br />
focus, brightness, and colors<br />
will be automatically adjusted.<br />
Finish shooting.<br />
• zPress the movie button again<br />
to stop shooting. The camera<br />
beeps twice as recording stops.<br />
• zRecording will stop<br />
automatically when the memory<br />
card becomes full.<br />
Still Images/Movies<br />
• If the camera is turned on while the button is held<br />
down, the camera will no longer sound. To activate sounds<br />
again, press the button and choose [Mute]<br />
on the [3] tab, and then press the buttons to<br />
choose [Off].
ç Contents<br />
Still Images<br />
ç Chapter Contents<br />
49<br />
• A blinking [ ] icon warns that images are more likely to be<br />
blurred by camera shake. In this case, mount the camera<br />
on a tripod or take other measures to keep it still.<br />
• If your shots are dark despite the flash firing, move closer<br />
to the subject. For details on the flash range, see “Flash<br />
Range” (= 209).<br />
• The subject may be too close if the camera only beeps<br />
once when you press the shutter button halfway. For<br />
details on the focusing range (shooting range), see<br />
“Shooting Range” (= 210).<br />
• To reduce red-eye and to assist in focusing, the lamp may<br />
be activated when shooting in low-light conditions.<br />
• A blinking [h] icon displayed when you attempt to shoot<br />
indicates that shooting is not possible until the flash has<br />
finished recharging. Shooting can resume as soon as the<br />
flash is ready, so either press the shutter button all the way<br />
down and wait, or release it and press it again.<br />
• Although you can shoot again before the shooting screen<br />
is displayed, your previous shot may determine the focus,<br />
brightness, and colors used.<br />
• You can change how long images are displayed after shots<br />
(= 105).
Movies<br />
ç Contents<br />
ç Chapter Contents<br />
50<br />
• The camera may become warm when shooting movies<br />
repeatedly over an extended period. This does not indicate<br />
damage.<br />
Microphone<br />
• Keep your fingers away<br />
from the microphone while<br />
shooting movies. Blocking<br />
the microphone may prevent<br />
audio from being recorded or<br />
may cause the recording to<br />
sound muffled.<br />
• Avoid touching camera controls other than the movie<br />
button when shooting movies, because sounds made by<br />
the camera will be recorded.<br />
<strong>IXUS</strong> <strong>170</strong> <strong>IXUS</strong> <strong>165</strong><br />
• Once movie recording begins, the image display area<br />
changes and subjects are enlarged to allow for correction<br />
of significant camera shake. To shoot subjects at the same<br />
size shown before shooting, adjust the image stabilization<br />
setting (= 107).<br />
<strong>IXUS</strong> <strong>160</strong><br />
• To prevent excessive motion blur when recording movies,<br />
mount the camera on a tripod or take other measures to<br />
hold it still.<br />
• Audio recording is monaural.
ç Contents<br />
Scene Icons<br />
ç Chapter Contents<br />
Still Images<br />
Movies<br />
51<br />
In [ ] mode, shooting scenes determined by the camera are<br />
indicated by the icon displayed, and corresponding settings are<br />
automatically selected for optimal focusing, subject brightness,<br />
and color.<br />
Subject People<br />
Other Subjects<br />
Icon<br />
Shadows<br />
In<br />
In At Close Background<br />
on<br />
Motion* 1<br />
Motion* Color<br />
Background<br />
Face* 1 Range<br />
1<br />
Bright<br />
Gray<br />
Backlit –<br />
With Blue<br />
Sky<br />
Light Blue<br />
Backlit –<br />
Sunsets – – Orange<br />
Spotlights<br />
Dark<br />
Tripod<br />
Used<br />
* 2 – * 2 –<br />
Dark Blue<br />
*1 Not displayed for movies.<br />
*2 Displayed in dark scenes when the camera is held still, as when mounted<br />
on a tripod.<br />
• Try shooting in [G] mode (= 83) if the scene icon does<br />
not match actual shooting conditions, or if it is not possible<br />
to shoot with your expected effect, color, or brightness.
ç Contents<br />
<strong>IXUS</strong> <strong>170</strong> <strong>IXUS</strong> <strong>165</strong><br />
ç Chapter Contents<br />
Still Images<br />
Image Stabilization Icons<br />
Movies<br />
Optimal image stabilization for the shooting conditions is<br />
automatically applied (Intelligent IS). Additionally, the following<br />
icons are displayed in [ ] mode.<br />
Image stabilization for still<br />
images (Normal)<br />
Image stabilization for still<br />
images when panning*<br />
(Panning)<br />
Image stabilization for macro<br />
shots (Hybrid IS).<br />
During movie recording,<br />
[ ] is displayed, and image<br />
stabilization for macro movie<br />
recording is used.<br />
52<br />
Image stabilization for<br />
movies, reducing strong<br />
camera shake, as when<br />
shooting while walking<br />
(Dynamic)<br />
Image stabilization for slow<br />
camera shake, such as when<br />
shooting movies at telephoto<br />
(Powered)<br />
No image stabilization,<br />
because the camera is<br />
mounted on a tripod or held<br />
still by other means.<br />
However, during movie<br />
recording, [ ] is displayed,<br />
and image stabilization to<br />
counteract wind or other<br />
sources of vibration is used.<br />
(Tripod IS)<br />
* Displayed when you pan, following moving subjects with the camera.<br />
When you follow subjects moving horizontally, image stabilization only<br />
counteracts vertical camera shake, and horizontal stabilization stops.<br />
Similarly, when you follow subjects moving vertically, image stabilization<br />
only counteracts horizontal camera shake.<br />
• To cancel image stabilization, set [IS Mode] to [Off] (= 107). In<br />
this case, an IS icon is not displayed.
ç Contents<br />
On-Screen Frames<br />
ç Chapter Contents<br />
Still Images<br />
Movies<br />
53<br />
A variety of frames are displayed once the camera detects<br />
subjects you are aiming the camera at.<br />
• A white frame is displayed around the subject (or person’s face)<br />
determined by the camera to be the main subject, and gray<br />
frames are displayed around other detected faces. Frames<br />
follow moving subjects within a certain range to keep them in<br />
focus.<br />
However, if the camera detects subject movement, only the<br />
white frame will remain on the screen.<br />
• When you are pressing the shutter button halfway and the<br />
camera detects subject movement, a blue frame is displayed,<br />
and the focus and image brightness are constantly adjusted<br />
(Servo AF).<br />
• Try shooting in [G] mode (= 83) if no frames are<br />
displayed, if frames are not displayed around desired<br />
subjects, or if frames are displayed on the background or<br />
similar areas.
ç Contents<br />
ç Chapter Contents<br />
Common, Convenient Features<br />
54<br />
Still Images<br />
Zooming In Closer on Subjects<br />
(Digital Zoom)<br />
Movies<br />
When distant subjects are too far away to enlarge using optical<br />
zoom, use digital zoom for up to about 48x ( <strong>IXUS</strong> <strong>170</strong> ) or 32x<br />
( <strong>IXUS</strong> <strong>165</strong> <strong>IXUS</strong> <strong>160</strong> ) enlargement.<br />
Zoom Factor<br />
1 Move the zoom lever<br />
toward .<br />
• zHold the lever until zooming<br />
stops.<br />
• zZooming stops at the largest<br />
possible zoom factor (before<br />
the image becomes noticeably<br />
grainy), which is then indicated<br />
on the screen.<br />
2 Move the zoom lever<br />
toward again.<br />
• zThe camera zooms in even<br />
closer on the subject.
ç Contents<br />
ç Chapter Contents<br />
55<br />
• Moving the zoom lever will display the zoom bar (which<br />
indicates the zoom position). The color of the zoom bar will<br />
change depending on the zoom range.<br />
- White range: optical zoom range where the image will not<br />
appear grainy.<br />
- Yellow range: digital zoom range where the image is not<br />
noticeably grainy (ZoomPlus).<br />
- Blue range: digital zoom range where the image will<br />
appear grainy.<br />
Because the blue range will not be available at some<br />
resolution settings (= 63), the maximum zoom factor<br />
can be achieved by following step 1.<br />
• Zoomed images may look grainy under some resolution<br />
settings (= 63) and zoom factors. In this case, the<br />
zoom factor is shown in blue.
ç Contents<br />
Using the Self-Timer<br />
ç Chapter Contents<br />
Still Images<br />
Movies<br />
With the self-timer, you can include yourself in group photos or<br />
other timed shots. The camera will shoot about 10 seconds after<br />
you press the shutter button.<br />
1 Configure the setting.<br />
• zPress the button,<br />
choose [ ] in the menu, and<br />
then choose the []] option<br />
(= 39).<br />
• zOnce the setting is complete,<br />
[]] is displayed.<br />
56<br />
2 Shoot.<br />
• zFor Still Images: Press the<br />
shutter button halfway to focus<br />
on the subject, and then press it<br />
all the way down.<br />
• zFor Movies: Press the movie<br />
button.
ç Contents<br />
ç Chapter Contents<br />
57<br />
• zOnce you start the self-timer,<br />
the lamp will blink and the<br />
camera will play a self-timer<br />
sound.<br />
• zTwo seconds before the shot,<br />
the blinking and sound will<br />
speed up. (The lamp will remain<br />
lit in case the flash fires.)<br />
• zTo cancel shooting after you<br />
have triggered the self-timer,<br />
press the button.<br />
• zTo restore the original setting,<br />
choose [ ] in step 1.<br />
Still Images<br />
Movies<br />
Using the Self-Timer to Avoid <strong>Camera</strong> Shake<br />
This option delays shutter release until about two seconds after<br />
you have pressed the shutter button. If the camera is unsteady<br />
while you are pressing the shutter button, it will not affect your<br />
shot.<br />
• zFollow step 1 in “Using the Self-<br />
Timer” (= 56) and choose<br />
[[].<br />
• zOnce the setting is complete,<br />
[[] is displayed.<br />
• zFollow step 2 in “Using the Self-<br />
Timer” (= 56) to shoot.
ç Contents<br />
ç Chapter Contents<br />
Still Images<br />
Movies<br />
58<br />
Customizing the Self-Timer<br />
You can specify the delay (0 – 30 seconds) and number of shots<br />
(1 – 10).<br />
1 Choose [$].<br />
• zFollowing step 1 in “Using the<br />
Self-Timer” (= 56), choose<br />
[$] and press the <br />
button.<br />
2 Configure the setting.<br />
• zPress the buttons to<br />
choose [Delay] or [Shots].<br />
• zPress the buttons to<br />
choose a value, and then press<br />
the button.<br />
• zOnce the setting is complete,<br />
[$] is displayed.<br />
• zFollow step 2 in “Using the Self-<br />
Timer” (= 56) to shoot.<br />
• For movies shot using the self-timer, [Delay] represents<br />
the delay before recording begins, but the [Shots] setting<br />
has no effect.
ç Contents<br />
ç Chapter Contents<br />
59<br />
• When you specify multiple shots, image brightness and white<br />
balance are determined by the first shot. More time is required<br />
between shots when the flash fires or when you have specified to<br />
take many shots. Shooting will stop automatically when the memory<br />
card becomes full.<br />
• When a delay longer than two seconds is specified, two seconds<br />
before the shot, the lamp blinking and self-timer sound will speed<br />
up. (The lamp will remain lit in case the flash fires.)<br />
Deactivating the Flash<br />
Still Images<br />
Prepare the camera for shooting without the flash as follows.<br />
• zPress the button several<br />
times until [!] is displayed.<br />
• zThe flash will no longer be<br />
activated.<br />
• zTo activate the flash, press<br />
the button again.<br />
([ ] is displayed.) The flash<br />
will automatically fire in low-light<br />
conditions.<br />
• If a blinking [ ] icon is displayed when you press the<br />
shutter button halfway in camera-shake inducing, low-light<br />
conditions, mount the camera on a tripod or take other<br />
measures to keep it still.
ç Contents<br />
Adding a Date Stamp<br />
ç Chapter Contents<br />
Still Images<br />
The camera can add the shooting date to images, in the lowerright<br />
corner.<br />
However, note that date stamps cannot be edited or removed, so<br />
confirm beforehand that the date and time are correct (= 23).<br />
60<br />
1 Configure the setting.<br />
• zPress the button,<br />
choose [Date Stamp ] on the<br />
[4] tab, and then choose the<br />
desired option (= 41).<br />
• zOnce the setting is complete,<br />
[ ] is displayed.<br />
2 Shoot.<br />
• zAs you take shots, the camera<br />
adds the shooting date or time<br />
to the lower-right corner of<br />
images.<br />
• zTo restore the original setting,<br />
choose [Off] in step 1.<br />
• Date stamps cannot be edited or removed.
ç Contents<br />
ç Chapter Contents<br />
61<br />
• Shots taken without adding a date stamp can be printed with one<br />
as follows.<br />
However, adding a date stamp this way to images that already have<br />
one may cause it to be printed twice.<br />
- Print using printer functions (= <strong>162</strong>)<br />
- Use camera DPOF print settings (= 168) to print<br />
- Use the software downloaded from the Canon website (= 155) to print<br />
Still Images<br />
Continuous Shooting<br />
Hold the shutter button all the way down to shoot continuously.<br />
For details on the continuous shooting speed, see “Continuous<br />
Shooting Speed” (= 210).<br />
1 Configure the setting.<br />
• zPress the button, choose<br />
[ ] in the menu, and then<br />
choose [W] (= 39).<br />
• zOnce the setting is complete,<br />
[W] is displayed.<br />
2 Shoot.<br />
• zHold the shutter button all the<br />
way down to shoot continuously.<br />
• Cannot be used with the self-timer (= 56).<br />
• Shooting may stop momentarily or continuous shooting<br />
may slow down depending on shooting conditions, camera<br />
settings, and the zoom position.<br />
• As more shots are taken, shooting may slow down.<br />
• Shooting may slow down if the flash fires.
ç Contents<br />
Using Eco Mode<br />
ç Chapter Contents<br />
Still Images<br />
Movies<br />
62<br />
This function allows you to conserve battery power in Shooting<br />
mode. When the camera is not in use, the screen quickly darkens<br />
to reduce battery consumption.<br />
1 Configure the setting.<br />
• zPress the button several<br />
times until [ ] is displayed.<br />
• zThe screen darkens when<br />
the camera is not used for<br />
approximately two seconds;<br />
approximately ten seconds after<br />
darkening, the screen turns<br />
off. The camera turns off after<br />
approximately three minutes of<br />
inactivity.<br />
• zBy pressing the button<br />
again, [ ] is displayed, and<br />
Eco Mode is deactivated.<br />
2 Shoot.<br />
• zTo activate the screen and<br />
prepare for shooting when the<br />
screen is off but the lens is still<br />
out, press the shutter button<br />
halfway.
ç Contents<br />
ç Chapter Contents<br />
Image Customization Features<br />
63<br />
Still Images<br />
Changing Image Resolution (Size)<br />
Choose from 5 levels of image resolution, as follows. For guidelines<br />
on how many shots at each resolution setting can fit on a memory<br />
card, see “Number of Shots per Memory Card” (= 208).<br />
• zPress the button, choose<br />
[ ] in the menu, and choose<br />
the desired option (= 39).<br />
• zThe option you configured is<br />
now displayed.<br />
• zTo restore the original setting,<br />
repeat this process but choose<br />
[ ].<br />
<strong>Guide</strong>lines for Choosing Resolution Based on<br />
Paper Size<br />
• z[<br />
]: For e-mailing images.<br />
A2 (16.5 x 23.4 in.)<br />
A3 – A5 (11.7 x<br />
16.5 – 5.8 x 8.3 in.)<br />
5 x 7 in.<br />
Postcard<br />
3.5 x 5 in.<br />
• z[<br />
]: For images displayed on<br />
widescreen HDTVs or similar<br />
display devices, on a 16:9<br />
screen.
ç Contents<br />
Red-Eye Correction<br />
ç Chapter Contents<br />
Still Images<br />
Red-eye that occurs in flash photography can be automatically<br />
corrected as follows.<br />
64<br />
• zPress the button,<br />
choose [Red-Eye Corr.] on the<br />
[4] tab, and then choose [On]<br />
(= 41).<br />
• zOnce the setting is complete,<br />
[R] is displayed.<br />
• zTo restore the original setting,<br />
repeat this process but choose<br />
[Off].<br />
• Red-eye correction may be applied to image areas other<br />
than eyes (if the camera misinterprets red eye makeup as<br />
red pupils, for example).<br />
• You can also correct existing images (= 130).
ç Contents<br />
ç Chapter Contents<br />
Changing Movie Image Quality<br />
Movies<br />
2 image quality settings are available. For guidelines on the<br />
maximum movie length at each level of image quality that will<br />
fit on a memory card, see “Recording Time per Memory Card”<br />
(= 209).<br />
65<br />
• zPress the button, choose<br />
[ ] in the menu, and choose<br />
the desired option (= 39).<br />
• zThe option you configured is<br />
now displayed.<br />
• zTo restore the original setting,<br />
repeat this process but choose<br />
[ ].<br />
Image<br />
Quality<br />
Resolution Frame Rate Details<br />
1280 x 720 25 fps For shooting in HD<br />
640 x 480 30 fps For shooting in standard definition<br />
• In [ ] mode, black bars displayed on the top and bottom edges of<br />
the screen indicate image areas not recorded.
ç Contents<br />
ç Chapter Contents<br />
Helpful Shooting Features<br />
66<br />
Checking for Closed Eyes<br />
Still Images<br />
[ ] is displayed when the camera detects that people may have<br />
closed their eyes.<br />
1 Configure the setting.<br />
• zPress the button,<br />
choose [Blink Detection] on the<br />
[4] tab, and then choose [On]<br />
(= 41).<br />
2 Shoot.<br />
• z[<br />
] flashes when the camera<br />
detects a person whose eyes<br />
are closed.<br />
• zTo restore the original setting,<br />
choose [Off] in step 1.<br />
• When you have specified multiple shots in [$] mode, this function<br />
is only available for the final shot.<br />
• A frame is displayed around people whose eyes are closed when<br />
you have selected [2 sec.], [4 sec.], [8 sec.], or [Hold] in [Display<br />
Time] (= 105).<br />
• This feature is not available in continuous shooting mode (= 61).
ç Contents<br />
ç Chapter Contents<br />
Customizing <strong>Camera</strong> Operation<br />
Customize shooting functions on the M<strong>EN</strong>U [4] tab as follows.<br />
For instructions on menu functions, see “Using Menus” (= 41).<br />
67<br />
Deactivating the Lamp<br />
Still Images<br />
You can deactivate the lamp that normally lights up to help you<br />
focus in low-light conditions when you press the shutter button<br />
halfway, or that lights up to reduce red-eye when you shoot in lowlight<br />
conditions with the flash.<br />
• zPress the button,<br />
choose [Lamp Setting] on the<br />
[4] tab, and then choose [Off]<br />
(= 41).<br />
• zTo restore the original setting,<br />
repeat this process but choose<br />
[On].
ç Contents<br />
68<br />
Other Shooting<br />
Modes<br />
Shoot more effectively in various scenes, and<br />
take shots enhanced with unique image effects or<br />
captured using special functions<br />
Brightness / Color<br />
Customization<br />
(Live View Control)...........69<br />
Specific Scenes..................70<br />
Applying Special Effects...73<br />
Special Modes for Other<br />
Purposes...........................79
ç Contents<br />
ç Chapter Contents<br />
Still Images<br />
Movies<br />
Brightness / Color Customization<br />
(Live View Control)<br />
Image brightness or colors when shooting can be easily<br />
customized as follows.<br />
1 Enter [ ] mode.<br />
• zPress the button several<br />
times until [ ] is displayed.<br />
69<br />
Brightness<br />
Color<br />
Tone<br />
2 Configure the setting.<br />
• zPress the button to access<br />
the setting screen. Press the<br />
buttons to choose a<br />
setting item, and then press the<br />
buttons to adjust the<br />
value as you watch the screen.<br />
• zPress the button.<br />
3 Shoot.<br />
For brighter images, adjust the level to the right, and for darker<br />
images, adjust it to the left.<br />
For more vivid images, adjust the level to the right, and for more<br />
subdued images, adjust it to the left.<br />
For a warm, reddish tone, adjust the level to the right, and for a<br />
cool, bluish tone, adjust it to the left.
ç Contents<br />
Specific Scenes<br />
ç Chapter Contents<br />
70<br />
Choose a mode matching the shooting scene, and the camera will<br />
automatically configure the settings for optimal shots.<br />
1 Choose a shooting<br />
mode.<br />
• zPress the button several<br />
times until [ ] is displayed.<br />
• zPress the button, choose<br />
[ ] in the menu, and choose<br />
the desired option (= 39).<br />
2 Shoot.<br />
Still Images<br />
Movies<br />
I Shoot portraits (Portrait)<br />
• zTake shots of people with a<br />
softening effect.<br />
Still Images<br />
Shoot under low light<br />
(Low Light)<br />
• zShoot with minimal camera and<br />
subject shake even in low-light<br />
conditions.
ç Contents<br />
ç Chapter Contents<br />
Still Images<br />
Movies<br />
P Shoot with snowy<br />
backgrounds (Snow)<br />
• zBright, natural-colored shots<br />
of people against snowy<br />
backgrounds.<br />
71<br />
Still Images<br />
Movies<br />
t Shoot fireworks<br />
(Fireworks)<br />
• zVivid shots of fireworks.<br />
• In [t] mode, mount the camera on a tripod or take other<br />
measures to keep it still and prevent camera shake.<br />
<strong>IXUS</strong> <strong>170</strong> <strong>IXUS</strong> <strong>165</strong><br />
• Set [IS Mode] to [Off] when using a tripod or other means<br />
to secure the camera (= 107).<br />
• [ ] mode resolution is [ ] (2560 x 1920) and cannot be changed.<br />
• In [t] mode, although no frames are displayed when you press the<br />
shutter button halfway, optimal focus is still determined.
ç Contents<br />
ç Chapter Contents<br />
72<br />
<strong>IXUS</strong> <strong>160</strong><br />
Still Images<br />
Shooting with Reduced Motion Blur<br />
(Digital IS)<br />
Shoot with minimal camera and subject shake. In scenes where<br />
the flash is not fired, consecutive shots are combined to reduce<br />
camera shake and noise.<br />
1 Enter [ ] mode.<br />
• zFollow step 1 in “Specific Scenes”<br />
(= 70) and choose [ ].<br />
2 Shoot.<br />
• zPress the shutter button<br />
halfway. [ ] is displayed on the<br />
left side of the screen in scenes<br />
where the flash is not fired.<br />
• zWhen [ ] is displayed, press the<br />
shutter button all the way down.<br />
Images will be shot continuously,<br />
and then be combined.<br />
• zWhen the icon is not displayed,<br />
press the shutter button all the<br />
way down to shoot a single image.<br />
• Because the camera will shoot continuously when [<br />
displayed, hold it steady while shooting.<br />
• In some scenes, images may not look as expected.<br />
] is<br />
• When using a tripod, shoot in [ ] mode (= 45).<br />
• [ ] mode resolution is [ ] (2560 x 1920) and cannot be changed.
ç Contents<br />
ç Chapter Contents<br />
Applying Special Effects<br />
Add a variety of effects to images when shooting.<br />
73<br />
1 Choose a shooting<br />
mode.<br />
• zFollow step 1 in “Specific Scenes”<br />
(= 70) to choose a shooting<br />
mode.<br />
2 Shoot.<br />
Still Images<br />
Movies<br />
Shoot in vivid colors<br />
(Super Vivid)<br />
• zShots in rich, vivid colors.<br />
Still Images<br />
Movies<br />
Posterized shots<br />
(Poster Effect)<br />
• zShots that resemble an old<br />
poster or illustration.<br />
• In [ ] and [ ] modes, try taking some test shots first, to<br />
make sure you obtain the desired results.
ç Contents<br />
ç Chapter Contents<br />
Still Images<br />
Shooting with a Fish-Eye Lens Effect<br />
(Fish-Eye Effect)<br />
Shoot with the distorting effect of a fish-eye lens.<br />
74<br />
1 Choose [ ].<br />
• zFollow step 1 in “Specific Scenes”<br />
(= 70) and choose [ ].<br />
2 Choose an effect level.<br />
• zPress the button, press<br />
the buttons to choose<br />
an effect level, and then press<br />
the button.<br />
• zA preview is shown of how your<br />
shot will look with the effect<br />
applied.<br />
3 Shoot.<br />
• Try taking some test shots first, to make sure you obtain<br />
the desired results.
ç Contents<br />
ç Chapter Contents<br />
Still Images<br />
Movies<br />
Shots Resembling Miniature Models<br />
(Miniature Effect)<br />
75<br />
Creates the effect of a miniature model, by blurring image areas<br />
above and below your selected area.<br />
You can also make movies that look like scenes in miniature<br />
models by choosing the playback speed before the movie is<br />
recorded. People and objects in the scene will move quickly during<br />
playback. Note that sound is not recorded.<br />
1 Choose [ ].<br />
• zFollow step 1 in “Specific Scenes”<br />
(= 70) and choose [ ].<br />
• zA white frame is displayed,<br />
indicating the image area that<br />
will not be blurred.<br />
2 Choose the area to keep<br />
in focus.<br />
• zPress the button.<br />
• zMove the zoom lever to resize<br />
the frame, and press the<br />
buttons to move it.<br />
3 For movies, choose the<br />
movie playback speed.<br />
• zPress the button, and<br />
then press the buttons<br />
to choose the speed.
ç Contents<br />
ç Chapter Contents 76<br />
4 Return to the shooting<br />
screen and shoot.<br />
• zPress the button to<br />
return to the shooting screen,<br />
and then shoot.<br />
Playback Speed and Estimated Playback Time<br />
(for One-Minute Clips)<br />
Speed<br />
Playback Time<br />
Approx. 12 sec.<br />
Approx. 6 sec.<br />
Approx. 3 sec.<br />
• The zoom is not available when shooting movies. Be sure<br />
to set the zoom before shooting.<br />
• Try taking some test shots first, to make sure you obtain<br />
the desired results.<br />
• To switch the orientation of the frame to vertical, press the <br />
buttons in step 2. To return the frame to horizontal orientation, press<br />
the buttons.<br />
• To move the frame when it is in horizontal orientation, press the<br />
buttons, and to move the frame when it is in vertical<br />
orientation, press the buttons.<br />
• Holding the camera vertically will change the orientation of the<br />
frame.<br />
• Movie image quality is [ ] when a still image resolution of [ ] is<br />
selected and [ ] when a still image resolution of [ ] is selected<br />
(= 63). These quality settings cannot be changed.
ç Contents<br />
ç Chapter Contents<br />
Still Images<br />
Shooting with a Toy <strong>Camera</strong> Effect<br />
(Toy <strong>Camera</strong> Effect)<br />
77<br />
This effect makes images resemble shots from a toy camera by<br />
vignetting (darker, blurred image corners) and changing the overall<br />
color.<br />
1 Choose [ ].<br />
• zFollow step 1 in “Specific<br />
Scenes” (= 70) and choose<br />
[ ].<br />
2 Choose a color tone.<br />
• zPress the button, press<br />
the buttons to choose<br />
a color tone, and then press the<br />
button.<br />
• zA preview is shown of how your<br />
shot will look with the effect<br />
applied.<br />
3 Shoot.<br />
Standard<br />
Warm<br />
Cool<br />
Shots resemble toy camera images.<br />
Images have a warmer tone than with [Standard].<br />
Images have a cooler tone than with [Standard].<br />
• Try taking some test shots first, to make sure you obtain<br />
the desired results.
ç Contents<br />
ç Chapter Contents<br />
Still Images<br />
Movies<br />
Shooting in Monochrome<br />
Shoot images in black and white, sepia, or blue and white.<br />
78<br />
1 Choose [ ].<br />
• zFollow step 1 in “Specific<br />
Scenes” (= 70) and choose<br />
[ ].<br />
2 Choose a color tone.<br />
• zPress the button, press<br />
the buttons to choose<br />
a color tone, and then press the<br />
button.<br />
• zA preview is shown of how your<br />
shot will look with the effect<br />
applied.<br />
3 Shoot.<br />
B/W<br />
Sepia<br />
Blue<br />
Black and white shots.<br />
Sepia tone shots.<br />
Blue and white shots.
ç Contents<br />
ç Chapter Contents 79<br />
Special Modes for Other Purposes<br />
Using the Face Self-Timer<br />
Still Images<br />
The camera will shoot about two seconds after detecting that the<br />
face of another person (such as the photographer) has entered<br />
the shooting area (= 94). This is useful when including yourself<br />
in group photos or similar shots.<br />
1 Choose [ ].<br />
• zFollow step 1 in “Specific Scenes”<br />
(= 70) and choose [ ].<br />
2 Compose the shot and<br />
press the shutter button<br />
halfway.<br />
• zMake sure a green frame is<br />
displayed around the face you<br />
focus on and white frames<br />
around other faces.<br />
3 Press the shutter button<br />
all the way down.<br />
• zThe camera now enters<br />
shooting standby mode, and<br />
[Look straight at camera to start<br />
count down] is displayed.<br />
• zThe lamp blinks and the selftimer<br />
sound is played.
ç Contents<br />
ç Chapter Contents<br />
80<br />
4 Join the subjects in the<br />
shooting area and look<br />
at the camera.<br />
• zAfter the camera detects a<br />
new face, the lamp blinking<br />
and self-timer sound will speed<br />
up. (When the flash fires, the<br />
lamp will remain lit.) About two<br />
seconds later, the camera will<br />
shoot.<br />
• zTo cancel shooting after you<br />
have triggered the self-timer,<br />
press the button.<br />
• Even if your face is not detected after you join the others in the<br />
shooting area, the camera will shoot about 15 seconds later.<br />
• To change the number of shots, press the button, press the<br />
buttons to choose the number of shots, and then press<br />
the button. [Blink Detection] (= 66) is only available for<br />
the final shot.
ç Contents<br />
Shooting Long Exposures<br />
(Long Shutter)<br />
ç Chapter Contents<br />
Still Images<br />
Specify a shutter speed of 1 – 15 seconds to shoot long<br />
exposures. In this case, mount the camera on a tripod or take<br />
other measures to prevent camera shake.<br />
1 Choose [N].<br />
• zFollow step 1 in “Specific<br />
Scenes” (= 70) and choose<br />
[N].<br />
81<br />
2 Choose the shutter<br />
speed.<br />
• zPress the button, choose<br />
[)] in the menu, and choose<br />
the desired shutter speed<br />
(= 39).<br />
3 Check the exposure.<br />
• zPress the shutter button halfway<br />
to view the exposure for your<br />
selected shutter speed.<br />
4 Shoot.
ç Contents<br />
ç Chapter Contents<br />
82<br />
• On-screen image brightness in step 3, when you pressed<br />
the shutter button halfway, may not match the brightness<br />
of your shots.<br />
• With shutter speeds of 1.3 seconds or slower, there will<br />
be a delay before you can shoot again, as the camera<br />
processes images to reduce noise.<br />
<strong>IXUS</strong> <strong>170</strong> <strong>IXUS</strong> <strong>165</strong><br />
• Set [IS Mode] to [Off] when using a tripod or other means<br />
to secure the camera (= 107).<br />
• If the flash fires, your shot may be overexposed. In this case, set<br />
the flash to [!] and shoot again (= 100).
ç Contents<br />
83<br />
P Mode<br />
More discerning shots, in your preferred shooting<br />
style<br />
• Instructions in this chapter apply to the camera when set to [G]<br />
mode.<br />
• [G]: Program AE; AE: Auto Exposure<br />
• Before using a function introduced in this chapter in modes<br />
other than [G], make sure the function is available in that mode<br />
(= 192 – 201).<br />
Shooting in Program AE<br />
([P] Mode)..........................84<br />
Image Brightness<br />
(Exposure).........................85<br />
Adjusting White Balance...90<br />
Shooting Range and<br />
Focusing............................92<br />
Flash..................................100<br />
Using Eco Mode...............103<br />
Other Settings..................104
ç Contents<br />
ç Chapter Contents<br />
Still Images<br />
Shooting in Program AE<br />
([P] Mode)<br />
Movies<br />
You can customize many function settings to suit your preferred<br />
shooting style.<br />
84<br />
1 Enter [G] mode.<br />
• zFollow step 1 in “Specific Scenes”<br />
(= 70) and choose [G].<br />
2 Customize the settings<br />
as desired (= 85 –<br />
108), and then shoot.<br />
• If adequate exposure cannot be obtained when you press the<br />
shutter button halfway, shutter speeds and aperture values are<br />
displayed in orange. In this case, try adjusting the ISO speed<br />
(= 88) or activating the flash (if subjects are dark, = 100),<br />
which may enable adequate exposure.<br />
• Movies can be recorded in [G] mode as well, by pressing the movie<br />
button. However, some FUNC. (= 39) and M<strong>EN</strong>U (= 41)<br />
settings may be automatically adjusted for movie recording.<br />
• For details on the shooting range in [G] mode, see “Shooting<br />
Range” (= 210).
ç Contents<br />
ç Chapter Contents<br />
Image Brightness (Exposure)<br />
85<br />
Still Images<br />
Adjusting Image Brightness<br />
(Exposure Compensation)<br />
Movies<br />
The standard exposure set by the camera can be adjusted in 1/3-<br />
stop increments, in a range of –2 to +2.<br />
• zPress the button and<br />
choose [#] in the menu. As<br />
you watch the screen, press<br />
the buttons to adjust<br />
brightness (= 39).<br />
• zThe correction level you<br />
specified is now displayed.<br />
• zWhen shooting movies, shoot<br />
with the exposure compensation<br />
bar displayed.<br />
• zWhen shooting still images,<br />
press the button to<br />
display the set exposure<br />
compensation amount, and then<br />
shoot.<br />
• You can also shoot still images with exposure compensation bar<br />
displayed.<br />
• While recording a movie, [&] is displayed, and the exposure is<br />
locked.
ç Contents<br />
ç Chapter Contents<br />
Still Images<br />
Movies<br />
Locking Image Brightness / Exposure<br />
(AE Lock)<br />
86<br />
Before shooting, you can lock the exposure, or you can specify<br />
focus and exposure separately.<br />
1 Deactivate the flash<br />
(= 100).<br />
2 Lock the exposure.<br />
• zAim the camera at the subject to<br />
shoot with the exposure locked.<br />
With the shutter button pressed<br />
halfway, press the button.<br />
• z[&] is displayed, and the<br />
exposure is locked.<br />
• zTo unlock AE, release the<br />
shutter button and press the<br />
button again. In this case,<br />
[&] is no longer displayed.<br />
3 Compose the shot and<br />
shoot.<br />
• AE: Auto Exposure
ç Contents<br />
ç Chapter Contents<br />
Changing the Metering Method<br />
Still Images<br />
Adjust the metering method (how brightness is measured) to suit<br />
shooting conditions as follows.<br />
87<br />
• zPress the button, choose<br />
[ ] in the menu, and choose<br />
the desired option (= 39).<br />
• zThe option you configured is<br />
now displayed.<br />
For typical shooting conditions, including backlit shots.<br />
Evaluative Automatically adjusts exposure to match the shooting<br />
conditions.<br />
Determines the average brightness of light across the<br />
Center<br />
entire image area, calculated by treating brightness in<br />
Weighted Avg.<br />
the central area as more important.<br />
Metering restricted to within the [ ] (Spot AE Point<br />
Spot<br />
frame), displayed in the center of the screen.
ç Contents<br />
Changing the ISO Speed<br />
ç Chapter Contents<br />
Still Images<br />
88<br />
• zPress the button, choose<br />
[ ] in the menu, and choose<br />
the desired option (= 39).<br />
• zThe option you configured is<br />
now displayed.<br />
AUTO<br />
100, 200<br />
400, 800<br />
<strong>160</strong>0<br />
Automatically adjusts the ISO speed to suit the<br />
shooting mode and conditions.<br />
For shooting outdoors in fair weather.<br />
Low<br />
For shooting in cloudy conditions, or at<br />
twilight.<br />
High For shooting night scenes, or in dark<br />
rooms.<br />
• To view the automatically determined ISO speed when you have set<br />
the ISO speed to [AUTO], press the shutter button halfway.<br />
• Although choosing a lower ISO speed may reduce image<br />
graininess, there may be a greater risk of subject and camera<br />
shake in some shooting conditions.<br />
• Choosing a higher ISO speed will increase shutter speed, which<br />
may reduce subject and camera shake and increase the flash<br />
range. However, shots may look grainy.
ç Contents<br />
ç Chapter Contents<br />
Correcting Image Brightness<br />
(i-Contrast)<br />
Still Images<br />
89<br />
Before shooting, excessively bright or dark image areas (such as<br />
faces or backgrounds) can be detected and automatically adjusted<br />
to the optimal brightness. Insufficient overall image contrast can<br />
also be automatically corrected before shooting to make subjects<br />
stand out better.<br />
• zPress the button,<br />
choose [i-Contrast] on the [4]<br />
tab, and then choose [Auto]<br />
(= 41).<br />
• zOnce the setting is complete,<br />
[@] is displayed.<br />
• Under some shooting conditions, correction may be<br />
inaccurate or may cause images to appear grainy.<br />
• You can also correct existing images (= 129).
ç Contents<br />
ç Chapter Contents<br />
Still Images<br />
Adjusting White Balance<br />
Movies<br />
90<br />
By adjusting white balance (WB), you can make image colors look<br />
more natural for the scene you are shooting.<br />
• zPress the button, choose<br />
[ ] in the menu, and choose<br />
the desired option (= 39).<br />
• zThe option you configured is<br />
now displayed.<br />
Auto<br />
Automatically sets the optimal white balance for the<br />
shooting conditions.<br />
Day Light For shooting outdoors in fair weather.<br />
Cloudy<br />
For shooting in cloudy conditions, in the shade, or<br />
at twilight.<br />
Tungsten<br />
For shooting under ordinary incandescent (tungsten)<br />
lighting and similarly colored fluorescent lighting.<br />
Fluorescent<br />
For shooting under warm-white (or similarly colored)<br />
or cool-white fluorescent lighting.<br />
For shooting under daylight fluorescent and similarly<br />
Fluorescent H<br />
colored fluorescent lighting.<br />
Custom<br />
For manually setting a custom white balance<br />
(= 91).
ç Contents<br />
ç Chapter Contents<br />
Still Images<br />
Movies<br />
91<br />
Custom White Balance<br />
For image colors that look natural under the light in your shot,<br />
adjust white balance to suit the light source where you are<br />
shooting. Set the white balance under the same light source that<br />
will illuminate your shot.<br />
• zFollow the steps in “Adjusting<br />
White Balance” (= 90) to<br />
choose [ ].<br />
• zAim the camera at a plain<br />
white subject, so that the entire<br />
screen is white. Press the<br />
button.<br />
• zThe tint of the screen changes<br />
once the white balance data has<br />
been recorded.<br />
• Colors may look unnatural if you change camera settings<br />
after recording white balance data.
ç Contents<br />
ç Chapter Contents<br />
Shooting Range and Focusing<br />
92<br />
Shooting Close-Ups (Macro)<br />
Still Images<br />
To restrict the focus to subjects at close range, set the camera<br />
to [e]. For details on the focusing range, see “Shooting Range”<br />
(= 210).<br />
• zPress the button,<br />
choose [ ] in the menu, and<br />
then choose the [e] option<br />
(= 39).<br />
• zOnce the setting is complete,<br />
[e] is displayed.<br />
• If the flash fires, vignetting may occur.<br />
• In the yellow bar display area below the zoom bar, [e] will<br />
turn gray and the camera will not focus.<br />
• To prevent camera shake, try mounting the camera on a tripod and<br />
shooting with the camera set to [[] (= 57).
ç Contents<br />
ç Chapter Contents<br />
Still Images<br />
Shooting Distant Subjects (Infinity)<br />
93<br />
To restrict the focus to distant subjects, set the camera to [u]. For<br />
details on the focusing range, see “Shooting Range” (= 210).<br />
• zPress the button,<br />
choose [ ] in the menu, and<br />
then choose the [u] option<br />
(= 39).<br />
• zOnce the setting is complete,<br />
[u] is displayed.<br />
Still Images<br />
Changing the AF Frame Mode<br />
Movies<br />
Change the AF (auto focus) frame mode to suit the shooting<br />
conditions as follows.<br />
z • Press the button,<br />
choose [AF Frame] on the<br />
[4] tab, and then choose the<br />
desired option (= 41).
ç Contents<br />
ç Chapter Contents<br />
Still Images<br />
Movies<br />
94<br />
Face AiAF<br />
• Detects people’s faces, and then sets the focus, exposure<br />
(evaluative metering only), and white balance ([ ] only).<br />
• After you aim the camera at the subject, a white frame is<br />
displayed around the person’s face determined by the camera<br />
to be the main subject, and up to two gray frames are displayed<br />
around other detected faces.<br />
• When the camera detects movement, frames will follow moving<br />
subjects, within a certain range.<br />
• After you press the shutter button halfway, up to nine green<br />
frames are displayed around faces in focus.<br />
• If faces are not detected, or when only gray frames are<br />
displayed (without a white frame), up to nine green frames<br />
are displayed in the areas in focus when you press the<br />
shutter button halfway.<br />
• If faces are not detected when Servo AF (= 96) is set to<br />
[On], the AF frame is displayed in the center of the screen<br />
when you press the shutter button halfway.<br />
• Examples of faces that cannot be detected:<br />
- Subjects that are distant or extremely close<br />
- Subjects that are dark or light<br />
- Faces in profile, at an angle, or partly hidden<br />
• The camera may misinterpret non-human subjects as<br />
faces.<br />
• No AF frames are displayed if the camera cannot focus<br />
when you press the shutter button halfway.
ç Contents<br />
ç Chapter Contents<br />
Still Images<br />
95<br />
Choosing Subjects to Focus On (Tracking AF)<br />
Shoot after choosing a subject to focus on as follows.<br />
1 Choose [Tracking AF].<br />
• zFollow the steps in “Changing<br />
the AF Frame Mode” (= 93) to<br />
choose [Tracking AF].<br />
• z[<br />
] is displayed in the center of<br />
the screen.<br />
2 Choose a subject to<br />
focus on.<br />
• zAim the camera so that [ ] is<br />
on the desired subject.<br />
• zPress the shutter button<br />
halfway. [ ] changes to a blue<br />
[ ], which follows the subject<br />
as the camera continues to<br />
adjust the focus and exposure<br />
(Servo AF) (= 96).<br />
3 Shoot.<br />
• zPress the shutter button all the<br />
way down to shoot.<br />
• [Servo AF] (= 96) is set to [On] and cannot be changed.<br />
• Tracking may not be possible when subjects are too small<br />
or move too rapidly, or when subject color or brightness<br />
matches that of the background too closely.<br />
• [AF-Point Zoom] on the [4] tab is not available.<br />
• [e] and [u] are not available.
ç Contents<br />
ç Chapter Contents<br />
Still Images<br />
Movies<br />
96<br />
Center<br />
One AF frame is displayed in the center. Effective for reliable focusing.<br />
• A yellow AF frame is displayed with [ ] if the camera<br />
cannot focus when you press the shutter button halfway.<br />
• To compose shots so that subjects are positioned at the edge or in<br />
a corner, first aim the camera to capture the subject in an AF frame,<br />
and then hold the shutter button halfway down. As you continue to<br />
hold the shutter button halfway, recompose the shot as desired, and<br />
then press the shutter button all the way down (Focus Lock).<br />
Still Images<br />
Shooting with Servo AF<br />
This mode helps avoid missing shots of subjects in motion,<br />
because the camera continues to focus on the subject and adjust<br />
the exposure as long as you press the shutter button halfway.<br />
1 Configure the setting.<br />
• zPress the button,<br />
choose [Servo AF] on the [4]<br />
tab, and then choose [On]<br />
(= 41).<br />
2 Focus.<br />
• zThe focus and exposure are<br />
maintained where the blue AF<br />
frame is displayed while you<br />
are pressing the shutter button<br />
halfway.
ç Contents<br />
ç Chapter Contents<br />
97<br />
• Focusing may not be possible in some shooting conditions.<br />
• In low-light conditions, Servo AF may not be activated<br />
(AF frames may not turn blue) when you press the shutter<br />
button halfway. In this case, the focus and exposure are<br />
set according to the specified AF frame mode.<br />
• If adequate exposure cannot be obtained, shutter speeds<br />
and aperture values are displayed in orange. Release the<br />
shutter button, and then press it halfway again.<br />
• AF lock shooting is not available.<br />
• [AF-Point Zoom] on the [4] tab is not available.<br />
• Not available when using the self-timer (= 56).<br />
Magnifying the Area in Focus<br />
Still Images<br />
You can check the focus by pressing the shutter button halfway,<br />
which will enlarge the portion of the image in focus in the AF frame.<br />
1 Configure the setting.<br />
• zPress the button,<br />
choose [AF-Point Zoom] on the<br />
[4] tab, and then choose [On]<br />
(= 41).<br />
2 Check the focus.<br />
• zIn [Face AiAF] AF mode, the<br />
face detected as the main<br />
subject is magnified when<br />
the shutter button is pressed<br />
halfway. In [Center] AF mode,<br />
the AF frame in the center is<br />
magnified.
ç Contents<br />
ç Chapter Contents<br />
98<br />
• The area in focus is not magnified in the following cases when the<br />
shutter button is pressed halfway.<br />
- [Face AiAF]: When a face was not detected, or when the person is<br />
too close to the camera and their face is too large for the screen<br />
- [Center]: When the camera cannot focus on the subject<br />
- [Tracking AF]: Not magnified in this mode<br />
- Digital zoom (= 54): Not magnified with this feature<br />
Changing the Focus Setting<br />
Still Images<br />
You can change default camera operation of constantly focusing<br />
on subjects it is aimed at, even when the shutter button is not<br />
pressed. Instead, you can limit camera focusing to the moment<br />
you press the shutter button halfway.<br />
• zPress the button,<br />
choose [Continuous AF] on the<br />
[4] tab, and then choose [Off]<br />
(= 41).<br />
On<br />
Off<br />
Helps avoid missing sudden photo opportunities, because the<br />
camera constantly focuses on subjects until you press the shutter<br />
button halfway.<br />
Conserves battery power, because the camera does not focus<br />
constantly.
ç Contents<br />
ç Chapter Contents<br />
Still Images<br />
Shooting with the AF Lock<br />
Movies<br />
The focus can be locked. After you lock the focus, the focal<br />
position will not change even when you release your finger from<br />
the shutter button.<br />
99<br />
1 Lock the focus.<br />
• zWith the shutter button pressed<br />
halfway, press the button.<br />
• zThe focus is now locked, and<br />
[%] is displayed.<br />
• zTo unlock the focus, release the<br />
shutter button and press the<br />
button again. In this case,<br />
[%] is no longer displayed.<br />
2 Compose the shot and<br />
shoot.
Flash<br />
ç Contents<br />
ç Chapter Contents<br />
100<br />
Changing the Flash Mode<br />
Still Images<br />
You can change the flash mode to match the shooting scene. For<br />
details on the flash range, see “Flash Range” (= 209).<br />
• zPress the button, press the<br />
buttons to choose a<br />
flash mode, and then press the<br />
button.<br />
• zThe option you configured is<br />
now displayed.<br />
[ ] Auto<br />
Fires automatically in low-light conditions.<br />
[h] On<br />
Fires for each shot.<br />
[Z] Slow Synchro<br />
Fires to illuminate the main subject (such as people) while<br />
shooting at a slower shutter speed to illuminate backgrounds out<br />
of flash range.
ç Contents<br />
ç Chapter Contents<br />
101<br />
• In [Z] mode, mount the camera on a tripod or take other<br />
measures to keep it still and prevent camera shake.<br />
• In [Z] mode, even after the flash fires, ensure that the<br />
main subject does not move until the shutter sound is<br />
finished playing.<br />
<strong>IXUS</strong> <strong>170</strong> <strong>IXUS</strong> <strong>165</strong><br />
• Set [IS Mode] to [Off] when using a tripod or other means<br />
to secure the camera (= 107).<br />
[!] Off<br />
For shooting without the flash.<br />
• If a blinking [ ] icon is displayed when you press the<br />
shutter button halfway in camera-shake inducing, low-light<br />
conditions, mount the camera on a tripod or take other<br />
measures to keep it still.
ç Contents<br />
Shooting with the FE Lock<br />
ç Chapter Contents<br />
Still Images<br />
Just as with the AE lock (= 86), you can lock the exposure for<br />
the flash shots.<br />
• FE: Flash Exposure<br />
102<br />
1 Set the flash to [h]<br />
(= 100).<br />
2 Lock the flash exposure.<br />
• zAim the camera at the subject to<br />
shoot with the exposure locked.<br />
With the shutter button pressed<br />
halfway, press the button.<br />
• zThe flash fires, and when [(] is<br />
displayed, the flash output level<br />
is retained.<br />
• zTo unlock FE, release the<br />
shutter button and press the<br />
button again. In this case,<br />
[(] is no longer displayed.<br />
3 Compose the shot and<br />
shoot.
ç Contents<br />
Using Eco Mode<br />
ç Chapter Contents<br />
103<br />
This function allows you to conserve battery power in Shooting<br />
mode. When the camera is not in use, the screen quickly darkens<br />
to reduce battery consumption.<br />
1 Configure the setting.<br />
• zPress the button, and then<br />
press the buttons to<br />
choose [ ].<br />
• z[<br />
] is now shown on the<br />
shooting screen (= 188).<br />
• zThe screen darkens when<br />
the camera is not used for<br />
approximately two seconds;<br />
approximately ten seconds after<br />
darkening, the screen turns<br />
off. The camera turns off after<br />
approximately three minutes of<br />
inactivity.<br />
2 Shoot.<br />
• zTo activate the screen and<br />
prepare for shooting when the<br />
screen is off but the lens is still<br />
out, press the shutter button<br />
halfway.
ç Contents<br />
Other Settings<br />
ç Chapter Contents<br />
104<br />
Displaying Grid Lines<br />
Still Images<br />
Grid lines can be displayed on the screen for vertical and<br />
horizontal reference while shooting.<br />
Movies<br />
• zPress the button,<br />
choose [Grid Lines] on the<br />
[4] tab, and then choose [On]<br />
(= 41).<br />
• zOnce the setting is complete,<br />
grid lines are displayed on the<br />
screen.<br />
• Grid lines are not recorded in your shots.<br />
Still Images<br />
Deactivating the Digital Zoom<br />
If you prefer not to use the digital zoom (= 54), you can<br />
deactivate it as follows.<br />
Movies<br />
z • Press the button,<br />
choose [Digital Zoom] on the<br />
[4] tab, and then choose [Off]<br />
(= 41).
ç Contents<br />
ç Chapter Contents<br />
105<br />
Still Images<br />
Changing the Image Display Style after<br />
Shots<br />
You can change how long images are displayed and what<br />
information is displayed immediately after shooting.<br />
Changing the Image Display Period after Shots<br />
1 Access the [Review<br />
image after shooting]<br />
screen.<br />
• zPress the button,<br />
choose [Review image after<br />
shooting] on the [4] tab, and<br />
then press the button<br />
(= 41).<br />
2 Configure the setting.<br />
• zChoose [Display Time], and<br />
then choose the desired option<br />
(= 42).<br />
Quick Displays images only until you can shoot again.<br />
Displays images for the specified time. Even while the shot is<br />
2 sec., 4 sec.,<br />
displayed, you can take another shot by pressing the shutter<br />
8 sec.<br />
button halfway again.<br />
Hold Displays images until you press the shutter button halfway.<br />
Off<br />
No image display after shots.
ç Contents<br />
ç Chapter Contents<br />
106<br />
Changing the Screen Displayed after Shots<br />
Change the way images are displayed after shots as follows.<br />
1 Set [Display Time] to<br />
[2 sec.], [4 sec.], [8 sec.],<br />
or [Hold] (= 105).<br />
2 Configure the setting.<br />
• zChoose [Display Info], and<br />
then choose the desired option<br />
(= 42).<br />
Off<br />
Detailed<br />
Displays only the image.<br />
Displays shooting details (= 190).<br />
• When [Display Time] (= 105) is set to [Off] or [Quick], [Display<br />
Info] is set to [Off] and cannot be changed.<br />
• By pressing the button while an image is displayed after<br />
shooting, you can switch the display information. Note that the<br />
settings of [Display Info] are not changed. You can also erase<br />
images by pressing the button, or protect images (= 119) by<br />
pressing the button.
ç Contents<br />
ç Chapter Contents<br />
<strong>IXUS</strong> <strong>170</strong> <strong>IXUS</strong> <strong>165</strong><br />
Still Images<br />
Changing the IS Mode Settings<br />
Movies<br />
107<br />
1 Access the setting<br />
screen.<br />
• zPress the button,<br />
choose [IS Settings] on the [4]<br />
tab, and then press the <br />
button (= 41).<br />
2 Configure the setting.<br />
• zChoose [IS Mode], and then<br />
choose the desired option<br />
(= 42).<br />
Continuous<br />
Optimal image stabilization for the shooting conditions is<br />
automatically applied (Intelligent IS) (= 52).<br />
Shoot Only* Image stabilization is active only at the moment of shooting.<br />
Off<br />
Deactivates image stabilization.<br />
* The setting is changed to [Continuous] for movie recording.<br />
• If image stabilization cannot prevent camera shake, mount<br />
the camera on a tripod or take other measures to hold it<br />
still. In this case, set [IS Mode] to [Off].
ç Contents<br />
<strong>IXUS</strong> <strong>170</strong> <strong>IXUS</strong> <strong>165</strong><br />
ç Chapter Contents<br />
Movies<br />
108<br />
Shooting Movies with Subjects at the Same Size<br />
Shown before Shooting<br />
Normally, once movie recording begins, the image display area<br />
changes and subjects are enlarged to allow for correction of<br />
significant camera shake. To shoot subjects at the same size<br />
shown before shooting, you can choose not to reduce significant<br />
camera shake.<br />
• zFollow the steps in “Changing<br />
the IS Mode Settings” (= 107)<br />
to access the [IS Settings]<br />
screen.<br />
• zChoose [Dynamic IS], and then<br />
choose [2] (= 42).<br />
• Only [1] is available when the movie quality is set to [ ]<br />
(= 65).<br />
• You can also set [IS Mode] to [Off], so that subjects are recorded at<br />
the same size shown before shooting.
ç Contents<br />
109<br />
Playback Mode<br />
Have fun reviewing your shots, and browse or<br />
edit them in many ways<br />
• To prepare the camera for these operations, press the <br />
button to enter Playback mode.<br />
• It may not be possible to play back or edit images that<br />
were renamed or already edited on a computer, or images<br />
from other cameras.<br />
Viewing.............................. 110<br />
Browsing and Filtering<br />
Images............................. 113<br />
Image Viewing Options.... 116<br />
Protecting Images............ 119<br />
Erasing Images.................122<br />
Rotating Images...............125<br />
Editing Still Images..........127
ç Contents<br />
Viewing<br />
ç Chapter Contents<br />
Still Images<br />
Movies<br />
110<br />
After shooting images or movies, you can view them on the screen<br />
as follows.<br />
1 Enter Playback mode.<br />
• zPress the button.<br />
• zYour last shot is displayed.<br />
2 Browse through your<br />
images.<br />
• zTo view the previous image,<br />
press the button. To view<br />
the next image, press the <br />
button.<br />
• zPress and hold the <br />
buttons to browse through<br />
images quickly.<br />
z • Movies are identified by a<br />
[ ] icon. To play movies, go<br />
to step 3.
ç Contents<br />
Volume Indicator<br />
ç Chapter Contents<br />
111<br />
3 Play movies.<br />
• zTo start playback, press<br />
the button, press the<br />
buttons to choose<br />
[ ], and then press the <br />
button again.<br />
4 Adjust the volume.<br />
• zPress the buttons to<br />
adjust the volume.<br />
• zTo adjust the volume when the<br />
volume indicator is no longer<br />
displayed, press the <br />
buttons.<br />
5 Pause playback.<br />
• zTo pause or resume playback,<br />
press the button.<br />
• zAfter the movie is finished,<br />
[ ] is displayed.<br />
• To switch to Shooting mode from Playback mode, press the shutter<br />
button halfway.<br />
• To have the most recent shot displayed when you enter Playback<br />
mode, choose M<strong>EN</strong>U (= 41) ► [1] tab ► [Resume] ► [Last<br />
shot].<br />
• To change the transition shown between images, access M<strong>EN</strong>U<br />
(= 41) and choose your desired effect in [1] tab ► [Transition].
ç Contents<br />
ç Chapter Contents<br />
Still Images<br />
Switching Display Modes<br />
Movies<br />
112<br />
Press the button to view other information on the screen, or<br />
to hide the information. For details on the information displayed,<br />
see “Playback (Detailed Information Display)” (= 190).<br />
No Information<br />
Display<br />
Simple Information<br />
Display<br />
Detailed Information<br />
Display<br />
Still Images<br />
Movies<br />
Overexposure Warning (for Image Highlights)<br />
Washed-out highlights in the image flash on the screen in detailed<br />
information display (= 112).<br />
Still Images<br />
Movies<br />
Histogram<br />
Dark<br />
Bright<br />
High<br />
Low<br />
• zThe graph in detailed information<br />
display (= 112) is a histogram<br />
showing the distribution of<br />
brightness in the image. The<br />
horizontal axis represents the<br />
degree of brightness, and the<br />
vertical axis, how much of<br />
the image is at each level of<br />
brightness. Viewing the histogram<br />
is a way to check exposure.
ç Contents<br />
ç Chapter Contents<br />
Browsing and Filtering Images<br />
113<br />
Still Images<br />
Movies<br />
Navigating through Images in an Index<br />
By displaying multiple images in an index, you can quickly find the<br />
images you are looking for.<br />
1 Display images in an<br />
index.<br />
• zMove the zoom lever toward<br />
to display images in an<br />
index. Moving the lever again<br />
will increase the number of<br />
images shown.<br />
• zTo display fewer images, move<br />
the zoom lever toward .<br />
Fewer images are shown each<br />
time you move the lever.<br />
2 Choose an image.<br />
• zPress the <br />
buttons to choose an image.<br />
• zAn orange frame is displayed<br />
around the selected image.<br />
• zPress the button to view<br />
the selected image in singleimage<br />
display.
ç Contents<br />
ç Chapter Contents<br />
Still Images<br />
Finding Images Matching Specified<br />
Conditions<br />
Movies<br />
114<br />
Find desired images quickly on a memory card full of images by<br />
filtering image display according to your specified conditions. You<br />
can also protect (= 119) or delete (= 122) these images all at<br />
once.<br />
Shot Date<br />
Still image/Movie<br />
Displays the images shot on a specific date.<br />
Displays only still images or movies.<br />
1 Choose the first<br />
condition for image<br />
display or navigation.<br />
• zPress the button, choose<br />
[ ] in the menu, and choose a<br />
condition (= 39).<br />
2 Choose the second<br />
condition for image<br />
display or navigation.<br />
• zPress the <br />
buttons to choose a condition,<br />
and then press the <br />
button.
ç Contents<br />
ç Chapter Contents<br />
115<br />
3 View the filtered images.<br />
• zImages matching your<br />
conditions are displayed in<br />
yellow frames. To view only<br />
these images, press the<br />
buttons.<br />
• zTo cancel filtered display,<br />
choose [ ] in step 1.<br />
• When the camera has found no corresponding images for<br />
some conditions, those conditions will not be available.<br />
• To show or hide information, press the button in step 3.<br />
• Options for viewing the images found (in step 3) include “Navigating<br />
through Images in an Index” (= 113), “Magnifying Images”<br />
(= 116), and “Viewing Slideshows” (= 117). You can protect,<br />
erase, or print all images found or add them to a photobook by<br />
choosing [Select All Images in Search] in “Protecting Images”<br />
(= 119), “Erasing Multiple Images at Once” (= 123), “Adding<br />
Images to the Print List (DPOF)” (= 168), or “Adding Images to a<br />
Photobook” (= <strong>172</strong>).<br />
• If you edit images and save them as new images (= 128 – 131),<br />
a message is displayed, and the images that were found are no<br />
longer shown.
ç Contents<br />
ç Chapter Contents<br />
Image Viewing Options<br />
116<br />
Magnifying Images<br />
Still Images<br />
Approximate Position of<br />
Displayed Area<br />
1 Magnify an image.<br />
• zMoving the zoom lever toward<br />
will zoom in and magnify<br />
the image. You can magnify<br />
images up to about 10x by<br />
continuing to hold the zoom lever.<br />
• zTo zoom out, move the zoom<br />
lever toward . You can<br />
return to single-image display<br />
by continuing to hold it.<br />
2 Move the display<br />
position and switch<br />
images as needed.<br />
• zTo move the display position,<br />
press the <br />
buttons.<br />
• zWhile [ ] is displayed, you<br />
can switch to [ ] by pressing<br />
the button. To switch to<br />
other images while zoomed,<br />
press the buttons.<br />
Press the button again to<br />
restore the original setting.<br />
• You can return to single-image display from magnified display by<br />
pressing the button.
ç Contents<br />
Viewing Slideshows<br />
ç Chapter Contents<br />
Still Images<br />
Movies<br />
Automatically play back images from a memory card as follows.<br />
Each image is displayed for about three seconds.<br />
117<br />
• zPress the button, choose<br />
[.] in the menu, and choose the<br />
desired option (= 39).<br />
• zThe slideshow will start after<br />
[Loading image] is displayed for<br />
a few seconds.<br />
• zPress the button to<br />
stop the slideshow.<br />
• The camera’s power-saving functions (= 36) are<br />
deactivated during slideshows.<br />
• To pause or resume slideshows, press the button.<br />
• You can switch to other images during playback by pressing the<br />
buttons. For fast-forward or fast-rewind, hold the <br />
buttons down.<br />
• In image search mode (= 114), only images matching search<br />
conditions are played.
ç Contents<br />
ç Chapter Contents<br />
118<br />
Changing Slideshow Settings<br />
You can set up slideshows to repeat, and you can change the<br />
transitions between images and the display duration of each<br />
image.<br />
1 Access the setting<br />
screen.<br />
• zPress the button, and<br />
then choose [Slideshow] on the<br />
[1] tab (= 41).<br />
2 Configure the settings.<br />
• zChoose a menu item to<br />
configure, and then choose the<br />
desired option (= 42).<br />
• zTo start the slideshow with your<br />
settings, choose [Start] and<br />
press the button.<br />
• zTo return to the menu screen,<br />
press the button.
ç Contents<br />
Protecting Images<br />
ç Chapter Contents<br />
Still Images<br />
Movies<br />
Protect important images to prevent accidental erasure by the<br />
camera (= 122).<br />
119<br />
• zPress the button, and<br />
then choose [:] in the menu<br />
(= 39). [Protected] is<br />
displayed.<br />
• zTo cancel protection, repeat<br />
this process and choose [:]<br />
again, and then press the <br />
button.<br />
• Protected images on a memory card will be erased if you<br />
format the card (= 138, 140).<br />
• Protected images cannot be erased using the camera’s erasure<br />
function. To erase them this way, first cancel protection.
ç Contents<br />
Using the Menu<br />
ç Chapter Contents<br />
120<br />
1 Access the setting<br />
screen.<br />
• zPress the button and<br />
choose [Protect] on the [1] tab<br />
(= 41).<br />
2 Choose a selection<br />
method.<br />
• zChoose a menu item and an<br />
option as desired (= 42).<br />
• zTo return to the menu screen,<br />
press the button.<br />
Choosing Images Individually<br />
1 Choose [Select].<br />
• zFollowing step 2 in “Using the<br />
Menu” (= 120), choose [Select]<br />
and press the button.<br />
2 Choose an image.<br />
• zPress the buttons to<br />
choose an image, and then press<br />
the button. [ ] is displayed.<br />
• zTo cancel selection, press the<br />
button again. [ ] is no<br />
longer displayed.<br />
• zRepeat this process to specify<br />
other images.
ç Contents<br />
ç Chapter Contents<br />
121<br />
3 Protect the image.<br />
• zPress the button.<br />
A confirmation message is<br />
displayed.<br />
• zPress the buttons to<br />
choose [OK], and then press the<br />
button.<br />
• Images will not be protected if you switch to Shooting<br />
mode or turn the camera off before finishing the setup<br />
process in step 3.<br />
Protecting All Images at Once<br />
1 Choose [Protect All<br />
Images].<br />
• zFollowing step 2 in “Using<br />
the Menu” (= 120), choose<br />
[Protect All Images] and press<br />
the button.<br />
2 Protect the images.<br />
• zPress the buttons to<br />
choose [OK], and then press the<br />
button.<br />
• To cancel protection for groups of images, choose [Unprotect All<br />
Images] in step 1.
ç Contents<br />
Erasing Images<br />
ç Chapter Contents<br />
Still Images<br />
Movies<br />
122<br />
You can choose and erase unneeded images one by one. Be<br />
careful when erasing images, because they cannot be recovered.<br />
However, protected images (= 119) cannot be erased.<br />
1 Choose an image to<br />
erase.<br />
• zPress the buttons to<br />
choose an image.<br />
2 Erase the image.<br />
• zPress the button.<br />
• zAfter [Erase?] is displayed,<br />
press the buttons to<br />
choose [Erase], and then press<br />
the button.<br />
• zThe current image is now<br />
erased.<br />
• zTo cancel erasure, press the<br />
buttons to choose<br />
[Cancel], and then press the<br />
button.
ç Contents<br />
ç Chapter Contents<br />
Erasing Multiple Images at Once<br />
123<br />
You can choose multiple images to erase at once. Be careful when<br />
erasing images, because they cannot be recovered. However,<br />
protected images (= 119) cannot be erased.<br />
Choosing a Selection Method<br />
1 Access the setting<br />
screen.<br />
• zPress the button, and<br />
then choose [Erase] on the [1]<br />
tab (= 41).<br />
2 Choose a selection<br />
method.<br />
• zPress the buttons to<br />
choose a selection method, and<br />
then press the button.<br />
• zTo return to the menu screen,<br />
press the button.<br />
Choosing Images Individually<br />
1 Choose [Select].<br />
• zFollowing step 2 in “Choosing<br />
a Selection Method” (= 123),<br />
choose [Select] and press the<br />
button.
ç Contents<br />
ç Chapter Contents<br />
124<br />
2 Choose an image.<br />
• zOnce you choose an image<br />
following step 2 in “Choosing<br />
Images Individually” (= 120),<br />
[ ] is displayed.<br />
• zTo cancel selection, press the<br />
button again. [ ] is no<br />
longer displayed.<br />
• zRepeat this process to specify<br />
other images.<br />
3 Erase the image.<br />
• zPress the button.<br />
A confirmation message is<br />
displayed.<br />
• zPress the buttons to<br />
choose [OK], and then press the<br />
button.<br />
Specifying All Images at Once<br />
1 Choose [Select All Images].<br />
• zFollowing step 2 in “Choosing<br />
a Selection Method” (= 123),<br />
choose [Select All Images] and<br />
press the button.<br />
2 Erase the images.<br />
• zPress the buttons to<br />
choose [OK], and then press the<br />
button.
ç Contents<br />
Rotating Images<br />
ç Chapter Contents<br />
Still Images<br />
Change the orientation of images and save them as follows.<br />
1 Choose [\].<br />
• zPress the button, and<br />
then choose [\] in the menu<br />
(= 39).<br />
125<br />
Using the Menu<br />
2 Rotate the image.<br />
• zPress the or button,<br />
depending on the desired<br />
direction. Each time you press<br />
the button, the image is rotated<br />
90°. Press the button to<br />
complete the setting.<br />
1 Choose [Rotate].<br />
• zPress the button and<br />
choose [Rotate] on the [1] tab<br />
(= 41).
ç Contents<br />
ç Chapter Contents 126<br />
2 Rotate the image.<br />
• zPress the buttons to<br />
choose an image.<br />
• zThe image is rotated 90° each<br />
time you press the button.<br />
• zTo return to the menu screen,<br />
press the button.<br />
• Rotation is not possible when [Auto Rotate] is set to [Off]<br />
(= 126).<br />
Deactivating Auto Rotation<br />
Follow these steps to deactivate automatic image rotation, which<br />
rotates images based on the current camera orientation.<br />
• zPress the button,<br />
choose [Auto Rotate] on the<br />
[1] tab, and then choose [Off]<br />
(= 41).<br />
• Images cannot be rotated (= 125) when you set [Auto<br />
Rotate] to [Off]. Additionally, images already rotated will be<br />
displayed in the original orientation.
ç Contents<br />
Editing Still Images<br />
ç Chapter Contents<br />
127<br />
• Image editing (= 127 – 131) is only available when the<br />
memory card has sufficient free space.<br />
Resizing Images<br />
Save a copy of images at a lower resolution.<br />
Still Images<br />
1 Choose [Resize].<br />
• zPress the button and<br />
choose [Resize] on the [1] tab<br />
(= 41).<br />
2 Choose an image.<br />
• zPress the buttons to<br />
choose an image, and then<br />
press the button.<br />
3 Choose an image size.<br />
• zPress the buttons to<br />
choose the size, and then press<br />
the button.<br />
• z[Save new image?] is displayed.
ç Contents<br />
ç Chapter Contents<br />
128<br />
4 Save the new image.<br />
• zPress the buttons to<br />
choose [OK], and then press the<br />
button.<br />
• zThe image is now saved as a<br />
new file.<br />
5 Review the new image.<br />
• zPress the button.<br />
[Display new image?] is<br />
displayed.<br />
• zPress the buttons to<br />
choose [Yes], and then press<br />
the button.<br />
• zThe saved image is now<br />
displayed.<br />
• Editing is not possible for images shot at a resolution of<br />
[ ] or [ ] (= 63).<br />
• Images cannot be resized to a higher resolution.
ç Contents<br />
ç Chapter Contents<br />
129<br />
Still Images<br />
Correcting Image Brightness (i-Contrast)<br />
Excessively dark image areas (such as faces or backgrounds) can<br />
be detected and automatically adjusted to the optimal brightness.<br />
Insufficient overall image contrast is also automatically corrected,<br />
to make subjects stand out better. Choose from four correction<br />
levels, and then save the image as a separate file.<br />
1 Choose [i-Contrast].<br />
• zPress the button, and<br />
then choose [i-Contrast] on the<br />
[1] tab (= 41).<br />
2 Choose an image.<br />
• zPress the buttons to<br />
choose an image, and then<br />
press the button.<br />
3 Choose an option.<br />
• zPress the buttons to<br />
choose an option, and then<br />
press the button.<br />
4 Save as a new image<br />
and review.<br />
• zFollow steps 4 – 5 in “Resizing<br />
Images” (= 128 – 128).<br />
• For some images, correction may be inaccurate or may<br />
cause images to appear grainy.<br />
• Images may look grainy after repeated editing using this<br />
function.
ç Contents<br />
ç Chapter Contents<br />
130<br />
• If [Auto] does not produce the expected results, try correcting<br />
images using [Low], [Medium], or [High].<br />
Correcting Red-Eye<br />
Still Images<br />
Automatically corrects images affected by red-eye. You can save<br />
the corrected image as a separate file.<br />
1 Choose [Red-Eye<br />
Correction].<br />
• zPress the button,<br />
and then choose [Red-Eye<br />
Correction] on the [1] tab<br />
(= 41).<br />
2 Choose an image.<br />
• zPress the buttons to<br />
choose an image.<br />
3 Correct the image.<br />
• zPress the button.<br />
• zRed-eye detected by the<br />
camera is now corrected, and<br />
frames are displayed around<br />
corrected image areas.<br />
• zEnlarge or reduce images as<br />
needed. Follow the steps in<br />
“Magnifying Images” (= 116).
ç Contents<br />
ç Chapter Contents<br />
4 Save as a new image<br />
and review.<br />
• zPress the <br />
buttons to choose [New File],<br />
and then press the <br />
button.<br />
• zThe image is now saved as a<br />
new file.<br />
• zFollow step 5 in “Resizing<br />
Images” (= 128).<br />
131<br />
• Some images may not be corrected accurately.<br />
• To overwrite the original image with the corrected image,<br />
choose [Overwrite] in step 4. In this case, the original<br />
image will be erased.<br />
• Protected images cannot be overwritten.
ç Contents<br />
132<br />
Setting Menu<br />
Customize or adjust basic camera functions for<br />
greater convenience<br />
Adjusting Basic <strong>Camera</strong><br />
Functions..........................133
ç Contents<br />
ç Chapter Contents 133<br />
Adjusting Basic <strong>Camera</strong> Functions<br />
M<strong>EN</strong>U (= 41) functions on the [3] tab can be configured. Customize<br />
commonly used functions as desired, for greater convenience.<br />
Silencing <strong>Camera</strong> Operations<br />
Silence camera sounds and movies as follows.<br />
• zChoose [Mute], and then<br />
choose [On].<br />
• Operation can also be silenced by holding down the button as<br />
you turn the camera on.<br />
• Sound is not played during movies (= 110) if you mute camera<br />
sounds. To restore sound during movies, press the button.<br />
Adjust volume with the buttons, as needed.<br />
Adjusting the Volume<br />
Adjust the volume of individual camera sounds as follows.<br />
• zChoose [Volume], and then<br />
press the button.<br />
• zChoose an item, and then press<br />
the buttons to adjust<br />
the volume.
ç Contents<br />
Hiding Hints and Tips<br />
ç Chapter Contents<br />
Hints and tips are normally shown when you choose FUNC.<br />
(= 39) items. If you prefer, you can deactivate this information.<br />
134<br />
• zChoose [Hints & Tips], and then<br />
choose [Off].<br />
Date and Time<br />
Adjust the date and time as follows.<br />
• zChoose [Date/Time], and then<br />
press the button.<br />
• zPress the buttons to<br />
choose an option, and then<br />
press the buttons to<br />
adjust the setting.
ç Contents<br />
World Clock<br />
ç Chapter Contents<br />
135<br />
To ensure that your shots will have the correct local date and time<br />
when you travel abroad, simply register the destination in advance<br />
and switch to that time zone. This convenient feature eliminates<br />
the need to change the Date/Time setting manually.<br />
Before using the world clock, be sure to set the date and time and<br />
your home time zone, as described in “Setting the Date and Time”<br />
(= 23).<br />
1 Specify your destination.<br />
• zChoose [Time Zone], and then<br />
press the button.<br />
• zPress the buttons to<br />
choose [ World], and then<br />
press the button.<br />
• zPress the buttons to<br />
choose the destination.<br />
• zTo set daylight saving time (1<br />
hour ahead), choose [ ] by<br />
pressing the buttons,<br />
and then choose [ ] by<br />
pressing the buttons.<br />
• zPress the button.<br />
2 Switch to the destination<br />
time zone.<br />
• zPress the buttons to<br />
choose [ World], and then<br />
press the button.<br />
• z[<br />
] is now shown on the<br />
shooting screen (= 188).
ç Contents<br />
ç Chapter Contents<br />
136<br />
• Adjusting the date or time while in [ ] mode (= 24) will<br />
automatically update your [ Home] time and date.<br />
Lens Retraction Timing<br />
The lens is normally retracted for safety about one minute after<br />
you press the button in Shooting mode (= 35). To have<br />
the lens retracted immediately after you press the button,<br />
set the retraction timing to [0 sec.].<br />
• zChoose [Lens Retract], and<br />
then choose [0 sec.].<br />
Power-Saving Adjustment<br />
Adjust the timing of automatic camera and screen deactivation<br />
(Auto Power Down and Display Off, respectively) as needed<br />
(= 36).<br />
• zChoose [Power Saving], and<br />
then press the button.<br />
• zAfter choosing an item, press<br />
the buttons to adjust it<br />
as needed.
ç Contents<br />
ç Chapter Contents<br />
137<br />
• To conserve battery power, you should normally choose<br />
[On] for [Auto Power Down] and [1 min.] or less for<br />
[Display Off].<br />
• The [Display Off] setting is applied even if you set [Auto Power<br />
Down] to [Off].<br />
• These power-saving functions are not available when you have set<br />
Eco mode (= 62, 103) to [ ].<br />
Screen Brightness<br />
Adjust screen brightness as follows.<br />
• zChoose [LCD Brightness], and<br />
then press the buttons<br />
to adjust the brightness.<br />
• For maximum brightness, press and hold the button for at<br />
least one second when the shooting screen is displayed or when in<br />
single-image display. (This will override the [LCD Brightness] setting<br />
on the [3] tab.) To restore the original brightness, press and hold<br />
the button again for at least one second or restart the camera.
ç Contents<br />
ç Chapter Contents<br />
Hiding the Start-Up Screen<br />
If you prefer, you can deactivate display of the start-up screen<br />
normally shown when you turn the camera on.<br />
138<br />
• zChoose [Start-up Image], and<br />
then choose [Off].<br />
Formatting Memory Cards<br />
Before using a new memory card or a card formatted in another<br />
device, you should format the card with this camera.<br />
Formatting erases all data on a memory card. Before formatting,<br />
copy images on the memory card to a computer, or take other<br />
steps to back them up.<br />
An Eye-Fi card (= 175) contains software on the card itself.<br />
Before formatting an Eye-Fi card, install the software on a computer.<br />
1 Access the [Format] screen.<br />
• zChoose [Format], and then<br />
press the button.<br />
2 Choose [OK].<br />
• zPress the buttons<br />
to choose [Cancel], press the<br />
buttons to choose<br />
[OK], and then press the <br />
button.
ç Contents<br />
ç Chapter Contents<br />
139<br />
3 Format the memory<br />
card.<br />
• zTo begin the formatting process,<br />
press the buttons to<br />
choose [OK], and then press the<br />
button.<br />
• zWhen formatting is finished,<br />
[Memory card formatting<br />
complete] is displayed. Press<br />
the button.<br />
• Formatting or erasing data on a memory card only<br />
changes file management information on the card and<br />
does not erase the data completely. When transferring or<br />
disposing of memory cards, take steps to protect personal<br />
information if necessary, as by physically destroying cards.<br />
• The total card capacity indicated on the formatting screen may be<br />
less than the advertised capacity.
ç Contents<br />
ç Chapter Contents<br />
140<br />
Low-Level Formatting<br />
Perform low-level formatting in the following cases: [Memory card<br />
error] is displayed, the camera is not working correctly, card image<br />
reading/writing is slower, continuous shooting is slower, or movie<br />
recording suddenly stops. Low-level formatting erases all data on<br />
a memory card. Before low-level formatting, copy images on the<br />
memory card to a computer, or take other steps to back them up.<br />
• zOn the screen in step 2 of<br />
“Formatting Memory Cards”<br />
(= 138), press the <br />
buttons to choose [Low Level<br />
Format], and then press the<br />
buttons to select this<br />
option. A [ ] icon is displayed.<br />
• zFollow steps 2 – 3 in<br />
“Formatting Memory Cards”<br />
(= 138) to continue with the<br />
formatting process.<br />
• Low-level formatting takes longer than “Formatting Memory Cards”<br />
(= 138), because data is erased from all storage regions of the<br />
memory card.<br />
• You can cancel low-level formatting in progress by choosing [Stop].<br />
In this case, all data will be erased, but the memory card can be<br />
used normally.
ç Contents<br />
File Numbering<br />
ç Chapter Contents<br />
141<br />
Your shots are automatically numbered in sequential order (0001<br />
– 9999) and saved in folders that store up to 2,000 images each.<br />
You can change how the camera assigns file numbers.<br />
• zChoose [File Numbering], and<br />
then choose an option.<br />
Continuous<br />
Auto Reset<br />
Images are numbered consecutively (until the 9999th shot is<br />
taken/saved) even if you switch memory cards.<br />
Image numbering is reset to 0001 if you switch memory<br />
cards, or when a new folder is created.<br />
• Regardless of the option selected in this setting, shots may be<br />
numbered consecutively after the last number of existing images on<br />
newly inserted memory cards. To start saving shots from 0001, use<br />
an empty (or formatted (= 138)) memory card.
ç Contents<br />
Date-Based Image Storage<br />
ç Chapter Contents<br />
142<br />
Instead of saving images in folders created each month, you can<br />
have the camera create folders each day you shoot to store shots<br />
taken that day.<br />
• zChoose [Create Folder], and<br />
then choose [Daily].<br />
• zImages will now be saved in<br />
folders created on the shooting<br />
date.<br />
Checking Certification Logos<br />
Some logos for certification requirements met by the camera can<br />
be viewed on the screen. Other certification logos are printed in<br />
this guide, on the camera packaging, or on the camera body.<br />
z • Choose [Certification Logo<br />
Display], and then press the<br />
button.
ç Contents<br />
ç Chapter Contents<br />
Display Language<br />
Change the display language as needed.<br />
143<br />
• zChoose [Language ], and<br />
then press the button.<br />
• zPress the <br />
buttons to choose a language,<br />
and then press the <br />
button.<br />
• You can also access the [Language] screen in Playback mode by<br />
pressing and holding the button and immediately pressing the<br />
button.<br />
Adjusting Other Settings<br />
The following settings can also be adjusted on the [3] tab.<br />
• [Video System] (= 152)<br />
• [Eye-Fi Settings] (= 175)
ç Contents<br />
Restoring Defaults<br />
ç Chapter Contents<br />
If you accidentally change a setting, you can restore default<br />
camera settings.<br />
144<br />
1 Access the [Reset All]<br />
screen.<br />
• zChoose [Reset All], and then<br />
press the button.<br />
2 Restore default settings.<br />
• zPress the buttons to<br />
choose [OK], and then press the<br />
button.<br />
• zDefault settings are now<br />
restored.<br />
• The following functions are not restored to default settings.<br />
- [3] tab settings [Date/Time] (= 134), [Time Zone] (= 135),<br />
[Language ] (= 143), and [Video System] (= 152)<br />
- Custom white balance data you have recorded (= 91)<br />
- Shooting mode (= 70)
ç Contents<br />
145<br />
Accessories<br />
Enjoy the camera in more ways with optional<br />
Canon accessories and other compatible<br />
accessories sold separately<br />
System Map......................146<br />
Optional Accessories......148<br />
Using Optional<br />
Accessories.....................151<br />
Using the Software...........155<br />
Printing Images................<strong>160</strong><br />
Using an Eye-Fi Card.......175
ç Contents<br />
System Map<br />
ç Chapter Contents<br />
146<br />
Included Accessories<br />
Wrist Strap<br />
Battery Pack<br />
NB‐11LH* 1 /NB‐11L<br />
Battery Charger<br />
CB‐2LF/CB‐2LFE* 1<br />
USB Cable (camera end: Mini-B)* 2<br />
Memory Card Card Reader Computer<br />
Power<br />
Cables<br />
AC Adapter Kit<br />
ACK‐DC90<br />
AV Cable AVC-DC400<br />
TV/Video<br />
System<br />
Flash Unit Canon-Brand PictBridge-<br />
Compatible Printers<br />
High-Power Flash<br />
HF‐DC2* 3<br />
*1 Also available for purchase separately.<br />
*2 A genuine Canon accessory is also available (Interface Cable<br />
IFC-400PCU).<br />
<strong>IXUS</strong> <strong>165</strong> <strong>IXUS</strong> <strong>160</strong><br />
*3 High-Power Flash HF-DC1 also supported.
ç Contents<br />
ç Chapter Contents<br />
147<br />
Use of genuine Canon accessories is recommended.<br />
This product is designed to achieve excellent performance when used with<br />
genuine Canon accessories.<br />
Canon shall not be liable for any damage to this product and/or accidents<br />
such as fire, etc., caused by the malfunction of non-genuine Canon<br />
accessories (e.g., a leakage and/or explosion of a battery pack). Please<br />
note that this warranty does not apply to repairs arising out of the<br />
malfunction of non-genuine Canon accessories, although you may request<br />
such repairs on a chargeable basis.<br />
Note that availability varies by area, and some accessories may no longer<br />
be available.
ç Contents<br />
Optional Accessories<br />
ç Chapter Contents<br />
148<br />
The following camera accessories are sold separately. Note that<br />
availability varies by area, and some accessories may no longer<br />
be available.<br />
Power Supplies<br />
Battery Pack NB-11LH<br />
• zRechargeable lithium-ion battery<br />
Battery Charger<br />
CB-2LF/CB-2LFE<br />
• zCharger for Battery Pack<br />
NB-11LH and NB-11L.<br />
• The battery pack includes a convenient cover which you can attach<br />
to know the charging status at a glance. Attach the cover so that <br />
is visible on a charged battery pack, and attach it so that is not<br />
visible on an uncharged battery pack.<br />
• Battery Pack NB-11L is also supported.<br />
• Battery Charger CB-2LD and CB-2LDE are also supported.<br />
AC Adapter Kit ACK-DC90<br />
• zFor powering the camera<br />
using household power.<br />
Recommended when using the<br />
camera over extended periods,<br />
or when connecting the camera<br />
to a printer or computer. Cannot<br />
be used to charge the battery<br />
pack in the camera.
ç Contents<br />
ç Chapter Contents<br />
149<br />
• The battery charger and AC adapter kit can be used in<br />
areas with 100 – 240 V AC power (50/60 Hz).<br />
• For power outlets in a different format, use a commercially<br />
available adapter for the plug. Never use an electrical<br />
transformer designed for traveling, which may damage the<br />
battery pack.<br />
Flash Units<br />
Other Accessories<br />
High-Power Flash HF-DC2<br />
• zExternal flash for illuminating<br />
subjects that are out of range of<br />
the built-in flash.<br />
<strong>IXUS</strong> <strong>165</strong> <strong>IXUS</strong> <strong>160</strong><br />
• zHigh-Power Flash HF-DC1 can<br />
also be used.<br />
Interface Cable<br />
IFC-400PCU<br />
• zFor connecting the camera to a<br />
computer or printer.<br />
AV Cable AVC-DC400<br />
• zConnect the camera to a TV to<br />
enjoy playback on the larger TV<br />
screen.
ç Contents<br />
Printers<br />
ç Chapter Contents<br />
150<br />
Canon-Brand PictBridge-<br />
Compatible Printers<br />
• zPrinting images without a<br />
computer is possible by<br />
connecting the camera to<br />
a Canon-brand PictBridgecompatible<br />
printer.<br />
For details, visit your nearest<br />
Canon retailer.
ç Contents<br />
ç Chapter Contents<br />
Still Images<br />
Using Optional Accessories<br />
Playback on a TV<br />
Still Images<br />
Movies<br />
Movies<br />
151<br />
Connecting the camera to a TV with the AV Cable AVC-DC400<br />
(sold separately) enables you to view your shots on the larger<br />
screen of the TV as you control the camera.<br />
For details on connection or how to switch inputs, refer to the TV<br />
manual.<br />
• Some information may not be displayed on the TV (= 190).<br />
Yellow<br />
Yellow<br />
Black or white<br />
Black<br />
1 Make sure the camera<br />
and TV are off.<br />
2 Connect the camera to<br />
the TV.<br />
• zOn the TV, insert the cable<br />
plugs fully into the video inputs<br />
as shown.<br />
• zOn the camera, open the<br />
terminal cover and insert the<br />
cable plug fully into the camera<br />
terminal.
ç Contents<br />
ç Chapter Contents 152<br />
3 Turn the TV on and<br />
switch to video input.<br />
• zSwitch the TV input to the video<br />
input you connected the cable<br />
to in step 2.<br />
4 Turn the camera on.<br />
• zPress the button to turn<br />
the camera on.<br />
• zImages from the camera are<br />
now displayed on the TV.<br />
(Nothing is displayed on the<br />
camera screen.)<br />
• zWhen finished, turn off<br />
the camera and TV before<br />
disconnecting the cable.<br />
• Correct display is not possible unless the camera video<br />
output format (NTSC or PAL) matches the TV format. To<br />
change the video output format, press the button<br />
and choose [Video System] on the [3] tab.
ç Contents<br />
ç Chapter Contents<br />
Still Images<br />
Movies<br />
Powering the <strong>Camera</strong> with Household<br />
Power<br />
153<br />
Powering the camera with AC Adapter Kit ACK-DC90 (sold<br />
separately) eliminates the need to monitor the remaining battery<br />
level.<br />
1 Make sure the camera is<br />
off.<br />
2 Open the cover.<br />
• zFollow step 1 in “Inserting the<br />
Battery Pack and Memory Card”<br />
(= 20) to open the memory<br />
card/battery cover, and then<br />
open the coupler cable port<br />
cover as shown.<br />
3 Insert the coupler.<br />
• zInsert the coupler facing the<br />
direction shown, just as you<br />
would a battery pack (following<br />
step 2 in “Inserting the Battery<br />
Pack and Memory Card”<br />
(= 21)).<br />
Terminals
ç Contents<br />
ç Chapter Contents<br />
• zMake sure the coupler cable<br />
passes through the port.<br />
154<br />
Coupler Cable Port<br />
4 Close the cover.<br />
• zLower the cover ( ) and hold it<br />
down as you slide it, until it clicks<br />
into the closed position ( ).<br />
5 Connect the power cord.<br />
• zInsert the adapter plug into the<br />
end of the coupler cable.<br />
• zInsert one end of the power<br />
cord into the compact power<br />
adapter, and then plug the other<br />
end into a power outlet.<br />
• zTurn the camera on and use it<br />
as desired.<br />
• zWhen finished, turn the camera<br />
off and unplug the power cord<br />
from the outlet.<br />
• Do not disconnect the adapter or unplug the power cord<br />
while the camera is still on. This may erase your shots or<br />
damage the camera.<br />
• Do not attach the adapter or adapter cord to other objects.<br />
Doing so could result in malfunction or damage to the product.
ç Contents<br />
Using the Software<br />
ç Chapter Contents<br />
155<br />
To utilize the features of the following software, download the<br />
software from the Canon website and install it on your computer.<br />
• <strong>Camera</strong>Window<br />
- Import images to your computer<br />
• To view and edit images on a computer, use preinstalled<br />
or commonly available software compatible with images<br />
captured by the camera.<br />
Checking Your Computer Environment<br />
The software can be used on the following computers. For detailed<br />
system requirements and compatibility information, including<br />
support in new operating systems, visit the Canon website.<br />
• Windows 8/8.1<br />
• Windows 7 SP1<br />
• Mac OS X 10.9<br />
• Mac OS X 10.8
ç Contents<br />
Installing the Software<br />
ç Chapter Contents<br />
Windows 7 and Mac OS X 10.8 are used here for the sake of<br />
illustration.<br />
156<br />
1 Download the software.<br />
• zWith a computer connected to<br />
the Internet, access http://www.<br />
canon.com/icpd/.<br />
• zAccess the site for your country<br />
or region.<br />
• zDownload the software.<br />
2 Install the files.<br />
• zClick [Easy Installation] and<br />
follow the on-screen instructions<br />
to complete the installation<br />
process. Installation may take<br />
some time, depending on<br />
computer performance and the<br />
Internet connection.<br />
• zClick [Finish] or [Restart] on the<br />
screen after installation.<br />
• Internet access is required, and any ISP account charges<br />
and access fees must be paid separately.<br />
• To uninstall the software, follow these steps.<br />
- Windows: Select [Start] menu ► [All Programs] ► [Canon<br />
Utilities], and then choose the software for uninstallation.<br />
- Mac OS: In the [Canon Utilities] folder within the [Applications]<br />
folder, drag the folder of the software for uninstallation to the<br />
Trash, and then empty the Trash.
ç Contents<br />
ç Chapter Contents<br />
Saving Images to a Computer<br />
157<br />
Using a USB cable (sold separately; camera end: Mini-B), you<br />
can connect the camera to the computer and save images to the<br />
computer.<br />
1 Connect the camera to<br />
the computer.<br />
• zWith the camera turned off,<br />
open the cover ( ). With the<br />
smaller plug of the USB cable<br />
in the orientation shown, insert<br />
the plug fully into the camera<br />
terminal ( ).<br />
• zInsert the larger plug of the USB<br />
cable in the computer’s USB<br />
port. For details about USB<br />
connections on the computer,<br />
refer to the computer user<br />
manual.<br />
2 Turn the camera on to<br />
access <strong>Camera</strong>Window.<br />
• zPress the button to turn<br />
the camera on.<br />
• zMac OS: <strong>Camera</strong>Window is<br />
displayed when a connection<br />
is established between the<br />
camera and computer.
ç Contents<br />
ç Chapter Contents<br />
158<br />
• zWindows: Follow the steps<br />
introduced below.<br />
• zIn the screen that displays, click the<br />
[ ] link to modify the program.<br />
• zChoose [Downloads Images<br />
From Canon <strong>Camera</strong>] and then<br />
click [OK].<br />
• zDouble-click [ ].<br />
3 Save the images to the<br />
computer.<br />
• zClick [Import Images from<br />
<strong>Camera</strong>], and then click [Import<br />
Untransferred Images].<br />
• zImages are now saved to the<br />
Pictures folder on the computer, in<br />
separate folders named by date.<br />
• zAfter images are saved, close<br />
<strong>Camera</strong>Window, press the<br />
button to turn the camera<br />
off, and unplug the cable.<br />
• zTo view images you save to a<br />
computer, use preinstalled or<br />
commonly available software<br />
compatible with images<br />
captured by the camera.
ç Contents<br />
ç Chapter Contents<br />
159<br />
• Windows 7: If the screen in step 2 is not displayed, click the [ ]<br />
icon in the taskbar.<br />
• Mac OS: If <strong>Camera</strong>Window is not displayed after step 2, click the<br />
[<strong>Camera</strong>Window] icon in the Dock.<br />
• Although you can save images to a computer simply by connecting<br />
your camera to the computer without using the software, the<br />
following limitations apply.<br />
- It may take a few minutes after you connect the camera to the<br />
computer until camera images are accessible.<br />
- Images shot in vertical orientation may be saved in horizontal<br />
orientation.<br />
- Image protection settings may be cleared from images saved to<br />
a computer.<br />
- Some problems may occur when saving images or image<br />
information, depending on the operating system version, the<br />
software in use, or image file sizes.
ç Contents<br />
Printing Images<br />
ç Chapter Contents<br />
Still Images<br />
Movies<br />
<strong>160</strong><br />
Your shots can easily be printed by connecting the camera to a<br />
printer. On the camera, you can specify images to set up batch<br />
printing, prepare orders for photo development services, and<br />
prepare orders or print images for photobooks.<br />
A Canon SELPHY CP series compact photo printer is used here for<br />
the sake of illustration. Screens displayed and available functions vary<br />
by printer. Also refer to the printer manual for additional information.<br />
Easy Print<br />
Still Images<br />
Easily print your shots by connecting the camera to a PictBridgecompatible<br />
printer (sold separately) with the USB cable.<br />
1 Make sure the camera<br />
and printer are off.<br />
2 Connect the camera to<br />
the printer.<br />
• zOpen the cover. Holding the<br />
smaller cable plug in the<br />
orientation shown, insert the<br />
plug fully into the camera<br />
terminal.<br />
• zConnect the larger cable plug to<br />
the printer. For other connection<br />
details, refer to the printer<br />
manual.
ç Contents<br />
ç Chapter Contents 161<br />
3 Turn the printer on.<br />
4 Turn the camera on.<br />
• zPress the button to turn<br />
the camera on.<br />
5 Choose an image.<br />
• zPress the buttons to<br />
choose an image.<br />
6 Access the printing<br />
screen.<br />
• zPress the button, choose<br />
[c], and press the button<br />
again.<br />
7 Print the image.<br />
• zPress the buttons to<br />
choose [Print], and then press<br />
the button.<br />
• zPrinting now begins.<br />
• zTo print other images, repeat the<br />
above procedures starting from<br />
step 5 after printing is finished.<br />
• zWhen you are finished printing,<br />
turn the camera and printer off<br />
and disconnect the cable.<br />
• For Canon-brand PictBridge-compatible printers (sold separately),<br />
see “Printers” (= 150).
ç Contents<br />
Configuring Print Settings<br />
ç Chapter Contents<br />
Still Images<br />
<strong>162</strong><br />
1 Access the printing<br />
screen.<br />
• zFollow steps 1 – 6 in “Easy<br />
Print” (= <strong>160</strong> – 161) to<br />
access the screen at left.<br />
2 Configure the settings.<br />
• zPress the buttons to<br />
choose an item, and then press<br />
the buttons to choose<br />
an option.<br />
Default Matches current printer settings.<br />
Date Prints images with the date added.<br />
File No. Prints images with the file number added.<br />
Both<br />
Prints images with both the date and file<br />
number added.<br />
Off –<br />
Default Matches current printer settings.<br />
Off –<br />
On<br />
Uses information from the time of shooting to<br />
print under optimal settings.<br />
Red-Eye 1 Corrects red-eye.<br />
No. of Copies Choose the number of copies to print.<br />
Cropping – Specify a desired image area to print (= 163).<br />
Paper<br />
Settings<br />
–<br />
Specify the paper size, layout, and other details<br />
(= 164).
ç Contents<br />
ç Chapter Contents<br />
Still Images<br />
163<br />
Cropping Images before Printing<br />
By cropping images before printing, you can print a desired image<br />
area instead of the entire image.<br />
1 Choose [Cropping].<br />
• zAfter following step 1 in<br />
“Configuring Print Settings”<br />
(= <strong>162</strong>) to access the printing<br />
screen, choose [Cropping] and<br />
press the button.<br />
• zA cropping frame is now<br />
displayed, indicating the image<br />
area to print.<br />
2 Adjust the cropping<br />
frame as needed.<br />
• zTo resize the frame, move the<br />
zoom lever.<br />
• zTo move the frame, press the<br />
buttons.<br />
• zTo rotate the frame, press the<br />
button.<br />
• zPress the button,<br />
press the buttons to<br />
choose [OK], and then press the<br />
button.<br />
3 Print the image.<br />
• zFollow step 7 in “Easy Print”<br />
(= 161) to print.
ç Contents<br />
ç Chapter Contents<br />
164<br />
• Cropping may not be possible at small image sizes, or at<br />
some aspect ratios.<br />
• Dates may not be printed correctly if you crop images shot<br />
with [Date Stamp ] selected.<br />
Still Images<br />
Choosing Paper Size and Layout before Printing<br />
1 Choose [Paper Settings].<br />
• zAfter following step 1 in<br />
“Configuring Print Settings”<br />
(= <strong>162</strong>) to access the printing<br />
screen, choose [Paper Settings]<br />
and press the button.<br />
2 Choose a paper size.<br />
• zPress the buttons<br />
to choose an option, and then<br />
press the button.<br />
3 Choose a type of paper.<br />
• zPress the buttons<br />
to choose an option, and then<br />
press the button.
ç Contents<br />
ç Chapter Contents<br />
<strong>165</strong><br />
4 Choose a layout.<br />
• zPress the buttons to<br />
choose an option.<br />
• zWhen choosing [N-up], press<br />
the buttons to specify<br />
the number of images per sheet.<br />
• zPress the button.<br />
5 Print the image.<br />
Available Layout Options<br />
Default<br />
Bordered<br />
Borderless<br />
N-up<br />
ID Photo<br />
Fixed Size<br />
Matches current printer settings.<br />
Prints with blank space around the image.<br />
Borderless, edge-to-edge printing.<br />
Choose how many images to print per sheet.<br />
Prints images for identification purposes.<br />
Only available for images with a resolution of L.<br />
Choose the print size.<br />
Choose from 3.5 x 5 in., postcard, or wide-format prints.
ç Contents<br />
Printing ID Photos<br />
ç Chapter Contents<br />
Still Images<br />
166<br />
1 Choose [ID Photo].<br />
• zFollowing steps 1 – 4 in<br />
“Choosing Paper Size and<br />
Layout before Printing” (= 164<br />
– <strong>165</strong>), choose [ID Photo] and<br />
press the button.<br />
2 Choose the long and<br />
short side length.<br />
• zPress the buttons<br />
to choose an item. Choose the<br />
length by pressing the <br />
buttons, and then press the<br />
button.<br />
3 Choose the printing<br />
area.<br />
• zFollow step 2 in “Cropping<br />
Images before Printing”<br />
(= 163) to choose the printing<br />
area.<br />
4 Print the image.
ç Contents<br />
Printing Movie Scenes<br />
ç Chapter Contents<br />
Movies<br />
167<br />
Movie Printing Options<br />
Single<br />
Sequence<br />
1 Access the printing<br />
screen.<br />
• zFollow steps 1 – 6 in “Easy<br />
Print” (= <strong>160</strong> – 161) to<br />
choose a movie. The screen at<br />
left is displayed.<br />
2 Choose a printing<br />
method.<br />
• zPress the buttons to<br />
choose [ ], and then press the<br />
buttons to choose the<br />
printing method.<br />
3 Print the image.<br />
Prints the current scene as a still image.<br />
Prints a series of scenes, a certain interval apart, on a single<br />
sheet of paper. You can also print the folder number, file<br />
number, and elapsed time for the frame by setting [Caption]<br />
to [On].<br />
• To cancel printing in progress, press the button.<br />
• [ID Photo] and [Sequence] cannot be chosen on Canon-brand<br />
PictBridge-compatible printers from CP720/CP730 and earlier<br />
models.
ç Contents<br />
ç Chapter Contents<br />
168<br />
Still Images<br />
Adding Images to the Print List (DPOF)<br />
Batch printing (= <strong>172</strong>) and ordering prints from a photo<br />
development service can be set up on the camera. Choose up to 998<br />
images on a memory card and configure relevant settings, such as<br />
the number of copies, as follows. The printing information you prepare<br />
this way will conform to DPOF (Digital Print Order Format) standards.<br />
Still Images<br />
Configuring Print Settings<br />
Specify the printing format, whether to add the date or file number,<br />
and other settings as follows. These settings apply to all images in<br />
the print list.<br />
• zPress the button, and<br />
then choose [Print Settings]<br />
on the [2] tab. Choose and<br />
configure items as desired<br />
(= 41).<br />
Print Type<br />
Date<br />
File No.<br />
Clear DPOF<br />
data<br />
Standard One image is printed per sheet.<br />
Index<br />
Smaller versions of multiple images are printed<br />
per sheet.<br />
Both Both standard and index formats are printed.<br />
On Images are printed with the shooting date.<br />
Off –<br />
On Images are printed with the file number.<br />
Off –<br />
On All image print list settings are cleared after printing.<br />
Off –
ç Contents<br />
ç Chapter Contents<br />
169<br />
• Not all of your DPOF settings may be applied in printing by<br />
the printer or photo development service, in some cases.<br />
• [ ] may be displayed on the camera to warn you that<br />
the memory card has print settings that were configured<br />
on another camera. Changing the print settings using this<br />
camera may overwrite all previous settings.<br />
• Setting [Date] to [On] may cause some printers to print the<br />
date twice.<br />
• Specifying [Index] will prevent you from choosing [On] for both<br />
[Date] and [File No.] at the same time.<br />
• Index printing is not available on some Canon-brand PictBridgecompatible<br />
printers (sold separately).<br />
• The date is printed in a format matching setting details in [Date/<br />
Time] on the [3] tab (= 23).<br />
Still Images<br />
Setting Up Printing for Individual Images<br />
1 Choose [Select Images &<br />
Qty.].<br />
• zPress the button,<br />
choose [Select Images & Qty.]<br />
on the [2] tab, and then press<br />
the button.
ç Contents<br />
ç Chapter Contents <strong>170</strong><br />
2 Choose an image.<br />
• zPress the buttons to<br />
choose an image, and then<br />
press the button.<br />
• zYou can now specify the<br />
number of copies.<br />
• zIf you specify index printing<br />
for the image, it is labeled with<br />
a [ ] icon. To cancel index<br />
printing for the image, press the<br />
button again. [ ] is no<br />
longer displayed.<br />
3 Specify the number of<br />
prints.<br />
• zPress the buttons to<br />
specify the number of prints (up<br />
to 99).<br />
• zTo set up printing for other<br />
images and specify the number<br />
of prints, repeat steps 2 – 3.<br />
• zPrinting quantity cannot be<br />
specified for index prints. You<br />
can only choose which images<br />
to print, by following step 2.<br />
• zWhen finished, press the<br />
button to return to the<br />
menu screen.
ç Contents<br />
ç Chapter Contents<br />
Still Images<br />
171<br />
Setting Up Printing for All Images<br />
• zFollowing step 1 in “Setting Up<br />
Printing for Individual Images”<br />
(= 169), choose [Select All<br />
Images] and press the <br />
button.<br />
• zPress the buttons to<br />
choose [OK], and then press the<br />
button.<br />
Still Images<br />
Clearing All Images from the Print List<br />
• zFollowing step 1 in “Setting Up<br />
Printing for Individual Images”<br />
(= 169), choose [Clear All<br />
Selections] and press the <br />
button.<br />
• zPress the buttons to<br />
choose [OK], and then press the<br />
button.
ç Contents<br />
ç Chapter Contents<br />
Still Images<br />
<strong>172</strong><br />
Printing Images Added to the Print List (DPOF)<br />
• zWhen images have been added<br />
to the print list (= 168 – 171),<br />
the screen at left is displayed<br />
after you connect the camera to<br />
a PictBridge-compatible printer.<br />
Press the buttons to<br />
choose [Print now], and then<br />
simply press the button to<br />
print the images in the print list.<br />
• zAny DPOF print job that you<br />
temporarily stop will be resumed<br />
from the next image.<br />
Still Images<br />
Adding Images to a Photobook<br />
Photobooks can be set up on the camera by choosing up to 998<br />
images on a memory card and importing them into the software<br />
on your computer, where they are stored in their own folder. This<br />
is convenient when ordering printed photobooks online or printing<br />
photobooks with your own printer.<br />
Choosing a Selection Method<br />
• zPress the button,<br />
choose [Photobook Set-up] on<br />
the [1] tab, and then choose<br />
how you will select images.
ç Contents<br />
ç Chapter Contents<br />
173<br />
• [ ] may be displayed on the camera to warn you that<br />
the memory card has print settings that were configured<br />
on another camera. Changing the print settings using this<br />
camera may overwrite all previous settings.<br />
Still Images<br />
Adding Images Individually<br />
1 Choose [Select].<br />
• zFollowing the procedure in<br />
“Choosing a Selection Method”<br />
(= <strong>172</strong>), choose [Select] and<br />
press the button.<br />
2 Choose an image.<br />
• zPress the buttons to<br />
choose an image, and then<br />
press the button.<br />
• z[<br />
] is displayed.<br />
• zTo remove the image from the<br />
photobook, press the <br />
button again. [ ] is no longer<br />
displayed.<br />
• zRepeat this process to specify<br />
other images.<br />
• zWhen finished, press the<br />
button to return to the<br />
menu screen.
ç Contents<br />
ç Chapter Contents<br />
Still Images<br />
174<br />
Adding All Images to a Photobook<br />
• zFollowing the procedure in<br />
“Choosing a Selection Method”<br />
(= <strong>172</strong>), choose [Select All<br />
Images] and press the <br />
button.<br />
• zPress the buttons to<br />
choose [OK], and then press the<br />
button.<br />
Still Images<br />
Removing All Images from a Photobook<br />
• zFollowing the procedure in<br />
“Choosing a Selection Method”<br />
(= <strong>172</strong>), choose [Clear All<br />
Selections] and press the <br />
button.<br />
• zPress the buttons to<br />
choose [OK], and then press the<br />
button.
ç Contents<br />
ç Chapter Contents<br />
Still Images<br />
Using an Eye-Fi Card<br />
Movies<br />
Before using an Eye-Fi card, always confirm that local use is<br />
permitted.<br />
175<br />
Inserting a prepared Eye-Fi card enables automatic wireless<br />
transfer of images to a computer or uploading to a photo-sharing<br />
website.<br />
Images are transferred by the Eye-Fi card. Refer to the card’s user<br />
manual or contact the manufacturer for instructions on preparing<br />
and using cards or resolving transfer problems.<br />
• When using an Eye-Fi card, keep the following points in<br />
mind.<br />
- Cards may continue to transmit radio waves even when<br />
[Eye-Fi trans.] is set to [Disable] (= 177). Remove the<br />
Eye-Fi card before entering hospitals, aircraft, or other<br />
areas where transmission is prohibited.<br />
- When troubleshooting image transfer issues, check<br />
the card and computer settings. For details, refer to the<br />
card’s user manual.<br />
- Poor Eye-Fi connections may cause image transfer to<br />
take a long time, and transfer may be interrupted in some<br />
cases.<br />
- Eye-Fi cards may become hot, due to their transfer<br />
functions.<br />
- Battery power will be consumed faster than in normal<br />
use.<br />
- <strong>Camera</strong> operation may become sluggish. To resolve this,<br />
try setting [Eye-Fi trans.] to [Disable].
ç Contents<br />
ç Chapter Contents<br />
176<br />
Connection status of Eye-Fi cards in the camera can be checked<br />
on the shooting screen (in regular information display mode) or<br />
playback screen (in simple information display mode).<br />
(Gray) Not connected Interrupted<br />
(Blinking white) Connecting<br />
(White)<br />
Connected<br />
Not communicating<br />
Error acquiring Eye-Fi card<br />
information* 2<br />
(Animated) Transfer in progress* 1<br />
*1 Power saving (= 36) on the camera is temporarily disabled during<br />
image transfer.<br />
*2 Restart the camera. Repeated display of this icon may indicate a problem<br />
with the card.<br />
Images labeled with a [ ] icon have been transferred.<br />
Checking Connection Information<br />
Check the access point SSID used by the Eye-Fi card or the<br />
connection status, as needed.<br />
• zPress the button,<br />
choose [Eye-Fi Settings] on<br />
the [3] tab, and then press the<br />
button.<br />
• zChoose [Connection info], and<br />
then press the button.<br />
• zThe connection information<br />
screen is displayed.
ç Contents<br />
Disabling Eye-Fi Transfer<br />
ç Chapter Contents<br />
Configure the setting as follows to disable Eye-Fi transfer by the<br />
card, if necessary.<br />
177<br />
• zPress the button,<br />
choose [Eye-Fi Settings] on<br />
the [3] tab, and then press the<br />
button.<br />
• zChoose [Eye-Fi trans.], and<br />
then choose [Disable].<br />
• [Eye-Fi Settings] is not shown unless an Eye-Fi card is<br />
in the camera with its write-protect tab in the unlocked<br />
position. For this reason, you cannot change settings for<br />
an inserted Eye-Fi card if the write-protect tab is in the<br />
locked position.
ç Contents<br />
178<br />
Appendix<br />
Helpful information when using the camera<br />
Troubleshooting...............179<br />
On-Screen Messages.......185<br />
On-Screen Information....188<br />
Functions and Menu<br />
Tables...............................192<br />
Handling Precautions......204<br />
Specifications...................205
ç Contents<br />
Troubleshooting<br />
ç Chapter Contents<br />
179<br />
If you think there is a problem with the camera, first check the<br />
following. If the items below do not solve your problem, contact a<br />
Canon Customer Support Help Desk.<br />
Power<br />
Nothing happens when the ON/OFF button is pressed.<br />
• Confirm that the battery pack is charged (= 19).<br />
• Confirm that the battery pack is inserted facing the correct way (= 21).<br />
• Confirm that the memory card/battery cover is fully closed (= 22).<br />
• Dirty battery terminals reduce battery performance. Try cleaning the<br />
terminals with a cotton swab and reinserting the battery pack a few times.<br />
The battery pack runs out of power quickly.<br />
• Battery performance decreases at low temperatures. Try warming the<br />
battery pack a little by putting it in your pocket, for example, ensuring that<br />
the terminals do not touch any metal objects.<br />
• If these measures do not help and the battery pack still runs out of power<br />
soon after charging, it has reached the end of its life. Purchase a new<br />
battery pack.<br />
The lens is not retracted.<br />
• Do not open the memory card/battery cover while the camera is on. Close<br />
the cover, turn the camera on, and then turn it off again (= 22).<br />
The battery pack is swollen.<br />
• Battery swelling is normal and does not pose any safety concerns.<br />
However, if battery swelling prevents the battery pack from fitting in the<br />
camera, contact a Canon Customer Support Help Desk.<br />
Display on a TV<br />
<strong>Camera</strong> images look distorted or not displayed on a TV<br />
(= 152).
ç Contents<br />
ç Chapter Contents<br />
180<br />
Shooting<br />
Cannot shoot.<br />
• In Playback mode (= 109), press the shutter button halfway (= 37).<br />
Strange display on the screen under low light (= 38).<br />
Strange display on the screen when shooting.<br />
Note that the following display problems are not recorded in still images but<br />
are recorded in movies.<br />
• The screen may darken under bright light.<br />
• The screen may flicker under fluorescent or LED lighting.<br />
• Purplish banding may appear on the screen if you compose a shot that<br />
includes a bright light source.<br />
No date stamp is added to images.<br />
• Configure the [Date Stamp ] (= 60) setting. Note that date stamps<br />
are not added to images automatically, merely because you have<br />
configured the [Date/Time] setting (= 23).<br />
• Date stamps are not added in shooting modes (= 200) in which this<br />
setting cannot be configured (= 60).<br />
[h] flashes on the screen when the shutter button is pressed,<br />
and shooting is not possible (= 49).<br />
[ ] is displayed when the shutter button is pressed halfway<br />
(= 49).<br />
• Set the flash mode to [h] (= 100).<br />
• Increase the ISO speed (= 88).<br />
• Mount the camera on a tripod or take other measures to keep it still.<br />
<strong>IXUS</strong> <strong>170</strong> <strong>IXUS</strong> <strong>165</strong><br />
• Set [IS Mode] to [Continuous] (= 107). However, you should set [IS<br />
Mode] to [Off] when using a tripod or other means to secure the camera<br />
(= 107).
ç Contents<br />
Shots are out of focus.<br />
ç Chapter Contents<br />
181<br />
• Press the shutter button halfway to focus on subjects before pressing it all<br />
the way down to shoot (= 37).<br />
• Make sure subjects are within focusing range (= 210).<br />
• Set [Lamp Setting] to [On] (= 67).<br />
• Confirm that unneeded functions such as macro are deactivated.<br />
• Try shooting with focus lock or AF lock (= 96, 99).<br />
No AF frames are displayed and the camera does not focus<br />
when the shutter button is pressed halfway.<br />
• To have AF frames displayed and the camera focus correctly, try<br />
composing the shot with higher-contrast subject areas centered before you<br />
press the shutter button halfway. Otherwise, try pressing the shutter button<br />
halfway repeatedly.<br />
Subjects in shots look too dark.<br />
• Set the flash mode to [h] (= 100).<br />
• Adjust brightness by using exposure compensation (= 85).<br />
• Adjust contrast by using i-Contrast (= 89, 129).<br />
• Use AE lock or spot metering (= 86, 87).<br />
Subjects look too bright, highlights are washed-out.<br />
• Set the flash mode to [!] (= 59).<br />
• Adjust brightness by using exposure compensation (= 85).<br />
• Use AE lock or spot metering (= 86, 87).<br />
• Reduce the lighting on subjects.<br />
Shots look too dark despite the flash firing (= 49).<br />
• Shoot within flash range (= 209).<br />
• Increase the ISO speed (= 88).<br />
Subjects in flash shots look too bright, highlights are<br />
washed-out.<br />
• Shoot within flash range (= 209).<br />
• Set the flash mode to [!] (= 59).
ç Contents<br />
ç Chapter Contents<br />
White dots or similar image artifacts appear in flash shots.<br />
• This is caused by light from the flash reflecting off dust or airborne<br />
particles.<br />
Shots look grainy.<br />
• Lower the ISO speed (= 88).<br />
182<br />
• High ISO speeds in some shooting modes may cause grainy images<br />
(= 88).<br />
Subjects are affected by red-eye (= 64).<br />
• Set [Lamp Setting] to [On] (= 67) to activate the red-eye reduction<br />
lamp (= 4) in flash shots. Note that while the red-eye reduction lamp<br />
is on (for about one second), it is not possible to shoot, because the lamp<br />
is counteracting red-eye. For best results, have subjects look at the redeye<br />
reduction lamp. Also try increasing the lighting in indoor scenes and<br />
shooting at closer range.<br />
• Edit images using red-eye correction (= 130).<br />
Recording to the memory card takes too long, or continuous<br />
shooting is slower.<br />
• Use the camera to perform low-level formatting of the memory card<br />
(= 140).<br />
Shooting settings or FUNC. menu settings are not available.<br />
• Available setting items vary by shooting mode. Refer to “Functions<br />
Available in Each Shooting Mode”, “FUNC. Menu”, and “Shooting Tab<br />
Menu” (= 192 – 201).<br />
Shooting Movies<br />
The elapsed time shown is incorrect, or recording is<br />
interrupted.<br />
• Use the camera to format the memory card, or switch to a card that<br />
supports high-speed recording. Note that even if the elapsed time display<br />
is incorrect, the length of movies on the memory card corresponds to the<br />
actual recording time (= 138, 209).
ç Contents<br />
ç Chapter Contents<br />
[ ] is displayed and shooting stops automatically.<br />
The camera’s internal memory buffer filled up as the camera could not<br />
record to the memory card quickly enough. Try one of the following<br />
measures.<br />
• Use the camera to perform low-level formatting of the memory card<br />
(= 140).<br />
• Lower the image quality (= 65).<br />
• Switch to a memory card that supports high-speed recording (= 209).<br />
183<br />
Playback<br />
Playback is not possible.<br />
• Image or movie playback may not be possible if a computer is used to<br />
rename files or alter the folder structure.<br />
Playback stops, or audio skips.<br />
• Switch to a memory card that you have performed low-level formatting on<br />
with the camera (= 140).<br />
• There may be brief interruptions when playing movies copied to memory<br />
cards that have slow read speeds.<br />
• When movies are played on a computer, frames may be dropped and<br />
audio may skip if computer performance is inadequate.<br />
Sound is not played during movies.<br />
• Adjust the volume (= 111) if you have activated [Mute] (= 133) or the<br />
sound in the movie is faint.<br />
Memory Card<br />
The memory card is not recognized.<br />
• Restart the camera, with the memory card in it (= 35).
ç Contents<br />
ç Chapter Contents<br />
184<br />
Computer<br />
Cannot transfer images to a computer.<br />
When attempting to transfer images to the computer via a cable, try reducing<br />
the transfer speed as follows.<br />
• Press the button to enter Playback mode. Hold the button<br />
down as you press the and buttons at the same time. On the<br />
next screen, press the buttons to choose [B], and then press the<br />
button.<br />
Eye-Fi Cards<br />
Cannot transfer images (= 175).
ç Contents<br />
On-Screen Messages<br />
ç Chapter Contents<br />
185<br />
If an error message is displayed, respond as follows.<br />
No memory card<br />
• The memory card may be inserted facing the wrong way. Reinsert the<br />
memory card facing the correct way (= 21).<br />
Memory card locked<br />
• The write-protect tab of the memory card is set to the locked position.<br />
Switch the write-protect tab to the unlocked position (= 21).<br />
Cannot record!<br />
• Shooting was attempted without a memory card in the camera. To shoot,<br />
insert a memory card facing the correct way (= 21).<br />
Memory card error (= 140)<br />
• If the same error message is displayed even after you have formatted a<br />
supported memory card (= 2) and have inserted it facing the correct<br />
way (= 21), contact a Canon Customer Support Help Desk.<br />
Insufficient space on card<br />
• There is not enough free space on the memory card to shoot (= 44,<br />
68, 83) or edit images (= 127 – 131). Either erase unneeded<br />
images (= 122) or insert a memory card with enough free space<br />
(= 20).<br />
Charge the battery (= 19)<br />
No Image.<br />
• The memory card does not contain any images that can be displayed.<br />
Protected! (= 119)<br />
Unidentified Image/Incompatible JPEG/Image too large./<br />
Cannot play back MOV/Cannot play back MP4<br />
• Unsupported or corrupt images cannot be displayed.<br />
• It may not be possible to display images that were edited or renamed on a<br />
computer, or images shot with another camera.
ç Contents<br />
ç Chapter Contents<br />
186<br />
Cannot magnify!/Cannot rotate/Cannot modify image/Cannot<br />
modify/Cannot assign to category/Unselectable image.<br />
• The following functions may be unavailable for images that were renamed<br />
or already edited on a computer, or images shot with another camera.<br />
Note that starred (*) functions are not available for movies.<br />
Magnify* (= 116), Rotate* (= 125), Edit* (= 127 – 131), Print List*<br />
(= 168), and Photobook Set-up* (= <strong>172</strong>).<br />
Exceeded selection limit<br />
• More than 998 images were selected for Print List (= 168) or Photobook<br />
Set-up (= <strong>172</strong>). Choose 998 images or less.<br />
• Print List (= 168) or Photobook Set-up (= <strong>172</strong>) settings could not be<br />
saved correctly. Reduce the number of selected images and try again.<br />
• You attempted to choose more than 500 images in Protect (= 119),<br />
Erase (= 122), Print List (= 168), or Photobook Set-up (= <strong>172</strong>).<br />
Naming error!<br />
• The folder could not be created or images could not be recorded,<br />
because the highest supported folder number (999) for storing images<br />
on the card has been reached and the highest supported image number<br />
(9999) for images in folders has been reached. On the [3] tab, change<br />
[File Numbering] to [Auto Reset] (= 141), or format the memory card<br />
(= 138).<br />
Lens Error<br />
• This error may occur if the lens is held while it is moving, or when the<br />
camera is used in dusty or sandy locations.<br />
• Frequent display of this error message may indicate camera damage. In<br />
this case, contact a Canon Customer Support Help Desk.<br />
A camera error was detected (error number)<br />
• If this error message is displayed immediately after a shot, the image may<br />
not have been saved. Switch to Playback mode to check for the image.<br />
• Frequent display of this error message may indicate camera damage.<br />
In this case, write down the error number (Exx) and contact a Canon<br />
Customer Support Help Desk.
ç Contents<br />
ç Chapter Contents<br />
187<br />
File Error<br />
• Correct printing (= <strong>160</strong>) may not be possible for photos from other<br />
cameras or images that have been altered using computer software, even<br />
if the camera is connected to the printer.<br />
Print error<br />
• Check the paper size setting (= 164). If this error message is displayed<br />
when the setting is correct, restart the printer and complete the setting on<br />
the camera again.<br />
Ink absorber full<br />
• Contact a Canon Customer Support Help Desk to request assistance with<br />
ink absorber replacement.
ç Contents<br />
ç Chapter Contents<br />
On-Screen Information<br />
Shooting (Information Display)<br />
188<br />
Battery level<br />
(= 189)<br />
White balance<br />
(= 90)<br />
Drive mode<br />
(= 61)<br />
Eco mode<br />
(= 62, 103)<br />
Self-timer<br />
(= 56)<br />
<strong>Camera</strong> shake<br />
warning (= 49)<br />
Metering method<br />
(= 87)<br />
Eye-Fi connection<br />
status (= 176)<br />
Resolution<br />
(= 63)<br />
Recordable shots<br />
(= 208)<br />
Movie quality<br />
(= 65)<br />
Remaining time<br />
(= 209)<br />
Digital zoom<br />
magnification<br />
(= 54)<br />
AF frame<br />
(= 93), Spot<br />
AE point frame<br />
(= 87)<br />
Focusing range<br />
(= 92, 93),<br />
AF lock (= 99)<br />
<strong>IXUS</strong> <strong>170</strong> <strong>IXUS</strong> <strong>165</strong><br />
IS mode icon<br />
(= 52)<br />
Shooting mode<br />
(= 192), Scene<br />
icon (= 51)<br />
Flash mode<br />
(= 59, 100)
ç Contents<br />
Red-eye<br />
correction<br />
(= 64)<br />
Date stamp<br />
(= 60)<br />
ISO speed<br />
(= 88)<br />
i-Contrast<br />
(= 89)<br />
Grid lines<br />
(= 104)<br />
AE lock<br />
(= 86), FE<br />
lock (= 102)<br />
Shutter speed<br />
Aperture value<br />
Exposure<br />
compensation<br />
level (= 85)<br />
ç Chapter Contents<br />
Zoom bar<br />
(= 46)<br />
Blink detection<br />
(= 66)<br />
Time zone<br />
(= 135)<br />
Image<br />
stabilization<br />
(= 107)<br />
189<br />
Battery Level<br />
An on-screen icon or message indicates the battery charge level.<br />
Display<br />
Sufficient charge<br />
Details<br />
Slightly depleted, but sufficient<br />
(Blinking red)<br />
[Charge the battery]<br />
Nearly depleted—charge the battery pack soon<br />
Depleted—charge the battery pack immediately
ç Contents<br />
ç Chapter Contents 190<br />
Playback (Detailed Information Display)<br />
Movies<br />
(= 45, 110)<br />
Shooting mode<br />
(= 192)<br />
ISO speed<br />
(= 88),<br />
Playback speed<br />
(= 76)<br />
Exposure<br />
compensation<br />
level (= 85)<br />
White balance<br />
(= 90)<br />
Histogram<br />
(= 112)<br />
Image editing<br />
(= 127 – 131)<br />
Resolution<br />
(= 63), MOV<br />
(movies)<br />
Transferred via<br />
Eye‐Fi (= 176)<br />
Battery level<br />
(= 189)<br />
Metering method<br />
(= 87)<br />
Folder number<br />
- File number<br />
(= 141)<br />
Current image<br />
no. / Total no. of<br />
images<br />
Shutter speed<br />
(still images),<br />
Image quality<br />
/ Frame rate<br />
(movies)<br />
(= 65)<br />
Aperture value<br />
Flash (= 100)<br />
Focusing range<br />
(= 92, 93)<br />
File size<br />
Still images:<br />
Resolution<br />
(= 208)<br />
Movies: Playback<br />
time (= 207)
Protection<br />
(= 119)<br />
ç Contents<br />
Red-eye<br />
correction<br />
(= 64, 130)<br />
ç Chapter Contents<br />
i-Contrast<br />
(= 89, 129)<br />
Shooting date/<br />
time (= 23)<br />
191<br />
• Some information may not be displayed when viewing images on a<br />
TV (= 151).<br />
Summary of Movie Control Panel in “Viewing”<br />
(= 110)<br />
c<br />
Exit<br />
Play<br />
Slow Motion (Press the buttons to adjust the playback<br />
speed. No sound is played.)<br />
Skip Backward* (To continue skipping backward, keep holding down<br />
the button.)<br />
Previous Frame (For fast-rewind, keep holding down the <br />
button.)<br />
Next Frame (For fast-forward, keep holding down the button.)<br />
Skip Forward* (To continue skipping forward, keep holding down the<br />
button.)<br />
Shown when the camera is connected to a PictBridge-compatible<br />
printer (= <strong>160</strong>).<br />
* Displays the frame approx. 4 sec. before or after the current frame.<br />
• To skip forward or back during movie playback, press the <br />
buttons.
ç Contents<br />
ç Chapter Contents<br />
Functions and Menu Tables<br />
192<br />
Functions Available in Each Shooting Mode<br />
Function<br />
Flash (= 59, 100)<br />
Shooting Mode<br />
G * 1 I<br />
O O O O O O O O<br />
h – O O – O O – O<br />
Z * 2 O O – – – – –<br />
! O O O O O O O O<br />
AE Lock/FE Lock<br />
(= 86, 102)* 3 – O – – – – – –<br />
AF Lock (= 99) – O O – – – – –<br />
Eco Mode<br />
(= 62, 103)<br />
On/Off O O O O O O O O<br />
Screen Display (= 38)<br />
No<br />
Information O O O O O O O O<br />
Display<br />
Information<br />
Display<br />
O O O O O O O O<br />
O Available or set automatically. – Not available.<br />
*1 Available only for <strong>IXUS</strong> <strong>160</strong> .<br />
*2 Not available, but switches to [Z] in some cases.<br />
*3 FE lock not available in [!] flash mode.
ç Contents<br />
ç Chapter Contents<br />
193<br />
Function<br />
Flash (= 59, 100)<br />
Shooting Mode<br />
P t N<br />
O O O O O O – –<br />
h O O O O O O – O<br />
Z – – – – – – – –<br />
! O O O O O O O O<br />
AE Lock/FE Lock<br />
(= 86, 102)*<br />
– – – – – – – –<br />
AF Lock (= 99) – – – – – – – O<br />
Eco Mode<br />
(= 62, 103)<br />
On/Off O O O O O O O O<br />
Screen Display (= 38)<br />
No<br />
Information O O O O O O O O<br />
Display<br />
Information<br />
Display<br />
O O O O O O O O<br />
O Available or set automatically. – Not available.<br />
* FE lock not available in [!] flash mode.
ç Contents<br />
FUNC. Menu<br />
ç Chapter Contents<br />
194<br />
Shooting Mode<br />
Function<br />
Metering Method (= 87)<br />
White Balance (= 90)<br />
G * 1 I<br />
O O O O O O O O<br />
– O – – – – – –<br />
O O O O O O O O<br />
– O – O – O O –<br />
ISO Speed (= 88)<br />
AUTO O O O O O O O O<br />
100, 200, 400,<br />
800, <strong>160</strong>0<br />
– O – – – – – –<br />
Exposure Compensation<br />
(= 85)<br />
– O * 2 O O O O O<br />
Self-Timer (= 56)<br />
O O O O O O O O<br />
] [ $ O O O O O – O O<br />
Self-Timer Settings (= 58)<br />
Delay* 3 O O O O O – O O<br />
Shots* 4 O O O O O – O O<br />
O Available or set automatically. – Not available.<br />
*1 Available only for <strong>IXUS</strong> <strong>160</strong> .<br />
*2 Settings [Dark - Light].<br />
*3 Cannot be set to 0 seconds in modes without selection of the number of<br />
shots.<br />
*4 One shot (cannot be modified) in modes without selection of the number<br />
of shots.
ç Contents<br />
ç Chapter Contents<br />
195<br />
Shooting Mode<br />
Function<br />
Metering Method (= 87)<br />
White Balance (= 90)<br />
P t N<br />
O O O O O O O O<br />
– – – – – – – –<br />
O O O O O O O O<br />
– – – – – – – O<br />
ISO Speed (= 88)<br />
AUTO O O O O O O O –<br />
100, 200, 400,<br />
800, <strong>160</strong>0<br />
– – – – – – – O<br />
Exposure Compensation<br />
(= 85)<br />
O O O O – O O –<br />
Self-Timer (= 56)<br />
O O O O O O O O<br />
] [ $ O O O O O O O O<br />
Self-Timer Settings (= 58)<br />
Delay* 1 O O O O O O O O<br />
Shots* 2 O O O O O O O O<br />
O Available or set automatically. – Not available.<br />
*1 Cannot be set to 0 seconds in modes without selection of the number of<br />
shots.<br />
*2 One shot (cannot be modified) in modes without selection of the number<br />
of shots.
ç Contents<br />
ç Chapter Contents<br />
196<br />
Shooting Mode<br />
Function<br />
Focusing Range (= 92, 93)<br />
Drive Mode (= 61)<br />
Resolution (= 63)<br />
Movie<br />
Quality<br />
(= 65)<br />
G * 1 I<br />
O O O O O O O O<br />
e u – O O O O – O O<br />
O O O * 2 O O O O<br />
O O – * 2 O – O O<br />
O O O – O O – O<br />
O O – – O O – –<br />
– – – O – – O –<br />
O O – – O O – –<br />
O O O O O O O O<br />
O Available or set automatically. – Not available.<br />
*1 Available only for <strong>IXUS</strong> <strong>160</strong> .<br />
*2 Depending on the scene, consecutive shots may be combined (= 72).
ç Contents<br />
ç Chapter Contents<br />
197<br />
Shooting Mode<br />
Function<br />
Focusing Range (= 92, 93)<br />
Drive Mode (= 61)<br />
Resolution (= 63)<br />
Movie<br />
Quality<br />
(= 65)<br />
P t N<br />
O O O O O O O O<br />
e u O O O O O O – O<br />
O O O O O O O O<br />
O O O O O O O –<br />
O O O O O O O O<br />
– – – – – O O O<br />
– – – – – – – –<br />
O – – – – O O O<br />
* O O O O O O O<br />
O Available or set automatically. – Not available.<br />
* Synchronizes with the resolution setting and is automatically set<br />
(= 76).
ç Contents<br />
4 Shooting Tab Menu<br />
ç Chapter Contents<br />
198<br />
Shooting Mode<br />
G * 1 I<br />
Function<br />
AF Frame (= 93)<br />
Face AiAF O O O O O O O –<br />
Tracking AF – O O O O – O –<br />
Center – O O O O – O O<br />
Digital Zoom (= 54, 104)<br />
On O O O – O O – –<br />
Off – O O O O O O O<br />
AF-Point Zoom (= 97)<br />
On – O O O O O O –<br />
Off O O O O O O O O<br />
Servo AF (= 96)<br />
On – O O O O – O –<br />
Off * 2 O O O O O O O<br />
Continuous AF (= 98)<br />
On O O O O O O – O<br />
Off – O O O O – O O<br />
Lamp Setting (= 67)<br />
On O O O O O O O O<br />
Off O O O O O O O O<br />
Red-Eye Corr. (= 64)<br />
On O O – O O O O –<br />
Off O O O O O O O O<br />
*1 Available only for <strong>IXUS</strong> <strong>160</strong> .<br />
*2 [On] when subject movement is detected.<br />
O Available or set automatically. – Not available.
ç Contents<br />
ç Chapter Contents<br />
199<br />
Function<br />
AF Frame (= 93)<br />
Shooting Mode<br />
P t N<br />
Face AiAF – O O O O O – O<br />
Tracking AF – – O O O O – O<br />
Center – O O O O O O O<br />
Digital Zoom (= 54, 104)<br />
On – – – – – O O O<br />
Off O O O O O O O O<br />
AF-Point Zoom (= 97)<br />
On – – O O O O – O<br />
Off O O O O O O O O<br />
Servo AF (= 96)<br />
On – – O O O O – –<br />
Off O O O O O O O O<br />
Continuous AF (= 98)<br />
On O O O O O O – O<br />
Off O O O O O O O O<br />
Lamp Setting (= 67)<br />
On O O O O O O – O<br />
Off O O O O O O O O<br />
Red-Eye Corr. (= 64)<br />
On – – – – – O – O<br />
Off O O O O O O – O<br />
O Available or set automatically. – Not available.
ç Contents<br />
ç Chapter Contents<br />
200<br />
Shooting Mode<br />
G * 1 I<br />
Function<br />
i-Contrast (= 89)<br />
Auto O O – – – – O –<br />
Off – O O O O O – O<br />
Review image after shooting (= 105)<br />
Off/Quick/<br />
Display<br />
2 sec./4 sec./<br />
Time<br />
8 sec./Hold<br />
O O O O O O O O<br />
Display Off O O O O O O O O<br />
Info Detailed – O O O O O O O<br />
Blink Detection (= 66)<br />
On O O O – O O O –<br />
Off O O O O O O O O<br />
Grid Lines (= 104)<br />
On – O O O O O O O<br />
Off O O O O O O O O<br />
IS Settings (= 107)* 2<br />
IS Off/Continuous O O O – O O O O<br />
Mode Shoot Only – O O – O O O O<br />
Dynamic 1 O O O – O O O O<br />
IS 2 O O O – O O O O<br />
Date Stamp (= 60)<br />
Off O O O O O O O O<br />
Date / Date & Time O O O – O O – –<br />
O Available or set automatically. – Not available.<br />
*1 Available only for <strong>IXUS</strong> <strong>160</strong> .<br />
*2 Available only for <strong>IXUS</strong> <strong>170</strong> <strong>IXUS</strong> <strong>165</strong> .
ç Contents<br />
ç Chapter Contents<br />
201<br />
Shooting Mode<br />
P t N<br />
Function<br />
i-Contrast (= 89)<br />
Auto – – – – – – – –<br />
Off O O O O O O O O<br />
Review image after shooting (= 105)<br />
Off/Quick/<br />
Display<br />
2 sec./4 sec./<br />
Time<br />
8 sec./Hold<br />
O O O O O O O O<br />
Display Off O O O O O O O O<br />
Info Detailed O O O O O O O O<br />
Blink Detection (= 66)<br />
On – – – O O O – –<br />
Off O O O O O O O O<br />
Grid Lines (= 104)<br />
On O O O O O O O O<br />
Off O O O O O O O O<br />
IS Settings (= 107)*<br />
IS Off/Continuous O O O O O O O O<br />
Mode Shoot Only O O O O O O O O<br />
Dynamic 1 – O O O O O O O<br />
IS 2 O O O O O O O O<br />
Date Stamp (= 60)<br />
Off O O O O O O O O<br />
Date / Date & Time – – – – – O O O<br />
O Available or set automatically. – Not available.<br />
* Available only for <strong>IXUS</strong> <strong>170</strong> <strong>IXUS</strong> <strong>165</strong> .
ç Contents<br />
3 Set Up Tab Menu<br />
ç Chapter Contents<br />
202<br />
Item Ref. Page Item Ref. Page<br />
Mute = 133 Format = 138, 140<br />
Volume = 133 File Numbering = 141<br />
Hints & Tips = 134 Create Folder = 142<br />
Date/Time = 134 Video System = 152<br />
Time Zone = 135 Eye-Fi Settings = 175<br />
Lens Retract<br />
= 136<br />
Certification Logo<br />
Display<br />
= 142<br />
Power Saving = 36, 136 Language = 26<br />
LCD Brightness = 137 Reset All = 144<br />
Start-up Image = 138<br />
1 Playback Tab Menu<br />
Item Ref. Page Item Ref. Page<br />
Slideshow = 117 Red-Eye Correction = 130<br />
Erase = 122 Resize = 127<br />
Protect = 119 Transition = 111<br />
Rotate = 125 Auto Rotate = 126<br />
Photobook Set-up = <strong>172</strong> Resume = 111<br />
i-Contrast<br />
= 129
ç Contents<br />
2 Print Tab Menu<br />
ç Chapter Contents<br />
203<br />
Item Ref. Page Item Ref. Page<br />
Print – Clear All Selections = 171<br />
Select Images & Qty. = 169 Print Settings = 168<br />
Select All Images = 171<br />
Playback Mode FUNC. Menu<br />
Item Ref. Page Item Ref. Page<br />
Rotate = 125 Play Movie = 110<br />
Protect = 119 Image Search = 114<br />
Print = <strong>160</strong> Slideshow = 117
ç Contents<br />
Handling Precautions<br />
ç Chapter Contents<br />
204<br />
• The camera is a high-precision electronic device. Avoid<br />
dropping it or subjecting it to strong impact.<br />
• Never bring the camera near magnets, motors, or other devices<br />
that generate strong electromagnetic fields, which may cause<br />
malfunction or erase image data.<br />
• If water droplets or dirt adheres to the camera or screen, wipe<br />
with a dry soft cloth, such as an eyeglass cloth. Do not rub hard<br />
or apply force.<br />
• Never use cleaners containing organic solvents to clean the<br />
camera or screen.<br />
• Use a blower brush to remove dust from the lens. If cleaning is<br />
difficult, contact a Canon Customer Support Help Desk.<br />
• To prevent condensation from forming on the camera after<br />
sudden temperature changes (when the camera is transferred<br />
from cold to warm environments), put the camera in an<br />
airtight, resealable plastic bag and let it gradually adjust to the<br />
temperature before removing it from the bag.<br />
• If condensation does form on the camera, stop using it<br />
immediately. Continuing to use the camera in this state may<br />
damage it. Remove the battery pack and memory card, and<br />
wait until the moisture has evaporated before resuming use.<br />
• Before long-term battery storage, use up the battery pack’s<br />
remaining charge, remove it from the camera, and store it in<br />
a plastic bag or similar container. Storing a partially charged<br />
battery pack over extended periods (about a year) may shorten<br />
its life or affect performance.
ç Contents<br />
Specifications<br />
ç Chapter Contents<br />
205<br />
<strong>Camera</strong> Effective<br />
Pixels (Max.)<br />
Lens Focal Length<br />
LCD Monitor<br />
File Format<br />
Data Type<br />
Interface<br />
Power Source<br />
Dimensions (Based<br />
on CIPA <strong>Guide</strong>lines)<br />
Approx. 20 million pixels<br />
<strong>IXUS</strong> <strong>170</strong><br />
12x zoom: 4.5 (W) – 54.0 (T) mm<br />
(35mm film equivalent: 25 (W) – 300 (T) mm)<br />
<strong>IXUS</strong> <strong>165</strong> <strong>IXUS</strong> <strong>160</strong><br />
8x zoom: 5.0 (W) – 40.0 (T) mm<br />
(35mm film equivalent: 28 (W) – 224 (T) mm)<br />
6.8 cm (2.7 in.) color TFT LCD<br />
Effective Pixels: Approx. 230,000 dots<br />
Design rule for <strong>Camera</strong> File system, DPOF (version<br />
1.1) compliant<br />
Still Images: Exif 2.3 (JPEG)<br />
Movies: MOV (Video: H.264/MPEG-4 AVC; Audio:<br />
Linear PCM (monaural))<br />
Hi-speed USB<br />
Analog audio output (monaural)<br />
Analog video output (NTSC/PAL)<br />
Battery Pack NB-11LH/NB-11L<br />
AC Adapter Kit ACK-DC90<br />
<strong>IXUS</strong> <strong>170</strong><br />
99.6 x 57.6 x 22.6 mm (3.92 x 2.27 x 0.89 in.)<br />
<strong>IXUS</strong> <strong>165</strong> <strong>IXUS</strong> <strong>160</strong><br />
95.2 x 54.3 x 22.1 mm (3.75 x 2.14 x 0.87 in.)
ç Contents<br />
Weight (Based on<br />
CIPA <strong>Guide</strong>lines)<br />
ç Chapter Contents<br />
206<br />
<strong>IXUS</strong> <strong>170</strong><br />
Approx. 141 g (approx. 4.97 oz.; including the battery<br />
pack and memory card)<br />
Approx. 124 g (approx. 4.37 oz.; camera body only)<br />
<strong>IXUS</strong> <strong>165</strong><br />
Approx. 128 g (approx. 4.52 oz.; including the battery<br />
pack and memory card)<br />
Approx. 112 g (approx. 3.95 oz.; camera body only)<br />
<strong>IXUS</strong> <strong>160</strong><br />
Approx. 127 g (approx. 4.48 oz.; including the battery<br />
pack and memory card)<br />
Approx. 111 g (approx. 3.92 oz.; camera body only)<br />
Digital Zoom Focal Length (35mm equivalent)<br />
<strong>IXUS</strong> <strong>170</strong><br />
25 – 1200 mm<br />
<strong>IXUS</strong> <strong>165</strong> <strong>IXUS</strong> <strong>160</strong><br />
28 – 896 mm<br />
• Represents the combined focal length of optical and digital<br />
zoom.
ç Contents<br />
ç Chapter Contents<br />
Number of Shots/Recording Time, Playback Time<br />
<strong>IXUS</strong> <strong>170</strong><br />
Number of Shots Approx. 200<br />
Movie Recording Time* 1<br />
Playback Time<br />
Eco Mode On Approx. 255<br />
Continuous<br />
Shooting* 2<br />
Approx. 55 minutes<br />
Approx. 1 hour, 45 minutes<br />
Approx. 5 hours<br />
207<br />
*1 Time under default camera settings, when normal operations are performed,<br />
such as shooting, pausing, turning the camera on and off, and zooming.<br />
*2 Time available when shooting the maximum movie length (until recording<br />
stops automatically) repeatedly.<br />
• The number of shots that can be taken is based on measurement<br />
guidelines of the <strong>Camera</strong> & Imaging Products Association (CIPA).<br />
• Under some shooting conditions, the number of shots and recording time<br />
may be less than mentioned above.<br />
• Number of shots/time with a fully charged battery pack.<br />
<strong>IXUS</strong> <strong>165</strong><br />
Number of Shots Approx. 200<br />
Eco Mode On Approx. 260<br />
Movie Recording Time* 1<br />
Approx. 50 minutes<br />
Continuous<br />
Approx. 1 hour, 40 minutes<br />
Shooting* 2<br />
Playback Time<br />
Approx. 4 hours<br />
*1 Time under default camera settings, when normal operations are performed,<br />
such as shooting, pausing, turning the camera on and off, and zooming.<br />
*2 Time available when shooting the maximum movie length (until recording<br />
stops automatically) repeatedly.<br />
• The number of shots that can be taken is based on measurement<br />
guidelines of the <strong>Camera</strong> & Imaging Products Association (CIPA).<br />
• Under some shooting conditions, the number of shots and recording time<br />
may be less than mentioned above.<br />
• Number of shots/time with a fully charged battery pack.
ç Contents<br />
ç Chapter Contents<br />
208<br />
<strong>IXUS</strong> <strong>160</strong><br />
Number of Shots Approx. 220<br />
Movie Recording Time* 1<br />
Playback Time<br />
Eco Mode On Approx. 300<br />
Continuous<br />
Shooting* 2<br />
Approx. 55 minutes<br />
Approx. 1 hour, 50 minutes<br />
Approx. 4 hours<br />
*1 Time under default camera settings, when normal operations are performed,<br />
such as shooting, pausing, turning the camera on and off, and zooming.<br />
*2 Time available when shooting the maximum movie length (until recording<br />
stops automatically) repeatedly.<br />
• The number of shots that can be taken is based on measurement<br />
guidelines of the <strong>Camera</strong> & Imaging Products Association (CIPA).<br />
• Under some shooting conditions, the number of shots and recording time<br />
may be less than mentioned above.<br />
• Number of shots/time with a fully charged battery pack.<br />
Number of Shots per Memory Card<br />
Recording Pixels<br />
Number of Shots per Memory Card (Approx. shots)<br />
16 GB<br />
(Large)<br />
20M/5152x3864<br />
2760<br />
(Medium 1)<br />
10M/3648x2736<br />
5061<br />
(Medium 2)<br />
3M/2048x1536<br />
16755<br />
(Small)<br />
0.3M/640x480<br />
80988<br />
(Widescreen)<br />
5152x2896<br />
3470<br />
• The values in the table are based on Canon measurement conditions and<br />
may change depending on the subject, memory card and camera settings.
ç Contents<br />
ç Chapter Contents<br />
Recording Time per Memory Card<br />
Recording Time per Memory Card<br />
Image Quality<br />
16 GB<br />
2 hr. 21 min. 58 sec.<br />
6 hr. 44 min. 38 sec.<br />
209<br />
• The values in the table are based on Canon measurement conditions and<br />
may change depending on the subject, memory card and camera settings.<br />
• Recording will automatically stop when the clip file size reaches 4 GB,<br />
or when the recording time reaches approximately 29 minutes and 59<br />
seconds when shooting in [ ], or approximately 1 hour when shooting in<br />
[ ].<br />
• Recording may stop even if the maximum clip length has not been reached<br />
on some memory cards. SD Speed Class 10 or higher memory cards are<br />
recommended.<br />
Flash Range<br />
<strong>IXUS</strong> <strong>170</strong><br />
Maximum wide angle (j)<br />
Maximum telephoto (i)<br />
50 cm – 4.0 m (1.6 – 13 ft.)<br />
1.0 – 2.0 m (3.3 – 6.6 ft.)<br />
<strong>IXUS</strong> <strong>165</strong> <strong>IXUS</strong> <strong>160</strong><br />
Maximum wide angle (j)<br />
Maximum telephoto (i)<br />
50 cm – 3.0 m (1.6 – 9.8 ft.)<br />
1.3 – 1.5 m (4.3 – 4.9 ft.)
ç Contents<br />
Shooting Range<br />
<strong>IXUS</strong> <strong>170</strong><br />
Shooting<br />
Mode<br />
Other modes<br />
Focusing<br />
Range<br />
ç Chapter Contents<br />
Maximum Wide<br />
Angle (j)<br />
210<br />
Maximum<br />
Telephoto (i)<br />
– 1 cm (0.4 in.) – infinity 1.0 m (3.3 ft.) – infinity<br />
e*<br />
* Not available in some shooting modes.<br />
<strong>IXUS</strong> <strong>165</strong> <strong>IXUS</strong> <strong>160</strong><br />
Shooting<br />
Mode<br />
Other modes<br />
5 cm (2.0 in.) – infinity 1.0 m (3.3 ft.) – infinity<br />
1 – 50 cm<br />
(0.4 in. – 1.6 ft.)<br />
u* 3.0 m (9.8 ft.) – infinity 3.0 m (9.8 ft.) – infinity<br />
Focusing<br />
Range<br />
Maximum Wide<br />
Angle (j)<br />
–<br />
Maximum<br />
Telephoto (i)<br />
– 1 cm (0.4 in.) – infinity 1.3 m (4.3 ft.) – infinity<br />
e*<br />
* Not available in some shooting modes.<br />
5 cm (2.0 in.) – infinity 1.3 m (4.3 ft.) – infinity<br />
1 – 50 cm<br />
(0.4 in. – 1.6 ft.)<br />
u* 3.0 m (9.8 ft.) – infinity 3.0 m (9.8 ft.) – infinity<br />
–<br />
Continuous Shooting Speed<br />
Shooting Mode<br />
Speed<br />
G<br />
Approx. 0.8 shots/sec.<br />
Approx. 2.2 shots/sec.
ç Contents<br />
Shutter Speed<br />
ç Chapter Contents<br />
211<br />
[ ] mode, automatically set range 1 – 1/2000 sec.<br />
Aperture<br />
f/number<br />
<strong>IXUS</strong> <strong>170</strong><br />
f/3.6 / f/10 (W), f/7.0 / f/20 (T)<br />
<strong>IXUS</strong> <strong>165</strong> <strong>IXUS</strong> <strong>160</strong><br />
f/3.2 / f/9.0 (W), f/6.9 / f/20 (T)<br />
Battery Pack NB-11LH<br />
Type:<br />
Rechargeable lithium-ion battery<br />
Nominal Voltage: 3.6 V DC<br />
Nominal Capacity: 800 mAh<br />
Charging Cycles: Approx. 300 times<br />
Operating Temperatures: 0 – 40 °C (32 – 104 °F)<br />
Battery Pack NB-11L<br />
Type:<br />
Rechargeable lithium-ion battery<br />
Nominal Voltage: 3.6 V DC<br />
Nominal Capacity: 680 mAh<br />
Charging Cycles: Approx. 300 times<br />
Operating Temperatures: 0 – 40 °C (32 – 104 °F)<br />
Battery Charger CB-2LF/CB-2LFE<br />
Rated Input:<br />
100 – 240 V AC (50/60 Hz)<br />
Rated Output:<br />
4.2 V DC, 0.41 A<br />
Charging Time: Approx. 2 hr. 20 min. (when using NB-11LH),<br />
Approx. 2 hr. (when using NB-11L)<br />
Charge Indicator: Charging: orange / Fully charged: green<br />
(two-indicator system)<br />
Operating Temperatures: 5 – 40 °C (41 – 104 °F)
Index<br />
ç Contents<br />
A<br />
AC adapter kit.....................148, 153<br />
Accessories................................148<br />
AE lock.........................................86<br />
AF frames.....................................93<br />
AF lock.........................................99<br />
Auto mode<br />
(shooting mode).....................27, 45<br />
AV cable.............................149, 151<br />
B<br />
Batteries<br />
→ Date/time (date/time battery)<br />
Battery charger.......................2, 148<br />
Battery pack<br />
Charging.................................19<br />
Eco mode.......................62, 103<br />
Level.....................................189<br />
Power saving..........................36<br />
Blink detection..............................66<br />
C<br />
<strong>Camera</strong><br />
Reset all...............................144<br />
Center (AF frame mode)..............96<br />
Color (white balance)...................90<br />
Continuous shooting.....................61<br />
Cropping.....................................163<br />
Custom white balance..................91<br />
212<br />
D<br />
Date/time<br />
Adding date stamps...............60<br />
Changing................................24<br />
Date/time battery....................25<br />
Settings..................................23<br />
World clock...........................135<br />
DC coupler.................................153<br />
Defaults → Reset all<br />
Digital IS (shooting mode)............72<br />
Digital zoom..........................54, 104<br />
Display language..........................26<br />
DPOF.........................................168<br />
Drive mode...................................61<br />
E<br />
Eco mode.............................62, 103<br />
Editing<br />
i-Contrast..............................129<br />
Red-eye correction...............130<br />
Resizing images...................127<br />
Erasing.......................................122<br />
Error messages..........................185<br />
Exposure<br />
AE lock...................................86<br />
Compensation........................85<br />
FE lock.................................102<br />
Eye-Fi cards...........................2, 175
ç Contents<br />
F<br />
Face AiAF (AF frame mode).........94<br />
Face self-timer (shooting mode)...79<br />
FE lock.......................................102<br />
File numbering............................141<br />
Fireworks (shooting mode)...........71<br />
Fish-eye effect (shooting mode)...74<br />
Flash<br />
Deactivating flash...........59, 101<br />
On........................................100<br />
Slow synchro........................100<br />
Focusing<br />
AF frames...............................93<br />
AF lock...................................99<br />
AF-point zoom........................97<br />
Servo AF................................96<br />
Focusing range<br />
Infinity.....................................93<br />
Macro.....................................92<br />
Focus lock....................................96<br />
FUNC. menu<br />
Basic operations.....................39<br />
Table.............................194, 203<br />
G<br />
Grid lines....................................104<br />
H<br />
Household power.......................153<br />
I<br />
i-Contrast..............................89, 129<br />
213<br />
Images<br />
Display period......................105<br />
Erasing.................................122<br />
Playback → Viewing<br />
Protecting............................. 119<br />
Image stabilization......................107<br />
Indicator........................................43<br />
Infinity (focusing range)................93<br />
ISO speed....................................88<br />
L<br />
Lamp............................................67<br />
Live View Control<br />
(shooting mode)...........................69<br />
Long shutter (shooting mode)......81<br />
Low light (shooting mode)............70<br />
M<br />
Macro (focusing range)................92<br />
Magnified display........................ 116<br />
Memory cards.................................2<br />
Recording time.....................209<br />
Menu<br />
Basic operations.....................41<br />
Table.....................................192<br />
Metering method..........................87<br />
Miniature effect<br />
(shooting mode)...........................75<br />
Monochrome (shooting mode).....78<br />
Movies<br />
Image quality<br />
(resolution/frame rate)............65<br />
Recording time.....................209
ç Contents<br />
P<br />
P (shooting mode)........................84<br />
Package contents...........................2<br />
Photobook set-up.......................<strong>172</strong><br />
PictBridge...........................150, <strong>160</strong><br />
Playback → Viewing<br />
Portrait (shooting mode)...............70<br />
Poster effect (shooting mode)......73<br />
Power.........................................148<br />
→ AC adapter kit<br />
→ Battery pack<br />
Power saving................................36<br />
Printing.......................................<strong>160</strong><br />
Program AE..................................84<br />
Protecting................................... 119<br />
R<br />
Red-eye correction...............64, 130<br />
Reset all.....................................144<br />
Resizing images.........................127<br />
Resolution (image size)................63<br />
Rotating......................................125<br />
S<br />
Saving images to a computer.....157<br />
Screen<br />
Display language....................26<br />
Icons.............................188, 190<br />
Menu → FUNC. menu, Menu<br />
SD/SDHC/SDXC memory cards<br />
→ Memory cards<br />
Searching................................... 114<br />
214<br />
Self-timer......................................56<br />
2-second self-timer.................57<br />
Customizing the self-timer......58<br />
Face self-timer<br />
(shooting mode).....................79<br />
Servo AF.......................................96<br />
Shooting<br />
Shooting date/time → Date/time<br />
Shooting information............188<br />
Slideshow................................... 117<br />
Snow (shooting mode).................71<br />
Software<br />
Installation............................156<br />
Saving images to<br />
a computer...........................157<br />
Sounds.......................................133<br />
Strap.........................................2, 18<br />
Super vivid (shooting mode).........73<br />
T<br />
Terminal..............................151, <strong>160</strong><br />
Toy camera effect<br />
(shooting mode)...........................77<br />
Tracking AF..................................95<br />
Traveling with the camera..........135<br />
Troubleshooting..........................179<br />
TV display...................................151<br />
V<br />
Viewing.........................................30<br />
Image search....................... 114<br />
Index display........................ 113<br />
Magnified display................. 116
ç Contents<br />
Single-image display..............30<br />
Slideshow............................. 117<br />
TV display............................151<br />
215<br />
W<br />
White balance (color)...................90<br />
Widescreen (resolution)...............63<br />
World clock.................................135<br />
Wrist strap → Strap<br />
Z<br />
Zoom................................28, 46, 54
ç Contents<br />
216<br />
Trademarks and Licensing<br />
• Microsoft and Windows are trademarks or registered<br />
trademarks of Microsoft Corporation in the United States and/or<br />
other countries.<br />
• Macintosh and Mac OS are trademarks of Apple Inc., registered<br />
in the U.S. and other countries.<br />
• The SDXC logo is a trademark of SD-3C, LLC.<br />
• All other trademarks are the property of their respective owners.<br />
• This device incorporates exFAT technology licensed from<br />
Microsoft.<br />
• This product is licensed under AT&T patents for the MPEG-4<br />
standard and may be used for encoding MPEG-4 compliant<br />
video and/or decoding MPEG-4 compliant video that was<br />
encoded only (1) for a personal and non-commercial purpose<br />
or (2) by a video provider licensed under the AT&T patents<br />
to provide MPEG-4 compliant video. No license is granted or<br />
implied for any other use for MPEG-4 standard.<br />
Disclaimer<br />
• Unauthorized reproduction of this guide is prohibited.<br />
• All measurements based on Canon testing standards.<br />
• Information subject to change without notice, as are product<br />
specifications and appearance.<br />
• Illustrations and screenshots in this guide may differ slightly<br />
from the actual equipment.<br />
• The above items notwithstanding, Canon cannot be held liable<br />
for any loss arising from the use of this product.