

Construction booklet - portfolio

You also want an ePaper? Increase the reach of your titles
YUMPU automatically turns print PDFs into web optimized ePapers that Google loves.
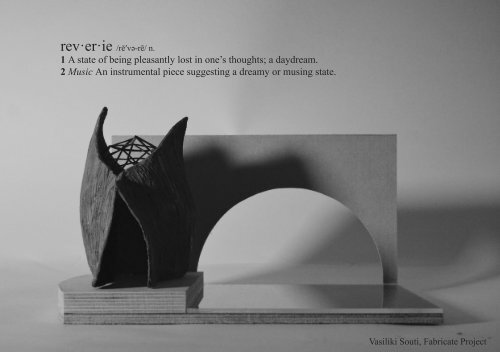
ev·er·ie /rĕʹvə-rē/ n.<br />
1 A state of being pleasantly lost in one’s thoughts; a daydream.<br />
2 Music An instrumental piece suggesting a dreamy or musing state.<br />
Vasiliki Souti, Fabricate Project
Introduction<br />
Reverie is a listening chamber dedicated to the<br />
song “Echoes” by Pink Floyd. Situated in the<br />
Rochdale canal, at a corner where the industrial<br />
landscape meets nature, it features a floatation<br />
tank which resembles the song’s “underwater”<br />
feeling. The chamber’s shape arises from<br />
the location itself, as it was inspired by graffiti<br />
observed on site, and, thus, is embodied by the<br />
area, rather than being plain decoration. It consists<br />
of a glass geodesic dome, surrounded by a<br />
wooden, curved “skin”. The floatation tank aims<br />
to relieve stress, provide relaxation and enhance<br />
the listener’s senses for an optimum listening<br />
experience.
The model
Step 1: Constructing a paper model of the dome<br />
What you’ll need:<br />
Paper, Glue, Scissors<br />
• Cut 10 triangles with dimensions of 2.94 x 2.94 x 2.94<br />
cm.<br />
• Cut 30 triangles with dimensions of 2.59 x 2.59 x 2.94<br />
cm.<br />
Note: Before cutting them, make sure you leave a 0.5 cm<br />
margin on each side and, once cut, fold it in. This will<br />
help in gluing the triangles together.<br />
Line A: 2.59 cm<br />
Line B: 2.94 cm<br />
The final model should look like this:<br />
• Once you have cut all the pieces, start gluing them together<br />
at the folded edges, following the plan and section<br />
provided below.<br />
Note: Blue Line=2.94 cm, Red Line=2.59cm
Step 2: Constructing the dome out of ABS acrylic strips<br />
What you’ll need:<br />
10 2.4x0.5x250 mm ABS acrylic strips, Plastic weld, paper<br />
model from Step 1, black acrylic paint, brush<br />
• Start by making the 5 triangles at the top and, using the<br />
plastic weld, glue them together with the paper model as a<br />
guide, forming a pentagon.<br />
Note: The sides of two adjacent triangles form a double line.<br />
This is only applied to the first five triangles, to indicate that<br />
they are windows, in contrast to the rest of the glass triangles.<br />
• Once the dome is constructed, paint both the inside<br />
and outside black.<br />
• Continue constructing the dome around the paper model<br />
now using a single line for the rest of the triangle sides.
Step 3: Constructing the main structure of the chamber<br />
What you’ll need:<br />
Air-drying clay, craft knife (or other pointy object), acrylic<br />
paint in white and burnt sienna, brush, medium sandpaper<br />
sheet, polyfilla, butter knife or spatula<br />
• Cut the following pieces out of the mesh:<br />
- 2 rectangles with dimensions of 10cm x 5 cm<br />
- 2 triangles (as seen in photo below) with a height of<br />
16 cm and width of 15 cm<br />
• Cover both sides of the mesh in a thin sheet of clay.<br />
• Start putting the parts together and use additional small<br />
pieces of clay-covered mesh where needed. The chamber’s<br />
perimeter (excluding the entrance corridor) should<br />
be 34 cm.<br />
• Leave the clay to dry overnight.<br />
• Start putting the parts together and use small pieces<br />
of clay-covered mesh where needed. The chamber’s<br />
perimeter (excluding the entrance corridor)<br />
should be 34 cm.<br />
• Leave the clay to dry overnight.
• Using a butter knife, apply a coat of polyfilla in small<br />
sections, and before it dries, score the wood texture pattern<br />
(as seen below). Once you have covered the exterior,<br />
repeat the procedure on the upper half of the chamber’s<br />
interior (the parts that will be visible after the dome has<br />
been placed).<br />
• Leave the chamber to dry. At this stage you could also<br />
correct any imperfections of its shape by adding clay.<br />
• Sand both the interior and exterior to achieve smoother<br />
surfaces and clean the dust using a damp cloth.<br />
• Mix white and burnt sienna in equal quantities and<br />
apply a coat of paint throughout. Before it dries paint<br />
some darker strokes using burnt sienna to achieve a more<br />
realistic resemblance to wood.<br />
• Using thin sheets of<br />
clay make the supports<br />
for the dome and after<br />
they have dried paint<br />
them in the same mix of<br />
white and burnt sienna.
Step 4: Constructing the context<br />
What you’ll need:<br />
2 light coloured wood sheets with dimensions of 31 x 17.5<br />
x 0.3 cm (sheet 1) and 21.5 x 12.5 x 1.7 cm (sheet 2), 1<br />
darker coloured sheet with dimensions of 33.5 x 21.5 x<br />
0.9 cm (sheet 3), one clear acrylic sheet with dimensions<br />
of 21.5 x 21 x 0.4 cm (sheet 4), bandsaw, disk sander,<br />
drum sander, glue<br />
• Sheet 1: Draw a semicircle with a diameter of 20.2<br />
cm 1.5 cm off the right 17.5 cm side. Use the bandsaw<br />
to remove as much material possible from the inside of<br />
the semicircle. Then use the drum sander to remove the<br />
remaining material.<br />
• Sheet 2: At the disk sander, round the corners of the left<br />
21.5 cm side<br />
• Sheet 3: At the disk sander, round the corners of the left<br />
21.5 cm side<br />
Sheet 3<br />
Sheet 2<br />
Sheet 1
• Glue Sheet 2 on top of Sheet 3. Once the glue has dried<br />
sand the left rounded side to even any differences between<br />
the two sheets<br />
• Carefully apply some glue on the left side of Sheet 4<br />
and glue it on the right side of Sheet 2 (placed on top of<br />
Sheet 3).<br />
Note: Be careful not to apply any glue on Sheet 3 because<br />
it will be visible through the clear acrylic.<br />
• Glue Sheet 1 at a right angle to sheet 3, as seen in the<br />
picture below
Step 5: Constructing the floatation tank<br />
What you’ll need:<br />
Clear plastic lid with a diameter of 9 cm and height of 2.5<br />
cm, polyfilla, gelatin, blue food colouring, clay, LED tea<br />
candle<br />
• Start with a small amount of clay and shape it to a five<br />
pointed “star” shape. Once you have formed the head,<br />
hands and legs arrange them into a “floating” position and<br />
add a bit of definition to the areas where the main muscles<br />
are supposed to be. Leave the clay to dry overnight.<br />
• Use a craft knife and/or scissors to cut a hole in<br />
the middle of the lid big enough for the LED of the<br />
candle to go through.
• Apply some polyfilla to the base of the lid, where it<br />
meets the candle. Let it dry for at least 3 hours.<br />
• Make 4 rectangular shapes out of clay and with dimensions<br />
of 3 x 1 x 0.7 cm. Place them on top of each other<br />
to make the stairs that lead into the floatation tank.<br />
• Soak the gelatin in cold water for 5-10 minutes. Fill a<br />
pan with water, put the gelatin into a bowl with 100 ml of<br />
water and bring it up to a slow simmer. When the gelatin<br />
dissolves, add a few drops of blue food colouring.<br />
• Pour the mixture in the lid and place in the fridge for at<br />
least 6 hours.<br />
• Place the clay figure on top of the jelly.<br />
• Place the floatation tank inside the chamber.
Other techniques<br />
• Although in the guide polyfilla is<br />
said to be used to place the lid on<br />
top of the candle, blu tack was used<br />
instead due to lack of time for the<br />
polyfilla to dry. It had to be repeated<br />
a lot of times in order to prevent<br />
leaks.<br />
• Prior to constructing the dome<br />
with acrylic strips, the technique of<br />
soldering was employed. However,<br />
it would be extremely difficult to use<br />
the paper model as a guide without<br />
burning it.<br />
Precedent<br />
• A geodesic dome calculator found<br />
at http://geo-dome.co.uk/2v_tool.asp<br />
was used for precise measurements.<br />
Inspiration in curvy clay shapes:<br />
• Andre Bloc’s clay sculptures/models.<br />
(I)<br />
• Sophie-Elizabeth Thompson’s clay<br />
art works that mimic forms of the<br />
human body. (II)<br />
Image sources:<br />
(I): http://www.penccil.com/gallery.<br />
php?p=248629112578<br />
(II): http://www.trendhunter.com/trends/<br />
sophieelizabeth-thompson<br />
(I)<br />
(II)