3D Creative December 2015
contoh majalah 3dcreative. majalah yang menyajikan trick, tips, dan seni dari teknologi citra 3 Dimensi
contoh majalah 3dcreative. majalah yang menyajikan trick, tips, dan seni dari teknologi citra 3 Dimensi

Create successful ePaper yourself
Turn your PDF publications into a flip-book with our unique Google optimized e-Paper software.
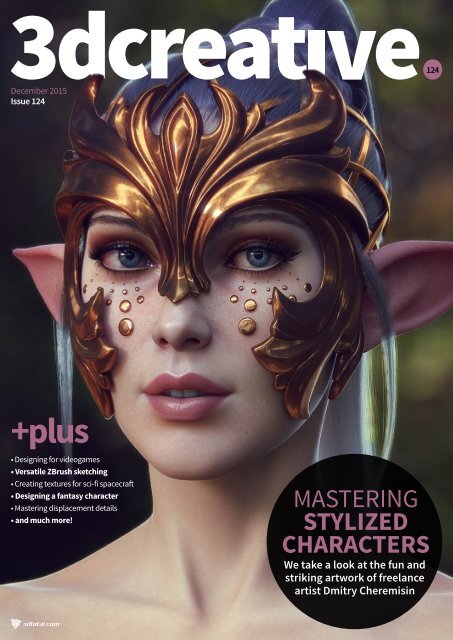
124<br />
<strong>December</strong> <strong>2015</strong><br />
Issue 124<br />
+plus<br />
• Designing for videogames<br />
• Versatile ZBrush sketching<br />
• Creating textures for sci-fi spacecraft<br />
• Designing a fantasy character<br />
• Mastering displacement details<br />
• and much more!<br />
We take a look at the fun and<br />
striking artwork of freelance<br />
artist Dmitry Cheremisin
<strong>3D</strong>CREATIVE: 2005 – <strong>2015</strong><br />
It’s with heavy hearts that we’re announcing the end of 3dcreative<br />
magazine. From 2005 to the present, 3dcreative has aimed to<br />
deliver affordable, high quality resources and inspiration for <strong>3D</strong><br />
artists of all kinds – but with so many great <strong>3D</strong> resources readily<br />
available online, and inevitable piracy to contend with, we’ve<br />
decided it’s time to draw 3dcreative to a close.<br />
We’re very grateful to all the artists and readers who’ve supported<br />
the magazine, whether you’ve just discovered it or have been<br />
following from the early days. It’s been a great privilege for us to<br />
work with the hundreds of artists who’ve featured in 3dcreative<br />
over the last ten years. It wouldn’t have been possible without your<br />
kindness and contributions.<br />
Subscriptions to 3dcreative are now no longer available to buy.<br />
<strong>2015</strong> will be our last complete year of twelve issues, and we’ll<br />
release a final free issue in January 2016. You’ll still be able to find<br />
back issues in the 3dtotal shop, as well as our huge collection of<br />
eBooks and printed books, and we’ll continue to bring you brilliant<br />
<strong>3D</strong> content and tutorials for free via the 3dtotal website. Our sister<br />
magazine, 2dartist, is still available for anyone interested in 2D art<br />
and digital painting. With the door closing on one project, we’ll use<br />
our time to bring you bigger, better content with a renewed energy.<br />
Thank you again to everyone who’s supported 3dcreative, whether<br />
by buying it or being in it, and we hope you continue to support us<br />
as we go forward into exciting new projects. Stay creative!<br />
The 3dcreative team
3dtotal presents the new issue of 2dartist<br />
magazine, a downloadable monthly<br />
magazine for digital artists for only ₤2.99<br />
(approx. $4.79/€3.69).<br />
Visit www.2dartistmag.com to see a full preview of the latest<br />
issue, subscription offers, and to purchase back issues.<br />
Issue 119 | November <strong>2015</strong><br />
119<br />
Create a<br />
dynamic<br />
exosuit scene<br />
Learn how to create<br />
a sci-fi mech and<br />
pilot character<br />
plus<br />
• 10 of the best digital images<br />
• Embellished anatomy<br />
• Painting an<br />
experimental scene<br />
• and much more!
<strong>3D</strong>CREATIVE MAGAZINE | ISSUE 124<br />
Editor’s letter<br />
MARISA LEWIS<br />
Junior Editor<br />
Welcome to 3dcreative issue 124!<br />
Welcome to our last issue of <strong>2015</strong>, and our second to last<br />
issue ever! 3dcreative has enjoyed a brilliant 10-year run –<br />
thank you to every artist and reader who made that possible.<br />
This month brings you great interviews with the likes of<br />
Dmitry Cheremisin and Matthias Develtere, tons of tutorials<br />
covering modeling, texturing and rendering, and more<br />
besides! Whether you’re in the mood for characters, objects<br />
or vehicles, fantasy or sci-fi, we hope there’s something here<br />
to tickle your fancy.<br />
Keep on creating, and join us again in the New Year for<br />
3dcreative’s final outing!<br />
KEEP UP TO DATE<br />
WITH <strong>3D</strong>TOTAL!<br />
• facebook.com/3dtotal<br />
• facebook.com/layerpaint<br />
• twitter.com/3dtotal<br />
• twitter.com/layer_paint<br />
• youtube.com/<br />
3dtotalpublishing<br />
• vimeo.com/3dtotal<br />
• vimeo.com/layerpaint<br />
• pinterest.com/3dtotal<br />
• instagram.com/3dtotal<br />
• google.com/+3dtotalcg<br />
• 3dtotal.tumblr.com<br />
Contributors<br />
MATTHIAS DEVELTERE<br />
Matthias Develtere is a young new artist in this industry,<br />
with a burning passion to make unique and interesting<br />
designs, currently employed by MachineGames as a<br />
junior <strong>3D</strong> artist.<br />
VICTORIA PASSARIELLO<br />
Victoria Passariello creates hard-surface models<br />
because she loves robots and <strong>3D</strong>. She works at<br />
Perihelion Interactive making ships for sci-fi videogame<br />
The Mandate.<br />
DMITRY CHEREMISIN<br />
Dmitry Cheremisin is a freelance <strong>3D</strong> artist from Ukraine,<br />
with an interest in character art. An architect by<br />
education, he was attracted to computer graphics as a<br />
hobby which later became his profession.<br />
RUBEN ALVAREZ<br />
Ruben Alvarez is a Spanish concept artist working for<br />
the film and videogame industry, currently based in The<br />
Netherlands. He has worked for companies including<br />
Gameloft, Sidhe Interactive and Activision.<br />
RORY BJÖRKMAN<br />
With a background in traditional art and sculpture, Rory<br />
Björkman is currently studying Media at the National<br />
College of Art and Design in Dublin, with a focus on<br />
digital arts.<br />
ROUMEN FILIPOV<br />
Roumen Filipov is a <strong>3D</strong> generalist born in Bulgaria,<br />
currently living in Brazil. His specialty is making <strong>3D</strong><br />
characters for film and the advertising agency. Here, he<br />
sculpts a fun sci-fi character.<br />
ANDREW FINCH<br />
Andrew Finch is a principle environment artist for<br />
Microsoft’s Rare Studio. He has eight years’ industry<br />
experience and is now working on his tenth<br />
professional game.<br />
TANVIR ISLAM<br />
Tanvir Islam is a self-taught CG generalist from Dhaka,<br />
Bangladesh. He is the founder of Incubator Effects<br />
Studios, a group of CG generalists working on a variety of<br />
versatile projects.
Junior Editor<br />
Marisa Lewis<br />
marisa@3dtotal.com<br />
Sub-editor<br />
Adam Smith<br />
Graphic Designers<br />
Matthew Lewis<br />
Aryan Pishneshin<br />
Advertising Manager<br />
Kinnor Wroughton<br />
kinnor@3dtotal.com<br />
Studio Manager<br />
Simon Morse<br />
simon@3dtotal.com<br />
Managing Director<br />
Tom Greenway<br />
Advertising<br />
Media pack and rates are<br />
available upon request.<br />
Contact Kinnor Wroughton :<br />
kinnor@3dtotal.com<br />
International<br />
Translation opportunities<br />
and international licenses are<br />
available. Contact Melanie<br />
Smith: melanie@3dtotal.com<br />
Distribution<br />
3dcreative is an<br />
e-magazine distributed as a<br />
downloadable PDF and on<br />
digital newsstands.<br />
Disclaimer<br />
All artwork, unless otherwise<br />
stated, is copyright ©<strong>2015</strong><br />
3dtotal.com Ltd. Artwork that<br />
is not copyright 3dtotal.com<br />
Ltd is marked accordingly.<br />
Every effort has been made<br />
to locate the copyright<br />
holders of materials included<br />
in this issue of 3dcreative<br />
magazine in order to obtain<br />
permissions to publish them.<br />
Special thanks to <strong>3D</strong>Hype,<br />
Hiperia <strong>3D</strong> and Veegraph for<br />
supporting 3dcreative with<br />
banners. Contact Kinnor<br />
Wroughton if you would also<br />
like to show your support:<br />
kinnor@3dtotal.com<br />
<strong>3D</strong>CREATIVE MAGAZINE | ISSUE 124<br />
Magazine.<br />
Your<br />
Get the most out of it!<br />
If you’re having problems viewing the double-page spreads that we feature within<br />
this magazine, then follow this handy little guide on how to set up your PDF reader!<br />
Top tips for viewing<br />
For optimum viewing of the magazine, it is recommended that you have the latest version of<br />
Adobe Acrobat Reader installed. You can download it for free here:<br />
To view the many double-page spreads featured in 3dcreative magazine, you can set the reader<br />
to display “two-up”, which will show double-page spreads as one large landscape image:<br />
1. Open the magazine in Reader;<br />
2. Go to the View menu, then Page Display;<br />
3. Select Two Page Scrolling, making sure<br />
that Show Cover Page in Two Page View<br />
is also selected.<br />
Download resources<br />
Whenever you see this symbol, be sure to click it to<br />
download free resources to accompany that article!<br />
Visit http://www.3dcreativemag.com/resources_<strong>2015</strong>.html if viewing from a mobile device.<br />
For lots more tutorials and exclusive articles, visit:<br />
www.3dtotal.com<br />
3dcreative magazine is available as a downloadable PDF magazine. If you have an iPad or iPhone, you can drag your<br />
magazine into your iTunes library – it will automatically add the PDF to your bookshelf in your iBooks app!<br />
5
078<br />
<strong>3D</strong>CREATIVE MAGAZINE | ISSUE 124 Contents Issue 124<br />
008_ Art Gallery<br />
10 of the most inspiring <strong>3D</strong> images from the world of<br />
CG, hand-picked just for you!<br />
022_ Designing for videogames<br />
Matthias Develtere talks vehicles, environments and<br />
modeling techniques<br />
034_ Mastering stylized characters<br />
Dmitry Cheremisin shares his amazing work,<br />
inspirations and tips<br />
042_ Versatile ZBrush sketching<br />
Ruben Alvarez reveals his ZBrush works in progress<br />
with this peek into his sketchbook<br />
052_ Mastering displacement details<br />
Learn character detailing techniques from expert<br />
Roumen Filipov<br />
058_ Texturing sci-fi ships with MARI<br />
Rory Björkman shares his process for texturing a<br />
steampunk airship<br />
008<br />
068_ Creating textures for sci-fi spacecraft<br />
Learn how Victoria Passariello textures a sci-fi cargo<br />
ship with Photoshop and Substance Painter<br />
078_ Texturing assets with Substance Painter<br />
Andrew Finch walks us through his Substance Painter<br />
texturing process<br />
086_ Presenting assets in Marmoset Viewer<br />
Improve your real-time presentation with Andrew<br />
Finch’s help<br />
096_ Designing a fantasy character<br />
Discover Tanvir Islam’s in-depth character creation<br />
process for his image, Khlotharius<br />
6 | <strong>3D</strong>CREATIVEMAG.COM
096<br />
<strong>3D</strong>CREATIVE MAGAZINE | ISSUE 124 113<br />
022<br />
042<br />
058<br />
7
<strong>3D</strong>CREATIVE MAGAZINE | Art Gallery<br />
Each issue the 3dcreative team selects 10 of the best digital images from around the world. Enjoy!
<strong>3D</strong>CREATIVE MAGAZINE | ISSUE 124<br />
Submit your images! Simply email: marisa@3dtotal.com<br />
JetSpeeder Concept<br />
Piers Coe<br />
Year created: 2014<br />
Software used:<br />
Maya, MODO, Photoshop<br />
Web: pierscoe.com
<strong>3D</strong>CREATIVE MAGAZINE | Art Gallery<br />
Mr Fang<br />
Diego Sain<br />
Year created: <strong>2015</strong><br />
Software used: ZBrush, KeyShot, Photoshop<br />
Web: iusalab.com<br />
Rooster Dream<br />
Cristiano Rinaldi<br />
Year created: <strong>2015</strong><br />
Software used: MODO, ZBrush, Photoshop<br />
Web: simultan.it<br />
<strong>3D</strong>CREATIVEMAG.COM
<strong>3D</strong>CREATIVE MAGAZINE | ISSUE 124<br />
11
Alien Type X<br />
Shaun Sherman<br />
Year created: <strong>2015</strong><br />
Software used:<br />
Photoshop, ZBrush, KeyShot<br />
Web: shaunsherman.com<br />
<strong>3D</strong>CREATIVEMAG.COM
Mecha design<br />
Jonathan Renaux<br />
Year created: 2013<br />
Software used: ZBrush, V-Ray<br />
Web: jonathan-renaux.wix.com/jonathan-renaux<br />
13
<strong>3D</strong>CREATIVE MAGAZINE | Art Gallery<br />
Lobster<br />
JongJik Kim<br />
Year created: 2014<br />
Software used:<br />
Maya, ZBrush, NUKE,<br />
After Effects, Photoshop,<br />
mental ray<br />
Web: kimjj.net<br />
<strong>3D</strong>CREATIVEMAG.COM
<strong>3D</strong>CREATIVE MAGAZINE | ISSUE 124<br />
15
<strong>3D</strong>CREATIVE MAGAZINE | Art Gallery<br />
<strong>3D</strong>CREATIVEMAG.COM
<strong>3D</strong>CREATIVE MAGAZINE | ISSUE 124<br />
Meteora Security Guard<br />
Mark Chang<br />
Year created: <strong>2015</strong><br />
Software used: CINEMA 4D, ZBrush, Octane Render<br />
Web: artstation.com/artist/equinoz
<strong>3D</strong>CREATIVE MAGAZINE | Art Gallery<br />
Dark Mermaid<br />
Ashleigh Foo Chong<br />
Year created: <strong>2015</strong><br />
Software used:<br />
ZBrush, KeyShot, Photoshop<br />
Letting Machines Do All<br />
the Thinking [A Bad Idea]<br />
Robert J. Tiess<br />
Year created: <strong>2015</strong> | Software used: Blender<br />
Web: artofinterpretation.com<br />
<strong>3D</strong>CREATIVEMAG.COM
<strong>3D</strong>CREATIVE MAGAZINE | ISSUE 124<br />
19
African Elephant<br />
Stavros Fylladitis<br />
Year created: <strong>2015</strong><br />
Software used:<br />
ZBrush, Maya, V-Ray, Photoshop<br />
Web: stavrosfyl.artstation.com<br />
<strong>3D</strong>CREATIVEMAG.COM
<strong>3D</strong>CREATIVE MAGAZINE | ISSUE 124<br />
21
<strong>3D</strong>CREATIVE MAGAZINE | Designing for videogames<br />
videogames<br />
Designing for<br />
We catch up with MachineGames’ talented<br />
Matthias Develtere about his latest projects<br />
and best creative advice<br />
<strong>3D</strong>CREATIVEMAG.COM
<strong>3D</strong>CREATIVE MAGAZINE | ISSUE 124<br />
The Artist<br />
Matthias Develtere<br />
<strong>3D</strong> artist at MachineGames, Sweden<br />
develterematthias.wordpress.com<br />
Interviewed by:<br />
Marisa Lewis<br />
Matthias Develtere is a young<br />
new artist in this industry, with a<br />
burning passion to make unique<br />
and interesting designs.<br />
23
<strong>3D</strong>CREATIVE MAGAZINE | Designing for videogames<br />
Matthias Develtere is a <strong>3D</strong> artist currently<br />
working for MachineGames in Sweden, with<br />
credits including the acclaimed videogame<br />
prequel Wolfenstein: The Old Blood.<br />
3dcreative: Hi Matthias, thanks for talking to<br />
us! Please introduce yourself with who you are,<br />
where you’re based, and what you do.<br />
Matthias Develtere: So, my name is Matthias<br />
Develtere. I originally come from a very small city<br />
in Belgium that nobody’s heard of. From the age<br />
of 17 I was completely sure I wanted to become<br />
an artist.<br />
My first thought was to go for concept artist,<br />
but I discovered <strong>3D</strong> and found it much more<br />
interesting to make and design on the fly – by the<br />
time I make a 2D design I can have a decent <strong>3D</strong><br />
model already. So the decision was quickly made.<br />
So yes, I work and live in Sweden now, and work<br />
for the amazing talented studio MachineGames.<br />
Being 22 and working for such an amazing<br />
company is a dream come true.<br />
3dc: What’s your creative background and<br />
education like?<br />
MD: I went to a small digital entertainment and<br />
art school in Belgium, but that was the worst<br />
decision ever. They just wanted to rush out artists<br />
with as many skills as possible and that’s not<br />
how it should be. It’s way better to focus on one<br />
specific area, become an expert in it, and learn<br />
new stuff later. Of course it’s not a bad idea to try<br />
out different area’s to find your fitting expertise.<br />
So I just left and focused myself for six months on<br />
nothing else but making videogame art.<br />
3dc: What inspired you to get into <strong>3D</strong>? What<br />
inspires you today?<br />
MD: I got inspired by two amazing artists: Laurens<br />
Corijn and Tor Frick. Laurens Corijn was my <strong>3D</strong><br />
teacher and he had so much love for vehicles that<br />
I got interested in them. I became interested in<br />
Tor’s work just because of the artistic look of it.<br />
The most important thing was not to copy or<br />
mimic their styles, but to come up with my own<br />
unique style, and still to this day, this is what<br />
inspires me to become a better artist. Coming<br />
up with my own style and learning from the best<br />
artists in the industry.<br />
A <strong>3D</strong> model Matthias made for this magazine! Check out<br />
issues 113 and 114 to see how he made it © 3dtotal<br />
<strong>3D</strong>CREATIVEMAG.COM
<strong>3D</strong>CREATIVE MAGAZINE | ISSUE 124<br />
An Allied vehicle Matthias made for his sci-fi WW2 universe<br />
A Soviet Union vehicle Matthias made for his sci-fi WW2 universe<br />
3dc: What software do you use for your artwork,<br />
and why? Are there any plugins, techniques or<br />
underrated tools that you’d recommend?<br />
MD: I use a lot of different softwares. I don’t like to<br />
be pinned down to only one software package. I<br />
don’t believe that a software package makes you<br />
a better artist – it’s all about the artist and how<br />
much/how hard you work.<br />
The softwares I use are MODO, 3ds Max, Quixel<br />
SUITE, Substance Painter, Photoshop, KeyShot,<br />
and more. Before I worked in the industry I only<br />
used 3ds Max as a modeling package, but at the<br />
office we are using MODO, so I am trying to fit<br />
both into my pipeline.<br />
3dc: Tell us more about your typical <strong>3D</strong> workflow.<br />
MD: I don’t really have a specific perfect workflow,<br />
but it always starts with the same thing: searching<br />
25
<strong>3D</strong>CREATIVE MAGAZINE | Designing for videogames<br />
An Allied vehicle Matthias made for<br />
his sci-fi WW2 universe © ZeniMax<br />
Media and MachineGames<br />
An Allied vehicle Matthias made for<br />
his sci-fi WW2 universe © ZeniMax<br />
Media and MachineGames<br />
for reference for hours and hours, just to make<br />
sure I have everything figured out, so that in the<br />
middle of the project I don’t need to go back or<br />
remake pieces.<br />
Next to all of this, I am too lazy to make blockouts<br />
– not for professional nor free-time projects. Yes,<br />
this is a bad thing, but it just doesn’t work for me.<br />
I see concept art as a sort of blockout, and then<br />
you have to make that design better.<br />
To comfort myself I always start working on a<br />
really interesting area of a vehicle, a detailed part,<br />
and that way I’m pumped to keep working on it<br />
and can figure out the style I’m going for. So I start<br />
on one specific area of a vehicle and make that<br />
one as alpha as possible.<br />
Then I can bring my design over to the team and<br />
show them my vision of the vehicle, instead of<br />
having to say, “This is just a blockout, just imagine<br />
the details being there.” After that I really do a<br />
lot in post, for example: removing floating parts,<br />
fixing color schemes, adding AO, adding texture<br />
information, and so on.<br />
3dc: Vehicle designs are a huge part of your<br />
portfolio and something you really enjoy. What<br />
makes vehicles especially interesting to you?<br />
MD: I didn’t start making vehicles just because<br />
I liked them or anything like that, but because I<br />
was told it was the hardest thing in the hardsurface<br />
field. So I just went for it. When I told<br />
people I was working as a <strong>3D</strong> artist, they were<br />
super enthusiastic until I told them that I was<br />
making vehicles! Then I always got the reply, “Oh,<br />
just vehicles.” So that became my goal: making<br />
unique and interesting vehicles.<br />
To me, making vehicles in this breathtaking<br />
industry is the best job in the world. I always start<br />
with the same thought in mind: “This needs to be<br />
more than just a vehicle. Every flow and line has<br />
to be elegant and done with a lot of care. It might<br />
sound silly but I could be tweaking a couple of<br />
polygons for hours just to make sure they catch<br />
the light in the right way.<br />
Every line, every surface is designed with a<br />
purpose, and nothing is done without a reason. If<br />
an artist takes a minute to check out my vehicle<br />
then I’ve accomplished my goal.<br />
3dc: What do you think is the key to creating a<br />
strong vehicle?<br />
MD: Personally, I see vehicles as storytellers. Just<br />
think about it: the main character fills up just 20%<br />
of the screen, so the rest is the environment, and<br />
it doesn’t matter what sort of game you like to<br />
play, there will always be some sort of vehicle in<br />
there somewhere.<br />
<strong>3D</strong>CREATIVEMAG.COM
<strong>3D</strong>CREATIVE MAGAZINE | ISSUE 124<br />
An Allied vehicle Matthias made for his sci-fi WW2 universe © ZeniMax Media and MachineGames<br />
But what really comes up a lot is that most games<br />
copy the same vehicles all over the game and just<br />
give them different color textures, so it doesn’t<br />
look like you’re coming across the same vehicle<br />
over and over again.<br />
But vehicles should tell stories as well, just like<br />
characters, weapons and environments do.<br />
They can be so much more than just pathblockers<br />
or pieces of cover. They should give the<br />
player an insight into what is happening in the<br />
environment. The key to this is making them<br />
unique. You want to tell a story with them.<br />
Okay, maybe it’s not always easy to find unique<br />
ideas, but a good idea is to search for vehicle<br />
dioramas. Miniature model hobbyists put a lot<br />
of work into making their pieces memorable.<br />
Anybody can go to a store and buy a vehicle<br />
assembly box, but making it stand out is<br />
something different.<br />
Artist history<br />
Matthias Develtere’s career up to this point...<br />
Sep 2013: Made the decision to start learning/making a portfolio on his own<br />
Jan 2014: Finished his first portfolio piece and began making something new every month<br />
Sep 2014: Started working for MachineGames<br />
Jan <strong>2015</strong>: First time working for a magazine – 3dcreative, of course!<br />
May <strong>2015</strong>: Release of the first game Matthias worked on<br />
May <strong>2015</strong>: Announced as a new artist for VERTEX3 magazine<br />
Jun <strong>2015</strong>: Started working on his own sci-fi universe<br />
Sep <strong>2015</strong>: Made the decision to move on from vehicles to environments<br />
27
<strong>3D</strong>CREATIVE MAGAZINE | Designing for videogames<br />
TOP TIP<br />
Guide for beginners<br />
If you want to start getting into vehicles,<br />
don’t rush. Start with understanding flow<br />
and elegance. You don’t even have to<br />
start with SubD models, not at all. Just<br />
make some fast studies every day, just car<br />
bodies. Aim for 2500 triangles and try to<br />
catch the characteristics from that vehicle,<br />
because that’s something a lot of people<br />
miss. Start with this and it’ll get you further<br />
than working on a high-poly car for several<br />
months. Here’s an example of some of my<br />
old studies from three years ago.<br />
Here are some vehicles Matthias made back in 2013<br />
<strong>3D</strong>CREATIVEMAG.COM
<strong>3D</strong>CREATIVE MAGAZINE | ISSUE 124<br />
A vehicle made and designed for Wolfenstein: The Old Blood © ZeniMax Media and MachineGames<br />
The main chapter Matthias<br />
worked on during the<br />
production of Wolfenstein: The<br />
Old Blood was Chapter 6<br />
© ZeniMax Media and<br />
MachineGames<br />
29
<strong>3D</strong>CREATIVE MAGAZINE | Designing for videogames<br />
3dc: You recently worked on Wolfenstein: The Old<br />
Blood at MachineGames. Could you tell us more<br />
about that experience and what you took away<br />
from it?<br />
MD: This was the first professional game I worked<br />
on, so it was pretty interesting. I never thought<br />
there was so much communication going on<br />
between all the different departments! For<br />
example, if you want to place a box for cover, you<br />
have to talk to a scripter, an environment artist,<br />
a combat scripter, and so on. Making a game is a<br />
team event. There’s nothing more breathtaking<br />
than seeing things grow, from a sketch to a<br />
blockout, an architectural pass, a detail pass,<br />
a final pass. It’s just amazing seeing all these<br />
different iterations coming together.<br />
3dc: What are your goals and plans for the near<br />
future? Any new skills you want to learn, or new<br />
projects we should watch out for?<br />
These environments were team<br />
efforts. On this environment,<br />
Matthias’ job was to dress up the<br />
existing architecture © ZeniMax<br />
Media and MachineGames<br />
A hero asset Matthias made<br />
during the production of<br />
Wolfenstein: The Old Blood and<br />
learned a lot from © ZeniMax<br />
Media and MachineGames<br />
<strong>3D</strong>CREATIVEMAG.COM
<strong>3D</strong>CREATIVE MAGAZINE | ISSUE 124<br />
The main chapter Matthias worked on<br />
during the production of Wolfenstein:<br />
The Old Blood was Chapter 6 © ZeniMax<br />
Media and MachineGames<br />
TOP TIP<br />
Start with overpaints<br />
I search for some big images to see how the<br />
light reacts on them. Overpaints are super<br />
handy to do before starting modeling. They<br />
can help you get the flow correct, which<br />
works for low-poly and SubD but is super<br />
important for high-poly. Just observe how<br />
the flow of the vehicle goes, and that way<br />
you know how your loops are suppose to<br />
go. These days I don’t bother myself doing<br />
those on paper or in Photoshop, but I still<br />
do it in my head, without even noticing it.<br />
It’s the best way to start on your vehicle.<br />
You don’t want to notice in the middle of<br />
your project that the flow of the vehicle<br />
doesn’t match the ref and you have to<br />
restart. You can learn by drawing them over<br />
real vehicles, but that’s less safe of course.<br />
Never rush into it, start with a plan<br />
MD: In fact, yes, I’m going to put my vehicle work<br />
aside and start exploring some other areas, like<br />
environments. I just don’t want to get stuck only<br />
doing the things that I am comfortable with, so<br />
it’s time to move on now to something that is<br />
completely new. But hey, every environment<br />
needs vehicles, right?<br />
Of course, keep an eye on the project we’re<br />
cooking up at MachineGames, and the newly<br />
announced indie game Astroneer.<br />
3dc: Finally, and most importantly: what do you<br />
like to do in your spare time?<br />
MD: Apart from creating digital art, my interests<br />
go out to all kinds of technology. I always enjoy<br />
reading up on that – you can never learn enough<br />
and it can always be handy for later projects. Next<br />
to all this, I of course love to make personal work.<br />
3dc: Thank you very much for speaking to<br />
3dcreative today!<br />
MD: No problem, thanks a lot for the opportunity!<br />
I love working with you guys.<br />
The Artist<br />
Matthias Develtere<br />
develterematthias.wordpress.com<br />
31
<strong>3D</strong>TOTAL’S ANATOMICAL COLLECTION:<br />
NEW FIGURES COMING SOON<br />
Affordable anatomical reference figures for<br />
traditional and digital artists, including male and<br />
female planar models and the impressive biosuit<br />
figure designed by Alessandro Baldasseroni!
ORIGINAL MALE<br />
AND FEMALE<br />
FIGURES STILL<br />
AVAILABLE FROM:<br />
SHOP.<strong>3D</strong>TOTAL.COM
<strong>3D</strong>CREATIVE MAGAZINE | Mastering stylized characters<br />
The Artist<br />
Dmitry Cheremisin<br />
Freelance<br />
artstation.com/artist/d33m0n<br />
Interviewed by:<br />
Marisa Lewis<br />
Dmitry Cheremisin is a<br />
freelance <strong>3D</strong> artist from<br />
Ukraine, with an interest in<br />
character art.<br />
Mastering stylized<br />
characters<br />
We take a closer look at the fun and striking<br />
artwork of freelance artist Dmitry Cheremisin<br />
<strong>3D</strong>CREATIVEMAG.COM
<strong>3D</strong>CREATIVE MAGAZINE | ISSUE 124<br />
Dmitry Cheremisin is instantly recognizable<br />
for his carefully crafted, stylized character<br />
designs. As well as freelancing, he’s been a<br />
judge at Blizzardfest and was a conference<br />
speaker at the NODE Forum for Digital Arts<br />
earlier this year.<br />
A model made just for fun<br />
3dcreative: Hi Dmitry, thanks for talking to<br />
3dcreative! Please introduce yourself to our<br />
readers with a bit about who you are, where<br />
you’re based, and what you do:<br />
Dmitry Cheremisin: Hello everyone! My name<br />
is Dmitry. I am 32 years old and I live in Kiev,<br />
Ukraine. I’ve worked in the gaming industry for<br />
seven years, but I’m currently a freelancer, as well<br />
as working on my own projects in my spare time.<br />
3dc: What was your artistic education like? How<br />
did you come to learn <strong>3D</strong>?<br />
DC: I’m an architect by education. However, I<br />
was always more attracted to computer graphics<br />
and video games. It was my hobby which later<br />
became my profession. I’m self-taught in <strong>3D</strong>.<br />
3dc: Who or what would you say are your biggest<br />
creative inspirations?<br />
DC: I’m inspired by videogames and anime for<br />
new projects. I like bright, colorful, memorable<br />
characters that don’t leave me indifferent. When<br />
I’m creating my own projects, I try to give the<br />
same qualities to my characters. It’s really very<br />
important to me. I like to convey the character’s<br />
personality, work on their accent details, and pay<br />
attention to detail. I set for myself several criteria<br />
for the final image and try to stick to them.<br />
35
<strong>3D</strong>CREATIVE MAGAZINE | Mastering stylized characters<br />
<strong>3D</strong>CREATIVEMAG.COM
This was Dmitry’s contribution to a Facebook<br />
contest by Serge Birault, the original concept artist<br />
<strong>3D</strong>CREATIVE MAGAZINE | ISSUE 124<br />
37
<strong>3D</strong>CREATIVE MAGAZINE | Mastering stylized characters<br />
3dc: Tell us about the software or tools that<br />
feature in your typical <strong>3D</strong> workflow.<br />
This is one of Dmitry’s earliest personal projects<br />
DC: 3ds Max, ZBrush and Photoshop are my<br />
main tools for work. For rendering, I prefer to<br />
use V-Ray. Depending on the task, this list can<br />
be changed and expanded. For example, I really<br />
like MARI for texturing. I prefer to use headus<br />
UVLayout for making UVs. Marvelous Designer is a<br />
great program for realistic simulation of clothing.<br />
Usually I use xNormal for baking textures, and<br />
finally NUKE for compositing.<br />
3dc: Skin and hair are always difficult to get right,<br />
but you do a great job on both. Could you offer<br />
any advice please for artists hoping to improve on<br />
these areas?<br />
DC: References are the key to success. I try to<br />
split complex tasks (for example, skin shaders)<br />
into more simple components and work on them<br />
separately. When I’m working on hair, I do the<br />
same thing – I break hair into separate strands<br />
and work on each separately. This approach<br />
allows me to work more quickly and efficiently.<br />
3dc: What do you think are the advantages and<br />
disadvantages of being a freelance artist?<br />
DC: Advantage: for me, it’s the freedom of choice.<br />
Disadvantage: lack of a team to work with. Live<br />
communication and exchanging experiences<br />
are very important elements of creative and<br />
professional growth.<br />
3dc: What do you feel is your biggest<br />
achievement so far?<br />
DC: I think I just figured out what I wanted to do<br />
in life and what I’d like to give a huge amount of<br />
time to. I think this is the most important thing:<br />
to find something for everyone and then work in<br />
that direction.<br />
TOP TIP<br />
Study your references images<br />
Here is a simple large-sized photo. I’ve<br />
added Photoshop’s High Pass filter to this<br />
image and made some simple adjustments.<br />
This helps me to see much more<br />
information than before, including a clear<br />
view of the pores and wrinkles’ structure.<br />
Now this image can be used as a stencil for<br />
sculpting or as base for custom brushes.<br />
You can always find more information in a<br />
reference image which might not be visible<br />
at first sight.<br />
<strong>3D</strong>CREATIVEMAG.COM
<strong>3D</strong>CREATIVE MAGAZINE | ISSUE 124<br />
Dmitry made this model very quickly in his spare time<br />
39
<strong>3D</strong>CREATIVE MAGAZINE | Mastering stylized characters<br />
3dc: What are you currently working on? Are there<br />
any new projects we should look out for soon?<br />
DC: Currently, I’m working on a new project. I<br />
want to learn a software that’s new to me, such<br />
as Substance Designer and Substance Painter.<br />
My goal is to create a believable character using<br />
game development technology (e.g. Unreal<br />
Engine 4). I hope I will finish it soon.<br />
3dc: Finally, what do you like to do in your spare<br />
time (if you have any)?<br />
DC: I pay attention to new technologies in the<br />
gaming industry; it’s important to be aware of<br />
new products. If possible, I play games too. I’d<br />
like to use new technology in my own work to<br />
improve its quality, and I spend a lot of time<br />
studying tutorials and learning new programs.<br />
TOP TIP<br />
Split complex things into simple ones<br />
This is my method for making skin shaders.<br />
A skin shader is a complex thing, so it’s<br />
better to split it into several simpler<br />
components and work on them separately.<br />
As you can see, I start from one element<br />
(subsurface scattering) and then step by<br />
step I add the other elements (specular,<br />
single scattering). By the end, I’ve achieved<br />
a very complex shader, but it was easy to<br />
do because I didn’t try to set up everything<br />
at once.<br />
<strong>3D</strong>CREATIVEMAG.COM
An elf girl, Dmitry’s latest project<br />
<strong>3D</strong>CREATIVE MAGAZINE | ISSUE 124<br />
41
Sketchbook of Damir G Martin<br />
The Artist<br />
The sketchbook of<br />
Ruben Alvarez<br />
Ruben Alvarez<br />
rubenalba.com<br />
Software used: ZBrush<br />
Concept artist Ruben Alvarez shares<br />
a behind-the-scenes look at his<br />
ZBrush sculpts<br />
<strong>3D</strong><strong>Creative</strong>mag.com<br />
Ruben Alvarez is a Spanish<br />
concept artist working for<br />
the film and videogame<br />
industry, currently based in The<br />
Netherlands. He has worked for<br />
companies including Gameloft,<br />
Sidhe Interactive and Activision.
<strong>3D</strong>CREATIVE MAGAZINE | ISSUE 124<br />
Find some sculpting<br />
inspiration in this month’s<br />
ZBrush Sketchbook…<br />
I am relatively new to using ZBrush as a tool<br />
to sketch and polish my designs. I knew about<br />
this software a long time ago but I never had<br />
the chance to give it a try. Soon I realized<br />
that ZBrush could be a key tool in my design<br />
process and I began to be more and more<br />
interested in knowing about it. It was a great<br />
surprise to find that introducing this software<br />
into my workflow was complementary to<br />
other concept art techniques that I use, like<br />
silhouette exploration, grayscale detailing and<br />
photo-bashing. It is a truly artistic software<br />
that merges computer graphics and traditional<br />
art, with the unique power of making your<br />
imagination and time fly!<br />
Ruben’s idea for Electric Lord<br />
was to create a character with<br />
rubber and metal armor to<br />
generate electric waves<br />
Inspiration and ideas<br />
Most of my inspiration comes from films, music,<br />
family, personal experiences, traveling… I<br />
think being a concept artist is a way of life. Your<br />
brain is always working and you spend a lot of<br />
time looking for a spark that switches on your<br />
inspiration. ZBrush helps you to relax in front<br />
of the computer and transform these sparks of<br />
inspiration into quick sketches that feed your<br />
design process.<br />
Mask detail using kitbashing and Insert Meshes<br />
43
<strong>3D</strong>CREATIVE MAGAZINE | The sketchbook of Ruben Alvarez<br />
ZBrush is not just used for creatures – you can also sketch environments with it<br />
Ruben mixed ZBrush and Marvelous Designer to create this fairy character’s clothing<br />
<strong>3D</strong>CREATIVEMAG.COM
<strong>3D</strong>CREATIVE MAGAZINE | ISSUE 124<br />
Ruben masked and extracted meshes from the body of the ogre to create armor plates and clothes<br />
45
<strong>3D</strong>CREATIVE MAGAZINE | The sketchbook of Ruben Alvarez<br />
Toolkit<br />
I don’t use a lot of tools in ZBrush during the<br />
sketching process. The most important brushes<br />
for me are the Move, Clay Buildup and Dam<br />
Standard brushes. DynaMesh is also a great<br />
feature that allows you to ‘generate’ geometry<br />
without losing mesh density. Sometimes I sketch<br />
using the kit-bashing method, by creating Insert<br />
Mesh brush libraries. With this special feature I<br />
can drag and drop previously-created geometry,<br />
adding richness to the sketch in a very simple and<br />
fast way.<br />
Sketch of a snake dragon with feathers instead of scales<br />
Sketching workflow<br />
Most of the time I begin with a Sphere and<br />
DynaMesh option activated. I sometimes use<br />
a human or animal base mesh to speed up<br />
the process if I’m designing a creature. The<br />
Move brush is perfect to look for new shapes<br />
and proportions. Once I am happy with the<br />
proportions I jump into adding some detail with<br />
Clay Buildup for major areas and Dam Standard<br />
for detail. I usually wait until the last moment<br />
to break Symmetry and add different details on<br />
certain parts.<br />
To finish my sketch I pose it really quickly and<br />
sometimes Polypaint it just to have a quick idea<br />
of the colors on the design.<br />
A different close-up pose for the snake dragon<br />
<strong>3D</strong>CREATIVEMAG.COM
<strong>3D</strong>CREATIVE MAGAZINE | ISSUE 124<br />
The first creature Ruben designed with ZBrush<br />
Ruben used kitbashing techniques to mix organic and hard-surface shapes in this design<br />
47
<strong>3D</strong>CREATIVE MAGAZINE | The sketchbook of Ruben Alvarez<br />
Ruben played around with organic shapes to create this deep-sea creature<br />
Anatomy practice, trying to find a nice and simple dynamic pose. Ruben<br />
wanted to create a more humanoid werewolf with less monster-like features<br />
<strong>3D</strong>CREATIVEMAG.COM
Would you like to see your sketches<br />
featured in 3dcreative magazine?<br />
We’re always on the lookout for talented artists<br />
and their artwork to adorn the pages of our<br />
magazines. If you think you have what it takes,<br />
please get in touch!<br />
All you need to do is email<br />
marisa@3dtotal.com with a link to your<br />
portfolio and some information about you.<br />
We look forward to hearing from you!
<strong>3D</strong>TOTALPUBLISHING<br />
ZBrush is a powerful program offering digital artists of all levels intuitive and<br />
inspiring workflow solutions for <strong>3D</strong> models and 2D images. Following on from the<br />
success of other ZBrush titles such as ZBrush Character Sculpting: Volume 1, this<br />
new book focuses on the design and creation of a variety of character<br />
and creature sculpts by world-class artists including Mariano<br />
Steiner, Maarten Verhoeven, Caio César, and Kurt Papstein.<br />
Topics covered by the panel of industry experts<br />
include alien concepts, quadruped designs,<br />
and inventive creatures, while a collection<br />
of speed-sculpting tutorials offers<br />
fantastic insight into working quickly<br />
with this revolutionary sculpting<br />
software. Aimed at aspiring and<br />
experienced modelers alike,<br />
ZBrush Characters & Creatures<br />
is a go-to resource for those<br />
looking to learn tips, tricks,<br />
and professional workflows<br />
from the digital art masters,<br />
taking you from concept to<br />
completion across a variety<br />
of imaginative projects.
A comprehensive human anatomy guide<br />
for today’s <strong>3D</strong> artist, offering fundamental,<br />
theoretical, and practical skills for anatomy<br />
and proportion.<br />
Anatomy for <strong>3D</strong> Artists is an essential teaching<br />
guide for sculpting human anatomy. Nonsoftware<br />
specific, it is packed with everything<br />
that today’s <strong>3D</strong> artist needs to know in order<br />
to tackle the difficult task of recreating the<br />
human form in <strong>3D</strong>. Starting with the use of 2D<br />
references, and moving on to practical and<br />
advanced <strong>3D</strong> sculpting – including topology –<br />
the book covers every stage in the creation of<br />
all kinds of male and female figures. Featuring<br />
established artists such as Chris Legaspi<br />
and Mario Anger, Anatomy for <strong>3D</strong> Artists<br />
also includes several master projects for an<br />
informative and in-depth overview of the <strong>3D</strong><br />
sculpting process of various forms, showing how<br />
the archetypal human form can be adapted to fit<br />
any character shape!<br />
ONLY 29.99 (APPROX 49.99)<br />
288 PAGES | ISBN: 978-1-909414-24-2
<strong>3D</strong>CREATIVE MAGAZINE | Mastering displacement details<br />
The Artist<br />
Roumen Filipov<br />
roumenfilipov.com<br />
Software Used:<br />
3ds Max<br />
Roumen Filipov is a <strong>3D</strong><br />
generalist born in Bulgaria,<br />
currently living in Brazil.<br />
His specialty is making <strong>3D</strong><br />
characters for film and the<br />
advertising agency.<br />
Mastering<br />
displacement details<br />
by Roumen Filipov<br />
Roumen Filipov shows us how to add fine skin and clothing<br />
details to a character model, from skin pores to fabric stitches,<br />
<strong>3D</strong>CREATIVEMAG.COM<br />
using ZBrush and 3ds Max
<strong>3D</strong>CREATIVE MAGAZINE | ISSUE 124<br />
See how Roumen Filipov<br />
brings a character to life with<br />
small details…<br />
This is the third of a series of four tutorials<br />
covering the production of a stylized <strong>3D</strong><br />
character of a steampunk pest exterminator<br />
girl using ZBrush and 3ds Max, from the<br />
initial blocking to the final render and postproduction.<br />
In this third phase, we will sculpt<br />
the displacement details like pores and cloth<br />
wrinkles, then finish the texturing process<br />
using Photoshop, with some composite and<br />
mask blending tricks in 3ds Max.<br />
During the process, I’ll be showing how to<br />
reproduce fine details in ZBrush, then I’ll<br />
show how to correctly set up and export<br />
displacement and normal maps to reproduce<br />
the same information on a low-poly mesh in<br />
3ds Max. This tutorial will also show you how<br />
to quickly create textures and other maps like<br />
specular, bump and dirt masks in order to set<br />
up semi-realistic materials in V-Ray.<br />
Creating skin pores and wrinkles in ZBrush<br />
Now let’s have some fun!<br />
Sculpting the skin details: Now that<br />
01we have our model fully retopologized<br />
and with proper UVs, it’s time to send it back to<br />
ZBrush for some displacement detailing. I always<br />
start with the skin since it’s the most tricky and<br />
delicate surface to work with. At first, you should<br />
look out for imperfections left from the sculpting<br />
process and even re-sculpt some detail that has<br />
been lost in the new topology.<br />
Multi Map Exporter setup and differences<br />
between displacement bit depth<br />
Detailed cloth in ZBrush and stitch alphas<br />
As soon as I have my model subdivided and<br />
ready, I start to sculpt the most delicate wrinkles<br />
around the eyes, mouth, hands and neck. Finally,<br />
I use the Standard brush with the stroke on<br />
DragRect to spread some pores and very fine<br />
wrinkle alphas all over the body. It’s important to<br />
look very carefully at how you distribute the size<br />
and direction of pores. One thing that’s good to<br />
remember during this whole process is that every<br />
detail needs to be twice as strong as the other<br />
surfaces, because SSS (subsurface scattering)<br />
kind of ‘eats’ a large part of it, even with good<br />
reflections in the shader.<br />
Detailing cloth in ZBrush: Clothes are<br />
02 usually tricky to make. You’ll see a lot<br />
of artists using different workflows nowadays<br />
in order to avoid having to sculpt folds and<br />
wrinkles, but not all of them are very practical and<br />
production-friendly, so I keep with sculpting the<br />
old way. The secret for me is to always observe<br />
what places in the body inflict more tension on<br />
the cloth and try to sculpt all the folds coming<br />
from those spots. The result is always some kind<br />
of generic but believable fabric behavior over the<br />
body. If the character’s clothes are too loose and<br />
hanging from the body, I usually pose the base<br />
mesh first and then sculpt the folds according to<br />
the pose, but in this case, the generic cloth over<br />
the body will work fine, even in more extreme<br />
poses. The stitches are all made using the stitch<br />
brush with the alphas shown in the picture.<br />
Exporting Maps from ZBrush: I<br />
03 see a lot of people discussing correct<br />
displacement map exporting in ZBrush, and<br />
I’ll show you what I’ve found to be the best<br />
workflow regarding quality and rendering speed.<br />
53
<strong>3D</strong>CREATIVE MAGAZINE | Mastering displacement details<br />
Setup of VRayDisplacement in 3ds Max<br />
Before anything, the final result in 3ds Max will<br />
depend directly on how your mesh behaves.<br />
If you have many stars in your topology and<br />
some odd distribution of polygons, this may<br />
screw up the displacement. That’s why I always<br />
export two types of maps in TIFF format: 32-bit<br />
displacements with mid 0, and 16-bit with mid 0.5<br />
setup. The first is obviously much more accurate<br />
and I use it with VRayDisplacement modifier, but<br />
the second is for using a non-scale-dependent<br />
workflow with the displace modifier in 3ds Max. I<br />
also use the 16-bit version to help add details to<br />
the texture. In the image you can see my setup for<br />
exporting the maps and mesh.<br />
Using VRayDisplacement in 3ds<br />
04 Max: Now that our displacement maps<br />
are properly exported and our new meshes<br />
are imported in 3ds Max, it’s time to reproduce<br />
the sculpted details directly in the render. First<br />
you should check if all the vertices are split<br />
using the Unwrap UVW modifier – this method<br />
helps to avoid wrong distribution of details<br />
after subdividing the mesh. After this, add the<br />
VRayDisplacement modifier and follow the<br />
settings shown in the image. It’s important to<br />
apply the displacement map using a VRayHDRI<br />
shader, since it’s made especially for handling<br />
32-bit images, and make sure you set the Color<br />
Skin Polypainting in ZBrush<br />
Space option to ‘None’. Another important setting<br />
is to set the Texmap min and max to -1 and 1, in<br />
order to tell the displacement to add negative<br />
and positive deformation to the mesh.<br />
Painting the skin colors: I usually<br />
05 paint most of the textures directly<br />
in Photoshop, but for the skin I use a mixed<br />
workflow of Polypaint in ZBrush with some<br />
<strong>3D</strong>CREATIVEMAG.COM
<strong>3D</strong>CREATIVE MAGAZINE | ISSUE 124<br />
blending of detail maps in Photoshop. Start by<br />
going to the last subdivision of the body model<br />
in ZBrush and, with a very smooth Standard<br />
brush, start painting the basic color regions of<br />
the skin. When you’re finished, export the texture<br />
generated from Polypaint, reset the color and<br />
generate a surface noise using a slightly darker<br />
color. This noise will be added later in order to<br />
create an irregularity effect over the overall skin<br />
tone; you can even play with different hues,<br />
like more green and blue in some regions. This<br />
is more important to me than any of the detail<br />
painting because it removes the flatness of the<br />
skin, which can ruin even the most detailed and<br />
realistic models.<br />
Maps used to create the skin shader<br />
“We need more than a<br />
good texture to reproduce a<br />
believable skin shader in<br />
any renderer”<br />
Finishing the skin texture: We need<br />
06 more than a good texture to reproduce<br />
a believable skin shader in any renderer. In the<br />
image, you can see that I use an additional<br />
normal map and a grayscale bump to make the<br />
pores pop again after the light scatter, followed<br />
by specular map to control the shininess of the<br />
skin in certain areas. To finish the skin texture, I<br />
usually add the bump map along with the 16-bit<br />
displacement over the basic colors in order to<br />
force the pores and other sculpted details to<br />
come out. Since it’s a young girl, you don’t need<br />
to do a very contrasting texture – even a really<br />
smooth result still works in most cases. I’ll share<br />
the skin shader settings at the end of this tutorial.<br />
Texturing the eyes : Eyes are usually<br />
07 the biggest challenge there is when it<br />
comes to making cartoon characters. There are<br />
some things that I usually care about in order to<br />
achieve an organic and alive look when creating<br />
the eye texture:<br />
Maps used to create the eyes shader<br />
1. The iris border needs to be darker and with<br />
a smooth transition. Sharp and perfectly<br />
round always kills the look.<br />
2. You can try out higher IOR values in the<br />
external sphere material; sometimes this<br />
reinforces the depth of the character’s look.<br />
3. The sclera of the eye is never fully white. I<br />
always make a gradient of a bright yellow to<br />
a darker pink in the borders.<br />
4. I always make the specular map very<br />
saturated. More vivid reflections in the base<br />
of the iris help to bring the character’s gaze<br />
to life.<br />
5. Always use SSS for the eyes, since they’re an<br />
organic part too.<br />
55
<strong>3D</strong>CREATIVE MAGAZINE | Mastering displacement details<br />
Fabric textures used in<br />
the cloth shaders<br />
Texturing the clothes: The secret to<br />
08 making good cloth shaders, for me,<br />
is to choose a nice fabric texture as a base to<br />
create the bump and diffuse maps. I rarely add<br />
reflections to cloth, only if it’s really visible in<br />
the type of fabric I want to mimic. I usually run<br />
away from very flat and realistic cloth – I really<br />
try to give a quick and exaggerated look to the<br />
fabric, and also try to make the stitch texture not<br />
too tiled. I use many images to make the dirt in<br />
the clothes, but also some texture brushes in<br />
Photoshop with scatter and hue variations. For all<br />
the pockets and leather materials I use a similar<br />
workflow, but with a blurry reflection using the<br />
unsaturated texture as specular map.<br />
Texturing the spray tank models: I’ve<br />
09 developed a very quick shader workflow<br />
for scratched and worn-out metal. I know that<br />
I have to replicate the same shader with little<br />
differences through all the metallic objects, but if<br />
I had to paint all the diffuse, specular and bump<br />
textures for each one separately, it would take<br />
a lot of time. So I create a blend of two shaders:<br />
painted metal and rusted metal. For each slot, I<br />
create a composite shader with a base color using<br />
VRayColor, then tile metal textures with different<br />
opacity values on top of it. I use a normal map<br />
of random noise surface over the metal bump<br />
to make it look more irregular. To blend the two<br />
materials, I paint masks in Photoshop for each<br />
object, and then, if I want to apply the same<br />
shader to another object, I just change the mask<br />
and it works fine.<br />
Basic shader setup: These are some<br />
10 examples of how I set up some of my<br />
shaders mentioned before. The red one is my skin<br />
material; it’s basically a VRayBlendMtl composed<br />
of an SSS2 shader for the skin itself and a VRayMtl<br />
with black diffuse in additive mode for realistic<br />
reflections. I always use the GGX BRDF option<br />
in all of the shaders – this new V-Ray feature<br />
makes the specular more accurate and detailed.<br />
The blue material is the basic metal shader I<br />
use for all metallic objects. The last one is the<br />
Metal shader workflow of the spray tank<br />
Setup of the main shaders I used<br />
cloth shader with a falloff shader applied in the<br />
diffuse slot. I use the falloff between the texture<br />
and a brighter version of the same in order to<br />
mimic the roughness of the surface caused by the<br />
microfibers in the cloth, usually not present in<br />
leather shaders.<br />
<strong>3D</strong>CREATIVEMAG.COM
The Artist<br />
Roumen Filipov<br />
roumenfilipov.com<br />
TOP TIP<br />
<strong>3D</strong>CREATIVE MAGAZINE | ISSUE 124<br />
UV Master solution<br />
Sometimes, even with the correct<br />
setup, distortions may occur in some<br />
areas when you apply the maps in<br />
3ds Max. A workaround for this is to<br />
always unwrap the mesh again in UV<br />
Master, checking the ‘Use Existing UV<br />
seams’. This correctly recalculates<br />
the distance between the edges for<br />
displacement generation.<br />
NEXT ISSUE<br />
Roumen finishes the<br />
character with posing<br />
and rendering<br />
57
<strong>3D</strong>CREATIVE MAGAZINE | Texturing sci-fi ships with MARI<br />
Texture files<br />
Texturing sci-fi<br />
ships with MARI<br />
by Rory Björkman<br />
Discover Rory Björkman’s sci-fi vehicle texturing<br />
techniques in this detailed MARI tutorial<br />
<strong>3D</strong>CREATIVEMAG.COM
The Artist<br />
<strong>3D</strong>CREATIVE MAGAZINE | ISSUE 124<br />
Rory Björkman<br />
artstation.com/artist/bjorkman<br />
Software Used:<br />
Maya, MARI<br />
With a background in traditional<br />
art and sculpture, Rory Björkman<br />
is currently studying Media at the<br />
National College of Art and Design in<br />
Dublin, with a focus on digital arts.<br />
59
<strong>3D</strong>CREATIVE MAGAZINE | Texturing sci-fi ships with MARI<br />
Explore MARI texturing with Rory Björkman…<br />
An overview of the MARI UI and palettes we’ll be using<br />
In this section of the tutorial, we’ll be looking at how to texture a sci-fi<br />
airship model using MARI.<br />
Overview of the MARI workspace: Before we begin, here’s a brief<br />
01 overview of the MARI workspace. You can click between the <strong>3D</strong><br />
painting view under the Ortho tab, and flat UV mode under UV tab depending<br />
on the need. If you cannot remember a button function, just let your cursor<br />
hover over the button for a few seconds and it will reveal its purpose in a<br />
small pop-up tab. In the top-left is the save button – remember to save often.<br />
Now let’s get texturing!<br />
Ambient occlusion: After importing the geometry, the first step for<br />
02 texturing our airship is generating ambient occlusion (AO). Select all<br />
of the mesh, and under the Objects menu, select Ambient Occlusion. Then<br />
under your Procedural tab in the main shader, select Geometry and then<br />
Ambient Occlusion.<br />
The AO may have hard edges which can be smoothened using the Blur tool.<br />
First right-click on your AO procedural layer, then ‘Convert to Paintable’ and<br />
use the Blur tool to soften any edges that are jagged. Be sure to save your<br />
project as you go.<br />
Texturing crevices: Now the AO is complete we need to go over the<br />
03 ship with the Brush tool. By pressing the ‘K’ key, you can access the<br />
brush sets. I find the Velvet Touch brush (under Organic Brushes) is good for<br />
soft organic build-up. To reduce the brush size, press the ‘R’ key and left-click,<br />
then push up and down or left and right according to the size and fall-off. For<br />
the brush opacity, press the ‘O’ key and left-click, and slide left and right. Use<br />
these tools to softly build up darkness in all the crevices on the ship.<br />
Creating the model’s ambient occlusion (AO)<br />
Using brushes to add texture to the ship’s crevices<br />
<strong>3D</strong>CREATIVEMAG.COM
<strong>3D</strong>CREATIVE MAGAZINE | ISSUE 124<br />
Making and adding the ship’s specular map<br />
Specular map: As we go we can create<br />
04 and add to our specular map. Firstly,<br />
under the Channel menu, create a new channel<br />
with the name ‘Specular’.<br />
Open this channel stack and drag it across to the<br />
left of the screen. Keeping this open, return to<br />
your Diffuse stack and duplicate our painted AO<br />
layer, then drag this layer across to the Specular<br />
stack. When you click the Specular shader again<br />
you will see what’s contained within it.<br />
Next, to increase the specular difference between<br />
objects, create a layer within the Specular stack,<br />
fill the entire surface with black and reduce the<br />
layer opacity to 50%. Next we need to create a<br />
mask stack to this layer.<br />
By painting on this layer with black or white paint,<br />
we can remove or add the black layer. Think of it<br />
as “the lighter it is, the more specular it is.”<br />
61
<strong>3D</strong>CREATIVE MAGAZINE | Texturing sci-fi ships with MARI<br />
Texturing bronze parts: Now let’s bring some color into this ship. I<br />
05 have supplied all the textures used in this project in the downloads.<br />
Import the Bronze 2k texture with the image manager. Select individual<br />
components, create a new layer in our Diffuse channel and fill in the objects<br />
with the bronze texture.<br />
Making a rivet texture: For our ship to look as if it’s made of large<br />
06 steel plates, using a rivet or bolt texture along the seams will help to<br />
give the impression of material type and scale. Firstly, import the blue bold<br />
picture provided into Photoshop, and use the Select Color Range tool to<br />
select the blue parts. You can adjust the fuzziness to leave only the shadows<br />
from the bolts. Then right-click, Select Inverse and delete the blue.<br />
Next we can desaturate the color and place a small gray disc behind where<br />
the bolts were to fill them back in. Creating a small gray disc is easily done by<br />
making a circular selection and filling it with mid-gray paint. Then export this<br />
as a PNG to retain the transparency.<br />
Placing the rivet texture: Before we place the rivet texture created<br />
07 in Photoshop, we first need to apply the base metal texture. Import<br />
the ‘Plain Metal’ texture provided into the image manager, and on a new<br />
layer, use it to texture the main body of the ship. When this is complete,<br />
make another new layer and apply the rivet texture in such a way to create<br />
the effect of panels where you feel they fit best. You can adjust the size of<br />
a texture in the buffer window by holding Shift+Ctrl and left-clicking while<br />
dragging left to right. You can also change the color or tone of the texture<br />
being painted by changing the color in the swatch in the top menu.<br />
Additional metals: To create a variation of metal types, I think we<br />
08 should apply a lighter type of metal to the sides and front of the<br />
body, as well as more bronze on some of the smaller details. We can achieve<br />
Picking out the ship’s bronze detailing<br />
Creating a rivet texture with Photoshop<br />
Applying the rivet texture to a base metal texture<br />
<strong>3D</strong>CREATIVEMAG.COM
<strong>3D</strong>CREATIVE MAGAZINE | ISSUE 124<br />
Brightening some of the metal parts to add variety<br />
Adding more details to break up the plain metal texture<br />
this using the plain metal material again, making<br />
another layer, then adding an adjustment stack to<br />
that layer and selecting HSV. When you select HSV<br />
a new window will open and you can use the V<br />
slider to brighten the value of the metal.<br />
Detailing some more welds and bolts:<br />
09 To break up the plain areas a bit, and<br />
add some more detail to the ship in general,<br />
we can start to add some more bolt textures<br />
to the front of the ship and the fin. We can also<br />
start to apply some welded textures using the<br />
‘weld’ texture provided. Make sure to apply these<br />
textures on separate layers so that we can blend<br />
them later if it is necessary to, or use them for<br />
some specular masking.<br />
63
<strong>3D</strong>CREATIVE MAGAZINE | Texturing sci-fi ships with MARI<br />
Transferring textures to the specular channel<br />
Adding textures to the ship’s engine<br />
Texturing the engine: Now we need to start filling in some of these<br />
10 white parts on the engine. I’ve supplied a texture called ‘old polished<br />
metal’ in the texture downloads to use on the main part of the engine and for<br />
the propeller strut. For the piping we can apply the copper texture supplied.<br />
By applying textures in separate layers and using an adjustment stack we can<br />
tune the lightness or hue of metals to slightly differentiate them if desired.<br />
Updating the specular map: Using the textures we have already<br />
11 painted from the diffuse channel, we can now duplicate them and<br />
drag them across into the specular channel stack. Then we need to apply<br />
an adjustment stack and desaturate the color, then depending on what the<br />
material is we can change its opacity to be darker or lighter in the specular<br />
channel. By using an adjustment stack on each layer, we can darken or<br />
lighten parts using the HSV value slider. Remember: the whiter, the shinier.<br />
Filling in the window textures<br />
<strong>3D</strong>CREATIVEMAG.COM
<strong>3D</strong>CREATIVE MAGAZINE | ISSUE 124<br />
Texturing the propellers and side engine<br />
Adding a wood paneling effect to the nose of the ship<br />
Painting the windows: Using the provided texture ‘dull window’,<br />
12 we can now start to fill in those windows. After importing the texture<br />
using the image manager we can fill in the window panes. If the texture looks<br />
a bit too dull or dark, we can boost the lightness by using an adjustment<br />
stack on the layer with the window texture.<br />
Wooden texturing: In keeping with the vintage theme and in the<br />
13 interest of variety of texture and materials, we can paint a nice<br />
section of wood paneling on the nose section. Using the wood texture, first<br />
paint the front’s side panels, before moving or baking the texture. Select the<br />
Spline Warper tool on the top and drag a rectangle around the shape. Using<br />
the frame that appears, drag the texture to fit the general shape of the nose<br />
by pushing and pulling on the frame edges. Then hit ‘B’ to bake the texture<br />
in place.<br />
The propeller and side engine: Using the texture ‘round metal’,<br />
14 we can paint the propellers now. As this texture is very brown, I will<br />
Adding dirt and grime build-up gives the textures more depth<br />
use an adjustment stack to desaturate it to be almost gray, and darken it just<br />
a little as well. Next, for the side engine section, we can paint the inside of it<br />
using the ‘mesh’ texture. At this point we may fill in the rest of the side engine<br />
using the ‘plain metal’ texture. We can update our specular map with these<br />
textures as before.<br />
Adding dirt and grime: As a finishing touch it’s always good to<br />
15 add some wear and tear to a vehicle like this. First make a new layer<br />
65
<strong>3D</strong>CREATIVE MAGAZINE | Texturing sci-fi ships with MARI<br />
using the grime textures provided, and go around<br />
the ship and paint the leak stains and dirt buildup<br />
in places where you would expect to find it.<br />
The key to this is not to overdo the dirt unless that<br />
is the look you are going for.<br />
Adding dirt to the specular channel:<br />
16 Before merging our diffuse textures we<br />
must first duplicate and drag our dirt and grime<br />
textures into the specular channel. We want these<br />
textures to be dull and non-reflective, so we must<br />
apply an adjustment stack and by using the HSV<br />
adjustment we can reduce the value until the<br />
grime texture is almost black. At this point it’s safe<br />
to select all of the layers and export them to your<br />
desktop. I would recommend renaming them.<br />
TOP TIPS<br />
Selecting individual parts<br />
To select the individual parts of<br />
a piece of geometry, first set the<br />
Selection mode to Face and also<br />
enable the Smart Selection mode.<br />
This is very useful for masking.<br />
Once you have a piece of geometry<br />
selected this way, you can right-click<br />
to access a menu which will enable<br />
the option to Hide Unselected and<br />
isolate the piece of geometry.<br />
Using Smart Selection mode<br />
UI tips<br />
When you open a channel stack, you<br />
can either drag the window near the<br />
edges of the workspace and a slot<br />
will automatically open, or you can<br />
simply click the little pin tab on the<br />
top-right of the box to temporarily<br />
tack the window anywhere within<br />
your workspace.<br />
Try using the pinning function<br />
Adding our dirt textures to the specular channel<br />
Making normal maps: We can make<br />
17 our normal maps by using the diffuse<br />
textures. First we need to create a new channel<br />
for the normal map, then duplicate the diffuse<br />
textures and drag them into the normal channel.<br />
As the diffuse textures are all separate, we will<br />
need to select them all and merge them into<br />
one. Then by adding an adjustment stack and<br />
selecting ‘Height to Normal’, we can right-click<br />
and export this layer to the desktop and rename<br />
it accordingly. Now the texturing is done and the<br />
model is ready for rendering.<br />
<strong>3D</strong>CREATIVEMAG.COM
<strong>3D</strong>CREATIVE MAGAZINE | ISSUE 124<br />
Finishing off the texturing process with normal maps<br />
NEXT ISSUE<br />
Rory Björkman shares<br />
his mental ray<br />
rendering workflow<br />
The Artist<br />
Rory Björkman<br />
artstation.com/artist/bjorkman<br />
67
<strong>3D</strong>CREATIVE MAGAZINE | Creating textures for sci-fi spacecraft<br />
Texture files & UVs<br />
Creating textures for<br />
sci-fi spacecraft<br />
by Victoria Passariello<br />
Victoria Passariello shares a range of techniques for creating<br />
textures with Photoshop and Substance Designer<br />
<strong>3D</strong>CREATIVEMAG.COM
<strong>3D</strong>CREATIVE MAGAZINE | ISSUE 124<br />
The Artist<br />
Victoria Passariello<br />
vitrux3d.com<br />
Software Used:<br />
3ds Max<br />
Victoria Passariello<br />
creates hard-surface<br />
models because she loves<br />
robots and <strong>3D</strong>. She works<br />
at Perihelion Interactive<br />
making ships for sci-fi<br />
videogame The Mandate.<br />
69
<strong>3D</strong>CREATIVE MAGAZINE | Creating textures for sci-fi spacecraft<br />
Discover new Photoshop<br />
texturing techniques from<br />
Victoria Passariello…<br />
Hide the seams between panels and try to not make cuts in visible areas<br />
In this second part of my tutorial series, I will<br />
show you the texturing process I usually use<br />
in my projects. I will show step by step how<br />
I cover the different stages in creating the<br />
textures of a model, starting by establishing<br />
the colors, followed by adding damage and<br />
weathering, and finally adding some dirtiness.<br />
I will also share the hand-painting techniques<br />
I use in Photoshop, as well as how to obtain<br />
certain effects using texture maps. I will also<br />
cover a very basic explanation of how to<br />
use the Metal Weathering filter in Substance<br />
Designer to make dust.<br />
I approach this process using the PBR system’s<br />
Metalness/Roughness workflow. I am going to<br />
explain the very basic principles of PBR, but<br />
if you want to read the full theory, you can<br />
download the free Comprehensive PBR Guide<br />
from Allegorithmic.<br />
I hope you find my techniques and methods<br />
useful to use in your own projects.<br />
Making UVs: To make the UVs I use<br />
01 UVLayout. I’ve been using it for about<br />
six years now, as it gives me the necessary tools<br />
to makes UVs easy and quick. Feel free to use<br />
the software of your choice to make the UVs –<br />
the important thing to take into account in this<br />
process is to hide the seams as much as possible.<br />
Try to make cuts between panels and inside<br />
grooves. Try not to make them in the middle of<br />
a visible area unless you don’t have any other<br />
choice; in that case, you will need to work that<br />
area in detail in the texture to cover up the seam<br />
as much as possible.<br />
Using checker maps: Another<br />
02 important thing to take into account<br />
when packing the UVs is to keep all the islands<br />
totally vertical or horizontal, because it will<br />
make the texturing process easier when painting<br />
or using tile maps of panels and straight lines.<br />
Always avoid any oblique islands. You can check<br />
by using a checkered map on the object.<br />
Texture sheets: Feel free to make two<br />
03 or three texture sheets for the ship. You<br />
can divide it as you want, for example, one texture<br />
sheet for the front section and one for the rear<br />
section. For the purposes of this tutorial and to<br />
keep things easy, I keep the whole ship in a single<br />
4096 x 4096 texture sheet and the cables in one<br />
1024 x 1024 texture sheet.<br />
Make sure to keep all the islands in the UVs 90 degrees straight<br />
<strong>3D</strong>CREATIVEMAG.COM
<strong>3D</strong>CREATIVE MAGAZINE | ISSUE 124<br />
Victoria creates one texture sheet for the ship and one texture sheet for the cables<br />
Rendering the UV template, mask and AO map<br />
Rendering out the maps: Before starting to paint the textures, I<br />
04 render out all the maps I’m going to need. The first one is a template<br />
for the UVs, which I’ll use in Screen blending mode in Photoshop as a<br />
reference for the different objects’ placement.<br />
Inside 3ds Max, apply an ‘Unwrap UVW’ modifier to the object and open the<br />
UV editor, then under Tools > Render UV Template, a new window will appear<br />
with the options for your render. Just put the correct size of the map and<br />
click Render.<br />
The second one I always make is a mask map, which I use in Photoshop’s<br />
alpha channel to make quick and easy selections of the areas I need. I’ve<br />
got this map in the same window as the UV template, but this time I change<br />
some parameters to get the black-and-white image and save it as a TGA file.<br />
Finally for the ambient occlusion (AO) map I use Faogen, a software that<br />
make AO maps very quickly and accurately. Feel free to use the software of<br />
your choice to make AO maps – the important thing is to have the occlusions<br />
very visible in the map.<br />
BPR Metalness/Roughness workflow: For this project I’m using<br />
05 PBR rendering with a Metalness/Roughness Workflow. I need three<br />
maps for this:<br />
1. Albedo map, where the colors represent the albedo for non-metallic<br />
materials and reflectance values for metals.<br />
2. Metallic map, where white represents metal and the black represents<br />
non-metal.<br />
3. Roughness map, where white represents rough surfaces and black<br />
represents smooth surfaces.<br />
To learn more about the characteristics of each of the maps and take a<br />
deeper look at the PBR workflow, you can look at the Comprehensive PBR<br />
Guide by Allegorithmic.<br />
71
<strong>3D</strong>CREATIVE MAGAZINE | Creating textures for sci-fi spacecraft<br />
Keeping that knowledge in mind, I start to build<br />
all the maps simultaneously in Photoshop,<br />
adding details, damage, dirt, and so on, step by<br />
step in different layers while constantly checking<br />
the process in Marmoset Toolbag 2.<br />
Establish the different colors: To start<br />
06 the texturing process, I first establish<br />
all the colors of the ship. I create a base layer<br />
of solid color that is the base color of the ship<br />
(in this case, blue). On top of this one, I start to<br />
create more solid color layers with all the different<br />
colors, and mask the desired pieces of the ship (I<br />
use the mask map I previously made in 3ds Max<br />
to help me select the areas and mask them). I<br />
basically make variations of blue, some black<br />
pieces and some different tones of gray.<br />
To learn about the PBR Metalness/Roughness workflow in depth,<br />
look up Allegorithmic’s comprehensive documentation<br />
The colors in this case represent the paint on the<br />
metal, so the roughness map should be the same<br />
in all the colors, even though I prefer to add some<br />
variation to break the homogeneity.<br />
Establish the different colors of the ship and add some variations in the roughness map<br />
The metal map is all black for now since I haven’t<br />
established any raw metal yet.<br />
Add metal textures: Once I set up all<br />
07 the colors, I move on to add the metal<br />
textures. I choose one metal map from www.<br />
textures.com as my base metal and duplicate<br />
it to fill the whole canvas. I use it in Overlay<br />
blending mode to get a very subtle effect.<br />
On top of this, I add a scratch map (also found in<br />
www.textures.com, and modified by me) at 60%<br />
opacity so the scratches are not very strong and<br />
evident in the render.<br />
In the roughness map, I desaturate the metal<br />
texture and use it in Multiply mode. I also move<br />
the arrows inside the Blending Mode option<br />
window so only the darker tones remain visible.<br />
I want the metal texture to be dark here, so these<br />
areas look shinier. For the scratch map, I invert<br />
the colors so they become black and use it in<br />
Multiply mode.<br />
I use a similar process for the metalness map to<br />
make it white (suggesting the metal underneath<br />
is the paint colors) and I duplicate the scratch<br />
map several times in Screen mode to get them<br />
very white.<br />
Adding the panels map: To add even<br />
08 more variation to the different colors, I<br />
add a panel texture from Total Textures v7: Scifi.<br />
I use it in Overlay with a very low opacity and<br />
modify the Levels to add more contrast. I only use<br />
this map in some blue areas, so I make a mask to<br />
specify it.<br />
For the roughness map, I desaturate the map<br />
and use it at very low opacity, tweaking Levels<br />
for more contrast. The metalness map remains<br />
unaffected by the panels. I also convert the<br />
desaturated map into a normal map to create<br />
more distinctions in the render.<br />
At this point you should feel that the ship is made<br />
of metal and has been painted, and the damage<br />
should look natural. If it doesn’t, go back and play<br />
a bit with the albedo, roughness and metalness<br />
maps, changing the values and balance of colors,<br />
and so on. In this tutorial I’m showing you the<br />
final result, my final colors and roughness values,<br />
but they took me a lot of time and testing until<br />
they looked good and natural. Feel free to change<br />
them as much as necessary until they give you a<br />
great result.<br />
<strong>3D</strong>CREATIVEMAG.COM
<strong>3D</strong>CREATIVE MAGAZINE | ISSUE 124<br />
Add metal textures and scratches. Darker in the Roughness map<br />
to suggest a smooth material and Lighter in the Metalness map to<br />
suggest the metal underneath the paint colors<br />
Add an extra panel map to get<br />
more variations in color and<br />
roughness/smoothness<br />
73
<strong>3D</strong>CREATIVE MAGAZINE | Creating textures for sci-fi spacecraft<br />
Paint some areas of glow to add more visual interest to the model<br />
Paint the peeling on the borders of the panels and in other exposed areas<br />
<strong>3D</strong>CREATIVEMAG.COM
<strong>3D</strong>CREATIVE MAGAZINE | ISSUE 124<br />
Create a solid color and mask the areas of the decals. Play with the blending options to get a nice wear effect<br />
Making the emissive map: Once I’ve<br />
09 got all the colors, panels, metal and<br />
scratches, the ship’s starting to take shape in<br />
terms of shaders/materials. It looks metallic and<br />
a bit damaged.<br />
Before I continue adding the peeling, dust<br />
and rust, I’ll first create the emissive map. The<br />
emissive map always adds that extra layer of<br />
detail and visual interest to the model, creating<br />
areas that emit light. I always like to add some<br />
lines and dots here and there, and it also looks<br />
good to paint the windows and engines and<br />
make them glow.<br />
To make the emissive map, I create a black solid<br />
color as the base layer, and on top of this one I<br />
add the emissive color layer (in this case, blue).<br />
This blue layer has a mask where I start to paint<br />
all the areas I wanted to glow. (I use the UV<br />
template in Screen mode as a guide to paint.)<br />
Adding peeling to the borders: Finally,<br />
10 the peeling, my favorite part. I need to be<br />
extra careful when making the peeling because I<br />
always add too much and then the model starts<br />
to look super destroyed; I end up deleting a lot<br />
of what I had already painted. (In any case, my<br />
models always look destroyed!) So whatever the<br />
goal you want for your model, whether you want<br />
it to look old and damaged or only have a bit of<br />
peeling damage, this is a very fun step.<br />
Nowadays there are some techniques to obtain<br />
this effect quickly: for example, using curvature<br />
maps or Substance Designer. However, I’m still a<br />
big fan of painting by hand because I like to have<br />
full control of what I want to do and where exactly<br />
I want to do it. Using one technique or another<br />
will alway depends on your time constraints. In<br />
this tutorial I will share how I do this completely<br />
by hand.<br />
For the albedo map, I create a dark-gray solid<br />
color layer and use a dry brush to start masking<br />
the borders of the panels. Remember that the<br />
value of gray determines the reflectance of the<br />
metal in the metalness map. I want the peeling to<br />
look bright, but not much, so I test some different<br />
gray values until I get the result I want.<br />
In the roughness map, I use a very dark-gray<br />
because I want the surface to look smooth, since<br />
it’s the raw metal that’s been revealed underneath<br />
the paint. Finally, for the metalness map, I use a<br />
very light-gray, almost white.<br />
Even if I use PBR and start using real material<br />
values, I change them a bit to fit my own tastes.<br />
Decals: After the hard work of painting<br />
11 all the peeling, let’s take a rest to add<br />
some decals, like the yellow bands on the sides<br />
and some logos. As usual, I create a solid color<br />
layer (yellow this time) and mask in the areas<br />
where I want the bands and logos to be. To give<br />
the worn feeling of the yellow paint, I modify<br />
some blending options in the Layer Style window.<br />
In the roughness map, I use a light-gray to get<br />
a rough result. As I said before, it needs to be<br />
tested several times to get the desired result. The<br />
metalness map remains unaffected.<br />
75
<strong>3D</strong>CREATIVE MAGAZINE | Creating textures for sci-fi spacecraft<br />
Make different adjustments to a texture to use it as rust<br />
Adding rust: For the rust effect, I want<br />
12 to add some orange/reddish patches<br />
around the model, but I don’t want to paint<br />
them by hand, so for this one I use a burnt<br />
texture from Total Textures v19: Destroyed &<br />
Damaged. At first glance, the chosen map doesn’t<br />
have the characteristics I want, but with a bit of<br />
manipulation in Photoshop I obtained exactly<br />
what I’m looking for.<br />
Generate a dirt map in Substance Designer using the Metal Weathering Filter<br />
I first copy the map around all the canvas, then<br />
put it in Color blending mode and play with the<br />
blending options inside the Layer Style window.<br />
At this point I’ve got the reddish patches I want,<br />
but they’re missing contrast, so I make some<br />
Levels adjustments and it’s done. I copy the same<br />
layer with all its blending adjustments (without<br />
the Levels adjustment) to the roughness map, but<br />
I need it to be white so I desaturate the map and<br />
set it to Color Dodge mode.<br />
For the metalness map, I again copy the layer<br />
with its blending adjustments, but this time I use<br />
it in Subtract mode to have it in black. It is almost<br />
invisible to the eyes if you look at the metalness<br />
map, but the rust texture is there doing its job.<br />
Dirt pass: I don’t paint the dirt by hand,<br />
13 and I don’t use any texture for it either.<br />
On this occasion, I use Substance Designer to<br />
generate the dirt. In Substance Designer, I first<br />
create a Metalness/Roughness Graph. I add a<br />
<strong>3D</strong>CREATIVEMAG.COM
<strong>3D</strong>CREATIVE MAGAZINE | ISSUE 124<br />
Use the dirt map generated in Substance Designer in Multiply mode for the albedo and inverted in Screen mode for the roughness<br />
Metal Weathering filter and only choose the Base<br />
Color input. I link a white color to the Base Color<br />
input and link the ship’s ambient occlusion map<br />
in the Ambient Occlusion input. That’s all I need<br />
here to generate the dirt, so, in the Effect rollout<br />
of the Weathering filter, I play with the Dirtiness<br />
parameter until I’ve achieved a nice result. I<br />
export the Base Color output here and am ready<br />
to start working in Photoshop once again. (See<br />
image 13a.)<br />
color to it. I also add it in Multiply mode to the<br />
metalness map.<br />
For the roughness map, I need to invert the colors<br />
of the map, so the black dirt becomes white and I<br />
use it in Screen blending mode. (See image 13b.)<br />
The Artist<br />
NEXT ISSUE<br />
Victoria Passariello<br />
renders the ship in<br />
Marmoset Toolbag 2<br />
Now I’m back in Photoshop with the new dirt<br />
map. It looks nice in Multiply mode, but the<br />
dirt wouldn’t be black, so to add some color to<br />
the new map I apply an orange/brownish solid<br />
Victoria Passariello<br />
vitrux3d.com<br />
77
<strong>3D</strong>CREATIVE MAGAZINE | Texturing assets with Substance Painter<br />
Model file<br />
Texture files<br />
The Artist<br />
Andrew Finch<br />
andrewfinch.carbonmade.com<br />
Software Used:<br />
3ds Max, ZBrush, Photoshop,<br />
Substance Painter, Marmoset<br />
Toolbag 2<br />
Andrew Finch is a principle<br />
environment artist for<br />
Microsoft’s Rare Studio. He has<br />
nine years’ industry experience<br />
and is currently working on his<br />
eleventh title.<br />
Texturing assets with<br />
Substance Painter<br />
by Andrew Finch<br />
Learn how Andrew Finch uses the powerful texturing<br />
software Substance Painter to add realism to this<br />
<strong>3D</strong>CREATIVEMAG.COM<br />
battle-worn Viking shield asset
<strong>3D</strong>CREATIVE MAGAZINE | ISSUE 124<br />
Discover Substance Painter<br />
with Andrew Finch…<br />
In this tutorial I will guide you through the<br />
process of creating a Viking shield inspired<br />
by the TV show Vikings. In the last tutorial<br />
we UV mapped a low resolution mesh of the<br />
shield and baked the high resolution data to<br />
a normal map. We also set up the Substance<br />
Painter project ready for us to begin texturing.<br />
In this tutorial we will use Substance Painter to<br />
texture the Viking shield to almost completion<br />
using a lot of the powerful tools it has to offer,<br />
such as the Substance materials to generate<br />
wear and tear. We will also explore painting<br />
the PBR textures and adjusting an already<br />
existing normal map. At the end of this fourpart<br />
tutorial series all the assets we create will<br />
be imported in Marmoset Toolbag 2 and set<br />
up in a quick scene to show off our model; but<br />
instead of rendering out still images for your<br />
portfolio, I will show you how to use the new<br />
Marmoset Viewer tool to create an interactive<br />
portfolio piece, which is a new very impressive<br />
way to display your artwork to potential<br />
employers, giving them the ability to examine<br />
your asset interactively.<br />
Updated base layer: In the previous<br />
01 chapter I showed you how to import an<br />
already existing texture to use as our base layer. I<br />
thought this texture was a little too plain-looking<br />
and so I decided to add some detail and color;<br />
most Viking shields have a pattern on them, so I<br />
added a red background and a white outline to<br />
the wooden cross shape. I think this looks much<br />
better and traditional. All of the other elements<br />
that make up the shield will be textured using<br />
Substance materials. These materials utilize<br />
texture maps to define how they behave and are<br />
very powerful and quick at producing realistic<br />
seamless textures.<br />
Geometry Decal tool: We will be<br />
02 using the masking tools a lot during<br />
the texturing phase and Substance Painter’s<br />
Geometry Decal tool makes creating masks very<br />
easy. You have many options for selecting areas<br />
to mask in or out such as UV islands, elements or<br />
polygons. You can drag and select elements in the<br />
<strong>3D</strong> viewport or 2D viewport, and press F1, F2 and<br />
F3 to switch viewport modes. If you’re working on<br />
a complex shape that’s hard to select, use the 2D<br />
UV window to easily select the UV islands.<br />
You are also given a grayscale slider to pick<br />
the color of your masked areas; the same rules<br />
apply as any other mask texture, where black is<br />
removed and white is drawn.<br />
The base layer is an already existing diffuse texture from Photoshop<br />
Substance Painter’s intelligent masking tools easily mask out unwanted areas<br />
Baking out textures to take full advantage of the Smart Material capabilities<br />
Baking new texture: Smart Materials<br />
03 are a group of folders and layers used to<br />
create advanced effects for your textures. In order<br />
for these materials to work correctly they require<br />
certain textures; AO maps are used to tell the<br />
material where dirt can build up, for example. A<br />
new texture which you can bake out in Substance<br />
Painter is the curvature map, which gives curved<br />
edge information to the material. This is good<br />
for wear and tear – areas that will be subject to<br />
weathering and general use. Under the TextureSet<br />
Settings, click Bake Textures and you’re presented<br />
79
<strong>3D</strong>CREATIVE MAGAZINE | Texturing assets with Substance Painter<br />
with a new window to choose what new textures<br />
you want to bake. Make sure ‘Curvature’, ‘World<br />
space normal’ and ‘Ambient occlusion’ are ticked.<br />
After pressing Bake Textures your project will be<br />
updated with these new textures. The normal<br />
map will have changed to use the new normal<br />
map, so make sure you re-apply your baked-out<br />
normal map from 3ds Max.<br />
Smart Materials: Substance Painter’s<br />
04 Smart Material library has some very<br />
useful materials for us to use to begin our<br />
texturing. These materials not only paint the<br />
diffuse color, but they affect the PBR and normal<br />
maps, making sure they full integrate with<br />
your model’s textures. These materials are fully<br />
customizable, allowing us to produce unique<br />
tileable textures. To apply a Smart Material, just<br />
select Smart Material in the layers tab. The library<br />
is then visible for you to select the appropriate<br />
one; in this case, I’m texturing the metal hand<br />
guard, so I use the ‘Steel Scratched’ material<br />
as this has a nice metal surface with plenty of<br />
scratches and dents which fit this element.<br />
Smart Material properties: To access<br />
05 the properties of a Smart Material,<br />
look for a mask with a red line under it, which<br />
indicates it has layer options. Click the layer and<br />
the generator is now visible, where you can adjust<br />
dirt level, dirt contrast, and grunge. Each Smart<br />
Material has different setups and generators so<br />
feel free to play around with them to get used<br />
to what they do. Note the Image Inputs contain<br />
an AO map and a curvature map to generate the<br />
details such as scratches and dirt.<br />
Substance Painter’s default library of Smart Materials is a useful starting point<br />
Exposed Smart Material properties for customization of the textures<br />
Remember to use the masking tools to remove<br />
unwanted areas the new material is affecting. By<br />
default all of your model will be textured using<br />
the new material until told not to.<br />
Gold ring: The texturing process can<br />
06 really now start to speed up by using the<br />
mask tools and the Smart Materials. Just quickly<br />
dragging and dropping the materials into the<br />
layer stack quickly applies excellent textures to<br />
the asset. Here I drag the Gold Armor material for<br />
use on the ring that holds the leather together.<br />
This spot of color and reflective highlight will<br />
really stand out among the darker wood and<br />
leather. I adjust the settings slightly just to make<br />
sure that I had something unique compared to<br />
the default settings. We can paint an extra layer of<br />
dirt onto these areas at a later stage.<br />
Leather straps: I use the Smart Material<br />
07 ‘Leather Rough’ to use as a base for the<br />
texture. To get a good worn-edge look I use a<br />
‘MG Metal Edge Wear’ filter – I find this gives me<br />
Texturing different elements now becomes a quick process<br />
the best results for edge wear using both the<br />
with heavy use. I’m not heavy with the default<br />
curvature and AO maps. This is a good base but I color of the leather, so to make it look more<br />
feel it could be improved more, so I paint in more natural I edit the base color and edge damages<br />
edge wear using a white noisy brush in the mask color. I use a lighter beige color to help it stand<br />
layer to paint in areas that would be worn away out from the wooden panels behind it.<br />
<strong>3D</strong>CREATIVEMAG.COM
<strong>3D</strong>CREATIVE MAGAZINE | ISSUE 124<br />
The heavily worn leather strap using curvature map and hand painting<br />
The thick protective leather surrounding used the same techniques as the straps<br />
Outer leather surrounding: I will use<br />
08 the same techniques here as we did with<br />
the leather straps, to texture the leather outer<br />
surrounding. I use the leather Smart Material<br />
with the ‘MG Metal Edge Wear’ filter applied,<br />
with slightly different settings which are shown<br />
in the image above. I tweak the colors again<br />
now to something that is more suitable for the<br />
shield. The curvature map plays an important<br />
part here to really get the worn texture down, so<br />
that it matches the ZBrushed creases and curves<br />
featured in the material.<br />
81
<strong>3D</strong>CREATIVE MAGAZINE | Texturing assets with Substance Painter<br />
Varying the wood color: The wooden<br />
09 parts of the shield are looking a bit too<br />
samey, so to fix this I use Photoshop to edit the<br />
base wood texture we originally brought in as<br />
our starting layer. I make the texture lighter in<br />
color. Back in Substance Painter, I import the<br />
new texture and apply it as a new fill layer to my<br />
stack. I then apply a black mask layer to make<br />
it invisible. I can now use a white noisy brush to<br />
gently draw in some highlights to the wood. As<br />
this is a fairly noisy surface you would expect a lot<br />
of variations in color and dirt.<br />
Hand-painted dirt: Now all of our<br />
10 Smart Materials are placed, we need<br />
to start to bed them in more so they look more<br />
natural. We do this by painting in details such as<br />
weathering and dirt. So on a new empty layer, I<br />
use a black noisy brush and lightly paint in dirt<br />
build-up behind the nails and in the creases.<br />
Don’t be scared to add too much, because if it<br />
looks too heavy when we are done we can always<br />
reduce the opacity of the layer or use a mask layer<br />
to soften the effect.<br />
Painting dirt build-up: On a new layer<br />
11 I continue to build up the layers of dirt,<br />
painting in all of the corners and crevices. I keep<br />
certain areas more clean, for example where<br />
the shoulders or forearm would be continually<br />
rubbing the surface. I like to keep each element’s<br />
painted dirt on separate layers, so I can use the<br />
layers’ opacity to tone the effect down if it’s too<br />
heavy without affecting the whole shield.<br />
Coloring the dirt: Doing the same<br />
12 process as above, I paint some dirt<br />
detail on the metal hand guard areas, particularly<br />
around the nails. As this is a metal surface, I can<br />
add some color to the dirt layer to represent<br />
rusting. I keep the color dull so it doesn’t stand<br />
out too much from the rest of the shield. I also<br />
add some larger patches of rust color on the<br />
spherical surface just to vary the diffuse coloring.<br />
Stitching mask: I feel it would be an<br />
13 easier process to paint the stitching in<br />
Photoshop rather than in Substance Painter,<br />
where I’ll have more control over such a finicky<br />
process. Using the UV texture and the normal<br />
map texture as a guide, I use the normal map<br />
texture to show where the height data is for each<br />
stitch so the textures line up correctly. I paint a<br />
black-and-white mask of stitching, making sure<br />
the stitches are untidy to look more natural. I save<br />
the texture out.<br />
Imported layer mask: Import the newly<br />
14 created mask texture into Substance<br />
Painter and select it in the Textures tab of the<br />
Using a second pre-made texture to add variations to the wood texture<br />
Hand-painted dirt and grime to really weather and age this asset<br />
Continual build-up of painted dirt layers on the wooden panels<br />
<strong>3D</strong>CREATIVEMAG.COM
<strong>3D</strong>CREATIVE MAGAZINE | ISSUE 124<br />
Metal dirt layer with an element of rusting<br />
Stitching detail for the leather straps will<br />
add a focus area of detail to the shield<br />
Using an imported texture as a layer mask<br />
Dirtying up the stitching to match the dirt on the leather straps<br />
Shelf. Create a new fill layer and add a black<br />
mask, then right-click on the mask and select<br />
‘Use texture as mask’. Select the stitches mask we<br />
just imported. You should now see the stitching<br />
appear on the leather straps as intended. Adjust<br />
the layers color and PBR values to look natural<br />
with the rest of the shield.<br />
Dirty stitching: The stitching stands<br />
15 out too much from the leather strapping<br />
because it is too clean. The stitches need to be<br />
dirtied up to match the weathering and wear on<br />
the leather straps. On another new layer, paint in<br />
some dirt but try to match the patches that are on<br />
the straps so it looks consistent. The straps really<br />
add something different to the shield with their<br />
organic shapes and details. I want to add more<br />
details to the rest of the shield to finish off and get<br />
the asset into Marmoset Toolbag 2, which I will<br />
cover in the next chapter.<br />
The Artist<br />
CHECKOUT CHAPTER 04 ON PAGE 086<br />
Andrew Finch renders the final shield asset…<br />
Andrew Finch<br />
andrewfinch.carbonmade.com<br />
83
Bringing you practical tuition and advice from an experienced <strong>3D</strong> Trainer,<br />
this invaluable book offers a comprehensive guide to character creation in<br />
Autodesk’s very popular <strong>3D</strong> software, Maya.<br />
Beginner’s Guide to Character Creation in Maya continues 3dtotal’s tradition of offering helpful<br />
guides for beginners looking to step into the world of digital art. Talented <strong>3D</strong> Animator and<br />
Trainer, Jahirul Amin, gives an insightful breakdown of how to model from scratch using Maya<br />
and Mudbox. Not only will you learn about the principles of rigging and animation, with a<br />
step-by-step guide detailing how to link the joints and create constraints and controls for<br />
animation, you will also learn how to correctly light and render your scene for porfolio-worthy<br />
presentation. Plus, in-depth chapters on anatomy will provide you with a solid foundation<br />
on which to develop your <strong>3D</strong> character skills, so that by the end of this book you will have<br />
created your very own realistic walk cycle.<br />
ONLY 29.99 (APPROX 49.99) | 288 PAGES | ISBN: 978-1-9094142-0-4
<strong>3D</strong>TOTALPUBLISHING<br />
AVAILABLE NOW!<br />
An innovative and fun way for people<br />
of all ages to find the inspiration to<br />
pick up a pencil – and draw!<br />
The Sketch Workshop incorporates a luxury<br />
leather-style folder that can securely hold a<br />
workbook and up to 20 quality drawing tools.<br />
We’ve created a number of workbooks that<br />
cover popular topics including:<br />
Designed to be easy to carry and use on the<br />
move, this beautiful art resource offers a<br />
complete sketching solution for beginners,<br />
hobbyists, and artists looking to brush up on<br />
drawing skills, with tuition by pro artists.<br />
FOR MORE INFORMATION ON THE<br />
FOLDER, WORKBOOKS, AND DRAWING<br />
TOOLS AVAILABLE, PLEASE VISIT:<br />
SHOP.<strong>3D</strong>TOTAL.COM
<strong>3D</strong>CREATIVE MAGAZINE | Presenting assets in Marmoset Viewer<br />
Alphas and maps<br />
The Artist<br />
Andrew Finch<br />
andrewfinch.carbonmade.com<br />
Software Used:<br />
3ds Max, ZBrush, Photoshop,<br />
Substance Painter, Marmoset<br />
Toolbag 2<br />
Andrew Finch is a principle<br />
environment artist for<br />
Microsoft’s Rare Studio. He has<br />
nine years’ industry experience<br />
and is currently working on his<br />
eleventh title.<br />
Presenting assets in<br />
Marmoset Viewer<br />
by Andrew Finch<br />
Andrew Finch demonstrates how to render a real-time<br />
asset from Marmoset Toolbag 2 to the interactive<br />
<strong>3D</strong>CREATIVEMAG.COM<br />
Marmoset Viewer
<strong>3D</strong>CREATIVE MAGAZINE | ISSUE 124<br />
Take your asset presentation<br />
to the next level…<br />
In this tutorial I will guide you through the<br />
process of creating a Viking shield inspired by<br />
the TV show Vikings. In the previous tutorial<br />
we textured the shield using Substance Painter<br />
and some of its powerful tools. We looked at<br />
not only hand-painting details but using Smart<br />
Materials and importing custom textures to<br />
aid in the texturing process. Not only was the<br />
diffuse texture created, but the Substance<br />
Painter helped create the PBR textures.<br />
In this final chapter we will export all of the<br />
assets from Substance Painter and import<br />
them into Marmoset Toolbag 2. We will<br />
create a small scene in Marmoset to display<br />
our work and also explore the new feature<br />
Marmoset Viewer. This will enable us to export<br />
an interactive display of our artwork that<br />
can be uploaded to galleries. This new way<br />
of presenting your work is becoming really<br />
popular and would definitely make your work<br />
stand out from the crowd.<br />
Stencil masks: No well-used Viking<br />
01 shield should be without some blood<br />
stains, old and fresh. To get a realistic blood stain<br />
would be quite difficult to do by hand-painting,<br />
especially for this art style, so we’ll use decals<br />
or stencils as masks to paint the details. I use<br />
the www.textures.com texture library as they<br />
have some very good blood splatter decals.<br />
Once I have a few variations I’m happy with, I<br />
turn them into black-and-white masks and make<br />
sure they are square textures as they work better<br />
in Substance Painter. Import the blood splatter<br />
decals and select them in the Texture tab. Drag<br />
this stencil texture to the stencil section of the<br />
brush properties and it will now be overlaid over<br />
the viewports.<br />
Dried blood splatter: I prefer to use<br />
02 the 2D viewport for this as it gives better<br />
precision when painting. I’m starting with dried<br />
old blood so it’s darker in color. It also has no<br />
shine to it, so its roughness value should be quite<br />
high. I add a levels modifier to the layer and<br />
change it to affect roughness only; this gives me<br />
better control and can be easily adjusted later<br />
on. I also add a second levels modifier that only<br />
affects the base color to give me better control<br />
over the color of the dried blood later on if it<br />
doesn’t quite look right.<br />
Fresh blood splatter: On a second<br />
03 layer and using a different stencil, I add<br />
some fresh blood to the shield using the same<br />
techniques as above. As I want some blood on<br />
the leather corners, I paint this in the <strong>3D</strong> viewport.<br />
Painting blood detail onto the shield using a stencil mask<br />
Dried blood splatter painted onto the shield<br />
Fresh blood splatter to contrast with the dried blood<br />
I also add two more levels modifiers to give the look fresh. Continue to paint the blood around<br />
blood a more vibrant red color, and also a lower the shield but don’t go too overboard with it, or<br />
roughness value so it’s more reflective, making it it’ll hide the other nice details in the shield.<br />
87
<strong>3D</strong>CREATIVE MAGAZINE | Presenting assets in Marmoset Viewer<br />
Filling in the cracks: The painted-on<br />
04 stencils can look a little flat and fake.<br />
This is because the normal map detail from the<br />
wood is showing through the blood decal too<br />
much; as blood is quite thick, you would expect<br />
it to fill in the cracks more, so to fix this we need<br />
to adjust the imported normal map. Substance<br />
Painter uses height maps to add to the normal<br />
map but this wont allow us to remove details<br />
from the normal map that we imported at the<br />
start. In order to paint into the normal map<br />
itself you need to add the normal map to the<br />
material. In the TextureSet settings next to the<br />
channel section, click the ‘+’ sign to get a lot more<br />
channels that we can add to our material. Select<br />
normal map. You will now notice a Base Normal<br />
has been added to the layer and a ‘nrm’ tab has<br />
appeared on the material. Now we can make<br />
edits to the actual normal map and subtract the<br />
detail away.<br />
Normal map wood damage: At the<br />
05 top of the layer section, select normal<br />
from the drop-down list so that we can only paint<br />
in the normal channel and not affect the other<br />
channels accidentally. Create a new layer and<br />
turn off all except the height channel. Now when<br />
you paint on the model you will notice you can<br />
add or subtract height data from the normal map.<br />
I feel the damaged part of the handle is a little<br />
flat, so I paint in some random brushstrokes to<br />
carve away at the wood. You can add scratches or<br />
blend out any detail you feel is too heavy around<br />
the asset.<br />
Completed texturing of shield: This<br />
06 now completes the methods I use to<br />
texture the shield. You can keep painting in details<br />
where you feel it is needed. This image shows<br />
the back view of the shield, which I think is quite<br />
successful at showing a damaged, weathered and<br />
well-used Viking shield. The gold ring and stitched<br />
leather really add a nice hint of detail. These<br />
assets are now ready to be exported to Marmoset<br />
Toolbag 2.<br />
Exporting the textures: The export<br />
07 process in Substance Painter is very<br />
simple. Select File > Export Textures and you will<br />
be presented with the export window. Here you<br />
can say where the files will be saved to; the size of<br />
the exported texture maps and the format of the<br />
textures. I use TGA for my format and a resolution<br />
of 2,948.<br />
Filling in the wood detail with blood to stop the ‘painted-on’ effect<br />
Painting in new normal map details into the wood damage<br />
There is also a list of all the textures that will be<br />
exported: Base color, Height, Roughness, Metallic<br />
and Normal. Hit export and Substance Painter will<br />
export the textures quickly. We can now move on<br />
to presenting our work in Marmoset Toolbag 2.<br />
Completed model in Substance Painter, ready for export<br />
<strong>3D</strong>CREATIVEMAG.COM
<strong>3D</strong>CREATIVE MAGAZINE | ISSUE 124<br />
Exporting the textures out of Substance Painter ready for Marmoset<br />
Importing the shield mesh and normal map into Marmoset Toolbag 2<br />
Mesh and normal in Marmoset: The<br />
08 first thing to do in Marmoset Toolbag 2<br />
is import the shield mesh, which should be the<br />
same FBX file you used in Substance Painter.<br />
I then drag the normal map into the surface/<br />
normal map slot of the material. I like to do this<br />
first as it will show up any problems. Sometimes<br />
the normal map can be flipped if you notice any<br />
issues. Select one of the Flip options to correct<br />
the map – in this case I flip the normal map<br />
on the Y axis. Now it looks as it did before in<br />
Substance Painter.<br />
89
<strong>3D</strong>CREATIVE MAGAZINE | Presenting assets in Marmoset Viewer<br />
Importing the metallic map: Next up<br />
09 in the material is the Metallic map. I like<br />
to leave the diffuse (base color) until last as I don’t<br />
want it to distract from any of the other textures.<br />
Drag the metallic map into the Reflectivity slot<br />
and change the type from Specular to Metalness.<br />
This is setting up the material to use the PBR<br />
textures we exported from Substance Painter.<br />
Importing the roughness map:<br />
10 Drag the roughness map into the<br />
microsurface/gloss map slot. You may notice<br />
that it looks a little odd or dark and patchy. This<br />
is because Marmoset Toolbag 2and Substance<br />
Painter use these maps a little differently. To get<br />
to the same result, each engine has their own<br />
way of dealing with textures, so it’s something<br />
you have to get used to in the games industry.<br />
The simple fix for this is to invert the texture<br />
(Marmoset have kindly added an ‘Invert’ check<br />
box to do this). Another important step to make<br />
sure this material is working at its best is to<br />
change the Reflection type to GGX, as this gives<br />
much better results to the final image.<br />
Importing the diffuse texture: Now<br />
11 that the PBR side of the material is set<br />
up and working correctly, we can drag the diffuse<br />
(base_color) into the albedo map slot. Now we<br />
have our completed textured shield in Marmoset<br />
Toolbag 2 looking just like it did when we<br />
exported it from Substance Painter. Now we can<br />
edit the scene to get the best possible results for<br />
our presentation.<br />
Adding a sky light: It is important to<br />
12 select the right sky light background,<br />
not only for looks but because the asset’s lighting<br />
comes from these HDR backgrounds. We need to<br />
make sure we select a background that lights the<br />
shield correctly but also isn’t too distracting from<br />
our artwork. Marmoset Toolbag 2 comes with a<br />
free library of backgrounds to choose from, so go<br />
through them all and see what differences they<br />
make. For this image I choose ‘Castle Sunset’.<br />
Now that we have a backdrop selected, I click<br />
on the image where I would like the main light<br />
source to come from. I pick a central position<br />
which emits an orangey sunset light. I also turn<br />
the brightness down to 0.5 and increase the<br />
Child-Light Brightness to 5.0 so the orange light is<br />
more dominant.<br />
Placing point lights: Even though<br />
13 Marmoset Viewer allows the user to<br />
rotate the lighting, this isn’t always obvious, so to<br />
make sure that no area of the mesh is in darkness<br />
we will add some extra lighting. It won’t be too<br />
bright as that would look strange, but just enough<br />
to illuminate the detail. Click Scene > Add New<br />
Adding the metallic map to the material<br />
Adding the roughness map to the material<br />
Adding the diffuse (base color) to the material<br />
<strong>3D</strong>CREATIVEMAG.COM
<strong>3D</strong>CREATIVE MAGAZINE | ISSUE 124<br />
A suitable sky that shows off the asset in the right light<br />
Placing point lights to add fill and rim lighting to ensure there are no dark spots on the mesh<br />
Light and a point light will be placed in the center<br />
of the viewport. We can now move this light into<br />
position behind the shield and slightly to the side.<br />
I give it a dull reddish color to match the sunset<br />
light, with a low brightness of 12 (just enough to<br />
highlight the surface) but this also depends on<br />
how far away you place the light from the shield.<br />
I add a second point light, this time at the front<br />
of the shield, and with a blueish color to contrast<br />
the red.<br />
Curve editor: Only some of the effects<br />
14 can be seen in the Marmoset Viewer<br />
for performance reasons, but one of the effects<br />
that can be used is the Curve Editor to colorcorrect<br />
and balance the scene. To do this I first<br />
91
<strong>3D</strong>CREATIVE MAGAZINE | Presenting assets in Marmoset Viewer<br />
change the background to black so I don’t get<br />
affected by the background image. Select the<br />
Main Camera in the scene viewer, and under<br />
Post Effects/Color, select ‘Curves’. This opens<br />
the Curve Editor window, which works the same<br />
as Levels in Photoshop. I adjust the red, green<br />
and blue channels individually to get the desired<br />
effect: I add more red in the highlights and less<br />
in the shadows, and do the opposite in the blue<br />
channel, leaving the green roughly as default.<br />
This helps push the reds in the blood and paint<br />
and the blues in the metal and darker areas.<br />
Final scene: To finish off the scene,<br />
15 I switch the background image back<br />
on but give it a slight blur. I feel the black is<br />
too simple and I like the subtle colors coming<br />
through, which really help make it look more<br />
photorealistic. Blurring the background keeps the<br />
viewer’s eye on the asset and our artwork. In the<br />
Render tab I enable Ambient Occlusion and set<br />
it to maximum, and make sure Local Reflection,<br />
High-Res Shadow and Front Face Shadows are<br />
all enabled. These settings won’t make it through<br />
to Marmoset Viewer but will make our rendered<br />
images look higher quality. Before we export,<br />
position the camera the way you want the viewer<br />
to be first presented, with the shield as shown in<br />
the image.<br />
Exporting to Marmoset Viewer: Now<br />
16 the scene is complete, click File > Viewer<br />
Export and you are presented with the Marmoset<br />
Viewer export window. Fill in all the fields to make<br />
sure your artwork is presented professionally,<br />
then browse to the location you want the export<br />
to go to. I keep all settings as default but make<br />
sure Auto Play is enabled and click Export.<br />
Marmoset will now package up the scene and<br />
export two files ready to be uploaded to the<br />
internet. Here is the official link to guide you<br />
through presenting your viewer work on websites.<br />
Using the Curve Editor to color correct the scene<br />
Final view before exporting to Marmoset Viewer<br />
The share section is most helpful, showing<br />
you how to add it to portfolio galleries such as<br />
ArtStation. You can also get the embedded code<br />
to link to your uploads. You can view the finished<br />
asset in Marmoset Viewer here, or visit my<br />
profile to see the asset and more single images.<br />
This now concludes my tutorial on making<br />
a Viking shield and exporting it to the new<br />
Marmoset Viewer. I hope you have found it useful,<br />
exploring the new software now available to<br />
us artists. Substance Painter really does make<br />
texturing easy, and the Marmoset Viewer is a great<br />
way to quickly and professionally present your<br />
work in a real-time engine.<br />
Exporting the finished scene to the Marmoset Viewer<br />
<strong>3D</strong>CREATIVEMAG.COM
<strong>3D</strong>CREATIVE MAGAZINE | ISSUE 124<br />
YOU CAN VIEW THE<br />
FINISHED ASSET IN<br />
MARMOSET VIEWER<br />
BY CLICKING HERE<br />
93
<strong>3D</strong>CREATIVE MAGAZINE | Presenting assets in Marmoset Viewer<br />
The Artist<br />
Andrew Finch<br />
andrewfinch.carbonmade.com<br />
<strong>3D</strong>CREATIVEMAG.COM
<strong>3D</strong>CREATIVE MAGAZINE | ISSUE 124<br />
95
<strong>3D</strong>CREATIVE MAGAZINE | Designing a fantasy character<br />
The Artist<br />
Tanvir Islam<br />
incubatorfx.com<br />
facebook.com/tanvirmni<br />
Software Used:<br />
ZBrush, Mantra<br />
Tanvir Islam is a selftaught<br />
CG generalist from<br />
Dhaka, Bangladesh. He is<br />
the founder of Incubator<br />
Effects Studios, a group of<br />
CG generalists working on<br />
versatile projects.<br />
Designing<br />
a fantasy character<br />
Tanvir Islam shares the ZBrush modeling and Houdini rendering<br />
techniques behind his epic character design, Khlotharius<br />
<strong>3D</strong>CREATIVEMAG.COM
<strong>3D</strong>CREATIVE MAGAZINE | ISSUE 124<br />
Get an insight into Zeno<br />
Pelgrims’ workflow…<br />
Designing some early motifs<br />
The purpose of making Khlotharius involved<br />
a few things, including testing my character<br />
rigging pipeline and transferring the whole<br />
light and shade pipeline from Maya to<br />
Houdini’s Mantra renderer. In this tutorial I<br />
will try to explain how I started in ZBrush and<br />
ended up rendering in Mantra.<br />
Concept: Blizzard Entertainment’s<br />
01 characters have always inspired me,<br />
and I’m a big fan of all The Lord of the Rings films,<br />
so whenever I plan a character these kinds of<br />
detailed ideas pop out from the back of my head.<br />
Keeping that in mind, plus collecting some shape<br />
references and design motifs of ‘elements’ such<br />
as wind and fire, I created these motifs. They’ll<br />
be used to design the armor details later. For<br />
the character himself, I collected some anatomy<br />
references from the internet, using Google and<br />
Pinterest. I tend to use my memory for anatomy<br />
sculpting for a little stylization, but whenever I get<br />
confused I turn to references.<br />
Starting from a sphere: If it’s a<br />
02 personal project I always start from a<br />
DynaMesh sphere in ZBrush. Using the Standard,<br />
Move, Snake Hook, Inflate and Smooth brushes, I<br />
create the basic form of the figure, as pictured.<br />
Building a base mesh up from a sphere<br />
Further sculpting: In order to build up<br />
03 secondary forms, I love to use the Clay<br />
Buildup brush in combination with Alpha06. By<br />
using this technique, I create all the necessary<br />
secondary forms, like bony landmarks and<br />
muscle fibers.<br />
Adding more form with Clay Buildup<br />
97
<strong>3D</strong>CREATIVE MAGAZINE | Designing a fantasy character<br />
The sculpted mesh so far<br />
Retopology: Now it’s time to do the<br />
04 topology. For topology I primarily use<br />
ZBrush’s ZRemesher for the body, then take the<br />
mesh into Maya. But before exporting, under the<br />
‘Export’ section of the Tools menu, deselect ‘Grp’.<br />
Setting the scale in Maya: Now I’m<br />
05 importing into Maya, one of the most<br />
important steps to do is setting the scale of the<br />
mesh. If the figure is six feet tall, then we should<br />
scale it to that measurement. I usually set the<br />
unit of measurement to feet and scale the figure<br />
to match the height I’m looking for. If I don’t do<br />
this step now, I’ll have trouble getting perfect<br />
displacement effects, lighting and rigging later.<br />
Making polygroups: Now I bring the<br />
06 retopologized mesh back into ZBrush<br />
and assign some polygroups for later use of<br />
the hide/show function and UV mapping. Make<br />
sure you also store the Morph Target. The model<br />
is now ready for adding micro details like skin<br />
wrinkles and pores!<br />
Retopologizing the mesh with ZRemesher<br />
Making sure we set the correct scale in Maya<br />
<strong>3D</strong>CREATIVEMAG.COM
<strong>3D</strong>CREATIVE MAGAZINE | ISSUE 124<br />
The model split into polygroups<br />
Add surface noise to the skin before beginning to sculpt details<br />
Some of the brush settings used for sculpting details<br />
Adding surface noise: Before going<br />
07 into some of the finer details, I distort<br />
the model a little bit with some surface noise. I<br />
start with the higher noise scale and the lower<br />
strength. Each time that I apply the surface noise<br />
to the mesh, I lower the noise scale and increase<br />
the noise strength.<br />
It’s best to start with a lower subdivision and<br />
increase it each time you add more noise, but<br />
this might inflate the model. So, in some places, I<br />
make use of the Morph brush and masked areas.<br />
To break up the secondary forms more, I use the<br />
Inflate brush with Alpha63 and Depth Gravity<br />
Strength set to 60.<br />
99
<strong>3D</strong>CREATIVE MAGAZINE | Designing a fantasy character<br />
The custom brushes used for<br />
The finished skin details<br />
The model’s UVs in Maya<br />
Sculpting skin details: For skin pores,<br />
08 wrinkles and cross-hatching detail, I use<br />
the Dam Standard and Pen A brushes with ZSub<br />
on, and the Standard brush with Color Spray<br />
settings using various alphas. With the help of<br />
the brushes pictured, and some custom alphas, I<br />
create all the skin details.<br />
Exporting UVs into Maya: For the UVs,<br />
09 I have the help of ZBrush’s UV Master<br />
plug-in. Under the UV Master settings, I turn on<br />
the polygroups which I created before. This gives<br />
me a decent UV. I export the low resolution mesh<br />
into Maya, making sure to deselect ‘Grp’ under<br />
the Export menu, as I did previously in step 4. If<br />
you don’t do this, the model will be exported in<br />
chunks. In Maya, I arrange it into four UDIMs (UV<br />
tiles) with some UV changes.<br />
After this, I export the model back into ZBrush. As<br />
there are no changes made to the mesh, keeping<br />
the tool open in ZBrush at its lowest subdivision<br />
and simply importing the UV modified mesh into<br />
ZBrush will do just fine.<br />
Sculpting the armor: There are a few<br />
10 awesome techniques for creating hardsurface<br />
accessories, which wouldn’t be possible<br />
or efficient without ZBrush. I’ll try to explain a few<br />
of them. To start with, we need a base, which can<br />
be extracted from the body as follows.<br />
First we need to duplicate the SubTool and mask<br />
the area to extract the mesh from. Use Ctrl+W<br />
to assign a polygroup. Now we need to smooth<br />
the jagged line of the polygroup border. For<br />
this I use the Smooth Groups brush from the<br />
<strong>3D</strong>CREATIVEMAG.COM
<strong>3D</strong>CREATIVE MAGAZINE | ISSUE 124<br />
Modeling and detailing an armor piece<br />
Adding some motif details to the armor<br />
Smooth brush collection in the Lightbox. Draw<br />
around the jagged polygroup border and hide<br />
the other polygroups. Under Tools > Geometry<br />
> Modify Topology, press ‘Delete hidden’, but<br />
before applying this remove or freeze all the<br />
subdivision levels. Now use ZRemesher with its<br />
default setting. Next, choose the ‘Half’ preset<br />
under ZRemesher and press it several times to<br />
get the polycount you think is suitable. Adjust it<br />
according to your needs.<br />
From the Stroke menu, under Curve function,<br />
select ‘Border only’ and press Frame Mesh. This<br />
will give us a guide curve at the border. Select<br />
the Curve Tube brush, click on the existing guide<br />
curve and apply DynaMesh. Smooth the jagged<br />
polygroup border and apply DynaMesh as we did<br />
above. Unwrap using UV Master, and now we have<br />
a clean base to which we can add detail. I select a<br />
white color and fillObject.<br />
Detailing the armor: No we can<br />
11 Polypaint the mesh using the Surface<br />
Noise function, with custom image along with<br />
UV enabled. We are going to use Surface Noise<br />
just to extract color from a custom image. Set the<br />
Strength to 0, Mix Basic Noise to 0, Color Blend to<br />
1 and the color to black. Now apply the noise to<br />
the mesh.<br />
I apply a mask based on color intensity and<br />
hit Ctrl+W to make a polygroup. I duplicate the<br />
SubTool, hide the other polygroups, and then<br />
press delete hidden. I use ZRemesher with its<br />
default setting and extrude with ZModeler. Now<br />
I’ve got something with much better topology.<br />
I use Crease Polygroup, subdivide twice, then<br />
Uncrease All. Finally, I subdivide again to get a<br />
cleaner edge.<br />
101
<strong>3D</strong>CREATIVE MAGAZINE | Designing a fantasy character<br />
Creating a stitch using a torus<br />
Creating a cloth with stitch detailing<br />
With the help of this technique, I create all the<br />
armor pieces.<br />
Making a stitch: First we need to create<br />
12 a Curve Insert brush with stitch mesh.<br />
Start with a poly converted torus and shape it<br />
into the letter ‘C’. Align it in a way that looks like<br />
the letter ‘I’, or based on your needs. If it’s lying on<br />
a surface, then align it that way. From the Brush<br />
menu, select ‘Create InsertMesh’. From the Stroke<br />
menu, choose Curve Mode. Now we have a stitch<br />
that can be applied to the character’s clothes.<br />
Creating cloth: Now I’ll create some<br />
13 fabric. First I do the ‘Group by normals’ to<br />
separate the facing surface by polygroup. I divide<br />
it and hide the other groups, then shrink the<br />
visibility. I use the Curve function’s ‘Frame Mesh<br />
by Border’.<br />
This way I get the guide curve a little inside the<br />
surface, which is the perfect area to place the<br />
stitches. Later it will be used to create stitches<br />
with the Curve Insert brush. With the Insert brush,<br />
click on the guide curve. Under the Brush menu,<br />
use the ‘Imbed’ slider to set the height of the<br />
Insert Mesh placement. Use the ‘CurveStep’ slider<br />
to set the distance in between each stitch.<br />
Now with more work we can bring out a nice<br />
stitch detail. Under Curve Function, you can use<br />
Smooth to remove distortion on the guide curve.<br />
If any weird result appears after changing the<br />
CurveStep value, try pressing Smooth once and<br />
then click on the guide curve using the Insert<br />
brush. You have to be careful because it also<br />
changes the placement of the guide curve just a<br />
little bit.<br />
Final accessories: The belts are created<br />
14 using the CurveStrapSnap brush, and<br />
the chain accessories are created with the help of<br />
various Insert brushes. The hood and clothes are<br />
created using Maya’s nCloth, then brought back<br />
into ZBrush for detailing. I use the Surface Noise<br />
function with a custom alpha image. To UV map<br />
all the belts, strips, armors and cloth, I follow the<br />
same procedure I used for the body.<br />
<strong>3D</strong>CREATIVEMAG.COM
<strong>3D</strong>CREATIVE MAGAZINE | ISSUE 124<br />
The model with final details added<br />
103
<strong>3D</strong>CREATIVE MAGAZINE | Designing a fantasy character<br />
Exporting displacement maps<br />
Moving into Houdini<br />
<strong>3D</strong>CREATIVEMAG.COM
<strong>3D</strong>CREATIVE MAGAZINE | ISSUE 124<br />
Setting up shaders in Houdini<br />
Displacement output: This character<br />
15 has four UDIMs so we have to follow a<br />
special workflow to output any map from ZBrush.<br />
We have to create polygroups based on these<br />
UDIMs. From the Polygroups rollout, press ‘UV<br />
Groups’. Now every time we output any map, we<br />
have to show only one of these polygroups at a<br />
time. At this point I am more concerned about<br />
displacement. I output all the displacement maps<br />
using the settings shown.<br />
“I assign Houdini’s<br />
mantraSurface shader to<br />
the body and make a special<br />
network to use the four<br />
UDIMs’ displacement maps<br />
with the shader. For this we<br />
will have to double-click on<br />
the mantraSurface to get deep<br />
into the shader and find the<br />
displacement section”<br />
Exporting into Houdini: With the help<br />
16 of a special workflow for UDIM in ZBrush,<br />
I output all the maps. I want to check if all my<br />
displacement details have came along nicely in<br />
Houdini, so I export all the meshes into it. I create<br />
some basic lighting to check the displacement<br />
and also create a Mantra PBR.<br />
Houdini shaders: I assign Houdini’s<br />
17 mantraSurface shader to the body and<br />
make a special network to use the four UDIMs’<br />
displacement maps with the shader. For this we<br />
will have to double-click on the mantraSurface<br />
to get deep into the shader and find the<br />
displacement section.<br />
I create the five nodes shown in the image,<br />
and connect them accordingly. Under the<br />
default displacement section which comes with<br />
mantraSurface, you will find textureDisp already<br />
connected to luminanceDisp, RGBDispChannel<br />
and texture_value. Disconnect them from<br />
textureDisp and connect them with the ‘add’<br />
node which we created just now. I also change UV<br />
Transform’s ‘Translate x’ value based on the UDIM<br />
number. I use a value of 0 for the first, 1 for the<br />
second and so on.<br />
Testing the displacement: As the<br />
18 scale of the model is based on realworld<br />
scale, I’ll have less trouble getting the<br />
displacement and detail which I already achieved<br />
in ZBrush. Here you can see the settings for the<br />
displacement, and test renders of the model with<br />
and without displacement.<br />
Texture painting: I texture the body<br />
19 using a mix of image projection and<br />
105
<strong>3D</strong>CREATIVE MAGAZINE | Designing a fantasy character<br />
Setting up the displacement<br />
<strong>3D</strong>CREATIVEMAG.COM
<strong>3D</strong>CREATIVE MAGAZINE | ISSUE 124<br />
Starting to paint texture onto the model<br />
hand painting with the various masking features<br />
that ZBrush provides. While texturing I use<br />
ZBrush’s skinShade4 shader. For image projection<br />
I use ZBrush’s Spotlight function. First we have to<br />
import a texture from the Texture menu. Select<br />
the texture and press ‘Add to spotlight’. The<br />
Lightbox might pop out at this point, but turn it<br />
off. Now we’re in texture placement and editing<br />
mode, so place and edit the texture using the<br />
circular manipulator.<br />
Adding more realistic detail to the skin<br />
Now we need to use two important shortcuts:<br />
Z and Shift+Z. Shift+Z will enable and disable<br />
Spotlight mode. After turning Spotlight on, the<br />
‘Z’ key will switch between image-editing and<br />
painting mode. For the Standard brush, we must<br />
enable ‘RGB only’ to project color. If ZAdd/ZSub<br />
is enabled it will project detail as well. This way I<br />
project images to most of the areas of the body.<br />
Using the Standard brush with the Color Spray<br />
setting and Alpha58 (or a custom alpha), I use<br />
the ‘C’ key to color-pick from existing projected<br />
textures and fill the white gaps. This way I get a<br />
vibrant color effect from the brush, which is like a<br />
real skin texture.<br />
Texture detailing: Now with more of<br />
20 a careful painting approach, I will finish<br />
the texturing using various different alphas<br />
and colors. While painting these areas I will<br />
choose darker colors to paint the cavity areas,<br />
compared to the areas of relief. For this, I lower<br />
the subdivision level and apply the option ‘Mask<br />
by cavity’, then blur the mask once, then sharpen<br />
it again. Then I go to the highest subdivision and<br />
start painting.<br />
107
<strong>3D</strong>CREATIVE MAGAZINE | Designing a fantasy character<br />
Painting hard surfaces: For hardsurface<br />
texturing I use ‘Mask by cavity’<br />
21<br />
the same way, but in addition to that I use two<br />
extra brushes. I use the TrimDynamic brush with<br />
RGB turned on, which constrains the painting at<br />
the edges only. With this we can get a torn edge<br />
effect. I also use the Pen A brush, which helps to<br />
create lines from thin to thick, and is good for<br />
scratch effects.<br />
Color maps: Later on I’ll use these maps<br />
22 as masks for creating layered shaders.<br />
Pictured, you can see the color maps for the body.<br />
For the specular map, I combine the desaturated<br />
color map with the displacement map, then paint<br />
and adjust a few areas in Photoshop.<br />
Area lights: For the lighting setup, I<br />
23 use four area lights. All the area lights’<br />
attenuation is on, and the sampling quality is<br />
increased for a quality render. One environment<br />
light uses an HDR image (the yellow box).<br />
Further shader setup: I double-click<br />
24 the mantraSurface shader that I created<br />
for displacement and open up the inside network<br />
section. I follow the same workflow here for the<br />
UDIM that I followed for displacement, but this<br />
time I connect the ‘add’ node to the surface<br />
model’s ‘sss_clr’.<br />
Further test renders: These are a few<br />
25 settings I use for the mantraSurface<br />
shader to create skin for the body. Pictured are<br />
a skin shader test rendered with the color and<br />
Texture painting for hard-surface accessories<br />
The model’s map so far<br />
A simple area light setup for the model<br />
More mantraSurface shader setup<br />
<strong>3D</strong>CREATIVEMAG.COM
<strong>3D</strong>CREATIVE MAGAZINE | ISSUE 124<br />
Testing the skin shaders with a new render<br />
Rendering settings and results<br />
displacement maps only, and finally a skin shader<br />
rendered with the color, displacement, specular<br />
and attenuation color maps.<br />
Rendering cloth and accessories:<br />
26 See pictured here the render settings for<br />
the metal and leather surfaces, and also some<br />
close-ups of the rendered surfaces, including the<br />
stitched border detailing and elemental motifs<br />
designed at the beginning.<br />
109
<strong>3D</strong>CREATIVE MAGAZINE | Designing a fantasy character<br />
Adding facial hair: For the beard I<br />
27 separately output the face as a null to<br />
use it as reference to the fur node. Now I create<br />
a geometry node, and under it, I reference the<br />
‘OUT_beard’ using the Object Merge node. In<br />
this part I minimize the area more, just to keep it<br />
where the beard should be. I paint unnecessary<br />
areas and delete based on color.<br />
Creating the beard<br />
I create a point node to add the normals so that<br />
the curves align with the surface’s normal. I create<br />
a scatter node to scatter points on the surface.<br />
Then I duplicate the lines using ‘Copy SOP’ on this<br />
surface. At the end, I add a Curve Groom node,<br />
which will later be used as a guide curve. After<br />
adding Curve Groom and grooming the curve, the<br />
beard looks more flowing and natural.<br />
“With the combination of<br />
fur and cloth displacement,<br />
a nice soft cloth effect<br />
is achieved”<br />
Using fur nodes: Let’s create a fur node.<br />
28 Under the skin tab I choose the ‘OUT_<br />
beard’ as skin mesh and Curve Groom as a guide.<br />
I hide the guides I created before and set the fur<br />
parameters as shown in the image. I use the color<br />
map for the tip and root color of the fur material,<br />
then set the reflection settings as pictured. The<br />
results are shown in the test render.<br />
For the eyebrows and eyelashes, the same<br />
technique is used, but for the cloth and<br />
armor padding, no guide is needed – just fur<br />
with a different appearance setting. With the<br />
combination of fur and cloth displacement , a<br />
nice soft cloth effect is achieved.<br />
The final render: For the final image, I<br />
29 don’t do any pass rendering, just some<br />
simple color corrections and some iris blur for<br />
close-ups in post. These renders are straight out<br />
of Houdini Mantra.<br />
The Artist<br />
Tanvir Islam<br />
incubatorfx.com<br />
facebook.com/tanvirmni<br />
<strong>3D</strong>CREATIVEMAG.COM
<strong>3D</strong>CREATIVE MAGAZINE | ISSUE 124<br />
Using fur nodes<br />
to add softer hair<br />
and fabric<br />
111
<strong>3D</strong>CREATIVE MAGAZINE | Designing a fantasy character<br />
<strong>3D</strong>CREATIVEMAG.COM
<strong>3D</strong>CREATIVE MAGAZINE | ISSUE 124<br />
113
NEXT MONTH<br />
Rendering a spacecraft scene<br />
Creating smoke with FumeFX<br />
Informative new interviews<br />
Inspiring ZBrush sketches<br />
10 of the best <strong>3D</strong> images from<br />
around the world<br />
Plus much more!
Stay updated!<br />
For your daily fix of news, animations, trailers and much more from the<br />
<strong>3D</strong> industry, make sure you head to 3dtotal.com...<br />
CLICK<br />
HERE<br />
Freelance <strong>3D</strong> artist Brice Laville Saint Martin discusses his workflow and influences for his recent gallery entry, ‘Teapot Tank’...<br />
Join the <strong>3D</strong> community! Over 27,000 people head to 3dtotal every day. Discover why at:<br />
3dtotal.com<br />
Francisco Garcia-Obledo Ordoñez<br />
‘Forza 6’ and a52: recreating the past<br />
Interview: Marcos Tonda<br />
Review: KeyShot 6<br />
Cinesite & Spectre<br />
Interview: Christian Peck<br />
For more top stories, news and industry updates, head to 3dtotal.com