The Logix 3000MD Series Digital Positioner - Flowserve Corporation
The Logix 3000MD Series Digital Positioner - Flowserve Corporation
The Logix 3000MD Series Digital Positioner - Flowserve Corporation

Create successful ePaper yourself
Turn your PDF publications into a flip-book with our unique Google optimized e-Paper software.
6<br />
With the <strong>Logix</strong> 3400MD, function blocks are no longer<br />
required to set up, configure and perform a simple stroke<br />
calibration. <strong>The</strong> 3400MD can be set up with 9-32 VDC supply<br />
and 45 psi (min.) air supply on any valve/actuator platform.<br />
Calibration, configuration and tuning parameters from<br />
the local interface will be automatically updated in the<br />
Transducer Block on the <strong>Logix</strong> 3400MD. Local setup and<br />
calibration that does not require a link to a host controller,<br />
PC or hand-held device, as well as local validation that setup<br />
is correct, make any Foundation Fieldbus installation easy<br />
and straightforward.<br />
<strong>Logix</strong> <strong>3000MD</strong> <strong>Series</strong> <strong>Digital</strong> <strong>Positioner</strong> FCD LGENTB0059-03 – 01/11<br />
<strong>The</strong> <strong>Logix</strong> <strong>3000MD</strong> <strong>Series</strong> <strong>Positioner</strong>s – no software or handheld<br />
device required... easy as 1, 2, 3<br />
<strong>The</strong> <strong>Logix</strong> 3200MD can be set up with 10 VDC milliamp<br />
current supply current and 45 psi (min.) air supply on any<br />
valve/actuator platform.<br />
Calibration, configuration and tuning parameters from the<br />
local interface will be automatically updated in the HART<br />
registers on the <strong>Logix</strong> 3200MD. Local setup and calibration<br />
that does not require a link to a host controller, PC or handheld<br />
device, and local validation that setup is correct make<br />
any HART installation easy and straightforward.<br />
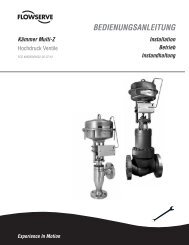
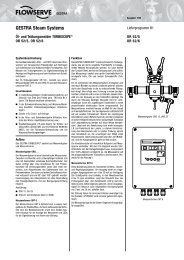
With the <strong>Logix</strong> 3200MD, the local interface shown to the<br />
right can be used to set up the unit in seconds through the<br />
When the 3400MD is in OOS (Out Of Service mode), the local following steps:<br />
GAIN<br />
interface shown to the right is accessible and setup can be<br />
H A B<br />
carried out through the following steps:<br />
G C<br />
Common Configuration Steps<br />
F D<br />
E<br />
1. Make sure the mechanical linkage, air tubing and actuator mounting are correct.<br />
2. Set the configuration switches to the desired operation of the valve/actuator.<br />
3. Set the quick calibration switch to Jog or Auto. In Jog, the 100% position can be manually adjusted using the yellow up<br />
and down buttons after Re-Cal is pressed. In Auto, the positioner finds the 100% position and calibration is complete. LED<br />
blink codes will guide the user through the process. Four green blinks (GGGG) or (GGGY) at the end of the sequence confirm<br />
that the calibration was successful.<br />
4. If needed, the GAIN switch located to the right of the jog buttons will speed up or slow down the positioner’s response to<br />
command changes. With the Auto Tune configuration switch set to “On”, the positioner’s algorithm will select a gain with no<br />
over-shoot. <strong>The</strong> ‘E” position of the rotary GAIN dial indicates “neutral” with respect to gain adjustment. Turning clockwise<br />
from E to H and will speed up the response. Tuning counter-clockwise from E will slow it down, with A being the slowest<br />
response.