


You also want an ePaper? Increase the reach of your titles
YUMPU automatically turns print PDFs into web optimized ePapers that Google loves.
Customer : ENV<br />
Type : A<strong>320</strong><br />
Rev. Date : Nov 01, 2016<br />
<strong>51</strong>-<strong>21</strong>-<strong>11</strong> Application of Protective Treatment to Metal Parts<br />
Manual : <strong>SRM</strong><br />
Selected effectivity :<br />
<strong>51</strong>-<strong>21</strong>-<strong>11</strong> Application of Protective Treatment to Metal Parts<br />
1. General<br />
A. The following sections detail the necessary treatments for metal repair parts. The required paint coatings<br />
are given in Chapter <strong>51</strong>-23-<strong>11</strong> .<br />
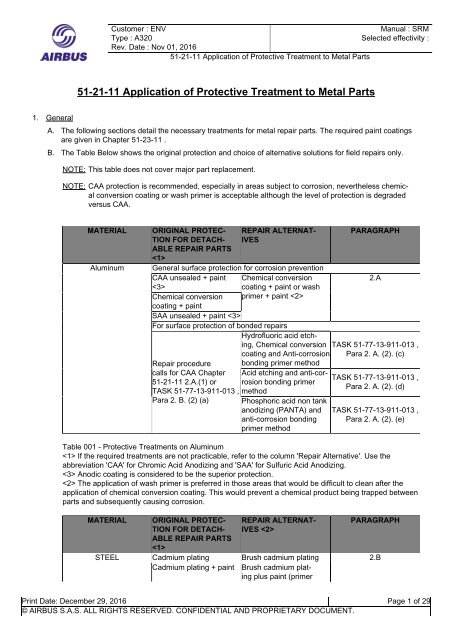
B. The Table Below shows the original protection and choice of alternative solutions for field repairs only.<br />
NOTE: This table does not cover major part replacement.<br />
NOTE: CAA protection is recommended, especially in areas subject to corrosion, nevertheless chemical<br />
conversion coating or wash primer is acceptable although the level of protection is degraded<br />
versus CAA.<br />
MATERIAL<br />
Aluminum<br />
ORIGINAL PROTEC-<br />
TION FOR DETACH-<br />
ABLE REPAIR <strong>PARTS</strong><br />
<br />
REPAIR ALTERNAT-<br />
IVES<br />
General surface protection for corrosion prevention<br />
CAA unsealed + paint Chemical conversion<br />
<br />
coating + paint or wash<br />
Chemical conversion primer + paint <br />
coating + paint<br />
SAA unsealed + paint <br />
For surface protection of bonded repairs<br />
Hydrofluoric acid etching,<br />
Chemical conversion<br />
coating and Anti-corrosion<br />
Repair procedure<br />
calls for CAA Chapter<br />
<strong>51</strong>-<strong>21</strong>-<strong>11</strong> 2.A.(1) or<br />
TASK <strong>51</strong>-77-13-9<strong>11</strong>-013 ,<br />
Para 2. B. (2) (a)<br />
bonding primer method<br />
Acid etching and anti-corrosion<br />
bonding primer<br />
method<br />
Phosphoric acid non tank<br />
anodizing (PANTA) and<br />
anti-corrosion bonding<br />
primer method<br />
PARAGRAPH<br />
2.A<br />
TASK <strong>51</strong>-77-13-9<strong>11</strong>-013 ,<br />
Para 2. A. (2). (c)<br />
TASK <strong>51</strong>-77-13-9<strong>11</strong>-013 ,<br />
Para 2. A. (2). (d)<br />
TASK <strong>51</strong>-77-13-9<strong>11</strong>-013 ,<br />
Para 2. A. (2). (e)<br />
Table 001 - Protective Treatments on Aluminum<br />
If the required treatments are not practicable, refer to the column 'Repair Alternative'. Use the<br />
abbreviation 'CAA' for Chromic Acid Anodizing and 'SAA' for Sulfuric Acid Anodizing.<br />
Anodic coating is considered to be the superior protection.<br />
The application of wash primer is preferred in those areas that would be difficult to clean after the<br />
application of chemical conversion coating. This would prevent a chemical product being trapped between<br />
parts and subsequently causing corrosion.<br />
MATERIAL<br />
STEEL<br />
ORIGINAL PROTEC-<br />
TION FOR DETACH-<br />
ABLE REPAIR <strong>PARTS</strong><br />
<br />
Cadmium plating<br />
Cadmium plating + paint<br />
REPAIR ALTERNAT-<br />
IVES <br />
Brush cadmium plating<br />
Brush cadmium plating<br />
plus paint (primer<br />
PARAGRAPH<br />
2.B<br />
Print Date: December 29, 2016 Page 1 of 29<br />
© AIRBUS S.A.S. ALL RIGHTS RESERVED. CONFIDENTIAL AND PROPRIETARY DOCUMENT.
Customer : ENV<br />
Type : A<strong>320</strong><br />
Rev. Date : Nov 01, 2016<br />
<strong>51</strong>-<strong>21</strong>-<strong>11</strong> Application of Protective Treatment to Metal Parts<br />
Manual : <strong>SRM</strong><br />
Selected effectivity :<br />
MATERIAL<br />
ORIGINAL PROTEC-<br />
TION FOR DETACH-<br />
ABLE REPAIR <strong>PARTS</strong><br />
<br />
Phosphating + paint<br />
Zinc spraying<br />
Silver plating<br />
Chrome plating<br />
REPAIR ALTERNAT-<br />
IVES <br />
or primer + top coat), or<br />
wash primer + primer +<br />
top coat if required.<br />
Phosphating or wash<br />
primer + paint<br />
Wash primer + paint<br />
None<br />
None<br />
PARAGRAPH<br />
Table 002 - Protective Treatments on Steel<br />
If the required treatments are not practicable, refer to the column 'Repair Alternative'. Use the<br />
abbreviation 'CAA' for Chromic Acid Anodizing and 'SAA' for Sulfuric Acid Anodizing.<br />
The repair alternatives in Table 002 are not allowed for bonded structure.<br />
MATERIAL<br />
Titanium<br />
ORIGINAL PROTEC-<br />
TION FOR DETACH-<br />
ABLE REPAIR <strong>PARTS</strong><br />
Anodizing<br />
Cadmium plating<br />
Nickel plating<br />
APPLICATION IN SITU<br />
PARAGRAPH<br />
not applicable 2.C<br />
2. Procedure<br />
Table 003 - Protective Treatments on Titanium<br />
A. Aluminum<br />
WARNING: BE CAREFUL WHEN YOU USE CHEMICAL MATERIALS. OBEY THE MATERIAL MAN-<br />
UFACTURER INSTRUCTIONS AND THE LOCAL REGULATIONS. MAKE SURE THAT<br />
THERE IS A GOOD FLOW <strong>OF</strong> AIR THROUGH THE WORK AREA. DO NOT BREATHE<br />
THE FUMES. DO NOT SMOKE. DO NOT USE THESE MATERIALS NEAR A FLAME,<br />
SPARKS OR SOURCES <strong>OF</strong> HEAT. USE <strong>PROTECTIVE</strong> CLOTHING, GOGGLES AND<br />
GLOVES. IF YOU GET ONE <strong>OF</strong> THESE MATERIALS ON YOUR SKIN OR IN YOUR<br />
EYES, FLUSH IT AWAY WITH A FLOW <strong>OF</strong> CLEAN WATER. IF YOU GET ONE <strong>OF</strong><br />
THESE MATERIALS IN YOUR MOUTH, GET IMMEDIATE MEDICAL AID. IN GENERAL,<br />
THESE MATERIALS ARE FLAMMABLE, POISONOUS AND SKIN IRRITATING.<br />
WARNING: PUT ON <strong>PROTECTIVE</strong> CLOTHING. ALL CHEMICAL COMPONENTS CAN CAUSE SKIN,<br />
EYE AND LUNG DAMAGE.<br />
(1). Chromic Acid Anodizing and Sulfuric Acid Anodizing (CAA, SAA, unsealed)<br />
(a) General<br />
1 CAA and SAA are galvanic procedures in which the surface of metal is given an oxide<br />
coating. The treatment increases the corrosion resistance of the material and gives a good<br />
surface for the adhesion of subsequent paint coatings.<br />
2 Make sure that subsequent paint coatings, if required, are applied within 16 hours after this<br />
treatment.<br />
(b) Safety Precautions<br />
Print Date: December 29, 2016 Page 2 of 29<br />
© AIRBUS S.A.S. ALL RIGHTS RESERVED. CONFIDENTIAL AND PROPRIETARY DOCUMENT.
Customer : ENV<br />
Type : A<strong>320</strong><br />
Rev. Date : Nov 01, 2016<br />
<strong>51</strong>-<strong>21</strong>-<strong>11</strong> Application of Protective Treatment to Metal Parts<br />
Manual : <strong>SRM</strong><br />
Selected effectivity :<br />
WARNING: BE CAREFUL WHEN YOU USE CONSUMABLE MATERIALS. OBEY THE MATERI-<br />
AL MANUFACTURER'S INSTRUCTIONS AND YOUR LOCAL REGULATIONS.<br />
WARNING: OBEY THE MANUFACTURER’S INSTRUCTIONS FOR THE MATERIALS WHICH<br />
YOU USE FOR THE CLEANING PROCEDURES BEFORE YOU START WITH THE<br />
CAA PROCESS. THESE CLEANING AGENTS ARE DANGEROUS.<br />
WARNING: OBEY THE MANUFACTURER INSTRUCTIONS FOR EACH CHEMICAL WHICH YOU<br />
USE IN THIS PROCEDURE. THESE CHEMICALS ARE POISONOUS AND DANGER-<br />
OUS.<br />
(c) Procedure<br />
1 For details of the CAA process and the necessary equipment refer to the PMS Chapter<br />
01-02-08 .<br />
2 For details of the SAA process and the necessary equipment refer to the PMS Chapter<br />
01-02-09 .<br />
(2). Application of Chemical Conversion Coating<br />
CAUTION:<br />
MAKE SURE THAT YOU REMOVE ALL MASKING MATERIAL FROM THE REPAIR<br />
AREA WHEN THE WORK IS COMPLETED. IT IS VERY IMPORTANT <strong>TO</strong> MAKE<br />
SURE THAT THERE IS NO MASKING MATERIAL ON THE PI<strong>TO</strong>T HEADS AND<br />
STATIC PORTS.<br />
(a) General<br />
1 The application of the product (Material No. 13-002 ), described in Paragraph 2.A.(2).(d) , is<br />
a non electrolytic process. It produces a protective coating and gives a good surface for the<br />
adhesion of the subsequent paint coatings. The product can be applied by brush, swab and<br />
immersion procedure. Brush application is suitable to field repairs.<br />
The use of ALODINE PEN <strong>11</strong>32 (Material No. 13-005 ) is a non electrolytic process driedin-place<br />
coating. It can be used as an alternative to pretreatment for painting (Material No.<br />
13-002 ) for small touch up repairs not exceeding 20000 mm² (31 in²), refer to Paragraph<br />
2.A.(2).(e) .<br />
2 Before you start with this procedure, make sure that the surface shows bright metal.<br />
(b) Safety Precautions<br />
WARNING: BE CAREFUL WHEN YOU USE CONSUMABLE MATERIALS. OBEY THE MATERI-<br />
AL MANUFACTURER'S INSTRUCTIONS AND YOUR LOCAL REGULATIONS.<br />
WARNING: OBEY THE MANUFACTURER’S INSTRUCTIONS WHEN YOU USE THE CLEANING<br />
AGENTS (MATERIAL NO. <strong>11</strong>-003 AND <strong>11</strong>-026). THESE CLEANING AGENTS ARE<br />
DANGEROUS.<br />
WARNING: OBEY THE MANUFACTURER INSTRUCTIONS WHEN YOU USE CHEMICAL CON-<br />
VERSION COATING (MATERIAL NO. 13-002). THIS PRODUCT IS POISONOUS.<br />
CAUTION:<br />
ENSURE THAT ALL MASKING MATERIALS ARE REMOVED FROM THE REPAIR<br />
AREA ON COMPLETION <strong>OF</strong> WORK, PAY SPECIAL ATTENTION <strong>TO</strong> PI<strong>TO</strong>T HEADS<br />
AND STATIC PORTS.<br />
(c) Materials<br />
Print Date: December 29, 2016 Page 3 of 29<br />
© AIRBUS S.A.S. ALL RIGHTS RESERVED. CONFIDENTIAL AND PROPRIETARY DOCUMENT.
Customer : ENV<br />
Type : A<strong>320</strong><br />
Rev. Date : Nov 01, 2016<br />
<strong>51</strong>-<strong>21</strong>-<strong>11</strong> Application of Protective Treatment to Metal Parts<br />
Manual : <strong>SRM</strong><br />
Selected effectivity :<br />
ITEM NOMENCLATURE QTY MATERIAL/REMARKS<br />
- Cleaning agent - Material No. <strong>11</strong>-003 or <strong>11</strong>-026 (Refer to<br />
CML)<br />
2 ALODINE 1200 or ALOCROME - Material No. 13-002 (Refer to CML)<br />
1200<br />
3 Concentrated nitric acid -<br />
4 Containers - Stainless steel or acid-resistant material<br />
5 Masking tape -<br />
6 Cotton cloth -<br />
7 Soft-bristle brushes - Fiber-bristled or nylon<br />
8 Hot-air dryer -<br />
9 SCOTCH-BRITE pads -<br />
- ALODINE 1000 or 1500 - Material No. 13-003 (Refer to CML)<br />
- ALODINE PEN <strong>11</strong>32 - Material No. 13-005 (Refer to CML)<br />
- SCOTCH-BRITE pads Type A fine - Local purchase<br />
(d) Application of Chemical Conversion Coating by Brushing<br />
1 Preparation of Brush Solution<br />
NOTE: Use either Material No. 13-002 (CCC yellow) or 13-003 (CCC colorless) in accordance<br />
with the areas to be repaired.<br />
Use pretreatment for painting (Material No. 13-003 ) on:<br />
- unpainted parts<br />
- non-painted area around static ports<br />
- parts where electrical bonding is required<br />
- when required in specific repair procedure<br />
a<br />
Mix the powder (Material No. 13-002 or 13-003 )) with deionized water in a plastic or<br />
stainless steel container at room temperature.<br />
NOTE: Use the applicable proportions as follows:<br />
Material No. 13-002 (ALODINE 1200 or ALOCROME 1200) The proportion to<br />
mix is 22 to 30 g in 1 liter of demineralized water. Contact time is 3 to 5 minutes.<br />
Material No. 13-003 (ALODINE 1000 or 15000) The proportion to mix is:<br />
For ALODINE 1500 10 to <strong>11</strong> g in 1 liter of demineralized water. Contact time is 1<br />
to 3 minutes.<br />
For ALODINE 1000 3 to 3.8 g in 1 liter of demineralized water. Contact time is 2<br />
to 5 minutes.<br />
NOTE: Refer to Chapter 01-01-18 for the definition of demineralized water.<br />
b<br />
Allow the solution to stand for a minimum of 1 hour before use.<br />
NOTE: You can disregard small amounts of insoluble material which may appear.<br />
2 Preparation Prior to Application<br />
a<br />
Mask all surfaces so that no solution can pass into adjacent splices, seams or voids.<br />
NOTE: Surfaces which are painted, anodized or have been previously treated with the<br />
product (Material No. 13-002 or 13-003 ) need not to be masked.<br />
b<br />
Abrade the surface to be treated with SCOTCH-BRITE pads.<br />
Print Date: December 29, 2016 Page 4 of 29<br />
© AIRBUS S.A.S. ALL RIGHTS RESERVED. CONFIDENTIAL AND PROPRIETARY DOCUMENT.
Customer : ENV<br />
Type : A<strong>320</strong><br />
Rev. Date : Nov 01, 2016<br />
<strong>51</strong>-<strong>21</strong>-<strong>11</strong> Application of Protective Treatment to Metal Parts<br />
Manual : <strong>SRM</strong><br />
Selected effectivity :<br />
c Clean the area with a clean cotton cloth soaked in cleaning agent (Material No. <strong>11</strong>-003<br />
or <strong>11</strong>-026 ).<br />
3 Application<br />
WARNING: MATERIALS SOAKED IN CHEMICAL CONVERSION SOLUTION (MATERI-<br />
AL NO. 13-002) CONSTITUTE A FIRE HAZARD.<br />
a<br />
Apply the solution onto the surface of the metal with a brush or lint-free cloth or by<br />
immersion procedure. Keep the surface moist by successive applications until a golden<br />
yellow film is obtained for Material No. 13-002 or an iridescent film is obtained for<br />
Material No. 13-003 . Darker powdery deposits will result in poor paint adhesion.<br />
CAUTION:<br />
CAUTION:<br />
DO NOT ALLOW THE APPLIED FILM <strong>TO</strong> BECOME DRY BEFORE IT IS<br />
RINSED WITH WATER.<br />
WHEN YOU RINSE AND DRY THE S<strong>OF</strong>T NEW COATING, EXERCISE CARE<br />
NOT <strong>TO</strong> DAMAGE THE FILM.<br />
b<br />
c<br />
d<br />
CAUTION:<br />
Rinse the area thoroughly with demineralized running clean water (minimum 2 minutes).<br />
Dry off the area with hot (maximum 60° C (140° F)), oil free low-pressure air.<br />
Apply the required paint coatings as soon as possible but within 16 hours (Refer to<br />
Chapter <strong>51</strong>-23-<strong>11</strong> ).<br />
WEAR <strong>PROTECTIVE</strong> EQUIPMENT AND OBEY MANUFACTURER’S INSTRUCTIONS.<br />
(e) Application of Chemical Conversion by Pen<br />
NOTE: The use of ALODINE PEN <strong>11</strong>32 (Material No. 13-005 ) is a non-electrolytic process driedin-place<br />
coating. It can be used as an alternative to pretreatment for painting (Material<br />
No. 13-002 ) for small touch-up repairs not exceeding 20000 mm² (31 in²).<br />
1 Preparation prior to application<br />
a<br />
b<br />
Mask all the surfaces so that no solution can pass into adjacent splices, seams or voids.<br />
NOTE: Anodized areas or areas already treated with ALODINE PEN <strong>11</strong>32 (Material No.<br />
13-005 ) need not to be masked.<br />
Abrade the surface to be treated with SCOTCH-BRITE pads.<br />
c Clean the area with a clean cotton cloth soaked in cleaning agent (Material No. <strong>11</strong>-003<br />
or <strong>11</strong>-026 ).<br />
d<br />
2 Application<br />
a<br />
b<br />
Dry the surface.<br />
Activation of the pen<br />
Remove the cap, hold the pen with the felt tip downwards. Press the tip of the pen<br />
against a cotton cloth. This will open the valve, allowing ALODINE <strong>11</strong>32 to reach the<br />
application tip. A new unit should charge in 30 to 45 seconds. When the ALODINE wets<br />
the tip and the cotton cloth, release pressure. Unit is ready to use. The tip shall be not<br />
excessively wet prior to its use.<br />
Apply ALODINE <strong>11</strong>32 to the part with firm, smooth, even and continues strokes. Overlap<br />
each stroke by 50% to ensure full coverage.<br />
Print Date: December 29, 2016 Page 5 of 29<br />
© AIRBUS S.A.S. ALL RIGHTS RESERVED. CONFIDENTIAL AND PROPRIETARY DOCUMENT.
Customer : ENV<br />
Type : A<strong>320</strong><br />
Rev. Date : Nov 01, 2016<br />
<strong>51</strong>-<strong>21</strong>-<strong>11</strong> Application of Protective Treatment to Metal Parts<br />
Manual : <strong>SRM</strong><br />
Selected effectivity :<br />
NOTE: Do not allow the solution to puddle. If it is the case, it will burn the surface and<br />
adhesion loss can occur.<br />
Do not use too much solution. Just wet the surface and the solution should not<br />
run, if the surface is held vertical.<br />
It is recommended that the application start and stop just outside the bare aluminum<br />
area.<br />
Do not rinse. Do not wipe.<br />
No solution breaks must be observed, repeat Paragraph 2.A.(2).(e).1 if solution<br />
breaks.<br />
c<br />
d<br />
Let it dry for 5 minutes and apply a second coat in 90° direction as described in<br />
Paragraph 2.A.(2).(e).2.b .<br />
Let it dry for 1 hour at ambient temperature.<br />
NOTE: Light brown color is acceptable. Color shades, lines or overlap marks are acceptable.<br />
e<br />
Apply the required primer within 4 hours maximum.<br />
NOTE: Replace the cap after use. To recharge the pen, repeat the activation process.<br />
Store the pens head up to avoid leaks.<br />
(3). Application of Wash Primer (Material No. 16-020 )<br />
(a) General<br />
1 The application of wash primer (Material No. 16-020 ) is a chemical pretreatment to increase<br />
the corrosion resistant properties of the metal and to give a good surface for the adhesion of<br />
further paint coatings.<br />
2 Wash primer (Material No. 16-020 ) is composed of a polyvinylbutyral basis and a hardener.<br />
The product must usually be thinned by a thinner to the appropriate viscosity for spray or<br />
brush application.<br />
(b) Safety Precautions<br />
WARNING: BE CAREFUL WHEN YOU USE CONSUMABLE MATERIALS. OBEY THE MATERI-<br />
AL MANUFACTURER'S INSTRUCTIONS AND YOUR LOCAL REGULATIONS.<br />
WARNING: OBEY THE MANUFACTURER’S INSTRUCTIONS WHEN YOU USE THE CLEANING<br />
AGENTS (MATERIAL NO. <strong>11</strong>-003 AND <strong>11</strong>-026). THESE CLEANING AGENTS ARE<br />
DANGEROUS.<br />
WARNING: OBEY THE MANUFACTURER INSTRUCTIONS WHEN YOU PREPARE AND APPLY<br />
WASH PRIMER (MATERIAL NO. 16-020). DO NOT LET ANY MATERIAL COME IN<br />
CONTACT WITH THE SKIN, EYES OR MOUTH. DO NOT INHALE VAPORS. WORK<br />
IN WELL VENTILATED AREA.<br />
CAUTION:<br />
ENSURE THAT ALL MASKING MATERIALS ARE REMOVED FROM THE REPAIR<br />
AREA ON COMPLETION <strong>OF</strong> WORK, PAY SPECIAL ATTENTION <strong>TO</strong> PI<strong>TO</strong>T HEADS<br />
AND STATIC PORTS.<br />
(c) Materials<br />
Print Date: December 29, 2016 Page 6 of 29<br />
© AIRBUS S.A.S. ALL RIGHTS RESERVED. CONFIDENTIAL AND PROPRIETARY DOCUMENT.
Customer : ENV<br />
Type : A<strong>320</strong><br />
Rev. Date : Nov 01, 2016<br />
<strong>51</strong>-<strong>21</strong>-<strong>11</strong> Application of Protective Treatment to Metal Parts<br />
Manual : <strong>SRM</strong><br />
Selected effectivity :<br />
ITEM NOMENCLATURE QTY MATERIAL/REMARKS<br />
1 Cleaning agent - Material No. <strong>11</strong>-003 or <strong>11</strong>-026 (Refer to<br />
CML)<br />
2 Wash primer - Material No. 16-020 (Refer to CML)<br />
3 Application tool - According to manufacturer's instructions<br />
4 Masking tape and paper -<br />
5 Cotton cloth -<br />
B. Steel Alloys<br />
(d) Procedure<br />
1 Mask off the area, which is not to be treated, with masking tape and paper.<br />
2 Clean the area with a cotton cloth, soaked in cleaning agent (Material No. <strong>11</strong>-003 or<br />
<strong>11</strong>-026 ).<br />
NOTE: Make sure that the area shows a bright metal surface.<br />
3 Mix the wash primer solution according to the material manufacturer's instructions.<br />
4 Apply wash primer (Material No. 16-020 ) according to the material manufacturer's<br />
instructions.<br />
(1). Cadmium Plating<br />
(a) General<br />
NOTE: After application subsequent paint coatings must be applied within a period of<br />
16 hours. For the determination of the required paint coatings refer to Chapter<br />
<strong>51</strong>-23-<strong>11</strong> .<br />
1 Cadmium plating is a procedure in which the surface of the material is given a layer of<br />
cadmium. If corrosion occurs it will remove the thin layer first. This is referred to as sacrificial<br />
corrosion.<br />
2 There are two different procedures used to put the cadmium onto the surface of the material.<br />
The first method describes a cadmium plating procedure, in which the metal parts are put<br />
into several immersion baths. The second method describes the 'DALIC' Process, which is<br />
suitable for field repairs.<br />
3 Before you start the cadmium plating procedure, make sure that the parts are clean, show a<br />
bright metal surface and are free from corrosion (Refer to Chapter <strong>51</strong>-74-00 ).<br />
4 It is recommended that cadmium plating is carried out by trained and approved personnel.<br />
(b) Safety Precautions<br />
WARNING: BE CAREFUL WHEN YOU USE CONSUMABLE MATERIALS. OBEY THE MATERI-<br />
AL MANUFACTURER'S INSTRUCTIONS AND YOUR LOCAL REGULATIONS.<br />
WARNING: OBEY THE MANUFACTURER INSTRUCTIONS FOR EACH MATERIAL WHICH YOU<br />
USE FOR CLEANING PROCEDURES BEFORE YOU START THE CADMIUM PLAT-<br />
ING. THESE CLEANING AGENTS ARE HARMFUL.<br />
WARNING: OBEY THE MANUFACTURER INSTRUCTIONS FOR EACH CHEMICAL WHICH YOU<br />
USE IN THIS PROCEDURE. THESE CHEMICALS ARE POISONOUS AND HARM-<br />
FUL.<br />
Print Date: December 29, 2016 Page 7 of 29<br />
© AIRBUS S.A.S. ALL RIGHTS RESERVED. CONFIDENTIAL AND PROPRIETARY DOCUMENT.
Customer : ENV<br />
Type : A<strong>320</strong><br />
Rev. Date : Nov 01, 2016<br />
<strong>51</strong>-<strong>21</strong>-<strong>11</strong> Application of Protective Treatment to Metal Parts<br />
Manual : <strong>SRM</strong><br />
Selected effectivity :<br />
(c) Cadmium Plating (Immersion Procedure)<br />
1 For details of this cadmium-plating procedure and the necessary equipment refer to PMS<br />
Chapter 01-02-02 .<br />
(d) Cadmium Plating ('DALIC' Process) for steel with a maximum tensile strength of <strong>11</strong>00 N/mm ²<br />
(159 KSI).<br />
NOTE: Alternative procedures given in Paragraph 2.B.(1).(e) for steels and in Paragraph 2.B.(1).<br />
(f) for stainless steels.<br />
1 Materials and Equipment<br />
Contact AIRBUS to obtain the reference source for the 'DALIC' materials.<br />
NOTE: For the power supply you need a 'DALIC' rectifier. Dishes for the solutions must be<br />
made out of glass, polythene or porcelain material. For electrodes use 'DALIC' tampons<br />
which have to be prepared in accordance with the material manufacturer's instructions.<br />
2 Subsidiary Materials<br />
ITEM NOMENCLATURE QTY MATERIAL/REMARKS<br />
1 'DALIC' cleaning and deoxidizing -<br />
solution<br />
2 'DALIC' cadmium/zinc passivating<br />
-<br />
solution<br />
3 Trichloroethane - Material No. <strong>11</strong>-026 (Refer to CML)<br />
4 Lint-free cloth -<br />
5 'DALIC' membrane -<br />
6 Masking tape -<br />
7 Brush or swab -<br />
8 Hot-air dryer -<br />
9 'DALIC' cadmium alkaline solution<br />
-<br />
10 'DALIC' cadmium acid solution - For all materials refer to the 'DALIC' instruction<br />
manual<br />
<strong>11</strong> 'DALIC' nickel epais solution -<br />
12 'DALIC' etch/activator solution -<br />
Number 4<br />
13 'DALIC' etch/activator solution -<br />
Number 3<br />
14 Aluminum oxide powder or<br />
Scotch-brite pads<br />
-<br />
3 How to Obtain the Correct Thickness<br />
The thickness of the deposited metal is controlled by the ampere-hour meter. It further<br />
depends upon the area to be plated and the specific plating factor. The specific plating factor<br />
gives the number of ampere hours required to produce a deposit in mm or inches onto a<br />
surface area of square centimeters or square inches.<br />
SOLUTION<br />
FAC<strong>TO</strong>R WHEN YOU FAC<strong>TO</strong>R WHEN YOU<br />
MEASURE IN (mm or cm) MEASURE IN (in)<br />
Nickel epais solution 1.282 <strong>21</strong>0<br />
Print Date: December 29, 2016 Page 8 of 29<br />
© AIRBUS S.A.S. ALL RIGHTS RESERVED. CONFIDENTIAL AND PROPRIETARY DOCUMENT.
Customer : ENV<br />
Type : A<strong>320</strong><br />
Rev. Date : Nov 01, 2016<br />
<strong>51</strong>-<strong>21</strong>-<strong>11</strong> Application of Protective Treatment to Metal Parts<br />
Manual : <strong>SRM</strong><br />
Selected effectivity :<br />
SOLUTION<br />
FAC<strong>TO</strong>R WHEN YOU<br />
MEASURE IN (mm or cm)<br />
FAC<strong>TO</strong>R WHEN YOU<br />
MEASURE IN (in)<br />
Cadmium alkaline solution 0.488 80<br />
Cadmium acid solution 0.488 80<br />
Table 004 - Specific Plating Factor<br />
- Example: You have to plate an area of 25 cm² (3.875 in²) with cadmium alkaline solution.<br />
The required thickness is 0.015 mm. The correct ampere-hours setting is: 0.488 x 0.015 x<br />
25 = 0.183 ampere-hours<br />
- Example: You have to plate the same area with the same thickness, but you measure in<br />
inches. The thickness is 0.0006 in and the area has the size of 3.87 sq.in Determine the<br />
correct number of ampere-hours as follows: 80 x 0.0006 x 3.87 = 0.183 ampere-hours<br />
4 Inspection<br />
The cadmium deposit must be fine grain, smooth, and free from blisters, pitting, burns and<br />
other defects. Ensure that the cadmium deposit has good adherence to the metal surface.<br />
Check this with an adhesive tape. Put a strip of adhesive tape onto the treated surface and<br />
draw it quickly away. The adhesive tape must be free from cadmium particles.<br />
5 Procedure for non stainless steel<br />
a<br />
b<br />
Remove all grease from the repair area with a clean cloth soaked in trichloroethane<br />
(Material No. <strong>11</strong>-026 ).<br />
When the cleaning agent has evaporated, mask off all areas which are not to be treated.<br />
WARNING: CLEANING AND DEOXIDIZING SOLUTION IS HARMFUL.<br />
c<br />
d<br />
With a prepared tampon apply the cleaning and deoxidizing solution (Item 1 in the<br />
Table of Subsidiary Materials). Do this at cathodic plating polarity (see manufacturer's<br />
instructions) and 10 to 12 volts. Move the tampon in contact and over the surface until<br />
you get a regular clean surface which is free from water breaks. This should take about 5<br />
to 10 seconds per square inch (6.5 cm² (1.007 in²)).<br />
Rinse the area with clean cold running water.<br />
WARNING: CADMIUM ALKALINE SOLUTION IS DANGEROUS.<br />
e<br />
With a prepared tampon apply the cadmium alkaline solution (Item 9 in the Table of<br />
Subsidiary Materials). Do this at cathodic plating polarity and 8 to 12 volts. Move the<br />
tampon in contact with and over the surface until you get the required thickness. You<br />
should move the tampon at a speed of approximately 10 to 38 cm (4 to 15 in) per<br />
second.<br />
NOTE: For unspecified thickness, the deposit must average between 0.015 mm (0.0006<br />
in) and a minimum of 0.01 mm (0.0004 in), refer to Paragraph 2.B.(1).(d).3 .<br />
f<br />
g<br />
Rinse the area with clean cold running water.<br />
Abrade slightly the treated surface with a Scotch-brite pad or aluminum oxide and<br />
cotton wool. It will brighten the cadmium deposit before passivation and improve its<br />
appearance.<br />
WARNING: CADMIUM/ZINC PASSIVATING SOLUTION IS HARMFUL.<br />
Print Date: December 29, 2016 Page 9 of 29<br />
© AIRBUS S.A.S. ALL RIGHTS RESERVED. CONFIDENTIAL AND PROPRIETARY DOCUMENT.
Customer : ENV<br />
Type : A<strong>320</strong><br />
Rev. Date : Nov 01, 2016<br />
<strong>51</strong>-<strong>21</strong>-<strong>11</strong> Application of Protective Treatment to Metal Parts<br />
Manual : <strong>SRM</strong><br />
Selected effectivity :<br />
h<br />
i<br />
Apply passivation solution (Item 2 in the Table of Subsidiary Materials) with a brush or<br />
swab to the plated surface. Allow the solution to remain in contact for 5 to 10 seconds<br />
until a yellow or gold appearance is obtained.<br />
Rinse the area with clean cold running water.<br />
CAUTION:<br />
THE PASSIVATED FILM IS RELATIVELY FRAGILE UNTIL DRY. AVOID<br />
<strong>TO</strong>UCHING IT BEFORE THE RELEVANT STEP IS COMPLETED.<br />
j<br />
Dry the repair area with a hot-air dryer at a maximum temperature of 50° C (122° F).<br />
NOTE: If step 2.B.(1).(d).5.j is impracticable, rinse with hot water to aid drying and<br />
gently dab the surface with soft clean tissues or clean cotton wool until the surface<br />
is dry.<br />
k Inspect the treated area as described in Paragraph 2.B.(1).(d).4 .<br />
NOTE: Make sure that the required paint coatings are applied within 16 hours.<br />
6 Procedure for Stainless Steel<br />
a Do the steps 2.B.(1).(d).5.a to 2.B.(1).(d).5.d .<br />
WARNING: ETCH/ACTIVA<strong>TO</strong>R SOLUTION NUMBER 4 IS HARMFUL.<br />
b<br />
c<br />
With a prepared tampon apply the etching solution (Item 12 in the Table of Subsidiary<br />
Materials). Do this at a reversed polarity (anodically, see manufacturer's instructions)<br />
and 10 to 14 volts. Move the tampon in contact with and over the complete surface<br />
concerned. Continue until an evenly etched and smutted appearance is obtained.<br />
Rinse the area with clean cold running water.<br />
WARNING: ETCH/ACTIVA<strong>TO</strong>R SOLUTION NUMBER 3 IS HARMFUL.<br />
d<br />
e<br />
With a prepared tampon apply the etching solution (Item 13 in the Table of Subsidiary<br />
Materials). Do this at a reversed polarity (anodically, see manufacturer's instructions)<br />
and 10 to 12 volts. Move the tampon in contact with and over the complete surface<br />
concerned until the surface will not lighten further.<br />
Rinse the area with clean cold running water.<br />
WARNING: ETCH/ACTIVA<strong>TO</strong>R SOLUTION NUMBER 4 IS HARMFUL.<br />
f<br />
With a prepared tampon apply the etching solution (Item 12 in the Table of Subsidiary<br />
Materials). Do this at cathodically polarity (see manufacturer's instructions) and 10 to 12<br />
volts. Move the tampon in contact with and over the complete surface concerned for 2 to<br />
3 seconds per square inch (6.5 cm² (1.007 in²)).<br />
WARNING: NICKEL EPAIS SOLUTION IS DANGEROUS.<br />
g<br />
Move the tampon with nickel epais solution (Item <strong>11</strong> in the Table of Subsidiary Materials)<br />
over the moistened area at cathodically plating polarity (see manufacturer's instructions)<br />
and 6 to 10 volts, until 0.0025 mm (0.0001 in) has been deposited, refer to Paragraph<br />
2.B.(1).(d).3 .<br />
Print Date: December 29, 2016 Page 10 of 29<br />
© AIRBUS S.A.S. ALL RIGHTS RESERVED. CONFIDENTIAL AND PROPRIETARY DOCUMENT.
Customer : ENV<br />
Type : A<strong>320</strong><br />
Rev. Date : Nov 01, 2016<br />
<strong>51</strong>-<strong>21</strong>-<strong>11</strong> Application of Protective Treatment to Metal Parts<br />
Manual : <strong>SRM</strong><br />
Selected effectivity :<br />
NOTE: Move the tampon at about 10 to 25 cm (4 to 10 in) per second.<br />
h<br />
Rinse the area with clean cold running water.<br />
WARNING: CADMIUM ACID SOLUTION IS DANGEROUS.<br />
i<br />
With a prepared tampon apply the cadmium acid solution (Item 10 in the Table of the<br />
Subsidiary Materials). Do this at the plating polarity (see manufacturer's instruction) and<br />
8 to 10 volts. Move the tampon in contact with and over the surface until you get the<br />
required thickness. You should move the tampon at a speed of approximately 15 to 61<br />
cm (6 to 24 in) per second.<br />
NOTE: For unspecified thickness, the deposit must average between 0.015 mm (0.0006<br />
in) and a minimum of 0.01 mm (0.0004 in), refer to Paragraph 2.B.(1).(d).3 .<br />
j Do steps 2.B.(1).(d).5.f thru 2.B.(1).(d).5.k .<br />
(e) Cadmium brush plating (or pad cadmium plating DALIC process) for steels (excluding stainless<br />
steels) with a maximum tensile strength of 1420 N/mm² (205 KSI).<br />
NOTE: This process is to be used to repair damaged protective treatment film not exceeding 700<br />
mm² (1.085 in²). The process is not allowed on any steel with carburized areas<br />
For larger surface perform multiple repairs.<br />
This process must be carried out by trained and approved personnel. An operator training<br />
service is available from the solution suppliers.<br />
1 Equipment<br />
- Power supply: Variable rectifier 30 volt 20 amp minimum fitted with voltmeter, ammeter,<br />
ampere hour meter, reversing switch and on/off switch.<br />
- Dishes for solutions glass polyethylene or porcelain flat bottom dishes of convenient size.<br />
- Electrodes: Use DALIC or DALIC UK or SIFCO tampons which have to be prepared in<br />
accordance with the material manufacturer's instructions. For optimum deposit speed area<br />
and shape of the anode must be determined by the area and the shape of the part to be<br />
plated the size should be s/6 < S < s/3 for SIFCO solution and s/8 < S < s/5 for DALIC<br />
solution where "s" is the area to be treated and "S" the area of the anode.<br />
- Hot air dryer (oil free).<br />
2 Repair Materials<br />
ITEM NOMENCLATURE QTY MATERIAL/REMARKS<br />
1 Cleaning Agent AR Material No. <strong>11</strong>-003 or <strong>11</strong>-026 (Refer to<br />
CML)<br />
2 Lint free cloth, cotton wool AR Local Purchase<br />
3 Abrasive Paper - Silicon Carbide<br />
(grade 120)<br />
4 Abrasive Paper - Aluminum Oxide<br />
AR Local Purchase<br />
(grade <strong>320</strong> - water resistant)<br />
or finer or red SCOTCH-BRITE<br />
pads<br />
5 Masking tape AR PVC insulating tape or 3M No. 470 or aluminum<br />
tape Material No. 08-052 (Refer to<br />
CML)<br />
6 Brush or Swab AR Local Purchase<br />
Print Date: December 29, 2016 Page <strong>11</strong> of 29<br />
© AIRBUS S.A.S. ALL RIGHTS RESERVED. CONFIDENTIAL AND PROPRIETARY DOCUMENT.
Customer : ENV<br />
Type : A<strong>320</strong><br />
Rev. Date : Nov 01, 2016<br />
<strong>51</strong>-<strong>21</strong>-<strong>11</strong> Application of Protective Treatment to Metal Parts<br />
Manual : <strong>SRM</strong><br />
Selected effectivity :<br />
ITEM NOMENCLATURE QTY MATERIAL/REMARKS<br />
7 De-mineralized Water AR<br />
8 Aluminium Oxide Powder (80 microns)<br />
AR DALIC Reference CC<strong>11</strong>5<br />
9 Brush Plating Tools (use graphite<br />
anode) and Bonnets<br />
AR Separate anodes, bonnets and solution<br />
must be used at each stage of the<br />
process .Do not use steel tools containing<br />
more than 5% of chromium<br />
10 DALIC Cadmium plating Solution AR<br />
2023<br />
<br />
<strong>11</strong> Chromic finish solution AR<br />
<br />
12 SIFCO Cadmium LHE<br />
<br />
13 SIFCO Passivating Solution<br />
<br />
Code <strong>11</strong>028 from DALIC Code DPS6123<br />
from DALIC UK<br />
Passivateur No. 2 Code 10033 from DAL-<br />
IC Cadmium/Zinc Passivating Code DFS<br />
8010 from DALIC UK<br />
Code SPS 5070 from SIFCO<br />
Code SSS 3002 from SIFCO<br />
Storage conditions: Keep away from humidity and light at a temperature between 5° C<br />
to 30° C. Recommended shelf life is three years in original container except dalic solution<br />
2023 one year.<br />
DALIC 41, Rue des Eaux, B.P. 90139 35501 VITRE - France Tel: (33)<br />
2.99.75.53.80 Fax: (33) 2.99.74.49.31 service@dalicworld.com<br />
DALIC UK Ltd South Lodge House, 68-70 Frogge Street Ickleton<br />
(South Cambridge Shire) CB 10-1 SH - UK Tel: 0 1799 532 002 Fax: 0<br />
1799 532 003 info.dalicuk@tiscali.co.uk<br />
Storage conditions: <strong>21</strong>° C to 43° C RH 30 to 90, keep away from humidity and light<br />
at a temperature between 5° C to 30° C. Recommended shelf life is three years in original<br />
container and one year for SIFO5070.<br />
SIFCO applied surface concepts 16, rue de la Noue Guimante<br />
Lots 22/23 PA de la Courtilliere 77400 Saint-Thibault des Vignes<br />
www.electrolyseautampon.com<br />
3 How to obtain the correct thickness<br />
The thickness of the deposited metal is controlled by the ampere-hour meter. It further<br />
depends upon the area to be plated and the specific plating factor. The specific plating factor<br />
gives the number of ampere hours required to produce a deposit in mm or inches onto a<br />
surface area of square centimeters or square inches.<br />
SOLUTION<br />
FAC<strong>TO</strong>R FOR<br />
MEASUREMENT<br />
IN (mm)<br />
FAC<strong>TO</strong>R FOR<br />
MEASUREMENT<br />
IN (in)<br />
DALIC Code 2023 0.4 70<br />
SIFCO SPS 5070 0.4 70<br />
Table 005 - Specific Plating Factor<br />
Example 1:<br />
You have to plate an area of 25 cm² (3.875 in²) with SPS 5070 cadmium LHE plating<br />
solution. The required thickness is 0.015 mm. The correct ampere hours setting is: 0.4 x<br />
0.015 x 25 = 0.15 ampere hours.<br />
Example 2:<br />
Print Date: December 29, 2016 Page 12 of 29<br />
© AIRBUS S.A.S. ALL RIGHTS RESERVED. CONFIDENTIAL AND PROPRIETARY DOCUMENT.
Customer : ENV<br />
Type : A<strong>320</strong><br />
Rev. Date : Nov 01, 2016<br />
<strong>51</strong>-<strong>21</strong>-<strong>11</strong> Application of Protective Treatment to Metal Parts<br />
Manual : <strong>SRM</strong><br />
Selected effectivity :<br />
You have to plate the same area with the same thickness but you measure in inches. The<br />
thickness is 0.0006 in and the area has the size of 3.87 sq.inch. Determine the correct<br />
number of ampere hours as follows: 70 X 0.0006 X 3.87 = 0.162 ampere-hours.<br />
4 Inspection<br />
The cadmium deposit must be fine grain, smooth and free from blisters, pitting, burns and<br />
other defects. Ensure that the cadmium deposit has good adherence to the metal surface.<br />
Check this with an adhesive tape. Put a strip of adhesive tape onto the treated surface and<br />
draw it quickly away. The adhesive tape must be free from cadmium particles. For more<br />
information refer to PMS Chapter 01-02-<strong>21</strong> .<br />
5 Procedure<br />
a<br />
b<br />
c<br />
d<br />
Remove all grease from the repair area (minimum one inch outside the repair area) with<br />
a clean cloth soaked in cleaning agent (Material No. <strong>11</strong>-003 or <strong>11</strong>-026 ) and wipe dry<br />
with a clean cloth or absorbent paper.<br />
Mask as necessary to define the area to be plated. If the area was already plated with<br />
cadmium, the brush plating must overlap the existing cadmium by about 4 mm (0.157<br />
in), refer to Figure 001 .<br />
Brush Plating Procedure<br />
Use one of the alternative procedures given in Paragraph 2.B.(1).(e).5.d and 2.B.(1).<br />
(e).5.e .<br />
Using SIFCO solutions<br />
NOTE: Prepare the work place with all the items. Start the power pack, adjust the<br />
voltage to 20 V and the current to the maximum and ensure the power pack is<br />
set in 'forward' polarity. Set the bonnet on the plating tool. Wet it first with demineralised<br />
water, squeeze with hand and paper, then place the electrode in the<br />
cadmium solution.<br />
- Manually abrade the area to be plated using a water wetted abrasive paper (<strong>320</strong><br />
grade or finer) or fine SCOTCH-BRITE pad and water. Feather the edge as shown on<br />
Figure 001 .<br />
- Rinse with demineralized water. Wipe with a clean wet cloth and wipe dry with a clean<br />
cloth.<br />
- Before switching on the current, wipe the area to be treated with a pad dampened<br />
with the plating solution (Item 12) or soak a tampon with the plating solution and start<br />
the appropriate tampon movement over the plating area. Ensure you have a liquid<br />
break free condition otherwise repeat 2.B.(1).(e).5.d Paragraph 2.<br />
- Using a prepared tampon move the tampon and apply plating solution at forward<br />
current cathodic plating polarity (part connected to (-) terminal and electrode (+) see<br />
manufacturer's instructions), plate at 15 to 20 V until a visible layer of cadmium is<br />
deposited, then reduce voltage to 8 to 14 V. Move the tampon in contact and over the<br />
surface and until you get the required thickness (see the required ampere hours in<br />
Paragraph 2.B.(1).(e).4 at a speed of approximately 6 to 24 m/min or 20 to 80 feet per<br />
minute. During plating do not allow the surface to dry and move the tampon to avoid<br />
the deposit to darken (burning).<br />
NOTE: For unspecified thickness the deposit must average between 0.015 mm (0.0006<br />
in) and a minimum of 0.01 mm (0.0004 in), refer to Paragraph 2.B.(1).(e).4 .<br />
- Rinse the area with clean cold running water.<br />
- Apply passivating solution (Item 13) with a brush or swab to the plated surface.<br />
Allow the solution to remain in contact for 15 to 30 seconds until a yellow or gold<br />
appearance is obtained.<br />
Print Date: December 29, 2016 Page 13 of 29<br />
© AIRBUS S.A.S. ALL RIGHTS RESERVED. CONFIDENTIAL AND PROPRIETARY DOCUMENT.
Customer : ENV<br />
Type : A<strong>320</strong><br />
Rev. Date : Nov 01, 2016<br />
<strong>51</strong>-<strong>21</strong>-<strong>11</strong> Application of Protective Treatment to Metal Parts<br />
Manual : <strong>SRM</strong><br />
Selected effectivity :<br />
- Rinse the area with clean cold running water.<br />
- Dry the repair area with an air blast or with a hot air dryer at a maximum temperature<br />
of 50° C (122° F) or gently dab the surface with soft clean tissues, absorbent paper or<br />
clean cotton wool.<br />
- Inspect the treated areas as described in Paragraph 2.B.(1).(e).4 .<br />
NOTE: Make sure that the required paint coatings are applied within 16 hours.<br />
NOTE: Do not return used solutions in original containers. The solutions, rinsing water<br />
and used bonnets must be processed or destroyed by an approved organization.<br />
Contaminated packaging if not re-used with the same product is also special<br />
waste to be sent to an approved organization for recycling or disposal.<br />
e DALIC Solution 2023<br />
NOTE: Prepare the work place with all the items. Start the power pack, adjust the<br />
voltage to 20 V and the current to the maximum and ensure the power pack is<br />
set in 'forward' polarity. Set the cover material on the plating tool. Wet it first with<br />
demineralised water, squeeze with hand and paper, then place the electrode in<br />
the cadmium solution.<br />
- Lightly dry abrade the area to be treated using 120 grade abrasive paper (around 3<br />
perpendicular cross pattern)<br />
- Re-apply aluminium or PVC masking tape.<br />
- Hand abrade area to be cadmium plated using 120 grade paper and water.<br />
- Clean with clean cloth dampened with demineralized water.<br />
- Lightly manually abrade the area using aluminium oxide powder, water and cotton<br />
wool.<br />
- Rinse with de-mineralized water.<br />
- Clean with clean cotton wool or clean cloth dampened with demineralized water,<br />
ensure that there is no longer black residues on the cloth.<br />
- Rinse with demineralized water.<br />
NOTE: Do not swab DALIC cadmium solution on the area to be plated.<br />
- Connect the piece to (-) terminal and the electrode to (+) terminal (red plug, +) to the<br />
power supply pack.<br />
- Plate at 20 V until 12 to 15% of the total current quantity calculated is reached.<br />
- Repeat 2.B.(1).(e).5.e Paragraph 3 thru Paragraph 8 to remove the first cadmium<br />
layer.<br />
- Set to 0 the current quantity meter.<br />
- Plate again at 20 V until 12 to 15% of the total current quantity calculated is reached<br />
then reduce to <strong>11</strong> V until the required current quantity is reached.<br />
NOTE: Ensure fast electrode movement to prevent 'burning' of the deposit (use a speed<br />
of around 25 m/min (80 feet / min). Put the electrode on the tape and start to<br />
move the electrode over the surface, sweep the surface very quickly.<br />
For unspecified thickness the deposit must average between 0.015 mm (0.0006<br />
in) and a minimum of 0.01 mm (0.0004 in), refer to Paragraph 2.B.(1).(e).4 .<br />
- Rinse with clean cold running water.<br />
- Remove the masking.<br />
- Rinse with water.<br />
- Dry with hot air dryer.<br />
- Clean with cleaning agent (Material No. <strong>11</strong>-026 ).<br />
Print Date: December 29, 2016 Page 14 of 29<br />
© AIRBUS S.A.S. ALL RIGHTS RESERVED. CONFIDENTIAL AND PROPRIETARY DOCUMENT.
Customer : ENV<br />
Type : A<strong>320</strong><br />
Rev. Date : Nov 01, 2016<br />
<strong>51</strong>-<strong>21</strong>-<strong>11</strong> Application of Protective Treatment to Metal Parts<br />
Manual : <strong>SRM</strong><br />
Selected effectivity :<br />
- Apply passivating solution (Item <strong>11</strong>) with a brush or swab to the plated surface. Allow<br />
the solution to remain in until a yellow or gold appearance is obtained.<br />
- Rinse the area with clean cold running water.<br />
- Dry the repair area with an air blast or with a hot air dryer at a maximum temperature<br />
of 50° C (122° F) or gently dab the surface with soft clean tissues, absorbent paper or<br />
clean cotton wool.<br />
- Inspect the treated areas as described in 2.B.(1).(e).5.e Paragraph 4.<br />
NOTE: Make sure that the required paint coatings are applied within 16 hours.<br />
NOTE: Do not return used solutions in original containers. The solutions, rinsing water<br />
and used bonnets must be processed or destroyed by an approved organization.<br />
Contaminated packaging if not re-used with the same product is also special<br />
waste to be sent to an approved organization for recycling or disposal.<br />
(f)<br />
Cadmium brush plating (or pad cadmium plating DALIC process) for stainless steels with<br />
maximum tensile strength of <strong>11</strong>00 N/mm² (159 KSI).<br />
NOTE: This process must be carried out by trained and approved personnel. An operator training<br />
service is available from the solution suppliers.<br />
1 Equipment<br />
- Power supply: variable rectifier minimum fitted with voltmeter, ammeter, ampere-hour<br />
meter, reversing switch and on/off switch.<br />
- Dishes for solutions glass polyethylene or porcelain flat bottom dishes of convenient size.<br />
- Electrodes: Use DALIC, DALIC UK or SIFCO tampons which have to be prepared in<br />
accordance with the material manufacturer's instructions. For optimum deposit speed area<br />
and shape of the anode must be determined by the area and the shape of the part to be<br />
plated. The size should be s/6 < S < s/3 where "s" is the area to be treated and "S" the<br />
area of the anode.<br />
- Hot air dryer (oil free).<br />
2 Repair Materials<br />
ITEM NOMENCLATURE QTY MATERIAL/REMARKS<br />
1 Cleaning Agent AR Material No. <strong>11</strong>-003 or <strong>11</strong>-026 (Refer to<br />
CML)<br />
2 Lint free cloth, cotton wool AR Local Purchase<br />
3 Abrasive Paper - Silicon Carbide<br />
(grade 120)<br />
4 Abrasive Paper - Aluminum Oxide<br />
AR Local Purchase<br />
(grade <strong>320</strong> - water resistant)<br />
or finer or red SCOTCH-BRITE<br />
pads<br />
5 Masking Tape AR PVC insulating tape or 3M No. 470 or aluminum<br />
tape Material No. 08-052 (Refer to<br />
CML)<br />
6 Brush or Swab AR Local Purchase<br />
7 De-mineralized Water AR<br />
8 Aluminium Oxide Powder (80 microns)<br />
AR DALIC Reference CC<strong>11</strong>5<br />
9 Brush Plating Tools (use graphite<br />
anode) and Bonnets<br />
AR<br />
Separate anodes, bonnets and solution<br />
must be used at each stage of the<br />
Print Date: December 29, 2016 Page 15 of 29<br />
© AIRBUS S.A.S. ALL RIGHTS RESERVED. CONFIDENTIAL AND PROPRIETARY DOCUMENT.
Customer : ENV<br />
Type : A<strong>320</strong><br />
Rev. Date : Nov 01, 2016<br />
<strong>51</strong>-<strong>21</strong>-<strong>11</strong> Application of Protective Treatment to Metal Parts<br />
Manual : <strong>SRM</strong><br />
Selected effectivity :<br />
ITEM NOMENCLATURE QTY MATERIAL/REMARKS<br />
process .Do not use steel tools containing<br />
more than 5% of chromium<br />
10 DALIC Cadmium plating Solution AR<br />
2023<br />
<br />
<strong>11</strong> Chromic finish solution AR<br />
<br />
12 ATTAQUE No. 3<br />
<br />
13 ATTAQUE No. 2<br />
<br />
14 NICKELAGE EP<br />
<br />
15 SIFCO Cadmium LHE<br />
<br />
16 SIFCO Passivating Solution<br />
<br />
17 SIFCO Electrolytic Degreasing<br />
Solution<br />
<br />
18 Nickel Plating Solution<br />
<br />
19 ACTIVA<strong>TO</strong>R No. 4<br />
<br />
20 ACTIVA<strong>TO</strong>R No. 1<br />
<br />
AR<br />
AR<br />
AR<br />
AR<br />
Code <strong>11</strong>028 from DALIC Code DPS6123<br />
from DALIC UK<br />
Passivateur No. 2 Code 10033 from DAL-<br />
IC Cadmium/Zinc Passivating Code DFS<br />
8010 from DALIC UK<br />
Code 10005 from DALIC or DCN ETCH-<br />
ING Code DPR 5075 from DALIC UK<br />
Code 10004 from DALIC or ACTIVAT-<br />
OR/ETCH No. 3 Code DPR5003 from<br />
DALIC UK<br />
Code <strong>11</strong>028 FROM DALIC or Nickel<br />
EPAIS Code DPS6340 from DALIC UK<br />
Code SPS 5070 from SIFCO<br />
Code SSS 3002 from SIFCO<br />
Code SCM 4100 from SIFCO<br />
Code SPS 5600 from SIFCO<br />
Code SCM 4250 from SIFCO<br />
Code SCM 4200 from SIFCO<br />
Storage conditions: Keep away from humidity and light at a temperature between 5° C<br />
to 30° C. Recommended shelf life is three years in original container.<br />
DALIC 41, Rue des Eaux, B.P. 90139 35501 VITRE - France Tel: (33)<br />
2.99.75.53.80 Fax: (33) 2.99.74.49.31 service@dalicworld.com<br />
DALIC UK Ltd South Lodge House, 68-70 Frogge Street Ickleton<br />
(South Cambridge Shire) CB 10-1 SH - UK Tel: 0 1799 532 002 Fax: 0<br />
1799 532 003 info.dalicuk@tiscali.co.uk<br />
Storage conditions: <strong>21</strong>° C to 43° C RH 30 to 90, keep away from humidity and light<br />
at a temperature between 5° C to 30° C. Recommended shelf life is three years in original<br />
container.<br />
SIFCO applied surface concepts 16, rue de la Noue Guimante Lots<br />
22/23 PA de la Courtilliere 77400 Saint-Thibault des Vignes http://<br />
www.electrolyseautampon.com<br />
3 How to obtain the correct thickness<br />
The thickness of the deposited metal is controlled by the ampere-hour meter. It further<br />
depends upon the area to be plated and the specific plating factor. The specific plating factor<br />
gives the number of ampere-hours required to produce a deposit in mm or inches onto a<br />
surface area of square centimeters or square inches.<br />
SOLUTION<br />
FAC<strong>TO</strong>R FOR MEASURE-<br />
MENT<br />
IN (mm)<br />
DALIC Code 2023 0.4 70<br />
FAC<strong>TO</strong>R FOR MEASURE-<br />
MENT<br />
IN (in)<br />
Print Date: December 29, 2016 Page 16 of 29<br />
© AIRBUS S.A.S. ALL RIGHTS RESERVED. CONFIDENTIAL AND PROPRIETARY DOCUMENT.
Customer : ENV<br />
Type : A<strong>320</strong><br />
Rev. Date : Nov 01, 2016<br />
<strong>51</strong>-<strong>21</strong>-<strong>11</strong> Application of Protective Treatment to Metal Parts<br />
Manual : <strong>SRM</strong><br />
Selected effectivity :<br />
SOLUTION<br />
FAC<strong>TO</strong>R FOR MEASURE-<br />
MENT<br />
IN (mm)<br />
SIFCO SPS 5070 0.4 70<br />
NICKEL EP/EPAIS 1.78 290<br />
Nickel SPS 5600 1.5 250<br />
FAC<strong>TO</strong>R FOR MEASURE-<br />
MENT<br />
IN (in)<br />
Table 006<br />
Example 1:<br />
You have to plate an area of 25 cm² (3.875 in²) with SPS 5070 cadmium LHE plating<br />
solution. The required thickness is 0.015 mm, the correct ampere hours setting is: 0.4 x<br />
0.015 x 25 = 0.15 ampere-hours.<br />
Example 2:<br />
You have to plate the same area with the same thickness, but you measure in inches. The<br />
thickness is 0.0006 in and the area has the size of 3.87 sq.inch. Determine the correct<br />
number of ampere hours as follows: 70 x 0.0006 x 3.87 = 0.162 ampere-hours.<br />
4 Inspection<br />
The cadmium deposit must be fine grain, smooth and free from blisters, pitting, burns and<br />
other defects. Ensure that the cadmium deposit has good adherence to the metal surface.<br />
Check this with an adhesive tape. Put a strip of adhesive tape onto the treated surface and<br />
draw it quickly away. The adhesive tape must be free from cadmium particles. Refer to PMS<br />
Chapter 01-02-<strong>21</strong> for more information.<br />
5 Procedure<br />
a<br />
b<br />
c<br />
Remove all grease from the repair area (minimum one inch outside the repair area) with<br />
a clean cloth soaked in cleaning agent (Material No. <strong>11</strong>-003 or <strong>11</strong>-026 ) and wipe dry<br />
with a clean cloth or absorbent paper.<br />
Mask as necessary to define the area to be plated. If the area was already plated with<br />
cadmium, the brush plating must overlap the existing cadmium by about 4 mm (0.157<br />
in), refer to Figure 001 .<br />
Brush Plating Procedure<br />
Use one of the alternative procedures given in Paragraph 2.B.(1).(f).5.d and 2.B.(1).<br />
(f).5.e .<br />
d SIFCO Solution SPS 5070<br />
NOTE: Prepare the work place with all the tools and solutions.<br />
Use a different and identified tool for each solution.<br />
First wet with demineralised water the bonnets set on the plating tools then<br />
squeeze with hand and paper and let soak with solution for a minimum of 2<br />
minutes.<br />
The treatment must be achieved in totality without interruption.<br />
- Manually abrade the area to be plated using a water wetted abrasive paper (<strong>320</strong><br />
grade or finer) or fine SCOTCH-BRITE pad and water or aluminum oxide powder on a<br />
water moistened swab. Feather the edge as shown on Figure 001 .<br />
- Rinse with demineralized water.<br />
- Electrolytically clean with deoxidizing solution (Item 27) at 10 to 20 volts forward<br />
current.<br />
- Rinse with demineralized water ensuring a water break free surface.<br />
- Anodically etch with solution ACTIVA<strong>TO</strong>R No. 4 SCM 4250 (Item 19) at 8 to 15 volts<br />
reverse current.<br />
- Rinse with demineralized water.<br />
Print Date: December 29, 2016 Page 17 of 29<br />
© AIRBUS S.A.S. ALL RIGHTS RESERVED. CONFIDENTIAL AND PROPRIETARY DOCUMENT.
Customer : ENV<br />
Type : A<strong>320</strong><br />
Rev. Date : Nov 01, 2016<br />
<strong>51</strong>-<strong>21</strong>-<strong>11</strong> Application of Protective Treatment to Metal Parts<br />
Manual : <strong>SRM</strong><br />
Selected effectivity :<br />
- Cathodically etch with solution ACTIVA<strong>TO</strong>R No. 1 SCM 4200 (Item 20) at 8 to 15<br />
volts forward current.<br />
- Do not allow to dry. Plate without delay a layer of nickel using plating solution (Item<br />
18) at 6 to 10 volts for the ampere minutes required to obtain 5 microns (2 to 7<br />
microns).<br />
- Rinse with de-mineralized water.<br />
- Do not allow to dry. Before switching on the current, wipe the area to be treated with<br />
a pad dampened with the plating solution (Item 15) or soak a tampon with the plating<br />
solution and start the appropriate tampon movement over the plating area.<br />
- Using a prepared tampon move the tampon and apply plating solution at forward<br />
current or cathodic plating polarity ( part (-) and tool (+)) see manufacturer's<br />
instructions (Item 15). Plate at 8 V and move the tampon in contact and over<br />
the surface and until you get the required thickness (for required ampere-hours<br />
refer to Paragraph 2.B.(1).(f).5.e . During plating move the tampon at a speed of<br />
approximately 6-24 m/min or 20-80 feet per minute. During plating do not allow the<br />
surface to dry and move the tampon to avoid the deposit to darken (burning).<br />
NOTE: For unspecified thickness the deposit must average between 0.015 mm (0.0006<br />
in) and a minimum of 0.01 mm (0.0004 in), refer to Paragraph 2.B.(1).(f).3 ).<br />
- Rinse the area with cold running water.<br />
- If required for appearance abrade slightly the treated surface with a SCOTCH-BRITE<br />
pad or aluminum oxide and cotton wool. It will brighten the cadmium deposit before<br />
passivation.<br />
- Apply passivating solution (Item 16) with a brush or swab to the plated surface. Allow<br />
the solution to remain in contact until a yellow or gold appearance is obtained.<br />
- Rinse the area with clean cold running water.<br />
- Dry the repair area with an air blast or with a hot air dryer at a maximum temperature<br />
of 50° C (122° F) or gently dab the surface with soft clean tissues or absorbent paper<br />
or clean cotton wool.<br />
- Inspect the treated area as described in Paragraph 2.B.(1).(e).5.d .<br />
NOTE: Make sure that the required paint coatings are applied within 16 hours.<br />
NOTE: Do not return used solutions in original containers. The solutions, rinsing water<br />
and used bonnets must be processed within the firm or destroyed by an<br />
approved organization. Contaminated packaging if not re-used with the same<br />
product is also special waste to be sent to an approved organization for recycling<br />
or disposal<br />
e DALIC Solution 2023<br />
NOTE: Prepare the work place with all the tools and solutions.<br />
Use a different and identified tool for each solution.<br />
First wet with demineralised water the bonnets set on the plating tools then<br />
squeeze with hand and paper and let soak with solution for a minimum of 2<br />
minutes.<br />
The treatment must be achieved in totality without interruption.<br />
- Manually abrade the area to be plated using a water wetted abrasive paper (220<br />
grade), feather the edges as shown on Figure 001 . Clean with demineralized water<br />
and several cloths or papers without drying the surface.<br />
- Manually abrade the area using a water wetted red abrasive sponge, clean with<br />
demineralized water and several cloths or papers without drying the surface.<br />
Print Date: December 29, 2016 Page 18 of 29<br />
© AIRBUS S.A.S. ALL RIGHTS RESERVED. CONFIDENTIAL AND PROPRIETARY DOCUMENT.
Customer : ENV<br />
Type : A<strong>320</strong><br />
Rev. Date : Nov 01, 2016<br />
<strong>51</strong>-<strong>21</strong>-<strong>11</strong> Application of Protective Treatment to Metal Parts<br />
Manual : <strong>SRM</strong><br />
Selected effectivity :<br />
(2). Phosphating<br />
(a) General<br />
- Manually abrade the area using alumina powder and a wetted cotton wool piece,<br />
clean carefully with demineralized water and several cloths or papers without drying<br />
the surface. The surface in final must be free from residues.<br />
NOTE: Before switching on the current, wipe the area to be treated with a tampon<br />
soaked with the indicated solution (Item 12) and start the appropriate tampon<br />
movement over the plating area.<br />
- Etch with ATTAQUE No. 3 Solution at <strong>11</strong> V, reverse polarity (part (+) and tool (-)),<br />
apply 0.25 Ah/dm² of area to be treated.<br />
- Rinse with de-mineralized water.<br />
- Etch for cleaning with ATTAQUE No. 2 solution (Item 13) at <strong>11</strong> V, reverse polarity<br />
(part (+) and tool (-)), apply 0.25 Ah/dm² of area to be treated.<br />
- Rinse with de-mineralized water.<br />
- Plate a nickel under layer with the NICKELAGE EP Solution (Item 14) at 6 to 10V,<br />
cathodic plating polarity or forward current (part (-) and tool (+)), for the ampere<br />
minutes required to obtain 5 microns (2 to 7 microns).<br />
- Rinse with de-mineralized water.<br />
- Plate around 3 µm cadmium with CADMIUM 2023 solution (Item 10) at 6 V, cathodic<br />
plating polarity or forward current (part (-) and tool (+)) then increase to 8 V to achieve<br />
the required thickness (see the required ampere-hours in Paragraph 2.B.(1).(f).5.e .<br />
During plating move the tampon at a speed of approximately 6 to 24 m/min or 20 to<br />
80 feet/minute. During plating do not allow the surface to dry and move the tampon to<br />
avoid the deposit to darken (burning).<br />
NOTE: For unspecified thickness the deposit must average between 0.015 mm (0.0006<br />
in) and a minimum of 0.01 mm (0.0004 in), refer to Paragraph 2.B.(1).(f).5.e .<br />
- Rinse the area with clean cold running water.<br />
- Apply passivating solution (Item <strong>11</strong>) with a piece of cotton wool. Do soft and regular<br />
movements on the plated surface for 15 to 30 seconds until a yellow or gold colour is<br />
obtained.<br />
- Rinse the area with clean cold running water.<br />
- Dry the repair area with an air blast or with a hot air dryer at a maximum temperature<br />
of 50° C (122° F).<br />
- Inspect the repair as described in Paragraph 2.B.(1).(e).5.d .<br />
NOTE: Make sure that the required paint coatings are applied within 16 hours.<br />
NOTE: Do not return used solutions in original containers. These solutions, rinsing water<br />
and used bonnets must be disposed by an approved organization. Contaminated<br />
packaging if not re-used with the same product is also special waste to be<br />
sent to an approved organization for recycling or disposal.<br />
1 The phosphorisation is a procedure in which the surface of the metal is given a layer of<br />
phosphoric acid solution. You do this with a brush when the parts are installed or you can put<br />
them into a phospheric bath.<br />
2 This protective treatment is necessary after the removal of corrosion or when a repair<br />
procedure breaks the original surface protection. All corrosion and the paint coatings must<br />
be removed until a clean metallic surface is obtained, before you start with phosphating.<br />
Before brush phosphating, the corrosion can be removed mechanically. When the parts are<br />
Print Date: December 29, 2016 Page 19 of 29<br />
© AIRBUS S.A.S. ALL RIGHTS RESERVED. CONFIDENTIAL AND PROPRIETARY DOCUMENT.
Customer : ENV<br />
Type : A<strong>320</strong><br />
Rev. Date : Nov 01, 2016<br />
<strong>51</strong>-<strong>21</strong>-<strong>11</strong> Application of Protective Treatment to Metal Parts<br />
Manual : <strong>SRM</strong><br />
Selected effectivity :<br />
phosphated in a bath and strongly oxidized, the corrosion must be removed by abrasive<br />
blasting (Refer to Chapter <strong>51</strong>-74-00 ).<br />
3 For the required paint coatings after this treatment refer to Chapter <strong>51</strong>-23-<strong>11</strong> .<br />
(b) Safety Precautions<br />
WARNING: BE CAREFUL WHEN YOU USE CONSUMABLE MATERIALS. OBEY THE MATERI-<br />
AL MANUFACTURER'S INSTRUCTIONS AND YOUR LOCAL REGULATIONS.<br />
WARNING: OBEY THE MANUFACTURER’S INSTRUCTIONS WHEN YOU USE THE CLEANING<br />
AGENTS (MATERIAL NO. <strong>11</strong>-003 AND <strong>11</strong>-026). THESE CLEANING AGENTS ARE<br />
DANGEROUS.<br />
WARNING: OBEY THE MANUFACTURER INSTRUCTIONS WHEN YOU USE THE PHOSPHORIC<br />
SOLUTION (MATERIAL NO. 05-041 OR 05-042). THESE PHOSPHORIC SOLUTIONS<br />
ARE DANGEROUS.<br />
(c) Brush Phosphating of Steel Parts in Installed Position<br />
1 Materials<br />
ITEM NOMENCLATURE QTY MATERIAL/REMARKS<br />
1 Phosphoric solution - Material No. 05-042 (Refer to CML)<br />
2 Cleaning agent - Material No. <strong>11</strong>-003 or <strong>11</strong>-026 (Refer to<br />
CML)<br />
3 Cheese cloth -<br />
4 Brush -<br />
5 Masking tape -<br />
6 Hot-air dryer -<br />
2 Procedure<br />
a<br />
Clean and remove grease from the repair area with a clean cloth, soaked in cleaning<br />
agent (Material No. <strong>11</strong>-003 or <strong>11</strong>-026 ).<br />
b Mask all adjacent surfaces on which the phosphoric solution (Material-Number 05-042 )<br />
can possibly cause damage.<br />
WARNING: PHOSPHORIC SOLUTION (MATERIAL NO. 05-042) IS DANGEROUS.<br />
c<br />
Apply a large quantity of phosphoric solution (Material No. 05-042 ) with a brush or a<br />
clean cloth. Permit the solution to penetrate for 10 minutes.<br />
d<br />
e<br />
NOTE: The surface must, when treated correctly, show a grey-white color. Do the phosphating<br />
procedure again if necessary.<br />
Clean the surface with a clean cloth, soaked in water.<br />
Dry the area with hot air.<br />
f Apply the required paint coatings (Refer to Chapter <strong>51</strong>-23-<strong>11</strong> ).<br />
(d) Phosphating of Steel Parts by Immersion in a Phosphoric Bath<br />
1 For details of this treatment and the necessary equipment refer to PMS Chapter 01-01-10 .<br />
(3). Hard Chromium Plating<br />
(a) General<br />
Print Date: December 29, 2016 Page 20 of 29<br />
© AIRBUS S.A.S. ALL RIGHTS RESERVED. CONFIDENTIAL AND PROPRIETARY DOCUMENT.
Customer : ENV<br />
Type : A<strong>320</strong><br />
Rev. Date : Nov 01, 2016<br />
<strong>51</strong>-<strong>21</strong>-<strong>11</strong> Application of Protective Treatment to Metal Parts<br />
Manual : <strong>SRM</strong><br />
Selected effectivity :<br />
1 Hard chromium plating is a procedure in which the surface of the material is given a<br />
chromium layer.<br />
2 Hard chromium plating is required when:<br />
- the original chromium layer becomes thinner by friction than is permitted,<br />
- or the material under the chromium layer is corroded.<br />
(b) Safety Precautions<br />
WARNING: BE CAREFUL WHEN YOU USE CONSUMABLE MATERIALS. OBEY THE MATERI-<br />
AL MANUFACTURER'S INSTRUCTIONS AND YOUR LOCAL REGULATIONS.<br />
WARNING: OBEY THE MANUFACTURER INSTRUCTIONS FOR THE MATERIALS WHICH YOU<br />
USE FOR CLEANING PROCEDURES BEFORE HARD CHROMIUM PLATING.<br />
WARNING: OBEY THE MANUFACTURER INSTRUCTIONS FOR EACH CHEMICAL WHICH YOU<br />
USE IN THIS PROCEDURE.<br />
(c) Procedure<br />
For details of hard chromium plating and the necessary equipment refer to PMS Chapter<br />
01-02-<strong>11</strong> .<br />
(4). Silver Plating<br />
(a) General<br />
1 Silver Plating is a procedure in which the surface of the material is given a layer of silver. You<br />
do this with the silver electrolytic process. Silver plating is used for its electrical conductive<br />
properties and its resistance to fretting corrosion under hot conditions.<br />
(b) Safety Precautions<br />
WARNING: BE CAREFUL WHEN YOU USE CONSUMABLE MATERIALS. OBEY THE MATERI-<br />
AL MANUFACTURER'S INSTRUCTIONS AND YOUR LOCAL REGULATIONS.<br />
WARNING: OBEY THE MANUFACTURER INSTRUCTIONS FOR THE MATERIALS WHICH YOU<br />
USE FOR CLEANING PROCEDURES BEFORE SILVER PLATING. THESE MATERI-<br />
ALS ARE DANGEROUS.<br />
WARNING: OBEY THE MANUFACTURER INSTRUCTIONS FOR EACH CHEMICAL WHICH YOU<br />
USE IN THIS PROCEDURE. SOME <strong>OF</strong> THESE MATERIALS CONTAIN IRRITANTS.<br />
(c) Procedure<br />
For details of silver plating and the necessary equipment refer to PMS Chapter 01-02-01 .<br />
(5). Zinc Spraying<br />
(a) General<br />
1 Zinc spraying is a procedure in which the surface of the metal is given a zinc layer. This<br />
can be necessary when the steel repair parts touch aluminum components and galvanic<br />
corrosion can occur.<br />
2 The zinc layer is a type of sacrificial protection. The corrosion effects initially damage the zinc<br />
layer and not the material below the protective layer.<br />
(b) Safety Precautions<br />
WARNING: BE CAREFUL WHEN YOU USE CONSUMABLE MATERIALS. OBEY THE MATERI-<br />
AL MANUFACTURER'S INSTRUCTIONS AND YOUR LOCAL REGULATIONS.<br />
Print Date: December 29, 2016 Page <strong>21</strong> of 29<br />
© AIRBUS S.A.S. ALL RIGHTS RESERVED. CONFIDENTIAL AND PROPRIETARY DOCUMENT.
Customer : ENV<br />
Type : A<strong>320</strong><br />
Rev. Date : Nov 01, 2016<br />
<strong>51</strong>-<strong>21</strong>-<strong>11</strong> Application of Protective Treatment to Metal Parts<br />
Manual : <strong>SRM</strong><br />
Selected effectivity :<br />
WARNING: OBEY THE MANUFACTURER INSTRUCTIONS FOR THE MATERIALS WHICH YOU<br />
USE FOR CLEANING PROCEDURES BEFORE ZINC SPRAYING. THESE MATERI-<br />
ALS ARE DANGEROUS.<br />
WARNING: OBEY THE MANUFACTURER INSTRUCTIONS WHEN YOU SPRAY ZINC WITH A<br />
SPRAY GUN. THE <strong>METAL</strong>LIC DUST IN THE AIR IS HIGHLY EXPLOSIVE. MAKE<br />
SURE THAT YOU DO THE SPRAYING PROCEDURE IN A GOOD VENTILATED<br />
AREA. USE <strong>PROTECTIVE</strong> CLOTHES FOR ALL <strong>PARTS</strong> <strong>OF</strong> YOUR BODY AND DO<br />
NOT INHALE THE <strong>METAL</strong>LIC DUST.<br />
WARNING: OBEY THE MANUFACTURER INSTRUCTIONS WHEN YOU USE PROPANE OR<br />
ACETYLENE GAS. BOTH GASES ARE HIGHLY FLAMMABLE.<br />
(c) Procedure<br />
For details of zinc spraying and the necessary equipment refer to PMS Chapter 01-02-24 .<br />
(6). Vacuum Cadmium Plating<br />
C. Titanium<br />
(a) General<br />
1 Vacuum cadmium plating is a procedure in which the surface of the metal is given a layer<br />
of cadmium. This layer of cadmium is a type of sacrificial protection. The corrosion effects<br />
initially damage the cadmium and not the metal under the protective layer.<br />
2 This procedure is specially used for high-tensile steels with a tensile strength more than 1450<br />
N/mm ² (<strong>21</strong>0 KSI). Other procedures of cadmium plating are not permitted for high-tensile<br />
steel because of the embrittlement of the material.<br />
(b) Safety Precautions<br />
WARNING: BE CAREFUL WHEN YOU USE CONSUMABLE MATERIALS. OBEY THE MATERI-<br />
AL MANUFACTURER'S INSTRUCTIONS AND YOUR LOCAL REGULATIONS.<br />
WARNING: OBEY THE MANUFACTURER INSTRUCTIONS FOR THE MATERIAL WHICH YOU<br />
USE FOR THE CLEANING PROCEDURES BEFORE VACUUM CADMIUM PLATING.<br />
THESE CLEANING AGENTS ARE DANGEROUS.<br />
WARNING: OBEY THE MANUFACTURER INSTRUCTIONS FOR EACH CHEMICAL WHICH YOU<br />
USE IN THIS PROCEDURE. THESE CHEMICALS ARE POISONOUS AND DANGER-<br />
OUS.<br />
(c) Procedure<br />
For details of vacuum cadmium plating and the necessary equipment refer to PMS Chapter<br />
01-02-38 .<br />
(1). Anodizing<br />
(a) General<br />
1 Anodizing of titanium is a procedure in which the surface of the material is given a very<br />
thin anodic coating. This protective treatment decreases galvanic corrosion when it is<br />
used without further protections. This coating gives a good surface for the adhesion of dry<br />
lubricants.<br />
2 This protective treatment is necessary when titanium touches other metals and galvanic<br />
effects have to be prevented.<br />
3 Make sure that the required paint coatings are supplied within 16 hours after this treatment.<br />
Print Date: December 29, 2016 Page 22 of 29<br />
© AIRBUS S.A.S. ALL RIGHTS RESERVED. CONFIDENTIAL AND PROPRIETARY DOCUMENT.
Customer : ENV<br />
Type : A<strong>320</strong><br />
Rev. Date : Nov 01, 2016<br />
<strong>51</strong>-<strong>21</strong>-<strong>11</strong> Application of Protective Treatment to Metal Parts<br />
Manual : <strong>SRM</strong><br />
Selected effectivity :<br />
(b) Safety Precautions<br />
WARNING: BE CAREFUL WHEN YOU USE CONSUMABLE MATERIALS. OBEY THE MATERI-<br />
AL MANUFACTURER'S INSTRUCTIONS AND YOUR LOCAL REGULATIONS.<br />
WARNING: OBEY THE MANUFACTURER INSTRUCTIONS FOR THE MATERIAL WHICH YOU<br />
USE FOR THE CLEANING PROCEDURE BEFORE ANODIZING. THESE CLEANING<br />
AGENTS ARE DANGEROUS.<br />
WARNING: OBEY THE MANUFACTURER INSTRUCTIONS FOR EACH CHEMICAL WHICH YOU<br />
USE IN THIS PROCEDURE. THESE CHEMICALS ARE DANGEROUS.<br />
(c) Procedure<br />
For details of anodizing titanium and the necessary equipment refer to PMS Chapter 01-02-10 .<br />
D. Copper Alloys<br />
(1). Cadmium Plating<br />
(a) General<br />
1 There are two different procedures used to put cadmium onto the surface of the material.<br />
The first method describe a cadmium plating procedure, in which the metal parts are put into<br />
several immersion baths. The second method describes the portable plating DALIC process,<br />
which is suitable for field repairs.<br />
2 Before you start the cadmium plating procedure, make sure that the parts are clean, show a<br />
bright metal surface and are free from corrosion, refer to Chapter <strong>51</strong>-74-00 .<br />
3 It is recommended that cadmium plating is carried out by trained and approved personnel.<br />
(b) Safety precautions<br />
WARNING: BE CAREFUL WHEN YOU USE CONSUMABLE MATERIALS. OBEY THE MATERI-<br />
AL MANUFACTURER'S INSTRUCTIONS AND YOUR LOCAL REGULATIONS.<br />
WARNING: OBEY THE MANUFACTURER INSTRUCTIONS FOR EACH MATERIAL WHICH YOU<br />
USE FOR CLEANING PROCEDURES BEFORE YOU START THE CADMIUM PLAT-<br />
ING. THESE CLEANING AGENTS ARE HARMFUL.<br />
WARNING: OBEY THE MANUFACTURER INSTRUCTIONS FOR EACH CHEMICAL WHICH YOU<br />
USE IN THIS PROCEDURE. THESE CHEMICALS ARE POISONOUS AND HARM-<br />
FUL.<br />
(c) Cadmium plating immersion procedure in accordance with AMS-QQ-P-416 Type II.<br />
NOTE: Use class 2 thickness unless otherwise noted in repair instructions/drawing.<br />
(d) Cadmium brush plating (or pad cadmium plating DALIC process) for copper alloys<br />
NOTE: This process must be carried out by trained and approved personnel, an operator training<br />
service is available from the solution suppliers.<br />
1 Equipment<br />
Power supply: variable rectifier minimum fitted with voltmeter, ammeter, ampere-hour meter,<br />
reversing switch and on/off switch.<br />
Dishes for solutions glass polyethylene or porcelain flat bottom dishes of convenient size.<br />
Print Date: December 29, 2016 Page 23 of 29<br />
© AIRBUS S.A.S. ALL RIGHTS RESERVED. CONFIDENTIAL AND PROPRIETARY DOCUMENT.
Customer : ENV<br />
Type : A<strong>320</strong><br />
Rev. Date : Nov 01, 2016<br />
<strong>51</strong>-<strong>21</strong>-<strong>11</strong> Application of Protective Treatment to Metal Parts<br />
Manual : <strong>SRM</strong><br />
Selected effectivity :<br />
Electrodes: Use DALIC or DALIC UK or SIFCO tampons which have to be prepared in<br />
accordance with the material manufacturer's instructions, for optimum deposit speed area<br />
and shape of the anode must be determined by the area and the shape of the part to be<br />
plated the size should be s/6 < S < s/3 where "s" is the area to be treated and "S" the area of<br />
the anode.<br />
Hot air dryer (oil free)<br />
2 Materials<br />
ITEM NOMENCLATURE QTY MATERIAL/REMARKS<br />
1 Cleaning Agent AR Material No. <strong>11</strong>-003 or <strong>11</strong>-026 (Refer to<br />
CML)<br />
2 Lint free cloth, cotton wool AR Local Purchase<br />
3 Abrasive Paper - Aluminum Oxide<br />
AR Local Purchase<br />
(grade <strong>320</strong> - water resistant)<br />
or finer<br />
4 Masking tape AR PVC insulating tape or 3M No. 470 or aluminum<br />
tape Material No. 08-052 (Refer to<br />
CML)<br />
5 Brush or Swab AR Local Purchase<br />
6 De-mineralized Water AR<br />
7 SCOTCH-BRITE pads - red AR Local Purchase<br />
8 Aluminium Oxide Powder (80 microns)<br />
AR DALIC Reference CC<strong>11</strong>5<br />
9 Brush Plating Tools (use graphite<br />
anode) and Bonnets<br />
AR<br />
10 DALIC Cadmium plating Solution AR<br />
2023<br />
<br />
<strong>11</strong> Chromic finish solution AR<br />
<br />
12 Cleaning de-oxidizing solution<br />
<br />
13 ATTAQUE No. 2<br />
<br />
14 SIFCO Cadmium LHE<br />
<br />
15 SIFCO Passivating Solution<br />
<br />
16 SIFCO Electrolytic Degreasing<br />
Solution<br />
<br />
17 Etching dismutting solution<br />
<br />
AR<br />
AR<br />
Separate anodes, bonnets and solution<br />
must be used at each stage of the<br />
process .Do not use steel tools containing<br />
more than 5% of chromium<br />
Code <strong>11</strong>028 from DALIC Code DPS6123<br />
from DALIC UK<br />
Passivateur No. 2 Code 10033 from DAL-<br />
IC Cadmium/Zinc Passivating Code DFS<br />
8010 from DALIC UK<br />
DECA Z from DALIC Code 10007<br />
Code 10004 from DALIC or ACTIVAT-<br />
OR/ETCH No. 3 Code DPR5003 from<br />
DALIC UK<br />
Code SPS 5070 from SIFCO<br />
Code SSS 3002 from SIFCO<br />
Code SCM 4100 from SIFCO<br />
SCM 4350 from SIFCO<br />
Storage conditions: Keep away from humidity and light at a temperature between 5° C<br />
to 30° C. Recommended shelf life is three years in original container.<br />
DALIC 41, Rue des Eaux, B.P. 90139 35501 VITRE - France Tel: (33)<br />
2.99.75.53.80 Fax: (33) 2.99.74.49.31 service@dalicworld.com<br />
Print Date: December 29, 2016 Page 24 of 29<br />
© AIRBUS S.A.S. ALL RIGHTS RESERVED. CONFIDENTIAL AND PROPRIETARY DOCUMENT.
Customer : ENV<br />
Type : A<strong>320</strong><br />
Rev. Date : Nov 01, 2016<br />
<strong>51</strong>-<strong>21</strong>-<strong>11</strong> Application of Protective Treatment to Metal Parts<br />
Manual : <strong>SRM</strong><br />
Selected effectivity :<br />
DALIC UK Ltd South Lodge House, 68-70 Frogge Street Ickleton<br />
(South Cambridge Shire) CB 10-1 SH - UK Tel: 0 1799 532 002 Fax: 0<br />
1799 532 003 info.dalicuk@tiscali.co.uk<br />
Storage conditions: <strong>21</strong>° C to 43° C RH 30 to 90, keep away from humidity and light<br />
at a temperature between 5° C to 30° C. Recommended shelf life is three years in original<br />
container.<br />
SIFCO applied surface concepts 16, rue de la Noue Guimante Lots<br />
22/23 PA de la Courtilliere 77400 Saint-Thibault des Vignes http://<br />
www.electrolyseautampon.com<br />
3 How to obtain the correct thickness<br />
The thickness of the deposited metal is controlled by the ampere-hour meter. It further<br />
depends upon the area to be plated and the specific plating factor. The specific plating factor<br />
gives the number of ampere-hours required to produce a deposit in mm or inches onto a<br />
surface area of square centimeters or square inches.<br />
SOLUTION<br />
FAC<strong>TO</strong>R FOR<br />
MEASUREMENT<br />
IN (mm)<br />
FAC<strong>TO</strong>R FOR<br />
MEASUREMENT<br />
IN (in)<br />
DALIC Code 2023 0.4 70<br />
SIFCO SPS 5070 0.4 70<br />
Table 007 - Specific Plating Factor<br />
Example 1:<br />
You have to plate an area of 25 cm² (3.875 in²) with SPS 5070 cadmium LHE plating<br />
solution. The required thickness is 0.015 mm, the correct ampere hours setting is: 0.4 x<br />
0.015 x 25 = 0.15 ampere-hours.<br />
Example 2:<br />
You have to plate the same area with the same thickness, but you measure in inches. The<br />
thickness is 0.0006 in and the area has the size of 3.87 sq.inch. Determine the correct<br />
number of ampere hours as follows: 70 x 0.0006 x 3.87 = 0.162 ampere-hours.<br />
4 Inspection<br />
The cadmium deposit must be fine grain, smooth and free from blisters, pitting, burns and<br />
other defects. Ensure that the cadmium deposit has good adherence to the metal surface.<br />
Check this with an adhesive tape. Put a strip of adhesive tape onto the treated surface and<br />
draw it quickly away. The adhesive tape must be free from cadmium particles. Refer to PMS<br />
Chapter 01-02-<strong>21</strong> for more information.<br />
5 Procedure<br />
a<br />
b<br />
c<br />
Remove all grease from the repair area (minimum one inch outside the repair area) with<br />
a clean cloth soaked in cleaning agent (Material No. <strong>11</strong>-003 or <strong>11</strong>-026 ) and wipe dry<br />
with a clean cloth or absorbent paper.<br />
Mask as necessary to define the area to be plated. If the area was already plated with<br />
cadmium, the brush plating must overlap the existing cadmium by about 4 mm (0.157<br />
in), refer to Figure 001 .<br />
Brush Plating Procedure<br />
Use one of the alternative procedures given in Paragraph 2.D.(1).(d).5.d and 2.D.(1).<br />
(d).5.e .<br />
d SIFCO Solution SPS 5070<br />
NOTE: Prepare the work place with all the tools and solutions.<br />
Use a different and identified tool for each solution.<br />
Print Date: December 29, 2016 Page 25 of 29<br />
© AIRBUS S.A.S. ALL RIGHTS RESERVED. CONFIDENTIAL AND PROPRIETARY DOCUMENT.
Customer : ENV<br />
Type : A<strong>320</strong><br />
Rev. Date : Nov 01, 2016<br />
<strong>51</strong>-<strong>21</strong>-<strong>11</strong> Application of Protective Treatment to Metal Parts<br />
Manual : <strong>SRM</strong><br />
Selected effectivity :<br />
First wet with demineralised water the bonnets set on the plating tools then<br />
squeeze with hand and paper and let soak with solution for a minimum of 2<br />
minutes.<br />
The treatment must be achieved in totality without interruption.<br />
- Manually abrade the area to be plated using a water wetted abrasive paper (180<br />
grade) or aluminum oxide powder on a water moistened swab. Feather the edge as<br />
shown on Figure 001 .<br />
- Rinse with de-mineralized water.<br />
- Electrolytically clean with deoxidizing solution (Item 16) at 10 to 15 volts forward<br />
current.<br />
- Rinse with de-mineralized water ensuring a water break free surface.<br />
- Before switching on the current, wipe the area to be treated with a pad dampened<br />
with the etching solution (Item 17) or soak a tampon with the plating solution and start<br />
the appropriate tampon movement over the plating area.<br />
- Anodically etch with solution SCM 4350 at 10 to 15 volts reverse current.<br />
- Rinse with cold clean running water.<br />
- Do not allow to dry. Before switching on the current, wipe the area to be treated with<br />
a pad dampened with the plating solution (Item 14) or soak a tampon with the plating<br />
solution and start the appropriate tampon movement over the plating area.<br />
- Using a prepared tampon move the tampon and apply plating solution at forward<br />
current or cathodic plating polarity (part (-) and tool (+)) see manufacturer's<br />
instructions (Item 14). Plate at 6 to 20 V and move the tampon in contact and over<br />
the surface and until you get the required thickness (for required ampere-hours<br />
refer to Paragraph 2.B.(1).(f).5.e . During plating move the tampon at a speed of<br />
approximately 6 to 24 m/min or 20 to 80 feet per minute. During plating do not allow<br />
the surface to dry and move the tampon to avoid the deposit to darken (burning).<br />
NOTE: For unspecified thickness the deposit must average between 0.015 mm (0.0006<br />
in) and a minimum of 0.01 mm (0.0004 in), refer to Paragraph 2.B.(1).(f).5.e .<br />
- Rinse the area with cold running water.<br />
- Apply passivating solution (Item 15) with a brush or swab to the plated surface. Allow<br />
the solution to remain in contact until a yellow or gold appearance is obtained.<br />
- Rinse the area with clean cold running water.<br />
- Dry the repair area with an air blast or with a hot air dryer at a maximum temperature<br />
of 50° C (122° F) or gently dab the surface with soft clean tissues or absorbent paper<br />
or clean cotton wool.<br />
- Inspect the treated area as described in Paragraph 2.B.(1).(e).5.d .<br />
NOTE: Make sure that the required paint coatings are applied within 16 hours.<br />
NOTE: Do not return used solutions in original containers. The solutions, rinsing water<br />
and used bonnets must be processed within the firm or destroyed by an<br />
approved organization. Contaminated packaging if not re-used with the same<br />
product is also special waste to be sent to an approved organization for recycling<br />
or disposal.<br />
e DALIC Solution 2023<br />
NOTE: Prepare the work place with all the tools and solutions.<br />
Use a different and identified tool for each solution.<br />
First wet with demineralised water the bonnets set on the plating tools then<br />
squeeze with hand and paper and let soak with solution for a minimum of 2<br />
minutes.<br />
Print Date: December 29, 2016 Page 26 of 29<br />
© AIRBUS S.A.S. ALL RIGHTS RESERVED. CONFIDENTIAL AND PROPRIETARY DOCUMENT.
Customer : ENV<br />
Type : A<strong>320</strong><br />
Rev. Date : Nov 01, 2016<br />
<strong>51</strong>-<strong>21</strong>-<strong>11</strong> Application of Protective Treatment to Metal Parts<br />
Manual : <strong>SRM</strong><br />
Selected effectivity :<br />
The treatment must be achieved in totality without interruption.<br />
- Manually abrade the area to be plated using a water wetted abrasive paper (180<br />
grade) or aluminum oxide powder on a water moistened swab. Feather the edge as<br />
shown on Figure 001 .<br />
- Clean with de-mineralized water and several cloths or papers without drying the<br />
surface.<br />
- Cathodically clean with cleaning/deoxidizing solution DECA Z solution (Item 12) at 12<br />
to 15 volts forward current.<br />
- Rinse with cold clean running water ensuring a water break free surface.<br />
- Anodically etch with etch ACTIVA<strong>TO</strong>R solution No. 3 (Item 13) at 12 to 15 volts,<br />
reverse polarity (part (+) and tool (-)).<br />
- Rinse with cold clean running water.<br />
- Swab cadmium 2023 plating solution and apply to the surface area to be treated.<br />
- Saturate tampon with cadmium 2023 solution and apply to the surface area to be<br />
treated.<br />
- Cadmium plate with the cadmium solution (Item 10) at 8 to 10 V, cathodic plating<br />
polarity or forward current (part (-) and tool (+)) to achieve the required thickness (for<br />
required ampere-hours refer to Paragraph 2.B.(1).(f).5.e . During plating move the<br />
tampon at a speed of approximately 6 to 24 m/min or 20 to 80 feet/minute. During<br />
plating do not allow the surface to dry and move the tampon to avoid the deposit to<br />
darken (burning).<br />
NOTE: For unspecified thickness the deposit must average between 0.015 mm (0.0006<br />
in) and a minimum of 0.01 mm (0.0004 in) refer Paragraph 2.B.(1).(f).5.e .<br />
- Rinse the area with cold running water.<br />
- Apply passivating solution (Item <strong>11</strong>) with a piece of cotton wool. Do soft and regular<br />
movements on the plated surface for 15 to 30 seconds until a yellow or gold<br />
appearance is obtained.<br />
- Rinse the area with clean cold running water.<br />
- Dry the repair area with an air blast or with a hot air dryer at a maximum temperature<br />
of 50° C (122° F).<br />
- Inspect the treated area as described in Paragraph 2.B.(1).(e).5.d .<br />
NOTE: Make sure that the required paint coatings are applied within 16 hours.<br />
NOTE: Do not return used solutions in original containers. The solutions, rinsing water<br />
and used bonnets must be processed within the firm or destroyed by an<br />
approved organization. Contaminated packaging if not re-used with the same<br />
product is also special waste to be sent to an approved organization for recycling<br />
or disposal.<br />
Print Date: December 29, 2016 Page 27 of 29<br />
© AIRBUS S.A.S. ALL RIGHTS RESERVED. CONFIDENTIAL AND PROPRIETARY DOCUMENT.
Customer : ENV<br />
Type : A<strong>320</strong><br />
Rev. Date : Nov 01, 2016<br />
<strong>51</strong>-<strong>21</strong>-<strong>11</strong> Application of Protective Treatment to Metal Parts<br />
Manual : <strong>SRM</strong><br />
Selected effectivity :<br />
DAMAGED AREA<br />
PLATING DAMAGED IN THIS AREA<br />
NS6 <strong>51</strong> <strong>21</strong> <strong>11</strong> 0 AAM0 00 0<br />
BLENDING AREA<br />
AT LEAST 4mm (0.157in.)<br />
TRANSITION AREA<br />
Figure 001 (sheet 1) / <strong>51</strong>-<strong>21</strong>-<strong>11</strong> Typical surface preparation<br />
Print Date: December 29, 2016 Page 28 of 29<br />
© AIRBUS S.A.S. ALL RIGHTS RESERVED. CONFIDENTIAL AND PROPRIETARY DOCUMENT.
Customer : ENV<br />
Type : A<strong>320</strong><br />
Rev. Date : Nov 01, 2016<br />
<strong>51</strong>-<strong>21</strong>-<strong>11</strong> Application of Protective Treatment to Metal Parts<br />
Manual : <strong>SRM</strong><br />
Selected effectivity :<br />
End of document<br />
Print Date: December 29, 2016 Page 29 of 29<br />
© AIRBUS S.A.S. ALL RIGHTS RESERVED. CONFIDENTIAL AND PROPRIETARY DOCUMENT.