Syngress - Secure Your Network for Free Using NMAP
Syngress - Secure Your Network for Free Using NMAP
Syngress - Secure Your Network for Free Using NMAP

Create successful ePaper yourself
Turn your PDF publications into a flip-book with our unique Google optimized e-Paper software.
Visit us at<br />
www.syngress.com<br />
<strong>Syngress</strong> is committed to publishing high-quality books <strong>for</strong> IT Professionals and<br />
delivering those books in media and <strong>for</strong>mats that fit the demands of our customers.<br />
We are also committed to extending the utility of the book you purchase<br />
via additional materials available from our Web site.<br />
SOLUTIONS WEB SITE<br />
To register your book, visit www.syngress.com/solutions. Once registered, you can<br />
access our solutions@syngress.com Web pages. There you may find an assortment<br />
of value-added features such as free e-books related to the topic of this book, URLs<br />
of related Web sites, FAQs from the book, corrections, and any updates from the<br />
author(s).<br />
ULTIMATE CDs<br />
Our Ultimate CD product line offers our readers budget-conscious compilations of<br />
some of our best-selling backlist titles in Adobe PDF <strong>for</strong>m. These CDs are the perfect<br />
way to extend your reference library on key topics pertaining to your area of expertise,<br />
including Cisco Engineering, Microsoft Windows System Administration,<br />
CyberCrime Investigation, Open Source Security, and Firewall Configuration, to<br />
name a few.<br />
DOWNLOADABLE E-BOOKS<br />
For readers who can’t wait <strong>for</strong> hard copy, we offer most of our titles in downloadable<br />
Adobe PDF <strong>for</strong>m. These e-books are often available weeks be<strong>for</strong>e hard copies,<br />
and are priced af<strong>for</strong>dably.<br />
SYNGRESS OUTLET<br />
Our outlet store at syngress.com features overstocked, out-of-print, or slightly hurt<br />
books at significant savings.<br />
SITE LICENSING<br />
<strong>Syngress</strong> has a well-established program <strong>for</strong> site licensing our e-books onto servers<br />
in corporations, educational institutions, and large organizations. Contact us at<br />
sales@syngress.com <strong>for</strong> more in<strong>for</strong>mation.<br />
CUSTOM PUBLISHING<br />
Many organizations welcome the ability to combine parts of multiple <strong>Syngress</strong><br />
books, as well as their own content, into a single volume <strong>for</strong> their own internal use.<br />
Contact us at sales@syngress.com <strong>for</strong> more in<strong>for</strong>mation.
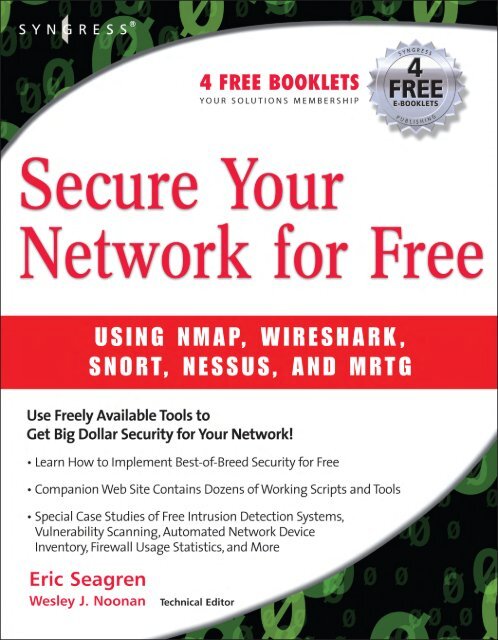
<strong>Secure</strong> <strong>Your</strong><br />
<strong>Network</strong> <strong>for</strong> <strong>Free</strong><br />
USING <strong>NMAP</strong>, WIRESHARK,<br />
SNORT, NESSUS, AND MRTG<br />
Eric Seagren<br />
Wes Noonan Technical Editor
<strong>Syngress</strong> Publishing, Inc., the author(s), and any person or firm involved in the writing, editing, or production<br />
(collectively “Makers”) of this book (“the Work”) do not guarantee or warrant the results to be obtained from<br />
the Work.<br />
There is no guarantee of any kind, expressed or implied, regarding the Work or its contents.The Work is sold AS<br />
IS and WITHOUT WARRANTY.You may have other legal rights, which vary from state to state.<br />
In no event will Makers be liable to you <strong>for</strong> damages, including any loss of profits, lost savings, or other incidental<br />
or consequential damages arising out from the Work or its contents. Because some states do not allow the<br />
exclusion or limitation of liability <strong>for</strong> consequential or incidental damages, the above limitation may not apply to<br />
you.<br />
You should always use reasonable care, including backup and other appropriate precautions, when working with<br />
computers, networks, data, and files.<br />
<strong>Syngress</strong> Media®, <strong>Syngress</strong>®,“Career Advancement Through Skill Enhancement®,”“Ask the Author<br />
UPDATE®,” and “Hack Proofing®,” are registered trademarks of <strong>Syngress</strong> Publishing, Inc.“<strong>Syngress</strong>:The<br />
Definition of a Serious Security Library”,“Mission Critical,” and “The Only Way to Stop a Hacker is to<br />
Think Like One” are trademarks of Elsevier. Brands and product names mentioned in this book are trademarks<br />
or service marks of their respective companies.<br />
KEY SERIAL NUMBER<br />
001 HJIRTCV764<br />
002 PO9873D5FG<br />
003 829KM8NJH2<br />
004 49HLPWE43W<br />
005 CVPLQ6WQ23<br />
006 VBP965T5T5<br />
007 HJJJ863WD3E<br />
008 2987GVTWMK<br />
009 629MP5SDJT<br />
010 IMWQ295T6T<br />
PUBLISHED BY<br />
<strong>Syngress</strong> Publishing, Inc.<br />
800 Hingham Street<br />
Rockland, MA 02370<br />
<strong>Secure</strong> <strong>Your</strong> <strong>Network</strong> <strong>for</strong> <strong>Free</strong><br />
Copyright © 2007 by Elsevier. All rights reserved. Except as permitted under the Copyright Act of 1976, no<br />
part of this publication may be reproduced or distributed in any <strong>for</strong>m or by any means, or stored in a database<br />
or retrieval system, without the prior written permission of the publisher, with the exception that the program<br />
listings may be entered, stored, and executed in a computer system, but they may not be reproduced <strong>for</strong><br />
publication.<br />
1 2 3 4 5 6 7 8 9 0<br />
ISBN-10: 1-59749-123-3<br />
ISBN-13: 978-1-59749-123-5<br />
Publisher: Andrew Williams Page Layout and Art: Patricia Lupien<br />
Acquisitions Editor: Gary Byrne Copy Editors: Michelle Melani and Audrey<br />
Technical Editors: Wes Noonan and Stephen Watkins Doyle<br />
Indexer: Richard Carlson Cover Designer: Michael Kavish<br />
For in<strong>for</strong>mation on rights, translations, and bulk sales, contact Matt Pedersen, Director of Sales and Rights, at<br />
<strong>Syngress</strong> Publishing; email matt@syngress.com or fax to 781-681-3585.
Lead Author<br />
Eric S. Seagren (CISA, CISSP-ISSAP, SCNP, CCNA, CNE-4,<br />
MCP+I, MCSE-NT) has 10 years of experience in the computer<br />
industry, with the last eight years spent in the financial services<br />
industry working <strong>for</strong> a Fortune 100 company. Eric started his computer<br />
career working on Novell servers and per<strong>for</strong>ming general network<br />
troubleshooting <strong>for</strong> a small Houston-based company. Since he<br />
has been working in the financial services industry, his position and<br />
responsibilities have advanced steadily. His duties have included<br />
server administration, disaster recovery responsibilities, business continuity<br />
coordinator,Y2K remediation, network vulnerability assessment,<br />
and risk management responsibilities. He has spent the last<br />
few years as an IT architect and risk analyst, designing and evaluating<br />
secure, scalable, and redundant networks.<br />
Eric has worked on several books as a contributing author or<br />
technical editor.These include Hardening <strong>Network</strong> Security (McGraw-<br />
Hill), Hardening <strong>Network</strong> Infrastructure (McGraw-Hill), Hacking<br />
Exposed: Cisco <strong>Network</strong>s (McGraw-Hill), Configuring Check Point<br />
NGX VPN-1/FireWall-1 (<strong>Syngress</strong>), Firewall Fundamentals (Cisco<br />
Press), and Designing and Building Enterprise DMZs (<strong>Syngress</strong>). He has<br />
also received a CTM from Toastmasters of America.<br />
I would like to express my gratitude to several people who have<br />
helped me make this book a reality. First and <strong>for</strong>emost I would like<br />
to say thank you to Sandra and Angela, <strong>for</strong> their support, patience,<br />
and understanding during the entire process. I would like to thank<br />
Wes, <strong>for</strong> the quality and consistency of his constructive feedback. I<br />
would also like to thank Holla, <strong>for</strong> providing the original spark of<br />
an idea that eventually evolved into this book (specifically Chapters<br />
2 and 7), and Moe, <strong>for</strong> being supportive when the opportunity presented<br />
itself.<br />
v
vi<br />
Technical Editors<br />
Wesley J. Noonan (Houston,Texas) has worked in the computer<br />
industry <strong>for</strong> more than 12 years, specializing in Windows-based networks<br />
and network infrastructure security design and implementation.<br />
He is a Staff Quality Engineer <strong>for</strong> NetIQ, working on the<br />
company’s security solutions product line. Wes was the author of<br />
Hardening <strong>Network</strong> Infrastructure (McGraw-Hill) and was a contributing/coauthor<br />
<strong>for</strong> The CISSP Training Guide (Que Publishing),<br />
Hardening <strong>Network</strong> Security (McGraw-Hill), Designing and Building<br />
Enterprise DMZs (<strong>Syngress</strong>), and Firewall Fundamentals (Cisco Press).<br />
Wes was also the technical editor <strong>for</strong> Hacking Exposed: Cisco<br />
<strong>Network</strong>s (McGraw-Hill). He contributes to Redmond magazine,<br />
writing on the subjects of network infrastructure and security, and<br />
he maintains a Windows <strong>Network</strong> Security section called “Ask the<br />
Experts” <strong>for</strong> Techtarget.com (http://searchwindowssecurity.<br />
techtarget.com/ateAnswers/0,289620,sid45_tax298206,00.html).<br />
Wes has also presented at TechMentor 2004.<br />
Wes lives in Houston,Texas.<br />
Stephen Watkins (CISSP) is an In<strong>for</strong>mation Security Professional<br />
with more than 10 years of relevant technology experience,<br />
devoting eight of these years to the security field. He currently<br />
serves as In<strong>for</strong>mation Assurance Analyst at Regent University in<br />
southeastern Virginia. Be<strong>for</strong>e coming to Regent, he led a team of<br />
security professionals providing in-depth analysis <strong>for</strong> a global-scale<br />
government network. Over the last eight years, he has cultivated his<br />
expertise with regard to perimeter security and multilevel security<br />
architecture. His Check Point experience dates back to 1998 with<br />
FireWall-1 version 3.0b. He has earned his B.S. in Computer<br />
Science from Old Dominion University and M.S. in Computer<br />
Science, with Concentration in Infosec, from James Madison
University. He is nearly a lifelong resident of Virginia Beach, where<br />
he and his family remain active in their church and the local Little<br />
League.<br />
Stephen was the technical editor <strong>for</strong> Chapter 3.<br />
vii
viii<br />
Companion Web Site<br />
Much of the code presented throughout this book is available <strong>for</strong><br />
download from www.syngress.com/solutions. Look <strong>for</strong> the <strong>Syngress</strong><br />
icon in the margins indicating which examples are available from<br />
the companion Web site.
Contents<br />
Chapter 1 Presenting the Business<br />
Case <strong>for</strong> <strong>Free</strong> Solutions . . . . . . . . . . . . . . . . . . . . . . . . . . 1<br />
Introduction . . . . . . . . . . . . . . . . . . . . . . . . . . . . . . . . . . . . .2<br />
The Costs of <strong>Using</strong> <strong>Free</strong> Security Solutions . . . . . . . . . . . . . .2<br />
Training Costs . . . . . . . . . . . . . . . . . . . . . . . . . . . . . . . .3<br />
Hardware Costs . . . . . . . . . . . . . . . . . . . . . . . . . . . . . . .3<br />
Consulting Costs . . . . . . . . . . . . . . . . . . . . . . . . . . . . . . .4<br />
Hidden Costs . . . . . . . . . . . . . . . . . . . . . . . . . . . . . . . . .5<br />
The Savings of <strong>Using</strong> <strong>Free</strong> Security Solutions . . . . . . . . . . . .6<br />
Purchase Costs . . . . . . . . . . . . . . . . . . . . . . . . . . . . . . . .6<br />
Maintenance Costs . . . . . . . . . . . . . . . . . . . . . . . . . . . . .7<br />
Customization Costs . . . . . . . . . . . . . . . . . . . . . . . . . . . .7<br />
Comparing <strong>Free</strong> Solutions with Commercial Solutions . . . . .8<br />
Strengths of <strong>Free</strong> Solutions . . . . . . . . . . . . . . . . . . . . . . .9<br />
Weaknesses of <strong>Free</strong> Solutions . . . . . . . . . . . . . . . . . . . . .10<br />
Evaluating Individual Solutions . . . . . . . . . . . . . . . . . . .12<br />
“Selling” a <strong>Free</strong> Solution . . . . . . . . . . . . . . . . . . . . . . . . . . .16<br />
Selling by Doing . . . . . . . . . . . . . . . . . . . . . . . . . . . . . .17<br />
Presenting a Proposal . . . . . . . . . . . . . . . . . . . . . . . . . . .17<br />
Summary . . . . . . . . . . . . . . . . . . . . . . . . . . . . . . . . . . . . . .19<br />
Solutions Fast Track . . . . . . . . . . . . . . . . . . . . . . . . . . . . . .19<br />
Frequently Asked Questions . . . . . . . . . . . . . . . . . . . . . . . .21<br />
Chapter 2 Protecting <strong>Your</strong> Perimeter. . . . . . . . . . . . . . . 23<br />
Introduction . . . . . . . . . . . . . . . . . . . . . . . . . . . . . . . . . . . .24<br />
Firewall Types . . . . . . . . . . . . . . . . . . . . . . . . . . . . . . . . . . .24<br />
Firewall Architectures . . . . . . . . . . . . . . . . . . . . . . . . . . . . .27<br />
Screened Subnet . . . . . . . . . . . . . . . . . . . . . . . . . . . . . .27<br />
One-Legged . . . . . . . . . . . . . . . . . . . . . . . . . . . . . . . . .28<br />
True DMZ . . . . . . . . . . . . . . . . . . . . . . . . . . . . . . . . . .30<br />
Implementing Firewalls . . . . . . . . . . . . . . . . . . . . . . . . . . . .31<br />
Hardware versus Software Firewalls . . . . . . . . . . . . . . . .32<br />
Configuring netfilter . . . . . . . . . . . . . . . . . . . . . . . . . . .32<br />
Choosing a Linux Version . . . . . . . . . . . . . . . . . . . . .32<br />
ix
x Contents<br />
Choosing Installation Media . . . . . . . . . . . . . . . . . . .33<br />
Linux Firewall Operation . . . . . . . . . . . . . . . . . . . . .36<br />
Configuration Examples . . . . . . . . . . . . . . . . . . . . . .42<br />
GUIs . . . . . . . . . . . . . . . . . . . . . . . . . . . . . . . . . . . .55<br />
Smoothwall . . . . . . . . . . . . . . . . . . . . . . . . . . . . . . .76<br />
Configuring Windows Firewall . . . . . . . . . . . . . . . . . . .85<br />
Providing <strong>Secure</strong> Remote Access . . . . . . . . . . . . . . . . . . . . .86<br />
Providing VPN Access . . . . . . . . . . . . . . . . . . . . . . . . . .87<br />
<strong>Using</strong> Windows as a VPN Concentrator . . . . . . . . . .89<br />
iPig . . . . . . . . . . . . . . . . . . . . . . . . . . . . . . . . . . . . .93<br />
OpenSSL VPN . . . . . . . . . . . . . . . . . . . . . . . . . . . . .98<br />
Providing a Remote Desktop . . . . . . . . . . . . . . . . . . . .108<br />
Windows Terminal Services . . . . . . . . . . . . . . . . . . .109<br />
VNC . . . . . . . . . . . . . . . . . . . . . . . . . . . . . . . . . . .113<br />
<strong>Using</strong> the X Window System . . . . . . . . . . . . . . . . .119<br />
Providing a Remote Shell . . . . . . . . . . . . . . . . . . . . . .125<br />
<strong>Using</strong> <strong>Secure</strong> Shell . . . . . . . . . . . . . . . . . . . . . . . . .126<br />
<strong>Using</strong> a <strong>Secure</strong> Shell GUI Client . . . . . . . . . . . . . . .128<br />
Summary . . . . . . . . . . . . . . . . . . . . . . . . . . . . . . . . . . . . .130<br />
Solutions Fast Track . . . . . . . . . . . . . . . . . . . . . . . . . . . . .131<br />
Frequently Asked Questions . . . . . . . . . . . . . . . . . . . . . . .132<br />
Chapter 3 Protecting <strong>Network</strong> Resources . . . . . . . . . . 133<br />
Introduction . . . . . . . . . . . . . . . . . . . . . . . . . . . . . . . . . . .134<br />
Per<strong>for</strong>ming Basic Hardening . . . . . . . . . . . . . . . . . . . . . . .134<br />
Defining Policy . . . . . . . . . . . . . . . . . . . . . . . . . . . . . .135<br />
Access Controls . . . . . . . . . . . . . . . . . . . . . . . . . . . . . .137<br />
Authentication . . . . . . . . . . . . . . . . . . . . . . . . . . . . . .137<br />
Authorization . . . . . . . . . . . . . . . . . . . . . . . . . . . . . . .138<br />
Auditing . . . . . . . . . . . . . . . . . . . . . . . . . . . . . . . . . . .138<br />
Hardening Windows Systems . . . . . . . . . . . . . . . . . . . . . . .139<br />
General Hardening Steps . . . . . . . . . . . . . . . . . . . . . . .139<br />
Users and Groups . . . . . . . . . . . . . . . . . . . . . . . . . .142<br />
File-Level Access Controls . . . . . . . . . . . . . . . . . . . .147<br />
Additional Steps . . . . . . . . . . . . . . . . . . . . . . . . . . .152<br />
<strong>Using</strong> Microsoft Group Policy Objects . . . . . . . . . . . . .153<br />
Account Lockout Policy . . . . . . . . . . . . . . . . . . . . .159
Contents xi<br />
Audit Policy . . . . . . . . . . . . . . . . . . . . . . . . . . . . . .160<br />
User Rights Assignment . . . . . . . . . . . . . . . . . . . . .160<br />
Hardening Linux Systems . . . . . . . . . . . . . . . . . . . . . . . . .164<br />
General Hardening Steps . . . . . . . . . . . . . . . . . . . . . . .164<br />
Users and Groups . . . . . . . . . . . . . . . . . . . . . . . . . .165<br />
File-Level Access Controls . . . . . . . . . . . . . . . . . . . .168<br />
<strong>Using</strong> the Bastille Hardening Script . . . . . . . . . . . . . . .172<br />
<strong>Using</strong> SELinux . . . . . . . . . . . . . . . . . . . . . . . . . . . . . .173<br />
Hardening Infrastructure Devices . . . . . . . . . . . . . . . . . . . .175<br />
Patching Systems . . . . . . . . . . . . . . . . . . . . . . . . . . . . . . . .176<br />
Patching Windows Systems . . . . . . . . . . . . . . . . . . . . .177<br />
Patching Linux Systems . . . . . . . . . . . . . . . . . . . . . . . .179<br />
Personal Firewalls . . . . . . . . . . . . . . . . . . . . . . . . . . . . . . .180<br />
Windows Firewall . . . . . . . . . . . . . . . . . . . . . . . . . . . .180<br />
Netfilter Firewall . . . . . . . . . . . . . . . . . . . . . . . . . . . . .187<br />
Configuring TCP Wrappers . . . . . . . . . . . . . . . . . . . . .187<br />
Providing Antivirus and Antispyware Protection . . . . . . . . .188<br />
Antivirus Software . . . . . . . . . . . . . . . . . . . . . . . . . . . .189<br />
Clam AntiVirus . . . . . . . . . . . . . . . . . . . . . . . . . . .189<br />
<strong>Using</strong> Online Virus Scanners . . . . . . . . . . . . . . . . . .196<br />
Antispyware Software . . . . . . . . . . . . . . . . . . . . . . . . .196<br />
Microsoft Windows Defender . . . . . . . . . . . . . . . . .197<br />
Microsoft Malicious Software Removal Tool . . . . . .200<br />
Encrypting Sensitive Data . . . . . . . . . . . . . . . . . . . . . . . . .201<br />
EFS . . . . . . . . . . . . . . . . . . . . . . . . . . . . . . . . . . . . . .202<br />
Summary . . . . . . . . . . . . . . . . . . . . . . . . . . . . . . . . . . . . .209<br />
Solutions Fast Track . . . . . . . . . . . . . . . . . . . . . . . . . . . . .209<br />
Frequently Asked Questions . . . . . . . . . . . . . . . . . . . . . . .212<br />
Chapter 4 Configuring an Intrusion Detection System 215<br />
Introduction . . . . . . . . . . . . . . . . . . . . . . . . . . . . . . . . . . .216<br />
Intrusion Detection Systems . . . . . . . . . . . . . . . . . . . . . . .216<br />
Configuring an Intrusion Detection System . . . . . . . . . . . .217<br />
Hardware Requirements . . . . . . . . . . . . . . . . . . . . . . .218<br />
Placing <strong>Your</strong> NIDS . . . . . . . . . . . . . . . . . . . . . . . . . . .218<br />
Configuring Snort on a Windows System . . . . . . . . . . . . .221<br />
Installing Snort . . . . . . . . . . . . . . . . . . . . . . . . . . . . . .222<br />
Configuring Snort Options . . . . . . . . . . . . . . . . . . . . .225<br />
<strong>Using</strong> a Snort GUI Front End . . . . . . . . . . . . . . . . . . .231
xii Contents<br />
Configuring IDS Policy Manager . . . . . . . . . . . . . .232<br />
Configuring Snort on a Linux System . . . . . . . . . . . . . . . .240<br />
Configuring Snort Options . . . . . . . . . . . . . . . . . . . . .240<br />
<strong>Using</strong> a GUI Front End <strong>for</strong> Snort . . . . . . . . . . . . . . . .246<br />
Basic Analysis and Security Engine . . . . . . . . . . . . .246<br />
Other Snort Add-Ons . . . . . . . . . . . . . . . . . . . . . . . . . . . .254<br />
<strong>Using</strong> Oinkmaster . . . . . . . . . . . . . . . . . . . . . . . . . . . .254<br />
Additional Research . . . . . . . . . . . . . . . . . . . . . . . . . .256<br />
Demonstrating Effectiveness . . . . . . . . . . . . . . . . . . . . . . .257<br />
Summary . . . . . . . . . . . . . . . . . . . . . . . . . . . . . . . . . . . . .258<br />
Solutions Fast Track . . . . . . . . . . . . . . . . . . . . . . . . . . . . .259<br />
Frequently Asked Questions . . . . . . . . . . . . . . . . . . . . . . .261<br />
Chapter 5 Managing Event Logs . . . . . . . . . . . . . . . . . 263<br />
Introduction . . . . . . . . . . . . . . . . . . . . . . . . . . . . . . . . . . .264<br />
Generating Windows Event Logs . . . . . . . . . . . . . . . . . . . .264<br />
<strong>Using</strong> Group Policy to Generate Windows Events Logs 267<br />
Generating Custom Windows Event Log Entries . . . . .274<br />
Collecting Windows Event Logs . . . . . . . . . . . . . . . . .275<br />
Analyzing Windows Event Logs . . . . . . . . . . . . . . . . . .277<br />
Generating Syslog Event Logs . . . . . . . . . . . . . . . . . . . . . .279<br />
Windows Syslog . . . . . . . . . . . . . . . . . . . . . . . . . . . . .282<br />
Generating Syslog Events . . . . . . . . . . . . . . . . . . . .282<br />
Receiving Syslog Events . . . . . . . . . . . . . . . . . . . . .295<br />
Linux Syslog . . . . . . . . . . . . . . . . . . . . . . . . . . . . . . . .297<br />
Generating Syslog Events . . . . . . . . . . . . . . . . . . . .297<br />
Encrypting Syslog Traffic . . . . . . . . . . . . . . . . . . . . .298<br />
Receiving Syslog Events on a Linux Host . . . . . . . .311<br />
Analyzing Syslog Logs on Windows and Linux . . . . . . .312<br />
Windows Log Analysis . . . . . . . . . . . . . . . . . . . . . .313<br />
Linux Log Analysis . . . . . . . . . . . . . . . . . . . . . . . . .321<br />
Securing <strong>Your</strong> Event Logs . . . . . . . . . . . . . . . . . . . . . . . . .327<br />
Ensuring Chain of Custody . . . . . . . . . . . . . . . . . . . . .328<br />
Ensuring Log Integrity . . . . . . . . . . . . . . . . . . . . . . . .329<br />
Applying <strong>Your</strong> Knowledge . . . . . . . . . . . . . . . . . . . . . . . . .331<br />
Summary . . . . . . . . . . . . . . . . . . . . . . . . . . . . . . . . . . . . .333<br />
Solutions Fast Track . . . . . . . . . . . . . . . . . . . . . . . . . . . . .333<br />
Frequently Asked Questions . . . . . . . . . . . . . . . . . . . . . . .335
Contents xiii<br />
Chapter 6 Testing and Auditing <strong>Your</strong> Systems . . . . . . 337<br />
Introduction . . . . . . . . . . . . . . . . . . . . . . . . . . . . . . . . . . .338<br />
Taking Inventory . . . . . . . . . . . . . . . . . . . . . . . . . . . . . . .338<br />
Locating and Identifying Systems . . . . . . . . . . . . . . . . .339<br />
Nmap . . . . . . . . . . . . . . . . . . . . . . . . . . . . . . . . . .341<br />
Super Scanner . . . . . . . . . . . . . . . . . . . . . . . . . . . .347<br />
Angry IP Scanner . . . . . . . . . . . . . . . . . . . . . . . . . .351<br />
Scanline . . . . . . . . . . . . . . . . . . . . . . . . . . . . . . . . .352<br />
Special-Purpose Enumerators . . . . . . . . . . . . . . . . .355<br />
Locating Wireless Systems . . . . . . . . . . . . . . . . . . . . . .357<br />
<strong>Network</strong> Stumbler . . . . . . . . . . . . . . . . . . . . . . . . .358<br />
Documentation . . . . . . . . . . . . . . . . . . . . . . . . . . . . . .361<br />
<strong>Network</strong> Topology Maps . . . . . . . . . . . . . . . . . . . . .362<br />
Access Request Forms . . . . . . . . . . . . . . . . . . . . . .364<br />
Business Continuity and Disaster Recovery Plans . . .365<br />
IT Security Policies/Standards/Procedures . . . . . . . .365<br />
Vulnerability Scanning . . . . . . . . . . . . . . . . . . . . . . . . . . . .366<br />
Nessus . . . . . . . . . . . . . . . . . . . . . . . . . . . . . . . . . . . .367<br />
Running Nessus on Windows . . . . . . . . . . . . . . . . .368<br />
Running Nessus on Linux . . . . . . . . . . . . . . . . . . .371<br />
X-Scan . . . . . . . . . . . . . . . . . . . . . . . . . . . . . . . . . . . .375<br />
Microsoft Baseline Security Analyzer . . . . . . . . . . . . . .379<br />
OSSTMM . . . . . . . . . . . . . . . . . . . . . . . . . . . . . . . . . . . .382<br />
Summary . . . . . . . . . . . . . . . . . . . . . . . . . . . . . . . . . . . . .386<br />
Solutions Fast Track . . . . . . . . . . . . . . . . . . . . . . . . . . . . .386<br />
Frequently Asked Questions . . . . . . . . . . . . . . . . . . . . . . .387<br />
Chapter 7 <strong>Network</strong> Reporting and Troubleshooting 389<br />
Introduction . . . . . . . . . . . . . . . . . . . . . . . . . . . . . . . . . . .390<br />
Reporting on Bandwidth Usage and Other Metrics . . . . . .390<br />
Collecting Data <strong>for</strong> Analysis . . . . . . . . . . . . . . . . . . . . . . . .392<br />
Understanding SNMP . . . . . . . . . . . . . . . . . . . . . . . . . . . .394<br />
Configuring Multi Router Traffic Grapher . . . . . . . . . .397<br />
Configuring MZL & Novatech TrafficStatistic . . . . . . .400<br />
Configuring PRTG Traffic Grapher . . . . . . . . . . . . . . .403<br />
Configuring ntop . . . . . . . . . . . . . . . . . . . . . . . . . . . .412<br />
Enabling SNMP on Windows Hosts . . . . . . . . . . . . . .418
xiv Contents<br />
Enabling SNMP on Linux Hosts . . . . . . . . . . . . . . . . .421<br />
Troubleshooting <strong>Network</strong> Problems . . . . . . . . . . . . . . . . . .424<br />
<strong>Using</strong> a GUI Sniffer . . . . . . . . . . . . . . . . . . . . . . . . . .425<br />
<strong>Using</strong> a Command-Line Sniffer . . . . . . . . . . . . . . . .433<br />
Additional Troubleshooting Tools . . . . . . . . . . . . . . . . . . . .438<br />
Netcat . . . . . . . . . . . . . . . . . . . . . . . . . . . . . . . . . . . .439<br />
Tracetcp . . . . . . . . . . . . . . . . . . . . . . . . . . . . . . . . . . .439<br />
Netstat . . . . . . . . . . . . . . . . . . . . . . . . . . . . . . . . . . . .440<br />
Summary . . . . . . . . . . . . . . . . . . . . . . . . . . . . . . . . . . . . .442<br />
Solutions Fast Track . . . . . . . . . . . . . . . . . . . . . . . . . . . . .442<br />
Frequently Asked Questions . . . . . . . . . . . . . . . . . . . . . . .444<br />
Chapter 8 Security as an Ongoing Process . . . . . . . . . 447<br />
Introduction . . . . . . . . . . . . . . . . . . . . . . . . . . . . . . . . . . .448<br />
Patch Management . . . . . . . . . . . . . . . . . . . . . . . . . . . . . .448<br />
<strong>Network</strong> Infrastructure Devices . . . . . . . . . . . . . . . . . .452<br />
Operating System Patches . . . . . . . . . . . . . . . . . . . . . .453<br />
Application Patches . . . . . . . . . . . . . . . . . . . . . . . . . . .453<br />
Change Management . . . . . . . . . . . . . . . . . . . . . . . . . . . .454<br />
Change Causes Disruption . . . . . . . . . . . . . . . . . . . . . .454<br />
Inadequate Documentation Can Exacerbate Problems . .455<br />
Change Management Strategy . . . . . . . . . . . . . . . . . . .455<br />
Antivirus . . . . . . . . . . . . . . . . . . . . . . . . . . . . . . . . . . . . .459<br />
Antispyware . . . . . . . . . . . . . . . . . . . . . . . . . . . . . . . . . . .459<br />
Intrusion Detection Systems . . . . . . . . . . . . . . . . . . . . . . .460<br />
Vulnerability Scanning . . . . . . . . . . . . . . . . . . . . . . . . . . . .460<br />
Vulnerability Management Cycle . . . . . . . . . . . . . . . . .461<br />
Roles and Responsibilities . . . . . . . . . . . . . . . . . . . . . .463<br />
Penetration Testing . . . . . . . . . . . . . . . . . . . . . . . . . . . . . .463<br />
Obtaining the Support of Senior Management . . . . . . .464<br />
Clarify What You Are Buying . . . . . . . . . . . . . . . . . . . .464<br />
Policy Review . . . . . . . . . . . . . . . . . . . . . . . . . . . . . . . . .465<br />
Physical Security . . . . . . . . . . . . . . . . . . . . . . . . . . . . . . . .466<br />
CERT Team . . . . . . . . . . . . . . . . . . . . . . . . . . . . . . . . . . .468<br />
Summary . . . . . . . . . . . . . . . . . . . . . . . . . . . . . . . . . . . . .470<br />
Solutions Fast Track . . . . . . . . . . . . . . . . . . . . . . . . . . . . .470<br />
Frequently Asked Questions . . . . . . . . . . . . . . . . . . . . . . .472<br />
Index. . . . . . . . . . . . . . . . . . . . . . . . . . . . . . . . . . . . . . . 475
Presenting the<br />
Business Case <strong>for</strong><br />
<strong>Free</strong> Solutions<br />
Solutions in this chapter:<br />
■ The Costs of <strong>Using</strong> <strong>Free</strong> Security Solutions?<br />
■ The Savings of <strong>Using</strong> <strong>Free</strong> Security<br />
Solutions?<br />
■ Comparing <strong>Free</strong> Solutions with Commercial<br />
Solutions<br />
■ “Selling” a <strong>Free</strong> Solution<br />
� Summary<br />
� Solutions Fast Track<br />
� Frequently Asked Questions<br />
Chapter 1<br />
1
2 Chapter 1 • Presenting the Business Case <strong>for</strong> <strong>Free</strong> Solutions<br />
Introduction<br />
You may be looking <strong>for</strong> inexpensive ways to solve a security problem and<br />
want to know more about the free tools that are available.This book will<br />
guide you to some of the best free solutions. In some environments, taking<br />
the initiative and implementing any type of security measures can get you<br />
in trouble; even with the best planning, problems can arise.This chapter will<br />
help you gain the support you need in order to implement a cost saving<br />
solution.<br />
Whether you are the person implementing the changes and need to “sell”<br />
the solution to your manager, or you’re the person making the decisions and<br />
need to understand the true implications of a particular “free” solution, this<br />
chapter will help you find solutions to your security problems.This chapter<br />
discusses some of the hidden costs associated with free solutions and clarifies<br />
what comes from those solutions.This chapter also addresses the fact that in<br />
most cases, an apples-to-apples comparison between a free package and a<br />
commercial product is not feasible. With all of this in<strong>for</strong>mation, you should be<br />
in a good position to propose a solution and back up your choice with some<br />
compelling business arguments.<br />
The Costs of<br />
<strong>Using</strong> <strong>Free</strong> Security Solutions<br />
In the case of security solutions, few things in life are free. And while you<br />
may not pay <strong>for</strong> a security solution itself, there are costs associated with<br />
implementing a solution that are not obvious. In most cases, your security<br />
needs dictate which solutions are appropriate; if there is not a free solution<br />
available, you have to use commercial tools. Fortunately, there are a lot of<br />
high-quality free solutions available.The cross section included in subsequent<br />
chapters is aimed at providing a spectrum of solutions with a variety of<br />
sophistication levels. If you dive headlong into implementing a free solution<br />
without adequate knowledge and research, it could end up costing you more<br />
than if you had purchased a commercial solution.<br />
www.syngress.com
Training Costs<br />
Training costs are one of the biggest expenses when it comes to implementing<br />
a free solution. First are the direct training expenses (e.g., sending<br />
someone <strong>for</strong> classroom instruction).<strong>Your</strong> options may be limited when it<br />
comes to training <strong>for</strong> free software solutions. In most cases, training does not<br />
exist in a focused <strong>for</strong>mat (i.e., you probably won’t find a class on netfilter firewalls).<br />
Instead, you may be able to find applicable training indirectly, such as<br />
in classes on general Linux use or administration.<br />
Another training cost is materials (e.g., books). Aside from this book, there<br />
will likely be areas where you want more specialized in<strong>for</strong>mation. For<br />
example, if you are implementing a Snort intrusion detection system (IDS),<br />
this book walks you through setting up Snort. A small library covering the<br />
specific software you have deployed is a worthwhile investment.<br />
You will also incur training costs, such as not having access to an<br />
employee during training.This time away from work is an expense, because<br />
you are paying <strong>for</strong> an asset that isn’t available.The same is true if the<br />
employee is on-site and “self-training.”<br />
Hardware Costs<br />
Presenting the Business Case <strong>for</strong> <strong>Free</strong> Solutions • Chapter 1 3<br />
A security appliance is a device that doesn’t require a computer and is only<br />
used <strong>for</strong> its intended purpose, while all of the free solutions require a system<br />
to run on. Luckily, the requirements are usually minimal; there<strong>for</strong>e, you can<br />
often use an old PC. However, connectivity requirements could make using<br />
the system in a nondedicated configuration a security risk. Rarely does a<br />
system require enough resources to make using the same host <strong>for</strong> any other<br />
function impractical (e.g., the Snort IDS logging capability can quickly eat up<br />
disk space, leaving little to no resources <strong>for</strong> other programs).<br />
If there are no old systems available, there are many online retailers<br />
offering older systems at af<strong>for</strong>dable rates. A large portion of the cost <strong>for</strong> lowend<br />
PC’s is often <strong>for</strong> the operating system. Many retailers offer af<strong>for</strong>dable systems<br />
that either include Linux as the operating system, or come without an<br />
operating system installed.These allow you to purchase a relatively modern<br />
www.syngress.com
4 Chapter 1 • Presenting the Business Case <strong>for</strong> <strong>Free</strong> Solutions<br />
system cheaply, and then install your own OS on it.This can be a viable<br />
option <strong>for</strong> running security tools and providing user workstations.<br />
Consulting Costs<br />
You must carefully weigh and balance where you spend your money.Too little<br />
training and you will end up hiring consultants. Implementing, configuring,<br />
or fixing your free firewall can cost a lot, more than if you had bought a firewall.<br />
With small commercial firewalls costing around $500.00, it doesn’t take<br />
long be<strong>for</strong>e free isn’t so free.<br />
With that said, don’t be afraid to call a consultant if necessary. Having a<br />
well-paid consultant configure your free solution and make sure that it’s<br />
implemented using best practices is a steal compared to implementing some<br />
proprietary solutions. A consultant can also act as a trainer.You can shadow<br />
the consultant and see how and what is being done, and you can ask questions<br />
and learn why things are done a certain way. In this way you can have<br />
your solution set up by someone who is knowledgeable and experienced, and<br />
provide training and guidance to the in-house personnel.<br />
If you have ever had to rely on consultants, you probably know they are<br />
not always a “good buy.” Sometimes they are not as knowledgeable as you<br />
were led to believe.The key is to communicate with the consulting firm,<br />
being very clear about what your needs are. A good consultant can save the<br />
day.<br />
WARNING<br />
You should always be careful when cutting consulting budgets. I have<br />
seen attempts to save money end up costing more. In almost all cases,<br />
getting a consultant in quickly is the best course of action and the most<br />
cost effective in the long run. If you find a skilled consultant you like, a<br />
monthly retainer might be a good investment.<br />
www.syngress.com
Hidden Costs<br />
Presenting the Business Case <strong>for</strong> <strong>Free</strong> Solutions • Chapter 1 5<br />
What are all the costs of a free solution? For starters, power consumption. I<br />
had a Windows 98 system that was only being used as a print server. It<br />
occurred to me that the PC cost me approximately $7 per month in electricity.<br />
With a dedicated print server costing only about $30.00 and using virtually<br />
no electricity, I would save money within five months by buying the<br />
print server.The Pentium II running Windows 98 was technically “free,” but<br />
paying <strong>for</strong> electricity to keep it running was not the most cost-effective<br />
choice. Some security tools are not offered as a commercial appliance, and<br />
some are (e.g., small, low cost firewalls that use far less power than a standard<br />
desktop PC are available from several manufacturers).<strong>Your</strong> cost <strong>for</strong> electricity<br />
will vary. Based on your electric bill, you can calculate with a high degree of<br />
accuracy what a given device costs.<br />
Another consideration is heating, ventilation, and air-conditioning<br />
(HVAC) costs. HVAC is basically the climate controls. Additional computers<br />
create additional heat, which costs more money <strong>for</strong> air conditioning.The<br />
same considerations apply as <strong>for</strong> power consumption. If a stand-alone appliance<br />
is not an option, the additional HVAC requirements are an unavoidable<br />
cost; however, in those cases where more efficient appliance-based solutions<br />
exist, they almost always produce less heat than a normal workstation.This<br />
also applies to the difference between an older computer and a newer computer.<br />
Newer systems that demand more power and cooling when they are<br />
being heavily utilized often incorporate energy-saving characteristics that are<br />
superior to those of the older systems.<br />
There is also the cost of real estate. A decommissioned full-sized tower PC<br />
takes up a lot more space than a new commercial appliance the size of a cigar<br />
box.You may have plenty of room now, but as the server room gets more and<br />
more crowded, space could become an issue. A keyboard, video, and mouse<br />
(KVM) switch might save more in space than it costs to buy. As the servers<br />
become increasingly tightly packed, good air flow and adequate cooling will<br />
be inhibited, and physical access to the systems <strong>for</strong> operation or maintenance<br />
will also be difficult.<br />
Inefficiency is another cost of free solutions with respect to the fact that<br />
the support staff are likely unfamiliar with the new free solutions. When a<br />
www.syngress.com
6 Chapter 1 • Presenting the Business Case <strong>for</strong> <strong>Free</strong> Solutions<br />
staff member per<strong>for</strong>ms a task on a new firewall, it takes longer to do than if<br />
they are familiar with the firewall.This inefficiency typically costs only the<br />
time to complete a task; however, if an outage or business disruption occurs,<br />
this delay could result in lost profit or business.These delays must also be<br />
accounted <strong>for</strong> when planning projects and other activities.<br />
<strong>Free</strong> solutions are usually produced by small organizations or by an individual.These<br />
solutions may do an excellent job in their assigned roles, but<br />
may not be well known.This could be a liability if the individual who configured<br />
your free solution leaves or is otherwise unavailable. If you have a PIX<br />
firewall that needs work, you probably would not have a hard time locating a<br />
resource. On the other hand, if you need someone to take over the administration<br />
of an obscure free solution, finding someone could be difficult.This<br />
difficulty could manifest itself as a hidden cost by increasing the delay be<strong>for</strong>e a<br />
problem can be addressed, having to pay a premium <strong>for</strong> a consultant, or any<br />
number of other inefficiencies.<br />
The Savings of<br />
<strong>Using</strong> <strong>Free</strong> Security Solutions<br />
The following section discusses how a free security solution can save you<br />
money.The primary savings is obvious: you didn’t pay <strong>for</strong> the product; however,<br />
there are additional benefits.This section offers a detailed look into the<br />
benefits of using free software. By evaluating the expected savings and costs,<br />
you can <strong>for</strong>m a more practical, accurate picture of what will be gained by<br />
implementing a free security solution.<br />
Purchase Costs<br />
The purchase cost is one of the single largest cost savings of using free software.The<br />
best example of this is with firewalls. A small Linksys or Netgear<br />
firewall costs around $20.00 to $50.00.They use almost no power, support<br />
port <strong>for</strong>warding, per<strong>for</strong>m <strong>Network</strong> Address Translation (NAT), act as a<br />
Dynamic Host Configuration Protocol (DHCP) server, and are stateful packet<br />
filters. Suppose you use Linux and netfilter to run a firewall <strong>for</strong> free. Odds are<br />
it will cost more to pay <strong>for</strong> the employee’s time to set up the Linux firewall<br />
www.syngress.com
than the Linksys would cost to buy. Firewalls are one of the best examples of<br />
how readily available af<strong>for</strong>dable commercial solutions can be.<br />
You can still save money on purchases. Some types of products, particularly<br />
IDSes, network analysis and reporting tools, and commercial virtual private<br />
network (VPN) solutions can cost staggering amounts of money. When<br />
comparing prices, come as close as possible to comparing like products. <strong>Using</strong><br />
the most expensive “deluxe” software suite available as the price <strong>for</strong> decision<br />
making is misleading.The free solution will not have the same features and<br />
capabilities as the commercial version. Look at the features you think you<br />
need as a starting point <strong>for</strong> which commercial products would be viable<br />
options. Use the costs of those products as your basis <strong>for</strong> determining what<br />
the free solution will save you.<br />
Maintenance Costs<br />
Maintenance can be expensive; it is not uncommon <strong>for</strong> a yearly maintenance<br />
contract to cost 10 percent of the purchase price.This price will also fluctuate,<br />
as almost all vendors have various support tiers with varying response<br />
times and service level agreements (SLAs).The reality is, however, if you opt<br />
<strong>for</strong> the free solution and spend the 10 percent on training instead, you would<br />
probably have a very high level of responsiveness from your own in-house<br />
staff. Ensuring an equivalent level of responsiveness and availability from the<br />
vendor would likely cost you a large sum.<strong>Your</strong> own support staff could probably<br />
go to the office or address the issue remotely far more quickly than all<br />
but the largest and most well-established vendors. Even if a vendor can have<br />
someone on site in two hours, sometimes getting a live person to return your<br />
call and schedule the emergency appointment takes time.You can probably<br />
reach your own staff as quickly, if not more so.The level of service you expect<br />
should be factored in when estimating the cost savings available by not having<br />
to purchase a maintenance contract.<br />
Customization Costs<br />
Presenting the Business Case <strong>for</strong> <strong>Free</strong> Solutions • Chapter 1 7<br />
Customization is an area that can offer huge gains or be inconsequential,<br />
depending on your circumstances. If you purchase a commercial product, you<br />
may find that there is no way it can be customized <strong>for</strong> your environment. If<br />
www.syngress.com
8 Chapter 1 • Presenting the Business Case <strong>for</strong> <strong>Free</strong> Solutions<br />
some degree of customization is available, it is rarely free. Often, the hourly<br />
rate <strong>for</strong> such services is at a premium, the assumption being you must really<br />
want or need the desired functionality if you are willing to pay to add it.<br />
With some free solutions, this customization can be af<strong>for</strong>dable, or even free, if<br />
you have the expertise. However, not all free software is customizable. Just<br />
because it’s free does not always mean it is open source. Open source software<br />
is software where the source code (i.e., the programming code used to make<br />
it run) is freely available. When software is open source, you can download<br />
the source code and edit it to your heart’s content.You can add as few or as<br />
many custom features as you want.<br />
Obviously, this is an advantage that not everyone will need or have the<br />
means to take advantage of. Depending on the software package in question,<br />
some are programmed using different programming languages, so even if you<br />
have a resource who knows enough to be able to customize the program,<br />
they might not know the particular programming language that is required.<br />
Customization is also something you don’t know you need until you are well<br />
into the implementation phase. If you know your customization needs ahead<br />
of time you can investigate and weigh the costs accordingly. Generally<br />
speaking, even if the cost is the same to customize the free solution as a comparable<br />
commercial solution, the level of customization that is possible is often<br />
(but not always) equivalent or better with the free solution.<br />
Comparing <strong>Free</strong> Solutions<br />
with Commercial Solutions<br />
When it comes to making an in<strong>for</strong>med decision as to whether to purchase a<br />
commercial solution or implement a free solution, there are some additional<br />
non-dollar-related considerations to take into account. First and <strong>for</strong>emost,<br />
compare like functionality. Don’t compare the deluxe version of the commercial<br />
product to the free version; they won’t have the same features or learning<br />
curve, or require the same hardware. Ultimately, by making the most<br />
in<strong>for</strong>med and well-reasoned comparison possible, the best solution will be<br />
chosen.<br />
www.syngress.com
Strengths of <strong>Free</strong> Solutions<br />
Presenting the Business Case <strong>for</strong> <strong>Free</strong> Solutions • Chapter 1 9<br />
One advantage free solutions often have over their commercial counterparts is<br />
that of development speed.This varies from one product to another; not all<br />
free products have quick development cycles.The open-source packages often<br />
have very fast development cycles and can address the latest security issue<br />
more quickly than their commercial counterparts. If you want to stay on the<br />
cutting edge, free software (especially open-source software) might be a better<br />
path than commercial solutions.<br />
Previously, we discussed customization as a cost savings with some free<br />
software.This is because often you can do the customizing yourself instead of<br />
paying the vendor to do it <strong>for</strong> you. Customization is worth mentioning as a<br />
strength of its own, above and beyond the cost savings. Again, not all free software<br />
is customizable. Sometimes the best software in a particular category<br />
uses closed code and there is no way <strong>for</strong> you to per<strong>for</strong>m any customization.<br />
But one of the greatest strengths of the open-source movement is that<br />
everyone has the freedom to edit, customize, and improve the software.<br />
A potential strength of free solutions is the speed with which they can be<br />
implemented (which is different than the development speed). When I speak<br />
of the implementation speed of free software I am referring to the time it<br />
takes to get the software loaded and working.This includes not only installation,<br />
but also the red tape sometimes involved in making significant purchases.<br />
For example, suppose you are trying to <strong>for</strong>m a business partnership that will<br />
be beneficial to your organization.The nature of the arrangement is such that<br />
time is of the essence; the sooner the partnership is completed the better.The<br />
partnership involves network connectivity to facilitate the exchange of in<strong>for</strong>mation.<br />
After reviewing the plans of how it would be done, your potential<br />
partner is hesitant to go through with it, because you lack adequate firewall<br />
protection. Maybe your current Internet connection is filtered with a consumer-level<br />
home router/firewall and you need a separate demilitarized zone<br />
(DMZ) with some advanced NATing rules and better logging.You could<br />
contact a vendor, wait <strong>for</strong> a response, get a quote on the price, and pass that<br />
to your manager <strong>for</strong> approval. After your manager approves the purchase, you<br />
hand it to accounting and they make the purchase and arrange shipping.<br />
Once it arrives, you must install and configure the new firewall and then test<br />
www.syngress.com
10 Chapter 1 • Presenting the Business Case <strong>for</strong> <strong>Free</strong> Solutions<br />
it. A faster approach would be to grab the old PC from the closet, download<br />
and install Linux on it, and configure the firewall. If your environment allows<br />
it, implementing the free solution could be much faster. In environments<br />
where there are restrictions on permitted vendors, permitted software, permitted<br />
hardware, and so on, getting approval <strong>for</strong> a free solution could be more<br />
difficult and time consuming than a commercial solution. Ultimately, your<br />
environment will dictate whether implementation speed can truly pan out as<br />
an advantage or not.<br />
You might think that all free software is produced by some kid after<br />
school and will be unstable and lacking the quality control of a commercial<br />
software development project. While this is certainly true some of the time, at<br />
other times it could not be farther from the truth.The fact is that the larger,<br />
well-established open-sourced projects can have hundreds of programmers<br />
reviewing, revising, scrutinizing, and modifying the code. Very few commercial<br />
companies have the same amount of resources to put into a single software<br />
product.This means that in many cases you are getting software that has<br />
been through more peer review and testing than the commercial equivalent.<br />
This is not always true; in many cases the free software has very little quality<br />
control and you, as the user, are really doing the testing. Basically, this means<br />
that the quality of free solutions will have a lot of variance.To increase the<br />
odds that you are not trying to implement buggy software, do your homework.<br />
If you stick to mature products that have a proven track record you will<br />
certainly improve your odds. Avoiding new releases that implement major<br />
architectural changes may help as well. If the current release of a product you<br />
are using incorporates newly added support <strong>for</strong> the latest chipset, it might be<br />
wise to wait <strong>for</strong> that release to be tested a little more be<strong>for</strong>e deploying it in<br />
your environment. For an excellent and lengthy article on the merits of free<br />
software, refer to www.dwheeler.com/oss_fs_why.html. In reality, some of the<br />
free offerings are not fit to be run in any sort of critical role, while others can<br />
do so with aplomb. Ultimately, not all free software is “cheap” software; some<br />
of the free offerings are of very high technical quality.<br />
Weaknesses of <strong>Free</strong> Solutions<br />
The single biggest drawback to implementing a free solution in a production<br />
environment is one of support, or lack of support. When you download<br />
www.syngress.com
Presenting the Business Case <strong>for</strong> <strong>Free</strong> Solutions • Chapter 1 11<br />
something <strong>for</strong> free from the Internet, there is generally no phone number to<br />
call and ask questions.This is sometimes mitigated by high quality documentation,<br />
and in some cases extensive online user <strong>for</strong>ums where you can ask<br />
questions and receive help from the creator of the package or other users. On<br />
the other hand, high-quality documentation is the exception rather than the<br />
norm, and many of the free utilities have little in the way of documentation.<br />
This consideration is one of the biggest concerns <strong>for</strong> management. Generally<br />
speaking, the more mission critical the role of the security software is, the<br />
more hesitant you should be about implementing a solution with minimal<br />
support. If you are a company that depends on the Internet, you should<br />
require a higher level expertise from in-house technical staff be<strong>for</strong>e implementing<br />
a free Linux firewall, compared with another company that makes<br />
money in a storefront and only uses the Internet to surf the Web.This isn’t to<br />
say that the support cannot be adequate with free software or that you<br />
shouldn’t use free solutions to fulfill critical needs, only that you need to do<br />
so knowingly and after careful consideration and planning.<br />
The management capabilities of free software solutions are typically not as<br />
robust as they are with commercial offerings.<strong>Your</strong> particular product will<br />
determine if this is a real consideration or not. Most often the presence or<br />
absence of management capabilities is more noticeable with free IDSes,<br />
antivirus, and antispyware offerings.The common denominator here is that<br />
these products require frequent updates in order to maintain their value and<br />
do their job effectively. An enterprise-class antivirus program will offer a lot<br />
of control and features around signature updates, such as when and how to<br />
per<strong>for</strong>m the updates and how to handle things when a virus is detected.The<br />
free solutions are generally more limited, often requiring the scanning or<br />
updating process to be per<strong>for</strong>med manually, and responding to a positive<br />
detection may have to be an interactive process, rather than an automated<br />
one.<br />
Another area where the free solutions are also sometimes lacking is<br />
reporting. While some offer excellent reporting, many others offer little to no<br />
reporting capability. In most cases, you will be able to manually configure<br />
some type of reporting on your own using freely available utilities. Even if<br />
you can arrange <strong>for</strong> some automated logging or reporting to be generated, it<br />
won’t be as simple or quick as it would be if it were a commercial product<br />
www.syngress.com
12 Chapter 1 • Presenting the Business Case <strong>for</strong> <strong>Free</strong> Solutions<br />
that supported that functionality natively. As you begin considering free solutions,<br />
you will want to also consider not only the logging capabilities you<br />
want, but those you need. In many cases, if you are in a highly regulated<br />
industry, such as banking, or healthcare, the lack of adequate logging capability<br />
is the determining factor that leads to a decision to go with commercial<br />
software. If you have auditors you need to satisfy, you will want to research<br />
the audit trail you will be able to generate carefully, be<strong>for</strong>e coming to a<br />
strategic decision on your solution.<br />
Previously, we touched on the fact that the free solutions are often not<br />
well known, and how this can translate into a hidden cost in consulting fees.<br />
This liability can go beyond consulting fees. If you were hiring a new<br />
employee and specified that they need to know Cisco equipment, you could<br />
undoubtedly find someone in short order. If you specified you wanted them<br />
to be familiar with some little-known free solution you have implemented,<br />
you could have a very hard time finding someone.That’s not to say that they<br />
couldn’t be trained, but again, there are costs and disadvantages associated<br />
with that.The familiarity (or lack thereof ) could also cause the time it takes<br />
to implement a solution to be longer than with a more widely understood<br />
technology. Speed of implementation was mentioned as a potential asset, but<br />
it can easily be a liability if there is no one available who understands the<br />
solution. Ultimately, there are advantages to using industry standard solutions<br />
over less widely deployed offerings.<br />
Evaluating Individual Solutions<br />
As you do your research, you will need to determine if the free solution is the<br />
best solution.There are a whole host of factors which will go into making<br />
this determination.The following list briefly summarizes the steps needed to<br />
make a determination as to whether or not a free solution is the best solution<br />
<strong>for</strong> you.<br />
1. Identify <strong>Your</strong> Options This can be the hardest part of the process,<br />
knowing what free alternatives exist. Hopefully this book will help,<br />
but there are also on-line sites to help you find free software. One of<br />
the largest sites housing open source software is<br />
http://source<strong>for</strong>ge.net/index.php. Also check out<br />
www.syngress.com
Presenting the Business Case <strong>for</strong> <strong>Free</strong> Solutions • Chapter 1 13<br />
http://freshmeat.net/.You can find a more programmer-oriented site<br />
containing only software that runs on Linux at<br />
www.icewalkers.com/. A directory of free software is located at<br />
http://directory.fsf.org/. A similar directory of free software <strong>for</strong><br />
Microsoft Windows is located at http://osswin.source<strong>for</strong>ge.net/.<br />
Finally, a CD containing some “top picks” of free software <strong>for</strong> use on<br />
Windows is located at www.theopencd.org/.<br />
2. Research Each Option Typically, this will mean doing searches on<br />
the software.Take note of how many problems people have, and if<br />
they have been fixed. Check the developer’s Web site and documentation.<br />
See if the documentation is well-crafted and complete.This is<br />
when you will weed out the majority of candidates and hopefully be<br />
left with a list of quality choices.<br />
3. Compare Products The previous step is meant to sort out the best<br />
free solutions.This step is aimed at comparing the best free solutions<br />
against their commercial counterparts.This is where you may rule<br />
out some products as too expensive or to hard to use. Metrics to use<br />
<strong>for</strong> comparison include:<br />
■ Functionality The product must meet your business needs to<br />
be considered. Pay attention to volumes.The product might do<br />
what you want, but not on the scale you want it to. Consider if<br />
the product will work with other utilities or if it uses proprietary<br />
and closed source methods, protocols, or algorithms.<br />
These traits may act as limiters and hinder flexibility later on.<br />
■ Cost This is one of the major reasons you are considering a<br />
free solution.Try and be as accurate as possible in your estimates<br />
of the true costs, including things such as purchase cost,<br />
maintenance, training, upgrades, and so on.<br />
■ Momentum How well established is the product? Remember<br />
this is a consideration <strong>for</strong> free software and commercial software.The<br />
more well established the software is, the better the<br />
odds the creators will be around in the future. A larger more<br />
well-established project will also likely have better community<br />
www.syngress.com
14 Chapter 1 • Presenting the Business Case <strong>for</strong> <strong>Free</strong> Solutions<br />
support and reliability. Included in the overall momentum is to<br />
look at how active the project is.You don’t want to invest a lot<br />
of time and energy in a product that is likely to just die off and<br />
fade away.<br />
■ Support What does support cost? Is it available? How timely<br />
is the support? What <strong>for</strong>mat does support take (online <strong>for</strong>ums,<br />
e-mail, phone, and so on).<br />
■ Per<strong>for</strong>mance Which solutions are the best per<strong>for</strong>mers? This<br />
includes speed, efficiency, and reliability. A powerful software<br />
package that crashes every hour isn’t a viable option.<br />
■ Usability Is the product user friendly? If the learning curve is<br />
very high, your training costs will rise. If the product doesn’t<br />
have a feature or function you like, can you customize it and<br />
make it more user friendly?<br />
■ Security Even <strong>for</strong> a security tool, you must consider the<br />
security implications. Is the product secure? Will it be handling<br />
secure data? Are you opening up any new security risks? What<br />
type of auditing and logging can it produce?<br />
■ Legal and License Issues Be sure and review the license<br />
agreement closely. Many times the free software is not free if<br />
you are a business, or there are special restrictions on the<br />
number of installations or other criteria. When in doubt have<br />
your legal counsel review the license agreement <strong>for</strong> you.<br />
■ Individual Criteria These are any special needs or requirements<br />
unique to your environment. What’s good <strong>for</strong> other<br />
organizations might not work <strong>for</strong> you.<br />
4. Per<strong>for</strong>m Detailed Testing At this stage, you have hopefully narrowed<br />
the playing field down to just one or two selections. It’s time<br />
to put these products through a real test and see if they do what their<br />
manufacturers claim they do.This can be done in a lab or possibly on<br />
the production network, depending on the risks involved and the<br />
nature of the product.You will need to evaluate how best to per<strong>for</strong>m<br />
your detailed testing based on your circumstances.<br />
www.syngress.com
Presenting the Business Case <strong>for</strong> <strong>Free</strong> Solutions • Chapter 1 15<br />
5. Come to a Conclusion After all this research, you can make a<br />
decision on what you think the best solution is. Whether you are the<br />
final approver or you need to <strong>for</strong>ward your recommendation to<br />
someone else <strong>for</strong> approval, at this point you should have all the facts<br />
collected in order <strong>for</strong> a good decision to be made.<br />
Remember, the preceding steps leave a lot of room <strong>for</strong> flexibility.They<br />
may be per<strong>for</strong>med in a more or less structured fashion.You might not <strong>for</strong>mally<br />
cover all the steps, but in one <strong>for</strong>m or another, those steps should occur.<br />
The more thoroughly you document the steps, the more you will be in a<br />
better position to justify your choices.<br />
Now that we have discussed the many ways that the cost of a free solution<br />
may be higher or lower than the commercial equivalent, let’s look at an<br />
example. Suppose your manager wants you to provide a reporting mechanism<br />
to see who is using the majority of the Internet bandwidth.<strong>Your</strong> manager<br />
also wants to know what the user(s) in question are using the bandwidth <strong>for</strong>.<br />
You search around and learn about a product called nGenius Per<strong>for</strong>mance<br />
Manager, which is made by Netscout<br />
(www.netscout.com/products/pm_home.asp). According to your research, it<br />
will do what you want and more.The graphs and charts it can produce are<br />
excellent, and it provides an extremely granular look into the traffic flowing<br />
across your network. In the free department, you’ve looked at ntop, and it<br />
seems pretty neat, not as granular, but still offering a respectable amount of<br />
data and reporting <strong>for</strong> free.You call up netscout and get some list pricing <strong>for</strong><br />
the nGenius equipment.The server licenses have a scaled price structure<br />
according to the software’s capabilities, so you inquire about the most economic<br />
server license they offer, which is $20,000.00 list.You will need at least<br />
a single probe to sniff and collect data, which is another $5,000.00.You will<br />
need to run this on a server, and the old one probably won’t work, so there’s<br />
another $2,000.00.The yearly maintenance contract will be 10 percent of the<br />
purchase price, meaning another $2,500.00, bringing the grand total to<br />
$29,500.00, less any price breaks from list you might get.<br />
If you then went to your boss and used the $30,000.00 price tag to justify<br />
why you should implement a free traffic reporting and analysis tool, your presentation<br />
wouldn’t be telling the whole story. First off, none of the free prod-<br />
www.syngress.com
16 Chapter 1 • Presenting the Business Case <strong>for</strong> <strong>Free</strong> Solutions<br />
ucts come close to the power and functionality of nGenius, so you are not<br />
comparing like products.There are other less expensive alternatives, which<br />
would represent a much more accurate comparison to use as a cost savings<br />
example. Second, even if money were no object, deploying an enterprise-class<br />
solution like nGenius is probably not the best choice. Along with the impressive<br />
array of features comes a fairly steep learning curve. After implementing<br />
such a solution, your in-house staff might have more difficulty learning how<br />
to use it than they would with one of the free (and simpler) solutions.Third,<br />
you may not need the level of detail and sophistication that nGenius offers. If<br />
ntop or a comparable free solution can offer all the reporting and metrics that<br />
you are looking <strong>for</strong>, deploying a more complex solution may not be wise. ntop<br />
may be the best choice <strong>for</strong> your organization, but presenting that choice as a<br />
$30,000.00 cost savings is far from accurate.<br />
nGenius is the Cadillac of network analysis tools. It has a staggering array<br />
of features and an impressive level of customization you can per<strong>for</strong>m without<br />
getting into actual programming. If I had the budget and the need, it is the<br />
product I would use.That being said, is ntop just as powerful? Not even close.<br />
But, in a small organization, the added features nGenius has to offer would<br />
likely never be used. With a price tag of free, ntop or one of the many other<br />
free alternatives is likely to do everything that is needed, and with a much<br />
smaller learning curve.<br />
“Selling” a <strong>Free</strong> Solution<br />
If you are in a position where you can implement a new security solution<br />
without having to receive anyone else’s approval, you probably don’t need to<br />
read this section. If on the other hand, you have to get someone to sign off<br />
on your plan, this should be helpful. If you do need approval, you are basically<br />
gong to try and “sell” your solution, much like a salesman, highlighting the<br />
benefits, and realistically noting any disadvantages to your proposed solution.<br />
Remember, the objective of presenting a solution is not to “win” by getting<br />
to do things your way.The objective is to provide the decision makers with<br />
the most complete and accurate in<strong>for</strong>mation so that the best decision can be<br />
made.<strong>Your</strong> own judgment of the environment and your target audience will<br />
play a large part in what constitutes the best approach <strong>for</strong> you to take. We<br />
www.syngress.com
hope some helpful guidelines as to how to approach gaining approval can<br />
help improve your odds of success.<br />
Selling by Doing<br />
One method of demonstrating the power and effectiveness of a given solution<br />
is to actually demonstrate the solution. If the environment allows, and you<br />
have the resources, it might be feasible to install the software in question, generate<br />
the reports, and present the facts, along with a demonstration of what<br />
the software can do.You don’t want to do anything that is inappropriate; if the<br />
change control procedures don’t allow such spontaneity, you will need to<br />
revise your approach. Assuming you have the freedom to do so, saying the<br />
software generates graphs and reports and traffic usage, broken up by protocol<br />
and the computer in question, rarely has the same impact as seeing that same<br />
graph. Not only does it provide factual real evidence of the utilities value, it<br />
also demonstrates your initiative and <strong>for</strong>ethought.<br />
WARNING<br />
Let’s be perfectly clear here; we’re not advocating that you go and<br />
implement some solution without proper management approval when<br />
policy says you shouldn’t. You need to evaluate your environment and<br />
factor in things such as climate, policy, risks, and benefits to determine if<br />
it’s wise to implement something without getting all the proper<br />
approvals ahead of time. Again, in some environments this would be<br />
perfectly okay, and your manager would be elated at your ingenuity and<br />
initiative, while in others you could end up looking <strong>for</strong> a new job. As<br />
always, exercise good judgment and when in doubt take the conservative<br />
approach.<br />
Presenting a Proposal<br />
Presenting the Business Case <strong>for</strong> <strong>Free</strong> Solutions • Chapter 1 17<br />
If you do not have the luxury of implementing something and then asking<br />
<strong>for</strong> “approval,” you will need to create a proposal with all of the relevant<br />
in<strong>for</strong>mation.You can certainly do both, including the sample data from the<br />
utility in the proposal.The truth is,“presenting a proposal” sounds very<br />
www.syngress.com
18 Chapter 1 • Presenting the Business Case <strong>for</strong> <strong>Free</strong> Solutions<br />
<strong>for</strong>mal, and it can be, but it doesn’t have to be. Some organizations have much<br />
more <strong>for</strong>mal procedures in place than others. Presenting your proposal may be<br />
as structured as using a standardized template with <strong>for</strong>ms to fill out and<br />
submit, and meetings with PowerPoint presentations. It could also just as<br />
easily mean talking with your manager over lunch and telling him what you<br />
would like to do.<br />
Regardless of the <strong>for</strong>mat you employ <strong>for</strong> your proposal, there are certain<br />
common elements you will want to touch upon, verbally or on paper. If you<br />
address all these issues as accurately as possible, the odds of your venture being<br />
a success should be greatly improved. At a minimum, try and have in<strong>for</strong>mation<br />
and answers covering the following areas concerning your proposed<br />
solution:<br />
■ Costs, Training, and Implementation What will it take? How<br />
much will it cost? How long will it take to implement? How much<br />
training will be required and of what type? How much will the<br />
training cost, and how long will it take? What hardware might be<br />
needed, and what will it cost? Will it impact the user experience? If<br />
so, how?<br />
■ Per<strong>for</strong>mance What will it do? What are the real capabilities, not<br />
just sales hype? Generating actual samples from your environment, or<br />
if you can find something online, would go a long way here. Hard<br />
data is always better than a sales blurb. What are the technical limitations?<br />
■ Assumptions What other factors must be in place <strong>for</strong> this to work<br />
as planned? Will you need assistance with the implementation? Will<br />
an outside consultant be needed?<br />
■ Caveats What are the drawbacks? What makes your solution less<br />
attractive? What are potential problems that might arise?<br />
www.syngress.com
Summary<br />
Not all facets of implementing free security solutions are free.There are<br />
always costs of one type or another, which vary in magnitude and relevance<br />
based on your individual circumstances. Ultimately, you don’t want to be yet<br />
another person who fell victim to the open-source or freeware hype.These<br />
are the people who read or heard about a “free” product and rushed to<br />
implement it without doing adequate research, thus ending up with a mess<br />
that is expensive to make work or to clean up. With the proper research and<br />
planning, free solutions can provide you with some very powerful security<br />
solutions without spending a lot of resources.The real value lies in finding<br />
free software that is the simplest solution available that can still meet your<br />
needs.<br />
Solutions Fast Track<br />
The Costs of <strong>Using</strong> <strong>Free</strong> Security Solutions<br />
� Training costs can quickly skyrocket, especially <strong>for</strong> classroom-based<br />
training.<br />
� Consulting costs are not always something to be avoided. At times<br />
they can provide a very efficient way to implement a given solution<br />
while at the same time providing some sorely needed training and<br />
documentation.<br />
� Intangibles can also add up. While items such as HVAC, power costs,<br />
and space requirements are not likely to break the bank, these are still<br />
considerations you should be aware of in order to make in<strong>for</strong>med<br />
decisions.<br />
The Savings of <strong>Using</strong> <strong>Free</strong> Security Solutions<br />
� The biggest savings is that there are no software costs.<br />
� No maintenance costs<br />
Presenting the Business Case <strong>for</strong> <strong>Free</strong> Solutions • Chapter 1 19<br />
www.syngress.com
20 Chapter 1 • Presenting the Business Case <strong>for</strong> <strong>Free</strong> Solutions<br />
Comparing <strong>Free</strong><br />
Solutions with Commercial Solutions<br />
� You can usually implement a free solution quicker than a commercial<br />
product, based on the time it takes to make and receive the purchase.<br />
� A free solution’s primary weakness is support. Without a toll-free<br />
number to call, you are left to educate yourself or pay someone with<br />
the appropriate skills to assist.The often sparse or non-existent<br />
documentation can sometimes be a major hindrance to a successful<br />
implementation.<br />
� Many of the free solutions are also open source, allowing you<br />
unequaled flexibility to customize, alter, change, or even rewrite the<br />
software in question.<br />
“Selling” a <strong>Free</strong> Solution<br />
� Be in<strong>for</strong>med of the pros and cons of the solution, and be honest<br />
about your data. Remember that it’s not a contest to implement a<br />
particular solution, but rather the objective is to be well in<strong>for</strong>med so<br />
that the best solution can be chosen.<br />
� Real life examples are always better than theory. A sample graph of<br />
data from your current network (policy allowing) is always going to<br />
drive home the point better than a bullet that says the product will<br />
produce the graph.<br />
www.syngress.com
Presenting the Business Case <strong>for</strong> <strong>Free</strong> Solutions • Chapter 1 21<br />
Frequently Asked Questions<br />
The following Frequently Asked Questions, answered by the authors of this book,<br />
are designed to both measure your understanding of the concepts presented in<br />
this chapter and to assist you with real-life implementation of these concepts. To<br />
have your questions about this chapter answered by the author, browse to<br />
www.syngress.com/solutions and click on the “Ask the Author” <strong>for</strong>m.<br />
Q: How do I know when I have found the best solution?<br />
A: The solution that is “best” today might not be tomorrow.The selection of<br />
free software is rapidly changing. While there are certain leaders who will<br />
likely continue to be top picks <strong>for</strong> the <strong>for</strong>eseeable future, many other free<br />
solutions will come and go.The only way to make a good decision is to<br />
“do your homework,” and if possible, consult an expert in the area you are<br />
interested in.<br />
Q: If some of these free tools are so good, why doesn’t everyone use them?<br />
A: In the case of a large organization, the features or functionality the free<br />
solutions lack are vital, so a commercial solution may be the only option<br />
<strong>for</strong> some. For smaller organizations <strong>for</strong> which a free solution can satisfy<br />
their needs, it typically comes down to not knowing what the options are.<br />
No one is paying to advertise free products in computer magazines, so<br />
generally only the more experienced and knowledgeable in<strong>for</strong>mation<br />
technology (IT) people know about all the available products.<br />
Q: Is free software really free?<br />
A: Not in every sense of the word. While the software itself may cost<br />
nothing, you have to consider the costs of the hardware required to run<br />
the software, the training required to implement the software, and the<br />
potential maintenance costs (in terms of man-hours and actual dollars)<br />
when considering a free solution. After you add all of this up, some free<br />
solutions can be very “cost-effective,” even if not truly free.<br />
www.syngress.com
Protecting<br />
<strong>Your</strong> Perimeter<br />
Solutions in this chapter:<br />
■ Firewall Types<br />
■ Firewall Architectures<br />
■ Implementing Firewalls<br />
■ Providing <strong>Secure</strong> Remote Access<br />
� Summary<br />
� Solutions Fast Track<br />
� Frequently Asked Questions<br />
Chapter 2<br />
23
24 Chapter 2 • Protecting <strong>Your</strong> Perimeter<br />
Introduction<br />
When it comes to securing networks, the first items that come to mind are<br />
firewalls, which are the primary gatekeepers between an organization’s<br />
internal network and the outside world. While a properly implemented firewall<br />
can be one of the most effective security tools in your arsenal, it<br />
shouldn’t be the only tool.The adage “defense-in-depth” means that you<br />
should have multiple layers of security. <strong>Using</strong> a defense-in-depth configuration,<br />
if one component of your defense failed or was defeated, there would<br />
still be a variety of other fallbacks to protect your network. With the availability<br />
of increasingly af<strong>for</strong>dable firewalls such as the popular Linksys<br />
cable/digital subscriber line (DSL) router, using the free firewall alternatives<br />
may not be as attractive <strong>for</strong> some. With a little ef<strong>for</strong>t, however, you will find<br />
the free alternatives are more configurable, allowing greater flexibility and<br />
control than the “home office” grade offerings.<br />
This chapter focuses on securing your network perimeter. Remember that<br />
although the most common way to implement a firewall is between an<br />
internal network and the outside world (often the Internet), you should not<br />
limit yourself to placing firewalls only on the network edge. A firewall should<br />
be in any place you want to restrict the flow of traffic. With the current trend<br />
of security breaches originating from the inside of the network (often<br />
employees or ex-employees), companies are increasingly relying on firewalls<br />
to isolate and filter traffic between portions of the internal network.<br />
This chapter reviews some basic firewall concepts and briefly discusses the<br />
different architectural ways to implement a firewall. Most of this chapter discusses<br />
the installation and configuration of free firewalls to run on both<br />
Windows- and Linux-based systems. Finally, once the network edge has been<br />
adequately secured, we discuss how to create controlled, secure paths through<br />
the perimeter <strong>for</strong> remote connectivity, including administrative access or<br />
remote office/work from home scenarios.<br />
Firewall Types<br />
No discussion of firewalls would be complete without a discussion of the different<br />
types of firewalls.This is particularly true in this context, because it allows<br />
you to better understand exactly where in the spectrum the free firewall<br />
www.syngress.com
Protecting <strong>Your</strong> Perimeter • Chapter 2 25<br />
offerings lie. In the networking sense, a firewall is basically any component<br />
(software or hardware) that restricts the flow of network traffic.This is a sufficiently<br />
broad definition to allow <strong>for</strong> all of the various ways people have chosen<br />
to implement firewalls. Some firewalls are notoriously limited in capability and<br />
others are extremely easy to use.<br />
Within the realm of firewalls there are many different ways to restrict network<br />
traffic. Most of these methods vary in the level of intelligence that is<br />
applied to the decision-making process. For example, to permit or deny traffic<br />
based on which network device is the sender or recipient, you would use a<br />
packet-filtering firewall. In reality, even the simplest packet filtering firewalls can<br />
typically make decisions based on the source Internet Protocol (IP) address,<br />
the destination IP address, and the source and/or destination port number.<br />
While this type of firewall may sound overly simplistic, consider if you have a<br />
server running a Web site <strong>for</strong> use on the Internet. In all likelihood, the only<br />
traffic that you need to allow to the server uses a destination port of<br />
Transmission Control Protocol (TCP) 80 or 443; thus, you could configure<br />
your firewall to permit only that traffic.These ports are used <strong>for</strong> HTTP and<br />
HTTPS, respectively. Because the server is available <strong>for</strong> the Internet, you can’t<br />
filter traffic based on the source address or source port, which will be different<br />
<strong>for</strong> each connection.<br />
The primary drawback with a simple packet filter is that the packet-filtering<br />
firewall has to rely on very primitive means to determine when traffic should<br />
be allowed (e.g., synchronous [SYN] or acknowledgement [ACK] bits being<br />
set). While this was adequate in the early days of the Internet when security<br />
was not as big of a concern, it won’t work any more. It is trivial to set the bits<br />
on the packet using freely available software to make the traffic look like it is a<br />
reply to another connection.Thus the stateful inspection firewall was born of<br />
necessity.This type of firewall monitors all connections (inbound or outbound),<br />
and as the connection is permitted (based on the firewall’s configured rules) it<br />
enters this connection into a table. When the reply to this connection comes<br />
back, even if the reply uses a port that the firewall was not previously configured<br />
to permit, it can intelligently realize the traffic is a response to a permitted<br />
session and permit the traffic.<br />
Un<strong>for</strong>tunately, as the firewalls get better so do the methods hackers use to<br />
circumvent them. Suppose you have configured your firewall perfectly and<br />
www.syngress.com
26 Chapter 2 • Protecting <strong>Your</strong> Perimeter<br />
there are no holes: every permitted port is one you expressly want to allow.<br />
<strong>Using</strong> the previous example, no traffic is allowed to the Web server except<br />
Web traffic. Sounds good, but the problem is, if the firewall is completely<br />
secure, the server might not be. Flaws in the Web server software could allow<br />
the attacker to send the server an HTTP request that is 10,000 characters<br />
long, overflowing the buffers and allowing the attacker to execute the code of<br />
his choice.The packets used to transport the 10,000-character HTTP request<br />
are all legal TCP packets as far as the firewall is concerned: there<strong>for</strong>e, it would<br />
permit them to pass through to the Web server.The next step in firewall evolution<br />
serves to combat this type of attack.These types of firewalls are application<br />
gateways, or layer 7 firewalls.<br />
This type of firewall not only filters network traffic based on the standard<br />
network parameters, but they also understand the higher layer protocol in<strong>for</strong>mation<br />
contained within the packet, in this example HTTP.The firewall itself<br />
knows what a legitimate HTTP request looks like and can filter out a mal<strong>for</strong>med<br />
or malicious request even though, from a network perspective, it might<br />
otherwise be a permitted packet.There is a downside to this type of approach,<br />
which is that the firewall must be programmed with all the same intelligence<br />
needed to filter normal traffic, plus the firewall must fully understand the protocols<br />
it is inspecting.This means additional programming <strong>for</strong> any protocol you<br />
want the firewall to understand. Most of the major commercial application<br />
gateways offer support <strong>for</strong> the major protocols such as HTTP, File Transfer<br />
Protocol (FTP), and Simple Mail Transfer Protocol (SMTP).<br />
With all of this in<strong>for</strong>mation circulating in your head, you’re probably<br />
wondering which type is available <strong>for</strong> free. Generally speaking, you can find<br />
many free varieties of firewalls that per<strong>for</strong>m some type of stateful inspection.<br />
Application layer gateways are not readily available <strong>for</strong> free. In reality, few<br />
organizations have the funds to use application gateways extensively. One<br />
ramification of not using an application gateway is that you need to ensure<br />
that the service that is exposed to un-trusted traffic is configured as securely<br />
as possible and that the server itself is hardened against attack. Keeping the<br />
service patches up-to-date will help reduce the odds that an application-level<br />
attack will be successful.<br />
www.syngress.com
Firewall Architectures<br />
The most securely configured firewall in existence will not provide much<br />
protection if a network was not designed properly. For example, if the firewall<br />
was installed into an environment that allows an alternate network path that<br />
bypasses the firewall, the firewall would only be providing a false sense of<br />
security.This is an architectural error that would render the firewall useless. In<br />
short, where the firewall is implemented is every bit as important as how it is<br />
implemented.The first step to installing anything is always planning. What<br />
follows is a discussion of the most common firewall architectures, in<br />
increasing order of security. Remember, these sections are discussing firewall<br />
architectures independent of the firewall type. For example, you could use a<br />
packet-filtering firewall, a stateful inspection firewall, or an application<br />
gateway in any of the designs discussed in the next section.<br />
Screened Subnet<br />
A screened subnet is the simplest and most common firewall implementation.<br />
Most small businesses and homes use this type of firewall (see Figure 2.1).<br />
This design places the firewall on the edge of your network, dividing everything<br />
(from the firewall’s point of view) into internal and external, with<br />
nothing in between.<br />
Figure 2.1 Screened Subnet Firewall<br />
Trusted <strong>Network</strong><br />
i.e., Internal<br />
Users<br />
Web Server<br />
Firewall<br />
Protecting <strong>Your</strong> Perimeter • Chapter 2 27<br />
Untrusted <strong>Network</strong><br />
i.e., Public Internet<br />
Internet<br />
www.syngress.com
28 Chapter 2 • Protecting <strong>Your</strong> Perimeter<br />
The screened subnet firewall (or edge firewall) is as straight<strong>for</strong>ward as you<br />
can get. Internet users who need access to an internal server (e.g., Web, FTP,<br />
SMTP, and so on) must traverse the firewall to do so. Internal users needing<br />
access to those same servers would be able to access them directly. Internet<br />
traffic not destined <strong>for</strong> any Web-based server would be blocked at the firewall<br />
to prevent attacks on internal systems. All internal users must also traverse<br />
firewalls to access the Internet.This is the same type of firewall architecture<br />
you would have at home with a small network behind a Linksys router.This<br />
configuration has several advantages.The primary advantage is simplicity. With<br />
only two interfaces, the Access Control Lists (ACLs), which are the filters that<br />
define the criteria <strong>for</strong> permitting or denying traffic, are much simpler.<br />
Although this configuration is cost-effective and simple to implement, it is<br />
not without its drawbacks. In this arrangement, the hacker has several chances<br />
to penetrate your network. If he or she can find a security hole in the firewall,<br />
or if the firewall is improperly configured, he or she might be able to gain<br />
access to the internal network. Even if the firewall is executed flawlessly, the<br />
hacker has a second opportunity to gain access. If the hacker can compromise<br />
any available Web-based services and take control of the servers, he or she<br />
would then have an internal system from which to launch additional attacks.<br />
Finally, if the servers are critical to the business function, by allowing the<br />
internal users to access them without going through the firewall, you may loose<br />
some audit capability that the firewall might otherwise offer. By far the biggest<br />
security weakness in this configuration is that if you are exposing any Webbased<br />
services: the servers hosting those services will be attacked frequently, and<br />
a compromise of one of those servers may expose your entire network.<br />
One-Legged<br />
The one-legged demilitarized zone (DMZ) still has the advantage of cost,<br />
because you are building a DMZ using only a single firewall (see Figure 2.2).<br />
Commonly, the firewall interfaces are called Internal or Inside, External or<br />
Outside, and DMZ.<br />
www.syngress.com
Figure 2.2 One-Legged DMZ<br />
Trusted <strong>Network</strong><br />
i.e., Internal<br />
Users<br />
Firewall<br />
Protecting <strong>Your</strong> Perimeter • Chapter 2 29<br />
Untrusted <strong>Network</strong><br />
i.e., Public Internet<br />
With this type of configuration you get to keep the low cost benefit, but<br />
add some isolation to your Internet-based servers. Internal users must traverse<br />
the firewall to access the servers or the Internet. External users must traverse the<br />
firewall to access the Web-based services.The real strength of this type of configuration<br />
is that if the servers that are hosting the Web-based services are compromised,<br />
the hacker still needs to contend with the firewall to continue<br />
attacking the internal network.As an added feature, because all users (internal or<br />
external) must traverse the firewall to access the Web-based servers, you may<br />
gain a higher degree of auditing from the firewall logs. If you wanted to provide<br />
even further isolation, assuming you have the available interfaces on the firewall,<br />
you could implement a separate DMZ <strong>for</strong> each Web-based server you needed.<br />
The only real disadvantages to this configuration are complexity, and to a<br />
small degree, cost.As you add interfaces to the firewall, the configuration will<br />
become more complex. Not only does this complexity add to the time and<br />
labor <strong>for</strong> configuration and maintenance, it also increases the chance that an<br />
error could be made in the configuration.As you add interfaces there will often<br />
be additional costs associated with them. In most cases this cost will be minor<br />
and far less than an additional firewall, but with some high-speed interfaces,<br />
they can become very costly. Lastly, though many would consider it minor, with<br />
this configuration, if the firewall itself is defeated, the entire network is open to<br />
attack. Of course the solution to such paranoid thinking is costly.<br />
www.syngress.com<br />
Internet<br />
DMZ<br />
Web Server
30 Chapter 2 • Protecting <strong>Your</strong> Perimeter<br />
True DMZ<br />
The true DMZ is generally considered the most secure of firewall architectures.<br />
With this design, there is an external and internal firewall. Between the<br />
two is sandwiched any Internet accessible devices (see Figure 2.3).<br />
Figure 2.3 True DMZ<br />
Trusted <strong>Network</strong><br />
i.e., Internal<br />
Users<br />
Internet traffic is only permitted to a server in the DMZ, and only on the<br />
port that server is listening on. For example, if you had a Web server in the<br />
DMZ and an FTP server in the DMZ, traffic with a destination port of 80<br />
would only be permitted to the Web server. For users accessing the same<br />
servers, the same rules would apply. Internal users would have to have permission<br />
through both firewalls to access the Internet. Obviously, this type of design<br />
costs more, typically double, but that cost buys you increased security. In a true<br />
DMZ, if the Web server is compromised the hacker is still trapped between two<br />
firewalls. For those who want to go the extra mile, the inside and outside firewalls<br />
can be of different types (e.g., Cisco Private Internet Exchange [PIX] and<br />
Linux netfilter). In this way, a hacker that finds a security hole in one firewall is<br />
unlikely to be able to apply the same techniques to the other firewall.<br />
With all of the basics out of the way, you will be in a better position to<br />
make in<strong>for</strong>med decisions when it comes time to propose and implement a<br />
firewall solution <strong>for</strong> your network. Bear in mind, while this chapter covers the<br />
basics of firewalls, there are entire volumes (such as Designing and Building<br />
Enterprise DMZs by <strong>Syngress</strong> Publishing, 2006) that explore the topic of firewall<br />
architectures, DMZ design, and implementation.<br />
www.syngress.com<br />
Firewall<br />
DMZ<br />
Web Server<br />
Firewall<br />
Untrusted <strong>Network</strong><br />
i.e., Public Internet<br />
Internet
Tools & Traps…<br />
Accidents Happen<br />
I saw a corporate firewall/DMZ with a connection that allowed traffic to<br />
completely bypass their Internet firewall. I do not know why this happened,<br />
because the organization was not lacking properly trained networking<br />
professionals. These types of errors could occur because<br />
someone didn’t analyze the implications of the changes adequately.<br />
Perhaps it was a “rush” to install some connectivity, or an emergency<br />
repair, or even a “temporary” fix. All of these things would indicate poor<br />
change control procedures. It is also possible that someone didn’t realize<br />
the complete layout of the network when they made the connection in<br />
question, which could indicate inadequate network documentation<br />
among other things. In any case, these were trained professionals who<br />
should have known better, but accidents happen to the best of us.<br />
Implementing Firewalls<br />
Protecting <strong>Your</strong> Perimeter • Chapter 2 31<br />
When it comes to selecting a firewall there are a host of factors to consider.<br />
For commercial offerings there is the up front cost in addition to ongoing<br />
maintenance costs, which in some cases can be considerable. For free offerings,<br />
however, one of the first considerations is what OS you want to run the<br />
firewall on.This will impact how it is managed, and while the capabilities of<br />
the firewalls are likely similar, the implementation details will be very different.<br />
Most firewalls (commercial and free) run on either Windows or Linux.<br />
Some commercial offerings run on their own base system (e.g., Cisco PIX).<br />
With some firewalls the underlying Linux system has been so heavily modified<br />
it is now considered proprietary. In the case of a Linux firewall, you also<br />
have the option of installing the firewall software on a CD-ROM or pen<br />
drive.These steps are discussed in more detail in the following sections, along<br />
with specific configuration examples <strong>for</strong> setting up a free firewall on both<br />
Linux and Windows.<br />
www.syngress.com
32 Chapter 2 • Protecting <strong>Your</strong> Perimeter<br />
Hardware versus Software Firewalls<br />
Another consideration is whether the firewall decision-making logic is run as<br />
software that sits on top of another functional system, or if the firewall is a<br />
dedicated piece of hardware. In the case of a Cisco PIX firewall, the smallest<br />
models are the size of a small cigar box and there is no OS other than the<br />
PIX software.This is a dedicated hardware device used to per<strong>for</strong>m the firewall<br />
function, also called a firewall appliance.The other alternative is that the firewall<br />
is not a dedicated box, but a software component. Many popular firewalls take<br />
this approach as well, such as a checkpoint firewall that can be installed on top<br />
of a Windows system. Of these two approaches, if you want a free solution<br />
the choice is made <strong>for</strong> you. I know of no free hardware-based firewalls, so<br />
you will be using a software firewall.<br />
Configuring netfilter<br />
When it comes to Linux-based firewalls, there is only one choice, which is<br />
netfilter.This is partially because it was the best option available <strong>for</strong> the<br />
longest time. Since version 2.4, however, netfilter has been built into the<br />
Linux kernel. Even many commercial firewalls are running a modified Linux<br />
OS with netfilter inside their own custom cases. Netfilter is the underlying<br />
software that makes up the built-in firewall on Linux systems.The netfilter<br />
component reads the contents of the network packets and decides to permit<br />
or deny network traffic. Many times people incorrectly refer to the firewall as<br />
iptables, or prior to that, ipchains. In fact, iptables is the software command<br />
that is used to configure the rules that netfilter uses to make decisions to<br />
permit or deny traffic, and ipchains is the previous version of iptables. Even<br />
after you have settled on using Linux as your base OS <strong>for</strong> your firewall, there<br />
are some additional choices to make be<strong>for</strong>e you start any configuring.<br />
Choosing a Linux Version<br />
While all versions of Linux share some common characteristics, there will be<br />
differences. Depending on the specific Linux distribution, the differences<br />
could be significant and each distribution will likely offer some different sets<br />
of software packages. An excellent source of in<strong>for</strong>mation on the different distributions<br />
is www.distrowatch.com.This site includes a brief summary of<br />
www.syngress.com
what the distribution is trying to accomplish, and includes links to the home<br />
page and download locations. Because there are so many free versions of<br />
Linux available, it doesn’t cost anything but the time to download and install<br />
several different versions and see which one you like. In the following examples<br />
I use a base system of Fedora core 5, which is the free version of the Red<br />
Hat Enterprise Linux that many companies use. I chose this distribution<br />
because it is one of the oldest and most well-established Linux distributions,<br />
and there<strong>for</strong>e extensive support documentation is available if you need it. If<br />
you just want to see if Linux is something you want to work with, try a live<br />
CD such as SLAX. When it comes to choosing the specific version of Linux<br />
you want to use, this decision must be made in parallel with choosing an<br />
installation media, because not all versions are supported on all media.<br />
Choosing Installation Media<br />
One of the more interesting features that Linux has over Windows is that it<br />
can be run from a variety of media. While windows is notoriously difficult to<br />
configure to run from a CD-ROM, there are Linux distributions that are<br />
capable of running off of a traditional hard disk install, CD-ROM, a Universal<br />
Serial Bus (USB) drive, or even a floppy disk. Each media type offers some<br />
security pros and cons, and not every distribution will be available on every<br />
media type. If you need the features of a specific distribution that doesn’t<br />
come on the media you prefer, you may need to make a compromise.You<br />
will need to research the different media options and choose one that fits in<br />
your environment. We will review some of the pros and cons of each.<br />
Full Install<br />
Protecting <strong>Your</strong> Perimeter • Chapter 2 33<br />
The full intall is the traditional install to a system’s hard disk. Much like<br />
Windows, you boot up an install CD and walk through a guided install process.<br />
Most of the Linux distributions installed on the hard disk offer graphical<br />
user interface (GUI) install programs that walk you through the installation<br />
steps.There is no great advantage to using this type of distribution other than<br />
that the size of the hard disk allows you to install a lot of extra software. For a<br />
firewall, you generally want to keep the software running to a minimum to<br />
enhance security, so this shouldn’t be a very big consideration.This type of<br />
installation also has the advantage that it will be easy to modify and alter the<br />
configuration if needed.<br />
www.syngress.com
34 Chapter 2 • Protecting <strong>Your</strong> Perimeter<br />
On the down side, this type of installation has all of the same disadvantages<br />
of a Windows bastion host. Namely that the entire system is sitting on<br />
the hard drive and if a hacker manages to compromise the root account, they<br />
will be able to install a virus or Trojan on the system that can survive future<br />
reboots.This type of install isn’t any better or worse than if you were using<br />
Windows <strong>for</strong> your bastion host OS. Despite these concerns, this is the most<br />
common type of Linux firewall installation and most versions of Linux install<br />
the firewall components by default.This means if you download a version of<br />
Linux you like and install it to a hard disk, you will have a firewall waiting to<br />
be configured when you’re done.<br />
TIP<br />
In the event that you discover your firewall has been compromised, it is<br />
considered best practice to wipe the system clean and rebuild it from<br />
scratch. Un<strong>for</strong>tunately, unless you have some means of isolating all<br />
changes that were made, you cannot ensure that it is safe to leave the<br />
system operational. One of a hacker’s first steps is often to install a back<br />
door so that they can easily gain access to the device in the future.<br />
These backdoors include techniques such as modifying various systems<br />
commands so that detecting the back door is difficult. For this reason,<br />
rather than risk leaving a system operational that may be compromised,<br />
a complete <strong>for</strong>mat and reinstall is recommended.<br />
CD-ROM<br />
While you can get windows running off of a bootable CD-ROM or live CD,<br />
it takes a lot more work than it does with Linux.There are many versions of<br />
Linux designed specifically to run from a CD-ROM, allowing you to turn<br />
virtually any machine into a firewall, router, or general-purpose PC.There is<br />
an obvious security advantage to having all of your configuration in<strong>for</strong>mation<br />
on read-only media. Even if a hacker manages to compromise the system, all<br />
it takes is a reboot and it can be restored to its previous condition.The system<br />
can still fall victim to a virus or Trojan, but only until it is rebooted. Further, if<br />
the firewall system has a hardware failure such as a failed central processing<br />
www.syngress.com
unit (CPU), all you would need to do to restore your firewall would be to<br />
move the CD to a new system and reboot.<br />
The primary advantage to a CD-ROM-based installation is also the primary<br />
disadvantage. If you burn the entire OS and configuration settings to a<br />
CD, any time you need to make adjustments you would need to burn a new<br />
CD-ROM.The cost of the CD media probably isn’t an issue, but such a configuration<br />
may hinder your ability to remotely administer the system, which<br />
would be limited to making changes to the running configuration. Changes<br />
that remained after a reboot would require someone local to insert the CD-<br />
ROM containing the new configuration. If you needed to implement and test<br />
changes that required a reboot to take effect, this type of the setup would<br />
make things more difficult. Finally, due to simple space limitations on a CD-<br />
ROM, you may not be able to fit all of the needed software or functionality<br />
on a CD-ROM.That being said, if the firewall rules are relatively static and<br />
don’t require frequent adjustment, a live CD could be a very attractive option.<br />
USB Drive<br />
If the space limitations are acceptable, a Linux-based firewall booting from a<br />
USB disk may offer the best compromise in security and flexibility. Having<br />
the operating systems and firewall software on a pen drive offers the same<br />
type of flexibility that a CD-ROM-based system provides, with increased<br />
storage capacity over that of a CD-ROM. If you purchase a USB disk that<br />
includes a physical write protect switch, you can make changes on the fly, like<br />
a live system, and then write protect the disk against modification when you<br />
are done. As the storage capacity of USB drive increases, you will be able to<br />
use a USB-based distribution that includes increasingly greater functionality.<br />
One key consideration with this type of media is that not all systems will support<br />
booting from a USB disk. While almost all newer systems support this<br />
option, many of the older systems that you may wish to install a free firewall<br />
on do not.<br />
Floppy Disk<br />
Protecting <strong>Your</strong> Perimeter • Chapter 2 35<br />
Although the functionality is typically very limited, there are many versions of<br />
Linux that can fit on a 3.5” floppy disk.The primary advantage of these distributions<br />
is their low resource requirements. Often, these systems only require 8<br />
www.syngress.com
36 Chapter 2 • Protecting <strong>Your</strong> Perimeter<br />
or 16 megabytes of memory and a 486 processor to function.The ability to<br />
toggle the write protect switch on the floppy can also provide a high degree of<br />
configuration flexibility and security. Considering the unreliable nature of<br />
floppy disks, it probably wouldn’t be appropriate <strong>for</strong> use if an outage cannot be<br />
tolerated.At the very least you should have duplicate floppy disks available in<br />
the event of a failure.Another disadvantage to these is functionality. Generally,<br />
these floppy-based distributions are single-purpose devices and lack much in<br />
the way of functionality.Another consideration is that due to the space restrictions<br />
on a floppy disk, these floppy-based distributions are almost always command<br />
line only, with no GUI <strong>for</strong> configuration or management.<br />
Linux Firewall Operation<br />
Be<strong>for</strong>e discussing the specific commands used to configure the Linux firewall,<br />
we will cover some basic Linux firewall vocabulary and how the firewall<br />
operates. Netfilter contains the firewall logic, and iptables is the program that<br />
is used to modify the rules that the firewall uses. (See the netfilter home page<br />
at www.netfilter.org/.) These rules (or ACLs) define the rules used to permit<br />
or deny packets and how to react to denied packets.The current iptables use<br />
both tables and chains. Tables are the blocks of processing where various<br />
actions are per<strong>for</strong>med on the packets. Different tables process different chains.<br />
Chains are a set of rules (or ACLs).There are four built-in tables: nat, mangle,<br />
filter, and raw, each of which processes different chains (see Figure 2.4).<br />
Figure 2.4 Netfilter Tables and Chains<br />
www.syngress.com<br />
Nat Table Mangle Table<br />
PREROUTING Chain<br />
POSTROUTING Chain<br />
OUTPUT Chain<br />
Filter Table<br />
INPUT Chain<br />
FORWARD Chain<br />
OUTPUT Chain<br />
PREROUTING Chain<br />
POSTROUTING Chain<br />
INPUT Chain<br />
FORWARD Chain<br />
OUTPUT Chain<br />
Raw Table<br />
PREROUTING Chain<br />
OUTPUT Chain
Protecting <strong>Your</strong> Perimeter • Chapter 2 37<br />
The following tables and chains are not listed in any particular order, as a<br />
given packet may be impacted by multiple tables and chains as it is processed.<br />
The primary built-in chains are INPUT, OUTPUT, and FORWARD. In<br />
addition to these, you can create your own user-defined chains. Capitalizing<br />
the names of the chains is a common convention, but is not required.<br />
A brief summary of the roles the tables and chains play is included <strong>for</strong><br />
reference.<br />
■ Nat Table This table is referenced with a packet that is used to<br />
create a new connection.<br />
■ PREROUTING This chain is processed as soon as a packet is<br />
received and be<strong>for</strong>e any routing decisions are made.<br />
■ POSTROUTING This chain is processed be<strong>for</strong>e a packet is<br />
sent to an interface but after any routing decisions have been<br />
made.<br />
■ OUTPUT This chain is processed <strong>for</strong> packets generated locally.<br />
■ Filter Table This is the default table that is used when the iptables<br />
command is used to modify the rules, and the command does not<br />
specify an alternate table.This is where the bulk of a firewall’s processing<br />
is consumed.<br />
■ INPUT This chain is processed <strong>for</strong> packets destined <strong>for</strong> the local<br />
system.<br />
■ FORWARD This chain is processed <strong>for</strong> packets passing through<br />
the local system.<br />
■ OUTPUT This chain is processed <strong>for</strong> packets generated by the<br />
local system.<br />
■ Mangle Table This table is used <strong>for</strong> any specialized packet alterations<br />
that are needed. Examples are per<strong>for</strong>ming <strong>Network</strong> Address<br />
Translation (NAT) or manipulating various bits within the packet.<br />
■ PREROUTING This chain is processed on incoming packets<br />
be<strong>for</strong>e a routing decision is made.<br />
■ POSTROUTING This chain is processed last be<strong>for</strong>e a packet is<br />
sent to an interface.<br />
www.syngress.com
38 Chapter 2 • Protecting <strong>Your</strong> Perimeter<br />
■ OUTPUT This chain is processed be<strong>for</strong>e a routing decision is<br />
made <strong>for</strong> packets generated locally.<br />
■ INPUT This chain is processed <strong>for</strong> packets destined <strong>for</strong> the local<br />
system.<br />
■ FORWARD This chain is processed <strong>for</strong> packets passing through<br />
the local system.<br />
■ Raw Table This table is primarily used <strong>for</strong> packets that are exempt<br />
from connection tracking, and if required, are called be<strong>for</strong>e any other<br />
netfilter table.<br />
■ PREROUTING This chain is processed as soon as a packet is<br />
received.<br />
■ OUTPUT This chain is processed <strong>for</strong> packets generated locally.<br />
After you have reviewed all the various tables and chains, it’s worth discussing<br />
the overall packet flow.The key to remember is that not all packets<br />
traverse all chains.To further muddy the waters, packets will traverse different<br />
chains depending on whether they are sourced from the netfilter host, destined<br />
<strong>for</strong> the netfilter host, or just passing through the netfilter host.<br />
Remembering this will save you time when troubleshooting your firewall<br />
rules in the future. Refer to Figure 2.5 <strong>for</strong> a diagram depicting the packet<br />
flow through netfilter.<br />
Targets are the actions that should be taken when a packet matches a<br />
given rule. A target is specified using the –j syntax (<strong>for</strong> jump).The<br />
primary targets used <strong>for</strong> a firewall are ACCEPT and DROP.<br />
■ ACCEPT The packet is accepted and processed by the rest of the<br />
TCP/IP stack.<br />
■ DROP The packet is dropped, and no notice is given to the sender.<br />
While this does not honor the TCP/IP protocol specifications, it is<br />
considered the most secure option, because it denies a hacker useful<br />
in<strong>for</strong>mation about the firewall.This behavior also has a negative side<br />
effect, which is if a system is trying to initiate a connection to a port<br />
that is blocked by a firewall, the connection attempt must time out<br />
be<strong>for</strong>e the initiating host gives up. If you use REJECT, the Internet<br />
www.syngress.com
Control Message Protocol (ICMP) port will allow the initiating<br />
system to abort the connection attempt immediately.<br />
■ LOG This allows you to per<strong>for</strong>m kernel logging, which appears in<br />
the syslog log. Further options allow you to specify the log level and<br />
a descriptive prefix <strong>for</strong> the log entry.<br />
■ RETURN Processing continues in the previous chain at the rule<br />
just after the last rule processed in that chain.<br />
■ QUEUE This is a special target that will hold (or queue) a packet<br />
<strong>for</strong> processing by a userspace process.<br />
Figure 2.5 Netfilter Packet Flow<br />
Forwarded<br />
Packet<br />
mangle FORWARD chain<br />
Raw PREROUTING Chain<br />
Mangle PREROUTING Chain<br />
Nat PREROUTING Chain<br />
Routing Decision<br />
Nat POSTROUTING Chain<br />
Protecting <strong>Your</strong> Perimeter • Chapter 2 39<br />
Filter INPUT Chain<br />
Raw OUTPUT Chain<br />
Nat OUTPUT Chain<br />
Filter FORWARD Chain filter OUTPUT chain<br />
Routing Decision<br />
Mangle POSTROUTING Chain<br />
Packet to<br />
Local Host<br />
Mangle INPUT Chain<br />
Local<br />
Process<br />
Mangle OUTPUT Chain<br />
Packet from<br />
Local Host<br />
www.syngress.com
40 Chapter 2 • Protecting <strong>Your</strong> Perimeter<br />
Unlike some firewalls, netfilter allows you to apply multiple rulesets<br />
(chains) to the same interface. Although it may seem minor, this option creates<br />
a lot of powerful possibilities. For example, suppose you have an ACL and<br />
you want to permit all packets originating on the 192.168.1.0 network<br />
except those from 192.168.1.11, which is a host that a third-party uses and is<br />
not a completely trusted system.You want packets sourced from 192.168.1.11<br />
with a destination port of 22, 25, 53, 80, and 443 to be permitted, while all<br />
other packets are blocked (see Figure 2.6).<br />
Figure 2.6 Cisco ACL<br />
1 somerule<br />
2 access-list 100 permit tcp host 192.168.1.11 any eq 22<br />
3 access-list 100 permit tcp host 192.168.1.11 any eq 25<br />
4 access-list 100 permit tcp host 192.168.1.11 any eq 53<br />
5 access-list 100 permit tcp host 192.168.1.11 any eq 80<br />
6 access-list 100 permit tcp host 192.168.1.11 any eq 443<br />
7 access-list 100 deny ip host 192.168.1.11 any any<br />
8 access-list 100 permit ip 192.168.1.0 255.255.255.0 any<br />
9 somerule<br />
In Figure 2.5, each line of the ACL is numbered <strong>for</strong> easy reference.The<br />
order of the rules is critical <strong>for</strong> proper operation of the firewall. Cisco processes<br />
each line in the ACL and compares the rule with the packet in question.<br />
If it finds a match, it per<strong>for</strong>ms the indicated action and then stops any<br />
further processing of the ACL.This means if you reversed the order of rules 7<br />
and 8, all packets from 192.168.1.11 would be permitted.This type of<br />
arrangement also means that a packet with a source IP address of<br />
192.168.1.22 has to be compared against rules 2–7 be<strong>for</strong>e being accepted by<br />
rule # 8. With seven rules this will happen quickly, but if the ACL is lengthy<br />
this extra overhead could be CPU-intensive.<br />
Netfilter’s ability to move through multiple chains <strong>for</strong> the same packet<br />
allows you to design your chains <strong>for</strong> greater efficiency (see Figure 2.7).<br />
www.syngress.com
Figure 2.7 Netfilter Chains<br />
<strong>Using</strong> netfilter and iptables, you created rule # 2, which says that the source<br />
address is 192.168.1.11 <strong>for</strong> processing the CUSTOM chain.You can create the<br />
CUSTOM chain with the iptables –N CUSTOM command. Within the<br />
CUSTOM chain, you check <strong>for</strong> the five permitted destination ports (rules<br />
2.1–2.5) and then reject everything else (rule 2.6). Rule # 2.7 has no matching<br />
criteria and will there<strong>for</strong>e match on any packet and instruct the packet to<br />
return to the FORWARD chain where processing can continue. FORWARD<br />
chain rule # 3 permits all other packets from the 192.168.1.0/24 network.This<br />
means that packets not sourced from 192.168.1.11 only have to be checked<br />
against rule # 2 and can then move through the chain(s) instead of being<br />
checked against all the rules.The actual rules as they would appear in iptables<br />
can be seen with the iptables –L command.<br />
# iptables -L<br />
Chain INPUT (policy DROP)<br />
target prot opt source destination<br />
Chain FORWARD (policy DROP)<br />
target prot opt source destination<br />
CUSTOM tcp -- 192.168.1.11 anywhere<br />
ACCEPT tcp -- 192.168.1.0/24 anywhere<br />
Chain OUTPUT (policy DROP)<br />
target prot opt source destination<br />
Protecting <strong>Your</strong> Perimeter • Chapter 2 41<br />
www.syngress.com
42 Chapter 2 • Protecting <strong>Your</strong> Perimeter<br />
Chain CUSTOM (1 references)<br />
target prot opt source destination<br />
ACCEPT tcp -- 192.168.1.11 anywhere tcp dpt:ssh<br />
ACCEPT tcp -- 192.168.1.11 anywhere tcp dpt:smtp<br />
ACCEPT tcp -- 192.168.1.11 anywhere tcp dpt:domain<br />
ACCEPT tcp -- 192.168.1.11 anywhere tcp dpt:http<br />
ACCEPT tcp -- 192.168.1.11 anywhere tcp dpt:https<br />
DROP all -- 192.168.1.11 anywhere<br />
RETURN all -- anywhere anywhere<br />
Another advantage is that because rule # 2 sent you to another chain, you<br />
can make certain assumptions that you wouldn’t otherwise be able to. For<br />
example, in the CUSTOM chain you could replace<br />
iptables -A CUSTOM -p tcp -s 192.168.1.11 --dport 22 -j ACCEPT<br />
with<br />
iptables -A CUSTOM --dport 22 -j ACCEPT.<br />
This is because the packet would not be in the CUSTOM chain without<br />
matching the –p tcp and –s 192.168.1.11 (source IP address). If you want to<br />
tweak the CUSTOM chain even more, the RETURN target in rule # 2.7<br />
isn’t strictly required. If the packet reaches the end of a user-defined chain<br />
without having a match, it will RETURN to the previous chain by default. If<br />
a packet reaches the end of a built-in chain without a match, it will use the<br />
policy target (typically DROP). Now that you have a feel <strong>for</strong> the flexibility<br />
and power of iptables and netfilter, let’s look at some practical configuration<br />
examples.<br />
Configuration Examples<br />
The next step is to demonstrate how to configure the netfilter firewall.This is<br />
a critical step, and the firewall should only be installed and configured after<br />
the underlying OS has been installed, updated, and hardened.These instructions<br />
assume you are working with an otherwise secure system and now need<br />
to configure the firewall functionality.<br />
www.syngress.com
To make sure the firewall is enabled, you can run chkconfig --list, which lists<br />
all of the services and the run levels they are configured to start in. For<br />
example, you get the following output:<br />
chkconfig –-list | grep iptables<br />
iptables 0:off 1:off 2:on 3:on 4:on 5:on 6:off<br />
This output tells you that iptables will start in run levels 2–5.You can set<br />
it to run in run levels 2–5 by using the chkconfig –level 2345 iptables on<br />
command. If you are using a GUI window manager, you probably have<br />
another graphical application to see this in<strong>for</strong>mation. For example, in Fedora<br />
Core 5, you can navigate to System | Administration | Security Level<br />
and Firewall, which opens the screen shown in Figure 2.8.<br />
Figure 2.8 Fedora Core Firewall GUI<br />
Protecting <strong>Your</strong> Perimeter • Chapter 2 43<br />
You can enable or disable the firewall by going to the Firewall Options<br />
tab and selecting Enabled or Disabled.This particular interface in Fedora<br />
Core 5 also allows you to per<strong>for</strong>m limited configurations of the firewall rules<br />
(e.g., by checking the Trusted Service SSH, a rule would be added to allow<br />
inbound connections on TCP port 22). Because any graphical interface provided<br />
will likely vary from one distribution to another, we use the command<br />
line to configure the firewall.<br />
www.syngress.com
44 Chapter 2 • Protecting <strong>Your</strong> Perimeter<br />
Deleting Rules and Chains<br />
With many Linux distributions, the netfilter firewall will come enabled, but<br />
with an empty ruleset. In others, it might come with the firewall enabled and<br />
a very liberal ruleset in place. Let’s start configuring a Linux firewall by<br />
deleting any default rules that are present.You can use iptables –L (or --list) to<br />
list the current rules. An empty default ruleset should look like this:<br />
iptables –L<br />
Chain INPUT (policy ACCEPT)<br />
Target prot opt source destination<br />
Chain FORWARD (policy ACCEPT)<br />
Target prot opt source destination<br />
Chain OUTPUT (policy ACCEPT)<br />
Target prot opt source destination<br />
If there are any default rules present, they can be deleted using the iptables<br />
–F command.The –F option means to flush, which is equivalent to using -flush.This<br />
will clear all rules out of any existing chains. If distribution has any<br />
additional chains created beyond the default, you can delete a custom chain<br />
by using the iptables –X customchain command. Creating your own userdefined<br />
chain is accomplished using the iptables –N customchain command. In<br />
addition to the individual rules within a chain, the built-in chains have a<br />
default policy associated with them.This policy tells netfilter what to do if a<br />
packet reaches the end of the chain without finding a match. While the<br />
default policy is to ACCEPT, it is better to change this to DROP by using<br />
the –P option, which sets the default policy <strong>for</strong> that chain, as follows:<br />
iptables –P INPUT DROP<br />
iptables –P FORWARD DROP<br />
iptables –P OUTPUT DROP<br />
Permitting Traffic to and from the Firewall<br />
Now that you have a clean slate and a default policy of DROP, the first thing<br />
you will want to do is make sure that management traffic is permitted to the<br />
firewall itself.This is done first, because once you have enabled the firewall<br />
www.syngress.com
with a default policy of DROP, you will not be able to manage the firewall<br />
remotely until you have configured the firewall rules to permit the management<br />
traffic.This traffic is processed against the INPUT chain, because the<br />
destination is the netfilter host itself.To allow secure shell (SSH) connections<br />
to the firewall, use the following command:<br />
iptables –A INPUT –p tcp –s 192.168.99.0/24 -–dport 22 –j ACCEPT<br />
In this example, you are appending (-A) a rule to the INPUT chain to<br />
allow traffic from the 192.168.99.0/24 network to a destination port of TCP<br />
22. With no other configurations, all other traffic through or to the firewall<br />
would be dropped.This will show up in the rule listing as follows:<br />
iptables –L INPUT<br />
Chain INPUT (policy DROP)<br />
Target prot opt source destination<br />
ACCEPT tcp -- 192.168.99.0/24 anywhere tcp dpt:ssh<br />
Although the a<strong>for</strong>ementioned rules will permit the inbound SSH session,<br />
there is currently no rule to permit the reply traffic <strong>for</strong> the SSH session. If<br />
you were to change the default policy <strong>for</strong> the OUTPUT chain to ACCEPT,<br />
this would permit the reply packet, but we will instead address this more<br />
securely in the next few examples.<br />
If you also wanted to allow 192.168.99.99 access to the firewall with a<br />
destination of TCP port 80, you could use the same syntax with –A to<br />
append the rule, which would put the new rule <strong>for</strong> port 80 after the rule <strong>for</strong><br />
port 22.You could also use –I <strong>for</strong> insert, as in the iptables –I INPUT 1 –p tcp<br />
–s 192.168.99.99 --dport 80 –j ACCEPT command.This would insert the<br />
new rule in the INPUT chain as rule # 1, meaning the rule <strong>for</strong> port 80<br />
would come be<strong>for</strong>e the rule <strong>for</strong> port 22. Remember, this is still permitting<br />
only half of the conversation; you still need to permit the outbound reply<br />
packets. It is sometimes useful to list the chains with rule numbers using the<br />
iptables –L --line-numbers command.<br />
For outbound traffic (i.e., traffic generated by the firewall), you need to<br />
create rules in the OUTPUT chain.To enable syslog traffic from the firewall<br />
to a remote syslog server (192.168.1.99), you would enter the following:<br />
iptables –A OUTPUT –p udp –d 192.168.1.99 --dport 514<br />
Protecting <strong>Your</strong> Perimeter • Chapter 2 45<br />
www.syngress.com
46 Chapter 2 • Protecting <strong>Your</strong> Perimeter<br />
This assumes you are using the default UDP syslog port of 514. Because<br />
syslog over UDP is a one-way conversation, you will not need to permit any<br />
inbound replies to the syslog traffic.The OUTPUT chain is where you need<br />
to permit replies <strong>for</strong> permitted traffic that you allowed inbound in the preceding<br />
examples.You could create rules to permit SSH and HTTP specifically,<br />
but there is also a way to permit all traffic that is a reply to a permitted<br />
session.You can enter<br />
iptables -A OUTPUT -m state --state RELATED,ESTABLISHED -j ACCEPT<br />
This will instruct netfilter to permit any outbound traffic that is part of an<br />
established session (ESTABLISHED).The RELATED keywork is similar, but<br />
it is <strong>for</strong> traffic that is part of a different session, but where the session is related<br />
to an established session. Some protocols will open additional ports (such as<br />
FTP) as part of their normal behavior. For those that netfilter understands, it<br />
can see the request <strong>for</strong> the additional port and permit that new session.<br />
TIP<br />
iptables commands that manipulate the chains or rules themselves use<br />
uppercase letters:<br />
–A append, –D delete rule, –I insert, –R replace, –L list, –F<br />
flush, –N new, –X delete chain<br />
Lowercase options are used <strong>for</strong> specifying rule parameters:<br />
–s source address, –p protocol, –d destination address, –j jump,<br />
–i in-interface, –o out-interface<br />
Simulating the Windows Firewall<br />
Now let’s configure the firewall.The built-in firewall on Windows XP is<br />
enabled by default with service pack 2 or better.The standard configuration is<br />
to allow outbound connections from the host system, and deny inbound connections<br />
unless they are explicitly configured.The Windows firewall also<br />
allows any traffic that is a reply to traffic that the host originally generated<br />
outbound. After you execute the iptables –F command to flush out all of the<br />
previously configured rules, the following commands would configure the<br />
Linux host similarly:<br />
www.syngress.com
iptables –P OUTPUT ACCEPT<br />
iptables –P INPUT DROP<br />
iptables –P FORWARD DROP<br />
iptables –A INPUT –m state -–state ESTABLISHED,RELATED –j ACCEPT<br />
The --state extensions track the current status of the connections. By specifying<br />
ESTABLISHED or RELATED, the firewall allows packets that are part<br />
of a currently established session, or packets that are starting a new session, but<br />
where the session is related to an existing session (such as an FTP data session).<br />
If you were hosting a service on this system, such as a Web server, you<br />
would need to configure the INPUT chain appropriately.This configuration<br />
would af<strong>for</strong>d any Linux system a minimum level of firewall security with virtually<br />
no impact to its overall functionality.<br />
Simulating a Home <strong>Network</strong> Router<br />
Protecting <strong>Your</strong> Perimeter • Chapter 2 47<br />
With the basics of iptables configuration out of the way, let’s tackle a more<br />
practical example. For a typical firewall, there is very little traffic destined to or<br />
from the firewall itself. In general, the only traffic that would fit this profile<br />
would be administrative sessions to configure the firewall itself.The vast<br />
majority of a firewall’s traffic is passing through the firewall, and will thus be<br />
checked against the FORWARD chain.The following examples would configure<br />
the Linux firewall with the same access controls as a typical home network<br />
router such as a Linksys or Netgear router/firewall.This example<br />
assumes that 192.168.1.0/24 is the internal network on interface eth0 and the<br />
external interface is eth1.<br />
iptables –P OUTPUT ACCEPT<br />
iptables –P INPUT DROP<br />
iptables –P FORWARD DROP<br />
iptables –A INPUT –p tcp –s 192.168.1.0/24 –i eth0 -–dport 80 –j ACCEPT<br />
iptables –A FORWARD –s 192.168.1.0/24 –i eth0 –o eth1 –j ACCEPT<br />
iptables -A FORWARD -m state --state ESTABLISHED,RELATED -j ACCEPT<br />
www.syngress.com
48 Chapter 2 • Protecting <strong>Your</strong> Perimeter<br />
NOTE<br />
Always remember that if you have configured the default policy <strong>for</strong> a<br />
chain to DROP (<strong>for</strong> example, iptables -P FORWARD DROP) that you will<br />
need to include an explicit rule to permit the return traffic. This can be<br />
done by using the following command:<br />
iptables -A -m state --state ESTABLISHED,RELATED -j ACCEPT<br />
So if you wanted to permit the return traffic <strong>for</strong> a FORWARD chain,<br />
you would enter<br />
iptables -A FORWARD -m state --state ESTABLISHED,RELATED -j ACCEPT<br />
Many hours of troubleshooting Linux firewalls have been spent by<br />
overlooking a rule that permits the return traffic.<br />
The INPUT chain allows port 80 to go to the firewall itself from the<br />
internal network. Many the home routers have a Web interface <strong>for</strong> configuring<br />
them, and while your configuration may not need this port open to the<br />
firewall, it is included here to help emphasize how the different chains are<br />
used. It is important to specify the input interface (using –i) so that the source<br />
IP cannot be spoofed by an external attacker. In this way, you ensure that<br />
even if a packet was generated with the proper source IP, if it came in on the<br />
outside interface (eth1) it would not match the rule and would thus not be<br />
permitted.The FORWARD rule allows any outbound traffic from the<br />
internal network to the external network.This configuration is simple to<br />
implement; however, the 192.168.1.0 IP range is a private IP range and is not<br />
routable on the Internet.Thus, this range wouldn’t allow traffic from the<br />
internal network to the Internet quite yet.To make this Linux firewall a<br />
useful replacement <strong>for</strong> a home network router, you need to enable NAT,<br />
which allows all of the systems on your internal network to appear as a single<br />
IP address when communicating on the Internet.<br />
Let’s review NAT in its various incarnations. In principle NAT is simple,<br />
but in a complex environment, it can get confusing. As always, good documentation<br />
can help keep things straight. Basically, NAT means that the NAT<br />
device (in this case the Linux netfilter firewall) will change the IP address in a<br />
packet and retransmit that packet. Depending on your needs, you can alter the<br />
www.syngress.com
source IP address (source NAT [SNAT]), the destination IP address (destination<br />
NAT [DNAT]), or both (double NAT). For example, take a home<br />
router.The objective behind the NAT capability is to allow all of the internal<br />
hosts to communicate on the Internet using the single public IP provided by<br />
your Internet Service Provider (ISP). (In this case, SNAT is being used.) As<br />
each of the hosts on your private network make a connection to an Internet<br />
server, the firewall is altering the source address to look like the public IP<br />
from your ISP. By doing this, the return traffic can find its way back to the<br />
firewall and be retranslated and sent to the originating host (see Figure 2.9).<br />
Figure 2.9 SNAT<br />
192.168.1.11<br />
192.168.1.0<br />
Private <strong>Network</strong><br />
S=192.168.1.11<br />
S=5.5.5.5<br />
D =www.syngress.com D D =www.syngress.com<br />
S=www.syngress.com<br />
D =192.168.1.11<br />
192.168.1.1<br />
Protecting <strong>Your</strong> Perimeter • Chapter 2 49<br />
S=www.syngress.com<br />
D =5.5.5.5<br />
5.5.5.5<br />
Public Internet<br />
www.syngress.com<br />
In Figure 2.9, the internal host has a private IP address of 192.168.1.11.<br />
The public address of the firewall is 5.5.5.5, which is provided by the ISP. If a<br />
host on the private network wants to make a connection to<br />
www.syngress.com using a Web browser, the connection is sent with source<br />
address 192.168.1.1 to a destination address of www.syngress.com.The firewall<br />
alters the source address to its own public IP address of 5.5.5.5 and sends<br />
the packet on its way. When the server replies to destination 5.5.5.5, the firewall<br />
again edits the packet, this time inserting a new destination of<br />
192.168.1.11. All of this takes place and is transparent to the 192.168.1.11<br />
host and the www.syngress.com server. When multiple hosts are using SNAT,<br />
the firewall tracks which connections belong to which private hosts using the<br />
port numbers. While the destination port of the Web server remains static<br />
www.syngress.com
50 Chapter 2 • Protecting <strong>Your</strong> Perimeter<br />
(typically port 80 <strong>for</strong> the Web), the source port is usually a random port<br />
above 1024. By tracking the source port, the firewall knows which address<br />
belongs to which session. In the event that two hosts attempt to use the same<br />
source port, the NAT device edits the source port of one of the connections<br />
and replaces it with another random source port. When the return traffic is<br />
received, it translates the source port back, just like it did <strong>for</strong> the IP address.<br />
Because this method of NAT relies heavily on using the source port number,<br />
it is sometimes referred to as port NAT (PNAT).<br />
To add the SNAT functionality to the example firewall, use the following<br />
command:<br />
iptables –t nat –A POSTROUTING –o eth1 –j SNAT -–to-source 5.5.5.5<br />
The –t option is used to specify the table you want to modify, and the –A<br />
option specifies that you are going to append this rule to the<br />
POSTROUTING chain. By specifying the outbound interface, you are<br />
ensuring that the SNAT only occurs as traffic leaves the private network,<br />
meaning only in the proper direction.<br />
NOTE<br />
SNAT can only be per<strong>for</strong>med in the nat table. However, the rules <strong>for</strong><br />
SNAT can only go in the POSTROUTING chain of the nat table. This<br />
means that any time you use SNAT, your rule will contain –t nat –A<br />
POSTROUTING.<br />
The jump target SNAT is self explanatory.The --to-source option specifies<br />
what IP address we want to use as the new source address. SNAT assumes we<br />
have a static IP address to SNAT the outgoing packets to. While this is likely<br />
the case in a corporate environment, a more appropriate solution to more<br />
closely mimic the configuration of a home router would be to use the MAS-<br />
QUERADE command:<br />
iptables –t nat –A POSTROUTING –o eth1 –j MASQUERADE<br />
The masquerade command does not require an IP specification, and will<br />
use the IP address of the firewall interface.You might be wondering why you<br />
www.syngress.com
wouldn’t use the masquerade target all of the time instead of the SNAT<br />
target. Because the source IP is static, the SNAT target will cause the NAT<br />
calculations to be per<strong>for</strong>med once <strong>for</strong> a given session. Subsequent packets<br />
belonging to that session are handled the same way as the first. With the masquerade<br />
target, each packet is checked <strong>for</strong> the source IP to use, which requires<br />
more overhead than with SNAT.This is why SNAT is preferable if you have a<br />
static source IP address, and masquerade is your only option if you do not<br />
have a static source IP address to use.<br />
Additional Commands<br />
Protecting <strong>Your</strong> Perimeter • Chapter 2 51<br />
By this point, you should have a relatively solid grasp of how to configure a<br />
Linux firewall. So far we have covered all of the core commands to permit<br />
and deny the traffic. Another useful command <strong>for</strong> your Linux firewall deals<br />
with logging packets. If you want to log everything passing through the firewall,<br />
use the iptables –A FORWARD –j LOG command. While simple,<br />
this would likely generate an excessive amount of logging traffic.You also<br />
might want some additional control of how the logging occurs.There are<br />
some additional options to provide this functionality. Of particular note are<br />
the --log-level and --log-prefix options.<br />
The --log-level option allows you to specify what logging level is used <strong>for</strong><br />
the LOG rule.The effect this log level has depends on how you have your<br />
kernel logging configured (via syslog or syslog-ng). When you combine the<br />
custom logging level of iptables with the syslog configuration, you can have<br />
syslog act in any manner of ways based on the firewall logs, including sending<br />
e-mails <strong>for</strong> certain events.The --log-prefix option allows you to insert up to a<br />
29-letter string in front of the log entry.This can be useful <strong>for</strong> troubleshooting<br />
purposes. Some examples of in<strong>for</strong>mation you could place in log<br />
prefix would be the name of the chain that generated the log entry such as<br />
iptables –A FORWARD –j LOG --log-prefix “from FORWARD chain.”(For<br />
more in<strong>for</strong>mation on event logging, refer to Chapter 7,“<strong>Network</strong> Reporting<br />
and Troubleshooting.”)<br />
www.syngress.com
52 Chapter 2 • Protecting <strong>Your</strong> Perimeter<br />
NOTE<br />
While a packet that matches an ACCEPT or DROP rule will stop traversing<br />
any other chains, this is not true of packets that match a log rule. After<br />
matching the log rule, the packets continue through any appropriate<br />
chains to be processed. Keep this in mind, so that you can configure an<br />
additional rule and action <strong>for</strong> the packet if desired.<br />
Now that you can create a working ruleset <strong>for</strong> netfilter, you will want to<br />
save it.There are two commands of note: one <strong>for</strong> saving the configurations<br />
and one <strong>for</strong> loading a saved configuration.You can use the iptables-save command<br />
to generate output that is the current active ruleset. By default, it will<br />
generate the output only to the stdout, meaning it will display in the console.<br />
To save this output, redirect it to a file.To redirect the current ruleset to a file<br />
called /etc/ruleset, you would type iptables-save > /etc/ruleset. If you want<br />
to save the current packet counts and rule counts, use the iptables-save –c ><br />
/etc/ruleset command. Individual tables can be saved separately by specifying<br />
the –t option using the iptables-save –t mangle > /etc/ruleset command.<br />
Restoring a ruleset is accomplished using the iptables-restore command.<br />
Like iptables-save, the restore function takes only two optional arguments.The<br />
–c option will cause iptables to load the saved packet and byte counts, overwriting<br />
the current count values.The default behavior when using iptablesrestore<br />
is to flush the ruleset be<strong>for</strong>e loading the saved ruleset, thus all previous<br />
rules are lost. If you wish to override this behavior, you can use the –n<br />
option, in which case the rules will be added to the existing ruleset, and will<br />
only overwrite if there is a duplicate rule.You can use the iptables-restore <<br />
/etc/ruleset command to pipe the saved configuration to iptables-restore.<br />
Command Summary<br />
The following is a brief summary of the most useful iptables commands <strong>for</strong><br />
easy reference, along with some examples to make the command usage more<br />
clear. Bear in mind this is not an exhaustive list of commands; it only represents<br />
the most important commands <strong>for</strong> configuring your firewall. For a complete<br />
list, refer to the iptables man page.<br />
www.syngress.com
Protecting <strong>Your</strong> Perimeter • Chapter 2 53<br />
■ –A appends a rule to a chain. iptables –A INPUT –p icmp –j ACCEPT<br />
will add the rule to permit ICMP at the bottom of the INPUT chain<br />
in the FILTER table.<br />
■ –D deletes a rule from a chain. iptables –D INPUT –p icmp –j<br />
ACCEPT will delete the matching rule from the INPUT chain. iptables<br />
–D INPUT 3 will delete the third rule from the top in the<br />
INPUT chain.<br />
■ –I inserts a rule in a chain. iptables –I INPUT 5 –p icmp –j ACCEPT<br />
will insert this rule as the fifth rule in the INPUT chain<br />
■ –R replaces a rule in a chain. iptables –R INPUT 4 –p icmp –j<br />
ACCEPT will replace the fourth rule in the INPUT chain with this<br />
new rule.<br />
■ –L lists the rules. iptables –L will list all rules and iptables –L INPUT<br />
will list all rules in the INPUT chain only.<br />
iptables –t nat –L will list all the rules in the nat table only.<br />
■ –F will flush (delete) the rules. iptables –F will delete all rules in all<br />
chains. It will not delete chains, only the rules inside the chains.<br />
■ –Z will zero the packet and byte counters. iptables –Z will delete all<br />
of the counters. iptables –Z FORWARD will delete all of the counters<br />
in the FORWARD chain only.<br />
■ –N will create a new chain. iptables –N CUSTOMCHAIN1 will<br />
create a new chain named CUSTOMCHAIN1.<br />
■ –X will delete a chain. iptables –X CUSTOMCHAIN1 will delete the<br />
custom chain named CUSTOMCHAIN1.<br />
■ –P will change the policy <strong>for</strong> a chain. iptables –P INPUT ACCEPT<br />
will change the policy <strong>for</strong> the INPUT chain to ACCEPT.<br />
The policy <strong>for</strong> a chain does not need to be limited to ACCEPT or<br />
DROP; it could use a custom chain <strong>for</strong> a target, if desired.<br />
www.syngress.com
54 Chapter 2 • Protecting <strong>Your</strong> Perimeter<br />
Option Summary<br />
■ –p specifies the protocol to match (works with “!”). iptables –A FOR-<br />
WARD –p tcp will add a rule to match any TCP packet to the FOR-<br />
WARD chain. iptables –A FORWARD –p ! tcp will match any packet<br />
that was not TCP.<br />
■ –s specifies the source address to match (works with !). iptables –A<br />
FORWARD –s 192.168.1.99 will match any packet with a source<br />
address of 192.168.1.99. iptables –A FORWARD –s ! 192.168.1.99<br />
will match any packet that did not have a source address of<br />
192.168.1.99.<br />
■ –d specifies the destination address to match (works with !). iptables<br />
–A FORWARD –d 192.168.1.99 will match any packet with a destination<br />
address of 192.168.1.99.<br />
■ –i specifies the network interface that the traffic was received on<br />
(works with !). iptables –A FORWARD –i eth0 will match any packet<br />
entering the eth0 interface.<br />
■ –j specifies the target. iptables –A FORWARD –p tcp –j DROP would<br />
create a rule at the bottom of the FORWARD chain that will DROP<br />
any TCP packet.<br />
■ –o specifies the network interface that the traffic was sent out of<br />
(works with “!”). iptables –A FORWARD –o eth1 would match any<br />
packet leaving on the eth1 interface.<br />
■ –t specifies the table to manipulate. iptables –t nat –A<br />
POSTROUTING –p tcp –j DROP will add a rule to the bottom of<br />
the POSTROUTING chain in the NAT table, to DROP any TCP<br />
packet.<br />
If you don’t specify the –t option, iptables assumes you are working with<br />
the filter table.<br />
■ –v specifies to be verbose. iptables –L –v lists all of the rules and<br />
includes packet counts per chain and per rule.<br />
■ --line-numbers specifies that the rule list should be numbered:<br />
www.syngress.com
iptables –L --line-numbers<br />
This option makes it easier to know what number to use <strong>for</strong> the commands<br />
that take a rule number as an argument, such as insert, delete,<br />
replace, and so on.<br />
■ -m will match packets based on certain protocol-specific criteria.<br />
Because the match options are protocol specific, -p (tcp/udp/icmp)<br />
must be used with –m. Some common examples include:<br />
■ -m --sport allows you to match packets based on the TCP or User<br />
Datagram Protocol (UDP) source port.<br />
■ -m --dport allows you to match packets based on the TCP or<br />
UDP destination port.<br />
■ -m multiport allows you to match packets based on multiple port<br />
numbers within the same rule. iptables –A FORWARD –p tcp -m<br />
multiport --dport 22,25,53 –j DROP would DROP any TCP<br />
packet with a destination port of 22, 25, or 53.<br />
■ -m state --state will allow you to match packets based on the state<br />
of the connection. iptables –A FORWARD –p tcp –m state --state<br />
NEW –j LOG would LOG any TCP packets that were being<br />
used to initiate a new connection.<br />
There are four recognized states: NEW, ESTABLISHED, RELATED, and<br />
INVALID.<br />
Netfilter and iptables give you powerful packet-filtering and manipulation<br />
capabilities <strong>for</strong> free. With Linux distributions available <strong>for</strong> free download, a<br />
firewall is within any company’s reach. Because of this, deploying firewalls<br />
internally to protect highly sensitive systems or data is becoming increasingly<br />
viable. If you want to obtain a Linux firewall without having to install Linux,<br />
try any of the many live CDs that are available. Some excellent choices are be<br />
Knoppix or Slax.<br />
GUIs<br />
Protecting <strong>Your</strong> Perimeter • Chapter 2 55<br />
While the console commands that are used to manipulate and configure netfilter<br />
are not terribly complicated, they can sometimes get very lengthy. As the<br />
www.syngress.com
56 Chapter 2 • Protecting <strong>Your</strong> Perimeter<br />
length of the command line grows, the chances of an accidental error<br />
increase. Alternatively, you may not like working on the command line, in<br />
which case there are a wide variety of GUI and menu-driven interfaces available<br />
<strong>for</strong> netfilter. In most cases, these menu-drive interfaces use your input to<br />
create the appropriate iptables commands, and alleviate you having to know<br />
the various switches and options to use.There are a large number of GUIs<br />
available to configure your netfilter firewall.These GUIs are listed in the following<br />
section in approximate order of ease of use. All else being equal, we<br />
have demonstrated the GUIs that are available on a wide variety of plat<strong>for</strong>ms<br />
over an equal quality choice that only works with one distribution. In general,<br />
simpler also means less full featured, so be aware that if you are trying to<br />
create a complex ruleset, some GUIs may not have the needed functionality.<br />
Security Level Configuration<br />
You can start the iptables GUI provided with Red Hat-based Linux distributions<br />
by navigating to System | Administration | Security Level and<br />
Firewall.You can also call the program directly by running system-config-securitylevel<br />
from a terminal window. While the interface looks nice, it is limited<br />
in what it can configure. Basically, all you can do with this GUI is permit or<br />
deny certain ports. Fedora Core 5 configures the INPUT and FORWARD<br />
chains to jump to a custom chain named RH-Firewall-1-INPUT.There is no<br />
ability to differentiate between ports permitted in the INPUT chain or the<br />
FORWARD chain, because all rules configured through the GUI are applied<br />
to this custom chain.<br />
Some services are predefined <strong>for</strong> you. Placing a check next to SSH and<br />
clicking OK and then Yes to commit the changes will create the following<br />
rule in the RH-Firewall-1-INPUT chain:<br />
iptables –A RH-Firewall-1-INPUT –p tcp –m state --state NEW –m tcp --dport<br />
22 –j ACCEPT<br />
By expanding Other ports on the Firewall Options tab, you can enter<br />
a custom port number (see Figure 2.10.)<br />
www.syngress.com
Figure 2.10 Custom Ports<br />
Click Add, and enter the desired port number in the dialog box. Use the<br />
drop-down menu to select TCP or UDP <strong>for</strong> the protocol and click OK (see<br />
Figure 2.11).<br />
Figure 2.11 Custom Port Dialog<br />
Protecting <strong>Your</strong> Perimeter • Chapter 2 57<br />
This creates a rule identical to the SSH rule.There are no other configuration<br />
options. While this interface is adequate <strong>for</strong> a home PC that isn’t running<br />
any services, it probably will not be adequate <strong>for</strong> a corporate firewall. If you<br />
need to configure access based on the interface in use or need to configure any<br />
NAT rules, you will need to use a different GUI. While you probably won’t<br />
need this particular GUI as a corporate firewall, it is still useful to be familiar<br />
with it if you are running any Linux systems as workstations.<br />
www.syngress.com
58 Chapter 2 • Protecting <strong>Your</strong> Perimeter<br />
Lokkit<br />
Lokkit is an ncurses-based menu <strong>for</strong> configuring your netfilter firewall. Lokkit<br />
is available <strong>for</strong> most major distributions and can be installed by default on<br />
some (such as Fedora Core 5).To start Lokkit, type lokkit in a terminal<br />
window.The first lokkit screen is shown in Figure 2.12.<br />
Figure 2.12 Lokkit Main Screen<br />
You can navigate the menus using the Tab key and the space bar to toggle<br />
the equivalent of radio buttons, such as the Enable and Disabled options<br />
shown here. If you select Enabled on this screen, the default ruleset is<br />
applied.To edit any custom settings, press Tab until the Customize button is<br />
highlighted and then press Enter.The customization screen is shown in<br />
Figure 2.13.<br />
Lokkit does provide a little more flexibility than the Security Level<br />
Configuration GUI discussed previously; however, it is still limited. By<br />
selecting an interface in Trusted Devices, all traffic from that interface will be<br />
permitted.This would typically be used to select the inside interface and designate<br />
it as trusted.You do have the option of enabling MASQUERADE.The<br />
interface you select is the one that will NAT outbound traffic; there<strong>for</strong>e, you<br />
would generally select your external interface. Some predefined services are<br />
www.syngress.com
available, and you can enter your own service in<strong>for</strong>mation in the “Other<br />
ports” section. Once you are satisfied with your choices, press OK and then<br />
Enter.This will take you back to the main screen, where you press OK and<br />
then Enter to apply the changes.<br />
Figure 2.13 Lokkit Customization Screen<br />
If you attempt to configure an interface <strong>for</strong> MASQUERADE, it must also<br />
be marked as trusted, or Lokkit will generate an error. Bear in mind that<br />
although MASQUERADE is limited, it has enough flexibility to configure a<br />
firewall similar to a typical home firewall/router device.This makes Lokkit a<br />
handy little utility to have in your repertoire should you need to configure a<br />
simple firewall quickly.The value of this utility is also increased, because it is<br />
available <strong>for</strong> a wide number of Linux distributions.<br />
Firestarter<br />
Protecting <strong>Your</strong> Perimeter • Chapter 2 59<br />
Firestarter is a GUI front end <strong>for</strong> netfilter and iptables that is designed to make<br />
it simple <strong>for</strong> average users to configure their firewalls and protect themselves.<br />
Firestarter runs on many Linux distributions, and the installation is supported by<br />
many automated package management systems (such as yum, apt-get, and<br />
portage). Firestarter is an excellent choice if your needs are relatively simple <strong>for</strong><br />
www.syngress.com
60 Chapter 2 • Protecting <strong>Your</strong> Perimeter<br />
your firewall configuration.To install it manually, downloaded it from www.fssecurity.com/download.php.<br />
Once it is installed, the first time you start the<br />
GUI interface you will need to per<strong>for</strong>m some initial configuration. Follow<br />
these steps to configure firestarter:<br />
1. Start the Firestarter GUI. In Fedora Core 5 this is done by navigating<br />
to Applications | System Tools | Firestarter.This will start the<br />
Firewall wizard. Click Forward on the Welcome to Firestarter<br />
screen.<br />
2. On the next screen, select your Internet-connected (i.e. external)<br />
network device from the “Detected device(s):” dropdown box (see<br />
Figure 2.14), and place a checkbox in the “IP address is assigned via<br />
DHCP” box.This is similar to the way a home router/firewall would<br />
be configured. When satisfied, click Forward.<br />
Figure 2.14 Firestarter <strong>Network</strong> Device Setup<br />
3. The next screen is the “Internet connection sharing setup” screen<br />
(see Figure 2.15), which is basically where you enable NAT. If you<br />
want to NAT all of the outbound packets to the external IP address,<br />
place a check in the “enable internet connection sharing” checkbox.<br />
When this checkbox is enabled, you can select the local area network<br />
device (i.e. the inside interface). If you only have two interfaces, it<br />
should be selected by default. When finished, press Forward.<br />
www.syngress.com
Figure 2.15 Firestarter Internet Connection Sharing Setup<br />
Protecting <strong>Your</strong> Perimeter • Chapter 2 61<br />
4. On the final screen, leave the “Start firewall now” box checked and<br />
click Save.This will install a service to start Firestarter each time the<br />
system boots up. Firestarter will also change the default action <strong>for</strong> the<br />
chains to DENY; there<strong>for</strong>e, you must explicitly configure any ports<br />
you want to permit through the firewall.<br />
The main Firestarter GUI is shown in Figure 2.16. As you can<br />
see, it has a straight<strong>for</strong>ward interface.The Status tab gives you highlevel<br />
in<strong>for</strong>mation such as sent and received data counters per interface,<br />
and a list of active connections. When you click the Stop<br />
Firewall button, all of the iptables chains are flushed and the default<br />
action is changed to ACCEPT.This can be useful <strong>for</strong> troubleshooting<br />
issues to see if they are related to your firewall configuration.<br />
The “Events” tab lists recent blocked connection attempts.The<br />
“Policy” tab is where you configure certain rules to permit desired<br />
traffic (see Figure 2.17).<br />
www.syngress.com
62 Chapter 2 • Protecting <strong>Your</strong> Perimeter<br />
Figure 2.16 Firestarter GUI<br />
Figure 2.17 Firestarter Inbound Policy<br />
www.syngress.com
Protecting <strong>Your</strong> Perimeter • Chapter 2 63<br />
For example, if there was a Web server running on the Linux<br />
host, you could use the “Policy” tab to permit inbound connections<br />
to TCP port 80. The “Editing” dropdown box allows you to choose<br />
between inbound and outbound rules to edit. For the Web server<br />
example, we selected “Inbound traffic policy.”The policy group you<br />
select when you click Add Rule determines where the policy is<br />
placed.The function of the various policy groups is outlined below.<br />
■ Allow Connections From Host This is used to configure a given<br />
IP address, hostname, or network. When you enter the IP in<strong>for</strong>mation<br />
and create a rule in this policy group, all traffic from the configured<br />
source is permitted.<br />
■ Allow Service The allow service policy group is used to permit<br />
individual services.You can configure the source to be anyone<br />
including a specific IP, or network, or all local area network (LAN)<br />
clients.The LAN clients option permits the service through the firewall<br />
with a source address that is on the same subnet as the inside<br />
network adapter.<br />
■ Forward Service This option is used only when you are NATing.<br />
This allows the firewall to <strong>for</strong>ward a specific port or range of ports,<br />
so that a service hosted on an internal NAT’ed device can receive<br />
inbound connections from the external network.<br />
The “Outbound traffic policy” window shows a different set of policy<br />
groups (see Figure 2.18).There are also the additional radio buttons to select<br />
“Permissive by default,”“blacklist traffic,” or “Restrictive by default, whitelist<br />
traffic.” If you select the permissive option (the default), all outbound connections<br />
will be allowed and any rules you create will be DENY rules.This is the<br />
same default behavior of most home firewalls. If you select the restrictive configuration,<br />
the default target <strong>for</strong> the table is DENY, and any rules you create<br />
will be PERMIT rules.<br />
www.syngress.com
64 Chapter 2 • Protecting <strong>Your</strong> Perimeter<br />
Figure 2.18 Firestarter Outbound Policy<br />
The function of the different policy groups toggle between “allow” and<br />
“deny,” based on whether you select restrictive or permissive mode.The<br />
policy groups are outlined here:<br />
■ Allow/Deny Connections To Host This policy group is used to<br />
globally permit or deny outbound access to a given host, IP address,<br />
or network range.This policy uses the destination to match the rule.<br />
You can use this policy group in permissive mode to list certain Web<br />
sites you do not want anyone to have access to.<br />
■ Allow/Deny Connection from LAN Host This policy group is<br />
used to permit or deny all access from a particular host, IP address, or<br />
network range.This policy uses the source to match the rule.<br />
■ Allow/Deny Service This policy group permits or denies traffic<br />
based on its destination port and source. When you are using permissive<br />
mode, this policy group can be used to block all access to the<br />
BitTorrent ports.The traffic source can be anyone; the firewall itself,<br />
LAN clients, or an arbitrary IP, hostname, or network range.<br />
www.syngress.com
Protecting <strong>Your</strong> Perimeter • Chapter 2 65<br />
Configuring the policies will satisfy the bulk of what you need to accomplish,<br />
but there are some additional configuration options available by navigating<br />
to Edit | Preferences. Selecting Interface | Events allows you to<br />
configure some useful options.The “Skip redundant entries” checkbox only<br />
makes one event entry <strong>for</strong> sequential event entries.This helps prevent the<br />
event windows from being flooded by repetitive alerts.You also have the<br />
option of entering certain hosts or ports as being exempt from triggering the<br />
event log. After making your selections, click Accept.<br />
Another preferences setting of note is under Firewall | <strong>Network</strong><br />
Settings.This allows you to enable Internet connection sharing (the same as<br />
during the initial wizard), and enable the firewall host as a Dynamic Host<br />
Configuration Protocol (DHCP) server.This allows you to configure the<br />
Linux host similarly to a home firewall, which generally acts as a DHCP<br />
server in addition to per<strong>for</strong>ming NAT and acting as a firewall.The ICMP filtering<br />
window also allows you to filter ICMP packets. By default, the permit<br />
and deny rules configured by Firestarter apply to TCP and UDP, but not<br />
ICMP.This screen allows you to permit the desired types of ICMP traffic.<br />
Generally speaking, it is better not to allow any ICMP from the Internet to<br />
your firewall or internal network unless absolutely necessary.<br />
One final setting you want to configure is under Firewall | Advanced<br />
Options. In the broadcast traffic section, check both options under<br />
Broadcast traffic. In general, you should not permit broadcast traffic to go<br />
through your firewall, as doing so poses a security risk.You also want to check<br />
the option to “Block traffic from reserved addresses on public interfaces,”<br />
which is a common filtering tactic. Because the “private” addresses outlined in<br />
RFC1918 should not be routed through the Internet, there is never a reason<br />
to receive traffic sourced from any of those addresses on your outside interface.<br />
If you do, it is almost always a hacker attempting to bypass a poorly configured<br />
firewall.<br />
Short of any advanced packet mangling, there isn’t much you can’t<br />
accomplish using Firestarter as your configuration tool. If you need to implement<br />
a more advanced configuration, use an alternate tool, or generate the<br />
configuration using Firestarter and use those chains as a starting point to add<br />
your own more advanced options.<br />
www.syngress.com
66 Chapter 2 • Protecting <strong>Your</strong> Perimeter<br />
Easy Firewall Generator<br />
Easy Firewall Generator is not a GUI per se, but it does help simplify your<br />
netfilter configuration and avoid the need to be familiar with the iptables<br />
syntax. By using the Web page at http://easyfwgen.morizot.net/<br />
gen/index.php, you can enter the relevant in<strong>for</strong>mation and click the<br />
Generate Firewall button. As you select options, if additional in<strong>for</strong>mation is<br />
needed click the Generate Firewall button and the page will refresh and<br />
provide the additional input fields. When all of the required in<strong>for</strong>mation has<br />
been entered, the page will change to a text page that can be copied and<br />
pasted <strong>for</strong> iptables to read as a saved configuration. On Fedora Core 5 the iptables<br />
configuration is stored in /etc/sysconfig/iptables. Although this method<br />
requires you to replace the default iptables configuration file used by your<br />
distribution, it is fairly painless, and it supports all of the same basic functionality<br />
as Firestarter.<br />
Firewall Builder<br />
Firewall Builder is the most complete GUI offering <strong>for</strong> managing netfilter<br />
firewalls with features and capabilities comparable to some commercial firewall<br />
products. As is almost always the case, this functionality and capability<br />
come at a price: as far as netfilter GUIs are concerned, Firewall Builder is not<br />
the easiest to configure and use. If you want or need its superior management<br />
capabilities, however, the extra ef<strong>for</strong>t is well worth it. (Download firewall<br />
builder from www.fwbuilder.org/.) Firewall Builder manages netfilter firewalls<br />
as well as ipfilter, OpenBSD PF, and (commercially) Cisco PIX firewalls.<br />
Firewall Builder runs on many popular operating systems including Red Hat,<br />
Mandrake, SUSE, <strong>Free</strong>BSD, Mac OS X, and Windows XP.<br />
Firewall Builder operates differently than all of the GUIs covered so far. It<br />
uses an object-based approach. Essentially, you must define an object to represent<br />
any entity that you want to use in the firewall rules. In most cases this<br />
means a source, a destination, and a service (port) at a minimum. Both the<br />
configuration and the GUI bear a strong resemblance to that of the<br />
Checkpoint Firewall GUI. Once the objects are defined, you can drag and<br />
drop them into the rules in order to permit or deny communications<br />
between the two. For this example we use a Windows XP host to run<br />
Firewall Builder and configure a Linux netfilter firewall.<br />
www.syngress.com
1. Install Firewall Builder.<br />
2. Start the GUI by navigating to Start | Programs | Firewall<br />
Builder 2.1 | FWBuilder, which opens the main Firewall Builder<br />
window (see Figure 2.19). It is divided up into an objects tree (the<br />
left pane) and the dialog area (the right pane).<br />
Figure 2.19 Firewall Builder<br />
Protecting <strong>Your</strong> Perimeter • Chapter 2 67<br />
3. Initially, the dialog area will be empty. In order to add the first firewall<br />
(in this case a netfilter firewall) on the same host as you are running<br />
Firewall Builder, select Firewalls in the object tree.<br />
4. Right-click and select New Firewall, which will open the New<br />
Firewall dialog box (see Figure 2.20).<br />
www.syngress.com
68 Chapter 2 • Protecting <strong>Your</strong> Perimeter<br />
Figure 2.20 FWBuilder New Firewall Wizard<br />
5. Enter the name <strong>for</strong> the new firewall (in this case LAB01).<br />
6. For the firewall software, select iptables.<br />
7. Choose Linux 2.4/2.6 <strong>for</strong> the OS and click Next.<br />
8. The next window allows you to configure the interfaces on the firewall.You<br />
can do so manually, or if the firewall is running SNMP, you<br />
can discover them via SNMP. You select Configure interfaces<br />
manually and click Next.<br />
9. The manual interface configuration window is shown in Figure 2.21.<br />
Enter the relevant in<strong>for</strong>mation <strong>for</strong> each network interface.The name<br />
must correspond to the actual interface name (same as if you entered<br />
ifconfig on the Linux host), such as eth0.The Label is a human<br />
friendly name <strong>for</strong> easy reference such as OUTSIDE. When you are<br />
done entering the in<strong>for</strong>mation <strong>for</strong> a given interface click Add.<br />
www.syngress.com
Figure 2.21 FWBuilder Manual Interface Configuration<br />
Protecting <strong>Your</strong> Perimeter • Chapter 2 69<br />
10. When you have entered the in<strong>for</strong>mation <strong>for</strong> all interfaces (typically<br />
an INSIDE and OUTSIDE), click Finish.<br />
11. You must designate one of the interfaces on the firewall as the management<br />
interface, typically the INSIDE interface. Do this by navigating<br />
to the firewall in the object tree. As you select each interface<br />
in the object tree, there is a “Management interface” checkbox in the<br />
dialog area. Check this box <strong>for</strong> the interface you want to use.This<br />
will be the interface that FWBuilder uses to connect and upload the<br />
firewall rules to.The interface properties are shown in Figure 2.22.<br />
Now that you have the basic firewall defined, you need to define something<br />
<strong>for</strong> it to talk to. In this case, let’s assume that 192.168.1.0/24 is your<br />
internal network, and you want to allow outbound Web browsing and access<br />
to an internal Web server (WEB1). For starters, you need to create an object<br />
to represent the internal network. Follow these steps to create the network<br />
object.<br />
www.syngress.com
70 Chapter 2 • Protecting <strong>Your</strong> Perimeter<br />
Figure 2.22 Management Interface<br />
13. Navigate to Objects | <strong>Network</strong>s in the object tree.<br />
14. Right-click <strong>Network</strong>s and select New <strong>Network</strong>.<br />
15. Enter INTERNAL <strong>for</strong> the name of the network, and use<br />
192.168.1.0 <strong>for</strong> the Address field. Enter 255.255.255.0 <strong>for</strong> the<br />
Netmask and click Apply.<br />
16. Let’s go ahead and next create an internal Web server at<br />
192.168.1.12. Right-click Objects | Hosts in the objects tree and<br />
select New Host.<br />
17. Enter WEB1 <strong>for</strong> the name of the object. Click the Use preconfigured<br />
template host objects check box and click Next.<br />
18. Select PC with one interface and click Finish.<br />
19. Expand the object tree to User | Objects | Hosts | WEB1 |<br />
eth0 | WEB1. Edit the IP address to be 192.168.1.12 and click<br />
Apply.<br />
20. Next, define the appropriate services to allow Web browsing. Rightclick<br />
Services | TCP and select New Service.<br />
21. Enter HTTP <strong>for</strong> the name. Leave the source port ranges at zero, but<br />
change the destination port range to start and end at 80 and click<br />
Apply.<br />
22. Repeat steps 20 and 21 <strong>for</strong> HTTPS on port 443 <strong>for</strong> secure Web<br />
pages.<br />
This can be a lot of trouble; however, the real strength of an object-oriented<br />
approach is seen when it comes time to configure the rules. With all of<br />
www.syngress.com
the appropriate objects in place, let’s define the rules to permit the inbound<br />
HTTP traffic.<br />
23. In the top panel of the dialog area right-click and select Insert<br />
Rule.<br />
24. Allow inbound HTTP to WEB1. Click on WEB1 in the object tree<br />
and drag it to the destination cell <strong>for</strong> rule 0.<br />
25. Now drag the HTTP and HTTPS service from the object pane to<br />
the Service cell in rule 0.<br />
26. Right-click the big red dot in the Action column and select<br />
Accept.This allows the inbound Web traffic to access WEB1.<br />
27. To allow outbound Internet access, create another rule by rightclicking<br />
on rule zero and selecting Add Rule.<br />
28. Drag and drop HTTP and HTTPS from the object tree into the<br />
Service column of rule one.<br />
29. Drag the <strong>Network</strong> object INTERNAL from the object tree to the<br />
Source column of the new rule.<br />
30. Right-click on the Action column <strong>for</strong> rule 1 and change the action<br />
to ACCEPT.<strong>Your</strong> policy should look like the one shown in Figure<br />
2.23.<br />
Figure 2.23 Sample FWBuilder Policy<br />
Protecting <strong>Your</strong> Perimeter • Chapter 2 71<br />
31. Although our rules seem simple at the moment, let’s apply them to<br />
see how things work. First, save your work by navigating to File |<br />
Save or File | Save As.<br />
32. Next, right-click the LAB01 Firewall and select Compile.<br />
www.syngress.com
72 Chapter 2 • Protecting <strong>Your</strong> Perimeter<br />
33. When the “Select Firewalls <strong>for</strong> compilation” window comes up,<br />
LAB01 should be checked. When satisfied with your selection, click<br />
Next. When the compilation is complete you should see “Success” in<br />
the “Progress” column. After verifying that the compilation was successful,<br />
click Finish.<br />
Tools & Traps…<br />
Don’t Block <strong>Your</strong>self<br />
Anyone who has spent any time configuring firewalls has learned the<br />
hard way to be very careful when configuring the rules. It is always a good<br />
idea to create the rules to PERMIT administrative access be<strong>for</strong>e any others.<br />
This is because as soon as you configure the default policies to DROP, your<br />
SSH connection will no longer be permitted unless you have it added to<br />
the access list. If you <strong>for</strong>get to do this, you could find that you no longer<br />
have remote access to your firewall after applying the policy. If that happens,<br />
you won’t even be able to remotely connect to update the policy<br />
and change the ACLs.<br />
The next step is to tell FWBuilder where to find the SSH executables,<br />
because this is how FWBuilder uploads the configuration to the firewalls.You<br />
need to have SSH working on both the firewall and the FWBuilder console<br />
(assuming they are on different systems). (Detailed steps on using and configuring<br />
SSH are included in Chapter 2,“Securing <strong>Your</strong> Perimeter.”<br />
34. Select Edit | Preferences from the menu.<br />
35. Select the SSH tab and click the Browse button.<br />
36. Navigate to the location of your desired SSH utility (e.g., plink.exe)<br />
and click Open. Note that if you are using Windows <strong>for</strong> the<br />
FWBuilder host, you cannot select PuTTY.exe; you must use the<br />
command-line PuTTY program, plink.exe.<br />
37. After selecting the SSH executable, click OK.<br />
38. Right-click the LAB01 firewall in the object tree and select Install.<br />
www.syngress.com
39. Select the Firewalls you wish to install to and click Next.<br />
40. Enter the username and password <strong>for</strong> the SSH connection.<br />
41. All other fields are optional; however, it is recommended that you<br />
check “Store a copy of the fwb on the firewall.” When satisfied with<br />
your choices, click Ok.<br />
After the upload completes, you will get a status of “Success” (see Figure<br />
2.24). Checking your firewall (iptables –L) shows you the new rules that are<br />
listed.<br />
Figure 2.24 Policy Install Success<br />
Protecting <strong>Your</strong> Perimeter • Chapter 2 73<br />
As you can probably see, once you have completed the up-front work of<br />
defining your objects, adding or modifying rules is simple. Additionally, unlike<br />
the other free GUI solutions, FWBuilder allows you to centrally and securely<br />
administer all of your (supported) firewalls from one location. When you use<br />
the a<strong>for</strong>ementioned policy, Figure 2.25 shows a sample of the iptables rules<br />
that were generated.<br />
Notice that the default chains have rules matching the rule you configured<br />
in FWBuilder, with a target of RULE_. These additional<br />
chains are used to configure the logging.There is also a rule at the beginning of<br />
all chains to ACCEPT traffic related to an established session.This is generally<br />
desirable but is still configurable.To remove this automatically generated rule,<br />
www.syngress.com
74 Chapter 2 • Protecting <strong>Your</strong> Perimeter<br />
select the firewall in the object tree and click on Firewall Settings in the<br />
dialog area.There is a checkbox that is selected by default called “Accept<br />
ESTABLISHED and RELATED packets be<strong>for</strong>e the first rule.”Although the<br />
FWBuilder policies you’ve configured can handle any basic rules you might<br />
need, there are still a few more bases to cover. If you need to NAT with your<br />
Linux firewall, configuring it with FWBuilder is easy. Follow these steps so that<br />
your Firewall will NAT all the traffic from the internal network to the DHCP<br />
address used on the outside interface.This configuration is also known as source<br />
nat because it is the source address that is being changed.<br />
Figure 2.25 FWBuilder Generated Chains<br />
1. In the dialog area select the NAT tab.<br />
2. Right-click and select Insert Rule.This will add a NAT rule<br />
number zero.<br />
3. Drag your INTERNAL network object from the object tree to the<br />
Original Src column in the new NAT policy.<br />
4. Drag the external interface on the firewall from the object tree to the<br />
“Translated Source” column in the NAT policy.<br />
That’s all there is to it. Save, compile, and install the new policy. Now<br />
traffic originating from the internal network will be NAT’ed to the IP on the<br />
external interface. Although this source NAT configuration will allow all your<br />
internal users to reach the internet, you will need to use destination NAT if<br />
Internet users need to reach an internal server. Because the internal server is<br />
using a private IP address (which is not routable on the Internet), you need to<br />
translate this destination to an IP address that the external users can reach.To<br />
configure packets destined <strong>for</strong> the firewall’s single public IP address to an<br />
inside resource using destination NAT, follow these steps.<br />
www.syngress.com
Protecting <strong>Your</strong> Perimeter • Chapter 2 75<br />
1. In the dialog select the NAT tab<br />
2. Right click on the rule number zero of the existing NAT rule and<br />
select Add Rule Below.<br />
3. Drag the firewall OUTSIDE interface into the Original Destination<br />
column of the new rule.<br />
4. Drag the appropriate services (i.e. HTTP <strong>for</strong> web access) into the<br />
Original Service column of the new rule.<br />
5. Drag the internal server into the translated destination column of the<br />
new rule.<br />
Another nice feature is being able to create a time policy (e.g., if you only<br />
want the internal systems to be able to surf the Internet from noon to 1:00<br />
P.M., you can easily make that adjustment.<br />
1. In the object tree, right-click Time, and select New Time Interval.<br />
2. In the “Name” field we’ll call this rule LUNCH.<br />
3. In the two time fields provided, enter a time <strong>for</strong> the rule to START<br />
and a time <strong>for</strong> the rule to STOP. In this case we will enter 12:00 and<br />
13:00 and leave the date field as zeros.The day of the week can stay<br />
at -1, which means all days. When done, click Apply.<br />
4. Drag the LUNCH time interval, <strong>for</strong>m the object tree to the Time<br />
column of rule # 1.<br />
Now, rule # 1 (which permits outbound Web surfing) will only be active<br />
from noon to 1:00 P.M.The ability to configure the rules to be active based<br />
on the time of day is a very powerful feature. If the organization is a strictly<br />
8:00 A.M to 5:00 P.M type of place, you could configure the firewall to disable<br />
all access during non-business hours. Alternatively, certain non-businessrelated<br />
protocols (e.g., instant messenger, file sharing, and so on) could be<br />
enabled after the normal business day ends. While not the easiest GUI to use,<br />
FWBuilder is definitely the most full featured, and the only one offering features<br />
you would expect to find in a commercial product.<br />
www.syngress.com
76 Chapter 2 • Protecting <strong>Your</strong> Perimeter<br />
Other GUIs<br />
Although there are too many netfilter GUIs to cover them all extensively, we<br />
have tried to cover some of the best ones available. If none of the ones covered<br />
strike your fancy, or if you just like to experiment and see what else is<br />
out there, you might want to investigate some additional offerings. If you are<br />
running KDE look into Guarddog from<br />
www.simonzone.com/software/guarddog/#introduction, which is aimed at<br />
novice to intermediate users and offers the ability to define security policies<br />
based on logical groupings called network “zones.”The Turtle Firewall Project<br />
(www.turtlefirewall.com/) allows you to administer your firewall host via a<br />
Web interface. While there is no substitute <strong>for</strong> a good understanding of the<br />
command-line configuration of iptables, <strong>for</strong> an uncomplicated firewall configuration<br />
many of these GUIs allow you to get your firewall up and running<br />
quickly and without having to read the iptables man page.<br />
Smoothwall<br />
Smoothwall (http://smoothwall.org/) is a firewall in its own category. First,<br />
let’s clarify some basic nomenclature. Smoothwall.org is the site <strong>for</strong><br />
SmoothWall Express. SmoothWall Express is a free open-source firewall solution.<br />
Smoothwall.net is the home of SmoothWall Limited, which produces several<br />
commercial security products, including a version of the SmoothWall<br />
firewall. SmoothWall differs from the other solutions covered here in that it is<br />
a dedicated firewall device. Other solutions using netfilter and optional GUIs<br />
to configure the firewall can be run on a workstation.You can still use the<br />
firewall system as a normal workstation, but it’s not recommended. If you<br />
want to harden the firewall (as you should), you need to remove unneeded<br />
services and software from the system, and update all of the remaining software.<br />
SmoothWall takes a different approach in that all of this is done <strong>for</strong> you.<br />
When you install SmoothWall, it wipes out the filesystem and installs a<br />
secured version of Linux on the hard disk, along with the SmoothWall software.The<br />
SmoothWall firewall has no GUI on the system, only commandline<br />
access and administration via the Web management interface.<br />
SmoothWall is meant to be a firewall and nothing more.<br />
With that in mind, there are several advantages to this approach. Foremost,<br />
you don’t have to learn how to harden your Linux distribution so that it will be<br />
www.syngress.com
secure enough to use. Further, unlike installing Linux and then learning iptables<br />
syntax, with SmoothWall you don’t need to know Linux.The installation menu<br />
walks you through configuring the minimum settings so that you can then use<br />
the Web interface to configure the firewall functionality.You don’t need to<br />
know anything about Linux to get SmoothWall up and running (though it<br />
never hurts).The fact that the SmoothWall firewall is already stripped down and<br />
unneeded software and services are removed means that you can get the maximum<br />
per<strong>for</strong>mance out of an old computer without having to spend a lot of<br />
time trying to tweak a full (normal) Linux distribution.<br />
Installing Smoothwall<br />
Protecting <strong>Your</strong> Perimeter • Chapter 2 77<br />
The simplest way to install SmoothWall Express is by downloading the .iso<br />
image from http://smoothwall.org/get/. It is advisable to read along with the<br />
manuals located at http://smoothwall.org/docs/.The documentation provided<br />
with SmoothWall Express is exceptional among free products, and all of<br />
the installation screens are shown in the PDF installation guide.This installation<br />
method is used as we walk though installing SmoothWall Express.<br />
1. After burning this image to a CD-ROM, boot the prospective firewall<br />
with the CD-ROM in the drive.<br />
2. The boot screen will look typical of many Linux distributions. It will<br />
warn you that installing SmoothWall Express will delete all data on<br />
the hard drive.To continue with the installation, press ENTER.<br />
3. The installation then shifts into a DOS-like GUI interface.<br />
Navigation is accomplished using the TAB, arrow, and ENTER keys.<br />
You will be prompted to insert the installation CD and press OK.<br />
This is done in case your system cannot boot from a CD-ROM and<br />
you used a boot floppy to begin the installation. Either way, ensure<br />
that the CD-ROM is (still) in the drive, highlight OK, and press<br />
ENTER.<br />
4. You have to select OK twice be<strong>for</strong>e the hard disk will be repartitioned<br />
and all data lost.<br />
5. When prompted, select Probe to allow the installation routine to see<br />
what network cards it can detect.<br />
www.syngress.com
78 Chapter 2 • Protecting <strong>Your</strong> Perimeter<br />
SmoothWall uses a concept of interface colors to denote their trust level,<br />
and you will begin seeing them referred to in that fashion during the installation<br />
process. For example, your inside interface is assumed to be the trusted<br />
traffic and is designated as the GREEN interface. Various dial-up, Integrated<br />
Services Digital <strong>Network</strong> (ISDN), or DMZ interfaces are designated as<br />
ORANGE interfaces.You can also have a combination of colors indicating<br />
your interface configuration. If you use an additional Ethernet interface as the<br />
untrusted (OUTSIDE) interface, in SmoothWall parlance that would be<br />
GREEN + RED.<br />
After the files are installed successfully, you are given the opportunity to<br />
restore your configuration from floppy disks.This is useful if you are<br />
upgrading or migrating to new hardware. In this case, we select OK.<br />
1. Select your keyboard layout (in my case “US,” and select OK.<br />
2. Select a hostname <strong>for</strong> the firewall (e.g., smoothwall) and select OK.<br />
3. The next screen allows you to enter proxy server in<strong>for</strong>mation in case<br />
you need to go through a proxy <strong>for</strong> the firewall to retrieve Web<br />
updates. If you are using a proxy, enter the appropriate in<strong>for</strong>mation<br />
here; if not, select OK.<br />
4. The next couple of screens allow you to enter configuration in<strong>for</strong>mation<br />
<strong>for</strong> an ISDN or ADSL connection.The assumption of the<br />
installation process is that your INSIDE (trusted) interface will be an<br />
Ethernet interface, and the OUTSIDE (untrusted) interface will be<br />
either an Ethernet, ISDN, or ADSL. If you are using one of these,<br />
enter the appropriate in<strong>for</strong>mation. If your OUTSIDE interface is a<br />
normal Ethernet interface (e.g., from a cable modem), select DIS-<br />
ABLE <strong>for</strong> both the ISDN and Asymmetric Digital Subscriber Line<br />
(ADSL) configuration screens.<br />
5. The next screen allows you to review and edit your network configuration.<br />
If you are using an Ethernet interface <strong>for</strong> both, you need to<br />
select GREEN + RED <strong>for</strong> the network configuration type. Check<br />
each menu option here and ensure that both interfaces have been<br />
recognized, have a driver installed, and have IP address settings.<br />
Commonly, the RED interface uses DHCP and the GREEN uses a<br />
static IP address, so that internal hosts can configure the firewall as<br />
their default gateway out to the Internet.<br />
www.syngress.com
Protecting <strong>Your</strong> Perimeter • Chapter 2 79<br />
6. When you are satisfied with all the settings, select DONE.<br />
7. You will be asked if you want to enable the SmoothWall firewall to<br />
serve as a DHCP server.This is the same configuration as most home<br />
firewalls, acting as firewall, gateway, and DHCP server. If you do not<br />
already have a DHCP server in your network, enable it. Fill in the<br />
desired values <strong>for</strong> the various fields. Most of the settings are not mission<br />
critical, but one setting to take note of is the lease duration. If<br />
your lease duration is too long, you will slowly lose IP addresses<br />
from systems that did not get the chance to release the address properly<br />
prior to going offline (such as from a crash or power outage). If<br />
the lease time is too long, this IP address attrition can exhaust the<br />
DHCP scope and leave no address available <strong>for</strong> other users. A 24hour<br />
lease is not uncommon, and generally the larger the network<br />
the shorter the lease duration you will want. If you are unsure about<br />
DHCP, you can leave it disabled.The DHCP settings are easily configured<br />
later from the Web interface.<br />
8. The next several screens allow you to enter the password <strong>for</strong> various<br />
accounts used by the firewall. Here are summaries of these accounts.<br />
■ Administrator This is used <strong>for</strong> administering the firewall via the<br />
Web interface.This account is only <strong>for</strong> accessing the Web interface<br />
and cannot be used to login to the Linux OS on the firewall<br />
directly.<br />
■ root This is a local Linux account that is used <strong>for</strong> command-line<br />
access on the firewall itself.<br />
■ setup This is a local Linux account that is used to run the setup<br />
program, which automatically starts when you login as setup.The<br />
setup program allows you to configure some of the network settings<br />
if they need to be changed after the initial installation.<br />
9. After you configure the final password, the CD-ROM will eject and<br />
the system will reboot. When the system comes back up, you can log<br />
in directly via the console using the root account, or the preferred<br />
method is to log in to the Web interface.The default Web interface is<br />
found at http://smoothwall:81 and the secure HTTP is found at<br />
www.syngress.com
80 Chapter 2 • Protecting <strong>Your</strong> Perimeter<br />
https://smoothwall:441. Both the root and the setup account can also<br />
login via SSH, which is configured by default on port 222.<br />
Configuring SmoothWall<br />
When you first log in to the SmoothWall Web interface, the screen will look<br />
like the one shown in Figure 2.26.<br />
Figure 2.26 SmoothWall Web Interface<br />
There is some in<strong>for</strong>mation available be<strong>for</strong>e logging in, such as the number<br />
of users and average load on the firewall. As soon as you click on a menu item<br />
at the top you are prompted to authenticate with the Web admin user. By<br />
default, the account name is “admin.” One of the first things you should do is<br />
enable SSH access, which is disabled by default.This allows you an additional<br />
way to manage the firewall if something goes wrong with the Web server or<br />
the firewall filters.You can enable SSH by clicking on the Services tab, and<br />
then selecting Remote Access. Next, place a check in the box next to SSH<br />
and click Save.You can verify what services are running by clicking the<br />
“About your smoothie” tab.There are three screens available under this tab.<br />
The status screen shows which services are running.The advanced screen<br />
www.syngress.com
shows more detailed in<strong>for</strong>mation regarding memory usage, hard disk usage,<br />
network interface settings, and uptime.The traffic graphs screen shows input<br />
and output rates <strong>for</strong> all interfaces.<br />
After enabling SSH, you should be able to connect on port 222. An<br />
example using openssh would be:<br />
ssh -l root –p 222<br />
Now that you have a backup way to get into the firewall, the next priority<br />
is to update the firewall. Although you don’t have much of a configuration<br />
to warrant making a backup be<strong>for</strong>e applying the patches, it is still a good<br />
habit to get into. By selecting the maintenance tab and then the backup<br />
screen, you have a couple of options.The “Create backup floppy disk” button<br />
will write the configuration in<strong>for</strong>mation directly to a floppy disk. Given the<br />
relatively unreliable nature of floppy disks, you should choose the “Create<br />
backup floppy image file” option.This creates and downloads an .img file to<br />
the system you are using <strong>for</strong> Web administration.You can store this file on a<br />
more reliable media, and then write the image to a physical floppy disk at a<br />
later date using a utility such as rawwrite. Once you have made a backup, you<br />
can safely apply the firewall updates.<br />
Firewall updates are another area where the SmoothWall designers have<br />
made things as painless as possible. Click on the maintenance tab and you<br />
will see two sections on the updates screen.The top section shows installed<br />
updates and the bottom one shows available updates.To update the firewall, go<br />
to http://smoothwall.org/get/. In the “Latest Updates and Patches” section<br />
there is a small link called updates archive. Click that link and on the following<br />
page, download all the available updates to your local system.<br />
NOTE<br />
Protecting <strong>Your</strong> Perimeter • Chapter 2 81<br />
All of the updates must be applied sequentially; the SmoothWall updates<br />
are not cumulative updates. Apply update 1 first, then update 2, and so<br />
on, until you have applied all of the updates currently available <strong>for</strong> your<br />
firewall. At the time of this writing there were seven updates available<br />
<strong>for</strong> download.<br />
www.syngress.com
82 Chapter 2 • Protecting <strong>Your</strong> Perimeter<br />
The bottom of the Maintenance | Updates page has a box to upload<br />
an update. Click Browse and select the first update, and then click upload.<br />
The firewall automatically installs the patch as it is uploaded and, when finished,<br />
the page will refresh and show the updated listed in the “Installed<br />
updates” section. Continue this process until all available updates have been<br />
completed. A partial list of the successfully installed updates can be seen in<br />
Figure 2.27.<br />
Figure 2.27 SmoothWall Installed Updates<br />
One final configuration option that should be a part of any firewall setup<br />
is providing the firewall with a good way to synchronize its clock. Accurate<br />
time is important <strong>for</strong> many reasons, one of which is to make sure your logs<br />
have accurate time stamps. Without accurate time stamps, it will be more difficult,<br />
if not impossible, to reconstruct events later if there is an intrusion.You<br />
can configure the time source on the “Services” tab using the “time” screen.<br />
You should use the drop-down box to select the appropriate time zone.<br />
While SmoothWall does not give you the option to configure network time<br />
protocol (NTP) security, it does give you the option of using random public<br />
servers. In this fashion, even if it pulled time from one that was too far off<br />
www.syngress.com
(either accidentally or maliciously), the next time it is checked (a different<br />
server) would likely correct itself.To enable SmoothWall to retrieve the time<br />
from a public time server, check the Enabled: checkbox and then click Save.<br />
With all of the basic administrative configuration out of the way, the<br />
actual rule configuration is next. SmoothWall relies heavily on the security<br />
level of the interfaces <strong>for</strong> access permissions. By default, all traffic will be<br />
blocked that enters on a RED interface and is destined <strong>for</strong> an address via a<br />
GREEN interface, unless it is specifically configured to be permitted.<br />
Similarly, traffic is blocked by default from an ORANGE interface to a<br />
GREEN interface.Traffic from a more secure interface to a less secure interface<br />
is permitted by default.This behavior is similar to several other commercial<br />
firewalls including the Cisco PIX/ASA. What all this means is that <strong>for</strong><br />
your users to access the Internet, you don’t need to configure anything at all.<br />
On the other hand, suppose you wanted to permit inbound access to a<br />
Web server (GREEN interface) with an IP address of 192.168.1.63 from any<br />
host on the Internet (RED interface).You would configure this by selecting<br />
the <strong>Network</strong>ing tab and the Port Forwarding screen (see Figure 2.28).<br />
Figure 2.28 SmoothWall Port Forwarding<br />
Protecting <strong>Your</strong> Perimeter • Chapter 2 83<br />
Leave the source IP blank (<strong>for</strong> ALL) and enter a source port of 80. For the<br />
destination IP, enter the internal server’s IP of 192.168.1.63, and <strong>for</strong> the destination<br />
port, enter 80 <strong>for</strong> HTTP. When finished, click Add. If you need to<br />
www.syngress.com
84 Chapter 2 • Protecting <strong>Your</strong> Perimeter<br />
permit HTTPS, you need to repeat the process with 443 as the destination<br />
port. By using SSH to connect to the firewall directly (SmoothWall uses port<br />
222 <strong>for</strong> SSH), you can list the netfilter rules using iptables –L and see where<br />
the HTTP and HTTPS rules were added.<br />
Chain portfwf (1 references)<br />
target prot opt source destination<br />
ACCEPT tcp -- anywhere 192.168.1.63 state NEW tcp dpt:http<br />
ACCEPT tcp -- anywhere 192.168.1.63 state NEW tcp dpt:https<br />
If you have three interfaces in a one-legged DMZ design, the DMZ interface<br />
is labeled as ORANGE. If you need to permit access from the DMZ<br />
into the trusted (GREEN) network, the process is a little different.You would<br />
then navigate to the networking | DMZ pinholes screen.The interface is<br />
very similar to the port <strong>for</strong>warding with the exception that there is no field<br />
to specify the source port.<br />
At times, an internal system’s permissions may allow it to communicate<br />
with a device outside the firewall (on the RED interface); however, you may<br />
wish to block the communications completely. If you do this, any access by<br />
the blocked site will fail, even attempts to respond to an internal trusted<br />
system’s request.You can configure this on the “<strong>Network</strong>ing” tab, using the<br />
“ip block” screen. Enter the source IP address or name to block, and click<br />
Add to save the rule.You also have the option to enable logging <strong>for</strong> the<br />
blocked attempts.<br />
With the basic firewall rules and maintenance configured, there are a few<br />
“extras” that are nice to see in a free product. One of these is the built-in<br />
Intrusion Detection System (IDS). Because it uses Linux as its base operating<br />
system, it conveniently includes Snort IDS; all you have to do is enable it.<br />
Enable Snort by selecting the “Services” tab, and then the “Intrusion<br />
Detection System” screen. Place a check next to Snort and click Save.The<br />
Snort alerts and other logs can be viewed on the “logs” tab.There are several<br />
subscreens that include a drop-down box to select what subset of logs you<br />
want to see, such as SSH, SmoothWall (which will show your recently applied<br />
patches), and several more.The “Web proxy” screen is only useful if you are<br />
using the Web proxy feature of the firewall.The “firewall” page shows all<br />
blocked connections and allows you to filter by month and day. Lastly, the<br />
www.syngress.com
IDS screen shows events logged by the Snort IDS. Un<strong>for</strong>tunately, SmoothWall<br />
Express does not support remote logging natively, while the commercial<br />
offering does. It does, however, allow you to export the log files to a text file.<br />
Another nice option is the dynamic DNS support.There are various<br />
dynamic DNS services available that will allow you to use a consistent DNS<br />
name to refer to a system whose IP address is dynamic via DHCP. In order to<br />
do this, you typically must install a small program on the host system that will<br />
periodically contact the dynamic DNS server and alert them to your current<br />
IP address.The service then uses this in<strong>for</strong>mation to update their DNS<br />
records so that people can locate the system via DNS.The SmoothWall firewall<br />
has the capability to per<strong>for</strong>m these updates <strong>for</strong> you, to the major<br />
dynamic DNS providers.You can configure dynamic DNS support by<br />
selecting navigating to the services | dynamic dns page. Use the dropdown<br />
menu to select the dynamic DNS service you are using, fill in the rest<br />
of the in<strong>for</strong>mation, and click Add.The firewall will then make the updates to<br />
the service and all of the hosts to IP mappings can be maintained in one<br />
place rather than having to install an agent on all of the systems that need<br />
dynamic DNS functionality.<br />
SmoothWall Express is a very well-built firewall package.The documentation<br />
is very good, and the setup and management are straight<strong>for</strong>ward and<br />
understandable.You don’t have to know anything about the underlying operating<br />
system. With all of the advanced features such as traffic graphs, intrusion<br />
detection, and respectable logging, it deserves a top spot on the list of contenders<br />
<strong>for</strong> “best free firewalls.” If you want the efficiency of running your<br />
firewall on Linux without having to learn how to secure your Linux installation,<br />
give SmoothWall a try.<br />
Configuring Windows Firewall<br />
Protecting <strong>Your</strong> Perimeter • Chapter 2 85<br />
Although there is a plethora of commercial firewalls available to run on<br />
Windows, the field is a lot smaller when it comes to free offerings.<br />
Additionally, while there are several quality offerings <strong>for</strong> Windows as personal<br />
firewalls, there are not any free ones that are appropriate to protect your network<br />
perimeter.The built in Windows Firewall included with Windows XP<br />
and 2003 is very limited in its configuration options and is only appropriate<br />
as the personal firewall it was intended to be.The Windows Firewall included<br />
www.syngress.com
86 Chapter 2 • Protecting <strong>Your</strong> Perimeter<br />
with Windows Vista is supposed to incorporate increased flexibility and control<br />
over the filtering rules, so that might be something to keep an eye on<br />
when it is released. Given this, configuring the Windows Firewall is covered<br />
in Chapter 3, along with content on other personal firewalls.<br />
Providing <strong>Secure</strong> Remote Access<br />
Sooner or later odds are good that you will either want or need the ability to<br />
work remotely. Providing remote access must be undertaken very cautiously,<br />
because, as soon as you allow employees to connect to the corporate network,<br />
you have to some degree, extended your network boundary to their workstations.This<br />
means your network’s security is now only as good as the security<br />
of the remote user’s system or network. In many cases this borders on no<br />
security at all.That is why remote access must only be granted after careful<br />
consideration and planning. While the different types of remote access pose<br />
different levels of security risk, there are some planning and configuration<br />
steps that are common to all of them.<br />
The first task is to determine what type of remote access is appropriate.<br />
With a virtual tunnel network (VPN), it is as if the remote workstation is on<br />
the corporate network.This generally provides the greatest level of functionality,<br />
but also poses the greatest risk. If the remote system is compromised, an<br />
attacker is effectively inside your corporate network. While there are steps you<br />
can take to mitigate these risks, they may be time- and ef<strong>for</strong>t-intensive.To<br />
plan, configure, and properly secure a VPN solution is the most involved<br />
choice of the various remote access solutions you could provide.<br />
Another option is to provide remote desktop functionality.This would<br />
allow a remote user to see and use the desktop of a system at work. A remote<br />
desktop acts as if the user is at work, while a VPN acts as if the user’s computer<br />
is at work.This type of solution is slightly easier to implement, because<br />
you can typically isolate the traffic that needs to be permitted through the<br />
firewall to a single TCP port. Many of the same risks exist, however, in that if<br />
an attacker manages to gain access to an internal desktop remotely, it is usually<br />
easy <strong>for</strong> them to move in<strong>for</strong>mation out of the network or otherwise<br />
cause mischief. Another key consideration with this type of solution is that<br />
you need to have a computer at home and a computer at work. With the<br />
www.syngress.com
VPN option, you only need to use one system, so if the user has a laptop, it<br />
can be used while they work remotely.<br />
The last and least functional option is that of a remote shell. Because most<br />
average users don’t operate extensively (if at all) in a console (i.e., text only)<br />
environment, this type of remote access is generally most viable <strong>for</strong> network<br />
administration personnel. While it may be impossible <strong>for</strong> accountants to<br />
operate their accounting program without a GUI, many network tasks and<br />
most firewall administration tasks can be per<strong>for</strong>med with only terminal access.<br />
Because the widely used Telnet protocol sends all data unencrypted, any sensitive<br />
tasks should only be per<strong>for</strong>med using a secured protocol such as secure<br />
shell (SSH), or Telnet over a <strong>Secure</strong> Internet Protocol (IPsec) tunnel.<br />
Providing VPN Access<br />
Protecting <strong>Your</strong> Perimeter • Chapter 2 87<br />
A virtual private network (VPN) is exactly what it sounds like, the network<br />
connection you create is virtual, because you can use it over an otherwise<br />
public network. Basically, you take two endpoints <strong>for</strong> the VPN tunnel, and all<br />
traffic between these two endpoints will be encrypted so that the data being<br />
transmitted is private and unreadable to the systems in between. Different<br />
VPN solutions use different protocols and encryption algorithms to accomplish<br />
this level of privacy. VPNs tend to be protocol independent, at least to<br />
some degree, in that the VPN configuration is not on a per-port basis.<br />
Rather, once you have established the VPN tunnel, all applicable traffic will<br />
be routed across the tunnel, effectively extending the boundaries of your<br />
internal network to include the remote host.<br />
One of your first considerations when planning to implement a VPN<br />
solution is the network design. Because the VPN tunnel needs two endpoints,<br />
one will be the remote workstation.The other will be a specially configured<br />
device <strong>for</strong> that purpose.This is generally called a VPN concentrator, because<br />
it acts as a common endpoint <strong>for</strong> multiple VPN tunnels.The remote systems<br />
will effectively be using the concentrator as a gateway into the internal network,<br />
so the placement of the concentrator is important. In a highly secured<br />
environment, the concentrator is placed in a DMZ sandwiched between two<br />
firewalls—one firewall facing the Internet and the other facing internally (see<br />
Figure 2.29). While this type of arrangement is the most secure, it takes more<br />
hardware to implement.<br />
www.syngress.com
88 Chapter 2 • Protecting <strong>Your</strong> Perimeter<br />
Figure 2.29 VPN Concentrator Design<br />
Corporate <strong>Network</strong><br />
Internal Resources<br />
Another way to place the VPN concentrator inside a DMZ is to use an<br />
additional interface on the firewall as the DMZ in a “one-legged” configuration.This<br />
saves you having to implement an additional firewall, but still provides<br />
some isolation between the concentrator and the rest of the internal<br />
network. If an attacker compromised a remote host who was VPN’d into the<br />
concentrator or compromised the concentrator itself, they would still have a<br />
firewall between them and the internal network.The least preferable option it<br />
to place the concentrator inside the internal network. With this type of<br />
design, if the concentrator is compromised, the attacker would have full access<br />
to the internal network, with no firewalls to inhibit their activities. With any<br />
of these designs, you will have to permit the required ports through the firewall<br />
and <strong>for</strong>ward them to your VPN concentrator.<br />
Another consideration is the type of VPN protocol you want to use. IPsec<br />
is still the most widely deployed VPN technology <strong>for</strong> good reason. One is<br />
interoperability. As a widely used and tested standard, IPsec will work with<br />
virtually any modern firewall and operating system.The disadvantage of IPsec<br />
is that it can sometimes be difficult to configure properly, and there is zero<br />
margin <strong>for</strong> error on the configuration. Both ends have to use the same<br />
parameters <strong>for</strong> encryptions, hashing, and so <strong>for</strong>th, or the tunnel cannot be<br />
established. <strong>Secure</strong> Sockets Layer (SSL) is an increasingly popular choice <strong>for</strong><br />
VPNs, largely because of its simplicity to implement.<br />
www.syngress.com<br />
DMZ<br />
VPN Concentrator<br />
VPN Tunnel<br />
VPN Tunnel<br />
Public Internet<br />
Remote User1<br />
Remote User2<br />
`<br />
`
Once you have chosen a design and VPN technology, you need to consider<br />
the administrative ramifications of offering remote access. Some level of<br />
training will be required, at the very least so that they can sue the VPN software.You<br />
should educate the users on good security habits as well. A determination<br />
will also need to be made as to whether remote users are allowed to<br />
use their own personal computers, or if they must use a company-provided<br />
computer <strong>for</strong> remote access.The <strong>for</strong>mer option carries with it many risks.<br />
When remote users connect their personal computers to the corporate network<br />
(via a VPN), they may have spyware, a virus, or any number of potentially<br />
damaging conditions present on their systems. Because you probably<br />
don’t have any administrative access to their systems, you may have no way to<br />
secure the personal systems even if you wanted to.This is why most companies<br />
require that only corporate resources be allowed to connect to the company<br />
network. In the case of remote users, this typically means a<br />
company-provided laptop, but I have also seen instances of older desktops<br />
being sent home <strong>for</strong> remote access.<br />
A final consideration is one of hardware selection. Normal desktop productivity<br />
applications typically place very little strain on an even remotely<br />
modern processor.The same is not true when it comes to VPN connections.<br />
A single VPN connection requires little overhead and rarely impacts the<br />
remote user’s system unless it is especially underpowered. For the VPN concentrator,<br />
however, it will handle the encryption and decryption of multiple<br />
connections, in addition to managing the volume of network data that will be<br />
accessed through it. For this reason, if you anticipate more than just a couple<br />
of VPN connections to be used simultaneously, you will want to test and<br />
evaluate your hardware needs.<br />
<strong>Using</strong> Windows as a VPN Concentrator<br />
Protecting <strong>Your</strong> Perimeter • Chapter 2 89<br />
For a simple VPN solution servicing a small number of users you can use a<br />
Windows 2000, XP, or 2003 system using native software.This has the advantage<br />
that you are not using any third-party software, so installation and support<br />
may be easier. Not only is the configuration reasonably simple, but it<br />
may be easier to sell to upper management, because it doesn’t involve any<br />
non-Microsoft software being installed or relied on.The Microsoft VPN connection<br />
uses the point-to-point tunneling protocol (PPTP), which is not<br />
www.syngress.com
90 Chapter 2 • Protecting <strong>Your</strong> Perimeter<br />
compatible with other types of VPNs such as IPsec-based or SSL-based<br />
VPNs. PPTP is a widely supported and relatively lightweight protocol. PPTP<br />
support can be found on Linux, MAC OS X, and Palm Personal Digital<br />
Assistants (PDAs).<br />
To configure a Windows host as a VPN endpoint using Windows 2000,<br />
follow these steps.<br />
1. Navigate to Start | Control Panel | <strong>Network</strong> Connections.<br />
2. Click Create New Connection<br />
3. On the welcome screen, click Next.<br />
4. In the New Connection Type windows, select Set up an advanced<br />
connection and click Next.<br />
5. In the Advanced Connections Options window, leave the default<br />
Accept incoming connections checked and click Next.<br />
6. On the “Devices <strong>for</strong> incoming Connections” window, click Next.<br />
Any modems you have installed will be listed; however, <strong>for</strong> a network<br />
connection, you can leave them unchecked.<br />
7. On the next screen, select Allow virtual private connections and<br />
then click Next.<br />
8. On the “User Permissions” window, place a check next to the user<br />
accounts you wish to be able to connect via VPN and then click<br />
Next.<br />
9. On the networking software screen, highlight Internet Protocol<br />
(TCP/IP) and click Properties (see Figure 2.30).<br />
10. The Incoming TCP/IP Properties window is where you configure<br />
the most important settings <strong>for</strong> the VPN connection.The Allow<br />
callers to access my local network must be checked or the VPN<br />
connection won’t work. For TCP/IP address assignment, you need to<br />
plan accordingly. If you leave the default selected, the remote systems<br />
will be assigned an IP address via DHCP as they connect.<br />
www.syngress.com
Figure 2.30 <strong>Network</strong> Software<br />
Protecting <strong>Your</strong> Perimeter • Chapter 2 91<br />
11. When finished configuring the TCP/IP properties, click OK.<br />
12. On the <strong>Network</strong>ing Software window, click Next.<br />
13. Click Finish.<br />
After completing these steps the server should be ready to accept an<br />
incoming VPN connection.The next step is the client side of the configuration.<br />
We will walk through this configuration using a Windows XP system, as<br />
the client, in order to make a VPN connection to the Windows XP VPN<br />
server.<br />
1. Navigate to Start | Control Panel | <strong>Network</strong> Connections.<br />
2. Click Create New Connection<br />
3. On the welcome screen, click Next.<br />
4. Select Connect to the network at my workplace and click<br />
Next.<br />
5. Select Virtual Private <strong>Network</strong> Connection and click Next.<br />
6. On the Connection Name window, choose a descriptive name <strong>for</strong><br />
the connection and then click Next.<br />
7. The next window is the VPN Server Selection screen. Enter an IP<br />
address or host name and click Next.<br />
www.syngress.com
92 Chapter 2 • Protecting <strong>Your</strong> Perimeter<br />
8. On the final screen you have the option of adding a shortcut <strong>for</strong> the<br />
connection to your desktop. Select the checkbox if you want to<br />
create the shortcut and then click Finish.<br />
The shortcut that is created can be opened to initiate the VPN connection.You<br />
will be prompted to enter the login credentials to use <strong>for</strong> the VPN<br />
connection (see Figure 2.31).<br />
Figure 2.31 Windows XP VPN Login<br />
After entering your username and password, click Connect. If the connection<br />
is successful, you should see a pop-up in the system tray indicating<br />
that you are connected. Once connected, you can route traffic through the<br />
VPN server.<br />
NOTE<br />
In order <strong>for</strong> the connection to work, you must have a password <strong>for</strong> the<br />
account you are using to connect via VPN. If the account has no password,<br />
you will not be able to connect.<br />
One final thing you may need to configure is the routing table on the<br />
client system. When you make the PPTP connection, a default route is added<br />
to the clients routing table after their existing default route.You can view the<br />
www.syngress.com
outing table on Windows using the route print command.The default<br />
route has 0.0.0.0 <strong>for</strong> the network destination.This means that any traffic destined<br />
<strong>for</strong> an IP address that the client doesn’t know where to send it, will<br />
continue to go out the interface it was using be<strong>for</strong>e the PPTP connection<br />
was made. If you need to change this behavior so that all non-local traffic<br />
goes through the VPN tunnel, you can alter the routing tables with a simple<br />
batch file.<br />
iPig<br />
iPig is a VPN solution provided by iOpus Software at www.iopus.com/ipig/.<br />
The client is freeware, and the server portion (the VPN concentrator) is<br />
offered as an unlimited commercial product or as a five-user iPig Server<br />
Express Edition <strong>for</strong> free.The five-user limit is <strong>for</strong> simultaneous connections to<br />
the VPN server.You can create more than five user accounts to use the VPN,<br />
but they cannot all use the server at the same time. Both the commercial and<br />
the free versions use AES256 <strong>for</strong> their encryption and run on Windows 2000,<br />
XP, and 2003. If you download the iPig client and do not install the iPig<br />
server, you can still use the client. In this configuration the client will connect<br />
to an iOpus-controlled server on the Internet.You are limited to 10MB of<br />
“free” bandwidth be<strong>for</strong>e you must pay <strong>for</strong> additional bandwidth. Instead, you<br />
should install your own server side component, which is the iPig Server<br />
Express Edition product. We walk through setting up the iPig server component<br />
first, and then the client software.<br />
Installing the iPig Server Express Edition<br />
Protecting <strong>Your</strong> Perimeter • Chapter 2 93<br />
Download and install the iPig server software.There are no unusual options<br />
during the installation process. In typical fashion, the install begins with a<br />
welcome screen and then asks you to accept the License agreement.The next<br />
screens lets you choose the installation directory and start menu folders.<br />
When the installation is complete, you will get a window in<strong>for</strong>ming you that<br />
the server started successfully.You can configure the iPig server options by<br />
navigating to Start | All Programs | iPig Server | iPig Server.The<br />
main configuration screen is shown in Figure 2.32.<br />
www.syngress.com
94 Chapter 2 • Protecting <strong>Your</strong> Perimeter<br />
Figure 2.32 iPig Server Configuration<br />
The first step is to define the VPN users.<br />
1. Select Users in the left pane and then click Add in the right pane.<br />
2. The Edit user window allows you to enter a username, a password,<br />
and a traffic limit if desired (see Figure 2.33).You can artificially<br />
throttle back the VPN users to make sure they do not consume too<br />
much of your Internet bandwidth and negatively impact Internet<br />
access <strong>for</strong> the local network users.<br />
Figure 2.33 iPig Edit User<br />
www.syngress.com
3. After entering the user in<strong>for</strong>mation, click OK. Back at the main configuration<br />
window there are a few additional settings to configure.<br />
One option of note is under the “Settings” section in the left pane. If<br />
you select “Settings” you can then edit the Server port that is used to<br />
listen <strong>for</strong> incoming connections. Generally speaking, a non-default<br />
port is almost always better than using the defaults.You should also<br />
change the Log type from None to Small or, even better, Full,<br />
depending on how much VPN traffic you expect to see.The server<br />
log is located in the \iPig\server\vpn_log.csv file.The logging that is<br />
offered even in “Full” mode is pretty minimal, but it’s better than<br />
nothing.<br />
Installing the iPig VPN Client<br />
Installing the client is equally as painless.<br />
Protecting <strong>Your</strong> Perimeter • Chapter 2 95<br />
1. Download the client installer and run the installation <strong>for</strong> the client<br />
setup.<br />
2. On the initial welcome screen, click Next, select the radio button to<br />
accept the license agreement, and then click Next.<br />
3. Choose the installation folder and click Next.<br />
4. Choose the start menu folder and click Next, and then click Install<br />
on the next screen.You will need to reboot the system when the<br />
installation completes.<br />
5. Start the iPig client program by navigating to Start | All Programs<br />
| iPig WLAN Security | iPig Client.<br />
Once the client is started, there are a couple of settings you must configure.<br />
1. First, select Advanced Settings in the left pane (see Figure 2.34).<br />
2. Select the radio button next to “Use your own iPig server,” and enter<br />
the IP address and server port (11888 is the default port) and click<br />
Apply. Click Connect and select User in the left pane (see Figure<br />
2.35).<br />
www.syngress.com
96 Chapter 2 • Protecting <strong>Your</strong> Perimeter<br />
Figure 2.34 iPig Client Advanced Settings<br />
Figure 2.35 iPig Client User Settings<br />
3. Enter the user name and password that matches the ones you defined<br />
in the iPig server.<br />
4. When finished, click iPig On.<br />
This is all that is needed to have the VPN tunnel up and working.<br />
However, there are some additional configuration options that would be<br />
advisable to configure.<br />
www.syngress.com
In the Settings page, make sure you have Log all Internet Access<br />
checked.There is also a checkbox to encrypt UDP traffic. If you leave this<br />
unchecked, only TCP traffic will be encrypted. Depending on your needs, this<br />
may or may not be significant. One thing to consider is that if you encrypt<br />
UDP traffic, it will include DNS requests.There<strong>for</strong>e, when the client requests<br />
an IP address to match a host name (e.g., www.syngress.com), the request is<br />
encrypted and sent to the iPig server, which then decrypts the request and<br />
sends it to its DNS server. In most cases, this shouldn’t be an issue, but sometimes<br />
ISP’s and others will configure their DNS servers to only answer<br />
queries when they come from their internal network.<br />
Another option of note is the ability to configure encryption filters.The<br />
Filter settings window is shown in Figure 2.36.<br />
Figure 2.36 iPig Client Filter Settings<br />
Protecting <strong>Your</strong> Perimeter • Chapter 2 97<br />
The two options at the top determine if this filter will act as an inclusion<br />
list or an exclusion list. If you select Encrypt only the following, only traffic<br />
matching the rules will be encrypted and everything else will be sent unencrypted<br />
as if the iPig VPN were not there. Alternatively, you can configure it<br />
to encrypt all traffic except those that match the filter rules.The latter option<br />
is probably more desirable, because it will allow you to send all data over the<br />
VPN except any applications you specify in the filters.The filters allow you<br />
to specify the name or IP address to match, as well as port number and protocol<br />
(UDP,TCP, or both).<br />
www.syngress.com
98 Chapter 2 • Protecting <strong>Your</strong> Perimeter<br />
The iPig VPN solution is extremely easy to set up, offering a quick and<br />
painless way to provide VPN connectivity to remote users.The limit of five<br />
connections to the iPig server is very reasonable and should be able to<br />
accommodate a small office. If you decide that the product meets your needs<br />
and you want to upgrade to the full, unlimited user version, the registration<br />
cost of $99 is very reasonable. Another offering in the “zero configuration”<br />
VPN space is LogMeIn Hamachi, available from www.hamachi.cc/. LogMeIn<br />
Hamachi’s structure <strong>for</strong> the free version limits you to 16 systems in the VPN<br />
network and the documentation says that the product’s “mediation” server is<br />
used to help clients find each other. It’s not entirely clear if the initial authentication<br />
passes through Himachi-owned devices or not. As always, do your<br />
research. While iPig’s limitations seem easier to work with, Hamachi might be<br />
worth investigating to see if it suits your needs.<br />
OpenSSL VPN<br />
There are many commercial VPN solutions using SSL to provide encryption.<br />
SSL is the same encryption protocol that is used <strong>for</strong> secure Web pages<br />
(HTTPS://) and as such it is a very well tested and widely understood protocol.There<br />
are not very many offerings <strong>for</strong> free SSL based VPNs, but<br />
OpenVPN is a very robust and active package.You can read about it and<br />
download it from http://openvpn.net. OpenVPN can be installed on Linux,<br />
Windows (2000 or newer), several versions of BSD, MAX OS X, and Solaris.<br />
We will be using Windows 2000 <strong>for</strong> the server and Windows XP <strong>for</strong> the<br />
client, although the differences between using Windows and Linux should<br />
be minimal.<br />
OpenVPN uses a single executable to serve as both the client and server<br />
components. Download the latest stable version from http://openvpn.net/<br />
download.html.You can download a .ZIP file or a Windows installation program<br />
(.EXE).The executable is the easiest to use, so that will be the installation<br />
method used in the examples. OpenVPN is natively a command-line program;<br />
however, there is a GUI available <strong>for</strong> download from http://openvpn.se/.<br />
Follow these steps to get OpenVPN installed and configured.<br />
1. Start the installation program. Click Next on the welcome screen.<br />
2. On the license agreement screen you must click I Agree to continue<br />
with the installation.<br />
www.syngress.com
3. The next screen is the “Choose Components screen.” Leave all components<br />
checked and click Next.<br />
4. On the next screen, select your installation directory and click<br />
Install. During the installation you will receive a notice that the TAP<br />
driver has not been Windows certified. Click Yes (Windows 2000)<br />
or Continue Anyway to continue with the installation.<br />
5. After the installation completes, click Next and then click Finish.<br />
Configuring the OpenVPN Server<br />
Protecting <strong>Your</strong> Perimeter • Chapter 2 99<br />
After installation, the next step is to edit the client configuration file and the<br />
server configuration file.You will first configure the server side. Pay strict<br />
attention when following the instructions as to whether you are working with<br />
the server configuration file or the client configuration file.Also note that your<br />
operating system has to be able to find any files it needs, so your configuration<br />
files either need to use the complete path <strong>for</strong> all file references, or you must<br />
have the appropriate directory in your system’s search path. Sample configuration<br />
files can be found in the \OpenVPN\sample-config\ directory.<br />
1. Copy the server.ovpn file to the \OpenVPN\config directory and<br />
rename it to something meaningful. For this example, we used<br />
\config\LAB_SERVER.ovpn.<br />
2. Open the server configuration file <strong>for</strong> editing with an American<br />
Standard Code <strong>for</strong> In<strong>for</strong>mation Interchange (ASCII) editor, such as<br />
Notepad.<br />
3. There is a directive named port that specifies the port the server will<br />
listen on <strong>for</strong> inbound connections.The default port <strong>for</strong> the server is<br />
1194. If you want to change the port and use something non-standard,<br />
edit the port number here.<br />
4. Scroll down to the line containing ;dev-node.You need to remove the<br />
semicolon and enter the name of the virtual adapter that OpenVPN<br />
installed in place of the default “MyTap.”You can find this by going to<br />
a command prompt and entering ipconfig /all. One of the adapters<br />
will list “TAP-Win32 Adapter V8” as its description.The name of that<br />
adapter is often Local Area Connection 2, or something similar.<br />
www.syngress.com
100 Chapter 2 • Protecting <strong>Your</strong> Perimeter<br />
TIP<br />
Edit the line in the configuration file with the adapter name such as<br />
dev-node Local Area Connection 2.<br />
5. Save your changes and then close the configuration file.<br />
As a general rule, I always rename the network interfaces on my systems<br />
to make it easier to administer. When you are troubleshooting a connection<br />
or program it is far easier to understand which interface is which<br />
with a more meaningful name than Local Area Connection 1, Local Area<br />
Connection 2, and so on. To do this, navigate to your <strong>Network</strong><br />
Connection, right-click any of the connections, and select Rename. You<br />
can use ipconfig to see the description, which usually tells you which<br />
one is which. In the preceding example, I renamed the OpenVPN virtual<br />
adapter to OpenVPN, so my configuration file would read dev-node<br />
OpenVPN.<br />
At this point you can choose which type of authentication you want to<br />
implement. OpenVPN can support a wide variety of methods, including<br />
public key infrastructure (PKI), user/password, and even two-part authentication<br />
with the proper plug-ins. For simplicity, we use a simple user and password.You<br />
will need to create a server certificate and Certificate of<br />
Authenticity (CA) certificate.This must be done as part of the SSL encryption,<br />
and is required whether you use PKI or user/password authentication.<br />
6. Open a command prompt prompt on the server and CD to the<br />
\OpenVPN\easy-rsa\ directory.<br />
7. Enter the init-config command and press Enter.This creates the<br />
vars.bat file and the openssl.cnf files.<br />
8. Edit the vars.bat file using a text editor such as notepad.exe or write.exe.<br />
9. Edit the HOME variable to match your directory structure if you<br />
installed OpenVPN to a non-default directory location.<br />
www.syngress.com
10. Edit the KEY_COUNTRY, KEY_PROVINCE, KEY_CITY,<br />
KEY_ORG, and KEY_EMAIL variables with their appropriate<br />
values.These are used to generate the key file.<br />
11. Enter the following commands at the command prompt.<br />
vars<br />
clean-all<br />
build-ca<br />
Protecting <strong>Your</strong> Perimeter • Chapter 2 101<br />
When you run build-ca it will prompt you <strong>for</strong> some localized<br />
in<strong>for</strong>mation. It should read the defaults from what you entered in the<br />
vars.bat file <strong>for</strong> any required fields. Additional fields that were not in<br />
the vars.bat are optional. Pressing ENTER should accept each default<br />
value and fill in all of the required in<strong>for</strong>mation.The only exception is<br />
the server’s “common name,” which you must enter. When the process<br />
completes there will be no special indication as to whether it<br />
was successful or not.You can verify the creation of the CA certificate<br />
by checking in the \OpenVPN\easy-rsa\keys\ directory <strong>for</strong> a newly<br />
created ca.crt file.<br />
12 Generate the required Diffie-Hellman parameters by running<br />
\OpenVPN\easy-rsa\build-dh.<br />
13 Generate the server certificate by running \OpenVPN\easy-rsa\buildkey-server<br />
server. As with build-ca, there will be a series of questions<br />
you must answer.The questions that must be answered should pull<br />
in<strong>for</strong>mation in from the vars.bat file and use it as the defaults. Once<br />
again you will need to enter a common name in a series of prompts.<br />
14 Add the following directives to the server configuration file<br />
(\OpenVPN\config\LAB_SERVER.ovpn).<br />
■ client-cert-not-required Tells the server not to expect the<br />
clients to present their own certificate.<br />
■ username-as-common-name Tells the server to use the username<br />
the client provides as the unique identifier <strong>for</strong> the client,<br />
rather than the common name found in the client’s certificate.<br />
■ Auth-user-pass-verify tells<br />
OpenVPN how to authenticate users.This directive is required<br />
www.syngress.com
102 Chapter 2 • Protecting <strong>Your</strong> Perimeter<br />
when not using certificates.The script is a file or program that<br />
authenticates the users. Vie-file or via-env tells OpenVPN to pass<br />
the username and password to the script as an environment variable<br />
or as a two-line file.<br />
The default assumption <strong>for</strong> OpenVPN is that you will use PKI to authenticate<br />
all parties. If you want to use a user/password authentication mechanism,<br />
you are expected to configure OpenVPN so that it can pass the<br />
credentials out to a third-party process <strong>for</strong> verification.This modularity allows<br />
OpenVPN to support many different types of authentication. If you are running<br />
on Linux, there is a PAM module you can use. If you are running on<br />
Windows, there is no built-in way to verify the authentication.You can use<br />
any script you like. If the script produces an error code of zero, the authentication<br />
was successful; a one means it was not successful.This means there are<br />
many ways to verify the users, with only your imagination as a limitation.<br />
To elaborate further, let’s look at a simple example. Suppose all you want<br />
to do <strong>for</strong> verification is see if a directory is present on the VPN server with<br />
the same name as the user’s name (not secure, but this is just an example of<br />
how the process works).You could create an “authentication” script called<br />
C:\check.bat.The line in the server configuration file would be auth-user-passverify<br />
C:\\check.bat via-env.This will cause the OpenVPN server to call the<br />
batch file any time a user logs in.The batch file will have environment variables<br />
of username and password.The authentication script would only need the<br />
following line to check <strong>for</strong> the appropriate user directory:<br />
IF EXIST C:\%username% EXIT<br />
If the directory is present, an error level of zero would be returned to the<br />
OpenVPN Server and the user would be authenticated. For something more<br />
practical, we used a psexec utility, which is part of the pstools package.These<br />
are free tools available from Microsoft at www.microsoft.com/technet/sysinternals/Security/PsTools.mspx.The<br />
purpose of the tool is to allow you to<br />
remotely execute commands on Windows hosts.The key component we use<br />
allows you to authenticate, so if you try and run the command using the credentials<br />
the VPN client supplied, it will tell you if they are a legitimate user<br />
or not, based on their local Windows account.The check.bat file assumes all<br />
relevant files and utilities are in the system’s path. Check.bat contains the following<br />
lines:<br />
www.syngress.com
IF "%1"=="test" exit<br />
psexec –l –u %username% -p %password% C:\check.bat test<br />
Protecting <strong>Your</strong> Perimeter • Chapter 2 103<br />
The first line is checking the command line <strong>for</strong> an argument of test.The<br />
first time the OpenVPN Server calls check.bat, this argument will not be present,<br />
so it will go to the next line.The next line will use psexec to run this<br />
same check.bat again.This will fail if the supplied credentials are not correct.<br />
If they are correct, check.bat (# 2) will be opened, this time with “test” as the<br />
first argument. When check.bat (# 2) sees “test” as the first argument,<br />
check.bat (# 2) will close. At this point, check.bat (# 1) has completed its<br />
assigned task and exits with an error code of zero, thus authenticating the<br />
VPN client.The psexec utility does allow you to specify the system to run<br />
the command on using \\ <strong>for</strong>mat. When you omit the computername,<br />
as in this example, psexec will assume the account is local. In this<br />
case, the VPN server would need a local account to authenticate against.<br />
1. Find the line with Sever 10.8.0.0 255.255.255.0.This line tells the<br />
VPN server to give out addresses to the clients from that network<br />
range.You will need to edit this to provide a range of IP addresses<br />
that fits your network topology and is not in use or conflicting with<br />
your own internal DHCP servers. If your DHCP assigned addresses<br />
from 192.168.1.100–192.168.1.200, you could use 192.168.1.64<br />
255.255.255.224, which would assign clients to addresses<br />
192.68.1.66–192.168.1.94, with one of the available IP addresses<br />
going to the VPN Server itself.<br />
2. If there are any non-local subnets that the VPN clients need to<br />
access, you must update the clients routing table accordingly.There<br />
are two ways to accomplish this, and both use the push directive. One<br />
is by sending them a specific route in the <strong>for</strong>mat push route<br />
192.168.111.0 255.255.255.0.This will modify the client’s routing<br />
table and add a route to 192.168.111.0 with the VPN server as the<br />
next hop to reach that network.The other is using the push “redirectgateway”<br />
directive.This will create a new default route in the client,<br />
so all traffic without a more specific route defined will go through<br />
the VPN server.The latter method is generally preferable as it is more<br />
secure.The increased security is because you will effectively disable<br />
www.syngress.com
104 Chapter 2 • Protecting <strong>Your</strong> Perimeter<br />
normal Internet access from the remote client via its own Internet<br />
link, thereby increasing the isolation between the corporate network<br />
and the rest of the Internet.The disadvantage is that when doing so,<br />
other non-work-related traffic will also traverse the corporate network,<br />
potentially consuming bandwidth.<br />
3. When you are finished making your changes save them and close the<br />
configuration file.<br />
Configuring the OpenVPN Client<br />
The next step is to configure the client-side configuration file.<br />
1. Copy the client.ovpn from the \OpenVPN\sample-config\ directory to<br />
the \OpenVPN\config\ directory and rename it. In this example it is<br />
named LAB_CLIENT.ovpn.<br />
2. Open the new configuration file in notepad <strong>for</strong> editing.<br />
3 Once again, edit the dev-node directive with the appropriate adapter<br />
name.<br />
4 Edit the directive remote my-server-1 1194. Replace my-server-1 with<br />
the hostname or IP address of the VPN server.The 1194 is the<br />
default port, which you can edit it if you want to use a different port<br />
number, which must match the port number you configured on the<br />
server “port” directive.<br />
5 In the client configuration file, you can comment out the lines cert<br />
client.crt and key client.key.<br />
6 Add the line auth-user-pass to the client configuration file.This<br />
instructs the client to prompt <strong>for</strong> a username and password.<br />
7 You need to copy the ca.crt from the server to each client, and edit<br />
the directive to include the appropriate path.The server and all of the<br />
clients must have a copy of this file.<br />
8 When you are finished making your changes save them and close the<br />
configuration file.<br />
Once everything is configured, you can start the VPN server with the following<br />
command: openvpn --config C:\openvpn\config\<br />
www.syngress.com
lab_server.ovpn. Obviously, you will need to make sure the path and name<br />
of the configuration files match your environment. If you do not have the file<br />
directories in the path, you will need to place an explicit path into the configuration<br />
files, using a double backslash <strong>for</strong> directories. For example, you<br />
would use C:\\openvpn\\easy-rsa\\keys\\ca.crt <strong>for</strong> the CA certificate path. Start the<br />
client with openvpn --config C:\openvpn\config\lab_client.ovpn or the equivalent<br />
<strong>for</strong> your directory path and file names.<br />
<strong>Using</strong> PKI Certificates of Authentication<br />
With this much complete, using CAs instead of a user/password is easy.<br />
Follow these steps to change the authentication mechanism from user/password<br />
to CAs.<br />
1. In the server configuration file, comment out the following lines:<br />
client-cert-not-required<br />
username-as-common-name<br />
auth-user-pass-verify C:\\check.bat via-env.<br />
Protecting <strong>Your</strong> Perimeter • Chapter 2 105<br />
2. On the server, generate a key pair <strong>for</strong> each client that will connect to<br />
the VPN. In the \OpenPVN\easy-rsa directory run build-key client1,<br />
where client1 is the name you want to use <strong>for</strong> the first client to connect.This<br />
is often the same as the users logon ID. When prompted,<br />
the common name should be unique <strong>for</strong> each client; and again, the<br />
login ID might be a good choice <strong>for</strong> the common name. When<br />
prompted, it is recommended that you create a password <strong>for</strong> the<br />
client certificate. If you do not, anyone who obtains the certificate<br />
files can access the VPN.<br />
3. Move or copy the client1.key and client1.crt to the appropriate client<br />
host.The server does not need a copy of these files, but generally you<br />
would leave a copy on the server as a backup.<br />
4. In the client configuration file comment out the auth-user-pass line.<br />
5. Edit the .cert and .key directives that were commented out previously<br />
<strong>for</strong> password authentication. Configure both of these lines with the<br />
appropriate paths to the .cert and .key files you copied from the<br />
server. Remember to use double backslashes <strong>for</strong> the path.<br />
www.syngress.com
106 Chapter 2 • Protecting <strong>Your</strong> Perimeter<br />
After the VPN connection is established, there are a few helpful shortcuts<br />
you can use from within the terminal window.<br />
■ F1 Conditional Restart This is similar to a warm reboot of the<br />
VPN tunnel.This will reset the tunnel, but will not reset the virtual<br />
<strong>Network</strong> Interface Card (NIC) (TAP adapter).<br />
■ F2 Show Connection Statistics This will give you some basic<br />
input and output statistics. Sample output is shown with the time and<br />
date removed from each line to conserve space.<br />
OpenVPN STATISTICS<br />
Updated,Sun Nov 26 10:20:20 2006<br />
TUN/TAP read bytes,240<br />
TUN/TAP write bytes,240<br />
TCP/UDP read bytes,4366<br />
TCP/UDP write bytes,4109<br />
Auth read bytes,272<br />
pre-compress bytes,0<br />
post-compress bytes,0<br />
pre-decompress bytes,0<br />
post-decompress bytes,0<br />
TAP-WIN32 driver status,"State=AT?c Err=[(null)/0] #O=5 Tx=[4,0,0]<br />
Rx=[4,0,0] IrpQ=[1,1,16] PktQ=[0,1,64]"<br />
■ F3 Hard Restart This reset will reset the virtual adapter.<br />
■ F4 Exit This will close the tunnel completely.<br />
Configuring the OpenVPN GUI<br />
Once the hard part is done (i.e., configuring the client-side and server-side<br />
OpenVPN configuration files and generating all the required keys), initiating<br />
the VPN tunnel is very simple.You could place the command line into a<br />
batch file or shortcut <strong>for</strong> your user’s desktop.There is also a GUI interface<br />
available, though again, once you have everything running, the GUI may not<br />
be needed.This GUI interface can be downloaded from<br />
http://openvpn.se/index.html.The installation program is very straight<strong>for</strong>ward,<br />
prompting <strong>for</strong> all of the normal parameters.The installer will install the<br />
base OpenVPN package in addition to the GUI components; there<strong>for</strong>e, you<br />
www.syngress.com
don’t need to install both.You will be prompted to confirm the installation,<br />
because the virtual NIC driver is not Microsoft certified.You should remove<br />
the previous OpenVPN program (via Add/Remove programs) be<strong>for</strong>e<br />
installing the GUI version to the same directory.The uninstall will not<br />
remove your certificates, keys, or configuration files, and the install will not<br />
overwrite them.<br />
After installing the GUI version, the virtual network adapter name will be<br />
reinstalled with a standard name (e.g., Local <strong>Network</strong> Adapter 2). If your configuration<br />
file refers to a more meaningful name, you will need to rename the<br />
adapter (again).There should be a new icon in the system tray. Right-click<br />
this and select Connect. If you have multiple configuration files present, you<br />
will be presented with a menu folder <strong>for</strong> each, and options to connect or edit<br />
each individually.You should see a progress window with the same messages<br />
as you saw in the console window. If it scrolls by too quickly and you want a<br />
second look, right-click the icon in the system tray and select Show Status<br />
(see Figure 2.37). After negotiation completes, a pop-up window will indicate<br />
a successful connection.<br />
Figure 2.37 OpenVPN GUI Status Window<br />
Protecting <strong>Your</strong> Perimeter • Chapter 2 107<br />
While OpenVPN is not a “zero configuration” VPN like iPig, it is very<br />
powerful and flexible.The capability to support such a wide variety of authentication<br />
methods is not offered by any other free VPN software at this time.<br />
What really sets OpenVPN apart is its enterprise-class options and management<br />
www.syngress.com
108 Chapter 2 • Protecting <strong>Your</strong> Perimeter<br />
features.As an example, add the line management localhost 7505.This directive<br />
will work in both the server and client configurations and will instruct<br />
OpenVPN to listen to the indicated port (7505 in this example) <strong>for</strong> management<br />
connections.This will allow you to remotely query the OpenVPN<br />
instance and execute some limited commands.<br />
An additional feature that lends itself to corporate functionality is the remote<br />
(remote ) and remote-random directives on the OpenVPN client.<br />
While we used the remote directive to specify the OpenVPN server to connect<br />
to, you can define multiple servers in the configuration file and the client will<br />
attempt each one in turn.This will allow you to configure a backup VPN<br />
server <strong>for</strong> redundancy.The remote-random directive instructs the clients to randomly<br />
select from defined remotes. In this way, you can load balance across two<br />
or more OpenVPN servers in an active-active configuration.<br />
There are many more features available <strong>for</strong> OpenVPN. If you are not discouraged<br />
by the configuration that is required, you will be hard pressed to<br />
find a more robust free VPN solution. A quickstart guide is available from the<br />
OpenVPN Web site at http://openvpn.net/howto.html#quick.<br />
Providing a Remote Desktop<br />
Some of the considerations <strong>for</strong> placing your remote desktop are similar to<br />
those of a VPN.The primary consideration (i.e., physical location <strong>for</strong> the<br />
desktop host) has very little flexibility. Because the remote users will be<br />
accessing the desktop virtually, the desktop needs access to all of the same<br />
things it normally has. Unless you have some systems you can dedicate to this<br />
task and place in a DMZ, this probably means the users will be coming in<br />
through the firewall and accessing their desktops that are sitting on the<br />
internal network. Because of this, you want to secure the connection as much<br />
as possible.This desktop will have a login prompt exposed to the Internet<br />
unless you take steps to prevent it. A personal firewall (covered in more detail<br />
in Chapter 3) can help mitigate this, as well as firewall rules on your Internet<br />
connection. Most home users will be using a dynamic IP address, so you will<br />
probably not be able to restrict the connection to the users’ specific IP<br />
addresses.You can, however, restrict it to the block of IP addresses corresponding<br />
to the local ISP’s dynamic range. It is better to only let your local<br />
www.syngress.com
geographic area be able to initiate a connection to the remote desktop than<br />
to the entire world.<br />
There are people who scan the Internet looking <strong>for</strong> systems that are listening<br />
on ports commonly used <strong>for</strong> remote access.This is the primary reason<br />
you may want to consider using a non-standard port <strong>for</strong> your remote desktop<br />
solution. In the case of terminal services, the port is configured in the registry,<br />
and Microsoft does not recommend changing it; however, it can be changed.<br />
For third-party products such as Virtual <strong>Network</strong> Computing (VNC),<br />
changing the listening port is typically much simpler and advisable. <strong>Using</strong> a<br />
non-standard port does not guarantee the system will not be discovered and<br />
attacked. In fact, you can bet it will be, just less often than with a standard<br />
port. For this reason you must require and en<strong>for</strong>ce a policy requiring very<br />
strong passwords <strong>for</strong> accounts with remote access privileges. If you’re going to<br />
be exposing your internal network to the outside world, you should also<br />
implement an IDS if possible (see Chapter 4).<br />
Windows Terminal Services<br />
Protecting <strong>Your</strong> Perimeter • Chapter 2 109<br />
Windows terminal services are a handy way to provide access to a remote<br />
desktop across a single TCP port using remote desktop protocol (RDP).The<br />
fact that terminal services only uses a single port (TCP 3389; however, you can<br />
configure the port to be any port), makes the firewall rules simple to configure.<br />
With Windows XP or Server 2003, the terminal services client and server will<br />
be installed by default. For Windows 2000, the terminal services component<br />
can be installed via the add/remove programs applet in the control panel.<br />
Another advantage of using the Windows terminal services is that the client<br />
portion can be installed on older systems, allowing them to use the newer hosts<br />
and software.The remote desktop client can be installed on Windows 95, 98,<br />
ME, and NT as well as all of the newer Windows operating systems.<br />
To enable the remote desktop functionality on a Windows XP<br />
Professional or Windows 2003 system, follow these steps.<br />
1. Right-click on the My Computer icon and select Properties<br />
2. Select the Remote tab.<br />
3. Check the box that says Allow users to connect remotely to this<br />
computer.<br />
www.syngress.com
110 Chapter 2 • Protecting <strong>Your</strong> Perimeter<br />
4. Click the Select Remote Users button (see Figure 2.38).<br />
Figure 2.38 Enabling Windows Terminal Services<br />
5. On the “Remote Desktop Users” screen, click Add<br />
6. On the “Select Users” window, enter the name of any user accounts<br />
that should be able to connect remotely and click OK.<br />
7. Click OK to close the “Remote Desktop Users” window.<br />
8. Click OK to close the “System Properties” window.<br />
If you are using a client host that has the remote desktop client already<br />
installed, navigate to Start | Accessories | Communications | Remote<br />
Desktop Connection.The “Remote Desktop Connection” window is<br />
shown in Figure 2.39.<br />
To connect to a remote desktop, enter the computer name or IP address in<br />
the “Computer” field and click Connect. If you click Options there are a<br />
wide variety of configurable parameters you can experiment with. Most of<br />
these settings are geared towards increasing the per<strong>for</strong>mance of the connection.<br />
www.syngress.com
Figure 2.39 Remote Desktop Connection<br />
If you want to use terminal services on a Windows 2000 computer, you<br />
need to install it following these steps.<br />
1. Navigate to Start | Settings | Control Panel.<br />
2. Select Add/Remove Programs.<br />
3. Click the Add/Remove Windows Components button.<br />
4. Highlight Terminal Services and click Details.<br />
5. In the “Terminal Services” window place a checkmark next to<br />
Enable Terminal Services and click OK (see Figure 2.40).<br />
Figure 2.40 Installing Terminal Services<br />
Protecting <strong>Your</strong> Perimeter • Chapter 2 111<br />
6. In the Windows Components Wizard, click Next.<br />
7. The Terminal Services Setup window will allow you to choose from<br />
Remote Administration Mode or Application Server Mode.<br />
Remote administration mode basically gives you a remote desktop,<br />
while application server mode allows you to share a single application.<br />
After selecting a mode, click Next.<br />
www.syngress.com
112 Chapter 2 • Protecting <strong>Your</strong> Perimeter<br />
8. When the wizard completes, click Finish.<br />
The simplicity of providing a complete desktop <strong>for</strong> remote users to access<br />
can be appealing, and the ability to do so without any third-party software<br />
can be a major factor when deciding which solution to use.The flexibility<br />
doesn’t end there, however. If have a Windows server but need to access the<br />
server remotely from a Linux system, you can install rdesktop, which is an<br />
open-source client capable of speaking RDP natively. After installing rdesktop<br />
(via whatever means you choose; yum install rdesktop works on fedora core 5),<br />
all it takes to connect to a terminal server at 192.168.1.90 is to enter the<br />
rdesktop 192.168.1.90:3389 command at a console prompt.To make things<br />
even easier, you can install terminal server client (tsclient), which provides a<br />
single GUI <strong>for</strong> establishing client connections to several common types of<br />
terminal servers.You still must install a client program such as rdesktop,<br />
because tsclient is only a front end, it does not include the client software<br />
itself.The only function of tsclient is to save you the trouble of needing to<br />
know the command-line options needed to make the connection.The tsclient<br />
interface is shown in Figure 2.41.<br />
Figure 2.41 tsclient<br />
www.syngress.com
Given the variety of RDP clients available, you should be able to connect<br />
to a Windows terminal server from most any OS. And with the convenience<br />
of having a GUI interface to make the connection, it is an easy solution.You<br />
should not expose any RDP services to the general Internet because then<br />
your only protection will be the password to connect, and automated brute<strong>for</strong>ce<br />
password crackers will eventually gain access. If you do need to allow<br />
any type of remote desktop functionality to an Internet-based source, you<br />
should filter traffic to the respective port so that only the trusted IP address is<br />
allowed to connect.<br />
VNC<br />
Protecting <strong>Your</strong> Perimeter • Chapter 2 113<br />
VNC computing and has been around <strong>for</strong> a long time. It has gone through a<br />
lot of changes and is now available under many names, each with their own<br />
focus.This resembles the situation with Linux distributions in that the number<br />
of options can sometimes make it difficult to know which one is the best<br />
choice. Some of the more prominent are RealVNC,TightVNC, and<br />
UltraVNC.TightVNC (www.tightvnc.com/) encrypts the password exchange<br />
when you initially logon, but the rest of the session is unencrypted. While you<br />
could use an encrypted tunnel to encapsulate the VNC session (see Chapter 5,<br />
Managing Event Logs, <strong>for</strong> instructions on encrypting arbitrary sessions over both<br />
SSH and SSL), the other alternatives include native encryption support.<br />
RealVPC Personal Edition (www.realvnc.com/) includes support <strong>for</strong> AES128<br />
encryption, but is only available <strong>for</strong> Windows plat<strong>for</strong>ms.This leaves my current<br />
top choice as UltraVPN from http://ultravnc.source<strong>for</strong>ge.net/. In addition to<br />
providing encryption plug-ins, the UltraVNC server will run on any Windows<br />
system (Windows 95 thru 2003) and allows you to connect to it from any<br />
system with a compatible browser.To install UltraVNC follow these steps.<br />
1. Download the UltraVNC setup file.The setup program includes both<br />
the client (the viewer) and the server component.<br />
2. Run the setup program.<br />
3. Choose the language and click OK.<br />
4. At the welcome screen, click Next.<br />
5. Accept the license agreement and click Next.<br />
www.syngress.com
114 Chapter 2 • Protecting <strong>Your</strong> Perimeter<br />
6. Click Next on the in<strong>for</strong>mation screen (after reading all of the text).<br />
7. Choose the installation directory and click Next.<br />
8. Select the components to install (the DSM Encryption plug-in<br />
should be checked), and click Next.<br />
9. Choose a start menu folder and click Next.<br />
10. Next is the “Additional Tasks” screen, which has some additional<br />
options.The more noteworthy are outlined in this section.<br />
www.syngress.com<br />
■ Register UltraVNC Server as System Service This will<br />
cause the server component to be installed as a service. If you<br />
install this, the server will be started automatically. If you choose<br />
not to install the server as a service, the server will need to be<br />
started manually in order <strong>for</strong> someone to connect to the server.<br />
Requiring a manual start is more secure, but installing the server<br />
as a service might be a legitimate need in your environment.<br />
■ Start or Restart UltraVNC Service This instructs the installation<br />
program to start the service during installation, or if it’s<br />
already started, to stop and restart the service.<br />
■ Configure MS-Logon II This is a relatively new option that<br />
allows an ACL to be configured that specifies who can have<br />
access to connect to the server, based on the Microsoft account<br />
in<strong>for</strong>mation. If you select this option but do not configure the<br />
ACL, only the administrator group will have access.This may be<br />
the preferred way to configure it if you only plan on using the<br />
VPN connection <strong>for</strong> support purposes. It is recommended that<br />
you enable this <strong>for</strong> increased security and simplified administration.<br />
■ Configure Admin Properties This option prompts you <strong>for</strong> the<br />
location of a file registry file (.reg) containing the administrative<br />
settings <strong>for</strong> the UltraVNC server.These settings control things<br />
such as what to do with disconnected sessions and what to do<br />
upon disconnect.This can make configuration more automated<br />
by exporting the HKEY_LOCAL_MACHINE\SOFTWARE\<br />
ORL key <strong>for</strong> use during the installation of subsequent hosts.
■ Clean Old VNC Registry Keys This option enables a house<br />
cleaning function to clear out old settings in the registry.<br />
11. After making your selections, click Next.<br />
12. Accept the defaults <strong>for</strong> any needed configuration files in the next<br />
couple of screens (such as the MS-Logon ACL file, if those options<br />
were checked) and then click Install.<br />
13. Click Next on the in<strong>for</strong>mation screen, and then click Finish on the<br />
next screen.<br />
The server component should now be installed, but it still needs to be<br />
configured. Start up the UltraVNC server by navigating to Start |<br />
Programs | UltraVNC | UltraVNC Server | Show Default Settings.<br />
The properties page that opens is a little busy (see Figure 2.42).<br />
Figure 2.42 UltraVNC Server<br />
Protecting <strong>Your</strong> Perimeter • Chapter 2 115<br />
Most of these settings can be left at their defaults, but there are a few that<br />
are significant from a security perspective.The section labeled “When Last<br />
Client Disconnects” determines what happens after the viewer disconnects.<br />
Which setting is best will depend on your intended uses <strong>for</strong> UltraVNC. If<br />
you are going to use it primarily <strong>for</strong> technical support, there will probably be<br />
an authenticated user at the server when you disconnect, in which case you<br />
www.syngress.com
116 Chapter 2 • Protecting <strong>Your</strong> Perimeter<br />
probably want Do Nothing. If, on the other hand, you plan on offering the<br />
server as a remote productivity tool, there may be no one present at the server<br />
end, in which case you likely want to Lock Workstation, or even better,<br />
Logoff Workstation.The “VNC Password” in the “Authentication” section<br />
is a default password to be used with no other password supplied.This must<br />
be configured or VNC will not accept any inbound connections.<br />
In order to take advantage of the Microsoft user and groups, place a check<br />
next to “Require MS Logon,” and preferably,“New MS Logon.” After doing<br />
so, click on Configure MS Logon Groups and configure what access different<br />
groups will have to the VNC server.The “Security Editor” windows<br />
provide a high degree of granularity.The editor is shown in Figure 2.43.<br />
Figure 2.43 UltraVNC Security Editor<br />
You can configure each group or user to have different levels of access,<br />
including view only, which can be a good choice <strong>for</strong> presentations or other<br />
applications where you only want the viewer to be able to see what’s occurring<br />
without the ability to interact with the server’s desktop.<br />
Perhaps the most significant portion of the configuration is the encryption<br />
plug-in, in the “DSM Plug-in” section of the window.<br />
1. Place a checkmark next to Use: and select the appropriate plug-in<br />
from the drop-down box. More plug-ins are available from<br />
www.syngress.com
NOTE<br />
Protecting <strong>Your</strong> Perimeter • Chapter 2 117<br />
http://msrc4plugin.home.comcast.netndex.html.There are currently<br />
three different encryption plug-ins available:<br />
■ MSRC4Plugin This plug-in provides RC4 128-bit encryption.<br />
There are two versions provided with the UltraVNC installation:<br />
MSRC4Plugin.dsm and MSRC4Plugin_NoReg.dsm.You should use<br />
the MSRC4Plug-in_NoReg.dsm plug-in.<br />
■ ARC4Plugin This plug-in provides RC4 128-bit encryption<br />
and handles the password slightly differently than the preceding<br />
one.<br />
■ AESV2Plugin This plug-in provides AES 128-bit encryption.<br />
The plug-in will not be available <strong>for</strong> selection in the drop-down<br />
box while it resides in the \UltraVNC\ plugin directory.You must<br />
copy the MSRC4Plugin_NoReg.dsm plug-in to the main<br />
\UltraVNC\ directory.<br />
The plug-in that comes with the installation is an older version than the<br />
one available from the plug-in site. The version that came with the<br />
install did not work <strong>for</strong> me. <strong>Using</strong> the latest plug-in resolved the issue.<br />
Also note that you need to use the same key on both the server and<br />
viewer, a fact that is not clearly spelled out in the documentation. It<br />
doesn’t matter which system you generate it on, although the server<br />
probably makes more sense.<br />
2. Select the MSRC4Plugin_NoReg.dsm in the dropdown box and<br />
click Config.<br />
3. Click on Gen Key to create a server key. When finished, click OK<br />
to close the plug-in configuration window.<br />
4. Click on Apply and then OK to close the Default properties<br />
window.<br />
www.syngress.com
118 Chapter 2 • Protecting <strong>Your</strong> Perimeter<br />
The VNC Server should now be started and running securely.The next step<br />
is starting up the UltraVNC viewer (the client), which is much easier to do.<br />
1. Start the UltraVNC Viewer via the desktop icon (if applicable) or by<br />
navigating to Start | Programs | UltraVNC | UltraVNC<br />
Viewer.This will open the connection window (see Figure 2.44).<br />
Figure 2.44 UltraVNC Viewer<br />
2. Enter the host name or IP address in the VNC Server field. Follow<br />
this with two colons (::) and port number, or a single colon (:) and<br />
the display number.The Default port will be 5901.<br />
3. Place a check in the box next to Use DMSPlug-in.<br />
4. Select the same exact plug-in in the drop-down box that you are<br />
using on the server.The plug-in files need to be the same version as<br />
well.<strong>Your</strong> key file should be the same one used on the server.The<br />
key file is not as “top secret” as you might think. Even if someone<br />
obtains the key file, they will still have to provide a username and<br />
password, and will be subject to the Windows account access you<br />
configured on the server.<br />
Once you are connected, the status window will indicate that you are<br />
using encryption (see Figure 2.45).You can open the status window <strong>for</strong> an<br />
established connection by using the “Show Status Window” button at the top<br />
of the viewer window (it has a large exclamation point on the button).<br />
www.syngress.com
Figure 2.45 UltraVNC Viewer Status<br />
The status line will show the plug-in you are using (if any), thus indicating<br />
that you are using the MS RC4 plug-in, which in turn is a simple way<br />
to verify that you are successfully using encryption <strong>for</strong> your sessions.<br />
Between using the native Windows Terminal Services and UltraVNC, you<br />
have a variety of options to provide you remote desktop access.Although<br />
Windows Terminal Services (also referred to by the Windows client/protocol<br />
name, Remote Desktop) is included and doesn’t require additional software, a<br />
VNC solution is likely to offer more flexibility, and the server is supported on<br />
more plat<strong>for</strong>ms. VNC clients and servers are also available <strong>for</strong> virtually all Linux<br />
distributions. In fact, the default install of many includes one or both components.<br />
Fedora Core 5 installs the VNC server by default, while the client is an<br />
optional installation package.This widespread availability and support are one of<br />
the reasons VNC (in all its variants) is such a widely used solution.<br />
<strong>Using</strong> the X Window System<br />
Protecting <strong>Your</strong> Perimeter • Chapter 2 119<br />
X window is the underlying management system <strong>for</strong> most UNIX and Linux<br />
GUIs. It takes an entirely different architectural approach than a Microsoft<br />
Windows system, in that the X Window system is set up in a client-server<br />
architecture from the beginning, similar to VNC. When reading the X Window<br />
documentation, you will find that X Window systems use the terms server and<br />
client in the reverse of what would seem intuitive, meaning the server is where<br />
the display is being generated, not the remote machine you are connecting to.<br />
Most current implementations are based on the work of the X.Org foundation<br />
www.syngress.com
120 Chapter 2 • Protecting <strong>Your</strong> Perimeter<br />
(http://x.org), which is the open source implementation of the X11 protocol.A<br />
closely related project is the X<strong>Free</strong>86 Project (www.xfree86.org), which is the<br />
open source version of the X Window system (which uses the X11 protocol).<br />
X11 is the protocol that is used to transfer in<strong>for</strong>mation about the GUI between<br />
the server and the client.The end result of these design decisions is that much<br />
like Windows’ built-in terminal server support, two Linux systems can remotely<br />
access each other via a GUI virtual desktop.<br />
You can configure the X Window System to permit connections from<br />
remote systems without any third-party software. While this works, the evolution<br />
of desktop Window Managers and common software packages has rendered<br />
this method inefficient. A much more robust way to accomplish the<br />
same thing is using NX technology developed by NoMachine, which is a<br />
highly optimized process and protocol to make X sessions available remotely.<br />
NX is available <strong>for</strong> free (client and server) from www.nomachine.com/download.php.<br />
Commercial variations are also available.You can see the differences<br />
between versions, and thus see what the limitations of the free version are at<br />
www.nomachine.com/features.php.The big limitation is that the NX <strong>Free</strong><br />
Edition limits you to only two concurrent connections. In most cases this<br />
won’t be much of a limitation unless you are trying to use it as a full-blown<br />
terminal server solution rather than just a remote access mechanism. An opensource<br />
version of the NX server is called <strong>Free</strong>NX and is available from<br />
http://freenx.berlios.de/. <strong>Free</strong>NX does not support relaying sounds to the<br />
client (the NoMachine server does).This is the recommended server and the<br />
one used in the following examples.<br />
To set up the <strong>Free</strong>NX server, download and install <strong>Free</strong>NX using whatever<br />
method is appropriate <strong>for</strong> your Linux distribution. For Fedora Core 5, I<br />
used yum install freenx.Yum (the package installer <strong>for</strong> Fedora Core 5) will<br />
automatically check <strong>for</strong> and install any dependencies.The a<strong>for</strong>ementioned<br />
command also installed the core nx package, and expect as dependencies. In<br />
the case of Fedora Core 5, there is no need <strong>for</strong> any further installation.<br />
Depending on the distribution you are using, the installation may be more<br />
involved. Most of the major distributions should have packages available that<br />
make the installation relatively painless.You will need to have SSHD listening<br />
on port 22 in order <strong>for</strong> NX to work properly.<br />
www.syngress.com
TIP<br />
Protecting <strong>Your</strong> Perimeter • Chapter 2 121<br />
If you check the running services in an attempt to verify that the <strong>Free</strong>NX<br />
server was installed successfully (via chkconfig or the like), you will not<br />
see it listed. This is because the server <strong>Free</strong>NX server does not sit and<br />
listen on a port <strong>for</strong> an inbound connection like most services. Instead,<br />
when you login via SSH (this is why you need SSHD running on port 22),<br />
it logs you in as a special user (NX). That user’s profile is configured such<br />
that it executes a process to start up the server and listen <strong>for</strong> the<br />
inbound connection.<br />
With the server configured, the next step is to download and configure<br />
the client to make a connection. While there are alternate clients available,<br />
including some command-line clients, we will go with the original<br />
NoMachine client, which is installed on Windows XP <strong>for</strong> this exercise.<br />
Download the client and follow these steps to make a connection to the<br />
Linux <strong>Free</strong>NX server:<br />
1. Run the installation program.The installation is unremarkable, asking<br />
<strong>for</strong> all the standards prompts such as a license agreement, and<br />
choosing an installation directory, the option to create a desktop icon,<br />
and so on.<br />
2. When you first run the NX Client <strong>for</strong> Windows shortcut, it will<br />
launch the NX Connection Wizard, because you have no sessions<br />
defined.The wizard will walk you through establishing a connection.<br />
On the first screen of the wizard click Next.<br />
3. The next screen allows you to configure a name <strong>for</strong> the session. All<br />
of the connection settings will be saved under this name <strong>for</strong> future<br />
use.This window also asks <strong>for</strong> the host and port. Unless you have<br />
changed it, leave the port at the default of 22, and configure the<br />
appropriate host name or IP address in the host field.This screen is<br />
shown in Figure 2.46.<br />
www.syngress.com
122 Chapter 2 • Protecting <strong>Your</strong> Perimeter<br />
Figure 2.46 NX Client Wizard Session<br />
4. After entering the required in<strong>for</strong>mation, click Next.<br />
5. The Desktop setting window is next. Select the OS you will be connecting<br />
to, along with the window manager. In this case it was<br />
UNIX and GNOME.This window also gives you the option of<br />
enabling SSL encryption of all traffic. Unless you have a reason not to<br />
have additional security, you should enable this option. If you do not<br />
enable encryption, all of the X11 data will be sent unencrypted,<br />
meaning that someone with a sniffer could capture and reconstruct<br />
everything sent between the client and the server.This screen is<br />
shown in Figure 2.47.<br />
Figure 2.47 NX Client Wizard Desktop<br />
www.syngress.com
6. When you are satisfied with your settings, click Next.<br />
7. The next screen of the wizard is the final one.The options are to<br />
create shortcut on desktop, and/or show the advanced configuration<br />
dialog. In order to enable SSL encryption <strong>for</strong> the connection,<br />
you will need to select the show the advanced<br />
configuration dialog checkbox and then click Finish.<br />
8. The advanced configuration dialog is shown in Figure 2.48.<br />
Figure 2.48 NX Client Advanced Dialog<br />
Protecting <strong>Your</strong> Perimeter • Chapter 2 123<br />
9. On the “General” tab in the “Server” section, click on Key.You<br />
must have a copy of the client.id_dsa.key file, which will be found on<br />
the server in either /etc/nxserver/ or /var/lib/nxserver/home/.ssh/.<br />
10. On the Key Management screen, click Import, and select the<br />
client.id_dsa.key file and then click OK followed by Save.<br />
11. Finally, click OK to commit your settings <strong>for</strong> this session.<br />
12. After completing the advanced configuration, you will see the client<br />
login window shown in Figure 2.49. Enter the appropriate login<br />
name and password, and click Login.<br />
www.syngress.com
124 Chapter 2 • Protecting <strong>Your</strong> Perimeter<br />
Figure 2.49 NC Client Login<br />
If you login as a user with administrative privileges, you will be given a<br />
warning (see Figure 2.50) that this is not best practices and that it would be<br />
more secure to use a non-administrator account. If you get this warning, you<br />
can click Continue to proceed with the connection anyway.<br />
Figure 2.50 NC Client Login Admin Warning<br />
You will be prompted to verify the key fingerprint of the host you are<br />
connecting to, which can be done by clicking Yes. After a period of encryption<br />
and authentication negotiation, you should see the remote desktop.You<br />
will quickly notice that the desktop that is spawned is a “new” fresh desktop<br />
just <strong>for</strong> this login, not a view of an existing logged-in user’s desktop.This<br />
default behavior is different than both Terminal Services and VNC, which<br />
both connect you to an existing session if one is present. While NX doesn’t<br />
behave this way natively, there are some workarounds to try and modify this<br />
behavior. Hopefully, future releases will simplify this option and make it easier<br />
to configure as the current workarounds are not elegant.<br />
www.syngress.com
If you are in full screen mode such that you cannot see your real local<br />
desktop, there are some keyboard shortcuts available to accomplish some<br />
commonly needed tasks.These are outlined here.<br />
■ CTR+ALT+F Toggles full-screen mode.<br />
■ CTRL+ALT+T Shows the terminate/suspend dialog. If you terminate,<br />
the session is closed, while if you select suspend, you will be<br />
able to open the same session next time.<br />
■ CTRL+ALT+M Maximizes or minimizes the NX client window<br />
■ CTRL+ALT+Mouse Drags the desktop viewing area, so you can<br />
view different portions of the desktop.This is useful if the remote<br />
desktop has a higher resolution than your local resolution.<br />
■ CTRL+ALT+Arrows CTRL+ALT+Keypad Will move the<br />
viewport by an incremental amount of pixels.<br />
■ CTRL+ALT+S It will activate “screen-scraping“ mode, so all the<br />
GetImage originated by the clients will be <strong>for</strong>warded to the real display.This<br />
will allow you to take a screenshot of the remote desktop,<br />
to your local clipboard. If you press the sequence again, nxagent will<br />
revert to the usual “fast” mode.<br />
■ CTRL+ALT+E Enables lazy image encoding <strong>for</strong> improved speed.<br />
Providing a Remote Shell<br />
Protecting <strong>Your</strong> Perimeter • Chapter 2 125<br />
Sometimes you need remote access to a system but all you need is command<br />
line access. Maybe you could use more, as in GUI access, but connecting via<br />
the command line might be faster if you just need to connect and check<br />
something quickly.The primary use where a command line only connection<br />
is most applicable is when you are doing scripted changes. For example, if you<br />
needed to connect to 3 dozen systems and change a value in a configuration<br />
file, this would actually take a significant amount of time to do manually via<br />
the GUI, and a batch file would not be able to handle the GUI interfaces<br />
anyway. In these instances what would be ideal is a secure command line only<br />
remote access method. I mention secure expressly because a simple Telnet<br />
connection, while fast and efficient, includes no encryption, and all data<br />
www.syngress.com
126 Chapter 2 • Protecting <strong>Your</strong> Perimeter<br />
during your session (including your login username and password) will be<br />
send in clear text across the network. For this reason you need a <strong>for</strong>m of<br />
access that includes encryption such as <strong>Secure</strong> Shell.<br />
<strong>Using</strong> <strong>Secure</strong> Shell<br />
SSH (<strong>Secure</strong> Shell) requires both an SSH client and an SSH server component.<br />
SSH is the industry standard <strong>for</strong> remote command line access and most<br />
systems come with it as part of the default install. Windows systems of course<br />
are one of the few that do not.There are a variety of products available to<br />
bring SSH functionality to Windows, both commercial and free. One of the<br />
better known commercial SSH clients is <strong>Secure</strong>CRT (www.vandyke.com).<br />
Most of the free versions are based on the OpenSSH (www.openssh.com)<br />
package.There is also a GUI front end <strong>for</strong> OpenSSH, called PuTTY. Cygwin<br />
(www.cygwin.com) is a port of many UNIX tools <strong>for</strong> Windows and included<br />
in this package is an SSH server.To add even more options, SSHWindows is a<br />
free package that installs only the minimum components of the Cygwin<br />
package to use SSH, SCP, and SFTP. We will walk through setting up<br />
SSHWindows (on a Windows XP system).This package includes both the<br />
SSH client files and the SSH server files.<br />
1. Download SSHWindows from http://sshwindows.source<strong>for</strong>ge.net/<br />
on the client and server<br />
2. Unzip the file and run the setup utility. Answer the standard prompts<br />
and then click Finish<br />
At this point the SSH client is ready to be used without the need <strong>for</strong> any<br />
additional configuration. Be<strong>for</strong>e you can use the SSH server, however, you<br />
must create and edit the \OpenSSH\etc\passwd and \group files.<br />
1. If desired create a separate group on the system to hold users who<br />
will have access to SSH, and add the local user accounts to the group<br />
<strong>for</strong> anyone you wish to have access to connect to the SSH server.<br />
2. At the console navigate to the directory where you installed<br />
\OpenSSH\bin\<br />
3. Enter the following command on the server to specify which groups<br />
can connect via SSH: mkgroup –l >> ..\etc\group.This will give<br />
www.syngress.com
all local (–l) groups permission to connect via SSH.You should open<br />
the group file and edit out the lines corresponding to any groups you<br />
do not wish to have access.<br />
4. Enter the mkpasswd –l –u >><br />
..\etc\passwd command on the server to specify a single account<br />
that is authorized to connect via SSH.You must per<strong>for</strong>m both steps 3<br />
and 4 <strong>for</strong> SSH to work. If you do not specify the –u <br />
all local users will be added to the passwd file.<br />
5. Edit the Banner.txt file located in \etc\ to match the banner specified<br />
by your IP security policy.<br />
Once this is completed you can start and use the SSH server via<br />
the Services applet of the MMC or by entering net start “openssh<br />
server” at the command prompt. Here is an example of output from<br />
a successful SSH connection.<br />
I:\OpenSSH\bin>ssh sshuser@192.168.1.101<br />
************ WARNING BANNER HERE ************<br />
sshuser@192.168.1.101's password:<br />
Last login: Sat Jun 24 20:05:22 2006 from 192.168.1.99<br />
Microsoft Windows 2000 [Version 5.00.2195]<br />
(C) Copyright 1985-2000 Microsoft Corp.<br />
C:\OpenSSH>ipconfig<br />
Windows 2000 IP Configuration<br />
Ethernet adapter Local Area Connection:<br />
Protecting <strong>Your</strong> Perimeter • Chapter 2 127<br />
Connection-specific DNS Suffix . : rr.com<br />
IP Address. . . . . . . . . . . . : 192.168.1.101<br />
Subnet Mask . . . . . . . . . . . : 255.255.255.0<br />
Default Gateway . . . . . . . . . : 192.168.1.1<br />
This is the sample output from sending a file to the bastion host<br />
(192.168.1.101) via SCP.<br />
I:\Internet\OpenSSH\bin>scp sample.txt sshuser@192.168.1.101:/<br />
************ WARNING BANNER HERE ************<br />
www.syngress.com
128 Chapter 2 • Protecting <strong>Your</strong> Perimeter<br />
sshuser@192.168.1.101's password:<br />
Could not chdir to home directory /home/SSHuser: No such file or directory<br />
sample.txt 100% 1735 1.7KB/s 00:00<br />
TIP<br />
While the SSH port in SSHWindows uses standard CMD.exe syntax, the<br />
SCP command and SFTP command both use Unix style paths. Also of<br />
note is that unless it is configured differently, the SSH connection will<br />
assume that the directory you installed OpenSSH into is the starting root<br />
<strong>for</strong> client connections.<br />
If you get an error of segid: Invalid Argument, this typically means that the<br />
permissions are incorrect in the passwd file.The logon account on Windows<br />
systems should be 544 instead of 514.The latest installation didn’t seem to<br />
have this issue but it’s not uncommon.<br />
<strong>Using</strong> a <strong>Secure</strong> Shell GUI Client<br />
In virtually all cases with a command line utility offering many options and<br />
configuration parameters, some one will come along and create a GUI front<br />
end to make things simpler.This is true with SSH as well. By far the most<br />
widely used front-end is PuTTY, which is available from www.chiark.greenend.org.uk/~sgtatham/putty/.<br />
Setting it up is fast and simple because all you<br />
need to do is download the single PuTTY.exe file and it’s “installed.” When<br />
you run the EXE, the configuration window will look like the one shown in<br />
Figure 2.51.<br />
While there are a lot of options, a basic SSH session is easy to configure.<br />
Make sure that SSH is selected as the protocol, and enter the host name or IP<br />
address you wish to connect to in the appropriate field.You can enter a session<br />
name and click Save if you wish to save your settings <strong>for</strong> future use.<br />
When you are happy with your settings, click Open to initiate the session. If<br />
it is the first time to connect to that particular host you will be prompted to<br />
verify the server key by clicking Yes as shown in Figure 2.52.<br />
www.syngress.com
Figure 2.51 PuTTY Configuration<br />
Figure 2.52 PuTTY Server Key Verification<br />
Protecting <strong>Your</strong> Perimeter • Chapter 2 129<br />
A console window will open and the configured logon banner will be<br />
displayed.You should then have access to the command prompt on the<br />
remote system.To restore the session settings, simply highlight the session<br />
name and click Load, followed by Open to connect.<br />
There is a wide variety of options <strong>for</strong> providing free, secure remote access,<br />
probably more options than most people realize. Each option has its strengths<br />
and weaknesses, and in reality, what you already have in-house may dictate<br />
which server you use. Hopefully, the coverage of remote access clients and<br />
servers in this chapter, will allow you to make the most out of the resources you<br />
have available.Table 2.1 summarizes the capabilities of the various remote access<br />
methods.<br />
www.syngress.com
130 Chapter 2 • Protecting <strong>Your</strong> Perimeter<br />
Table 2.1 Remote Access Methods Feature Summary<br />
Summary<br />
In this chapter, we examined a multitude of methods to secure your network<br />
perimeter and provide you, as the administrator, the access that is needed to<br />
administer the network.The Linux built-in firewall netfilter was covered<br />
extensively due to its power and flexibility, not to mention availability, as a<br />
free stateful firewall. In addition to iptables, we looked at several GUI front<br />
ends that allow you to manage the netfilter firewall without knowing the iptables<br />
command-line syntax. With your perimeter secured, the next step was to<br />
establish a secured doorway, so that you could sit at home and take care of the<br />
network. With command-line access via SSH, and Windows Terminal Services<br />
offering a remote desktop, <strong>Free</strong>NX rounded out the offering by offering multiple<br />
remote desktop sessions from the same server.<br />
Armed with this knowledge, you have no excuse to not have some type<br />
of firewall <strong>for</strong> protection on any and all unsecured connections. We say unsecured,<br />
not Internet intentionally, because any business partner, home user network,<br />
or the Internet are all considered untrusted, meaning you have no or<br />
incomplete administrative control over the security of the network you are<br />
connected to. Ultimately, you have no way to guarantee or en<strong>for</strong>ce the proper<br />
security controls of an untrusted network.The sad fact is, if you have an<br />
Internet connection and don’t have any type of firewall between a computer<br />
and the Internet, odds are very high that you have already been compromised.<br />
For other types of untrusted connections your odds may be better, but you’re<br />
still gambling if you don’t take steps to protect your network and systems.<br />
www.syngress.com
Solutions Fast Track<br />
Firewall Types<br />
� In the networking sense, a firewall is basically any component<br />
(software or hardware) that restricts the flow of network traffic.<br />
� Some firewalls are notoriously limited in capability, and others are<br />
extremely easy to use.<br />
� To permit or deny traffic based on which network device is the<br />
sender or recipient and what ports are being used, you would use a<br />
packet-filtering firewall.<br />
Firewall Architectures<br />
� The most securely configured firewall in existence will not provide<br />
much protection if the underlying network was not designed properly.<br />
� A screened subnet is the simplest and most common firewall implementation.<br />
Most small businesses and homes use this type of firewall.<br />
� The one-legged demilitarized zone (DMZ) still has the advantage of<br />
cost, because you are building a DMZ using only a single firewall.<br />
� The true DMZ is generally considered the most secure of firewall<br />
architectures. With this design, there is an external and internal firewall.<br />
Between the two is sandwiched any Internet accessible devices.<br />
Implementing Firewalls<br />
Protecting <strong>Your</strong> Perimeter • Chapter 2 131<br />
� Netfilter is the built-in component that per<strong>for</strong>ms the firewall logic.<br />
iptables is the command-line interface used to configure the netfilter<br />
ACLs.<br />
� Many GUIs exist with widely varying degrees of functionality and<br />
complexity. My suggestion here is choose the simplest one that will<br />
do what you need it to do. In all likelihood the “right” one will<br />
change <strong>for</strong> you over time.<br />
� SmoothWall sits in a class of its own, due to the fact that it turns a<br />
PC into a dedicated firewall appliance that is completely configurable<br />
without ever logging into the underlying Linux operating system.<br />
www.syngress.com
132 Chapter 2 • Protecting <strong>Your</strong> Perimeter<br />
Providing <strong>Secure</strong> Remote Access<br />
� <strong>Your</strong> remote access options will depend most heavily on the plat<strong>for</strong>ms<br />
you have available to use <strong>for</strong> the remote access server. In most cases, the<br />
client used <strong>for</strong> remote access will run on virtually any OS.<br />
� In conjunction with considering the available resources, you need to<br />
evaluate what your remote access needs really are. Is command line<br />
good enough? Do you need a remote GUI? Do you need to tap into<br />
existing sessions <strong>for</strong> a tech support type of functionality?<br />
� For any remote access solution, remember to make sure you are using<br />
encryption if you plan on the session traversing an untrusted<br />
network, such as the Internet.<br />
Frequently Asked Questions<br />
The following Frequently Asked Questions, answered by the authors of this book,<br />
are designed to both measure your understanding of the concepts presented in<br />
this chapter and to assist you with real-life implementation of these concepts. To<br />
have your questions about this chapter answered by the author, browse to<br />
www.syngress.com/solutions and click on the “Ask the Author” <strong>for</strong>m.<br />
Q: How do I make the NX Client connect to an existing session?<br />
A: Currently, the most oft used solution is to have the local user use an NX<br />
session (to localhost).That way, all of their activities are always within an<br />
NX session, making management (terminate, pause, resume) much simpler.<br />
Again, it’s not elegant but it works adequately.<br />
Q: I like the features of a particular flavor of VNC (or any remote access<br />
method) but it doesn’t support encryption. What can I do to secure it?<br />
A: One of the most common approaches is to use the SSH port-<strong>for</strong>warding<br />
functionality.This is how many of the VNC variants are providing<br />
encryption behinds the scenes anyway. While we discuss gaining administrative<br />
access via SSH in this chapter, Chapter 5 (Managing Event Logs)<br />
contains detailed instructions on using the SSH port <strong>for</strong>warding feature.<br />
PV27<br />
www.syngress.com
Protecting<br />
<strong>Network</strong> Resources<br />
Solutions in this chapter:<br />
■ Per<strong>for</strong>ming Basic Hardening<br />
■ Hardening Windows Systems<br />
■ Hardening Linux Systems<br />
■ Hardening Infrastructure Devices<br />
■ Patching Systems<br />
■ Personal Firewalls<br />
■ Providing Anti-virus and Anti-spyware<br />
Protection<br />
■ Encrypting Sensitive Data<br />
� Summary<br />
� Solutions Fast Track<br />
� Frequently Asked Questions<br />
Chapter 3<br />
133
134 Chapter 3 • Protecting <strong>Network</strong> Resources<br />
Introduction<br />
Chapter 2 focused on protecting the perimeter of your network, which typically<br />
means the Internet link, but it could include any link to the outside<br />
world, including connections to business partners and affiliates.This chapter<br />
focuses on how to secure the network-connected resources, such as servers<br />
and workstations. Many times an organization looks only at securing its<br />
perimeter, while leaving its interior network wide open and unprotected.This<br />
hard-exterior-soft-squishy-interior approach is surely better than no security,<br />
but it is not the best approach.The best approach is through defense in depth,<br />
which is the practice of applying security measures at all levels of the network.<br />
A solid defense-in-depth approach includes defenses at the outer<br />
perimeter—typically, firewalls and an intrusion detection system. It also<br />
includes defenses within the interior of the network, such as internal firewalls,<br />
network segmentation, and port-level access controls. Finally, at the core of<br />
the security onion are the actual network resources.You can protect these<br />
resources in a variety of ways, including via personal firewalls, antivirus software,<br />
antispyware software, data encryption, and automated security policy<br />
en<strong>for</strong>cement.This chapter demonstrates how to accomplish all of these objectives<br />
and secure your network resources using only free tools.<br />
Per<strong>for</strong>ming Basic Hardening<br />
All general-purpose operating systems will, by their very nature, come with<br />
weaker security settings than you might like.This characteristic is unavoidable,<br />
largely because the devices are general-purpose.To accommodate the wide<br />
variety of uses the system might fulfill, some sacrifices must be made when it<br />
comes to securing the system.This isn’t necessarily true when it comes to<br />
special-purpose systems, which often come with highly secured and specially<br />
tailored configurations so that the system can be used only <strong>for</strong> its intended<br />
purpose.You, on the other hand, know exactly what you want systems to do,<br />
so you can customize the general-purpose installation to be more secure in<br />
your environment. Securing a system is also referred to as hardening the<br />
system, which means to make it harder <strong>for</strong> an attacker to compromise the<br />
system.<br />
www.syngress.com
Regardless of what purpose the system serves, there are some common<br />
hardening steps that you should apply to all systems.There are high-level<br />
tasks, and as such, the specific implementation details are going to vary from<br />
system to system.These high-level hardening tasks have been outlined here.<br />
Any plan you develop to harden any network resource should address all of<br />
these issues in some fashion.<br />
Defining Policy<br />
Protecting <strong>Network</strong> Resources • Chapter 3 135<br />
You cannot possibly harden a system, at least not from an auditing perspective,<br />
if you do not have a definition and set of criteria <strong>for</strong> what constitutes “hardened,”<br />
or secure. Because of this, any hardening process actually starts long<br />
be<strong>for</strong>e you ever configure anything on a device, with defining policies and<br />
standards. We touch upon some of the policy-related elements in Chapter 8.<br />
<strong>Your</strong> IT security team will clearly outline the objectives you are trying to<br />
meet.The related standards will provide measurable milestones to meet in<br />
pursuit of that objective.<strong>Your</strong> security standards are your yardstick <strong>for</strong> success<br />
and provide an objective measure of your progress. Although the words “make<br />
the server secure” imply certain objectives, they do not clearly define measurable<br />
tasks; there<strong>for</strong>e, proving that you have “made the server secure” would be<br />
difficult at best. As such, having some well-defined security standards will be<br />
to everyone’s advantage.<br />
The IT policies and standards your organization employs should accurately<br />
reflect your organization’s specific needs. Many organizations will sell<br />
you an IT policy to use, or one to use as a shell <strong>for</strong> filling in your own<br />
specifics.Taking this approach of using a “canned” policy has many challenges.<br />
What constitutes an appropriate policy or standard <strong>for</strong> one organization may<br />
not adequately cover the needs of another organization.The business model,<br />
type of business, and a host of other factors all contribute to making a good<br />
policy fit your organization. You always will want your security policy and<br />
security standards to address some elements, as shown in the following list.<br />
Note that you need to represent each item in both policy and standards:<br />
■ Classifying Data. You must have some guidelines on the classification<br />
of data (public, confidential, secret, etc.) in order to define steps<br />
to secure the data.These classifications will drive subsequent stan-<br />
www.syngress.com
136 Chapter 3 • Protecting <strong>Network</strong> Resources<br />
dards, such as “confidential data must be secured on untrusted networks.”<br />
Also, such policy needs to define when data needs to be classified,<br />
and explain the different levels of data classification.<br />
■ In<strong>for</strong>mation Confidentiality. This policy and standard should<br />
define how to keep data private.This will include encryption<br />
requirements and methods.You also need to define the requirements<br />
concerning authorization and authentication. Any password requirements<br />
would fall into this category.This will also include procedures<br />
<strong>for</strong> granting and revoking access to data, and who has the authority<br />
to do so.<br />
■ In<strong>for</strong>mation Availability. This covers when and where redundancy<br />
mechanisms are required.This should spell out what levels of<br />
redundancy are needed under what circumstances, such as redundant<br />
hardware, redundant Internet circuits, RAID arrays, server clusters,<br />
failover hot sites, spare hardware, and UPS requirements.<br />
■ Physical Security. These will address requirements concerning<br />
granting access, revoking access, monitoring, and types of access.<br />
These could include when and where badge readers are required,<br />
when keys should and should not be used, office locks, access by service<br />
personnel, and so on.<br />
Generally speaking, the larger the organization, the larger the IT security<br />
documents will be. In some cases, you may get as specific as to have separate<br />
documents <strong>for</strong> “Physical Security <strong>for</strong> IT Datacenters” and “Physical Security<br />
<strong>for</strong> Retail Storefronts.” In a very small organization, the entire IT security<br />
policy may be one document, and the entire set of IT security standards<br />
another document.<strong>Your</strong> IT policies are an instance of where “size doesn’t<br />
matter,” meaning that a large 100-page policy is not necessarily a “better”<br />
policy than a short, concise one.The key is that the policy fits your organization<br />
and addresses your needs.<br />
Except in an emergency situation (where you have vulnerable devices in<br />
need of immediate hardening steps), defining the appropriate policies and<br />
standards should be the first step toward securing your network.You will not<br />
be able to create a proper IT security policy without understanding the business<br />
first.The creation of these policies cannot be done in a vacuum. I have<br />
www.syngress.com
seen more than one policy or standard that was written without input from<br />
the appropriate groups. Although you could point to it and say,“yes, we have<br />
a policy defined,” the policy was constantly in need of revision, and there<br />
were innumerable exceptions. Remember, from an audit perspective, a high<br />
number of exceptions against a very granular policy are likely to look less<br />
favorable than very few exceptions against a more liberal policy.<br />
Access Controls<br />
Access to the devices will be one of the first issues to consider, regardless of<br />
what type of device it is.This will include hardening both the logical access<br />
and the physical access. When it comes to logical access, the simplest control<br />
to introduce is the use of firewalls, whether separate firewalls or a built-in<br />
“personal” firewalls on the host in question. Some systems have their own<br />
mechanisms <strong>for</strong> implementing logical access controls in addition to simply filtering<br />
network packets. Where possible, using these additional methods helps<br />
provide defense in depth and increase security.You should address physical<br />
access as well.The universal truth is that if you have physical access to a<br />
system, you can have full access to the system.This is because if you have<br />
physical control of a system, generally the system has mechanisms that allow<br />
you to gain complete access to the system.<br />
For example, if you have physical access to a server, you can boot it up<br />
under Linux, edit the raw data on the hard disk, and reset the administrator<br />
password.You can use encryption mechanisms to encrypt the entire hard disk,<br />
which will render this particular attack ineffective. In this scenario encryption<br />
is serving as a type of access control as part of your defense-in-depth strategy.<br />
These types of requirements are exactly the ones you would need to spell out<br />
within your policy and then implement them to secure your systems and your<br />
data.<strong>Your</strong> hardening steps should address all of these concerns.<br />
Authentication<br />
Protecting <strong>Network</strong> Resources • Chapter 3 137<br />
Authentication means to prove your identity. In the most common <strong>for</strong>m, you<br />
do this using passwords. Recall that there are several different means to authenticate<br />
a user, including something they have, something they are, something they<br />
know, or any combination of the three. In the case of a password, this would mean<br />
www.syngress.com
138 Chapter 3 • Protecting <strong>Network</strong> Resources<br />
using something the user knows (the password) to prove he is who he claims to<br />
be. When you hear the term two-factor authentication, this refers to using two out<br />
of the three mechanisms <strong>for</strong> proving someone’s identity.Two-factor authentication<br />
most often takes the <strong>for</strong>m of a token which randomly generates a key.This<br />
key (something you have), combined with a password or PIN (something you<br />
know), provides heightened authentication. One of your key goals of your<br />
hardening ef<strong>for</strong>ts is to strengthen the authentication process as much as possible.<br />
<strong>Your</strong> hardening steps will need to provide authentication as much as possible.<br />
Authorization<br />
Authorization means to define what you have access to do. Obviously, authorization<br />
cannot occur securely without authentication happening first.You<br />
cannot possibly know what Jill should be able to access until you have positively<br />
identified that the person in question is in fact Jill. Usually you control<br />
and harden authorization through tighter configuration of file-level security.<br />
It can also include access to systems—<strong>for</strong> instance, a restricted user who is not<br />
allowed to install software drivers or applications on his workstation.The<br />
objective is, of course, to provide as few privileges as possible, while still<br />
enabling the person to per<strong>for</strong>m his assigned tasks.This concept is known as<br />
the principle of least privilege. It helps to determine the least amount of access a<br />
user requires in order to fulfill his assigned duties.<br />
Auditing<br />
Auditing is a part of the hardening process as well. A system with no audit<br />
trail is certainly less secure than one with an audit trail. While most of the<br />
security hardening you will per<strong>for</strong>m to various network resources comprises<br />
preventive controls, an audit trail serves as a detective control.You should not<br />
only enable and configure the appropriate level of auditing but also take steps<br />
to protect the resultant audit logs. Remember to protect the logging process<br />
(by using a secured account to run it) and the logging configuration (typically<br />
using file-level access controls).You will need to safeguard the audit logs by<br />
implementing mechanisms to ensure log integrity and availability. If you<br />
cannot ensure the integrity of a log file, it may still be useful when it comes<br />
to troubleshooting a technology issue.The log file will be practically useless,<br />
www.syngress.com
however, if you need it to reconstruct the actions of a hacker or <strong>for</strong> use<br />
during legal proceedings.<br />
Hardening Windows Systems<br />
Windows systems have a reputation <strong>for</strong> being insecure out of the box.This<br />
reputation is certainly less justified than it once was. Microsoft has made a lot<br />
of progress toward a very difficult goal, which is to make its operating systems<br />
inherently more secure without diminishing the user’s experience. After all, a<br />
secure system that is unusable isn’t going to be of much value. Much like<br />
minimum password requirements, there is a point at which your ef<strong>for</strong>ts to<br />
increase security will actually backfire and will reduce your overall security<br />
level. Because of this, you should always maintain an ef<strong>for</strong>t to balance<br />
increased security measures with overall system usability and functionality.<br />
Again, doing this properly will require an in-depth understanding of the<br />
needs and processes of the organization.<br />
The first thing to do in terms of hardening a system is to assess the current<br />
security posture of the device in question. Only after you know how the<br />
system is configured can you determine what you need to do next. Chapter 6<br />
provides some good guidance on how to assess the current security posture of<br />
your network, while this chapter will focus on the tools that you can use to<br />
configure security settings in an ef<strong>for</strong>t to harden your network resources.<br />
General Hardening Steps<br />
Protecting <strong>Network</strong> Resources • Chapter 3 139<br />
All the possible steps that you can take to secure a Windows host could fill<br />
(and have filled) entire volumes.The contents of this chapter should start you<br />
on your way with the basic hardening steps, and hopefully will point out a<br />
few tools you might not have known you had at your disposal. Be aware that<br />
in some cases, certain policies and standards may influence or affect other<br />
areas indirectly. For example, if you use biometric scanners <strong>for</strong> logon on all<br />
workstations, a “secure password” policy becomes practically moot. Under<br />
those circumstances, the password policy would end up applying only to special-purpose<br />
devices that were not able to take advantage of the biometric<br />
scanner.The exception, of course, is a requirement to use multifactor authentication,<br />
such as biometrics and a password. In this way, all of the hardening<br />
www.syngress.com
140 Chapter 3 • Protecting <strong>Network</strong> Resources<br />
steps are interrelated and interdependent. A policy decision in one area can<br />
impact a policy in another area, and we see a similar relationship in the use of<br />
standards.<br />
Most configuration on modern Microsoft systems is per<strong>for</strong>med using the<br />
Microsoft Management Console, or MMC.The MMC has come standard on<br />
Windows systems since Windows 2000. Because we’ll be relying on it so<br />
heavily in the following sections, let’s get familiar with using the MMC here.<br />
You can start by opening a new MMC console. Do this by navigating to<br />
Start | Run | mmc.exe.<br />
Figure 3.1 shows the blank console.<br />
Figure 3.1 Empty MMC Console<br />
The MMC is not very exciting without some additional configuration.<br />
The various interfaces are called snap-ins.The first time you open the MMC<br />
in this fashion it will have no snap-ins loaded.To load the services snap-in,<br />
you would open the console and click File | Add/Remove Snap-in.Then,<br />
in the Add/Remove Snap-in window, click the Add button. On the Add<br />
Standalone Snap-in window (shown in Figure 3.2), select the desired snapin—in<br />
this case, Services, and click the Add button. Leave the default selection<br />
of Local Computer and click Finish.You can then close the Add<br />
www.syngress.com
Standalone Snap-in window by clicking Close. Click OK on the<br />
Add/Remove Snap-in window. If you peruse the fields of the services<br />
snap-in you will find that they are the same as what you’d see if you had navigated<br />
to the stand-alone services snap-in via Start | Run | Services.msc<br />
or Start | Programs | Administrative Tools | Services. For one-off<br />
configuration tasks, the individual snap-ins might be easier to access, but an<br />
MMC console that includes all the snap-ins you need in one place is very<br />
efficient.<br />
Figure 3.2 Add Standalone Snap-in Screen<br />
Protecting <strong>Network</strong> Resources • Chapter 3 141<br />
When you close the MMC you will be asked whether you want to save<br />
your settings. If you click Yes, you can choose a name and location <strong>for</strong> the<br />
.msc file. In this way, you can have access to an MMC with your preferred<br />
snap-ins <strong>for</strong> future use.These saved configuration files are also portable, so you<br />
could place the file on a pen drive or network share and use it on another<br />
system.This can be handy <strong>for</strong> support personnel to have access to when<br />
working on other systems, especially since the start menu shortcuts might not<br />
be available on all systems. Now that you understand the basic operation of<br />
the MMC, let’s move on to some actual hardening steps.<br />
www.syngress.com
142 Chapter 3 • Protecting <strong>Network</strong> Resources<br />
Users and Groups<br />
One of the simplest ways to define access is by configuring the user and<br />
group accounts and the rights they have.Typically you can access the users<br />
and groups configuration via the Control Panel under User Accounts.You<br />
can also access the same in<strong>for</strong>mation (in an easier-to-use <strong>for</strong>mat, at least in<br />
my opinion) within the MMC using the Local Users and Groups snap-in.<br />
If you try to use the Local Users and Groups snap-in on a domain controller,<br />
you will receive an error.You should instead use the Active<br />
Directory Users and Computers snap-in to manage your domain user<br />
and group accounts.There are a few common hardening steps you can per<strong>for</strong>m<br />
with little ef<strong>for</strong>t, which are very effective from a security standpoint.<br />
Most user and group administration will revolve around the Administrator<br />
account. On Windows, the Administrator account is a special account.<br />
Although the Administrator account is in the Administrator group, the<br />
uniqueness of the account goes far beyond that. Placing another user in the<br />
Administrator group will not give it the level of access and breadth of power<br />
that the Administrator account enjoys. Because of the privilege this account<br />
provides (similar to the root account on Linux), the Administrator account is<br />
the number-one target <strong>for</strong> attacks upon the Microsoft operating system.The<br />
name of this account is identical on every Microsoft Windows system, so<br />
everyone knows which account to attack. But we don’t have to leave it that<br />
way.You cannot delete the Administrator account, but you can rename it to a<br />
more customized (and unknown) username.<br />
A clever security technique is to rename the Administrator account.You<br />
can then create a new user account (with a username of administrator) with as<br />
little access as possible.This new Administrator account can have very thorough<br />
logging and auditing enabled <strong>for</strong> any actions this account per<strong>for</strong>ms.<br />
<strong>Using</strong> this method, all of your local technical support personnel will know<br />
about the renamed Administrator account and will not attempt to use it.<br />
There<strong>for</strong>e, the only people attempting to use the Administrator account are<br />
likely to be up to no good, or at least such account activity would be highly<br />
suspicious. Renaming the Administrator account is as simple as right-clicking<br />
the account and selecting Rename.You might also want to remove the<br />
description <strong>for</strong> the newly named Administrator account. In some environ-<br />
www.syngress.com
Protecting <strong>Network</strong> Resources • Chapter 3 143<br />
ments, the accounts are renamed to very innocuous-looking names, such as<br />
Printing or Lockout. In other environments, I have seen random-looking<br />
account names, such as XHOU923744.You can decide what strategy you<br />
want to employ. Just make sure the people who need to know can figure out<br />
the appropriate account to use.<br />
Creating a new, fake “administrator” account is simple. Just right-click<br />
Users in the tree view (the left pane of the MMC) and select New User.<br />
Enter Administrator <strong>for</strong> the account name.You could even enter Built-in<br />
account <strong>for</strong> administering the computer/domain in the description<br />
field.You can change the password to random characters, as no one should<br />
ever really be logging on using the new Administrator account anyway. If you<br />
really want to make life difficult <strong>for</strong> an attacker, you can configure the login<br />
script <strong>for</strong> the fake Administrator account to execute some type of notification<br />
program. If anyone does actually manage to log in as the new administrator, it<br />
can send an e-mail to the security team. I have also seen organizations in<br />
which the legitimate Administrator account (the renamed one) did the same.<br />
They did this because tech support personnel should never be using the local<br />
Administrator account. Instead, they should be using their own personal<br />
accounts or a separate account that possesses administrative access to the local<br />
workstations.<br />
If you wanted, you could take this concept a step further.You could<br />
require that any administrative accounts are to be used <strong>for</strong> administrative<br />
activities only and that they are not to be used <strong>for</strong> day-to-day login, even by<br />
the administrators. In this scenario, an administrator would have his normal<br />
account, which would have the same access as any other user account, and<br />
also have a unique account to use when doing administrative tasks.This<br />
unique account would have the elevated privileges that are required. Although<br />
this approach might be considered extreme, it does provide increased separation,<br />
as well as a high-quality audit trail of what high-privilege accounts are<br />
being used <strong>for</strong>. Whenever possible shared accounts should not be used<br />
(including the local administrator’s account) because, if something happens,<br />
having the audit trail tell you the local administrator account was used won’t<br />
really mean much when any number of support staff have access to the<br />
administrator password.<br />
www.syngress.com
144 Chapter 3 • Protecting <strong>Network</strong> Resources<br />
You can add a special script to the fake Administrator account by doubleclicking<br />
the account name and selecting Properties. Click on the Profile tab<br />
and enter the path to an appropriate file in the Login Script box. I have<br />
seen instances where the true Administrator account was also “trapped.”<br />
When anyone logged in with either the “fake” or the real Administrator<br />
account, a batch file was run to collect a variety of system in<strong>for</strong>mation, and<br />
then it was all e-mailed to the security team. A net send was also used to send<br />
an alert message to the entire security team. How elaborate you want to get<br />
when it comes to “trapping” the accounts is up to you.<br />
Another simple step is to disable the guest account. In an environment<br />
where you have a domain controller you want all users to log in using their<br />
domain accounts anyway.This provides <strong>for</strong> much more meaningful auditing.<br />
The only common instances where a guest account serves a useful purpose<br />
would be when the environment is completely peer-to-peer and there are no<br />
domain controllers. Even then it would be preferable to have each person log<br />
in with a unique account, although doing so would require creating the<br />
account on all the workstations to which the person needed access.You can<br />
use net user to programmatically add a user account. By entering net user<br />
newuser newpass /add at a command prompt, you can add an account,<br />
called newuser, with a password of newpass. If you add /domain to the end<br />
and execute the command on a domain controller, it will add the account to<br />
the domain instead of adding it as a local account. If you use the same command<br />
without the /add or /domain, it will allow you to change the password<br />
<strong>for</strong> the account.<br />
When it comes to account management, there is also an issue of education.<br />
It is desirable to use the actual Administrator account as little as possible.<br />
It is also desirable to per<strong>for</strong>m day-to-day operations as a standard user instead<br />
of as a user with administrative access.This limits the possibility of a virus or<br />
other malware from being able to compromise the system. When the software<br />
in question attempts to modify the Registry or per<strong>for</strong>m other actions to<br />
embed itself it would be met with inadequate privileges. Because spyware,<br />
malware, and viruses almost always require some type of elevated privileges to<br />
propagate, this mode of operation is much safer. In reality, most people know<br />
this is the recommended way to operate, but few people actually do it<br />
because of the inconvenience it can cause. Many programs are written poorly<br />
www.syngress.com
and require access only an administrator has, and still others truly require<br />
administrative access by their nature. People can quickly grow tired of not<br />
being able to run the software they want to, so they tend to revert back to<br />
just logging in as an administrative user <strong>for</strong> their day-to-day activities.<br />
Some tools, when combined with education, can help make it easier to<br />
follow best practices and limit the use of Administrator accounts.The<br />
Windows NT 4 Resource Kit included a utility called su.exe.This program<br />
allows you to execute a command as the super user, even though you are<br />
logged in as another user. More modern Windows operating systems accomplish<br />
the same functionality using the runas.exe tool. Here is the help output<br />
<strong>for</strong> runas.exe:<br />
RUNAS USAGE:<br />
RUNAS [/profile] [/env] [/netonly] /user: program<br />
/profile if the user's profile needs to be loaded<br />
/env to use current environment instead of user's.<br />
/netonly<br />
only.<br />
use if the credentials specified are <strong>for</strong> remote access<br />
/user should be in <strong>for</strong>m USER@DOMAIN or DOMAIN\USER<br />
program command line <strong>for</strong> EXE. See below <strong>for</strong> examples<br />
Examples:<br />
> runas /profile /user:mymachine\administrator cmd<br />
> runas /profile /env /user:mydomain\admin "mmc %windir%\system32\dsa.msc"<br />
> runas /env /user:user@domain.microsoft.com "notepad \"my file.txt\""<br />
By using runas, a normal (nonprivileged) user could operate safely, but still<br />
have access to elevate his privileges quickly and conveniently in order to per<strong>for</strong>m<br />
a specific task.The following command opens a command prompt as<br />
the user named test, on the lab machine:<br />
runas /user:lab\test cmd<br />
Protecting <strong>Network</strong> Resources • Chapter 3 145<br />
After executing the command, you will of course be asked to provide the<br />
password <strong>for</strong> the account you specified.This doesn’t keep the administrative<br />
staff from knowing the password <strong>for</strong> an elevated account, but at least they can<br />
use it only when needed.You can start most programs in this fashion.The<br />
www.syngress.com
146 Chapter 3 • Protecting <strong>Network</strong> Resources<br />
most common scenario where the runas command doesn’t work properly is<br />
when multiple smaller executables must be started <strong>for</strong> a single application to<br />
function properly.You could even use runas to open the MMC with administrative<br />
access, to per<strong>for</strong>m detailed administrative steps.<br />
I have seen a normal user with administrative access on many occasions.<br />
The justification was that the user used some application which required<br />
administrative access. If you’ve ever tried to figure out what access the program<br />
truly needed in order to lock it down, this can be quite a chore.<br />
Microsoft provides a diagnostics tool to help you isolate the specific access<br />
that is required. Called the Microsoft Standard User Analyzer, the tool un<strong>for</strong>tunately<br />
will run only on Windows XP or newer machines.The program also<br />
needs the Microsoft Application Verifier<br />
(www.microsoft.com/technet/prodtechnol/windows/appcompatibility/appver<br />
ifier.mspx), which is an additional download. Still, it can be a very powerful<br />
tool <strong>for</strong> locking down a standard user who happens to use a software package<br />
that “requires admin.”You run the analyzer, specify the application to run, as<br />
well as any parameters the target application needs, and then click Launch.<br />
Figure 3.3 shows the main output screen.<br />
Figure 3.3 Microsoft Standard User Analyzer<br />
www.syngress.com
While the program is running, you will want to activate as many of its<br />
functions as possible. If you do not use a particular feature or menu function,<br />
the program may not fully exercise all the access rights it needs. When you<br />
are through testing the program, stop the program manually.This will cause<br />
the analyzer to complete its analysis and show the results. Each tab contains<br />
the elevated access that the program used. In the example shown in Figure<br />
3.3, I was testing Windump, the Windows command-line sniffer. If you navigate<br />
to View | Detailed In<strong>for</strong>mation, the window will split into multiple<br />
panes showing more detailed fields explaining what type of access was<br />
requested. With the help of this tool, the odds are very good that you can<br />
have user access restricted to that of a standard user and simply grant elevated<br />
privileges where needed, rather than making the user account an<br />
Administrator account.<br />
File-Level Access Controls<br />
With all your accounts and groups organized and secured, the next step is to<br />
get more granular and look at file-level access controls.This is also the next<br />
logical step if you have used the Microsoft Standard User Analyzer and now<br />
need to modify some access within the file system.The standard way to access<br />
the file-level permission <strong>for</strong> a given directory or file is to right-click on the<br />
file or folder in Explorer and select Properties. Select the Security tab and<br />
you will be able to see the currently applied access <strong>for</strong> users and groups, as<br />
shown in Figure 3.4.<br />
As you highlight each user or group in the top pane, the assigned rights<br />
will be displayed in the bottom pane.<br />
WARNING<br />
Protecting <strong>Network</strong> Resources • Chapter 3 147<br />
Avoid the common mistake of clicking Deny when you do not want a<br />
particular user to have access to a file or directory. To remove access, you<br />
should instead remove the check in the Allow column. If the user is not<br />
granted access via the Allow column—either directly or as an inherited<br />
permission from a folder higher up—the user will not have any access.<br />
The Deny selection overrides any granted access that may be present.<br />
This particular error occurs most often when an administrator wants to<br />
remove access to a directory <strong>for</strong> the Everyone group. By clicking Deny,<br />
no one will have access, including authorized users.<br />
www.syngress.com
148 Chapter 3 • Protecting <strong>Network</strong> Resources<br />
Figure 3.4 File-Level Security<br />
By clicking the Advanced button, you gain access to several tabs with<br />
some very powerful functionality. One of those is the Permissions tab,<br />
shown in Figure 3.5.<br />
Figure 3.5 Windows Advanced Security Settings<br />
www.syngress.com
Protecting <strong>Network</strong> Resources • Chapter 3 149<br />
The Permissions tab allows you to control inheritance. With inheritance,<br />
if you grant access to a folder, it is assumed that you should have the same<br />
level of access to newly created files and folders underneath that folder.The<br />
new folders effectively inherit the same access control lists.The Replace permission<br />
entries on all child objects with entries shown here that<br />
apply to child objects checkbox allows you to do much the same thing<br />
with existing folders and files.The Auditing tab allows you to configure<br />
auditing on files or folders. Chapter 5 also covers enabling auditing on files<br />
and folders, so we won’t discuss it here.The Owner tab can be very useful to<br />
an administrator. In cases where the administrator has been denied access to a<br />
file or folder (either directly or via membership in the Everyone group), the<br />
simple method to regain control over the file or folder is to go to a level<br />
above it, where the administrator does have access, and take ownership.You<br />
can do this by navigating to the Owner tab.The administrative user you are<br />
logged in as should already be entered in the Name field. Select the<br />
checkbox that says Replace owner on subcontainers and objects and<br />
click OK. As the new owner, you will always have access.You can then edit<br />
the permissions as needed to restore proper operation.<br />
The Effective Permissions tab allows you to specify a particular group or<br />
account and generate a listing of what access users would have.This takes into<br />
account inheritance, group membership, and any explicitly defined permissions<br />
that may be present.To see the effective permissions <strong>for</strong> a user, click Select.<br />
On the next screen, you can enter the account name, or if you are unsure of<br />
the account name, you can click Advanced.This will take you to a third<br />
window that allows you to search <strong>for</strong> an account name.You can click the<br />
Object types button to limit the search to only users, groups, or built-in<br />
security principles, <strong>for</strong> example.The Locations button will allow you to<br />
choose on which system you want to search.After selecting your search criteria,<br />
you can click the Find Now button. With no search criteria defined,<br />
you will see a list of all accounts, groups, and built-in security principles <strong>for</strong><br />
the local machine. Clicking one and then clicking OK will place the name in<br />
the Select User or Group window.You can then click OK to show the<br />
effective permissions. Figure 3.6 shows the Effective Permissions window.<br />
This is an effective way to know the result of all the various levels of filters and<br />
www.syngress.com
150 Chapter 3 • Protecting <strong>Network</strong> Resources<br />
access controls.This is also one of the first places to check when a program or<br />
user action generates an access denied error when you don’t want it to.<br />
Figure 3.6 Windows Effective Permissions<br />
Sometimes you may be looking <strong>for</strong> a security issue and you want to look<br />
at all the directories, not specific directories or folders.The built-in security<br />
interfaces don’t do a very good job of allowing you to do that. Some additional<br />
utilities do, however.<br />
AccessEnum (www.microsoft.com/technet/sysinternals/Security/<br />
AccessEnum.mspx) is a GUI utility that you can use to quickly identify permissions<br />
that deviate from the norm. AccessEnum will run on Windows NT,<br />
2000, XP, and 2003. It will scan the folder you specify and all subfolders and<br />
files, and list only the ones that deviate from their parent. In this way, you can<br />
quickly see which ones have had permissions changed or modified in some<br />
fashion. AccessEnum can also scan a portion of the Registry, looking <strong>for</strong> similar<br />
permission deviations.This is a big plus because the provided interfaces<br />
<strong>for</strong> working with Registry permissions are very cumbersome. Un<strong>for</strong>tunately,<br />
AccessEnum abbreviates the access types to just Read, Write, and Deny, so it’s<br />
probably not an auditor’s best friend, but it can help you spot things that look<br />
out of place.<br />
www.syngress.com
Another handy utility is AccessChk (www.microsoft.com/technet/sysinternals/Security/AccessChk.mspx).This<br />
is a command-line program that will<br />
run on Windows 2000, XP, and 2003. AccessChk will also collapse the various<br />
permissions into a simplified read, write, and deny, but this program is still a<br />
very powerful tool <strong>for</strong> a security administrator.The following command will<br />
list the access <strong>for</strong> all files and folders at the root of the C: drive:<br />
I:\Internet\Firefox>accesschk eric c:\<br />
AccessChk v2.0 - Check account access of files, registry keys or services<br />
Copyright (C) 2006 Mark Russinovich<br />
Sysinternals - www.sysinternals.com<br />
RW c:\i386\<br />
RW c:\My Documents\<br />
RW c:\MSDOS.SYS<br />
RW c:\WINDOWS\<br />
RW c:\IO.SYS<br />
RW c:\Program Files\<br />
RW c:\Windows Update Setup Files\<br />
RW c:\boot.ini<br />
RW c:\CONFIG.SYS<br />
RW c:\AUTOEXEC.BAT<br />
RW c:\ntldr<br />
RW c:\ntdetect.com<br />
RW c:\BOOTSECT.DOS<br />
RW c:\Documents and Settings\<br />
RW c:\System Volume In<strong>for</strong>mation\<br />
RW c:\Recycled\<br />
If you add the –s switch, it will recursively list all directories, and the –v<br />
switch will cause it to list all permissions that are present, instead of just R, W,<br />
and Deny.You could easily combine this utility with a little creative programming<br />
and create a batch file that could generate some very useful security<br />
reports, as shown here:<br />
I:\Internet\Firefox>accesschk someuser I:\testfile.txt -v<br />
Protecting <strong>Network</strong> Resources • Chapter 3 151<br />
AccessChk v2.0 - Check account access of files, registry keys or services<br />
Copyright (C) 2006 Mark Russinovich<br />
www.syngress.com
152 Chapter 3 • Protecting <strong>Network</strong> Resources<br />
Sysinternals - www.sysinternals.com<br />
R I:\TestFile.txt<br />
FILE_EXECUTE<br />
FILE_LIST_DIRECTORY<br />
FILE_READ_ATTRIBUTES<br />
FILE_READ_DATA<br />
FILE_READ_EA<br />
FILE_TRAVERSE<br />
SYNCHRONIZE<br />
READ_CONTROL<br />
AccessChk will also scan the Registry, and you can specify a service<br />
instead of a username <strong>for</strong> the reporting. Several other switches not covered in<br />
this chapter add to the functionality and flexibility of AccessChk. Running<br />
AccessChk without any parameters will induce the program to output its<br />
usage text.<br />
Additional Steps<br />
There are, of course, additional steps that you can take to harden a Windows<br />
system besides tightening users and groups, and file-level permissions.As you<br />
might expect, Microsoft has the inside track on securing Windows systems.You<br />
can read some very extensive hardening guides on the Microsoft Web site. Here<br />
is a list of some of the more noteworthy security documents available:<br />
■ Windows Server 2003 Security Guide:<br />
www.microsoft.com/technet/security/prodtech/windowsserver2003/<br />
w2003hg/sgch00.mspx<br />
■ Windows XP Security Guide: www.microsoft.com/technet/<br />
security/prodtech/windowsxp/secwinxp/default.mspx<br />
■ Microsoft Windows 2000 Security Hardening Guide:<br />
www.microsoft.com/technet/security/prodtech/windows2000/<br />
win2khg/default.mspx<br />
■ The Microsoft Windows NT 4.0 and Windows 98 Threat<br />
Mitigation Guide: www.microsoft.com/technet/security/guidance/networksecurity/threatmi.mspx<br />
www.syngress.com
Although the respective guides will go into great detail on hardening the<br />
operating system you are interested in, there are, of course, many more articles<br />
on the Internet and books on the subject. Essentially you can summarize all<br />
of the hardening steps in a few high-level tasks which are the same on any<br />
operating system, and most of them do not require additional software other<br />
than what is included with the operating system.The steps are as follows:<br />
1. Remove unnecessary software.<br />
2. Disable unneeded services/daemons.<br />
3. Patch the operating system and any remaining software.<br />
4. Configure user and group accounts to provide only the minimum<br />
required access.<br />
5.Tighten operating system parameters (login requirements, timeouts,<br />
etc.).<br />
6. Configure network access to permit only the minimum required connectivity<br />
(IP/ports).<br />
<strong>Using</strong> Microsoft Group Policy Objects<br />
Protecting <strong>Network</strong> Resources • Chapter 3 153<br />
If you find yourself wanting to lock down a particular security setting, such as<br />
removing user access to a directory, you could connect to each system and<br />
edit the security properties individually. While this would work, it’s not a very<br />
efficient way of doing things. Of course, you can use the MMC to edit and<br />
control these settings individually, but you can also configure these settings<br />
and then have them applied to computers automatically.This collection of<br />
security settings is called a group policy object (GPO).You can apply a GPO to<br />
the domain level, to individual organizational units (OUs), or to individual<br />
computers. Chapter 5 covers applying a GPO to an individual computer in<br />
detail, so we won’t cover it here. Unless you have special security needs, such<br />
as <strong>for</strong> a high-risk host, you will configure most of your security policy to<br />
apply to all devices within the domain. If this is the case, the logical place to<br />
define your GPO is at the domain level.You could then address any highsecurity<br />
hosts by applying a more restrictive local policy (this policy should<br />
not include settings that conflict with the domain policy or else they will be<br />
www.syngress.com
154 Chapter 3 • Protecting <strong>Network</strong> Resources<br />
overwritten) or placing the high-security hosts in a particular OU and apply<br />
an OU GPO. Here is a step-by-step example of how this would work.<br />
1. Local policies are applied.These could be modified or just left at the<br />
default; it doesn’t really matter if you will be updating them with the<br />
domain GPO anyway.<br />
2. The domain GPO is applied to every device on the network (workstations<br />
and servers).This overwrites the local policy with settings<br />
you want applied to everyone. In effect, this acts as your security<br />
baseline.<br />
3. The GPO <strong>for</strong> the server OU is applied to the servers (or other highsecurity<br />
hosts).These devices will still have the minimum security<br />
settings from the domain GPO, but in cases where you wanted to<br />
define a more strict security setting, the OU GPO will allow you to<br />
do so.<br />
The nature of GPOs is that you will configure settings with the intent of<br />
overriding other settings. GPOs are applied in the following order: local, the<br />
site GPO, the Domain GPO, and each OU GPO working downward.<br />
Typically you configure the domain settings to intentionally override the local<br />
computer security settings. Each successive application of the GPO overrides<br />
the previous one, which also has the desired side effect that the local policies<br />
are of lowest priority.You can view the default domain policy by opening your<br />
MMC console. Add the Active Directory Users and Computers snap-in.<br />
Right-click the domain in question and select Properties. Click the Group<br />
Policy tab. Initially the window will contain only the Default Domain<br />
Policy.This represents the top level of the domain, and you can configure<br />
multiple policies here. Again, all settings you configure in the domain GPO<br />
will override any local settings.<br />
If the default domain policy does not have that particular setting configured<br />
at all, the previous policy settings will remain in effect. Because the<br />
default domain policy contains all of your default settings, you do not want to<br />
edit it directly. Instead, click on New, give the new policy a name, and then<br />
click Edit.This will place the newly created policy below the domain policy.<br />
www.syngress.com
You can use the Up and Down buttons to shift positions of the highlighted<br />
policy. As you can see in Figure 3.7, the highest policy in the list will take priority<br />
(remember all of the GPOs in this list are domain GPOs). Because any<br />
newly created policies are intended to override the default domain policy, you<br />
probably want to click Up so that your policy takes precedence over the<br />
default policy. Figure 3.7 shows the Group Policy tab showing the default<br />
domain policy.<br />
Figure 3.7 Domain GPOs<br />
Protecting <strong>Network</strong> Resources • Chapter 3 155<br />
You can follow the same procedure to add a GPO to an OU (right-click<br />
Properties | Group Policy). In this fashion, you can assign very granular<br />
policies to all your resources. If you click Edit, you are presented with the<br />
same MMC console structure as that found within the Local Computer<br />
Policy snap-in. If you were to instead edit the Local Computer Policy settings,<br />
you would be configuring a local GPO, which would be overwritten in<br />
the event of conflicting settings with the domain GPO, or an OU GPO.<br />
You may have noticed that within the Local Computer Policy snap-in<br />
there is no mechanism to export and import settings.This would imply that<br />
you have to configure any desired policies within Active Directory instead of<br />
doing so locally. Indeed, if you plan to apply the settings to all hosts, doing it<br />
within Active Directory may be a better way to do it, but there is actually a<br />
www.syngress.com
156 Chapter 3 • Protecting <strong>Network</strong> Resources<br />
way to configure the desired settings and then export them <strong>for</strong> use on<br />
another machine’s local GPO.You do this through either the GUI or the<br />
command line.The GUI is, of course, the MMC.You will need to add the<br />
Security Configuration and Analysis and, optionally, the Security<br />
Templates snap-ins to your console.<br />
In order to import settings from another system, you have to have configured<br />
the desired settings at some point.To do this you use the Security<br />
Templates snap-in. A template is simply a preconfigured collection of settings.<br />
You can, of course, edit the templates to your taste, or create your own.The<br />
following is a brief summary of the templates included with Windows XP:<br />
■ compatws. Relaxes the default file and Registry permissions <strong>for</strong><br />
the Users group.<br />
■ hisecdc. Provides further restrictions on LanManager authentication<br />
and further requirements <strong>for</strong> the encryption and signing of secure<br />
channel and SMB data above and beyond what is configured within<br />
the securedc template.<br />
■ hisecws. Provides further restrictions on LanManager authentication<br />
and further requirements <strong>for</strong> the encryption and signing of<br />
secure channel and SMB data above and beyond what is configured<br />
within the securews template.<br />
■ rootsec. Will reset the default permissions on the drive roots and<br />
propagate those permissions to child objects. Use with caution.<br />
■ securedc. A “secure domain controller” template that will configure<br />
tighter restrictions on domain account policies and additional restrictions<br />
on anonymous users.<br />
■ securews. A “secure workstation” template that will configure<br />
tighter restrictions on local account policies and additional restrictions<br />
on anonymous users.<br />
■ setup security. Holds the default settings and is usually a good<br />
place to start if you’re not sure which template to use.<br />
Figure 3.8 shows the Security Templates snap-in. If you want to create<br />
your own template, or make any changes to one of the default templates, you<br />
www.syngress.com
should make a copy and work from that one so that you always have the<br />
original if you need it.You can copy the Setup Security template by rightclicking<br />
and selecting Save As.You can edit the settings in the template by<br />
drilling down using the Security Templates snap-in. After making changes, be<br />
sure to save the template. Because these templates are simply ASCII files, you<br />
can open a template to use the settings on different computers. If you can edit<br />
the security settings and import and export them using the Security Templates<br />
snap-in, you might be wondering why you would need the Security<br />
Configuration and Analysis snap-in.You need it because there is no way to<br />
apply the templates using the Security Templates snap-in.<br />
Figure 3.8 Security Templates MMC Snap-in<br />
Protecting <strong>Network</strong> Resources • Chapter 3 157<br />
In order to apply the settings in a security template, right-click on the<br />
Security Configuration and Analysis snap-in and select Open<br />
Database. Since this is the first time you’re configuring the settings, you will<br />
be creating a new database. Enter a meaningful name ending in .sdb and click<br />
Open.You will be prompted to import a template.This is where you can<br />
import the custom template you configured previously. Once you do this, you<br />
www.syngress.com
158 Chapter 3 • Protecting <strong>Network</strong> Resources<br />
can apply your template by right-clicking the Security Configuration and<br />
Analysis snap-in again, and this time select Import Template.The various<br />
settings will populate within the snap-in.This provides you with yet another<br />
opportunity to edit the security settings.The settings are still not applied,<br />
however.The final step to commit the settings is to right-click again and<br />
select Configure Computer Now. All of the settings configured within the<br />
template will be applied. Depending on the number of nondefault settings<br />
this step could take a few minutes to complete.<br />
Should the need arise, you also have the ability to create a template based<br />
on the current policy settings of the local system.You can do this using the<br />
Security Configuration and Analysis snap-in. Right-click the snap-in and<br />
select Analyze Computer Now. Choose a filename and path <strong>for</strong> the log<br />
file, or just accept the default and click OK.This will reveal several expandable<br />
items, all under Security Configuration and Analysis.These settings represent<br />
what is currently configured.To save these settings as a template,<br />
right-click and select Export Template.The most common reason to work<br />
from the current policy template and change it would be if you wanted to<br />
make incremental changes in a very controlled fashion.This would carry less<br />
risk of breaking something than applying any of the pregenerated templates if<br />
the system has undergone significant policy adjustments since it was originally<br />
installed.<br />
Microsoft also provides a command-line utility called secedit.exe which you<br />
can use to import and export policy settings. In order to export a policy template<br />
using secedit, you must start by analyzing the current settings against a<br />
template. <strong>Using</strong> secedit /analyze /db C:\export.sdb /cfg C:\test.inf would instruct<br />
secedit to analyze the current local policy, using the test.inf template.The<br />
results will be stored in a database file called C:\export.sdb.To export the settings<br />
to an .inf file that you can import, you would use secedit /analyze /db<br />
C:\export.sdb /cfg C:\test.inf.<br />
NOTE<br />
If you try to export the setting and the file ends up being empty, you<br />
will be experiencing a known bug with secedit. The bug is caused<br />
because XP stores the security in<strong>for</strong>mation in a different location than<br />
secedit is looking <strong>for</strong> it (secedit was originally developed <strong>for</strong> Windows<br />
www.syngress.com
2000). A hotfix is available to fix the issue, and it’s basically is just a<br />
newer version of seced.exe. See the Knowledgebase article ID 897327 at<br />
http:///support.microsoft.com/kb/897327 <strong>for</strong> more in<strong>for</strong>mation on the<br />
bug with secedit.<br />
Account Lockout Policy<br />
Protecting <strong>Network</strong> Resources • Chapter 3 159<br />
Now that you are familiar with GPOs and how to apply them, we will discuss<br />
a few policy settings that you may want to consider implementing, either at<br />
the domain level or with local GPOs.The account lockout policy<br />
(\Computer Configuration\Windows Settings\Security Settings\Account<br />
Policy\Account Lockout Policy) allows you to configure the number of<br />
incorrect passwords that a user can enter be<strong>for</strong>e being locked out of an<br />
account, how long the account stays locked out, and how long be<strong>for</strong>e the<br />
lockout counter will reset.The following recommended settings will provide<br />
the most security in an average environment:<br />
■ Account Lockout Duration represents how long the account will<br />
stay locked out. Setting this to zero means that the account will stay<br />
locked out until an administrator manually unlocks it.This is the<br />
most secure option. However, even allowing the account to reset after<br />
as little as 10 minutes will serve to slow down a hacker who is<br />
attempting to brute <strong>for</strong>ce the password.<br />
■ Account Lockout Threshold represents how many invalid passwords<br />
a user can attempt be<strong>for</strong>e locking out the account. A setting of<br />
three invalid logon attempts is usually considered adequate. If the<br />
number is too low, a simple typo could result in an account being<br />
locked out. If this is set to 0 (insecure), the account will never be<br />
locked out.<br />
■ Reset Account Lockout Counter After determines how long<br />
be<strong>for</strong>e the invalid attempt counter is reset.The default setting of 30<br />
minutes is usually adequate. A longer setting is considered more<br />
secure.<br />
www.syngress.com
160 Chapter 3 • Protecting <strong>Network</strong> Resources<br />
Figure 3.9 shows the account lockout policy setting and MMC console.<br />
Figure 3.9 Account Lockout Policy<br />
Audit Policy<br />
Chapter 5 covers the specific settings <strong>for</strong> controlling various aspects of your<br />
auditing settings. Don’t <strong>for</strong>get that the audit trail you configure can help you<br />
catch a hacker, and sometimes help you troubleshoot issues. Having extensive<br />
auditing of failed access attempts, <strong>for</strong> example, can sometimes help you isolate<br />
a rights issue that is keeping software from properly running. Refer to<br />
Chapter 5 when configuring your policy <strong>for</strong> auditing.<br />
User Rights Assignment<br />
The list of configurable events under user rights assignments is extensive.<br />
These settings (Local Computer Policy\Computer Configuration\Windows<br />
Settings\Security Settings\Local Policies\User Rights Assignments) allow you<br />
to configure what users (including the accounts processes run as) can do.<br />
Many of these settings are used only in unusual circumstances to allow particular<br />
software to run. Rather than elaborate on all of the specific settings in<br />
this category, we will examine only the most significant configurable events and<br />
recommend the most secure settings <strong>for</strong> the majority of environments:<br />
www.syngress.com
Protecting <strong>Network</strong> Resources • Chapter 3 161<br />
■ Access This Computer from the <strong>Network</strong>. You can safely set<br />
this to Authenticated Users and remove all other access.You should<br />
make certain that ANONYMOUS LOGON is not in the allowed<br />
list. In some cases it is more secure to remove the ability to log on<br />
locally <strong>for</strong> normal users. For example, a nonadministrator account<br />
really has no reason to need to log on to your domain controller.<br />
■ Act As Part of the Operating System. No accounts should need<br />
this privilege. It allows a user to impersonate any other user on the<br />
system without authentication.This would pose a huge security risk,<br />
and it would render your other auditing events meaningless. If an<br />
application needs this type of access to function properly, it should<br />
use the LocalSystem account, which includes this access by default.<br />
■ Bypass Traverse Checking. This setting allows a user to navigate<br />
through directory trees even if the user does not have access to a<br />
directory. It does not allow the user to list the directory contents of a<br />
directory to which he does not have the appropriate rights.You<br />
should set this to Administrators Only.<br />
■ Change the System Time. While setting the time might not seem<br />
important at first glance, setting it incorrectly can create a huge security<br />
hole. If you do not set the time correctly, certain encryption systems<br />
such as IPsec will fail. Further, it becomes impossible to<br />
accurately correlate event logs, and critical transactions could fail,<br />
causing a denial of service <strong>for</strong> legitimate traffic.You should set this<br />
setting to Administrators Only.<br />
■ Create Token Object. This setting allows an account to create a<br />
token that can be used to gain access to any system resource.You<br />
should not need to set this right manually on any account. If you<br />
need this right, you should assign it to the LocalSystem account.<br />
■ Debug Programs. This right will allow a user to attach a debugger<br />
to a process which, in turn, will give the user access to many sensitive<br />
internal resources.You should assign this right with great care.<br />
Usually you will not need it on a production host anyway.<br />
www.syngress.com
162 Chapter 3 • Protecting <strong>Network</strong> Resources<br />
■ Deny Access to This Computer from the <strong>Network</strong>. This<br />
should include the local Administrator account.There is no legitimate<br />
need <strong>for</strong> the local account to access the system over the network.<br />
■ Deny Logon as Batch Job, and Deny Logon as Service. You<br />
should set both of these to the local administrator. By doing this, you<br />
ensure that if the local Administrator account is compromised, the<br />
attacker will not be able to immediately install a service or batch job<br />
to further compromise system security.<br />
Security Options<br />
This group of settings is also extensive (Local Computer Policy\Computer<br />
Configuration\Windows Settings\Security Settings\Local Policies\Security<br />
Options) and offers important security settings that impact the entire system,<br />
instead of individual accounts. For most of these settings, the purpose and<br />
function will be fairly obvious, but a brief description should hopefully clear<br />
up any lingering doubts.The following list represents the settings that are the<br />
most important <strong>for</strong> securing your systems:<br />
■ Do not display last username in logon screen. You should set<br />
this to Enabled. By displaying the last user to log on, you are giving<br />
any attacker that can get to that logon screen a first clue as to what a<br />
viable account name to attack might be.This may not prevent<br />
attempts by attackers who have done some reconnaissance, but it will<br />
not provide 50 percent of the credentials to be available to the casual<br />
attacker.<br />
■ Message text <strong>for</strong> users attempting to log on. You will see this<br />
message when someone attempts to log on to the console directly<br />
(after entering Ctrl + Alt + Delete).This setting, also known as the<br />
logon banner, gives some legal protection against unauthorized access.<br />
Fill this in with a message stating that only authorized users should<br />
be accessing the system.<strong>Your</strong> organization’s IT security staff and its<br />
legal department should work together to develop a suitable message.<br />
The purpose of this message is primarily to remove attackers’ claims<br />
that they didn’t know they were doing anything wrong.<br />
www.syngress.com
TIP<br />
Protecting <strong>Network</strong> Resources • Chapter 3 163<br />
■ Message title <strong>for</strong> users attempting to log on. This is the title<br />
<strong>for</strong> the preceding message. Something suitably ominous such as<br />
“Warning” or “Authorized Users Only” should be adequate.<br />
Consult your legal department to be safe.<br />
■ Number of previous logons to cache (in case domain controller<br />
is not available). If this is a stand-alone server, there should<br />
be no credentials to cache and you can set this to zero (which disables<br />
caching). Even if you are using domain authentication on your<br />
bastion host, the most secure setting is a setting of 0.<br />
■ Rename Administrator account. As mentioned earlier, the local<br />
Administrator account is the most popular user account <strong>for</strong> attack.<br />
Changing this account name to something other than the default can<br />
help prevent the success of some automated attacks, such as an automated<br />
password-cracking attack against the local Administrator<br />
account.You should avoid any obvious alternatives, such as “Admin”<br />
or “root.”<br />
■ Rename Guest account. For the same reasons as the<br />
Administrator account, you should select this option as well. While<br />
the Guest account has few privileges, it can still provide a local logon<br />
account and act as a first step toward elevating an attacker’s privileges.<br />
Code Red, <strong>for</strong> example, adds Guest to the local Administrators<br />
group. Since this account name is mentioned specifically in Code<br />
Red’s payload, merely renaming this account would prevent such a<br />
group membership modification from succeeding.<br />
While some of the policy settings will take effect immediately, some will<br />
take effect only after the system is rebooted. For this reason, you should<br />
immediately reboot after making any policy changes to ensure that the<br />
changes take effect.<br />
www.syngress.com
164 Chapter 3 • Protecting <strong>Network</strong> Resources<br />
Hardening Linux Systems<br />
When you install a given Windows operating system (OS), you will always get<br />
the same basic installation <strong>for</strong> that version of OS, including the default security<br />
settings. Basically, all versions of Windows XP are the same out of the<br />
box, unless your have customized the installation yourself. With Linux, this<br />
isn’t true. Some distributions you install are very secure as part of their default<br />
configuration and others are very insecure. At a high level, the hardening steps<br />
remain the same <strong>for</strong> Linux as they do <strong>for</strong> Windows, but some of them may be<br />
done <strong>for</strong> you to a greater or lesser extent.The following list represents the<br />
high-level hardening tasks that you would need to per<strong>for</strong>m:<br />
■ Remove unnecessary software.<br />
■ Disable unneeded services/daemons.<br />
■ Patch the operating system and any remaining software.<br />
■ Configure user and group accounts to provide only the minimum<br />
required access.<br />
■ Tighten operating system parameters (login requirements, timeouts,<br />
and so on).<br />
■ Configure network access to permit only the minimum required<br />
connectivity (IP/ports).<br />
These are the same steps you would per<strong>for</strong>m to harden a Windows<br />
system. A special-purpose distribution, such as the Smoothwall firewall, per<strong>for</strong>ms<br />
most of these steps except <strong>for</strong> applying the latest patches as part of the<br />
basic installation. At the other end of the spectrum are distributions that<br />
emphasize user friendliness, such as Ubuntu or Red Hat. If a default install is<br />
per<strong>for</strong>med with these types of distributions there will be a lot of hardening<br />
work left to do. As such, they may not represent the best choice in a highsecurity<br />
environment.<br />
General Hardening Steps<br />
Some of the most basic ways to implement logical access controls is through<br />
the use of users and groups (to establish authentication), and then to apply<br />
www.syngress.com
file-level access controls based on those identities.The basic procedures are<br />
the same <strong>for</strong> Linux as they are <strong>for</strong> Windows, but the commands are different,<br />
of course. We will walk through how to create users and groups, assign users<br />
to groups, and grant access to users and groups within the file system.<br />
Users and Groups<br />
Most Linux distributions that include a GUI will include a GUI interface <strong>for</strong><br />
managing users and groups in addition to the normal command-line tools. If<br />
you have access to a GUI utility, that will probably be the easiest way to configure<br />
your users and groups.The only time the command line would be<br />
preferable would be if you need to make a large number of changes at one<br />
time. <strong>Using</strong> Fedora Core 5, you can navigate to System | Administration<br />
| Users and Groups to open the GUI interface <strong>for</strong> the User Manager, as<br />
shown in Figure 3.10.<br />
Figure 3.10 Linux GUI User Manager<br />
Protecting <strong>Network</strong> Resources • Chapter 3 165<br />
The interface probably looks a little “busier” than the Windows interfaces,<br />
but managing users isn’t too difficult. Let’s start by looking at the GUI to see<br />
what in<strong>for</strong>mation we have available. First, you can see that this system has several<br />
users created, including ones named user, sguil, and snort.You may notice<br />
that the root user is missing from the list.There are actually an additional 40<br />
www.syngress.com
166 Chapter 3 • Protecting <strong>Network</strong> Resources<br />
or so accounts, but you have to navigate to Preferences and remove the<br />
checkmark next to Filter system users and groups in order to see them in<br />
the list.The User ID was automatically generated <strong>for</strong> these accounts, incrementing<br />
them from 500 upward.The user ID is analogous to the username, in<br />
that it is a unique identifier <strong>for</strong> a user; however, the system will use the user<br />
ID to track file and directory permissions.<br />
If you click Add User you are presented with a window offering all the<br />
standard fields, including User Name, Full Name, Password, and so on.This<br />
process is very straight<strong>for</strong>ward and doesn’t really need much explanation. After<br />
you create a user, you can highlight the user in the list and click Properties.<br />
The tabbed window shown in Figure 3.11 allows you to set various options,<br />
including an expiration time <strong>for</strong> the account, which can be valuable when<br />
you have temporary staff or other accounts you need <strong>for</strong> only a limited time.<br />
Figure 3.11 Linux GUI User Properties<br />
Other tabs allow you to change the password (User Data), configure password<br />
aging policies (Password Info), and assign users to groups (Groups). All<br />
of this may seem overly simplistic, but that’s because a lot of things were done<br />
automatically by using the GUI.You may not always have the GUI available,<br />
and being able to quickly add a user from the command line can be a valuable<br />
ability.You can add a user via the command line with the adduser command.<br />
A simple example is adduser test2.This will create a new user named<br />
www.syngress.com
test2, and it will use the defaults <strong>for</strong> all the other required settings. In most<br />
cases, this will also create the user directory at /home/test2, though you can<br />
override this behavior with the –M switch.You can set a password <strong>for</strong> the<br />
new account using passwd test2, after which you will be prompted to enter<br />
the new password and then confirm the new password.<br />
Every user account that you create must belong to at least one group. By<br />
default, a group will be created with the same name as the newly created user<br />
account.There is no “everyone” group, like there is in Windows, so if you<br />
need a global account to which to assign broad access rights you have two<br />
choices.You can create a group yourself and assign the required access to that<br />
group, or you can rely on the access that is granted when no other access has<br />
been explicitly defined. In my experience, one of the most difficult things<br />
about using Linux is that if you are not familiar with the various commands<br />
to use, finding them can be difficult. For this reason, I have compiled the following<br />
list of the various user/group administration commands dealing with<br />
user or group administration that are both most useful and most likely to be<br />
supported on a variety of Linux distributions:<br />
■ adduser/useradd. adduser test will add a user to the system named<br />
test.<br />
■ chage. Used to change the time the user’s password will expire and<br />
various other parameters related to password aging.<br />
■ chown. Changes the owner of the file(s) to another user. <strong>Using</strong><br />
chown test file.txt would change the owner of file.txt to the user test.<br />
■ gpasswd. Allows you to add or remove users from groups. <strong>Using</strong><br />
gpasswd –a test test2 would add the test user to the test2 group. <strong>Using</strong><br />
–d will delete a user from a group.<br />
■ groupadd. Creates a new group.<br />
■ groupdel. Deletes a group.<br />
■ groups. Prints all the groups a user is in.<br />
■ id. Prints the real and effective user id and group ids.<br />
Protecting <strong>Network</strong> Resources • Chapter 3 167<br />
■ passwd. Set a user’s password. Use passwd newuser to set the newuser’s<br />
password.<br />
www.syngress.com
168 Chapter 3 • Protecting <strong>Network</strong> Resources<br />
■ su. Allows you to change the effective user and group of the current<br />
user. Entering su testuser would change the current user to testuser.If<br />
the current user is root, no password will be needed.The –m option<br />
will preserve the original user’s environment variables instead of<br />
resetting them.<br />
■ userdel. Deletes a user account.<br />
■ usermod. Allows you to configure various settings <strong>for</strong> a given user<br />
account.<br />
File-Level Access Controls<br />
Linux file permissions are the source of a lot of frustration <strong>for</strong> those not<br />
familiar with Linux.The system, while elegantly simple, is not intuitive.To<br />
help sort it out, we will again start with the GUI interface. Open the GUI<br />
file manager <strong>for</strong> your distribution, right-click on a file, and select Properties.<br />
The window you see should look similar to the one shown in Figure 3.12.<br />
Figure 3.12 Linux GUI File Permissions<br />
You can clearly see the file owner and the group to which the file<br />
belongs.The next section lists which permissions (read, write, and execute)<br />
the file owner, file group, and all others have to the file.The special flags sec-<br />
www.syngress.com
tion lists whether the set user ID, set group ID, or sticky bit is set.These bits<br />
are important, so we will discuss them in detail.The last section, with the text<br />
view and number view, displays the respective views <strong>for</strong> the file permissions<br />
listed above. We will explore those as well, but <strong>for</strong> now, just make note of<br />
them.<br />
The set user ID and set group ID bits are also referred to as the SUID and<br />
SGID bits. In simple terms, the SUID bit causes a given file/application to<br />
run as the user who is the owner of the file, rather than the user who is executing<br />
the file. Most often this is used to allow a normal, nonprivileged user<br />
to run a script or process requiring root access.The first thing that comes to<br />
most people’s minds is that this would be a big security risk. Well, like so<br />
many other things, it can be a big risk, but it can also increase security. An<br />
obvious example of a big security risk would be one where the application or<br />
script is interactive, or allows manipulation of other system parameters.<br />
Obviously, allowing an unprivileged user to run a file manager as the root<br />
user would be a big security risk. Many security scanners will report the<br />
number of SUID files which are also owned by root <strong>for</strong> exactly this reason.<br />
The following command would search the entire file system from the root <strong>for</strong><br />
files that are owned by root, and have the SUID bit set:<br />
find / -type f –perm /4000 –uid 0 -ls<br />
Protecting <strong>Network</strong> Resources • Chapter 3 169<br />
Find is the utility that is doing the searching (type man find at the Linux<br />
command prompt <strong>for</strong> more in<strong>for</strong>mation).The type –f option says to look <strong>for</strong><br />
normal files (instead of named pipes and other, more unusual options).The<br />
–perm option specifies that we are looking <strong>for</strong> the SUID bit being set.The<br />
–uid option specifies the owner as user ID 0, which is always root. Finally, –ls<br />
tells find to <strong>for</strong>mat the output such that all unusual characters are escaped.<br />
This is <strong>for</strong> your own protection in case any filenames are using nonprinting<br />
characters that could cause problems within your terminal.You can use the<br />
same command with –perm /2000 to list the SGID files belonging to the root<br />
group.<br />
SUID can increase your security as well. Suppose you have a program or<br />
script that you want the user to run, to per<strong>for</strong>m some administrative task<br />
automatically. If this program requires root permissions to function properly,<br />
you would have to give the user the root password, or run the program yourself.<br />
Instead, the administrator can set the program SUID bit and make root<br />
www.syngress.com
170 Chapter 3 • Protecting <strong>Network</strong> Resources<br />
the owner, allowing the user to run the program without ever needing to<br />
know the root user password. Basically, whether SUID is an asset or a liability<br />
depends on the program to which it is attached.The SGID bit does the same<br />
thing, except the program is run as the owning group. All of the same security<br />
considerations apply <strong>for</strong> SGID as <strong>for</strong> SUID.<br />
The sticky bit is much less interesting than it sounds. When set, it tells the<br />
operating system not to unload the executable from memory after a user<br />
closes it. In this fashion, the program (the sticky bit applies only to executable<br />
files) will now start faster.This can have some security implications, but in<br />
reality, is it not used much anymore and is mostly a holdover from when<br />
Linux was intended to serve as a multiuser operating system.<br />
With those special bits out of the way, let’s look at the basic file system<br />
permissions.You can list the files in a directory in long list <strong>for</strong>mat, including<br />
the detailed file permissions, using ls –o:<br />
ls –o<br />
total 116<br />
drwxr-xr-x 5 root 4096 Dec 9 00:10 Desktop<br />
-rw-r--r-- 1 test 164 Dec 8 23:32 file (copy).txt<br />
-rwSr--r-- 1 test 164 Dec 8 23:32 file.txt<br />
-rw-r--r-- 1 root 26225 Sep 9 14:37 install.log<br />
-rw-r--r-- 1 root 3973 Sep 9 14:36 install.log.syslog<br />
You’ll notice that the file.txt file we looked at earlier is different from all<br />
the rest.The leftmost column contains the permissions <strong>for</strong> the file, and the<br />
series of dashes and letters corresponds to the grid of checkboxes in the GUI<br />
permissions tab.The breakdown of the permissions designations is as follows.<br />
1222333444<br />
1. This first character designates the object type. Usually the object is a<br />
directory (d), but other options are possible, such as a socket (s) or a<br />
named pipe (p). A directory will contain a d in the leftmost position.<br />
2. The next three characters indicate the permissions granted to the<br />
owner of the object (r = read, w = write, x = execute). x is replaced<br />
with S when the SUID bit is set.<br />
www.syngress.com
3. These characters represent the permissions granted to the group the<br />
object belongs to, using the same rwx notation.The x bit is replaced<br />
with an s when the SGID bit is set.<br />
4. These last characters indicate the permissions granted to users who<br />
are neither the object owner nor in the object’s group.The rwx notation<br />
is the same.The x is replaced with a t when the sticky bit is set.<br />
If you refer back to the file permissions in Figure 3.12, you will notice<br />
that the “number view” is listed.This is actually yet another way to represent<br />
file permissions. As you check or uncheck the various permissions, the<br />
number view will be updated and will display the new number view. If the<br />
pattern to the numbers is a little hard to sort out, here is how it works.The<br />
rightmost digit indicates the permission <strong>for</strong> “other” users.The next character<br />
to the left represents the permissions <strong>for</strong> the group, and the next one to the<br />
left represents the permissions <strong>for</strong> the object owner. Read access corresponds<br />
to a 4, write corresponds to a 2, and execute to a 1. Each of these (rwx) is<br />
added together to indicate the access.Thus, read access by the owner, group,<br />
and other would be 444 <strong>for</strong> the rightmost numbers. Read and write access<br />
<strong>for</strong> all three would be 666, and finally, rwx <strong>for</strong> all three would be represented<br />
numerically as 777.You can use the chmod utility to change the permissions<br />
on a file from the command line, as shown here:<br />
# ls file.txt –o<br />
-r--r--r-- test 164 Dec 8 23:32 file.txt<br />
# chmod 777 file.txt<br />
# ls file.txt –o<br />
-rwxrwxrwx test 164 Dec 8 23:32 file.txt<br />
Protecting <strong>Network</strong> Resources • Chapter 3 171<br />
Administering Linux file permissions is not more difficult than doing so<br />
<strong>for</strong> a Windows file system, but there are a lot of utilities involved when<br />
administering from the command line. Understanding permissions will be<br />
essential to properly lock down users and restrict their access to only the minimum<br />
that is needed. For more advanced configuration suggestions, you<br />
might want to research the following commands related to disk usage quotas:<br />
quota, quotaoff, quotaon, quotacheck, repquota, and edquota.You also can enable<br />
process accounting using the accton command.<br />
www.syngress.com
172 Chapter 3 • Protecting <strong>Network</strong> Resources<br />
<strong>Using</strong> the Bastille Hardening Script<br />
There are many settings to configure when it comes to hardening your Linux<br />
distribution, and all you have to do is miss one setting and a hacker can compromise<br />
the system.To help combat this, many people have developed semiautomated<br />
scripts to help harden a Linux system.These scripts basically just<br />
make a bunch of configuration changes automatically based on configuration<br />
selections that you would have otherwise had to make manually. One of the<br />
oldest hardening scripts, and thus one of the most mature and well developed,<br />
is the Bastille Linux script. It has evolved from a crude basic script to a wellrefined<br />
hardening system with a GUI interface. Bastille currently supports<br />
Red Hat Enterprise Linux, Fedora Core, SuSE, Debian, Gentoo, Mandrake,<br />
and HP-UX, with a Mac OS X version in development.You can read and<br />
download Bastille from www.bastille-linux.org.<br />
You can pass only three options to Bastille, each of which tells it to run in<br />
a different mode. If you use bastille --report it will generate a Web-based report<br />
of your current “hardness.”The –c option will run the actual hardening script<br />
in a text-based mode, and –x will run it in a graphical mode, as shown in<br />
Figure 3.13.<br />
Figure 3.13 Bastille Graphical Configuration<br />
www.syngress.com
All you have to do to use Bastille is start it up, and it will present a series<br />
of yes/no questions to which you must respond. Based on your answers, it<br />
will configure various security settings automatically.These settings include<br />
removing SUID bits from some programs, disabling insecure services (such as<br />
rshell, <strong>for</strong> example), changing user account expiration, and much more.The<br />
script does a good job of presenting you with reasonable defaults, providing<br />
the most secure option that will not overly impact normal usage of the<br />
system. When you are finished answering the questions, you will be prompted<br />
to choose whether to save the resulting Bastille configuration. Note that<br />
saving the configuration is not the same as applying it, as the next question is<br />
whether you want to apply the configuration.<br />
Bastille is a powerful tool that helps harden a default install. Depending on<br />
your selections, you can easily make a system too secure and unsuitable <strong>for</strong><br />
use as an everyday workstation. A little experimentation, combined with<br />
reading the excellent explanations that Bastille provides, should help you<br />
create a very secure system with a minimal amount of ef<strong>for</strong>t.<br />
<strong>Using</strong> SELinux<br />
Protecting <strong>Network</strong> Resources • Chapter 3 173<br />
SELinux stands <strong>for</strong> security-enhanced Linux, and it was developed in partnership<br />
with the National Security Agency (NSA). It provides a higher level of security<br />
by en<strong>for</strong>cing mandatory access controls (MAC) through the kernel.<br />
Mandatory access controls are very different from the standard discretionary access<br />
controls. Most systems are said to use discretionary access controls because<br />
someone (the file owner, or the root/administrator user account) has discretion<br />
over who has access to what. Mandatory access control is based on the<br />
principle that a given role has predetermined access rights, and these are<br />
immutable. Basically, the only way to change access permissions is <strong>for</strong> the user<br />
to be assigned to a new role (called contexts in SELinux terminology). Because<br />
the en<strong>for</strong>cement is through the kernel, it can restrict the actions of any process,<br />
even a process run by the root user. As far as the underlying components<br />
of SELinux are concerned, there is no concept of a root user, only security<br />
policies and security contexts. SELinux is available <strong>for</strong> many Linux distributions<br />
(see which ones at http://selinux.source<strong>for</strong>ge.net/distros/redhat.php3).<br />
SELinux is installed by default (though disabled) on Fedora Core 5.You can<br />
www.syngress.com
174 Chapter 3 • Protecting <strong>Network</strong> Resources<br />
read the SELinux FAQ from the NSA at www.nsa.gov/selinux/info/faq.cfm<br />
<strong>for</strong> more in<strong>for</strong>mation.<br />
SELinux is a work in progress. Currently the setup and configuration<br />
can be rather complicated.You can enable SELinux on Fedora Core by navigating<br />
to System | Administration | Security Level and Firewall.<br />
On the SELinux tab, you enable SELinux by changing the SELinux<br />
Setting from Disabled to En<strong>for</strong>cing or Permissive and clicking OK,as<br />
shown in Figure 3.14.<br />
Figure 3.14 Enabling SELinux<br />
SELinux uses the xattr labels within the file system to generate labels<br />
describing the security context of a file or directory which are persistent<br />
across reboots.These labels are not normally used; thus, when you enable<br />
SELinux, you will get the warning dialog shown in Figure 3.15.You must<br />
select Yes in order to enable SELinux.Then click OK on the Security<br />
Level Configuration window, and then reboot.<br />
It is recommended that you select Permissive initially, in which case the<br />
system will generate logs based on the configured SELinux policy but will not<br />
actually restrict any activities.This allows you to see the impact of a policy<br />
without impacting productivity.You can then use the results of the log files to<br />
adjust your policy until it is usable. Once you are satisfied with the SELinux<br />
rules, you can enable en<strong>for</strong>cing mode, which will actually apply your configured<br />
policy.You can define your policies as targeted or strict.A strict policy<br />
www.syngress.com
applies to all processes and files on the system, and a targeted policy is applied to<br />
only specific files. Strict mode is very difficult to configure properly.Targeted is<br />
easier to configure and is the default policy type when SELinux is first enabled.<br />
You can check the status of SELinux by typing sestatus.<br />
Figure 3.15 Relabel Warning Dialog<br />
Protecting <strong>Network</strong> Resources • Chapter 3 175<br />
If you navigate back to the Security Level Configuration window, and<br />
then click to expand Modify SELinux Policy on the SELinux tab, you will<br />
be presented with a list of options to toggle various SELinux settings.These<br />
options represent only a limited set of preconfigured choices to toggle settings<br />
in the SELinux policy files. For any serious configuration, you will need to<br />
edit the files manually.You can also download a third-party SELinux policy<br />
editor from the SELinux Policy Editor Project (http://seedit.source<strong>for</strong>ge.<br />
net/index.html).This package includes a simplified set of tools that is slightly<br />
less functional than the normal package.You can, however, switch between<br />
using one or the other.<br />
You can see what actions the policy would have denied if it were en<strong>for</strong>ced<br />
by reviewing the logs.You can find log messages from SELinux in /var/<br />
log/messages or /var/log/audit/audit.log. Enabling SELinux is not a project<br />
to be undertaken lightly. Implementing SELinux in a manner that is both<br />
useful and functional will likely require a good deal of investigation and<br />
research. It is recommended that you read the documentation on the Web site<br />
of your chosen distribution if SELinux is supported, as well as the documentation<br />
on the official SELinux Web site (www.nsa.gov/selinux).<br />
Hardening Infrastructure Devices<br />
Don’t overlook hardening your infrastructure devices. Not all routers and<br />
switches have administrative capability, but many do. For those that do,<br />
www.syngress.com
176 Chapter 3 • Protecting <strong>Network</strong> Resources<br />
referred to as managed devices, they usually allow you to control many aspects<br />
of the device, including redirecting traffic to ports of your choosing and basically<br />
enabling or disabling all traffic flow through the device. Given the often<br />
central role these devices fulfill in your network, control over one of them<br />
will often mean control over your entire business. For this reason, you should<br />
exercise the same care and due diligence in securing your infrastructure<br />
devices as you would your critical servers.The same high-level bullets <strong>for</strong><br />
hardening host-based systems also apply to managed infrastructure devices.<br />
Most managed devices will have a means to authenticate using a local<br />
account as well as a central authentication server, such as TACACS or<br />
RADIUS. Ensure that the accounts are secured and a high-quality password is<br />
used. Sometimes even routers and switches will have unneeded services<br />
installed by default. One common example is enabling an HTTP interface <strong>for</strong><br />
managing the devices. While this can certainly be handy, often the Web interface<br />
opens up an entire category of potential security risks that would not<br />
otherwise be present.The highest level of security is achieved by disabling any<br />
services that are not needed. Conservative timeouts <strong>for</strong> abandoned sessions<br />
and a login warning banner are advisable security measures.<br />
You will also need to update the software on the device. Given the criticality<br />
and potential scope of impact <strong>for</strong> these devices if an update causes a<br />
problem, these devices are rarely configured to update automatically. In most<br />
cases, this will be a manual process which you must incorporate into your<br />
patch management and change management processes. Pay extra attention to<br />
any device connected to the Internet as these are going to be attacked on a<br />
regular basis.You must secure them be<strong>for</strong>e you connect them to the Internet,<br />
or you will likely lose control of them in short order.<br />
Patching Systems<br />
Patching systems is an age-old chore that no one likes. Besides the time and<br />
labor involved, sometimes an update will actually do more harm than good,<br />
breaking some functionality or, in a worst-case scenario, rendering the system<br />
unusable and requiring a complete rebuild. While both the labor involved and<br />
the number of adverse reactions to patches have decreased as patching<br />
methodologies have matured, it is still not a fun task. In this section, we will<br />
look at ways to keep your systems patched with a minimal amount of ef<strong>for</strong>t.<br />
www.syngress.com
Patching Windows Systems<br />
Windows systems are known <strong>for</strong> breaking from updates.This is true to some<br />
degree with patches, but service packs (which are nothing more than several<br />
patches rolled into one) are almost legendary <strong>for</strong> breaking things. Microsoft<br />
has made the task of keeping your systems up-to-date nearly painless with<br />
Automatic Updates. Automatic Updates allows a system to download and<br />
install patches automatically as they are released. Now, given the fact that any<br />
patch runs a risk of causing undesirable side effects, you might question the<br />
safety of using Automatic Updates.This is a reasonable precaution. Keep in<br />
mind that millions of users are using Automatic Updates every day without<br />
incident (Automatic Updates is enabled automatically on Windows XP when<br />
SP2 is installed).The configuration options allowed within Automatic<br />
Updates can help lessen the risk of applying updates automatically.<br />
Within the Control Panel you should have an Automatic Updates icon.<br />
Clicking it will open the Automatic Updates configuration window shown in<br />
Figure 3.16.<br />
Figure 3.16 Windows Automatic Updates<br />
Protecting <strong>Network</strong> Resources • Chapter 3 177<br />
Each of the four options offers a different level of invasiveness on behalf of<br />
the Automatic Updates service. At the bottom, you can disable automatic<br />
www.syngress.com
178 Chapter 3 • Protecting <strong>Network</strong> Resources<br />
updates completely.This offers the most control over the update process.<br />
Because you will need to apply any updates manually, this ensures that you<br />
will be on hand and that the updates won’t catch you by surprise.The function<br />
of the other options is self-explanatory. While these options do offer<br />
some security, in many cases they do not provide enough control <strong>for</strong> some<br />
organizations.<br />
Windows Server Update Services (WSUS) offer increased control over the<br />
update process, and some other advantages as well.You can read about WSUS<br />
at www.microsoft.com/windowsserversystem/updateservices/<br />
default.mspx. Basically, WSUS acts as an intermediary between the systems<br />
using Automatic Updates and the Windows Update server at Microsoft.You<br />
configure the internal hosts to use the WSUS server to retrieve updates, and<br />
the WSUS server will offer greater control over which updates are to be<br />
installed and when. WSUS is currently considered beta software and you must<br />
register in order to download the server component. Figure 3.17 depicts the<br />
WSUS update process.<br />
Figure 3.17 WSUS Process<br />
www.syngress.com<br />
`<br />
`<br />
`<br />
Workstations<br />
Internal <strong>Network</strong><br />
WSUS<br />
Server<br />
Internet<br />
Microsoft Update Server
This solution offers more advantages than just control of the updates<br />
installed using Automatic Updates.You also can realize considerable bandwidth<br />
savings through the use of WSUS. If 20 machines download a 25MB<br />
update, you have to download 500 MB. If you are using only a T1 <strong>for</strong> your<br />
Internet connectivity, this will saturate the link <strong>for</strong> around 45 minutes solid. If<br />
you use the Internet <strong>for</strong> business reasons, this could be very inconvenient.<br />
<strong>Using</strong> WSUS, the WSUS server will download the 25MB update once, and<br />
all other systems will download the updates from the WSUS server without<br />
needing to use any Internet bandwidth at all. As tempting as WSUS may be,<br />
the server component will run only on Windows Server 2003 or newer.The<br />
client computers can be Windows 2000 (SP4) or newer.<br />
Patching Linux Systems<br />
Protecting <strong>Network</strong> Resources • Chapter 3 179<br />
The methods <strong>for</strong> patching your Linux distribution vary greatly from other<br />
distributions. In the case of Fedora Core 5, entering yum update without<br />
any program name specified will update all programs on the system, including<br />
the kernel. Of course, you can update individual programs using yum as well,<br />
by specifying the program name—yum update tcpdump, <strong>for</strong> example.You<br />
can cause yum to check the repositories and produce a list of all programs <strong>for</strong><br />
which newer versions exist using the yum check-update command. Similar<br />
functionality is offered on Debian-based systems using the apt-get utility.<br />
<strong>Using</strong> apt-get update followed by apt-get upgrade will update all installed<br />
software.The upgrade option is used to tell apt-get to update its application<br />
listing database.You can install or update individual packages using apt-get<br />
install tcpdump. If you are using a GUI desktop environment, most likely a<br />
GUI interface will be provided. For Fedora Core 5, there is a GUI package<br />
manager at Applications | System Tools | Software Updater (shown in<br />
Figure 3.18).You can also install a GUI front end <strong>for</strong> yum, called yumex<br />
(which stands <strong>for</strong> yum extender).<br />
www.syngress.com
180 Chapter 3 • Protecting <strong>Network</strong> Resources<br />
Figure 3.18 Fedora Software Updater<br />
Personal Firewalls<br />
Personal firewall is a term that refers to firewalls that protect only the single<br />
host on which they reside. While many excellent personal firewalls are free<br />
versions of commercial software, you should read the license agreement <strong>for</strong><br />
these firewalls carefully. In most cases, the free use extends only to home users<br />
and specifically excludes use in a business environment. One example is<br />
ZoneAlarm, from Zone Labs (www.zonelabs.com), which comes in a free<br />
version as well as a commercial offering.The free version offers great program<br />
control but is <strong>for</strong> nonbusiness use only. Kerio Personal Firewall (www.sunbeltsoftware.com/Kerio-Download.cfm)<br />
follows a similar business model, with<br />
the free version being <strong>for</strong> “personal use” only. For any freeware products you<br />
find, and there are several excellent ones, be sure to review the license agreement<br />
carefully to ensure that you can deploy it within your organization<br />
legally. If you are unsure, consult your organization’s legal council to determine<br />
whether a given product license is suitable.<br />
Windows Firewall<br />
Although it hasn’t been around <strong>for</strong> as long as the netfilter firewall (<strong>for</strong> Linux),<br />
the Windows firewall enjoys a similar advantage in that it is included with all<br />
modern Windows operating systems (Windows XP and Windows 2003).<br />
www.syngress.com
Because it is enabled by default, most users have some firewall protection in<br />
place even if they don’t know it. While fairly ubiquitous, the Windows<br />
Firewall is very simple in its configuration and capability. It cannot per<strong>for</strong>m<br />
any advanced packet manipulation and is really designed only to protect the<br />
host on which it is running.You can access your Windows Firewall by navigating<br />
to Start | Settings | Control Panel | Windows Firewall.The<br />
General tab has only three settings: an On setting, and Off setting, and a<br />
Don’t allow exceptions option. If you select Don’t allow exceptions,any<br />
selections you make on the Exceptions tab are simply ignored.<br />
The Exceptions tab is where all the fun happens.The Windows Firewall<br />
operates as most personal firewalls do by default, which is to allow the local<br />
system to communicate outbound unhindered.The only traffic that is allowed<br />
inbound to the interface is reply traffic to sessions that were established outbound<br />
first. In this way, your surfing and other network access is unimpeded,<br />
but others cannot initiate a session to the protected system.This is usually<br />
perfectly adequate; however, if you happen to be running any type of server<br />
on the local machine, no one will be able to initiate a connection to the listening<br />
port. In other words, if you had a Web server running on the protected<br />
system, the Windows Firewall would block connection attempts to port 80.<br />
The Exceptions tab allows you to configure an exception to that normal<br />
behavior and allow a particular port in. Figure 3.19 shows the Exceptions tab.<br />
Figure 3.19 Windows Firewall Exceptions<br />
Protecting <strong>Network</strong> Resources • Chapter 3 181<br />
www.syngress.com
182 Chapter 3 • Protecting <strong>Network</strong> Resources<br />
One nice feature of the Windows Firewall is the ability to permit access<br />
based on the program that is running instead of on the port number. For the<br />
standard services, you probably know what port is needed, but sometimes a<br />
single application might need a large number of ports, or it may use a custom<br />
port and you’re not sure which port it needs. In these cases, you can permit<br />
the application to open a listening port, and the firewall will allow inbound<br />
connections.To do this simply click Add Program, navigate to the program<br />
needing access, and then click OK. If you happen to know the port you need<br />
to open, this is easy as well. Click Add Port, and enter a reference name <strong>for</strong><br />
the rule, such as Web Server.Then enter the port number—80, <strong>for</strong> example.<br />
As a final step, select whether to open the port <strong>for</strong> TCP or UDP connections<br />
using the radio buttons. Figure 3.20 shows the Add a Port window.<br />
Figure 3.20 Windows Firewall Add a Port Window<br />
By clicking the Change Scope button, you can change the systems <strong>for</strong><br />
which the port will be open.This allows you greater control over who will be<br />
able to connect to these ports.<strong>Your</strong> available options are Any Computer, My<br />
<strong>Network</strong> (meaning the subnet that the host is on), or a custom list of IP<br />
addresses. File sharing access would be a good example of when changing the<br />
scope from the default (Any) may be advisable. As long as your entire network<br />
is on the same subnet, there is no reason to leave the scope at Any. By setting<br />
it to My <strong>Network</strong>, you ensure that only local IP addresses can connect.<br />
www.syngress.com
WARNING<br />
Depending on how your Internet connection is configured, if the<br />
Internet router will NAT inbound traffic, traffic originating from the<br />
Internet or an external network may be NATed to an internal address. If<br />
this is the case, the external address would appear as an internal address<br />
from an IP subnet perspective and a Windows Firewall scope of My<br />
<strong>Network</strong> would still grant them access.<br />
The Advanced tab (shown in Figure 3.21) has a few interesting settings of<br />
its own. Starting from the bottom of the window and moving upward, the<br />
setting with the simplest options is the Restore Defaults button. Of course,<br />
this will restore the default settings <strong>for</strong> the Windows Firewall, which is useful<br />
if the configuration is messed up and starting fresh is the easiest option.The<br />
next section is ICMP. By clicking the Settings button, you can configure a<br />
list of checkboxes, with each one corresponding to another type of ICMP<br />
packet. If you highlight a particular option a description will be displayed<br />
below.The descriptions are pretty helpful, and in most cases you shouldn’t<br />
need to edit these unless you have some specific needs.The Security Logging<br />
section also has a Settings button. Clicking the Settings button will allow<br />
you to configure whether dropped packets and successful connections should<br />
be logged.You can also specify the path <strong>for</strong> the log file and enter a maximum<br />
log size.<br />
Figure 3.21 Windows Firewall Advanced<br />
Protecting <strong>Network</strong> Resources • Chapter 3 183<br />
www.syngress.com
184 Chapter 3 • Protecting <strong>Network</strong> Resources<br />
The top section, <strong>Network</strong> Connection Settings, allows you to select<br />
which interfaces will have the Windows Firewall enabled. In this way, it<br />
doesn’t have to be an all-or–nothing proposition.You can specify that one<br />
network card has the Windows Firewall working and another one doesn’t.<br />
This section also has a Settings button of its own.The Settings button<br />
applies only to the highlighted interface.This allows you to configure additional<br />
port exceptions on a per-interface basis. Clicking the Settings button<br />
will open an Advanced Settings window. From within the Advanced<br />
Settings window you can permit services, similar to the Exceptions tab,<br />
however these services apply only on the interface you highlighted when you<br />
clicked Settings.You can also use the ICMP tab to configure your ICMP<br />
permissions on a per-interface basis.<br />
When it comes to Windows-based systems, little administration is done<br />
from the command line. In most cases, GUI tools are used. If you need to<br />
script things, often <strong>for</strong> use in login scripts, command-line tools can be invaluable.<br />
Microsoft added Netsh firewall support as of Service Pack 2, which<br />
allows you to manipulate the Windows Firewall from the command line.To<br />
access the firewall context of Netsh, enter netsh and then firewall at the<br />
command prompt to use Netsh interactive mode.<strong>Your</strong> command prompt will<br />
change to netsh firewall>.You can view useful diagnostic in<strong>for</strong>mation by<br />
entering show state or show config.You can display the same in<strong>for</strong>mation<br />
without entering interactive mode by entering netsh firewall show state<br />
from a command prompt, as follows:<br />
C:\>netsh firewall show state<br />
Firewall status:<br />
-------------------------------------------------------------------<br />
Profile = Standard<br />
Operational mode = Disable<br />
Exception mode = Enable<br />
Multicast/broadcast response mode = Enable<br />
Notification mode = Enable<br />
Group policy version = None<br />
Remote admin mode = Disable<br />
Ports currently open on all network interfaces:<br />
www.syngress.com
Port Protocol Version Program<br />
-------------------------------------------------------------------<br />
137 UDP IPv4 (null)<br />
139 TCP IPv4 (null)<br />
138 UDP IPv4 (null)<br />
3389 TCP IPv4 (null)<br />
445 TCP IPv4 (null)<br />
Additional useful commands <strong>for</strong> scripting purposes might be netsh firewall<br />
show allowedprogram, netsh firewall show logging, and netsh<br />
firewall show portopening. All of these commands can provide valuable<br />
data, which you can use to scan systems programmatically <strong>for</strong> certain settings.<br />
With the command-line utility, you can easily make many changes to the<br />
Windows Firewall configuration at one time using a batch file, or login script.<br />
This is advantageous in that making many changes via the GUI would be<br />
very time consuming, but making those changes via the command line could<br />
be done with a batch file very quickly. If you wanted to add an allowed program<br />
to the Windows Firewall, you would use the following command syntax<br />
to add a program, and then verify that it was added successfully:<br />
C:\>netsh firewall add allowedprogram C:\program.exe appname ENABLE<br />
Ok.<br />
C:\>netsh firewall show allowedprogram<br />
Protecting <strong>Network</strong> Resources • Chapter 3 185<br />
Allowed programs configuration <strong>for</strong> Domain profile:<br />
Mode Name / Program<br />
-------------------------------------------------------------------<br />
Enable Remote Assistance / C:\WINDOWS\system32\sessmgr.exe<br />
Enable AOL Instant Messenger / I:\Internet\AIM95\aim.exe<br />
Allowed programs configuration <strong>for</strong> Standard profile:<br />
Mode Name / Program<br />
-------------------------------------------------------------------<br />
Enable Remote Assistance / C:\WINDOWS\system32\sessmgr.exe<br />
Enable AOL Instant Messenger / I:\Internet\AIM95\aim.exe<br />
Enable appname / C:\program.exe<br />
www.syngress.com
186 Chapter 3 • Protecting <strong>Network</strong> Resources<br />
You can also enable a particular port using any of the following syntax<br />
examples:<br />
netsh firewall add portopening TCP 80 Webserver<br />
netsh firewall add portopening UDP 80 Webserver<br />
netsh firewall add portopening ALL 80 Webserver<br />
As yet another means to configure and control the Windows Firewall, you<br />
can use GPOs.You can find the settings <strong>for</strong> the Windows Firewall in the<br />
MMC Group Policy Editor snap-in. Navigate to /Computer<br />
Configuration/Administrative Templates/<strong>Network</strong>/<strong>Network</strong><br />
Connections/Windows Firewall/ to locate the appropriate settings.<br />
The Windows Firewall can usually do an adequate job of protecting the<br />
local system.The Windows Firewall configuration allows you to configure<br />
global settings on the General and Exceptions tabs, and allows a higher degree<br />
of granularity using the Advanced tab.The Advanced tab allows you to configure<br />
many of the same settings as the global settings, but you can configure<br />
them on a per-interface basis.You also can configure these same settings from<br />
the command line using the Netsh utility. While I wouldn’t recommend using<br />
the Windows Firewall as a perimeter firewall gateway, it can make an excellent<br />
personal firewall <strong>for</strong> your Windows-based network resources.<br />
Tools & Traps…<br />
What’s in a Name?<br />
The ability to specify access through the Windows Firewall based on the<br />
program name is pretty handy. By doing so, you don’t need to figure out<br />
which port it needs, or whether the program needs to listen on a lot of<br />
ports or manage a large list of ports to allow through the firewall. This<br />
ease is not without its pitfalls, however. The access is based on the program<br />
name and nothing else. This means if the Windows Firewall is configured<br />
to allow inbound connections to helphesk.exe, and a user<br />
renames badapp.exe to helpdesk.exe, connections to badapp will be permitted<br />
through the firewall. This is why renaming an executable of the<br />
user’s choosing is a popular method of bypassing Windows Firewall<br />
restrictions.<br />
www.syngress.com
Netfilter Firewall<br />
Netfilter is the firewall component that is included with the Linux kernel.<br />
Unless firewall support has been explicitly removed, netfilter should be present<br />
on all Linux distributions. Unlike the Windows Firewall, which is really<br />
suited only <strong>for</strong> use as a personal firewall, netfilter is just as capable of serving<br />
as a personal firewall as it is a dedicated firewall <strong>for</strong> your perimeter Internet<br />
connection. Detailed usage guidelines, including several recommended GUI<br />
interfaces <strong>for</strong> configuring netfilter, is discussed in detail in Chapter 2. All of<br />
the same configuration recommendations that were discussed when implementing<br />
netfilter as a perimeter firewall will apply when using it as a personal<br />
firewall.<br />
Configuring TCP Wrappers<br />
You can find similar functionality to the Windows Firewall’s capability to<br />
permit access based on a program name in the Linux utility,TCP Wrappers.<br />
TCP Wrappers works in conjunction with the network-level filtering of a<br />
firewall. Whereas a firewall permits or denies traffic based on data contained<br />
in the IP header of the packet,TCP Wrappers filters access to services (by<br />
name) on the host on which the service is running. Only services that are<br />
compiled against the libwrap.a library can use TCP Wrappers. With TCP<br />
Wrappers enabled, attempts to access a given service will be compared against<br />
the /etc/hosts.allow file, and then the /etc/hosts.deny file. Rules are checked<br />
sequentially and processing of the rules files stops when a match is found. If a<br />
match is not found in either file, access will be granted. As an example, if you<br />
wanted to allow only connections from syngress.com to SSH on your bastion<br />
host while rejecting all other attempts, you would have the following two<br />
lines in your hosts.allow and hosts.deny files:<br />
/etc/hosts.allow<br />
sshd : .syngress.com<br />
/etc/hosts.deny<br />
sshd : ALL<br />
Protecting <strong>Network</strong> Resources • Chapter 3 187<br />
While you would not want to rely on TCP Wrappers as your only means<br />
of protection, it does have the advantage that in the preceding example, access<br />
www.syngress.com
188 Chapter 3 • Protecting <strong>Network</strong> Resources<br />
would be permitted to sshd regardless of the port on which it was listening.<br />
The two filter files accept several wildcards, such as ALL, LOCAL, KNOWN,<br />
UNKNOWN, and PARANOID.You can enable logging in the rule files as<br />
well, and configure the facility and severity of the log entry. With TCP<br />
Wrappers’ limited functionality and syntax, you might wonder why you<br />
would ever use it over simply using netfilter. Because iptables works at the<br />
packet level, if you want to deny access to a particular process, such as HTTP,<br />
you must do it based on port number. So if you use netfilter to explicitly<br />
block connection attempts to port 80, and the user starts up the Web server<br />
and tells it to listen on port 8080, the connection will be allowed. With TCP<br />
Wrappers, you permit or deny access to a process. In this way, you can ensure<br />
that a given process will work only on the port you want it to work.This distinction<br />
could prove invaluable if you have a service that uses a large number<br />
of listening ports, or some type of service that is spawned as needed and the<br />
port number isn’t always consistent, or if the packets are tunneled in another<br />
protocol, rendering identification via port numbers impossible.<br />
Providing Antivirus<br />
and Antispyware Protection<br />
Antivirus and antispyware ef<strong>for</strong>ts are a necessary evil in today’s world. Having<br />
no protection from viruses and spyware will almost guarantee that you will<br />
fall victim to one or the other eventually. Almost everyone has a good feel <strong>for</strong><br />
the risk a virus can pose, from just being a nuisance to rendering a system<br />
inoperable. Spyware, despite all the hype, often doesn’t get the attention it<br />
deserves. I have seen many systems that have become so choked with spyware-consuming<br />
resources that they have slowed to a crawl and are no longer<br />
usable. Worse yet, some spyware is very difficult to remove, which translates<br />
into more lost time and ef<strong>for</strong>t just to clean the computer. In the end, it’s definitely<br />
better not to let any spyware or viruses on a system in the first place<br />
than it is to have to deal with the hassle of trying to clean up the mess after<br />
the fact.<br />
www.syngress.com
Antivirus Software<br />
Antivirus software is required on all systems. Most computers these days come<br />
with antivirus software installed, typically with a limited duration of updates<br />
<strong>for</strong> the virus definitions (often as short as 30 days or, at best, a year).<br />
Un<strong>for</strong>tunately, many systems are never updated and continue running the<br />
out-of-date virus signatures. While an out-of-date antivirus program is still<br />
better than no antivirus program at all, it will not offer you much protection<br />
from the latest virus threats. Whichever antivirus methodology you use<br />
(Automatic Updates, live Web scans, manual updates), you will need to ensure<br />
that the signature files are maintained and remain current. Several of the best<br />
free antivirus programs have license agreements limiting their use to home or<br />
personal computers, specifically excluding a business environment. However,<br />
there are still some excellent free alternatives.<br />
Clam AntiVirus<br />
Clam AntiVirus (www.clamav.net) is an open source, free antivirus program<br />
with a lot of commercial-grade features. Clam was natively written <strong>for</strong> use on<br />
UNIX/Linux systems, but a Windows port also is available. Clam provides a<br />
command-line scanner <strong>for</strong> spot scans or scripted scanning.This is the primary<br />
way Clam was intended to be used.There is also an (experimental) on-access<br />
scanner, similar to what you’d find in most commercial products. It even<br />
includes a utility to update your signature files automatically.You can view the<br />
latest online documentation at www.clamav.net/doc/latest/html. Because<br />
Clam AntiVirus is one of the few antivirus solutions available without stipulation<br />
that it be used <strong>for</strong> “personal” use, I will discuss using it on both Linux<br />
and Windows systems.<br />
Installing Clam AntiVirus on Linux<br />
Protecting <strong>Network</strong> Resources • Chapter 3 189<br />
You should be able to download the needed files to install Clam AntiVirus<br />
from your standard repositories. If they are not available, you can download<br />
the base packages from www.clamav.net and install them manually. After<br />
installation, there is some configuration required. Follow these steps to get<br />
Clam AntiVirus running:<br />
www.syngress.com
190 Chapter 3 • Protecting <strong>Network</strong> Resources<br />
1. Install the ClamAV package and any dependencies.<br />
2. You will need to create a ClamAV user and group.Typing the command<br />
useradd –s /bin/false clamav will create the ClamAV user<br />
and will set the user shell to /bin/false. On Fedora Core 5<br />
/home/clamav will be created automatically, but you will want to<br />
verify that this is true on your distribution. If the directory is not created<br />
automatically, you will need to create the directory manually.<br />
You can now run the command-line scanner using the syntax clamscan<br />
. As an example, clamscan –r /home would scan all the home directories<br />
and all subdirectories (–r specifies a recursive scan). Clamscan includes a large<br />
number of command-line options.The most significant ones are explained in<br />
the following list (you can enter clamscan --help <strong>for</strong> a more detailed explanation<br />
of the many command-line options):<br />
■ --infected. This causes clamscan to list only infected files in its<br />
output.<br />
■ --bell. This will cause a bell sound to be played if a virus is found.<br />
■ --recursive / -r. This will cause clamscan to scan recursively—that<br />
is, to scan all subdirectories of the specified path.<br />
■ --move=. You use this to specify that infected files be<br />
moved to a particular location.Typically the target directory is one<br />
that normal users have no access to, effectively placing the file in<br />
quarantine.<br />
That’s about all there is to the on-demand portion of Clam AntiVirus. As<br />
soon as you run any of the example commands, or any on-demand scan,<br />
clamscan will notify you that the definitions are out-of-date.You can see this<br />
error in the following example:<br />
[root@localhost ~]# clamscan /input.txt<br />
LibClamAV Warning: **************************************************<br />
LibClamAV Warning: *** The virus database is older than 7 days. ***<br />
LibClamAV Warning: *** Please update it IMMEDIATELY! ***<br />
LibClamAV Warning: **************************************************<br />
/input.txt: OK<br />
www.syngress.com
----------- SCAN SUMMARY -----------<br />
Known viruses: 75410<br />
Engine version: 0.88.6<br />
Scanned directories: 0<br />
Scanned files: 1<br />
Infected files: 0<br />
Data scanned: 0.00 MB<br />
Time: 3.023 sec (0 m 3 s)<br />
[root@localhost ~]#<br />
The next step would be to update the virus definition files.You do this<br />
using the freshclam updater (the clamav-update package in the Fedora repository).<br />
Follow these steps to get freshclam up and running.<br />
1. Install the clamav-updater package.<br />
2. Edit the /etc/freshclam.conf file.You may want to configure many<br />
settings.These are the settings which you must configure at a minimum<br />
in order to use freshclam:<br />
Locate and edit the following line:<br />
Example<br />
Either delete this line or add a # to the beginning of the line so<br />
that it will be a comment.This will prevent freshclam from running<br />
because it assumes you have not edited the example configuration file<br />
yet.<br />
Locate and edit the following line:<br />
#DatabaseMirror db.XY.clamav.net<br />
Protecting <strong>Network</strong> Resources • Chapter 3 191<br />
Remove the # to uncomment the line. Change XY to your twoletter<br />
country code.<br />
3. Verify that the /var/log/freshclam.log file is writable by the owner<br />
and is owned by the clamav user.<br />
4. Verify that the /var/lib/clamav/ directory is writable by the owner<br />
and is owned by the clamav user.This is the directory where the signature<br />
database files are stored.<br />
www.syngress.com
192 Chapter 3 • Protecting <strong>Network</strong> Resources<br />
TIP<br />
Unless you use the --user= option to specify a different user <strong>for</strong> clamav<br />
to run as, it will run as the clamav user. This is true even if you are running<br />
the process as the root user. As soon as the clamav process starts, it<br />
drops from the running user to the clamav user. This explains why you<br />
may run the process as root but still receive a permissions error. In my<br />
case, with Fedora Core 5, the permissions were not set correctly <strong>for</strong><br />
clamscan or freshclam to run and had to be edited.<br />
You can run freshclam with no options and it will use the Internet to<br />
update the database definitions.You can automate the database update process<br />
in several ways.You could run the same command as the command line and<br />
schedule it with cron to run as frequently as you like.You could also run<br />
freshclam in database mode by adding the –d switch. If you are going to use<br />
database mode, the default is to connect and check <strong>for</strong> updates every two<br />
hours.You can edit this in the freshclam.conf file with the line reading<br />
#Checks 24. Uncomment this line to cause freshclam to check <strong>for</strong> updates<br />
every hour (i.e., 24 times per day).<br />
This covers running on-demand scans.You gain a lot of protection by<br />
running these scans regularly in this fashion.You may want to evaluate the<br />
pros and cons of running an on-access scanner so that all files will be scanned<br />
as they are accessed. By scanning files as they are accessed, you may prevent<br />
the payload of an infected file from ever being triggered. With a nightly scan,<br />
an entire system could be infected by the time the nightly scan runs.You can<br />
configure clamav to run in this fashion; however, this additional protection<br />
comes at a price. By scanning every file as it is accessed, a small additional<br />
delay is incurred <strong>for</strong> each file. On a system that accesses a large number of<br />
files, this delay can bring the system to a grinding halt. Clamuko functionality<br />
(discussed shortly) is also not as stable as the base package, so even if the<br />
expected level of file access is low, you should evaluate whether an unexpected<br />
lockup is acceptable.The best bet is to run the on-access feature on a<br />
test system and evaluate the stability <strong>for</strong> yourself.<br />
If you do want to enable on-access scanning, you can do so by installing<br />
Clamuko, which is a thread within the clamd daemon process. Un<strong>for</strong>tunately,<br />
www.syngress.com
Clamuko requires the use of Dazuko <strong>for</strong> the file access tracking. Dazuko is<br />
not available as a precompiled binary, and in order to install it you must<br />
recompile your kernel and incorporate Dazuko into the kernel as a kernel<br />
module.You should check your particular distribution, as a few have Dazuko<br />
support already integrated into their kernel. If you do not have Dazuko support<br />
already enabled, you will need to download the kernel source and the<br />
Dazuko source and recompile both, which is beyond the scope of this book.<br />
Installing Clam AntiVirus on Windows<br />
Protecting <strong>Network</strong> Resources • Chapter 3 193<br />
You can download the Windows port of Clam AntiVirus from several different<br />
locations (see www.clamav.net/binary.html). One of the most well-polished<br />
versions, which includes a GUI front end <strong>for</strong> per<strong>for</strong>ming various scanning<br />
tasks and right-click integration with Windows Explorer, is located at<br />
www.clamwin.com. It will run on Windows 98, ME, 2000, XP, and 2003.As a<br />
bonus, clamwin is available as a portable application (meaning you do not need<br />
to execute any type of installation, so you can run it from a USB drive) from<br />
http://portableapps.com.To install clamwin, download and run the setup<br />
utility. Follow the prompts, accepting the license agreement and choosing the<br />
installation folder.You can probably accept the defaults <strong>for</strong> the entire installation.At<br />
the end of the installation, it will automatically update the virus definitions<br />
(assuming you left that option checked). When it’s finished, you should<br />
see a clamwin icon that looks like a target in the System Tray.<br />
If you double-click on the icon in the System Tray or navigate to Start |<br />
Programs | ClamWin Antivirus | Virus Scanner you will open the<br />
main windows shown in Figure 3.22.<br />
Remember that the Windows version has no support <strong>for</strong> on-access scanning.You<br />
must per<strong>for</strong>m all scanning manually, although you can still run it<br />
from the command line, and thus script and schedule it. Scanning files is easy.<br />
Simply use the main window to select the file or folder you want to scan and<br />
click Scan.The four icons across the top, in order from left to right, are <strong>for</strong><br />
accessing preferences, Web-based Virus Signature Updates, scan memory, and<br />
scanning files or folders (the same as the Scan button).<br />
www.syngress.com
194 Chapter 3 • Protecting <strong>Network</strong> Resources<br />
Figure 3.22 ClamWin<br />
By clicking the Preferences button, you can open another window and<br />
configure many ClamWin options (as shown in Figure 3.23).<br />
Figure 3.23 ClamWin Preferences<br />
You probably will be most interested in the Internet Updates, Scheduled<br />
Scans, and Email Alerts tabs. Internet Updates allows you to specify when<br />
ClamWin should update itself, and how often. A daily update in the middle<br />
of the night is usually adequate. Click on the Scheduled Scans tab and you<br />
can add a scanning process to the scheduler.To do so, click Add to open the<br />
www.syngress.com
Scheduled Scan window shown in Figure 3.24. Set the Scanning<br />
Frequency and Time. Make sure that Activate This schedule is checked.<br />
Select a Scan Folder and, optionally, a Description, and click OK. I recommend<br />
a scan time when the machines will be on, but hopefully not in use, so<br />
that the scan does not slow down the system’s responsiveness. If the systems<br />
are routinely left running all night, this shouldn’t be an issue.<br />
Figure 3.24 ClamWin Scheduled Scan<br />
Protecting <strong>Network</strong> Resources • Chapter 3 195<br />
You can schedule e-mail alerts <strong>for</strong> when a virus is found, by using the<br />
Email Alerts tab.The configuration is straight<strong>for</strong>ward. Enter the SMTP<br />
server name and, if required, your username and password.You can send a test<br />
e-mail using the button at the bottom. When you are finished configuring<br />
the preferences, click OK to accept the settings.You can view the reports<br />
ClamWin generates by navigating to Tools | Display Reports and then<br />
selecting the Virus Database Update Report or the Scan Report.<br />
While ClamWin lacks on-access scanning, which is supported with virtually<br />
every commercial antivirus product, the integrated scheduling functionality<br />
and automated e-mail alerts are very nice features in a free product.The<br />
ClamWin virus signature database is updated several times a day, so you have<br />
the ability to keep your signatures updated without any manual configuration.<br />
If you are trying to keep your network secure without spending a lot of cash,<br />
you should definitely consider ClamWin.<br />
www.syngress.com
196 Chapter 3 • Protecting <strong>Network</strong> Resources<br />
<strong>Using</strong> Online Virus Scanners<br />
Another option is to use any of several free online virus scanners.These are<br />
not as hands-off as installing a product is, because you need to go to the Web<br />
site and initiate a scan.This process will also require installation of various<br />
browser plug-ins to function. Although many Web sites offer free online<br />
scans, many actually require you to download software, which isn’t really an<br />
“online” scan.Trend Micro offers a true online scan using HouseCall, from<br />
http://housecall.trendmicro.com. When you run the scan, HouseCall will<br />
allow you to choose between per<strong>for</strong>ming the scan using a Java-based application<br />
or via an ActiveX browser plug-in. Loading HouseCall will take some<br />
time. Once HouseCall is completely initialized, you can choose to scan the<br />
complete computer, or selected files and folders. If you select the entire computer,<br />
there are no other options to configure and the scan will commence. If<br />
you choose selected files and folders, you will be presented with a tree view<br />
to choose which folders to scan. After making your selection, click Next. One<br />
word of caution: Stick with reputable antivirus vendors’ Web sites <strong>for</strong> online<br />
scans; otherwise, you could fall victim to a hacker posing as an online virus<br />
scanner.<br />
Antispyware Software<br />
Spyware can cause a lot more problems than most people realize. Even if a<br />
corporate firewall prevents the software from ever revealing any confidential<br />
in<strong>for</strong>mation, the processes that are running can rob the system of valuable<br />
resources. Right off the top, these programs will consume processor cycles,<br />
and with enough of them, or with a poorly written program, the impact can<br />
be substantial. Also, the running spyware will consume some amount of<br />
memory. In addition to these resources, the spyware will consume some<br />
amount of disk space, though this is typically the least of your worries. All<br />
these are present even if the spyware in question is working perfectly.The<br />
truth is this is rare. In most cases, the people installing the spyware don’t care<br />
whether your system crashes, and these programs are rarely tested adequately.<br />
The source of many unexplained problems is often spyware. Luckily, many<br />
free antispyware utilities are available.Take note that the same licensing caveats<br />
that apply to antivirus software (and all free software, really) apply to antispy-<br />
www.syngress.com
ware software. In many instances, the default business model is to offer a feature-limited<br />
version <strong>for</strong> free, in an attempt to convince you to buy the commercial<br />
version. In most of these cases, the license agreement will expressly<br />
exclude installation in a business environment. Be sure to review the license<br />
carefully and ensure that you are using the software legally. When in doubt,<br />
consult your legal team.<br />
Microsoft Windows Defender<br />
Microsoft Windows Defender is a relatively new offering which will attempt<br />
to block and defend you from spyware and other malware.You can read about<br />
it and download Windows Defender from www.microsoft.com/athome/security/spyware/software/default.mspx.<br />
Un<strong>for</strong>tunately, Windows Defender will<br />
run on only Windows XP SP2 or Windows 2003 SP1. Windows Defender<br />
does include real-time protection, which few of the other “personal” antispyware<br />
products include.You can download and run the installation directly<br />
from the Microsoft Web site. During the installation, you will be asked<br />
whether you want to join the Microsoft SpyNet online community via the<br />
window shown in Figure 3.25.<br />
Figure 3.25 Microsoft SpyNet Community<br />
Protecting <strong>Network</strong> Resources • Chapter 3 197<br />
www.syngress.com
198 Chapter 3 • Protecting <strong>Network</strong> Resources<br />
A brief description is provided next to each choice. SpyNet is a system<br />
whereby the actions users take collectively <strong>for</strong>m a profile of a given program<br />
to help determine whether it is malicious. Participating in this will mean that<br />
some nonuser-specific data will be sent back to Microsoft. If you don’t want<br />
to send any data, the more conservative option is to select Ask me later.If<br />
you want to participate in SpyNet, select the top option.The option in the<br />
middle allows you to update your spyware signatures without joining SpyNet.<br />
After making your selection, click Next. Choose between a complete install<br />
and a custom one. If you’re like me, you will almost always click Custom,<br />
just because you want to see what the options are.There really aren’t any,<br />
other than choosing the installation directory. Click Next and then Install.<br />
When the installation is complete, you can click Finish.You should leave the<br />
checkbox selected to Check <strong>for</strong> updated definitions and run a quick<br />
scan now.<br />
The main Windows Defender window will open (see Figure 3.26).<br />
Figure 3.26 Windows Defender<br />
Windows Defender has some nice features. If you select Tools at the top,<br />
the window shows several icons <strong>for</strong> different functions. Selecting Options<br />
will allow you to configure the Windows Defender settings.The options are<br />
www.syngress.com
not exhaustive, but they are functional.You can choose to enable automatic<br />
scanning (enabled by default daily at 2 A.M.).You can also choose <strong>for</strong> the automatic<br />
scan to be a quick scan or a full scan. Most of the default selections will<br />
probably be appropriate <strong>for</strong> most users. Default Actions is a critical configuration<br />
area.This determines how invasive you want Windows Defender to be.<br />
You can choose available actions <strong>for</strong> detected items which are high-,<br />
medium-, or low-risk. Each one offers the same options: Default action<br />
(which is defined by Microsoft’s signature database), Ignore, Remove, and<br />
Quarantine, as shown in Figure 3.27.<br />
Figure 3.27 Windows Defender Options<br />
Protecting <strong>Network</strong> Resources • Chapter 3 199<br />
By allowing Microsoft to use the default action, you are trusting that the<br />
company will know what’s best. If you want to ensure that nothing critical<br />
can be accidentally deleted you can change all actions to Ignore.<br />
Another interesting window is under Tools | Software Explorer.This<br />
is a useful screen that will give you in<strong>for</strong>mation on all running processes, just<br />
startup processes (the default view), programs using the network, or Winsock<br />
service providers.These can be very in<strong>for</strong>mative lists to see what is happening<br />
on your current system.<br />
www.syngress.com
200 Chapter 3 • Protecting <strong>Network</strong> Resources<br />
Microsoft Malicious Software Removal Tool<br />
The Microsoft Malicious Software Removal Tool is a specialized utility<br />
designed to help you remove a specific subset of the most damaging viruses<br />
and worms. Because some of these software packages can be both very damaging<br />
to your system and very hard to remove, this tool was designed to help.<br />
The goal of the Microsoft Windows Malicious Software Removal Tool is to<br />
remove the offending software while minimizing any lasting damage to<br />
existing files.This utility does not offer any type of ongoing protection; it is<br />
purely intended to help you clean up and recover after an infection has<br />
occurred.You can download and read about the tool at www.microsoft.<br />
com/security/malwareremove/default.mspx.To see a list of the malicious software<br />
that the tool checks <strong>for</strong>, refer to the knowledge base article located at<br />
http://support.microsoft.com/?kbid=890830.<br />
Running the tool is easy. Just download the tool and run the downloaded<br />
executable.You will be prompted to choose the type of scan you want to run,<br />
as shown in Figure 3.28.<br />
Figure 3.28 Microsoft Malicious Software Removal Tool<br />
www.syngress.com
After making your selection, click Next and the scan will begin. A quick<br />
scan really is very quick, and the next window you see will be the Scan<br />
Results window.That’s really all there is to it, unless the tool detects something,<br />
in which case you will be prompted to determine what action you<br />
want to take.<br />
Encrypting Sensitive Data<br />
Protecting <strong>Network</strong> Resources • Chapter 3 201<br />
Another way to protect your sensitive data is through encryption. In theory,<br />
even if logical controls are compromised and bypassed, an encryption mechanism<br />
can still keep data out of a hacker’s hands.There are some critical caveats<br />
to employing any <strong>for</strong>m of data encryption, whether <strong>for</strong> personal use or<br />
within an organization.You should never encrypt something without having a<br />
means to decrypt the data in an emergency.You typically would do this<br />
through a password escrow mechanism, whereby a central repository contains<br />
all the needed passwords to decrypt the data.<br />
The objective is to ensure that the encryption does not become a liability.<br />
This can occur in a surprising number of ways. An employee who has the<br />
password <strong>for</strong> critical encrypted data could quit or become unreachable. A<br />
malicious employee could intentionally encrypt important data, or a criminal<br />
could even use your encryption mechanism to encrypt critical data and then<br />
offer the password up <strong>for</strong> ransom. If the encryption protocols and methods are<br />
truly secure, the data will be as unrecoverable <strong>for</strong> you as it would be <strong>for</strong> any<br />
other attacker.The requirement <strong>for</strong> a password recovery mechanism exists<br />
whether you are implementing encryption that is supported natively by the<br />
operating system, or in the <strong>for</strong>m of third-party software.This warning is so<br />
important that many security experts advise disabling the native Windows<br />
encryption (encrypted file system, or EFS) if you do not not implement a<br />
means (of which there are several) to recover encrypted data (see the next<br />
section <strong>for</strong> more in<strong>for</strong>mation).<br />
You should also consider the types of encryption you need. Encrypting<br />
single files is a convenient way to secure specific files on an as-needed basis.<br />
Another alternative is to create a normal file, which you can access as though<br />
it were an entire disk volume.The volume is integrated into your operating<br />
system and appears as another drive letter. Any files placed on this virtual disk<br />
www.syngress.com
202 Chapter 3 • Protecting <strong>Network</strong> Resources<br />
will be encrypted automatically.This type of encryption can be useful <strong>for</strong><br />
large numbers of frequently changing files.The native Windows encryption is<br />
a sort of hybrid solution, encrypting and decrypting data files automatically<br />
using your Windows credentials.You may not need to use all of these<br />
methods of encryption, or you may benefit from a combination of methods.<br />
Ultimately, one of the most common determining factors is ease of use. An<br />
encryption method that is easy to use will probably be used far more consistently<br />
than one that is hard to use. We will review some of these methods in<br />
the next section in order to help you make an in<strong>for</strong>med decision.<br />
EFS<br />
Microsoft’s EFS really shines when it comes to ease of use. Once you configure<br />
it, there are no additional passwords to remember (other than your<br />
Windows login credentials), and you don’t need to manually encrypt or<br />
decrypt anything. EFS was introduced with Windows 2000, and you can<br />
implement it only on Windows 2000 or newer. With Windows 2000, a<br />
recovery policy was required in order to implement EFS.This allowed <strong>for</strong> an<br />
alternative means to recover encrypted data, in addition to the data being<br />
unencrypted by the original user who encrypted it. Without a recovery<br />
policy defined, EFS would simply not work. With Windows XP and 2003,<br />
this requirement was removed, meaning that if EFS is enabled and there is no<br />
recovery policy, a user could encrypt data that was not recoverable by the<br />
organization. In most cases IT policy is worded in such a way that any data<br />
the user might store belongs to the organization, and there<strong>for</strong>e, the organization<br />
has a right to ensure that the data is recoverable. Because the default data<br />
recovery agent is the domain administrator, the risk of data becoming unrecoverable<br />
is particularly high with stand-alone workstations.<br />
Because EFS is enabled by default, it’s easy to encrypt an individual file or<br />
folder. Select the file you want to encrypt, right-click it, and select<br />
Properties. Click Advanced and check the box next to Encrypt contents<br />
to secure data, as shown in Figure 3.29.<br />
www.syngress.com
Figure 3.29 Windows EFS Encryption<br />
Protecting <strong>Network</strong> Resources • Chapter 3 203<br />
Afterward, click OK, and then OK again.You will receive an encryption<br />
warning, which alerts you that the folder the file resides in is not an<br />
encrypted folder.You will need to click OK to close the warning. Under<br />
these circumstances, you can edit the file and close it and it will remain<br />
encrypted, but if you use Save As and rename the file, it will no longer<br />
remain encrypted.This opens up the possibility that a user will either <strong>for</strong>get<br />
to encrypt the file after modifying it, or neglect it due to the inconvenience<br />
of doing it every time a filename is changed due to versioning or other factors.This<br />
is why it is recommended that you set entire folders as encrypted,<br />
instead of individual files.The process is the same, except you select a folder<br />
instead of an individual file. After you do this, all files placed in the folder will<br />
be encrypted, even ones moved or copied from other folders.This makes<br />
encryption painless to use.<br />
A significant disadvantage to using EFS is that it does not support access to<br />
encrypted content based on group membership.This means that once a user<br />
encrypts the data, only that user can encrypt the data, or individual users manually<br />
given access on a per-file basis (Windows XP and newer only).This makes<br />
EFS unsuitable, or at least cumbersome, <strong>for</strong> files that are shared among a group<br />
of users.To configure additional users to access a specific encrypted file, open<br />
the Advanced Properties <strong>for</strong> the file and click Details.You can then click<br />
Add to add an individual user to be able to access that encrypted file.<br />
www.syngress.com
204 Chapter 3 • Protecting <strong>Network</strong> Resources<br />
TIP<br />
Some applications will remove the certificate in<strong>for</strong>mation associated<br />
with a file. This certificate in<strong>for</strong>mation is used to allow multiple users to<br />
access the file. As a result, all the additional users that were granted<br />
access to the encrypted file individually are removed.<br />
With Windows 2000, if the administrator changed the password <strong>for</strong> a user<br />
account, that user could still access all of his encrypted content. With Windows<br />
XP, that is no longer true. Instead, the user will lose all access to his previously<br />
encrypted files.The only way to retrieve the encrypted data is to use the data<br />
recovery agent. Stand-alone XP workstations with no recovery policy defined<br />
(and thus, no data recovery agents defined) make it very easy to permanently<br />
lose access to your encrypted data. If you elect to disable EFS entirely, you can<br />
do so via local GPOs on individual computers.You can also disable EFS via<br />
the domain GPOs, though if the workstations are part of a domain, you could<br />
instead define the data recovery agent and thus eliminate the risk of lost data<br />
in the first place.You could even enable EFS <strong>for</strong> specific subsets of systems<br />
based on a GPO applied to an OU.To do so, navigate to \Computer<br />
Configuration\Windows Settings\Security Settings\Public Key<br />
Policies\Encrypting File System within the appropriate policy snap-in (local or<br />
domain). Right-click Encrypting File System and select Properties.You<br />
will see a single General tab, with a single checkbox. Uncheck the checkbox<br />
next to Allow users to encrypt file using Encrypting File System.<br />
If you elect to use EFS, you must have a data recovery agent. Windows<br />
XP does not create one by default.The recovery policy defines the data<br />
recovery agent to be used.The recovery policy is inherited from the domain<br />
<strong>for</strong> machines that are members of a domain. For stand-alone machines, you<br />
must create the recovery policy and data recovery agent manually.To manually<br />
create the recovery policy and assign the data recovery agent on XP<br />
machines, follow these steps:<br />
1. <strong>Using</strong> the credentials of the desired data recovery agent, enter cipher<br />
/r: to generate encryption keys. In this example, I generated<br />
the keys while logged in as the user Eric.You will be asked to<br />
www.syngress.com
provide a password and verify the password in order to complete the<br />
process.This will generate two files, named filename.cer and filename.pfx.<br />
2. Navigate within the Local Computer Policy snap-in to \Computer<br />
Configuration\Windows Settings\Security Settings\Public Key<br />
Policies\Encrypting File System. Right-click Encrypting File<br />
System and select Add Data Recovery Agent.<br />
3. Click Next on the welcome screen. On the Select Recovery<br />
Agents screen, click Browse Folders, select the .CER file you created<br />
previously, and click Open.<br />
4. Click Next, and then Finish.<br />
Now you can use this certificate to decrypt data on that local machine,<br />
regardless of which user account encrypted it.You can see that the data<br />
recovery agent’s key was incorporated into the encrypted file by again<br />
viewing the Encryption Details, as shown in Figure 3.30.<br />
Figure 3.30 Encryption Details with the Data Recovery Agent<br />
Protecting <strong>Network</strong> Resources • Chapter 3 205<br />
You can see that the certificate we created earlier and configured in the<br />
recovery policy is now listed as the data recovery agent.To recover data using<br />
this certificate, follow these steps.<br />
www.syngress.com
206 Chapter 3 • Protecting <strong>Network</strong> Resources<br />
1. Right-click the file you want to decrypt (in my example, the file was<br />
created by a user named recovery1) and select Properties.<br />
2. Click Advanced and then remove the checkmark next to Encrypt<br />
contents to secure data.<br />
3. Click OK and OK again to close the Properties window.<br />
The files will no longer be encrypted.The designated recovery agent can<br />
also simply open the files in question; however, they will remain encrypted<br />
when the data recovery agent closes them.The recovery agent will only have<br />
access to decrypt files encrypted after the policy was configured. If files were<br />
encrypted prior to defining the data recovery agent, you can update the<br />
encryption on all files using the cipher /u command. Note that this command<br />
will be able to update only the files you have access to. If you had three users<br />
with files that were encrypted prior to the data recovery agent being defined,<br />
all three would need to run the command to update their encryption keys<br />
with the data recovery agent in<strong>for</strong>mation.<br />
Cipher.exe also has several other uses.You can use it to encrypt a file or<br />
folder from the command line, or to display a listing of the encryption status<br />
of a directory and its contents. Cipher with no options will list the files and<br />
folders in the current directory and show which are encrypted. A U indicates<br />
that the file or folder is unencrypted, and an E indicates that it is encrypted:<br />
E:\>cipher<br />
Listing E:\<br />
New files added to this directory will not be encrypted.<br />
U Burned to CD<br />
U Docs<br />
U backup Files<br />
E EFS_ERIC<br />
E EFS_RECOVERY1<br />
E EFS_RECOVERY2<br />
To encrypt a file, use cipher with the /a option.You can encrypt a directory<br />
with /a (which will not mark the directory as encrypted) or /e (which<br />
will mark the directory to be encrypted).To decrypt a directory, use the /d<br />
www.syngress.com
option.To decrypt a file in a directory, you must use /d /a , which<br />
will decrypt the specified file:<br />
E:\>cipher /D EFS_RECOVERY1<br />
Decrypting directories in E:\<br />
EFS_RECOVERY1 [OK]<br />
1 directorie(s) within 1 directorie(s) were decrypted.<br />
Here, I have included examples of encrypting and then decrypting a file,<br />
with a plain listing from cipher to illustrate the file’s status, to clarify the use of<br />
the switches. I have removed blank lines to conserve space:<br />
E:\EFS_RECOVERY1>cipher<br />
Listing E:\EFS_RECOVERY1\<br />
New files added to this directory will not be encrypted.<br />
U test.TXT<br />
E:\EFS_RECOVERY1>cipher /e /a test.txt<br />
Encrypting files in E:\EFS_RECOVERY1\<br />
test.TXT [OK]<br />
1 file(s) [or directorie(s)] within 1 directorie(s) were encrypted.<br />
Converting files from plaintext to ciphertext may leave sections of old<br />
plaintext on the disk volume(s). It is recommended to use command<br />
CIPHER /W:directory to clean up the disk after all converting is done.<br />
E:\EFS_RECOVERY1>cipher<br />
Listing E:\EFS_RECOVERY1\<br />
New files added to this directory will not be encrypted.<br />
E test.TXT<br />
E:\EFS_RECOVERY1>cipher /d /a test.txt<br />
Decrypting files in E:\EFS_RECOVERY1\<br />
test.TXT [OK]<br />
1 file(s) [or directorie(s)] within 1 directorie(s) were decrypted.<br />
E:\EFS_RECOVERY1>cipher<br />
Listing E:\EFS_RECOVERY1\<br />
New files added to this directory will not be encrypted.<br />
U test.TXT<br />
Protecting <strong>Network</strong> Resources • Chapter 3 207<br />
www.syngress.com
208 Chapter 3 • Protecting <strong>Network</strong> Resources<br />
A final, very useful function you can get from cipher is the /w option.You<br />
can use the /w option to remove remnant data from “empty” portions of the<br />
hard disk. When you delete a file, only the pointer to the file in the file allocation<br />
table is really removed.The actual data from the file stays right where it<br />
was on the hard disk, until something else randomly comes along and needs<br />
that particular piece of disk real estate.The various programs designed to<br />
“undelete” files work by scanning the disk and finding the original data, and<br />
then rebuilding the file allocation table entry <strong>for</strong> it.The /w option of cipher will<br />
intentionally overwrite all unallocated disk space to ensure that files cannot be<br />
undeleted.You can find additional in<strong>for</strong>mation on the Encrypting File System<br />
at www.microsoft.com/technet/security/guidance/cryptographyetc/efs.mspx.<br />
www.syngress.com
Summary<br />
Many security solutions are available <strong>for</strong> protecting your network resources.<br />
You should per<strong>for</strong>m basic hardening on all network resources, from workstations,<br />
to servers, to routers and switches. After basic hardening, regular patches<br />
and updates are required to ensure that you are running the most secure software<br />
possible. Personal firewalls can serve as your first line of defense, providing<br />
logical access control based on the contents of network packets. After<br />
the network is secured, your defenses turn inward, to protecting your assets<br />
from such things as viruses and spyware. Finally, we wrapped up with the last<br />
line of defense—file encryption—to protect sensitive data even if the system<br />
or encrypted files should fall into the wrong hands.<br />
Solutions Fast Track<br />
Per<strong>for</strong>ming Basic Hardening<br />
� Have an IT security policy in place so that you have a concrete set of<br />
standards against which to measure. Having specific objectives in<br />
mind when you are hardening systems will increase the odds of you<br />
achieving those objectives.<br />
� Requiring high-quality passwords is a balancing act between<br />
requiring a good password and making the requirements so difficult<br />
that the user ends up writing down the password in order to<br />
remember it.<br />
Hardening Windows Systems<br />
Protecting <strong>Network</strong> Resources • Chapter 3 209<br />
� Renaming the administer account and disabling the user account are<br />
simple and effective security measures.<br />
� Utilizing GPOs is a means to provide centrally managed security<br />
configurations to all of your protected hosts.<br />
www.syngress.com
210 Chapter 3 • Protecting <strong>Network</strong> Resources<br />
Hardening Linux Systems<br />
� Understand how file system permissions work in order to lock down<br />
access to only the minimum that is required.<br />
� Employ TCP Wrappers to restrict network access based on<br />
applications (daemons) instead of based on network ports or IP<br />
addresses.<br />
Hardening Infrastructure Devices<br />
� You must per<strong>for</strong>m the same high-level tasks <strong>for</strong> infrastructure devices<br />
as <strong>for</strong> any other workstation or server.<br />
� Remember to disable the unneeded services that most managed<br />
infrastructure devices will enable by default.<br />
Patching Systems<br />
� Remember that a controlled patch management methodology does<br />
not mean applying all the patches the instant they are released.You<br />
should conduct proper research and testing be<strong>for</strong>e making any<br />
changes to a system’s software.<br />
� Most modern operating systems (Linux and Windows) include tools<br />
to automatically check <strong>for</strong> software updates online and apply them if<br />
desired.<br />
Personal Firewalls<br />
� Pay careful attention to the license agreements and make sure you are<br />
not using a great “personal” firewall illegally.<br />
� Windows Firewall provides adequate controls <strong>for</strong> what types of access<br />
are permitted, but it only really is suitable as a personal firewall, not as<br />
a network perimeter firewall.<br />
www.syngress.com
Providing Antivirus and Antispyware Protection<br />
� <strong>Free</strong> antivirus and antispyware software often prohibit use in a<br />
business setting. Verify that the license agreement allows you to<br />
deploy the software in your environment.<br />
� Both antivirus and antispyware software require regular patching with<br />
the current signature files in order to remain effective.<br />
Encrypting Sensitive Data<br />
Protecting <strong>Network</strong> Resources • Chapter 3 211<br />
� You should use EFS only if a data recovery agent has been<br />
configured and en<strong>for</strong>ced via group policy. <strong>Using</strong> EFS without a data<br />
recovery agent runs the risk of permanently losing access to<br />
encrypted data if the original user who encrypted it becomes corrupt<br />
or unavailable.<br />
� Consider carefully the ease of the encryption methods you choose. A<br />
high-quality encryption program that is hard to use probably will go<br />
unused.<br />
www.syngress.com
212 Chapter 3 • Protecting <strong>Network</strong> Resources<br />
Frequently Asked Questions<br />
The following Frequently Asked Questions, answered by the authors of this book,<br />
are designed to both measure your understanding of the concepts presented in<br />
this chapter and to assist you with real-life implementation of these concepts. To<br />
have your questions about this chapter answered by the author, browse to<br />
www.syngress.com/solutions and click on the “Ask the Author” <strong>for</strong>m.<br />
Q: Is there any way to automate the live Web-based virus scans?<br />
A: While you can do it, such a project would likely be very time-intensive.<br />
You could start with the set of tools called libwww, from<br />
www.w3.org/Library/Distribution.html.This includes tools <strong>for</strong> command-line<br />
HTTP tools <strong>for</strong> retrieving Web sites, and even sending input<br />
back.You could probably patch together a script that would per<strong>for</strong>m the<br />
scan, though again, I don’t recommend it unless you really need that functionality<br />
desperately.<br />
Q: I haven’t had a virus or any spyware be<strong>for</strong>e. Do I really need to worry<br />
about installing any software to protect myself?<br />
A: First, I would encourage you to run some scanners. Many systems are<br />
infected with a virus or spyware without it causing enough of a problem<br />
<strong>for</strong> anyone to notice. Second, even the most well-in<strong>for</strong>med users can<br />
sometimes make mistakes, and with no protection, it will take only one<br />
mistake to potentially bring your entire network to its knees. If you want<br />
to see how easy it is to fall victim, try this. Burn a CD-ROM and configure<br />
the autorun file to execute a program that will e-mail you when<br />
run. Do the same with an executable on the disk. Give the files interesting-sounding<br />
names, such as quotes, incomes, merchants, or discounts.<br />
When finished, leave the unlabeled CD-ROM lying around somewhere<br />
near your organization’s building. Sit back and see how long it takes<br />
be<strong>for</strong>e you receive your e-mail. All it takes is one person getting curious<br />
and putting the disk in the drive.<br />
Q: How can I disable the configuration of Windows Firewall so that my users<br />
can’t turn it off?<br />
www.syngress.com
Protecting <strong>Network</strong> Resources • Chapter 3 213<br />
A: You can read about the process of configuring Windows Firewall using<br />
GPOs in more detail here: www.microsoft.com/technet/security/smallbusiness/prodtech/windowsxp/fwgrppol.mspx.The<br />
appropriate settings<br />
are located in the policy under Computer Configuration\Administrative<br />
Templates\<strong>Network</strong>\<strong>Network</strong> Connections\Windows Firewall. When<br />
your configuration changes are completed, you can apply the policy by<br />
running gpupdate, rebooting the machine, or waiting <strong>for</strong> the default<br />
policy refresh to occur.<br />
Q: What happens if I’m using EFS and copy an encrypted file to my USB<br />
drive? Will it remain encrypted, or does Windows decrypt it be<strong>for</strong>e<br />
copying it out?<br />
A: It depends on a lot of factors. If the destination file system is not <strong>for</strong>matted<br />
as NTFS, the file will be decrypted and copied. If you are using<br />
Windows 2000 EFS, this decryption takes place transparently, so you may<br />
not be aware that the file was decrypted. With newer versions of<br />
Windows, you will receive a warning reminding you that the file will be<br />
decrypted. Without getting too long-winded, EFS behaves differently<br />
depending on (1.) whether you are doing a move or a copy operation; (2.)<br />
the way the destination file system is <strong>for</strong>matted; and (3.) what OS and<br />
directory access the destination operating system has.<br />
Q: I’m a home user. Will Windows Firewall protect my host if I plug it in<br />
directly to my cable modem?<br />
A: Placing your system directly on the Internet with no firewall at all ensures<br />
that the system will be compromised and used <strong>for</strong> some purposes you<br />
probably wouldn’t approve of—possibly without you ever even knowing.<br />
Enabling Windows Firewall is a big improvement over no firewall and will<br />
offer some protection. A real firewall (even an inexpensive home model)<br />
offers additional security that Windows Firewall doesn’t.This includes<br />
source NAT <strong>for</strong> one, which will help hide your machines real IP address<br />
and make directing attacks toward it more difficult. So will Windows<br />
Firewall protect you? Sure, to a degree, but remember defense in depth is<br />
the objective.<br />
www.syngress.com
214 Chapter 3 • Protecting <strong>Network</strong> Resources<br />
Q: How long should I wait be<strong>for</strong>e applying patches to my protected hosts?<br />
A: This is really going to depend on your environment, and the requirements<br />
will likely be different <strong>for</strong> different resources within your environment.<br />
The development servers probably deserve a different patching schedule<br />
than the critical Web portal that makes the majority of company revenue.<br />
Another important determining factor will be the severity of the issue(s)<br />
the patch addresses. If the patch closes a remotely exploitable security<br />
hole, applying it will be more urgent than if the patch addresses a vulnerability<br />
that can only be exploited while someone is logged in to the<br />
machine locally.<br />
www.syngress.com
Configuring<br />
an Intrusion<br />
Detection System<br />
Solutions in this chapter:<br />
■ Intrusion Detection Systems<br />
■ Configuring an Intrusion Detection System<br />
■ Configuring Snort on a Windows System<br />
■ Configuring Snort on a Linux System<br />
■ Other Snort Add-Ons<br />
■ Demonstrating Effectiveness<br />
� Summary<br />
� Solutions Fast Track<br />
� Frequently Asked Questions<br />
Chapter 4<br />
215
216 Chapter 4 • Configuring an Intrusion Detection System<br />
Introduction<br />
No matter how secure your network is, sooner or later something will<br />
happen that wasn’t supposed to. If you don’t take steps to identify security<br />
events, your only notice that something has occurred might be when there is<br />
a production outage or other undesirable disruption. At that point you are in<br />
a reactive mode instead of a proactive one. It would be preferable to know<br />
the instant a security event takes place so that you have a head start on correcting<br />
the issue and minimizing any damage.The two most common ways to<br />
keep yourself in<strong>for</strong>med of security events across your network are through<br />
intrusion detection systems (IDSes) and by monitoring event logs. In this<br />
chapter we will demonstrate how to install and configure a first-class IDS on<br />
both Linux and Windows systems, and we will discuss the various tools <strong>for</strong><br />
managing event logs, including syslog and Windows event log <strong>for</strong>mats.<br />
Intrusion Detection Systems<br />
Intrusion detection systems do exactly what it sounds like.They spot undesirable<br />
activity and, typically, send an alert to someone so that action can be<br />
taken.The undesirable activity does not necessarily have to be from an actual<br />
intrusion, it can be any activity that you don’t want to occur, such as the use<br />
of a file sharing program on the corporate network.The most common way<br />
to implement an IDS is by having a system monitor and inspect (sniff ) all<br />
traffic over a given link.The system then compares the traffic with a database<br />
of known signatures <strong>for</strong> undesirable traffic.This is an example of a signaturebased<br />
IDS. Some IDS systems are anomaly based, which means the IDS<br />
attempts to build a list of “normal” traffic from your actual network data, and<br />
then it flags anything that doesn’t fit the list of normal traffic that it has built.<br />
The process of identifying the normal traffic can be very time consuming and<br />
requires a lot of human intervention and judgment. Some systems combine<br />
the two methods.<br />
Anomaly based and signature based are both terms that describe how the<br />
undesirable traffic is identified. In addition to this, there are also different<br />
terms to describe where the IDS is doing the monitoring. A host-based IDS<br />
(HIDS) inspects the activities on a particular system. In this way, you can<br />
monitor your key servers, such as a Web server, and look <strong>for</strong> attempts to brute<br />
www.syngress.com
<strong>for</strong>ce a password. A network-based IDS (NIDS) inspects the actual packets<br />
flowing across the network.The difference in methodologies between the two<br />
is significant. Sometimes malicious traffic at the host level may be indistinguishable<br />
from legitimate traffic at the network level.<br />
As a final bit of vocabulary it’s worth mentioning intrusion prevention systems<br />
(IPS).An IDS serves only to detect the malicious activities; it then notifies<br />
someone so that human judgment can be applied and the needed steps taken in<br />
response to the malicious activities.An IPS is more powerful in that in addition<br />
to merely detecting malicious activities, it has the capability to take action on its<br />
own to prevent the malicious activity from being successful.As an example, an<br />
IDS can detect a user who uses ICQ messenger on the corporate network. If<br />
configured to do so, the IDS can send an e-mail, or even page the network<br />
administrator who can take any needed action.The IDS could also merely log<br />
the occurrence to be included in a report at the end of the month.At its most<br />
invasive, the IPS can, upon detecting the connection, send a TCP RESET<br />
packet to the ICQ server and tell it to terminate the connection.The user<br />
would only see that the application would not work properly.<br />
Such authority to take direct action without human intervention may<br />
sound appealing, but such capabilities must be used with extreme caution. A<br />
packet could be generated with a false source IP, to make it look like another<br />
machine is trying to connect using ICQ, and a reset packet would dutifully<br />
be sent to the incorrect machine. A little creativity and a malicious user could<br />
turn your IPS against you and cause problems on your network.The real<br />
drawback is that no matter how well programmed it is, the IPS lacks human<br />
judgment. For this reason, when an IPS is implemented, it is generally done<br />
very gradually and with very conservative settings.There are Snort modules<br />
that provide IPS functionality, but we won’t be covering those in this book.<br />
Configuring an<br />
Intrusion Detection System<br />
Configuring an Intrusion Detection System • Chapter 4 217<br />
When it comes to IDSes, there really isn’t a very large playing field <strong>for</strong> free<br />
solutions.That’s not to say that there isn’t an excellent free IDS, just that there<br />
is only one, Snort (http://snort.org/). Snort is an excellent, free, signaturebased<br />
NIDS.You can take advantage of a subscription service, which enables<br />
www.syngress.com
218 Chapter 4 • Configuring an Intrusion Detection System<br />
you to download newer signatures as they are released, but it is not a requirement.You<br />
can also create your own rules to match on various portions of the<br />
IP packet relatively easily.The configuration of Snort is a little different when<br />
it’s installed on Linux versus when it’s installed on Windows, so I will demonstrate<br />
both. If you would like to pursue more in-depth reading on Snort see<br />
Snort Intrusion Detection and Prevention Toolkit (<strong>Syngress</strong> Publishing, 2006).<br />
Hardware Requirements<br />
The prevailing theme in this book is to improve security without requiring a<br />
direct purchase of anything. In the majority of cases there will be an old PC<br />
lying around somewhere to use. In the case of an IDS, this device will need to<br />
see traffic at critical chokepoints in your network, possibly placing the IDS<br />
host, or an interface on the host, outside the protected perimeter. For this<br />
reason, the IDS hosts are often dedicated systems.You would need to weigh<br />
carefully if you planned on using the IDS host as a normal workstation in<br />
addition to per<strong>for</strong>ming the IDS function.<br />
The point of all this is to touch on the fact that with your IDS, probably<br />
more than with any other system in this book, you will need to ensure you<br />
have hardware with adequate resource to do its job. Most of the tools mentioned<br />
here are simply other processes that could run on almost any system<br />
and usually require very few resources.The IDS has the potential to log a<br />
large amount of data and process a lot of network traffic.These functions will<br />
require both memory and hard drive space.This doesn’t mean you can’t use<br />
an old PC as your IDS. It only means that you want to give your IDS (and<br />
your firewalls) the “best” of the old hardware you have available. After you<br />
implement the IDS, monitor the system resources closely until you gain a<br />
level of com<strong>for</strong>t with the resources that are required.<br />
Placing <strong>Your</strong> NIDS<br />
When it comes to implementing an NIDS, the single biggest factor in its<br />
effectiveness is its placement within the network.The value of the NIDS is in<br />
identifying malicious traffic and obviously it can’t do that if it can’t see the<br />
traffic.This means you want to place the NIDS in a location to maximize the<br />
data it will see. In a very small office where there is only one switch or hub,<br />
this is a pretty simple decision. Depending on your objectives, you may place<br />
www.syngress.com
it inline with the Internet connection only, so that you are inspecting traffic<br />
only to or from the Internet. In a larger installation, you may need to place<br />
multiple network cards in the NIDS so that it can inspect traffic from several<br />
chokepoints in your network. Also see Chapter 7,“<strong>Network</strong> Reporting and<br />
Troubleshooting,” <strong>for</strong> additional discussions on sensor placement.<br />
Notes from the Underground…<br />
Further Considerations<br />
Configuring an Intrusion Detection System • Chapter 4 219<br />
Remember that an IDS is also a target <strong>for</strong> a hacker just like any other<br />
system, and often even more so. As such, the IDS host system should be<br />
hardened and locked down as much as possible. In addition to being a<br />
target because it can alert administrators to their activities, the hacker<br />
might target the IDS system itself because it often contains logs with valuable<br />
in<strong>for</strong>mation in it about various systems. The IDS also has the capability<br />
of capturing packets that match its rulebase, and these packet<br />
dumps can contain valuable data as well. Don’t neglect securing your IDS<br />
or you may be creating a security liability instead of the asset you<br />
intended.<br />
Be cognizant of the fact that if you do choose to install multiple network<br />
cards to monitor multiple segments that you have the potential to create an<br />
alternate data path that enables traffic to bypass a firewall. As part of your<br />
hardening of the IDS host, you must ensure that routing is not enabled so that<br />
the IDS cannot <strong>for</strong>ward traffic from one segment that it is monitoring to<br />
another.There are multiple approaches to protect against this happening.The<br />
simplest is to use a network tap instead of just plugging in a normal network<br />
card. A tap is a specially designed piece of hardware that will only listen to<br />
traffic but will not transmit. Because it is hardware, there is no possibility of<br />
hacking the configuration or making a mistake in the configuration and accidentally<br />
allowing routing. Un<strong>for</strong>tunately, network taps are not free. Disabling<br />
routing, ensuring the host has no static routes, and disabling any routing protocols<br />
are the free ways to ensure that you don’t create a path around a firewall.<br />
Figure 4.1 illustrates bypassing the firewalls using your IDS.<br />
www.syngress.com
220 Chapter 4 • Configuring an Intrusion Detection System<br />
Figure 4.1 Bypassing the Firewalls <strong>Using</strong> the IDS<br />
The first dotted line (data flow #1) represents the desired (secure) data<br />
flow.Traffic from outside can only terminate on a server in the DMZ, and<br />
traffic going into the internal network can only come from a server in the<br />
DMZ. With this configuration traffic from the Internet can never pass all the<br />
way through directly to a host on the internal network.The second data flow,<br />
#2, represents how an incorrectly configured IDS could be used to route traffic<br />
from the outside (untrusted) network into the internal network.<br />
When it comes to placement of your IDS, you need to be aware of the<br />
difference between a switch and a hub. A hub operates by sending any traffic<br />
it receives on any port to every other port.There<strong>for</strong>e, when using a hub, the<br />
IDS will see all the traffic passing through that hub, which is usually what you<br />
want <strong>for</strong> your IDS. A switch is more advanced than a hub, and most new<br />
devices are switches. A switch listens and learns what machines are connected<br />
to which port. It then uses this in<strong>for</strong>mation to construct a <strong>for</strong>warding table.<br />
www.syngress.com
After it has learned which port a given host is on, it will then only send<br />
traffic destined <strong>for</strong> that host to that specific port.This means that without any<br />
additional configuration, when you plug your IDS into a switch port, it isn’t<br />
going to be seeing much traffic.<br />
Luckily, there are some options <strong>for</strong> getting around this feature. Most<br />
enterprise switches (that is, the more expensive ones) have a port mirroring<br />
option.The terms used to describe this functionality varies from one manufacturer<br />
to another, Cisco calls it Switched Port Analyzer (SPAN).This enables<br />
you to configure a specific port such that it will see traffic from other designated<br />
ports (or all other ports) even though the traffic is destined <strong>for</strong> a different<br />
port.Typically, one port is configured to mirror all other ports, and the<br />
IDS is attached to this port. On a Cisco 3750 switch with 24 ports you could<br />
configure mirroring by entering the following commands:<br />
switch(config)# monitor session 1 source interface gig1/0/1 – gig1/0/23<br />
switch(config)# monitor session 1 destination interface gig1/0/24<br />
switch(config)# end<br />
This setup is straight<strong>for</strong>ward. Line one specifies which ports to <strong>for</strong>ward<br />
traffic from, and line two specifies which port the traffic should be mirrored to.<br />
You will need to refer to the user guide <strong>for</strong> your specific switch hardware to see<br />
if port mirroring is supported, and if it is, how to configure it.<br />
Configuring Snort<br />
on a Windows System<br />
Configuring an Intrusion Detection System • Chapter 4 221<br />
From the start, the developers of Snort wanted it to be available on a wide<br />
variety of plat<strong>for</strong>ms.The current version will run on Linux, UNIX,<br />
Windows, and Macintosh OSX.This is good since you will probably be running<br />
your IDS on whatever system happens to be lying around.There are<br />
some caveats to be aware of when running Snort on Windows. For one, the<br />
documentation is very *nix-centric. Many times what is referred to as the<br />
“default” behavior is not the default <strong>for</strong> Windows Snort.The second, more<br />
noticeable difference is that getting Snort up and running on Windows is<br />
actually more difficult than setting it up to run on Linux. Still, if your com<strong>for</strong>t<br />
level is much higher on Windows (as it is <strong>for</strong> many), then Windows still<br />
may be the best choice. For my example I installed it on Windows Server<br />
2003 with all the latest updates applied.<br />
www.syngress.com
222 Chapter 4 • Configuring an Intrusion Detection System<br />
Installing Snort<br />
Begin by browsing to http://snort.org/ and clicking on the Get Snort link<br />
on the left-hand side of the Web page. Click on Binaries, then Win32, and<br />
download the latest Installer file. When this is done, navigate to the file you<br />
downloaded and double-click it to start the install process.<br />
1. You must click I Agree on the License Agreement window to<br />
proceed with the installation.<br />
2. The next screen enables you to configure support <strong>for</strong> oracle or SQL<br />
server logging (see Figure 4.2). MySQL and ODBC are already supported<br />
by default. For a smaller installation the (first) default option<br />
will usually be adequate. After making your selection, click Next.<br />
Figure 4.2 Snort Setup Logging Options<br />
3. On the Choose Components screen shown in Figure 4.3, you<br />
should probably select the default, which is to install all components.<br />
The schemas are needed only if you plan to log to a database; however,<br />
the full install is only about 7 MB, so there isn’t much space to<br />
be gained by trying to trim down the install. After making your<br />
selections, click Next.<br />
www.syngress.com
Figure 4.3 Choose Components <strong>for</strong> Snort<br />
4. The next screen enables you to choose your installation location.The<br />
default is C:\snort. Remember, this server is a prime target <strong>for</strong><br />
attackers and should be hardened as much as possible. As a general<br />
rule, non-default paths are almost always at least slightly more secure<br />
than default ones. After you’ve selected the installation path, click<br />
Next.<br />
5. When the Installation has completed, click Close.<br />
6. You will see a window, as shown in Figure 4.4, alerting you that<br />
Snort requires WinPcap to function and that it can be download<br />
from www.winpcap.org.<br />
Figure 4.4 WinPcap Reminder<br />
Configuring an Intrusion Detection System • Chapter 4 223<br />
www.syngress.com
224 Chapter 4 • Configuring an Intrusion Detection System<br />
7. WinPcap is basically a Windows version of the UNIX libpcap API.<br />
This enables applications to interact with network packets directly,<br />
bypassing the Windows protocol stack.You will find WinPcap is<br />
required to run many networking tools on Windows.You will need<br />
to download WinPcap by clicking Get WinPcap on the left side of<br />
the Web page.<br />
8. Save the setup file to a location of your choice and double-click it to<br />
begin the installation routine.<br />
9. The first screen contains news and update in<strong>for</strong>mation. Click Next<br />
to continue.<br />
10. The next window is the License Agreement; you must click I Agree<br />
to continue the installation.<br />
11. The install will complete. Click Finish to close the Installation<br />
Wizard.<br />
Navigate to Start | Control Panel | <strong>Network</strong> Connections | Local<br />
Area Connection, right-click, and then choose Properties.You should see a<br />
new network driver in the properties list, as shown in Figure 4.5.<br />
Figure 4.5 Local Area Connection Properties<br />
www.syngress.com
It would probably be a good idea to test the installation of WinPcap and<br />
the packet capture functionality be<strong>for</strong>e moving on to configuring Snort, that<br />
way if you need to troubleshoot Snort later, you can at least know WinPcap is<br />
working.The easiest way to test WinPcap is by starting up WinDump, which<br />
is a command-line packet sniffing utility <strong>for</strong> Windows that uses WinPcap.<br />
Windump can be downloaded from www.winpcap.org as well. See Chapter<br />
7,“<strong>Network</strong> Reporting and Troubleshooting,” <strong>for</strong> detailed instructions on<br />
using WinDump.<br />
Configuring Snort Options<br />
Configuring an Intrusion Detection System • Chapter 4 225<br />
After you have verified that WinPcap is working, it’s time to configure the<br />
various options that determine how Snort will behave using the Snort configuration<br />
file.The configuration file is excellently documented and very easy to<br />
use.The configuration file is divided up into six “steps” annotated within the<br />
comments.To get Snort working the way you want it to, follow these simple<br />
steps:<br />
1. Start by opening the main Snort configuration file. By default it will<br />
be located at C:\Snort\etc\snort.conf. If you open it in Notepad<br />
it may not display properly, so WordPad would probably be a better<br />
choice.<br />
2. Configure the HOME_NET variable, if desired, by removing the #<br />
from the line you need. (# is a comment indicator in the Snort configuration<br />
file.) The HOME_NET variable defines which networks<br />
are the “trusted” internal networks.This is used with the signatures to<br />
determine when the internal network is being attacked. By default,<br />
HOME_NET is set to any network with the var HOME_NET any<br />
line in the snort.conf. Setting this to accurately reflect your internal<br />
address space will reduce the number of false positive alerts you<br />
receive. A common example is var HOME_NET 192.168.1.0/24.<br />
3. Configure the EXTERNAL_NET variable if desired.This is the network<br />
you expect attacks to come from.The recommended setting is<br />
to set this to everything except your HOME_NET using the following<br />
var EXTERNAL_NET !$HOME_NET. (Default: var<br />
EXTERNAL_NET any).<br />
www.syngress.com
226 Chapter 4 • Configuring an Intrusion Detection System<br />
4. Next, define what servers are running specific services. For example,<br />
by setting HTTP_SERVERS to only specific servers, Snort will only<br />
watch <strong>for</strong> HTTP attacks targeted at those servers. If you wish to see<br />
attacks targeting servers that are not running the affected services,<br />
leave the defaults, which are to watch <strong>for</strong> attacks directed towards any<br />
internal servers. (Default: var DNS_SERVERS $HOME_NET). If<br />
you had a Web server running on 192.168.1.11 and 192.168.1.12,<br />
you could tell Snort to only look <strong>for</strong> HTTP attacks targeting that<br />
server by setting the following variable: var HTTP_SERVERS<br />
[192.168.1.11/32,192.168.1.12/32].<br />
5. If desired, configure the specific ports that services are available on.<br />
For an example, the default <strong>for</strong> HTTP is defined on the following<br />
line: var HTTP_PORTS 80. Similar to defining the servers in the<br />
preceding section, this will tell Snort to look only <strong>for</strong> attacks targeting<br />
specific ports. With the default configuration, Snort would<br />
ignore an HTTP attack to port 8080.<br />
6. If you are interested in detecting the usage of AOL Instant Messenger<br />
(AIM), the various IP addresses of the AIM servers are defined in the<br />
snort.conf file.This is done because the IP addresses change frequently,<br />
and by using a variable, the rules don’t have to be updated<br />
each time the IP address changes. If you don’t wish to trigger based<br />
off AIM usage, don’t worry about changing these IP addresses.<br />
7. Configure the RULE_PATH variable, which tells Snort where to<br />
find the rules used <strong>for</strong> triggering events.This is one of the differences<br />
between Snort on Windows and Snort on other operating systems.<br />
Most operating systems will use a relative path, which is what is configured<br />
by default (var RULE_PATH ../rules), but on Windows you<br />
should use an absolute path. By default, the path would be var<br />
RULE_PATH C:\snort\rules.<br />
8. The next section has some commented-out lines to disable certain<br />
detections of some infrequently seen types of traffic. Unless you are<br />
having some issues with those alerts or your IDS is very low on<br />
resources, it’s probably fine to just leave those at the default (enabled)<br />
configuration.<br />
www.syngress.com
Configuring an Intrusion Detection System • Chapter 4 227<br />
9. The last few lines of the “step 1”section enable you to configure the<br />
detection engine <strong>for</strong> systems with limited resources. Unless you are<br />
having issues, you can leave this option alone.<br />
10. After that the “step 2” and “step 3” sections of the configuration file<br />
allow you to enable or disable specific functionality and detect particular<br />
types of attack, such as fragmentation attacks, stateful inspection,<br />
and stream reassembly options. Delving into the specifics of each of<br />
those options is beyond the scope of this chapter and <strong>for</strong> many, the<br />
default settings will serve them well.<br />
11. The section labeled “Step #4” contains output options <strong>for</strong> Snort.There<br />
are several valuable options in this section. Uncomment output<br />
alert_syslog: host=hostname, LOG_AUTH LOG_<br />
ALERT and enter the hostname of your syslog server. LOG_AUTH is<br />
the facility to use, and LOG_ALERT is the priority <strong>for</strong> the alert. In<br />
my example I used the following command: output alert_syslog:<br />
host=192.168.1.99, log_local7 log_notice; this will log to the local7<br />
facility as a notice. Note that not all combinations of facility and<br />
severity are supported by Snort.You also need to include the –s switch<br />
on the command line. We will discuss syslog in more detail in the next<br />
chapter. If you don’t have a syslog server to log to yet, just make note<br />
of the setting and come back to it when your syslog server is set up.<br />
12. Edit the paths <strong>for</strong> the dynamically loaded libraries in section #2. Edit<br />
the lines as follows: dynamicpreprocessor directory C:\snort\<br />
lib\snort_dynamicpreprocessor and dynamicengine<br />
C:\snort\lib\snort_dynamicengine\sf_engine.dll. Note that <strong>for</strong><br />
the preprocessor directory you are editing it <strong>for</strong> an absolute path (with<br />
no trailing slash). For the dynamicengine, you are altering the path<br />
from the default libsf_engine.so to the sf_engine.dll used in Windows.<br />
13. Change include classification.config to an absolute path such as include<br />
C:\snort\etc\classification.config. Do the same <strong>for</strong> include<br />
reference.config.<br />
14. The include section enables you to specify which rulesets are to be<br />
checked. Some rules are disabled by default, such as chat.rules, which<br />
are triggered by the use of various instant messaging clients.To enable<br />
www.syngress.com
228 Chapter 4 • Configuring an Intrusion Detection System<br />
or disable a given ruleset, simply add or remove a # at the beginning<br />
of the include line.This entry can be left as relative (that is, include<br />
$RULE_PATH/local.rules) because the RULE_PATH variable will<br />
be expanded to make it an absolute path.<br />
15. After you are satisfied with your changes, save and close the configuration<br />
file.<br />
16. The basic install does not include any rules. Go to www.snort.org<br />
and click RULES on the left side of the Web page. On the next<br />
page, click DOWNLOAD RULES on the far-right side of the<br />
page. Scroll down to Sourcefire VRT Certified Rules – The<br />
Official Snort Rulesset (unregistered user release) and click<br />
Download by the most current ruleset.The ruleset will be a compressed<br />
file so you will need a program to uncompress it; IZArc or<br />
FileZip are good options.There is also a selection of community-provided<br />
rules at the bottom of the page. If you are looking <strong>for</strong> something<br />
unusual, you might find it there without having to create the<br />
rule yourself.<br />
17. Extract all files in the archive’s signatures folder to C:\snort\doc\<br />
signatures\ and extract all files in the archive’s rules folder to<br />
C:\snort\rules\.This will take some time because there are currently<br />
about 3,700 rules.<br />
You are now ready to start up Snort and see what it looks like in action.<br />
Go to a command prompt window and change your working directory to<br />
the \snort\bin directory, which is where the snort.exe is located.Type snort<br />
–W to list the available interfaces. In my case I get the output shown in<br />
Figure 4.6.<br />
Figure 4.6 Snort Interface Listing<br />
C:\Snort\bin>snort -W<br />
,,_ -*> Snort!
Configuring an Intrusion Detection System • Chapter 4 229<br />
Interface Device Description<br />
-------------------------------------------<br />
1 \Device\NPF_GenericDialupAdapter (Generic dialup adapter)<br />
2 \Device\NPF_{F95B71A4-C943-40BA-9F65-CD73D4B20769} (Intel(R) PRO/100B PCI<br />
Adapter (TX))<br />
3 \Device\NPF_{A7F703C5-7567-49BC-B6C1-1A1F14614CAF} (SiS NIC SISNIC)<br />
(Note:The line has been wrapped <strong>for</strong> Interface 2 to fit this page.)<br />
When we start Snort, we can specify the interface to listen on using the –i<br />
switch. If you don’t specify, it will use the first interface, which in my case<br />
won’t see anything because it’s a dial-up interface that is not in use. Use the<br />
–c option to tell Snort which configuration file to use. It can be useful to<br />
have multiple configuration files configured so that you can quickly switch<br />
configurations <strong>for</strong> special circumstances.You could prepare different configuration<br />
files to home in on certain issues, segments, or more in-depth logging.<br />
Another important option is –A, which tells Snort what type of alerts to generate.The<br />
options are fast, full, console, or none.<br />
The following command example would start Snort listening on interface<br />
3, with alerts going to the console only, using the configuration file at<br />
C:\snort\etc\snort.conf.The –K switch tells Snort what types of logs to generate.<br />
ASCII logs are easier <strong>for</strong> a human to read, but they take a little more<br />
time to log. If speed isn’t a concern, the ASCII logs will probably be the easiest<br />
to read and analyze manually.<br />
snort –A console –i 3 –c C:\snort\etc\snort.conf –l C:\snort\log –K ascii<br />
You should see any triggered rules produce a message on the console. If<br />
you add the –s switch to the end of the line, it will tell snort to log to the<br />
syslog server you have configured in the snort.conf file; however, it will not<br />
also display on the snort console. If you want to create a rule <strong>for</strong> testing purposes<br />
to see what the results look like, create a test rule file, such as<br />
TESTING.rules, and place it in the rules folder (C:\snort\rules\ by default).<br />
In this file you could place the following line, which would trigger on any<br />
attempts to ping another system.<br />
Alert icmp any any -> any any (msg:"TESTING rule"; sid:1000001;)<br />
www.syngress.com
230 Chapter 4 • Configuring an Intrusion Detection System<br />
Edit the snort.conf to include your new rule by adding the following line:<br />
include $RULE_PATH/TESTING.rules. As a last step, edit the<br />
snort\stc\sid-msg.map file.This file provides a mapping between snort alert<br />
messages and alert IDs or numbers. Custom alerts should use an ID number<br />
of more than one million. Add the following line at the end of the file:<br />
1000001<br />
Placing the ID number is the minimum requirement <strong>for</strong> Snort not to<br />
output an error.You can certainly fill in all the other fields, following the<br />
existing message maps as a guideline. When this is done, you will need to stop<br />
and restart Snort. Here is the console output of a single ping and the reply:<br />
08/10-18:22:19.823970 [**] [1:0:0] TESTING rule [**] [Priority: 0] {ICMP}<br />
192.168.1.99 -> 192.168.1.1<br />
08/10-18:22:20.284438 [**] [1:0:0] TESTING rule [**] [Priority: 0] {ICMP}<br />
192.168.1.1 -> 192.168.1.99<br />
You can also add your own custom rules to the local.rules file. When you<br />
open the file, you will find it is essentially empty, existing solely <strong>for</strong> you to<br />
place your custom rules in it.The local.rule is “included” in the snort.conf by<br />
default, so you will not need to add it there.You will, however, still need to<br />
edit the sid-msg.map file <strong>for</strong> any rules placed in local.rules.The a<strong>for</strong>ementioned<br />
command example would display only to the console. For day-to-day<br />
operations you would probably want to use fast alerts in your log files, which<br />
look like the ones that are sent to the console with the console option.<br />
snort –A fast –I 3 –c C:\snort\etc\snort.conf –l C:\snort\log –K ascii -s<br />
Congratulations! You now have a working IDS. Packets will get logged by<br />
default to C:\snort\log\. A subdirectory will be created <strong>for</strong> each source IP<br />
that triggers an alert. In this subdirectory will be placed a log file named after<br />
the rule that was triggered. Additional instances of the same alert will be<br />
appended to the same file. Figure 4.7 shows an example of the log file<br />
C:\snort\log\192.168.1.99\ICMP_ECHO.ids:<br />
Figure 4.7 ICMP Example Log<br />
[**] TESTING rule [**]<br />
08/10-20:25:51.282620 192.168.1.99 -> 192.168.1.107<br />
ICMP TTL:128 TOS:0x0 ID:13266 IpLen:20 DgmLen:60<br />
Type:8 Code:0 ID:512 Seq:28928 ECHO<br />
www.syngress.com
61 62 63 64 65 66 67 68 69 6A 6B 6C 6D 6E 6F 70 abcdefghijklmnop<br />
71 72 73 74 75 76 77 61 62 63 64 65 66 67 68 69 qrstuvwabcdefghi<br />
=+=+=+=+=+=+=+=+=+=+=+=+=+=+=+=+=+=+=+=+=+=+=+=+=+=+=+=+=+=+=+=+=+=+=+=+<br />
[**] TESTING rule [**]<br />
08/10-20:25:52.282888 192.168.1.99 -> 192.168.1.107<br />
ICMP TTL:128 TOS:0x0 ID:13274 IpLen:20 DgmLen:60<br />
Type:8 Code:0 ID:512 Seq:29184 ECHO<br />
61 62 63 64 65 66 67 68 69 6A 6B 6C 6D 6E 6F 70 abcdefghijklmnop<br />
71 72 73 74 75 76 77 61 62 63 64 65 66 67 68 69 qrstuvwabcdefghi<br />
=+=+=+=+=+=+=+=+=+=+=+=+=+=+=+=+=+=+=+=+=+=+=+=+=+=+=+=+=+=+=+=+=+=+=+=+<br />
Note that the output on the console (same as fast) is not the same as those<br />
logged in \log\.The logged packets also include the data portion of the<br />
ICMP ping (a through z repeated).The preceding configuration will log to<br />
the syslog server you specified in the snort.conf. In my case, the syslog server<br />
is Kiwi syslog.The incoming alerts <strong>for</strong> the ICMP test rule are shown in<br />
Figure 4.8.<br />
Figure 4.8 Snort Sending Syslog Alerts to Kiwi Syslog<br />
<strong>Using</strong> a Snort GUI Front End<br />
Configuring an Intrusion Detection System • Chapter 4 231<br />
Many times the command-line options <strong>for</strong> programs with lots of functionality<br />
can seem cryptic, opaque, or even overwhelming. At these times a GUI front<br />
www.syngress.com
232 Chapter 4 • Configuring an Intrusion Detection System<br />
end can make things a lot easier. Rather than know a certain command-line<br />
option and syntax, a check box can often be a lot easier to get right. Even an<br />
experienced admin can find these front ends easier to use than the commandline<br />
versions. While it’s always going to be preferable to know the commandline<br />
operation in addition to being able to use a GUI, there is no need to<br />
memorize a lot of syntax if you don’t have to. Although it is capable of “managing”<br />
the execution of Snort, IDS Policy Manager (IDSPM) is primarily<br />
geared toward managing and customizing the Snort rules.<br />
Configuring IDS Policy Manager<br />
IDS Policy Manager is available <strong>for</strong> download from www.activeworx.org/<br />
programs/idspm/index.htm.This program will run on Windows 2000 and<br />
Windows XP and provides a graphical interface <strong>for</strong> Snort rule management<br />
and configuring Snort itself via the Snort configuration file. IDSPM does not<br />
need to be installed on the sensor itself; in fact, one of the strengths of<br />
IDSPM is that it can manage multiple sensors remotely. IDS Policy Manager’s<br />
primary strength is in its capability to manage the Snort rules, making this a<br />
must have <strong>for</strong> anyone who will be customizing and working with their rules<br />
extensively. IDSPM also supports the automated download of the newest<br />
Snort rules, using Oinkmaster. Setting up IDSPM can be accomplished by<br />
following these steps.<br />
1. Download and run the installation program.<br />
2. If you do not currently have the Microsoft .NET 2.0 framework<br />
installed you will be asked if you want to install it.The window that<br />
prompts you will refer to it as an optional component. In my case the<br />
product would not install until I had installed .NET V2, so I’m not<br />
sure how optional it really is.This shouldn’t pose any issues unless<br />
you are running some other software that relies on older .NET features<br />
and is incompatible with the newer version.<br />
3. Follow the installation prompts, accepting the license agreement and<br />
choosing the installation directory.<br />
4. When you first run the software, you will see a pop-up window<br />
alerting you that your oinkcode is not set up; click OK to get past<br />
this message.<br />
www.syngress.com
5. Next open the IDS Policy Manager shortcut.The opening screen is<br />
shown in Figure 4.9.<br />
Figure 4.9 IDS Policy Manager<br />
One of the first steps is to configure adding a sensor and then configure<br />
Oinkmaster. Add a sensor by right-clicking Snort Sensors and selecting<br />
Add Sensor.There are several tabs of in<strong>for</strong>mation to fill out on the Sensor<br />
properties window shown in Figure 4.10.<br />
Figure 4.10 IDSPM Add Sensor<br />
Configuring an Intrusion Detection System • Chapter 4 233<br />
www.syngress.com
234 Chapter 4 • Configuring an Intrusion Detection System<br />
6. At a minimum, fill out the Name and a Description <strong>for</strong> the sensor.<br />
7. Also enter the IP address or host name on the Sensor Settings<br />
tab.<br />
8. On the Authentication tab, enter the username and password to<br />
use to connect to the sensor (IDSPM will use SSH to communicate<br />
with the sensor).You can also use PKI <strong>for</strong> authentication. If you<br />
select PKI in the Authentication Mode drop-down box, the password<br />
fields will then change to fields to indicate the location of your<br />
public and private key files.<br />
9. On the Upload Settings tab, ensure that the Upload Directory is<br />
configured; by default it’s /etc/snort/rules.<br />
10. When you are finished filling out the in<strong>for</strong>mation, click the small<br />
monitors in the upper-left corner of the window.This will test the<br />
SSH connection to the server.The first time it connects, you will get<br />
the standard choice of accepting the RSA key or not. Choose Yes.<br />
Afterwards a brief Test connectivity Log will be displayed. All these<br />
should have a result of OK. Click OK to continue.<br />
11. Click OK to close the Sensor properties window.<br />
To configure the Oinkmaster portion of IDSPM, you will need<br />
to go to www.snort.org and register so that you can download the<br />
rules file. After registering, log onto the Snort Web site and click the<br />
link that says User Preferences. At the bottom of the page is a section<br />
titled Oink Code; click the Get Code button. Copy this code<br />
<strong>for</strong> use in the Oinkmaster configuration file.<br />
12. Navigate to Options | Settings.<br />
13. In the Settings pane on the left, select Miscellaneous.<br />
14. You will need to paste the Oink Code you generated previously, so<br />
that Oinkmaster can download the latest Snort rules.<br />
15. Use the drop-down boxes to select how often you wish to check <strong>for</strong><br />
updates and how often to back up the rules database. After you are<br />
finished, click OK.<br />
www.syngress.com
16. The next step is to create a policy. In this context, a policy is a definition<br />
of which rules to apply to a given sensor. Right-click Snort<br />
Policies and select Add Policy.<br />
17. Provide a name and description <strong>for</strong> the policy. Use the drop-down<br />
box to select the Snort version.The Initialize policy check box<br />
should be checked, so that it will apply the new settings immediately.<br />
18. Select the Update Locations tab shown in Figure 4.11. Click the<br />
“plus” to add a location.<br />
19. Click the cell under Update Location Name and select the appropriate<br />
location.You can define alternate locations at Options |<br />
Setting under Update Locations. After selecting the update location,<br />
click OK.<br />
Figure 4.11 IDSPM New Policy Locations<br />
Configuring an Intrusion Detection System • Chapter 4 235<br />
20. The Initialize Policy window will come up.This window enables<br />
you to pull your rules from a pre-defined location (in this case, the<br />
one called “Snort 2.6, which is a Web URL), a local file, or another<br />
HTTP address that has not been pre-defined. Select the proper location<br />
(or just leave the default) and click Start.<br />
21. The next step is to edit the policies’ various properties to match your<br />
environment.<br />
www.syngress.com
236 Chapter 4 • Configuring an Intrusion Detection System<br />
NOTE<br />
There is no mechanism to import your current Snort configuration into<br />
IDSPM. This means that if you have a working Snort configuration<br />
already, you will need to redefine it within IDSPM. After you start using<br />
IDSPM to manage your Snort sensors, you shouldn’t ever need to edit<br />
the sensors’ configuration directly and, in fact, doing so would cause<br />
your changes to be overwritten the next time you applied the configuration<br />
from IDSPM.<br />
When you click the plus next to Snort Policies, it should expand and show<br />
the newly created policy.After you expand the newly created policy, a number<br />
of property groups come into view, as shown in Figure 4.12.The primary one<br />
to configure is the Variables group.This is where you set the various variables<br />
in the configuration file so Snort knows what alerts to look out <strong>for</strong>.<br />
Figure 4.12 IDSPM Variables<br />
In the example you will see that there are multiples of many variables<br />
defined.This is done as a convenience to enable you to easily switch between<br />
them by right-clicking and selecting Disable Item or Enable Item. If, <strong>for</strong><br />
www.syngress.com
Configuring an Intrusion Detection System • Chapter 4 237<br />
example, you don’t want HOME_NET to be any (the default), you will rightclick<br />
the highlighted variable and select Disable Item.You could then doubleclick<br />
(or right-click and select Edit Item) the HOME_NET that is defined as<br />
10.1.1.0/24 and edit it.After changing the value to 192.168.1.0/24, click Save.<br />
Lastly, right-click the newly defined HOME_NET and select Enable Item.<br />
Refer to the beginning of this chapter <strong>for</strong> a more-detailed description of the<br />
various variables you need to set.<br />
If you need to edit the output modules, such as if you wanted Snort to<br />
log to MySQL, you would select the Output Modules section. If you do<br />
want to use Snort to log to a MySQL database, select either of the output<br />
modules with a name of “database” and with “mysql” in the value column.<br />
There should be two available, and each is the same except one specifies the<br />
localhost <strong>for</strong> the DB user. After editing the value to match your user name,<br />
database name, and the MySQL password, click Save. After the rule value has<br />
been saved, right-click and select Enable Item.<br />
To select which rule groups to apply, select Rule Groups in the left<br />
pane. Each category can be enabled or disabled.These settings correspond to<br />
commenting out the include statements in the snort.conf file. For example, to<br />
enable all the backdoor checks (over 500), right-click the row with “backdoor”<br />
in the name column and select Enable Item. By drilling down in the<br />
left column and selecting backdoor there, you can choose between individual<br />
rules to enable or disable in the right column. A very handy feature of<br />
IDSPM is the Find Rule function. With Rule Groups selected in the left<br />
pane, a small pair of binoculars will appear in the upper-left of the window;<br />
click this to open the Find Rule dialog.You can enter a Rule ID or Rule<br />
Name and then click Search.You don’t have to know the entire name; you<br />
can enter a partial name and it will pull up a list of rules.<br />
Perhaps the most compelling feature of IDSPM is the GUI interface <strong>for</strong><br />
creating your own custom rules. Follow these steps to create your own<br />
custom rule.<br />
1. Drill down into Rule Groups until you get to individual rules in<br />
the right pane (it doesn’t matter which group you are in).<br />
2. Click anywhere in the right pane and select Add Item.The Rule<br />
window is shown in Figure 4.13.<br />
www.syngress.com
238 Chapter 4 • Configuring an Intrusion Detection System<br />
Figure 4.13 IDSPM Rule Editor<br />
3. Start by entering a Name <strong>for</strong> the rule.<br />
4. Select a Group <strong>for</strong> the rule to go into.This drop-down selection is<br />
why it doesn’t matter which group you are in when you click Add<br />
Item.The Local group has been created specifically <strong>for</strong> the placement<br />
of custom rules.<br />
5. The Settings tab is where you specify what triggers the rule. For<br />
example, if we wanted to create a rule that would trigger any time<br />
ICMP was sent to the Snort sensor (192.168.1.104), we could easily<br />
do so. For Action, use the drop-down box to select the desired<br />
action. Log will log the packet, while Alert will show an alert on the<br />
Snort console. We will select Alert <strong>for</strong> this exercise.<br />
6. For Protocol, use the drop-down list to select icmp.<br />
7. For Classification, use the drop-down list to select icmp-event.<br />
8. In the Destination IP/Mask field, you can type 192.168.1.104/32.<br />
9. Enter a unique Signature ID number. Any custom rules should have<br />
ID numbers over 1,000,000 (the first one million IDs are reserved).<br />
10. Take note of the Rule Options field, but <strong>for</strong> now leave it blank.<br />
11. Place a Check in the Enabled box at the top and click OK.<br />
www.syngress.com
Configuring an Intrusion Detection System • Chapter 4 239<br />
The Rule Options field deserves a closer look.This is where<br />
you specify the bulk of the Snort rule logic.This is where the really<br />
interesting in<strong>for</strong>mation is placed.There are currently four types of<br />
rule options: meta-data, payload, non-payload, and post-detection.<br />
Odds are good that the majority of what you might want to search<br />
<strong>for</strong> would be done using the payload option, which enables you to<br />
trigger based on defined strings being present (or absent) from the<br />
packet. While the rule options are behind the true power of Snort’s<br />
custom rules, don’t <strong>for</strong>get that there is a repository of user community<br />
rules available (from www.snort.org). Unless you are trying to<br />
match a rule based on very unusual characteristics, odds are good that<br />
the rule is already out there.<br />
12. After you have finished all your customization, it’s time to assign the<br />
new policy to your sensor and apply the policy. Select Snort<br />
Sensors in the left pane and then right-click and select Edit item,<br />
or double-click the sensor row in the right pane.<br />
13. In the Policy drop-down box, select your new policy and click OK.<br />
14. Now right-click the sensor and select Upload policies to Sensors.<br />
15. The next window enables you to place a check next to each sensor<br />
you want to update.The status column will tell you if any rules<br />
applied to the selected sensor have been changed. If so, the status will<br />
read “Sensor needs to be updated.” When satisfied with the selection,<br />
click Start.<br />
16. After it is finished, click Close.<br />
You will find that the /etc/snort/rules/ directory contains a file called<br />
local.rules.The snort.conf file has an include $RULE_PATH/local.rules<br />
entry to enable the rules in this file. If you open this file, you can see our<br />
custom rule is there:<br />
alert icmp any any -> 192.168.1.104/32 any (msg:"TestRule"; classtype:icmpevent;<br />
sod:1000001; rev:1)<br />
The resultant alert on the Snort console is also shown here.<br />
12/01-12:16:41.236240 [**] [1:1000001:1] TestRule [**] [Classification:<br />
Generic ICMP event] [Priority: 3] {ICMP} 192.168.1.99 -> 192.168.1.104<br />
www.syngress.com
240 Chapter 4 • Configuring an Intrusion Detection System<br />
Configuring Snort on a Linux System<br />
The process of installing Snort on a Linux system is very close to the process<br />
on a Windows system.The primary difference is that the default (relative)<br />
paths in the snort.conf file are much more likely to work without modification<br />
on the Linux system.You will need to download the latest version of<br />
Snort that is appropriate <strong>for</strong> your system. If you are using Fedora Core 5, this<br />
is as simple as typing yum install snort, or you could download and install the<br />
.rpm from snort.org.<br />
Configuring Snort Options<br />
The next step is to configure the various options that determine how Snort<br />
will behave using the Snort configuration file.The configuration file is excellently<br />
documented and very easy to use.To get Snort working the way you<br />
want it to, follow these simple steps.<br />
1. Start by opening the main Snort configuration file. By default it will<br />
be located at /etc/snort/snort.conf.<br />
2. Configure the HOME_NET variable, if desired, by removing the #<br />
from the line you need. # is a commend indicator in the Snort configuration<br />
file.The HOME_NET variable defines which networks are<br />
the “trusted” internal networks.This is used with the signatures to<br />
determine when the internal network is being attacked. By default,<br />
HOME_NET is set to any network with the var HOME_NET any<br />
line in the snort.conf. Setting this to accurately reflect your internal<br />
address space will reduce the number of false positive alerts you<br />
receive.A common example would be var HOME_NET 192.168.1.0/<br />
24 or perhaps var HOME_NET [192.168.1.0/24,192.168.2.0/24].<br />
3. Configure the EXTERNAL_NET variable if desired.This is the network<br />
you expect attacks to come from.The recommendation is to set<br />
this to everything except your HOME_NET using the following: var<br />
EXTERNAL_NET !$HOME_NET. (Default: var EXTERNAL_<br />
NET any.)<br />
4. Next, define what servers are running specific services. For example,<br />
by setting HTTP_SERVERS to only specific servers, Snort will only<br />
www.syngress.com
Configuring an Intrusion Detection System • Chapter 4 241<br />
watch <strong>for</strong> HTTP attacks targeted at those servers. If you wish to see<br />
attacks targeting servers that are not running the affected services,<br />
leave the defaults, which are to watch <strong>for</strong> attacks directed towards any<br />
internal servers. (Default: var DNS_SERVERS $HOME_NET) If you<br />
had a Web server running on 192.168.1.11 and 192.168.1.12, you<br />
could tell Snort to only look <strong>for</strong> HTTP attacks targeting that server<br />
by setting the following variable: var HTTP_SERVERS<br />
[192.168.1.11/32,192.168.1.12/32].<br />
5. If desired, configure the specific ports that services are available on.<br />
For example, the default <strong>for</strong> HTTP is defined on the following line:<br />
var HTTP_PORTS 80. Similar to defining the servers in the preceding<br />
section, this will tell Snort to only look <strong>for</strong> attacks targeting<br />
specific ports. With the default configuration, Snort would ignore an<br />
HTTP attack to port 8080. Again, this setting will help focus where<br />
Snort looks <strong>for</strong> different types of attacks to occur.<br />
6. If you are interested in detecting the usage of AOL Instant Messenger<br />
(AIM), the various IP addresses of the AIM servers are defined in the<br />
snort.conf file.This is done because the IP addresses change frequently,<br />
and by using a variable, the rules don’t have to be updated<br />
each time the IP address changes. If you don’t wish to trigger based<br />
off AIM usage, don’t worry about changing these IP addresses.<br />
7. Download the Snort rules from http://snort.org/rules. Click<br />
Download Rules on the right-hand side of the page. On the<br />
Download Rules page, scroll down to the section labeled<br />
Sourcefire VRT Certified Rules (unregistered user release).<br />
Download the latest ruleset.<br />
8. Extract the rules (and /docs) to the location of your choice, typically<br />
/etc/snort/rules and /etc/snort/docs.<br />
9. Configure the RULE_PATH variable, which tells Snort where to<br />
find the rules used <strong>for</strong> triggering events.You can use a relative path<br />
such as var RULE_PATH ../rules or an absolute path such as /etc/<br />
snort/rules.<br />
www.syngress.com
242 Chapter 4 • Configuring an Intrusion Detection System<br />
10. The next section has some commented out lines to disable certain<br />
detections of some infrequently seen types of traffic. Unless you are<br />
having some issues with those alerts or your IDS is very low on<br />
resources, it’s probably fine to just leave those at the default (enabled)<br />
configuration.<br />
11. The last few lines of the “step 1” section enable you to configure the<br />
detection engine <strong>for</strong> systems with limited resources. Unless you are<br />
having issues, you can leave this option alone.<br />
12. After that the “step 2” and “step 3” sections of the configuration file<br />
allow you to enable or disable specific functionality and detect particular<br />
types of attack, such as fragmentation attacks, stateful inspection,<br />
and stream reassembly options. Delving into the specifics of each of<br />
those options is beyond the scope of this chapter and <strong>for</strong> many, the<br />
default setting will serve them well.<br />
13. The section labeled Step #4 contains output options <strong>for</strong> Snort.<br />
Uncomment output alert_syslog: LOG_AUTH LOG_ALERT<br />
(the default). Despite what facility and severity you configure here,<br />
the snort alerts will be generated as auth.info.You also need to<br />
include the –s switch on the command line to enable syslog logging.<br />
We will discuss syslog in more detail in the next chapter. If you don’t<br />
have a syslog server to log to yet, just make note of the setting and<br />
come back to it when your syslog server is set up.<br />
<strong>Using</strong> the preceding example of LOG_AUTH and<br />
LOG_ALERT, you would need the following in your syslog.conf file<br />
to log to a syslog server at 192.168.1.99:<br />
auth.info @managmentserverIP<br />
If you are using syslog-ng, you would need a logging destination<br />
defined, a filter that specifies what events to capture, and a log statement<br />
in the syslog-ng.conf file. An example of this configuration<br />
would be the following:<br />
destination d_lab { udp ("192.168.1.99" port(514)); };<br />
filter f_most { level(info..emerg); };<br />
log { source(s_sys); filter(f_most); destination(d_lab); };<br />
www.syngress.com
Configuring an Intrusion Detection System • Chapter 4 243<br />
14. Edit the paths <strong>for</strong> the dynamically loaded libraries in section #2 to<br />
point to the proper path. Depending on your Linux distribution and<br />
installation method, these paths may not be the default. For example,<br />
on Fedora Core 5, using yum to install Snort, the settings would use<br />
the following paths: dynamicpreprocessor directory /usr/lib/snort/dynamicpreprocessor<br />
and dynamicengine /usr/lib/snort/libsf_engine.so. If you<br />
receive an error when you try to run Snort, along the lines of<br />
Unknown rule type: dynamicpreprocessor directory or Unknown rule type:<br />
dynamicengine, then your installation of Snort is not configured to use<br />
dynamically loaded processors. In this case, simply place a # in front<br />
of both of those lines to comment them out.<br />
15. The last section (Step #6), contains various include statements that<br />
specify the rulesets to be checked. Some rules are disabled by default,<br />
such as chat.rules, which is triggered by the use of various instant<br />
messaging clients.To enable or disable a given ruleset, simply add or<br />
remove a # at the beginning of the include line.This entry can be<br />
left as a relative path (<strong>for</strong> example, include $RULE_PATH/<br />
local.rules) because the RULE_PATH variable will be expanded to<br />
make it an absolute path.<br />
16. If you need any custom rules that are not included with the standard<br />
Snort release, you can download rules provided by the Snort community<br />
from the Rules page on the Snort Web site. If you are looking<br />
<strong>for</strong> something unusual, you might find it there without having to<br />
create the rule yourself.<br />
You are now ready to start up Snort and see what it looks like in action.<br />
When you start Snort you can specify the interface to listen on using the –i<br />
switch such as –i eth0. If you don’t specify, it will use the first interface. Use<br />
the –c option to tell Snort which configuration file to use. It can be useful to<br />
have multiple configuration files configured so you can quickly switch configurations<br />
<strong>for</strong> special circumstances.You could prepare different configuration<br />
files to home in on certain issues, segments, or more in-depth logging.<br />
Another important option is –A, which tells Snort what type of alerts to generate.The<br />
options are fast, full, console, or none.<br />
www.syngress.com
244 Chapter 4 • Configuring an Intrusion Detection System<br />
The following command example would start Snort listening on the first<br />
interface (no –i used), with alerts going to the console only, using the configuration<br />
file at /etc/snort/snort.conf.The –l switch tells Snort where the logging<br />
directory is located.The –K switch tells Snort what types of logs to<br />
generate. ASCII logs are easier <strong>for</strong> a human to read, but they take a little more<br />
time to log. If speed isn’t a concern, the ASCII logs will probably be the easiest<br />
to read and analyze.<br />
snort –A console –c /etc/snort/snort.conf –l /etc/snort/log –K ascii<br />
You should see any triggered rules produce a message on the console and<br />
logged to your syslog server. If you add the –s switch to the end of the line, it<br />
will tell snort to log to the syslog server you have configured in the snort.conf<br />
file; however, it will not also display on the snort console. If you want to<br />
create a rule <strong>for</strong> testing purposes to see what the results look like, create a test<br />
rule file, such as TESTING.rules, and place it in the rules folder<br />
(/etc/snort/rules, in this example). In this file you could place the following<br />
line, which would trigger on any attempts to ping another system.<br />
Alert icmp any any -> any any (msg:"TEST rule";sid: 1000001;)<br />
Edit the snort.conf to read your new rule by inserting the following statement<br />
towards the end of the file: include<br />
$RULE_PATH/TESTING.rules. . As a last step, edit the snort\stc\sidmsg.map<br />
file.This file provides a mapping between snort alert messages and<br />
alert IDs or numbers. Custom alerts should use an ID number of more than<br />
one million. Add the following line at the end of the file:<br />
1000001<br />
Placing the ID number is the minimum requirement <strong>for</strong> Snort not to<br />
output an error.You can certainly fill in all the other fields, following the<br />
existing message maps as a guideline. When this is done, you will need to stop<br />
and restart Snort. Here is a partial display of the console output of a single<br />
ping and the reply.<br />
10/12-21:29:35.911089 [**] [1:0:0] TEST rule [**] [Priority: 0] {ICMP}<br />
192.168.1.99 -> 192.168.1.103<br />
08/10-18:22:20.284438 [**] [1:0:0] TEST rule [**] [Priority: 0] {ICMP}<br />
192.168.1.103 -> 192.168.1.99<br />
www.syngress.com
You can also add your own custom rules to the local.rules file. When you<br />
open the file, you will find it is essentially empty, existing solely <strong>for</strong> you to<br />
place your custom rules in it.The local.rule is “included” in the snort.conf by<br />
default, so you will not need to add it there.You will, however, still need to<br />
edit the sid-msg.map file <strong>for</strong> any rules placed in local.rules.<br />
The –A option will alter the display of the alerts on the console, while the<br />
–K option controls how the alerts are logged to the log directory.You should<br />
experiment with the different display <strong>for</strong>mats to find the one that provides adequate<br />
in<strong>for</strong>mation with the minimal strain on the Snort host. For day-to-day<br />
operations you would probably want to use fast alerts in your log files, which<br />
look like the ones that are sent to the console with the console option.Available<br />
alert modes and logging <strong>for</strong>mats are outlined here <strong>for</strong> handy reference.<br />
■ -A console Logs to the console in the following <strong>for</strong>mat:<br />
10/12-21:29:35.911089 [**] [1:0:0] TEST rule [**] [Priority: 0] {ICMP}<br />
192.168.1.99 -> 192.168.1.103<br />
■ -A fast Logs in the same <strong>for</strong>mat as console, but writes the alerts to a<br />
/snort/alert file with no output to the console.<br />
■ -A full Logs to the /snort/alert file in the following <strong>for</strong>mat:<br />
[**] [1:0:0] TEST rule [**]<br />
[Priority: 0]<br />
10/12-21:38:53.741606 192.168.1.103 -> 192.168.1.99<br />
ICMP TTL:64 TOS:0x0 ID:6350 IpLen:20 DgmLen:60<br />
Type:0 Code:0 ID:512 Seq:7936 ECHO REPLY<br />
Configuring an Intrusion Detection System • Chapter 4 245<br />
■ –K pcap This is the default mode if you don’t specify an alternate<br />
<strong>for</strong>mat on the command line.This file will contain the alert packets<br />
in their entirety.You can open this file using a network sniffer such as<br />
Wireshark.<br />
■ –K ascii Will create a folder under /log <strong>for</strong> each IP address. Within<br />
that folder each rule will create a log file.The log entries will be the<br />
same <strong>for</strong>mat as the “full” alert <strong>for</strong>mat.<br />
■ –K none No log file will be created.<br />
www.syngress.com
246 Chapter 4 • Configuring an Intrusion Detection System<br />
Congratulations! You now have a working IDS. Figure 4.14 shows the<br />
syslog alerts from the TESTING.rule in the Kiwi Syslog Daemon console.<br />
Figure 4.14 Snort Alerts in Kiwi Syslog Daemon Console<br />
<strong>Using</strong> a GUI Front End <strong>for</strong> Snort<br />
Like the Windows version of Snort, some have felt the administration of<br />
Snort could be improved upon by implementing a more robust GUI interface.There<br />
are several Snort GUIs to choose from aimed at both the configuration<br />
of Snort, as well as the interpretation of the Snort alerts. Some really<br />
only offer buttons to configure options on the Snort command line, and offer<br />
very little additional functionality, while others bring some very powerful<br />
additional features to the table. We will discuss the operation of some of the<br />
better offerings in the next section.<br />
Basic Analysis and Security Engine<br />
Basic Analysis and Security Engine (BASE) is available <strong>for</strong> download from<br />
http://base.secureideas.net/about.php.The purpose of BASE is to provide a<br />
Web-based front end <strong>for</strong> analyzing the alerts generated by Snort. Base was<br />
derived from the ACID project (Analysis Console <strong>for</strong> Intrusion Databases).<br />
Whereas ACID is more of a general-purpose front end <strong>for</strong> viewing and<br />
searching <strong>for</strong> events, BASE is a Snort-specific utility.The instructions to configure<br />
BASE assume you have already installed and configured Snort. Snort<br />
must be installed with the —with-mysql switch because Snort does not support<br />
MySQL output by default.The Snort Web site has RPM packages with<br />
MySQL support already included <strong>for</strong> some operating systems.This is the list<br />
www.syngress.com
of dependencies <strong>for</strong> running BASE: httpd, Snort (with MySQL support),<br />
MySQL, php-gd, pcre, php-mysql, php-pdo, php-pear-Image-GraphViz,<br />
graphviz, and php-adodb. Follow these steps to get BASE up and running.<br />
1. Download and install MySQL and BASE<br />
2. Edit the /snort/snort.conf file. Uncomment and edit the following<br />
line:<br />
output database: log, mysql, user=snort password=snortpass dbname=snort<br />
host=localhost<br />
3. The next few steps are related to setting up the MySQL database and<br />
settings. After you install MySQL, enter the MySQL commands by<br />
typing mysql on the command line.This will place you in an interactive<br />
command mode. All commands must have a semicolon at the<br />
end of the line. By default, the MySQL installation will not have a<br />
password set at all.You should add a default password with the following<br />
commands.<br />
mysql<br />
mysql> SET PASSWORD FOR root@localhost=PASSWORD('somepassword');<br />
After you have assigned a password to the root account, simply<br />
entering mysql will not enable you to access the interactive command<br />
mode. After a password has been assigned, use mysql –u<br />
–p.You will then be prompted to enter the password<br />
<strong>for</strong> the user you specified (typically root).<br />
4. The next step is to create the Snort database.<br />
mysql> create database snort;<br />
5. You now need to give the Snort user permissions to add the needed<br />
tables to the Snort database. Use these commands:<br />
mysql> grant INSERT,SELECT on root.* to snort@localhost;<br />
Configuring an Intrusion Detection System • Chapter 4 247<br />
6. You should now set the password <strong>for</strong> the Snort user to the same password<br />
you used in the Snort configuration file.<br />
mysql> SET PASSWORD FOR snort@localhost=PASSWORD('snortpass');<br />
7. The next step is to add some additional permissions <strong>for</strong> the Snort<br />
database using the following commands:<br />
www.syngress.com
248 Chapter 4 • Configuring an Intrusion Detection System<br />
mysql> grant ALL on snort.* to snort@localhost;<br />
mysql> grant ALL to snort;<br />
mysql> exit<br />
8. Now that the database has been created, you need to populate it with<br />
the tables Snort uses. Use the following command to create the<br />
tables:<br />
mysql –u root –p < /etc/snort/schemas/create_mysql snort<br />
TIP<br />
When the command completes, it will not give any indication of<br />
its success; there<strong>for</strong>e, it will be necessary to manually verify that the<br />
tables were created.<br />
If the package you installed did not include the /snort/schemas/ directory,<br />
you can download the source package and extract the directory from<br />
there. With Fedora Core 5, <strong>for</strong> some reason installing the Snort with<br />
MySQL support did not include the schemas directory.<br />
9. Verify the MySQL tables were created in the Snort database by<br />
entering the following commands.You should see output similar to<br />
that shown in the following example:<br />
mysql –u root –p<br />
show databases;<br />
+----------+<br />
| Database |<br />
+----------+<br />
| mysql |<br />
| snort |<br />
| test |<br />
+----------+<br />
use snort;<br />
show tables;<br />
www.syngress.com
+------------------+<br />
| Tables_in_snort |<br />
+------------------+<br />
| data |<br />
| detail |<br />
| encoding |<br />
| event |<br />
| icmphdr |<br />
| iphdr |<br />
| opt |<br />
| reference |<br />
| reference_system |<br />
| schema |<br />
| sensor |<br />
| sig_class |<br />
| sig_reference |<br />
| signature |<br />
| tcphdr |<br />
| udphdr |<br />
+------------------+<br />
exit<br />
The list of databases is not significant, as long as the Snort database exists,<br />
of course.The table listing must be accurate. If any are missing, Snort will<br />
generate an error when you run it.<br />
10. Install php-gd, which is used to generate the graphs in BASE. On<br />
Fedora Core 5 you can just type yum install php-gd.<br />
11. Install ADODB, which is a database abstraction library <strong>for</strong> PHP. On<br />
Fedora you can simply enter yum install php-adodb.<br />
12. It’s now time to configure BASE itself. Edit the /usr/share/basephp4/base_conf.php<br />
file to ensure that the following lines are<br />
configured with paths and settings appropriate <strong>for</strong> your configuration.<br />
$BASE_urlpath = '/base';<br />
$DBlib_path = '/usr/share/ododb';<br />
$DBtype = 'mysql';<br />
$alert_dbname = 'snort';<br />
$alert_host = 'localhost';<br />
Configuring an Intrusion Detection System • Chapter 4 249<br />
www.syngress.com
250 Chapter 4 • Configuring an Intrusion Detection System<br />
$alert_port = '';<br />
$alert_user = 'snort';<br />
$alert_password = 'snortpass';<br />
You should not be able to access the BASE Web page at the following<br />
URL: http://localhost/base/.<br />
Tools & Traps…<br />
Troubleshooting Tips<br />
■ You can enable debugging in BASE by editing the<br />
/usr/share/base-php4/base-php4.conf file.<br />
$debug_mode = 2;<br />
■ Use chkconfig to make sure that MySQL, Snort, and httpd are<br />
running.<br />
Chkconfig --list | grep snort<br />
Snortd 0:off 1:off 2:on 3:on 4:on 5:on 6:on<br />
If all entries say “off,” then that service is configured not to start. Try<br />
service snortd start.<br />
■ Httpd may need to be restarted <strong>for</strong> some configuration<br />
changes to take effect; when in doubt, restart it just to be<br />
safe: service httpd restart.<br />
■ The httpd access log and error log can be found at<br />
/etc/httpd/logs.<br />
■ You can control the logging level of the httpd by editing<br />
/etc/httpd/conf/httpd.conf.<br />
LogLevel debug<br />
www.syngress.com<br />
■ If you are having issues with the URLs not being found, the<br />
/etc/httpd/conf.d/base-php4.conf file tells the Web server to<br />
alias /base/ with the directory /usr/share/base-php4/.
The very first time you start up BASE, none of the database tables have<br />
been created.You will see something like the page shown in Figure 4.15.<br />
Figure 4.15 BASE Setup<br />
13. Click on the Setup page link.<br />
14. Click the Create BASE AG button on the right-hand side.You see<br />
several success messages as shown in Figure 4.16.<br />
Figure 4.16 BASE Success<br />
Configuring an Intrusion Detection System • Chapter 4 251<br />
15. Click the Main Page link.This should take you to the primary<br />
BASE interface as shown in Figure 4.17.<br />
Although this window may not be too flashy, there is a wealth of in<strong>for</strong>mation<br />
you can discover. Most of the fields are actually links. By clicking to the<br />
right of Today’s alerts, <strong>for</strong> example, you can get a sorted list of unique<br />
alerts, a listing of all alerts, or a list sorted by source IP address or destination<br />
www.syngress.com
252 Chapter 4 • Configuring an Intrusion Detection System<br />
IP address.The other headings along the left side offer similar functionality.<br />
Of particular note are the links <strong>for</strong> the Most Frequent 15 addresses by<br />
source address.This would enable you to quickly see which systems are generating<br />
the majority of your alerts. If you open that window (shown in Figure<br />
4.18) there are several additional fields that are also hyperlinked.<br />
Figure 4.17 BASE Main Page<br />
Figure 4.18 BASE Most Frequent by Source IP<br />
www.syngress.com
Note the field at the bottom labeled ACTION.This enables you to configure<br />
the alert groups. Alert groups are basically shortcuts to enable you to<br />
view a subset of alerts quickly, without having to navigate through the various<br />
menus to get there. For example, suppose you want to know anytime that<br />
192.168.1.1 generates an alert.You can check the check box to the left of<br />
192.168.1.1, and then use the {action} drop-down box to select Create AG<br />
(by Name). In the action column, enter .1_ALERTS to use as the alert group<br />
name. Finally, click Selected.<br />
The next screen enables you to enter a description <strong>for</strong> the newly created<br />
alert group. Enter a meaningful text description <strong>for</strong> the group and click Save<br />
Changes.The next screen will be a listing of all alerts from 192.168.1.1.This<br />
screen is the alert group. In the future, if you want to quickly see this group<br />
of alerts, you can click Alert Group Maintenance at the bottom of each page,<br />
and then click the alert group you want to view. In this way, any subset of<br />
alerts is only two clicks away, sort of like a shortcut straight to a particular set<br />
of filtering criteria.<br />
Another feature of note is the Administration link at the bottom of each<br />
page.This will take you to a screen where you can configure users <strong>for</strong> BASE.<br />
There are four options on the administration screen: list users, create a user,<br />
list roles, and create a role.These screens enable you to create users and assign<br />
them to various roles. If you click List Roles, you can see the four predefined<br />
roles. If you want to assign a user in the administrator role, simple click Create<br />
a user. Enter the login name, a full name or description, and a password. Use<br />
the drop-down box to select a role and then click Submit Query. None of<br />
the settings here will take effect until you edit the base_conf.php file and<br />
change the value of $Use_Auth_System = 1;. A value of 0 (the default) means<br />
the authentication is disabled and everyone has full access to BASE. Only the<br />
admin role has access to the administration screen.<br />
TIP<br />
Configuring an Intrusion Detection System • Chapter 4 253<br />
Remember the different logging options <strong>for</strong> Snort on the command line.<br />
Previously, we used –A console, which would log Snort events to the Snort<br />
terminal. If you are going to be using a different front end <strong>for</strong> viewing<br />
Snort alerts, there isn’t much value in also logging to the console. You can<br />
www.syngress.com
254 Chapter 4 • Configuring an Intrusion Detection System<br />
use –A none when starting Snort, which will cause Snort not to log anything<br />
to the Snort terminal, resulting in improved per<strong>for</strong>mance.<br />
Other Snort Add-Ons<br />
The number of Snort utilities and add-ons is impressive. Some of these<br />
address such key issues as keeping your Snort rulebase up-to-date, while<br />
others provide additional per<strong>for</strong>mance improvements such as faster logging. If<br />
you are looking <strong>for</strong> a particular feature or option, you should do some<br />
searching on the Internet, and you might find that the functionality you are<br />
looking <strong>for</strong> already exists. If you do find an add-in you are interested in using,<br />
remember to properly test it be<strong>for</strong>e deploying it in a production environment.<br />
<strong>Using</strong> Oinkmaster<br />
You may get tired of constantly having to update the Snort signature files.<br />
Because Snort is a signature-based IDS, having current signatures is vital.<br />
Without current signature files you could be unaware of intrusion attempts<br />
happening right in front of you. Although Snort itself does not include any<br />
means to automatically update the signature file, there is another utility that<br />
can help called Oinkmaster (http://oinkmaster.source<strong>for</strong>ge.net/<br />
features.shtml). Oinkmaster is a Perl script that will update your Snort rules<br />
from the Snort Web site automatically. Because it uses Perl, Oinkmaster will<br />
run on a Linux or a Windows Snort host.The Oinkmaster Perl script can be<br />
scheduled to run and check <strong>for</strong> updates as often as you like.To download<br />
Snort rules without having to wait until the next release of Snort, you have to<br />
register on the Snort Web site.You can register <strong>for</strong> free at<br />
https://snort.org/pub-bin/register.cgi. A password will be sent to the e-mail<br />
address you provide during registration.The configuration of Oinkmaster is<br />
outlined here.<br />
1. After logging on to the Snort Web site, click the link that says User<br />
Preferences.<br />
2. At the bottom of the page is a section titled Oink Code; click the<br />
Get Code button.<br />
www.syngress.com
3. Copy this code <strong>for</strong> use in the Oinkmaster configuration file.<br />
4. Download the latest tar.gz from the Oinkmaster Web site.<br />
5. Extract the folder in the archive to /etc/oinkmaster.<br />
6. Edit the oinkmaster.conf file. Find the line that specified the URL<br />
<strong>for</strong> the current ruleset. (You can search <strong>for</strong> CURRENT.)<br />
Uncomment the line by removing the #, and then paste your oink<br />
code into the line in place of .<br />
url = http://www.snort.org/pub-bin/oinkmaster.cgi//snortrulessnapshot-CURRENT.tar.gz<br />
7. Start Oinkmaster with the following command:<br />
oinkmaster.pl –C /etc/oinkmaster/oinkmaster.conf –o /etc/snort/rules<br />
When it completes, Oinkmaster will tell you what rules were<br />
changed/updated.You can also specify the URL to retrieve the rules from the<br />
command line using the –u option.To configure the Oinkmaster<br />
script to run daily, use crontab with the following command:<br />
crontab –u -e<br />
Enter the username you are running Oinkmaster as in place of .<br />
This will open the crontab <strong>for</strong> that user. Adding the following line to the<br />
crontab will cause Oinkmaster to run each night at 2:00 A.M. If you prefer,<br />
there are also several GUI’s available <strong>for</strong> configuring the cron daemon, such as<br />
gnome-schedule.<br />
0 2 * * * oinkmaster.pl –C /etc/oinkmaster/oinkmaster.conf –o<br />
/etc/snort/rules<br />
Now your Snort rules should stay up to date. Remember, if you change<br />
Snort versions, the URL to the appropriate rules may change, in which case<br />
you will need to update your oinkmaster.conf accordingly.<br />
WARNING<br />
Configuring an Intrusion Detection System • Chapter 4 255<br />
Because the oinkmaster.conf file contains the path to update your Snort<br />
rules, if this file does not have secure access permissions on it, someone<br />
who could edit the file could render your IDS useless. With the ability to<br />
www.syngress.com
256 Chapter 4 • Configuring an Intrusion Detection System<br />
edit the configuration file, a malicious user could point the URL to one<br />
of his choosing, with empty rule sets that will not trigger on anything,<br />
or even worse, rules that work perfectly except ignore the attacker’s IP<br />
address. Make sure the oinkmaster.conf file is secured and only the<br />
account you are running Oinkmaster under has access to the file.<br />
Additional Research<br />
If the Snort utilities we have covered don’t do everything you want them to<br />
do, there are other alternatives. Some of the utilities that are out there are<br />
more user friendly than others. Here are a few additional tools that are highly<br />
regarded and which may be helpful when running your Snort IDS.These<br />
include both Windows– and Linux-based tools.<br />
■ ACID ACID stands <strong>for</strong> Analysis Console <strong>for</strong> Intrusion Databases.<br />
You can download ACID from http://acidlab.source<strong>for</strong>ge.net/. BASE<br />
was based off code from ACID, so the interfaces are strikingly similar.<br />
If you are only looking to use the Web front end <strong>for</strong> Snort logs,<br />
ACID probably doesn’t buy you anything over BASE. If you plan to<br />
import data from additional non-Snort sources, however, ACID has<br />
the flexibility to do that.<br />
■ Barnyard Is available from http://source<strong>for</strong>ge.net/project/showfiles.php?group_id=34732.<br />
It is basically a utility to offload the logging<br />
overhead from Snort. <strong>Using</strong> Barnyard, you configure Snort to<br />
log binary data (which is the fastest way <strong>for</strong> Snort to log, but not<br />
very human-readable) and Barnyard will then take the binary logs<br />
and convert them to human-friendly ASCII or import them into a<br />
database. For a small environment with low-alert volumes on the<br />
IDS, Barnyard is probably not needed. Snort will support logging to a<br />
MySQL database natively without using Barnyard.<br />
■ Sguil Sguil (http://sguil.source<strong>for</strong>ge.net/) is pronounced “sgweel”<br />
and stands <strong>for</strong> Snort GUI <strong>for</strong> Lamerz. It is also referred to as the<br />
Analysis Console <strong>for</strong> <strong>Network</strong> Security Monitoring.The objective of<br />
sguil is to provide more than just a console to view Snort alerts. Sguil<br />
www.syngress.com
also gives the analyst the capability to delve deeper into an alert, all<br />
the way to the captured packet, to facilitate investigation. Basically,<br />
sguil integrates multiple security tools into one interface <strong>for</strong> easy<br />
access.The sguil developers provide a demo sensor that you can connect<br />
to from the Web to see sguil in action.To use it, simply download<br />
and install the sguil client, and then connect to the sensor<br />
demo.sguil.net on port 7734. When prompted, you can enter any<br />
user name and password, and then select the sensor named “reset” in<br />
the console. Sguil is a powerful tool <strong>for</strong> investigating Snort alerts, but<br />
the configuration and setup is not <strong>for</strong> the faint of heart.<br />
■ Snortsnarf This is a log analyzer targeted specifically at analyzing<br />
Snort logs.You can download it from www.snort.org/dl/<br />
contrib/data_analysis/snortsnarf/.<br />
Demonstrating Effectiveness<br />
Configuring an Intrusion Detection System • Chapter 4 257<br />
One of the age-old debates when it comes to network data collection is<br />
placement of the sensors.This applies to both IDS sensors and reporting sensors<br />
such as PRTG Traffic Grapher.The most common difference of opinion<br />
is whether you should place the sensor outside your external firewall or inside<br />
it.This is relevant because the data you see will be drastically different<br />
between the two. With the sensor placed outside your perimeter firewall, you<br />
will see all traffic directed at you from the Internet, including all the traffic<br />
your firewall is blocking. If the sensor is placed inside the perimeter firewall,<br />
you will only see the traffic that has managed to pass through your firewall.<br />
Undeniably, the traffic of the most security relevance is the traffic that has<br />
managed to traverse your firewall and get into your internal network.These<br />
are the potential attacks, probes, and whatnot that need to be inspected and<br />
monitored closely to make sure the network is not compromised. If everything<br />
is configured properly, an IDS inside the perimeter should really see<br />
very little traffic, except perhaps triggers related to IT policy, such as file<br />
sharing or instant messaging protocols. So if all the data a security officer<br />
would find “interesting” is on the inside, you might wonder what value a<br />
sensor on the outside would bring.<br />
www.syngress.com
258 Chapter 4 • Configuring an Intrusion Detection System<br />
The best value <strong>for</strong> placing a sensor outside is really one of public relations.<br />
The un<strong>for</strong>tunate fact is that when it comes to network security, if everything<br />
is done properly, no one ever sees much of anything.There are no flashing<br />
lights or alarms that say the network is functioning properly and securely. If<br />
you place an IDS on the outside of the perimeter, you can extract reports<br />
based on the traffic the IDS sees.These can be used to demonstrate to management<br />
in concrete terms what your security ef<strong>for</strong>ts are accomplishing.<br />
Saying “the network is running fine” is great, but probably doesn’t have the<br />
impact that a one-page report with a pie chart would have. An executive<br />
summary of the attacks the sensor has seen could list some basic facts like<br />
“56,000 instances of code red worm were blocked, up 5 percent from last<br />
month,” and so <strong>for</strong>th. With an old PC and a little up-front ef<strong>for</strong>t, these types<br />
of reports would take very little ef<strong>for</strong>t to produce, but they could help you<br />
reap huge rewards when it comes to public perception of network security.<br />
When exposing any system to the Internet at large, remember it will be<br />
attacked. If your IDS is outside your perimeter firewall, there is nothing protecting<br />
the IDS except the IDS itself.This means the IDS will need to be<br />
hardened and secured as much as possible to ensure that it doesn’t become a<br />
system <strong>for</strong> hackers to use. Under these circumstances, one of your best<br />
defenses would be <strong>for</strong> the IDS to use a network tap (not free) to ensure that<br />
it can only receive from the network and not transmit.There are various discussions<br />
on the Internet <strong>for</strong> making cables that can receive only. A little<br />
research will surely turn up some interesting designs to try.The success of<br />
these read-only cables will vary greatly depending on your system’s network<br />
card and the switch or hub you are connected to. While this doesn’t make the<br />
IDS sensor invulnerable to attacks or alleviate the need to harden it, this configuration<br />
will make it significantly harder to compromise.<br />
Summary<br />
Snort has the undisputed position as the lead open source IDS. As such, it<br />
enjoys several advantages. One advantage is the very large and diverse user<br />
base.This user base enables you to find a lot of help and in<strong>for</strong>mation on the<br />
Internet <strong>for</strong> running, configuring, and customizing Snort. Although Snort<br />
may not enjoy the cohesive turnkey nature of a commercial package, you can<br />
www.syngress.com
assemble several utilities and tools to make Snort into an enterprise-class IDS.<br />
With no cost in software you can have an industry-standard IDS with a large<br />
signature base and the ability to create your own custom signatures.<strong>Your</strong> signatures<br />
can be automatically updated to keep them current, and you can use<br />
several GUI front ends to remotely configure and manage several Snort sensors<br />
at one central location. All this adds up to a lot of value and increased<br />
security, with no additional software cost.<br />
Solutions Fast Track<br />
Intrusion Detection Systems<br />
Configuring an Intrusion Detection System • Chapter 4 259<br />
� The most common way to implement an IDS is by having a system<br />
monitor and inspect (sniff ) all traffic over a given link.<br />
� An IDS that compares traffic with a database of known signatures <strong>for</strong><br />
undesirable traffic is an example of a signature-based IDS.<br />
� Some IDS systems are anomaly based, which means the IDS attempts<br />
to build a list of “normal” traffic from your actual network data, and<br />
then it flags anything that doesn’t fit the list of normal traffic that it<br />
has built.<br />
Configuring an Intrusion Detection System<br />
� Placement of the IDS will be key. If the IDS is not placed properly<br />
you will miss alerts and possibly think you are more secure than you<br />
really are.<br />
� <strong>Your</strong> IDS is probably the security host that will need the most<br />
hardware resources of any discussed in this book (with the firewall<br />
being a close second), so plan accordingly when selecting the<br />
hardware to use <strong>for</strong> your IDS.<br />
� Remember that even with the proper physical placement, you need<br />
to have a hub in order <strong>for</strong> the IDS to be able to see traffic destined<br />
<strong>for</strong> other devices, or enable port mirroring if you are using a switch<br />
instead of a hub.<br />
www.syngress.com
260 Chapter 4 • Configuring an Intrusion Detection System<br />
Configuring Snort on a Windows System<br />
� Remember that every path in the snort.conf file needs to be an<br />
absolute path. A single incorrect path will prevent Snort from<br />
running properly.<br />
� WinPcap will be required in order to use Snort on Windows. It is<br />
also required <strong>for</strong> using several other networking utilities on<br />
Windows.<br />
� IDS Policy Manager can be used to centrally configure and manage<br />
the Snort process and Snort rules.<br />
Configuring Snort on a Linux System<br />
� You may want to consider a Snort alert front end such as BASE <strong>for</strong><br />
viewing alerts.<br />
� If your environment is primarily Windows, this will enable you to<br />
access the alerts from the Windows systems without having to view<br />
the Snort console on the Linux IDS host.<br />
Other Snort Add-Ons<br />
� A fully functioning IDS will not be of much value if no one is taking<br />
notice of the alerts it generates. An easy-to-use alert console can add<br />
a lot of value to your IDS in that it may increase the attention the<br />
alerts receive.<br />
� We recommend using Oinkmaster to automatically keep your Snort<br />
signature files current.<br />
Demonstrating Effectiveness<br />
� One of the age-old debates when it comes to network data<br />
collection is placement of the sensors.<br />
www.syngress.com
� The most common difference of opinion is whether you should<br />
place the sensor outside your external firewall or inside it.<br />
� Undeniably, the traffic of the most security relevance is the traffic<br />
that has managed to traverse your firewall and get into your internal<br />
network.These are the potential attacks, probes, and whatnot that<br />
need to be inspected and monitored closely to make sure the<br />
network is not compromised.<br />
Frequently Asked Questions<br />
Configuring an Intrusion Detection System • Chapter 4 261<br />
The following Frequently Asked Questions, answered by the authors of this book,<br />
are designed to both measure your understanding of the concepts presented in<br />
this chapter and to assist you with real-life implementation of these concepts. To<br />
have your questions about this chapter answered by the author, browse to<br />
www.syngress.com/solutions and click on the “Ask the Author” <strong>for</strong>m.<br />
Q: How do I configure Snort to send e-mail alerts?<br />
A: You don’t. Snort includes no native way to send e-mail alerts.This was an<br />
intentional decision because processing e-mail alerts would place an<br />
undue burden on the Snort process, possibly resulting in dropped packets<br />
and missed alerts. Instead, the simplest way to accomplish this is with a log<br />
parsing tool, such as swatch. Swatch and other utilities <strong>for</strong> log management<br />
are covered in more detail in Chapter 7,“<strong>Network</strong> Reporting and<br />
Troubleshooting.”<br />
Q: How do I turn Snort into an IPS instead of an IDS?<br />
A: Snortsam (www.snortsam.net/) is designed to automatically adjust the<br />
rules on a firewall based on certain Snort alerts. It is a mature tool with<br />
relatively active development. Also check the user-contributed section of<br />
the Snort Web site <strong>for</strong> an assortment of utilities at www.snort.org/dl/contrib/patches/.<br />
Snort itself also has some limited capability to take actions,<br />
specifically when acting in “inline mode.” Refer to the documentation at<br />
www.snort.org/docs/snort_htmanuals/htmanual_260/node7.html <strong>for</strong><br />
more on Snort’s native IPS support.<br />
www.syngress.com
262 Chapter 4 • Configuring an Intrusion Detection System<br />
Q: How do I make a Snort rule to trigger <strong>for</strong> “X” application’s traffic?<br />
A: Start by searching online; you can usually find the rule already made <strong>for</strong><br />
you. If not, the general procedure is to do a packet capture (with<br />
Wireshark, <strong>for</strong> example) and then review the packets.The tricky part is to<br />
identify something all the packets (or if not all, at least the initial packet)<br />
has in common. Some string that can uniquely identify that application’s<br />
packet from any other’s.Then you place this string in the rule using the<br />
payload option. See the online Snort manual <strong>for</strong> more in<strong>for</strong>mation on<br />
rule option fields.<br />
Q: How can I make my Snort sensor more secure?<br />
A: There are many ways. First, configure a firewall on the sensor itself to protect<br />
itself.You would only filter traffic with a destination of the sensor, so<br />
that you don’t accidentally filter the traffic you want to trigger alerts on.<br />
You can also have Snort listen on an interface without an IP address; this<br />
will make it a lot harder <strong>for</strong> an attacker to target the sensor. (See the main<br />
Snort FAQ <strong>for</strong> instructions on how to do this.)<br />
www.syngress.com
Managing<br />
Event Logs<br />
Solutions in this chapter:<br />
■ Generating Windows Event Logs<br />
■ Generating Syslog Event Logs<br />
■ Securing <strong>Your</strong> Event Logs<br />
■ Applying <strong>Your</strong> Knowledge<br />
� Summary<br />
� Solutions Fast Track<br />
� Frequently Asked Questions<br />
Chapter 5<br />
263
264 Chapter 5 • Managing Event Logs<br />
Introduction<br />
Event logs provide valuable insight into what is happening on a system.The<br />
scope of a typical event log is very different from the output of an IDS (intrusion<br />
detection system).This is because in general the event logs are more tailored<br />
to specific systems and applications. With the right utilities you can even<br />
create event log entries <strong>for</strong> custom applications or batch files/scripts. For<br />
example, if you have a batch file that deleted old temp files on a server, you<br />
could have it send a log message to the syslog server if there are errors during<br />
the delete process. When talking about free event logging (free software to<br />
generate the logs and free software to receive the logs), there are basically two<br />
<strong>for</strong>mats you are likely to encounter and work with extensively. In the UNIX<br />
world, there is syslog, which is the de facto standard when it comes to centralized<br />
logging. On the other hand, there are the Microsoft proprietary event<br />
logs, which are used only by Microsoft systems. Because Microsoft chooses<br />
not to natively support syslog, we will discuss what you can do to make the<br />
best use of the Windows event logs. In addition to configuring and generating<br />
the logs, we will show you how to analyze the logs and create notifications<br />
<strong>for</strong> significant events.<br />
Generating Windows Event Logs<br />
Windows event logs are broken up into six major categories: Application,<br />
Security, and System; and on domain controllers: Directory Service, DNS, and<br />
File Replication.You can view the event logs on a Windows host by navigating<br />
to Start | Run | eventvwr.exe.The Event Viewer is really an MMC<br />
console snap-in, and as such you can add it to your MMC console instead of<br />
using the standalone Event Viewer if you choose to do so. Application logs<br />
are, of course, application specific and rely on the application that is generating<br />
the logs to provide meaningful in<strong>for</strong>mation <strong>for</strong> the event log. Because of<br />
this, support from specific applications can vary greatly. When the application<br />
in question is a Microsoft application, event log support tends to be good, and<br />
the logs usually provide relatively detailed in<strong>for</strong>mation. In other cases, the<br />
application may not support Windows event logs at all and you may not see<br />
the application generate any logs of its own.The Event Viewer is shown<br />
www.syngress.com
elow in Figure 5.1.The Event Viewer is intended to be your primary access<br />
to view and save Windows event logs, though there are some additional tools<br />
available to manipulate the logs, both from Microsoft and third parties.<br />
Figure 5.1 Windows Event Viewer<br />
Managing Event Logs • Chapter 5 265<br />
Navigating the Event Viewer is simple.You select the category of events<br />
you wish to view on the left-hand pane, and the right-hand pane will display<br />
the events.You may double-click an event in the right pane to view the<br />
details <strong>for</strong> that particular event.The Event Properties window will display the<br />
complete event entry, including all the summary in<strong>for</strong>mation as seen on the<br />
main Event Viewer window, plus the full description of the event. Sometimes<br />
the description can include very valuable troubleshooting in<strong>for</strong>mation.The<br />
Event Properties window is shown in Figure 5.2; you’ll notice that Snort <strong>for</strong><br />
Windows supports logging to the Windows event log.<br />
www.syngress.com
266 Chapter 5 • Managing Event Logs<br />
Figure 5.2 Event Properties<br />
The list of events can be quite lengthy. Fortunately, there are mechanisms<br />
to enable you to filter and search <strong>for</strong> events. If you wish to filter the list of<br />
events that are displayed, select View | Filter.This enables you to enter criteria<br />
to filter the event list as shown in Figure 5.3.<br />
Figure 5.3 Filtering the Windows Event Log<br />
www.syngress.com
Most of the fields are self-explanatory.The Event ID is often the quickest<br />
way to filter the list <strong>for</strong> a specific event if you happen to already know the<br />
event ID you are looking <strong>for</strong>.The User field is the user a process was running<br />
under when it generated the event. In most cases this will simply be NA or<br />
SYSTEM, which isn’t of much use.This field is most useful when viewing<br />
the security log. After you have configured the filters to your satisfaction, click<br />
Apply and OK.The event list will be filtered immediately.To remove the<br />
filter and display all events, go back to the filter list and click Restore<br />
Defaults.<br />
TIP<br />
The event log details can sometimes be cryptic. If the meaning of a particular<br />
event is not clear, there are many places on the Internet to get<br />
in<strong>for</strong>mation on particular events (including www.Microsoft.com). A<br />
handy site <strong>for</strong> investigating events is www.eventid.net. This site includes<br />
a <strong>for</strong>m to enter the event ID and source, as well as links to search <strong>for</strong><br />
in<strong>for</strong>mation <strong>for</strong> that event on Google and Microsoft’s Web pages.<br />
<strong>Using</strong> Group Policy to<br />
Generate Windows Events Logs<br />
Managing Event Logs • Chapter 5 267<br />
By default, Windows systems will generate event log entries <strong>for</strong> certain types of<br />
events automatically. Individual applications will generate events based on their<br />
programming. While the level of logging is adequate <strong>for</strong> day-to-day use, there<br />
are a lot of additional things you might wish to generate log entries <strong>for</strong>, particularly<br />
when it comes to security events.You can configure the operating system<br />
to generate security-related event logs relatively easily by applying policies to<br />
enable auditing via the Microsoft Management Console (MMC).You can access<br />
the console by navigating to Start | Programs | Administrative Tools.All the<br />
listed utilities, such as Services, are actually MMC snap-ins.You can also customize<br />
your MMC console and add the snap-ins of your choice instead of just<br />
viewing the snap-ins individually.You will need to load the Security<br />
Configuration and Analysis snap-in to configure auditing.To do this, go to<br />
Start | Run, type mmc, and then click OK.This will open up the full<br />
www.syngress.com
268 Chapter 5 • Managing Event Logs<br />
MMC.The first time you do this the MMC will have no snap-ins loaded. Click<br />
Console | Add/Remove Snap-in, and then in the Add/Remove Snap-in<br />
dialog box, click the Add button. In the Add Standalone Snap-in dialog<br />
box, select the Security Configuration and Analysis snap-in (see Figure<br />
5.4), click the Add button, and then click Close. Click OK to close the<br />
Add/Remove snap-in dialog box and complete the process.This process can be<br />
repeated to add multiple snap-ins to your MMC console.<br />
Figure 5.4 Add Standalone Snap-In Screen<br />
Now that you have the snap-in added to your MMC, the next step is to<br />
create a new security configuration database. Do this by right-clicking the<br />
Security Configuration and Analysis snap-in and selecting Open<br />
Database.The first time this is done, there will be no security database; you<br />
will need to create a new one.Type a name ending in .sdb and click Open.<br />
The next window enables you to choose a security template to import. Select<br />
Setup Security.inf and click Open. After this is done, you need to rightclick<br />
Security Configuration and Analysis again and select Analyze<br />
Computer now. On the next window, you should choose a path and filename<br />
<strong>for</strong> the log file (or accept the default) and click OK. After the analysis<br />
is completed, this will reveal several expandable items under Security<br />
Configuration and Analysis.<br />
www.syngress.com
Managing Event Logs • Chapter 5 269<br />
The audit policy settings can be found by navigating in the MMC to<br />
Security Configuration and Analysis\Local Policies\Audit Policy.You<br />
can review Microsoft’s recommendations <strong>for</strong> securing Windows 2000,<br />
including audit settings, here: www.microsoft.com/technet/security/<br />
prodtech/windows2000/secwin2k/default.mspx. For Windows 2003 you can<br />
refer to this article: http://www.microsoft.com/technet/security/<br />
prodtech/windowsserver2003/w2003hg/sgch00.mspx. Some of the most significant<br />
audit options are outlined below, along with some recommendations<br />
<strong>for</strong> the most secure settings. Remember that enabling extensive auditing can<br />
have an adverse impact on the per<strong>for</strong>mance of the host system.You must<br />
carefully weigh the benefits of having the audit trail versus the resources that<br />
will be consumed by enabling various audit options.<br />
■ Audit account logon events There is a subtle yet important difference<br />
between “audit account logon events” and “audit logon<br />
events.”The account logon events occur only when a local account is<br />
used to log on to another computer. For standalone servers in isolated<br />
environments, this event should never be triggered.You will see<br />
the most logs generated from this type of auditing when it is used on<br />
domain controllers.<br />
■ Audit account management Keep this set to Success, Failure,<br />
which tracks when passwords are changed, accounts are created and<br />
deleted, and group membership changes.The audit records generated<br />
by this setting should be closely monitored <strong>for</strong> signs of unauthorized<br />
activity, which can indicate a system compromise.<br />
■ Audit directory service access This will create event log entries<br />
<strong>for</strong> active directory events, which can be useful <strong>for</strong> spotting security<br />
issues.<br />
■ Audit logon events Set to Success, Failure.This is the single most<br />
important audit item.These audit events will let you know who and<br />
when someone is trying to log on, and perhaps even more importantly,<br />
if they are succeeding.This setting will provide glaring evidence<br />
of brute <strong>for</strong>ce logon attempts and hopefully give you a jump<br />
start on investigating the source and taking corrective action.<br />
www.syngress.com
270 Chapter 5 • Managing Event Logs<br />
■ Audit object access Keep at Success, Failure.This is another<br />
important audit setting. It will record access to objects such as<br />
printers, registry keys, folders, or individual files. Basically, it will audit<br />
anything with a system access control list (SACL) defined.<br />
■ Audit policy change Keep at Success, Failure.This will trigger<br />
when someone modifies (or attempts to modify) your policies. An<br />
attacker who has successfully compromised a system may attempt to<br />
alter the system policy, to give him more freedom over the compromised<br />
system.<br />
■ Audit privilege use According to Microsoft, this setting will<br />
“Audit each instance of a user exercising a user right.”This might<br />
sound handy at first, but in reality it often generates far too much<br />
data to be useful. If your environment justifies enabling auditing on<br />
these events, setting it to audit only failures will usually suffice. Most<br />
often this is set to No auditing on production systems and enabled<br />
only <strong>for</strong> special troubleshooting activities.<br />
■ Audit process tracking Similar to “privilege use,” this setting can<br />
generate a large amount of data and can have a significant impact on<br />
per<strong>for</strong>mance. In most cases you should set it to No auditing, unless<br />
you’re diagnosing specific problems.<br />
■ Audit system events Keep at Success, Failure.This event triggers<br />
only <strong>for</strong> events affecting the entire system, such as system start and<br />
shutdown or <strong>for</strong> events that affect the system security or security log.<br />
All of these will cause audit events to be generated and recorded to the<br />
event log. Another item <strong>for</strong> which it may be useful to generate audit events is<br />
access to specific files. With some files, and especially executables, you may<br />
find it advantageous to configure the creation of audit events when the file is<br />
accessed.To enable auditing on specific files, follow these steps:<br />
1. In the left-hand pane, under Security and Configuration Analysis,<br />
select File System.<br />
2. Navigate to the directory containing the file you want to audit and<br />
select it in the left pane. In this example will use cmd.exe, located in<br />
%systemroot%\system32\.<br />
www.syngress.com
Managing Event Logs • Chapter 5 271<br />
3. Locate cmd.exe in the right pane and double-click the file.<br />
4. Click Edit Security.<br />
5. Configure the access settings <strong>for</strong> various accounts to your preferences.<br />
6. Click Advanced.<br />
7. Select the Auditing tab at the top of the window.<br />
8. Click Add.<br />
9. Select the users and groups you wish to audit when accessing<br />
CMD.EXE and click OK.<br />
10. Place a check mark next to any events you wish to audit; <strong>for</strong><br />
example, Traverse Folder/Execute File.<br />
11. Click OK four times to close all the windows.<br />
12. Navigate to Security Configuration and Analysis | Local<br />
Policies | Audit Policy in the left pane.<br />
13. In the right pane, double-click Audit Object Access and place a<br />
check next to Success and Failure.<br />
14. Click OK.<br />
15. Right-click Security Configuration and Analysis in the left-hand<br />
pane of the MMC and select Configure Computer Now…<br />
16. Choose a name and location <strong>for</strong> the log file, and then click OK.<br />
In this example, we checked Traverse Folder/Execute File <strong>for</strong> both<br />
Success and Failure <strong>for</strong> the Everyone group so that any time cmd.exe is<br />
executed it will generate an event in the event log. A sample event documenting<br />
successful access to cmd.exe by administrator is shown in Figure 5.5.<br />
www.syngress.com
272 Chapter 5 • Managing Event Logs<br />
Figure 5.5 Sample Audit Event<br />
As you can see, with a little customization you can cause the Windows<br />
event logs to generate a lot of auditing data. While the built-in auditing and<br />
logging capabilities are impressive, sometimes you may need still more flexibility<br />
when it comes to generating entries in the event log.<br />
If you wish to enable auditing policies <strong>for</strong> all clients that log into your<br />
domain controller, you can apply the policy on the domain controller using<br />
group policy objects.These policies will be applied to computers as they are<br />
authenticated to the domain.The process <strong>for</strong> enabling them at the domain<br />
level is very similar to doing it at the computer level.You can configure the<br />
policies to be applied throughout the domain or to specific organizational units<br />
(OUs) within AD.To enable auditing on all computers within the domain,<br />
using global policy objects, follow these steps:<br />
1. Navigate to Start | Programs | Administrative Tools | Active<br />
Directory Users and Computers.<br />
2. Right-click the desired domain name and select Properties.<br />
3. Select the Group Policy tab.<br />
4. Click New.<br />
www.syngress.com
WARNING<br />
It is considered best practices to create a new policy object instead of<br />
editing the default domain policy. This is a safety precaution in case you<br />
run into a problem with the new policy changes. In an emergency situation,<br />
you can simply disable the newly created policy (Group Policy tab,<br />
click Options, check disabled:) instead of trying to troubleshoot the<br />
specific setting that is causing problems.<br />
5. Enter a meaningful name of the new policy and press Enter to<br />
accept the name.<br />
6. Highlight the Newly Created Policy and select Edit.<br />
7. Configure the desired audit policies following the a<strong>for</strong>ementioned<br />
guidelines <strong>for</strong> configuring a local audit policy (see Figure 5.6).<br />
Figure 5.6 Configuring Audit <strong>Using</strong> Domain GPOs<br />
Managing Event Logs • Chapter 5 273<br />
www.syngress.com
274 Chapter 5 • Managing Event Logs<br />
Configuring your policies at the domain level also allows <strong>for</strong> some additional<br />
settings that are not available using a local computer policy object, such<br />
as event log settings. By navigating to Default Domain Policy |<br />
Computer Configuration | Windows Settings | Security Settings |<br />
Event Log | Settings <strong>for</strong> Event Logs, you can (and should) configure settings<br />
related to how the event log itself is accessed.The following list summarizes<br />
the event log policy settings that have a high impact on security.<br />
■ Restrict Guest Access to Log This should be set to<br />
enable to prevent a potential attacker who manages to gain guest<br />
access from gaining access to the event logs.<br />
■ Retention Method <strong>for</strong> Log This determines what is<br />
to be done with old log events. By default the event log will overwrite<br />
old events as needed.This method ensures that the system will<br />
not shut down due to an inability to log the security events, and this<br />
should be acceptable as long as you are collecting the important<br />
events on another secure system.The objective is to ensure that<br />
important security events cannot be lost because an attacker generates<br />
so many events that the incriminating ones are wrapped and lost.<br />
Shutting the system down due to running out of space, possibly even<br />
with the intent of creating a denial of service attack (versus legitimately<br />
attempting to break into the system) are most likely if you use<br />
the setting “Do not overwrite events (clear the log manually).”<br />
Generating Custom Windows Event Log Entries<br />
Granular per-file auditing enables a lot of control of when events are generated;<br />
however, suppose you were in the following scenario:You have a custom<br />
script or batch file that runs regularly and you would like to create event log<br />
entries based on the actions of that script. Auditing based on file access could<br />
create an event any time cmd.exe was accessed, but it wouldn’t be able to<br />
know anything about the script files actions, only that cmd was accessed. In<br />
this case you need to be able to manually create event log entries containing<br />
your own custom data.<br />
www.syngress.com
Logevent.exe (Windows 2000 and Windows NT) and eventcreate.exe<br />
(Windows 2003/XP) will do exactly that. Various command-line switches<br />
will enable you to specify the event data, the log to write to (system, application,<br />
or security), the event source, the event type, and the event ID to use.<br />
The following is an example command:<br />
Eventcreate /T ERROR /ID 123 /L SYSTEM /D "<strong>Secure</strong> your network <strong>for</strong> FREE!"<br />
This would create an event in the system log of type ERROR, with an<br />
ID of 123, and the contents “<strong>Secure</strong> your network <strong>for</strong> free.” Note that you<br />
cannot create custom events in the security log. <strong>Using</strong> this utility you could<br />
have portions of your custom script generate event log entries based on the<br />
script’s internal processing.<br />
Collecting Windows Event Logs<br />
Managing Event Logs • Chapter 5 275<br />
The MMC will enable you to view the event logs from remote computers.<br />
While useful, this is a manual process and far from ideal when it comes to<br />
day-to-day monitoring of your entire network.The best solution is to find a<br />
means to get all your logs from all your systems in one place.Then the logs<br />
can be centrally parsed, filtered, analyzed, and processed. Windows is somewhat<br />
limited when it comes to collecting event logs. Most of the feature-rich<br />
applications to do so are created by third parties and are commercial products.<br />
Eventlog.pl (Windows 2000 Resource Kit, supplement) will enable you to<br />
back up the event logs and export them as text files.These text files could<br />
then be moved to a central system and analyzed. Eventquery.vbs (Windows<br />
2003/XP) enables you to filter and list events from a local machine or a single<br />
remote machine.<br />
Another option is EventCombMT (from Microsoft).This has a GUI<br />
interface which will enable you to basically search remote event logs <strong>for</strong><br />
events that match your criteria and log them to a text file. EventCombMT<br />
will search multiple systems simultaneously, while eventquery.vbs must be run<br />
<strong>for</strong> each system to be queried. EventCombMT is available as part of the<br />
Windows Server 2003 Resource Kit and the Windows Server 2003<br />
Deployment Kit.The Windows Server 2003 Resource Kit Tools can be<br />
downloaded here:<br />
www.syngress.com
276 Chapter 5 • Managing Event Logs<br />
www.microsoft.com/downloads/details.aspx?FamilyID=9d467a69-57ff-4ae7-<br />
96ee-b18c4790cffd&DisplayLang=en<br />
In Figure 5.7, you can see the EventCombMT program window.The<br />
configuration and search criteria are pretty straight<strong>for</strong>ward. By default,<br />
EventCombMT will log the output from its searches to C:\temp\.<br />
EventCombMT.txt provides summary in<strong>for</strong>mation on the query, such as how<br />
many servers were searched and what search criteria was used. Additional logs<br />
will be created of the <strong>for</strong>mat -.txt.<br />
Figure 5.7 EventCombMT<br />
For example, we searched <strong>for</strong> events with an event ID between 1 and<br />
1000.The resultant output was logged to C:\temp\Lab2003-<br />
System_LOG.txt.The log contained the following entry:<br />
123,ERROR,system,Sun Aug 13 21:25:32 2006,LAB2003\Administrator, <strong>Secure</strong> your<br />
network <strong>for</strong> FREE!<br />
The longest gap between all scanned records occurred at Sun Aug 13 21:25:32<br />
2006 and was 0 days, 0 hours, 28 minutes, 18 seconds.<br />
c:\temp\Lab2003-System_LOG.txt contains 1 parsed events.<br />
As you can see, EventCombMT found the sample entry we made earlier<br />
using EventCreate.exe.The sample event had an event ID of 123.<br />
www.syngress.com
An additional tool provided by Microsoft is Log Parser, which can be<br />
downloaded from www.microsoft.com/downloads/details.aspx?FamilyID=<br />
890cd06b-abf8-4c25-91b2-f8d975cf8c07&displaylang=en. Log parser is more<br />
of a general-purpose utility that can parse any log, not just Windows event<br />
logs. With the increased flexibility comes increased complexity.The syntax <strong>for</strong><br />
using Log Parser (a command-line utility) can be complex at times and<br />
resembles that of SQL queries. Entering logparser.exe –h examples will generate<br />
a lengthy list of sample commands. If you review the documentation you will<br />
see that Log Parser is indeed very flexible and powerful but not <strong>for</strong> the faint<br />
of heart.<br />
When it comes to collecting your Windows event logs in a centralized<br />
location in their native event log <strong>for</strong>mat, you are really limited to using a<br />
Microsoft host.This is because a Linux system cannot work with the event<br />
logs directly. Because of this, if you want to manipulate, filter, or otherwise<br />
process the Windows event logs on a non-Microsoft logging server, the best<br />
bet is to export them in a commonly understood <strong>for</strong>mat, such as syslog.The<br />
use of syslog will be discussed in depth later in this chapter.<br />
Analyzing Windows Event Logs<br />
Managing Event Logs • Chapter 5 277<br />
Microsoft provides some tools that can be used to sort through the large<br />
volume of event logs you are likely to generate. Eventlog.pl (Windows 2000<br />
Resource Kit, supplement 1) enables you to back up event logs, export event<br />
lists to text files, clear event logs, and query properties of event logs.<br />
Eventquery.pl (Windows 2000 Resource Kit, supplement 1) enables you to<br />
display and filter event logs based on various fields such as time, date, source,<br />
category, ID, et cetera. Both of these could be scripted to sort through event<br />
logs and generate a listing of the most serious security issues. If you wish to<br />
do the processing on the host that is generating the logs, you can always use<br />
something like eventtriggers.exe (Windows 2003/XP), which enables you to<br />
configure a process to be executed when certain events are logged.<br />
www.syngress.com
278 Chapter 5 • Managing Event Logs<br />
TIP<br />
Remember that if you set up an event trigger to send an e-mail when a<br />
local account is locked out (<strong>for</strong> example), if a hacker manages to compromise<br />
the local system, he may be able to disable your event triggers.<br />
This means that from a security perspective, exporting the logs and then<br />
parsing them is going to be more secure (and preferable) than per<strong>for</strong>ming<br />
any sort of log analysis on the machine that is generating the<br />
logs.<br />
If your event logs stay in Windows event log <strong>for</strong>mat, there are some thirdparty<br />
tools to help manage and view them centrally. Event Log XP is one<br />
such tool available from www.eventlogxp.com. It uses a simple Installation<br />
Wizard and provides some very useful functionality.The main screen is shown<br />
in Figure 5.8 with the System Log window currently displayed.<br />
Figure 5.8 Event Log Explorer<br />
If you select an event in the right-hand pane and right-click, you have the<br />
option to look up the event in an online knowledgebase—either the<br />
Microsoft knowledgebase or EventID.net.This can be handy when you’re not<br />
www.syngress.com
sure exactly what a specific event ID means. Another useful feature is the<br />
capability to configure an automatic refresh by navigating to View | Autorefresh.<br />
If you wish to change the refresh interval, you can access the setting<br />
by navigating to View | Auto-refresh Interval.You can access a robust filter<br />
mechanism by navigating to View | Filter.The filters will enable you to<br />
quickly check a system’s logs <strong>for</strong> events of particular importance.The downside<br />
to the Event Log Explorer is that it displays each log <strong>for</strong> each system in a<br />
separate window.This could make navigating a large number of logs tedious,<br />
though still better than doing it using Event Viewer in the MMC.<br />
A good free utility targeted at inspecting IIS logs is NTLast, available from<br />
www.foundstone.com. Un<strong>for</strong>tunately, free solutions that offer quality features<br />
<strong>for</strong> analyzing Windows event logs are few and far between. For serious event<br />
log parsing without paying <strong>for</strong> a commercial product, we would recommend<br />
converting the Windows event log to the syslog <strong>for</strong>mat and then analyzing<br />
the syslog logs on a Linux host.This architecture will offer the most functionality<br />
and options <strong>for</strong> log collection and analysis while providing the best per<strong>for</strong>mance.<br />
Even if you choose to per<strong>for</strong>m your analysis on a Windows host,<br />
you will find that there is a wealth of free utilities <strong>for</strong> parsing logs that use the<br />
syslog <strong>for</strong>mat; the same cannot be said <strong>for</strong> the Windows event log <strong>for</strong>mat.<br />
Generating Syslog Event Logs<br />
Managing Event Logs • Chapter 5 279<br />
Right out of the box, virtually every Linux system will be configured to generate<br />
a generous amount of logging in<strong>for</strong>mation. In most cases, not only will<br />
syslog logs be generated with a default installation, but often a syslog server<br />
will be running unless you have specifically disabled it. Even if you choose to<br />
host your syslog server on a Windows system, there are far more options <strong>for</strong><br />
analyzing syslog logs than Windows event logs (largely due to syslog’s ASCII<br />
data <strong>for</strong>mat no doubt). Due to the ubiquitous nature of syslog logging, it<br />
would be advisable to familiarize yourself with some basic syslog concepts.<br />
Syslog works in a client-server fashion.The server (or daemon in<br />
UNIX/Linux parlance) receives the messages that are generated by remote<br />
hosts, or even the same host.The client piece compiles the messages with the<br />
proper data and sends them to the server. A syslog entry is recorded all on a<br />
single line. Each entry consists of a facility and a severity level.The facility<br />
www.syngress.com
280 Chapter 5 • Managing Event Logs<br />
loosely tells you what component subsystem generated the message, while the<br />
severity tells you the general severity or importance of the message. We use<br />
terms like “loosely” and “general” because not all applications will be written<br />
the same and one may think a given message is more important than another.<br />
When you are manually generating the messages you can typically enter<br />
facility and severity levels of your choosing.Table 5.1 provides a summary of<br />
the different severity levels that are available, in order from most severe to least<br />
severe. Note that while the severity is listed as LOG_EMER, it would appear<br />
using slightly different <strong>for</strong>mats depending on the software you are using, such<br />
as emer, emerg, or even emergency.<br />
Table 5.1 Syslog Severity Summary<br />
Some systems and utilities will refer to the various levels by name while<br />
others will use the numerical representation of the level. Because most non-<br />
Windows systems support syslog natively, they typically are configured with<br />
www.syngress.com
default facilities to use in the event that the source of the message does not<br />
explicitly define one. For example, if login or su generates a syslog event<br />
without specifying the facility, it will automatically be assigned to the<br />
LOG_AUTH facility. Custom messages are typically assigned a facility of<br />
LOG_LOCAL1 through LOG_LOCAL7, also referred to as simply local1<br />
through local7.The facility is written as facility.level, such as debug.local1 <strong>for</strong><br />
example.<br />
The syslog server typically listens on UDP port 514. Unless you take steps<br />
to secure the communication, the syslog messages will be sent in cleartext<br />
between the generating host and the syslog server. Frequently, the syslog messages<br />
will contain sensitive or at least confidential in<strong>for</strong>mation, such as server<br />
names, the names of software you are running, and IP addresses. See Figure<br />
5.9 <strong>for</strong> a capture of a test syslog message using NGsniff. We will discuss the<br />
use of sniffer software in Chapter 7,“<strong>Network</strong> Reporting and<br />
Troubleshooting.”<br />
Figure 5.9 Syslog Cleartext<br />
C:\ngSniff-1.3>ngsniff --interface 0<br />
ngSniff v1.3 by NGSEC Research Team <br />
FREEWARE command line sniffer<br />
Next Generation Security Technologies<br />
http://www.ngsec.com<br />
Sniffing...<br />
IP HEADER 192.168.1.107 -> 192.168.1.99<br />
------------------------------------------<br />
IP->version: 4<br />
IP->ihl: 5<br />
IP->tos: 0<br />
IP->tot_len: 106<br />
IP->id: 62345<br />
IP->frag_off: 0<br />
IP->ttl: 128<br />
IP->protocol: 17<br />
IP->checksum: 28972<br />
UDP HEADER<br />
Managing Event Logs • Chapter 5 281<br />
www.syngress.com
282 Chapter 5 • Managing Event Logs<br />
----------<br />
UDP->sport: 1733<br />
UDP->dport: 514<br />
UDP->ulen: 86<br />
UDP->checksum: 6598<br />
----- Begin of data dump -----<br />
3c 39 3e 41 75 67 20 31 35 20 31 39 3a 32 30 3a Aug 15 19:20:<br />
35 38 20 65 76 65 6e 74 63 72 65 61 74 65 5b 77 58 eventcreate[w<br />
61 72 6e 69 6e 67 5d 20 32 34 36 20 4c 41 42 32 arning] 246 LAB2<br />
30 30 33 5c 41 64 6d 69 6e 69 73 74 72 61 74 6f 003\Administrato<br />
72 20 20 54 65 73 74 20 45 76 65 6e 74 20<br />
----- End of data dump ----r<br />
Test Event<br />
There are a variety of methods available to secure the syslog communications.<br />
We will walk you through setting up a syslog server on a Windows host<br />
and on a Linux host. We will also demonstrate some of the software that can<br />
be used to filter and analyze the syslog logs as well as the steps needed to<br />
encrypt your syslog data between the syslog client and syslog server.<br />
Windows Syslog<br />
Although it is not native to Windows, syslog has been around since the 1980s<br />
and is so prevalent that the inevitable Windows support has surfaced. When<br />
you are researching the products to use <strong>for</strong> Windows-based syslog, remember<br />
to differentiate between the syslog server (or daemon) software and the client<br />
software. Because the software to send and receive syslog messages is typically<br />
not the same software package, we will discuss each in turn. We will cover the<br />
various ways to generate your events to send to a syslog server, <strong>for</strong> both<br />
Windows and Linux, as well as the software that is used to receive the event<br />
messages (again on Windows and Linux).<br />
Generating Syslog Events<br />
The approaches to generating syslog messages from a Windows host basically<br />
fall into two broad categories.The first is to generate the message natively in<br />
syslog <strong>for</strong>mat and send it to the syslog server. Because current Windows offerings<br />
don’t support syslog natively, you need to manually generate these mes-<br />
www.syngress.com
Managing Event Logs • Chapter 5 283<br />
sages in batch file or other type of script. While this might be a good solution<br />
<strong>for</strong> one-off processes or custom applications, odds are you will have a large<br />
number of items that can only log to the Windows event log, which brings us<br />
to the second alternative.<br />
Perhaps the “cleanest” option of all is not to try to generate syslog events<br />
natively, but to use a utility to convert the Windows event logs into a syslogcompatible<br />
<strong>for</strong>mat and then process them in that <strong>for</strong>mat. <strong>Using</strong> this methodology<br />
will not only be easier to configure, but will also help ensure you don’t<br />
have events that are missed. We have found three quality free options to do<br />
this. In increasing order of complexity and functionality is the Eventlog to<br />
Syslog Utility (evtsys), NTsyslog, and SNARE.<br />
The Eventlog to Syslog Utility is available at the following link:<br />
https://engineering.purdue.edu/ECN/Resources/Documents/UNIX/evtsys/<br />
Evtsys is the simplest option in terms of both configuration and features.<br />
Evtsys requires virtually no setup, but will only <strong>for</strong>ward events with a facility<br />
of DAEMON and a priority of ERROR, WARNING, or NOTICE. In<br />
many circumstances this may be all you need, but <strong>for</strong> more control over what<br />
is <strong>for</strong>warded there are other alternatives.<br />
NTsyslog represents the middle-ground when it comes to complexity and<br />
functionality.To be fair, it isn’t hard to set up at all, but there are a few more<br />
options than evtsys. NTsyslog runs as a service <strong>for</strong> Windows NT/2000/XP<br />
and will re<strong>for</strong>mat the event logs to the one-line syslog <strong>for</strong>mat and send them<br />
to a syslog server as they are generated. NTsyslog allows you to configure<br />
what types of events you wish to export and what facility and severity to<br />
label them as (Figure 5.10 shows the <strong>for</strong>warding settings window). NTsyslog<br />
can be downloaded from http://source<strong>for</strong>ge.net/projects/ntsyslog/. Because<br />
NTsyslog is a good middle ground and will likely be adequate <strong>for</strong> most<br />
installations, we will walk through setting up NTsyslog.<br />
Similar functionality to NTsyslog is offered by SNARE, which is available<br />
<strong>for</strong> free from www.intersectalliance.com/projects/SnareWindows/. While it is<br />
a little more complicated to set up than NTsyslog, SNARE can provide additional<br />
control over which events get exported to the syslog server. Effectively,<br />
SNARE enables you to do some robust upfront filtering at the host be<strong>for</strong>e<br />
generating the syslog traffic, whereas NTsyslog only enables a less-flexible filtering<br />
mechanism based on the event type and event log.This can be advan-<br />
www.syngress.com
284 Chapter 5 • Managing Event Logs<br />
tageous when dealing with a large number of event log events. Between the<br />
three of them, they should be able to provide a good selection between functionality<br />
and ease of use.You should research and test all three products and<br />
determine which one best meets your needs.<br />
Configuring NTsyslog<br />
To configure NTsyslog, follow these simple steps:<br />
1. Download and install NTsyslog.<br />
2. Open a command prompt and navigate to the directory where you<br />
installed NTsyslog.<br />
3. Enter ntsyslog –install.<br />
4. Enter ntsyslogctrl to start the GUI NTsyslog Service Control<br />
Manager (shown in Figure 5.10).<br />
5. Click Syslog Daemons and enter the name or IP address of your<br />
syslog server and click OK.<br />
6. Verify that you wish to save the syslog parameters by clicking Yes.<br />
7. Click Start Service.<br />
Figure 5.10 NTsyslog Service Control Manager<br />
www.syngress.com
You should now be able to receive your Windows event logs on your<br />
syslog server. We used eventcreate.exe to create an artificial event <strong>for</strong> testing<br />
with the following syntax:<br />
Eventcreate /T WARNING /ID 246 /D "Test Event"<br />
The resultant event in my syslog console is shown in Figure 5.11.<br />
Figure 5.11 Sample Event from NTsyslog<br />
If you so desire, you can configure NTsyslog to <strong>for</strong>ward the events from<br />
only certain logs (such as the security log, <strong>for</strong> example), and to <strong>for</strong>ward only<br />
certain types of events.You can also configure NTsyslog to <strong>for</strong>ward the events<br />
using the facility and severity of your choosing, rather than the default translated<br />
values. Figure 5.12 shows the System Settings window, which will make<br />
the Forwarding configuration a lot clearer. Figure 5.12 shows the properties<br />
<strong>for</strong> the system event log. Each Windows event log can be configured separately,<br />
with the same level of control.<br />
Figure 5.12 Forwarding Settings<br />
Managing Event Logs • Chapter 5 285<br />
www.syngress.com
286 Chapter 5 • Managing Event Logs<br />
Encrypting Syslog Traffic<br />
Often, the systems we wish to monitor are in un-trusted networks, such as a<br />
Web server in an Internet-facing DMZ, or a DNS server. Because the messages<br />
could contain sensitive in<strong>for</strong>mation, we should encrypt the data to maintain<br />
confidentiality while in transit.This is where the choice of using syslog over<br />
UDP or TCP becomes important.<strong>Your</strong> choice of encryption mechanisms<br />
changes dramatically based on whether you plan to use UDP or TCP as the<br />
underlying protocol.You can encrypt traffic with TCP or UDP, but TCP’s reliability<br />
makes encryption much simpler to implement.There<strong>for</strong>e, many more<br />
options exist <strong>for</strong> implementing encryption of arbitrary data over TCP than<br />
UDP. Syslog uses UDP port 514 by default.There are both syslog clients and<br />
syslog servers that can use TCP instead of UDP.The KiwiSyslog daemon<br />
(Server) is free and can receive syslog messages over either UDP or TCP.<br />
The problem, however, is that at the time of this writing we could not<br />
find a free syslog utility that will convert the Windows logs to syslog <strong>for</strong>mat<br />
and use TCP. SNARE will use TCP, but only <strong>for</strong> the commercial version.<br />
Although there are many ways to encrypt TCP traffic using free solutions, the<br />
same is not true <strong>for</strong> UDP traffic.There is a version of TLS (Transport Layer<br />
Security) in the works, called DTLS (Datagram TLS), which will be able to<br />
encrypt over UDP, but there is no working implementation as of yet.TLS is<br />
the successor to SSL (<strong>Secure</strong> Sockets Layer), which is the standard <strong>for</strong><br />
encrypting Web pages (i.e., https://).The Adiscon logger (www.monitorware.com/en/logger/index.php)<br />
is a free command-line utility <strong>for</strong> generating<br />
log messages that will support sending syslog over TCP or UDP.<br />
If you have the ability to send your Windows event logs to the syslog<br />
server using TCP, there are a couple of encryption options that are easy to set<br />
up. One way is to use SSL. SSL is a very well-documented and simple-toimplement<br />
encryption <strong>for</strong> almost any TCP-based communications. Stunnel is<br />
open-source software available from www.stunnel.org. Stunnel can tunnel<br />
www.syngress.com
Managing Event Logs • Chapter 5 287<br />
TCP communications through an SSL-encrypted session with a minimum of<br />
configuration complexity.Yet another industry-standard option is to use SSH<br />
and its port-<strong>for</strong>warding capability. In practice, this works very similarly to<br />
Stunnel, but SSH is a different encryption mechanism.The end result is the<br />
same, the capability to <strong>for</strong>ward a TCP connection through an encrypted<br />
tunnel.<br />
If you are limited to using UDP-based syslog architecture, there is still<br />
hope.You will need to set up an IP Security (IPsec) tunnel between the client<br />
and server. Although a little more complicated to configure, IPsec is the<br />
industry standard when it comes to setting up VPNs, which is just another<br />
<strong>for</strong>m of encrypted tunnel. IPSec also has a major advantage in that it is protocol<br />
independent. IPsec can encrypt TCP, UDP, and even ICMP, basically<br />
anything that runs over IP with a few caveats. In the case of sending syslog<br />
messages, we only need the syslog communications encrypted, but IPsec can<br />
be used to encrypt all communications between a given host and destination.<br />
The primary downside to using IPsec over one of the previously mentioned<br />
solutions is of course the configuration complexity. Additionally, the out-ofbox<br />
support <strong>for</strong> modern Windows systems (Windows 2000, Windows XP, and<br />
Windows Server 2003) is better (easier to configure) than that of a Linux<br />
host. Although Linux supports IPsec natively, the task of configuring it is<br />
made much simpler with the assistance of some third-party configuration<br />
utilities. We will demonstrate how to set up IPsec between the syslog server<br />
(in this case running on Windows XP) and the syslog client generating the<br />
syslog messages (in this case running on Windows Server 2003).<br />
As a final option, if you happen to be sending your syslog messages from<br />
one Windows host to another Windows host (not likely given Windows’ lack<br />
of syslog support), then you can use a free syslog tunneling application from<br />
Kiwi Enterprises. Kiwi <strong>Secure</strong> Tunnel can be downloaded from<br />
www.kiwisyslog.com/secure-tunnel-info.php. Kiwi <strong>Secure</strong> Tunnel supports<br />
the tunneling of both TCP- and UDP-based syslog, but there is no Linux<br />
software component.The most likely scenario where you could take advantage<br />
of this would be when you have several systems (including Linux hosts)<br />
generating syslog messages from a secure subnet, but the messages must traverse<br />
an insecure network, such as the Internet, to be received at a central<br />
location. In this case, all the hosts could send their logs to the Windows host<br />
www.syngress.com
288 Chapter 5 • Managing Event Logs<br />
at the remote location, which could then tunnel the messages through the<br />
Internet and back to a syslog server at a central office.<br />
Encrypting Syslog Traffic <strong>Using</strong> IPsec<br />
For starters, let’s cover some basic IPsec terminology. IPsec settings are controlled<br />
on a Windows system via the IPsec policy. Only one policy can be<br />
applied to a given host at a time.The policy is defined using IPsec rules. A rule<br />
defines what types of traffic to act on and whether the traffic is permitted,<br />
blocked, or encrypted.The rules also determine how to authenticate the IPsec<br />
peer and other encryption settings. Filters are used to identify what types of<br />
traffic should be processed by the IPsec policy. On some systems this is<br />
referred to as defining interesting traffic. Security methods are used to define the<br />
encryption and hashing algorithms to be used. Follow these steps to configure<br />
IPsec on the syslog client and syslog server.<br />
1. Open the MMC and add the IP Security Policies snap-in to your<br />
console if it is not already present.<br />
2. Right-click IP Security Policies on Local Computer in the left<br />
pane and select Manage IP Filter lists and filter actions (see<br />
Figure 5.13).<br />
Figure 5.13 Manage IP Filter Lists and Filter Actions<br />
www.syngress.com
3. On the Manage IP Filter Lists tab, click Add at the bottom.This<br />
will bring up the IP Filter List window as shown in Figure 5.14.<br />
Figure 5.14 IP Filter List<br />
Managing Event Logs • Chapter 5 289<br />
4. Enter a name <strong>for</strong> the filter; in this case we used “syslog.”<br />
5. Enter a description <strong>for</strong> the filter.<br />
6. Ensure that the Use Add Wizard check box is checked and click<br />
Add.<br />
7. Click Next on the IP Filter Wizard welcome screen.<br />
8. Enter a description of the filter and ensure that the Mirrored option<br />
is checked (it should be by default) and click Next.<br />
9. On the next window, leave the source address at the default of My<br />
IP Address and click Next.<br />
10. On the next window, <strong>for</strong> Destination address, select a specific IP<br />
address, enter the IP address of the syslog server, and then click<br />
Next.<br />
11. For Select a protocol type, select UDP and click Next.<br />
12. For Set the IP protocol port, leave From any port selected and<br />
select To this port.<br />
www.syngress.com
290 Chapter 5 • Managing Event Logs<br />
13. Enter 514 in the Port box and click Next.<br />
14. Click Finish, which will take you back to the IP Filter List<br />
window.There should be a new IP Filter in the bottom section of<br />
this window.This filter will match against any outbound UDP traffic<br />
with a destination IP of the syslog server and a destination port of<br />
514.<br />
15. Click OK to go back to the Manage IP filter lists and filter<br />
actions window. Click Close. We now have our filter defined,<br />
which will tell the system what traffic should be processed by the<br />
IPsec policy. We now must create that policy.<br />
16. Right-click IP Security Policies on Local Computer in the lefthand<br />
pane and select Create IP Security Policy.<br />
17. Click Next to begin the wizard.<br />
18. Enter a Name and Description and click Next.<br />
19. In Requests <strong>for</strong> <strong>Secure</strong> Communications, leave Activate the<br />
default response rule checked and click Next.<br />
20. Choose your Authentication method <strong>for</strong> the default response rule.<br />
Active directory is the default and will be the best choice in most<br />
circumstances. However, some systems, such as DMZ hosts, may not<br />
have domain connectivity, and instead may be standalone servers. In<br />
those cases you will need to use certificates or a preshared key. A preshared<br />
key is basically a password and is the weakest of the options<br />
available; however, it is also the simplest to implement. After making<br />
your selection click Next.<br />
21. Leave the check box checked to Edit Properties and click Next.<br />
22. On the Rules tab, ensure that the Use Add Wizard is not checked<br />
and click Add to add an IP filter.<br />
23. In the list of premade filters you should see the syslog filter you created<br />
earlier. Select the radio button <strong>for</strong> the filter you created earlier.<br />
24. Select the Filter Action tab and select Require Security.<br />
25. Click the Authentication Methods tab and click Edit.<br />
www.syngress.com
26. Select the radio button <strong>for</strong> the authentication method you want to<br />
use, and then click OK.<br />
27. On the New Rule Properties screen shown in Figure 5.15, click<br />
Apply and then OK.<br />
Figure 5.15 New Rule Properties<br />
28. You will be back at the Security Rules screen; click OK.<br />
29. <strong>Your</strong> Policy should now appear in the list in the right pane of the<br />
MMC window. Right-click this new policy and select Assign. After<br />
the policy is assigned, the MMC window should look similar to that<br />
shown in Figure 5.16.<br />
Figure 5.16 Assigning IPsec Policy<br />
Managing Event Logs • Chapter 5 291<br />
www.syngress.com
292 Chapter 5 • Managing Event Logs<br />
Now all that is left is to configure the IPsec policy on the syslog server.<br />
On the server side, you need to per<strong>for</strong>m a similar configuration; however,<br />
there are some implementation details to consider be<strong>for</strong>e settling on your<br />
configuration. For example, if all the systems connecting to the syslog server<br />
will be using IPsec, you can configure the policy on the server to require<br />
IPsec, instead of requesting it. If you will have a mixture, with some systems<br />
using IPsec secured syslog and some systems connecting with plain UDP<br />
syslog (internal trusted systems, <strong>for</strong> example), then the most secure option<br />
would be to require security from the individual systems that will be using<br />
IPsec, based on their IP address or IP segment.<br />
Notes from the Underground…<br />
Log Servers Are Hacker Targets Too<br />
Remember that a logging server can make a very attractive target <strong>for</strong> a<br />
hacker <strong>for</strong> many reasons. For one, if he gains enough access to see that<br />
logs are being sent, attacking the logging server may enable him to delete<br />
the logs and erase his tracks. In addition to erasing his tracks, the log<br />
server will likely contain a treasure trove of in<strong>for</strong>mation about your<br />
internal systems and what software is running on them. Based on the log<br />
data, even more in<strong>for</strong>mation may sometimes be deduced. As an example,<br />
if the hacker sees a large number of connection from a variety of systems<br />
to a host in a DMZ on port 443, and then subsequent connection from<br />
that host to another host in the internal network on 1433, the attacker<br />
might guess that the first host is an e-commerce Web server that makes<br />
calls to an internal SQL database, possibly containing customer in<strong>for</strong>mation<br />
such as credit card numbers.<br />
If all that isn’t enough, and the hacker cannot compromise the logging<br />
server, he could simply attack it to cause a denial of service so that<br />
it cannot receive the logs, or try to overwhelm the logging server with so<br />
many messages as to cause it to run out of disk space, crash, or at the<br />
least make it really hard to sort through all the chaff to find entries related<br />
to his attack. For all these reasons, the logging server must be secure like<br />
any other high-risk system.<br />
www.syngress.com
30. In the MMC of the syslog client (not the server), select IP security<br />
policies on local computer in the left pane.<br />
31. Right-click and select All Tasks | Export Policies.<br />
32. Choose a name and location to save the policies and click Save.<br />
33. Open the MMC of the syslog server, and if it isn’t already added, add<br />
the IP Security Policies snap-in.<br />
34. Right-click IP Security Policies on local computer in the left<br />
pane, and then select All Tasks | Import Policies….<br />
35. Browse to the policies you exported previously and click Open.This<br />
will import the exact policy that was configured on the syslog client.<br />
36. You should see the syslog policy in the list of policies in the righthand<br />
pane. At this time it should list No under the Policy Assigned<br />
column.<br />
37. Right-click the syslog policy and select assign.<br />
Now when you send a syslog message it will negotiate an IPsec tunnel.<br />
You can verify that the tunnel was established by opening the IP Security<br />
Monitor snap-in in your MMC. Simply select IP Security Monitor on the<br />
left pane and click to expand the tree under your server name.Then select<br />
Main Mode, and finally select Security Associations.<strong>Your</strong> SA listing<br />
should look similar to the one shown below in Figure 5.17.<br />
Figure 5.17 Security Associations<br />
Managing Event Logs • Chapter 5 293<br />
www.syngress.com
294 Chapter 5 • Managing Event Logs<br />
If you refer back to Figure 5.9, that was the sniffer output of the test<br />
syslog message demonstrating that without encryption, it was possible <strong>for</strong><br />
anyone to read the contents of the syslog message. In Figure 5.18 you will<br />
find a similar capture, with our encryption policy in place.<br />
Figure 5.18 Encrypted Syslog Message<br />
Sniffing...<br />
IP HEADER 192.168.1.104 -> 192.168.1.99<br />
------------------------------------------<br />
IP->version: 4<br />
IP->ihl: 5<br />
IP->tos: 0<br />
IP->tot_len: 136<br />
IP->id: 12545<br />
IP->frag_off: 0<br />
IP->ttl: 128<br />
IP->protocol: 50<br />
IP->checksum: 63412<br />
UNKOWN IP_PROTO 50<br />
----- Begin of data dump ---d6<br />
46 14 5b 00 00 00 08 62 5e 34 00 a1 6e 4f ad .F.[....b^4..nO.<br />
13 3d 58 88 9b 8b 41 ef d4 a8 f9 68 b8 d1 6a a8 .=X...A....h..j.<br />
a4 38 72 74 ec bc 6d 56 f8 f4 7e 5a a8 32 92 82 .8rt..mV..~Z.2..<br />
b3 39 10 f1 f6 01 97 4e 3f 82 36 39 8c 3d a8 fe .9.....N?.69.=.?<br />
be f0 7d 60 b3 cd c1 42 8a 85 bf f1 72 fe c0 1c ..}`...B....r?..<br />
ae 6f 5e 6d 4b 95 96 e0 ce 23 89 af 85 72 07 f9 .o^mK....#...r..<br />
04 d1 70 8d 1a 30 00 fa 6e 64 f5 c7 c5 f1 46 05 ..p..0..nd....F.<br />
cd aa 31 ac<br />
----- End of data dump -----<br />
..1.<br />
As you can see, the data is now unintelligible to hackers who might be<br />
trying to extract any useful in<strong>for</strong>mation from your syslog messages.<br />
www.syngress.com
Receiving Syslog Events<br />
When it comes to running a syslog server on a Windows host (to receive<br />
syslog logs), there are several options. Far and away the most widely used free<br />
solution is KiwiSyslog available from www.kiwisyslog.com.To prepare your<br />
Windows host to receive syslog messages follow these steps.<br />
1. Download and install Kiwi Syslog Daemon.<br />
2. When run, it will open up with the default display as shown in<br />
Figure 5.19.<br />
Figure 5.19 Kiwi Syslog Console<br />
Managing Event Logs • Chapter 5 295<br />
3. For standard UDP syslog messages, you shouldn’t need to do anything<br />
else to begin receiving messages.There are some configuration<br />
options you can configure by navigating to File | Setup.The setup<br />
window is shown in Figure 5.20.<br />
www.syngress.com
296 Chapter 5 • Managing Event Logs<br />
Figure 5.20 Kiwi Syslog Setup<br />
4. If you will be receiving any syslog messages over TCP, browse in the<br />
left pane to Inputs | TCP.<br />
5. Check the box next to Listen <strong>for</strong> TCP Syslog messages.<br />
6. Enter the port you will be receiving the messages on.<br />
7. The other options are probably fine to leave at the defaults. If the<br />
messages are not <strong>for</strong>matted properly, or the priorities are not correct,<br />
adjust the message delimiters or Data Encoding respectively.<br />
Kiwi Syslog also comes with some free alarm options.You can set an<br />
alarm <strong>for</strong> a minimum message count, maximum message count, or <strong>for</strong> a disk<br />
space threshold.The value of an alarm <strong>for</strong> minimum message count may not<br />
be immediately obvious. If you set this to one per hour, this means if you<br />
don’t get any syslog messages in an hour it will trigger an alarm. Unless your<br />
environment is very small, or you are sending only high-severity messages,<br />
this probably means there is a connectivity problem.The alarm can make an<br />
audible sound, execute a program, or send an e-mail.<br />
www.syngress.com
Another very powerful feature is that you can configure Kiwi to receive<br />
SNMP traps. SNMP is Simple <strong>Network</strong> Management Protocol.Traps can be<br />
configured as a sort of alarm message, to be sent when various parameters<br />
surpass certain thresholds. When this option is enabled, you can configure<br />
which facility and level/severity to use <strong>for</strong> the SNMP traps. In most cases, if<br />
you point your SNMP traps to the server that is hosting your Kiwi syslog,<br />
and check the box next to Listen <strong>for</strong> SNMP Traps, the default settings on this<br />
screen should work fine.<br />
Linux Syslog<br />
The Linux daemon that supports syslog is syslogd, or on some newer distributions,<br />
syslog-ng. With current Linux distributions you would be hard pressed<br />
to find one that didn’t come with a syslog daemon already enabled, but if you<br />
need to, you can install it like any other package.There are a few differences<br />
between syslogd and the newer syslog-ng. Syslog-ng supports sending syslog<br />
messages over TCP, which gives you more choices <strong>for</strong> encrypting your syslog<br />
messages.The feature that will appeal to the most people is the increased<br />
granularity when configuring what actions should generate syslog events<br />
using the /etc/syslog-ng.conf file.This greater degree of control also comes<br />
with a price, which is that the configuration file of syslog-ng is a little more<br />
complex than that of plain old syslog.<br />
Generating Syslog Events<br />
Managing Event Logs • Chapter 5 297<br />
Once installed, you can control the behavior of the syslog daemon through<br />
/etc/syslog.conf or, in the case of syslog-ng, through /etc/syslog-ng.conf.This<br />
configuration file is relatively simple and additional in<strong>for</strong>mation can be found<br />
by viewing the man page <strong>for</strong> your version of syslog.You can typically type<br />
man syslog at the console to view the MANual <strong>for</strong> syslog.There should also<br />
be a man page <strong>for</strong> syslog.conf to explain the syntax of the configuration file.<br />
The configuration file is used to tell the syslog daemon what syslog messages<br />
to generate. Each line contains a selector and an action field.The selector tells<br />
the syslog daemon what types of events to act on, while the action field tells<br />
the syslog daemon what to do with those events. More practically you will<br />
see the following <strong>for</strong>mat used in the syslog.conf file: .<br />
.Take the following example:<br />
www.syngress.com
298 Chapter 5 • Managing Event Logs<br />
Mail.* /var/log/maillog<br />
^Selector ^action<br />
This would tell the syslog daemon to log all events from the mail subsystem;<br />
that is, the mail facility, regardless of their severity, to /var/log/maillog.<br />
For examples of valid severities refer to Table 5.1 earlier in this chapter. An<br />
asterisk “*” is a special case and can represent several different things. If used<br />
in place of the facility or severity, it can represent all facilities or all severities<br />
respectively. If you place an asterisk as the action, the message will be sent to<br />
all logged-on users.The action can also be /dev/console, <strong>for</strong> example, to send<br />
it to the console.<br />
Unless a given facility isn’t used or available on your bastion host, you<br />
should probably plan a logging action <strong>for</strong> all of them.The action will typically<br />
be to log to a real file, but there are some other options available.The most<br />
notable action from a security perspective is the remote machine action.This<br />
enables you to send the logs to a remote machine, which is a good idea.The<br />
syntax <strong>for</strong> the remote machine action is simply @host.The following line in<br />
the syslog.conf would send all critical events to the system at 192.168.1.11.<br />
*.crit @192.168.1.11<br />
If the system holding your log files were compromised by a hacker, any<br />
logs on that host become suspect and of less value if legal action were to be<br />
taken. If you needed to use logs that were stored on the compromised<br />
machine, ensuring their integrity would be nearly impossible.You would have<br />
virtually no way to guarantee that the logs had not been modified; in short,<br />
the logs would become all but useless. By sending the syslog events to a syslog<br />
daemon on another machine, you can make the logs much more secure.The<br />
hacker would have to break into two machines in an attempt to modify the<br />
log files.<br />
Encrypting Syslog Traffic<br />
To encrypt your syslog messages, you will need to send your syslog messages<br />
over TCP and then use another means to encrypt the logs in transit. If the<br />
Linux distribution you are using does not include syslog-ng, it is available <strong>for</strong><br />
free from www.balabit.com/products/syslog_ng/ and can be installed like any<br />
other package.There are many ways available to encrypt the syslog messages.<br />
www.syngress.com
Stunnel can be used to send the logs over an SSL-encrypted tunnel.<br />
OpenSSH can use its port-<strong>for</strong>warding feature in much the same way and<br />
encrypt the data using SSH. Finally, IPsec can be used as well. IPsec is the<br />
only option that enables you to encrypt the syslog logs even if they are being<br />
sent over UDP.<br />
Be<strong>for</strong>e beginning the encryption configuration, verify that you can successfully<br />
send syslog messages from the Linux host to the syslog server (Linux<br />
or Windows). While UDP syslog uses a destination port of 514,TCP syslog<br />
messages do not have a standardized port number to use.You can use TCP514<br />
if you like, but it is officially registered to rshell. For more in<strong>for</strong>mation, go to<br />
www.iana.org/assignments/port-numbers. If you don’t have any other software<br />
listening on your syslog server on TCP 514, though, you can certainly<br />
use that port.The default syslog-ng.conf is configured to behave very closely<br />
to the original syslog if you don’t modify anything.To direct logs to a remote<br />
syslog server you will need to edit the syslog-ng.conf file.<br />
The default configuration file has all the destinations defined in one area.<br />
The default is to name destinations with a name following the <strong>for</strong>mat<br />
d_, but this isn’t required. Syslog.conf uses the <strong>for</strong>mat of<br />
. . Syslog-ng uses the <strong>for</strong>mat log { source; filter; destination;<br />
};. Each of these fields must be defined in the syslog-ng.conf file.To<br />
define our remote destination, add the following line just after the last destination<br />
that is defined in the syslog-ng.conf file.<br />
destination d_lab { tcp ("192.168.1.99" port(5140)); };<br />
This defines d_lab as a syslog server at 192.168.1.99, which is listening on<br />
TCP port 5140. In the filter section, you can define any filters you want to<br />
apply to the logging.The following filter would trigger on all log messages of<br />
severity info (6) through emerg (0), which is basically anything except debug.<br />
<strong>Using</strong> f_ to precede any filter names is a standard, but it is not a requirement.<br />
The following line will define a filter named f_no-debug.<br />
filter f_no-debug {level(info..emerg); };<br />
Managing Event Logs • Chapter 5 299<br />
The source is defined by default as s_sys, and we have added definitions<br />
<strong>for</strong> the filter and the destination.You can now use these definitions and configure<br />
syslog-ng to send syslog messages. Do this by adding the following line<br />
after the last log line.<br />
www.syngress.com
300 Chapter 5 • Managing Event Logs<br />
log { source(s_sys); filter(f_no-debug); destination(d_lab); };<br />
After you save the changes, you will need to restart the syslog-ng daemon.<br />
Considering that we are logging everything short of debug, you should see<br />
some messages as soon as you start the syslog-ng service. In the event that you<br />
don’t see any messages, or if you just want to do some further testing, you can<br />
generate a test message on most Linux systems with the logger command<br />
using the <strong>for</strong>mat logger –p facility.severity message. An example is:<br />
logger –p cron.emerg test message here<br />
This will send the messages “test message here” as facility cron, with a<br />
severity of emergency. Assuming you are able to successfully send TCP-based<br />
syslog messages, the next step is to add a layer of encryption to secure the<br />
syslog messages.<br />
Configuring Stunnel<br />
Stunnel doesn’t contain any cryptographic code itself. Instead, Stunnel uses<br />
external libraries to per<strong>for</strong>m the encryption. In this case, OpenSSL is used to<br />
create an encrypted tunnel. SSL stands <strong>for</strong> <strong>Secure</strong> Sockets Layer, which is the<br />
same well-tested encryption that is commonly used to encrypt Web pages.To<br />
demonstrate the operation of Stunnel on both Windows and Linux, we will<br />
be using a Linux host to generate the logs (via syslog-ng) and a Windows host<br />
to receive them (via Kiwi Syslog Daemon).This should give you a feel <strong>for</strong> the<br />
operation of Stunnel on both operating systems. Follow these steps to configure<br />
Stunnel on the Linux host.<br />
1. Add the following destination definition to your syslog-ng.conf file,<br />
which will define a new destination called d_loghost.<br />
destination d_loghost {tcp("127.0.0.1" port(5140));};<br />
2. Change the log line in syslog-ng.conf that points to a destination of<br />
d_lab to point to the new destination d_loghost and restart syslogng.This<br />
tells syslog-ng to send the syslog messages to the localhost<br />
using a destination TCP port of 5140, which is where we will tell<br />
Stunnel to listen.<br />
log { source(s_sys); filter(f_no-debug); destination(d_loghost); };<br />
www.syngress.com
3. If Stunnel does not come pre-installed on your Linux distribution,<br />
then download and install Stunnel from www.stunnel.org.<br />
4. Create a Stunnel configuration file called /etc/stunnel/stunnel.conf.<br />
Add the following text to the file and save the file.<br />
client = yes<br />
[syslog-ng]<br />
accept = 127.0.0.1:5140<br />
connect = 192.168.1.99:6140<br />
This sets Stunnel in client mode (the default is server mode), and<br />
tells Stunnel to listen on port 5140 and send the data back out to<br />
192.168.1.99 on port 6140.<br />
5. Open a terminal window and start Stunnel by typing Stunnel.<br />
Now you need to configure the server side of the SSL tunnel. Follow<br />
these steps to configure Stunnel on the syslog server and Kiwi Syslog<br />
Daemon.<br />
1. Download and install Stunnel from www.stunnel.org.<br />
2. Navigate to the directory where you installed Stunnel and edit the<br />
stunnel.conf file. Add the following at the end of stunnel.conf and<br />
save the changes.<br />
[syslog_lab]<br />
accept = 6140<br />
connect = 7140<br />
Managing Event Logs • Chapter 5 301<br />
Stunnel will be in server mode by default, and the accept-and-connect<br />
line simply tells Stunnel to listen on port 6140, and when a connection is<br />
made, send the data out to 7140 on the local host. By not specifying an IP<br />
address in our configuration file, Stunnel assumes the local host.<br />
3. Ensure that your Kiwi Syslog Daemon is listening <strong>for</strong> TCP connection<br />
on the port you specified in the previous step (7140 in this<br />
example).You can configure this by opening the Kiwi Syslog<br />
Daemon and navigating to File | Setup. Select Inputs | TCP in<br />
the left pane and ensure that Listen <strong>for</strong> TCP Syslog Messages is<br />
checked and 7140 is entered in the TCP port field.<br />
www.syngress.com
302 Chapter 5 • Managing Event Logs<br />
4. Navigate to Start | Programs | Stunnel | Run Stunnel.<br />
You should now be receiving log messages on the syslog server over the<br />
encrypted SSL tunnel. After you start Stunnel, it will place an icon in the<br />
system tray. Right-clicking on this icon will open a very small menu. If you<br />
select Log on this menu, you can see a running log of the connections that<br />
Stunnel has accepted. Because the communication path can be a little confusing,<br />
Figure 5.21 shows a graphical representation of the data flow using<br />
Stunnel.<br />
Figure 5.21 Stunnel Data Flow<br />
Stunnel<br />
Syslog-ng<br />
After you have verified that you can receive the encrypted syslog messages,<br />
you will need to generate a new server certificate and private key to<br />
replace the default one. Stunnel requires a server certificate and private<br />
encryption key <strong>for</strong> the SSL encryption to function.The installation files come<br />
with a default certificate and key, combined into a single file called<br />
stunnel.pem. Because the same certificate is distributed with all the installation<br />
files, using this certificate in a production environment would be insecure<br />
because everyone would have your key.You need to generate a new certificate<br />
www.syngress.com<br />
Dst<br />
Port<br />
5140<br />
SSL Encrypted Tunnel<br />
Dst<br />
Port<br />
7140<br />
Dst<br />
Port<br />
6140<br />
Stunnel<br />
Kiwi Syslog<br />
Daemon<br />
Client Server<br />
192 .168.1.99
Managing Event Logs • Chapter 5 303<br />
and key file <strong>for</strong> use on the server (you do not need to do this on the client<br />
host).The simplest way of generating the new certificate and key is by using<br />
the OpenSSL package.<br />
1. Download and install OpenSSL.The source files (to be used on<br />
Linux) can be downloaded from www.openssl.org/source/. Pre-compiled<br />
binary files (<strong>for</strong> use on Windows) can be downloaded from<br />
www.slproweb.com/products/Win32OpenSSL.html.<br />
2. After you have downloaded and installed OpenSSL, use these commands<br />
to generate a new server certificate: openssl genrsa –des3<br />
–out server.key 1024.You will be prompted <strong>for</strong> a pass phrase and it<br />
will then generate an initial server key.<br />
3. Enter openssl req -new -key server.key -out server.csr to generate<br />
a certificate signing request.You will be required to enter the<br />
previously assigned pass phrase and answer several prompts with<br />
regional in<strong>for</strong>mation such as your state, country, and company name.<br />
4. Enter openssl rsa -in server.key.org -out server.key to remove<br />
the pass phrase from the server key.You will be required to enter the<br />
pass phrase to complete this step.<br />
5. Enter openssl x509 -req -in server.csr -signkey server.key -out<br />
server.crt to generate the server certificate.<br />
6. Finally, combine the certificate and key file into a single .pem file<br />
that Stunnel will use by entering the following command: copy<br />
server.crt+server.key stunnel.pem<br />
7. Replace the original stunnel.pem with the newly created<br />
stunnel.pem certificate in the Stunnel directory.<br />
8. Restart Stunnel on the server and verify that everything is still<br />
working properly.<br />
Now that you are successfully encrypting your syslog messages using<br />
Stunnel, you might notice that all of the syslog messages claim to be sourced<br />
from 127.0.0.1, which is the local host.This is because technically, that is who<br />
sent the message to the syslog server. If you are receiving the syslog messages<br />
to syslog-ng (on a Linux host) you can change this behavior by including<br />
www.syngress.com
304 Chapter 5 • Managing Event Logs<br />
keep_hostname(yes); in the options section of the syslog-ng.conf file. Stunnel<br />
enables you to encrypt virtually any TCP-based connection, not just syslog.<br />
You could use Stunnel to encrypt a Telnet session, <strong>for</strong> example, or even a<br />
custom TCP-based application. After you have the Stunnel software installed<br />
and the basic configuration set up, adding additional tunnels is as simple as<br />
defining additional services in the stunnel.conf configuration file.<br />
Configuring OpenSSH<br />
OpenSSH is an open source implementation of the SSH (<strong>Secure</strong> Shell) protocol.<br />
Originally it was intended as a secure alternative to other clear text<br />
protocols <strong>for</strong> remote administration, such as Telnet or rshell, SSH includes a<br />
port <strong>for</strong>warding option that enables it to function similarly to Stunnel.There<br />
are advantages to using OpenSSH over Stunnel, such as the fact that you<br />
might already have OpenSSH installed to provide remote access. In those<br />
cases it would be one less piece of software that you needed to install and<br />
configure. Virtually every Linux implementation will come with OpenSSH<br />
installed by default, so you are more likely to already have SSH on your Linux<br />
host than you are Stunnel.<br />
We discussed the installation and configuration of OpenSSH in Chapter<br />
2,“Protecting <strong>Your</strong> Perimeter,” so we will discuss only the configuration of<br />
OpenSSH here, under the assumption that you already have OpenSSH<br />
installed and working properly to provide remote command-line access.<br />
OpenSSH port <strong>for</strong>warding, in this scenario, is used like Stunnel.The SSH<br />
client establishes a connection to the SSH server and then listens to local<br />
traffic destined <strong>for</strong> a port you specify. When it receives it, it will send the data<br />
out encrypted, to an OpenSSH server, which in turn decrypts the data and<br />
passes it to the local port the service is listening on.To setup port <strong>for</strong>warding<br />
using OpenSSH, per<strong>for</strong>m the following steps.<br />
1. On the Linux host, run the following command: ssh<br />
user@192.168.1.99 –L 5140:192.168.1.99:7140.<br />
2. Generate a sample syslog message and it should be received on the<br />
syslog server. If not, ensure that your Kiwi Syslog Daemon is still listening<br />
on TCP port 7140.<br />
www.syngress.com
Although much of the operation of SSH port <strong>for</strong>warding is the same as<br />
the SSL tunnel that Stunnel creates, there are a couple of differences. By<br />
default, the SSH port <strong>for</strong>warding is just that. It is the <strong>for</strong>warding of a port on<br />
an established SSH tunnel. So the encrypted SSH tunnel is established first,<br />
using the normal SSH TCP port of 22 unless you specify a different port.This<br />
tunnel is set up exactly the same as if you were going to connect <strong>for</strong> remote<br />
command-line access. In addition, SSH will listen <strong>for</strong> and <strong>for</strong>ward connections<br />
on the additional port you have specified.The primary disadvantage of<br />
SSH <strong>for</strong> port <strong>for</strong>warding is there is no command line means to specify the<br />
password.This is an intentional design choice on the part of the SSH developers<br />
in order to increase security.They specifically did not wish to provide a<br />
simple means of including passwords in scripts and batch files.This requirement<br />
<strong>for</strong> user interaction makes SSH a better candidate <strong>for</strong> interactive sessions<br />
rather than service-based connections such as syslog. As you can see, however,<br />
it is very easy to set up on a system that already has SSH configured properly.<br />
Configuring IPsec<br />
Because IPsec is an industry standard, specifically designed <strong>for</strong> interoperability<br />
between different vendor systems, it is a very popular choice <strong>for</strong> implementing<br />
encryption. Current Linux kernels have IPsec support built in, and<br />
there are other packages that provide their own implementation of IPsec as<br />
well. For these examples we will assume you are using the Linux kernel native<br />
IPsec support. Follow these steps to configure IPsec on a Linux host.<br />
1. If they are not already installed, download and install the IPsec Tools<br />
from http://source<strong>for</strong>ge.net/projects/ipsec-tools.These tools provide<br />
a simplified interface to configure the various IPsec settings.<br />
2. Edit the /etc/racoon/psk.txt file.This file holds the pre-shared (AKA<br />
“secret”) keys. In the previous example we chose “password” as our<br />
pre-shared key. (This certainly isn’t a secure password; you should use<br />
a high-quality password <strong>for</strong> a production environment.) The <strong>for</strong>mat<br />
of the file is . In our example we would add the<br />
following line to the file and save the new file.<br />
192.168.1.99 password<br />
Managing Event Logs • Chapter 5 305<br />
www.syngress.com
306 Chapter 5 • Managing Event Logs<br />
The previous example <strong>for</strong> setting up IPsec on Windows used a<br />
preshared key of “password.” If you wish to change the preshared key<br />
on the Windows syslog server, edit the IPsec policy by following<br />
these steps:<br />
3. Open the MMC and select IP Security Policies on Local<br />
Computer in the left pane.<br />
4. Double-click the Inbound_Syslog policy in the right pane.<br />
5. Double-click the TCP Syslog security rule and select the<br />
Authentication Methods tab.<br />
6. Click Edit to change the preshared key, and enter the new key.<br />
7. Click OK, OK, Apply, and OK to accept the changes and exit the<br />
policy configuration windows.<br />
The next step is to configure the IPsec policy on the Linux host.<br />
With the IPsec tools loaded, this can be done using the setkey utility.<br />
The utility can display the current security associations and per<strong>for</strong>m<br />
several other configuration changes to your IPsec policy. By creating a<br />
setkey configuration file, we will define the security parameters to use.<br />
The entire contents of the configuration file are shown in Figure 5.22.<br />
8. Create a configuration file, you could name it<br />
/etc/racoon/setkey.conf, and enter the in<strong>for</strong>mation shown in Figure<br />
5.22.<br />
Figure 5.22 setkey Configuration File<br />
# Configuration <strong>for</strong> 192.168.1.105<br />
# Flush the SAD and SPD<br />
flush;<br />
spdflush;<br />
#### ESP SAs using 192 bit long keys (168 + 24 parity) ####<br />
add 192.168.1.105 192.168.1.99 esp 1001<br />
-E 3des-cbc 0x7aeaca3f87d060a12f4a4487d5a5c3355920fae69a96c831;<br />
add 192.168.1.99 192.168.1.105 esp 1001<br />
-E 3des-cbc 0x7aeaca3f87d060a12f4a4487d5a5c3355920fae69a96c831;<br />
www.syngress.com
#### Security policies ####<br />
spdadd 192.168.1.105 192.168.1.99 any -P out ipsec<br />
esp/transport//require;<br />
spdadd 192.168.1.99 192.168.1.105 any -P in ipsec<br />
esp/transport//require;<br />
Managing Event Logs • Chapter 5 307<br />
All lines beginning with # are comments and ignored by setkey.<br />
The flush and spdflush tells setkey to wipe out the previous configuration.This<br />
enables us to start clean and ensures that we are using<br />
only what is contained in this configuration file.The next section<br />
(#ESP SAs) defines the Encapsulating Security Payload (ESP) parameters.The<br />
first line states that traffic from 192.168.1.105 (the syslog<br />
client) to 192.168.1.99 (the syslog server) should use ESP and 3DES<br />
<strong>for</strong> encryption.The long string beginning with 0x is a key.This is just<br />
a sample key used <strong>for</strong> testing.You should generate your own key <strong>for</strong><br />
increased security.The following section serves the same purpose <strong>for</strong><br />
traffic coming from 192.168.1.99 to 192.168.1.105. In this example<br />
we used the same key <strong>for</strong> both, but you certainly don’t have to.The<br />
final section (# Security Policies) defines the IPsec modes to be<br />
used. We are configuring transport mode and requiring that traffic<br />
matching the policy be encrypted.The line is duplicated with the IP<br />
addresses reversed so that our policy will apply to traffic in both<br />
directions.<br />
9. Apply the settings in your IPsec policy by entering setkey –f<br />
/etc/racoon/setkey.conf.<br />
10. Edit your racoon configuration file /etc/racoon/racoon.conf.<br />
Racoon is the daemon on Linux that handles your Internet Key Exchange<br />
(IKE) functionality. If invoked from the command line with no options, it will<br />
automatically be run in daemon mode. For initial testing and setup, we would<br />
recommend running it in the <strong>for</strong>eground, so that you can see the output <strong>for</strong><br />
troubleshooting purposes. Executing racoon –F will run in the <strong>for</strong>eground, and<br />
adding –d (<strong>for</strong> debug) will increase the verbosity level to provide even more<br />
in<strong>for</strong>mation. Figure 5.23 shows the complete racoon.conf contents.<br />
www.syngress.com
308 Chapter 5 • Managing Event Logs<br />
Figure 5.23 Racoon.conf File<br />
# Racoon IKE daemon configuration file.<br />
# See 'man racoon.conf' <strong>for</strong> a description of the <strong>for</strong>mat and entries.<br />
path include "/etc/racoon";<br />
path pre_shared_key "/etc/racoon/psk.txt";<br />
path certificate "/etc/racoon/certs";<br />
##### IKE PHASE 1<br />
remote 192.168.1.99 {<br />
exchange_mode main;<br />
proposal {<br />
encryption_algorithm 3des;<br />
hash_algorithm sha1;<br />
authentication_method pre_shared_key;<br />
dh_group 2;<br />
}<br />
}<br />
##### IKE PHASE 2<br />
sainfo anonymous<br />
{<br />
lifetime time 1 hour ;<br />
encryption_algorithm 3des, des ;<br />
authentication_algorithm hmac_sha1, hmac_md5 ;<br />
compression_algorithm deflate ;<br />
}<br />
www.syngress.com<br />
The first few path lines are unedited from the defaults and tell<br />
racoon where to find the pre-shared key file and any certificates you<br />
want to use.The functioning of this configuration file is pretty<br />
straight<strong>for</strong>ward.The remote entry says that when speaking to<br />
192.168.1.99 we will use main mode and attempt to use 3DES, with<br />
SHA1, and a pre-shared key.The second section contains security<br />
association in<strong>for</strong>mation that should be applied to all hosts (due to the<br />
anonymous entry).You could instead define different parameters to<br />
be used when communicating with different hosts if desired, by
Managing Event Logs • Chapter 5 309<br />
creating multiple entries in the <strong>for</strong>mat sainfo instead of using<br />
anonymous.<br />
11. At a terminal prompt, start racoon using racoon –F or racoon –F<br />
–d.<br />
If you already have the Windows IPsec policy defined from the previous<br />
example, follow these steps to change the previously configured IPsec policy to<br />
accept TCP-based connections. If you are not using the same system, refer to<br />
the Windows IPsec section of this chapter and follow the steps <strong>for</strong> configuring<br />
the IPsec policy, substituting the TCP port number your want to use<br />
<strong>for</strong> the UDP port 514 that was used in the previous example.<br />
1. Open the MMC and navigate to the IP Security Policies on<br />
Local Computer in the left pane.<br />
2. Double-click the policy that was created previously; in my example it<br />
was called Inbound_Syslog.<br />
3. Highlight the syslog filter, which will open the Edit Rule<br />
Properties window.<br />
4. Click Add and enter a name <strong>for</strong> the new filter, such as TCP Syslog.<br />
5. Enter a description and click Add, ensure that the Use Add Wizard<br />
is checked.<br />
6. Click Next in the IP Filter Wizard. For source address select Any<br />
and click Next.<br />
7. For Destination Address select My IP Address and click Next.<br />
8. For a protocol select TCP and click Next.<br />
9. Leave From any port selected, and change the bottom option to<br />
To this port. Enter the port you want your syslog server to listen<br />
on, such as 7140.<br />
10. Click Next, Finish, and then OK.<br />
11. This will place you back at the Edit Rule Properties window;<br />
ensure that the new rule is selected with the radio button and click<br />
OK.<br />
12. Back on the Properties window, click Apply and then OK.<br />
www.syngress.com
310 Chapter 5 • Managing Event Logs<br />
The new policy should now be in effect, which will encrypt traffic it<br />
receives on TCP port 7140.You should now be able to receive your<br />
encrypted syslog messages over TCP to port 7140. Because IPsec is not protocol<br />
dependent, this same type of configuration can easily enable you to<br />
encrypt UDP-based syslog from your Linux system to a Windows system as<br />
well.To do this, simply substitute the configuration options of TCP 7140 <strong>for</strong> a<br />
UDP port of your choice, such as the default UDP 514.<br />
TIP<br />
When you first apply all the IPsec settings, you will probably not see<br />
traffic immediately. In most cases there will be a short delay while the<br />
initial IPsec connection is being established. This time is being spent<br />
agreeing on the encryption parameters and exchanging key in<strong>for</strong>mation<br />
prior to the secure communications being able to take place.<br />
The following is a short summary of the various encryption options <strong>for</strong><br />
use with syslog.<br />
■ SSL SSL is probably the simplest to implement. It does require a<br />
TCP-based syslog daemon and reconfiguration of syslog to point to<br />
the local listening SSL port. Stunnel may or may not need to be<br />
installed on your particular distribution.<br />
■ SSH In almost all Linux systems SSH will be included in the default<br />
install. Like SSL, it does require a TCP-based syslog daemon but does<br />
not require reconfiguration of the syslog ports and destinations, other<br />
than to use TCP.The biggest disadvantage is that SSH is intended <strong>for</strong><br />
interactive session and requires authentication to establish the SSH<br />
tunnel.<br />
■ IPsec IPsec is both the most functional and flexible encryption<br />
option, as well as the most complicated.You need to match various<br />
security association settings on both systems and multiple files have to<br />
be configured in order <strong>for</strong> it to work. IPsec’s primary strengths are<br />
the high degree of flexibility in how it is configured and that it is<br />
www.syngress.com
protocol independent.You can implement IPsec without making any<br />
changes to your TCP-based syslog configuration.<br />
Bear in mind that this is a very minimalist IPsec configuration.The objective<br />
is only to secure your syslog traffic. Configuration can become much<br />
more complex, particularly if you need to configure different IPsec policies<br />
<strong>for</strong> multiple systems. Refer to www.ipsec-howto.org <strong>for</strong> some very good documents<br />
that walk you through the process in a little more detail. We would<br />
also recommend reading the man page <strong>for</strong> syslog-ng, syslog-ng.conf, setkey,<br />
racoon, and racoon.conf.<br />
Receiving Syslog Events on a Linux Host<br />
Configuring your Linux host to accept syslog messages is fairly simple. For<br />
the generation of test events from a Windows host, Kiwi offers a handy tool<br />
creatively called Kiwi Syslog Message Generator. It will generate both TCP<br />
and UDP messages of your specification, or messages using random parameters.You<br />
can download the message generator at<br />
www.kiwisyslog.com/info_sysloggen.htm. If you are using the standard syslog<br />
daemon, you will need to edit the /etc/sysconfig/syslog file.The line that<br />
contains SYSLOGD_OPTIONS= tells the system how to run the syslog<br />
daemon. Add –r to the list of options and restart the syslog service.That’s all<br />
there is to it.<strong>Your</strong> Linux system will now be listening on the default syslog<br />
port (UDP 514) <strong>for</strong> syslog messages. If you enter netstat –A in a terminal<br />
window, you should see syslog as one of the listening processes.<br />
If you are using syslog-ng, you will need to edit the /etc/syslogng/syslog-ng.conf<br />
file. If you are only trying to receive syslog messages on the<br />
default UDP port of 514, all you need to do is remove the comment delimiter<br />
(#) from the following line in the syslog-ng.conf file.<br />
# udp(ip(0.0.0.0) port(514));<br />
Managing Event Logs • Chapter 5 311<br />
The default configuration file is set up this way to mimic the original<br />
syslog daemon, which is set up to not listen <strong>for</strong> syslog messages from the network<br />
by default. After editing the configuration file, restart the syslog-ng service<br />
and you should begin receiving syslog messages on UDP port 514.To<br />
configure the Linux host to receive syslog messages on a TCP port (recom-<br />
www.syngress.com
312 Chapter 5 • Managing Event Logs<br />
mended) instead, add the following to the syslog-ng.conf file in the source<br />
definition section (s_sys is the default source definition).<br />
tcp(ip(0.0.0.0) port(7140));<br />
Replace 7140 with the TCP port you wish to receive syslog messages on.<br />
If you wish to configure some type of encryption <strong>for</strong> your syslog messages to<br />
the Linux host, you can use any of the previously discussed examples to<br />
accomplish this.<br />
Analyzing Syslog Logs on Windows and Linux<br />
Now that you are receiving all these wonderful logs, there is the question of<br />
what to do with them.You are probably realizing that they can create a large<br />
volume of data in a relatively short time frame.You need a way to sort<br />
through the log files and pick out the most interesting pieces of in<strong>for</strong>mation,<br />
and then do something about it where necessary, preferably all in as automated<br />
fashion as possible.There are basically two types of processing you may<br />
wish to per<strong>for</strong>m on your log data. One is a real time analysis, and the other is<br />
an offline analysis done at some later point in time after the logs have been<br />
generated.Typically, the real-time type of analysis is used <strong>for</strong> sorting out the<br />
more important events from the bulk of “normal” activity and highlighting<br />
them or sending alerts to bring these events to the attention of a human <strong>for</strong><br />
further analysis.This type of analysis and response can take many <strong>for</strong>ms, from<br />
a simple color coding as the events scroll across an administrative terminal, to<br />
complex rules <strong>for</strong> sending out automated e-mails or paging people.<br />
The offline analysis is more often used <strong>for</strong> less time-sensitive investigations,<br />
such as identifying trends or spotting issues <strong>for</strong> follow up. For example,<br />
a CPU running a little high is not generally a critical event that would be<br />
flagged during a real-time analysis, while a chronically high CPU might be<br />
something you want the offline analysis to report on. On a similar note, an<br />
excessively high CPU would be appropriate <strong>for</strong> real-time notification because it<br />
could indicate a production device is no longer able to adequately service<br />
requests. Each type of analysis has its merit and uses. What follows is a discussion<br />
of some useful tools <strong>for</strong> log analysis.<br />
www.syngress.com
Windows Log Analysis<br />
Managing Event Logs • Chapter 5 313<br />
<strong>Your</strong> first criteria <strong>for</strong> log analysis is to determine if you are going to be analyzing<br />
the logs in their native Evenlog <strong>for</strong>mat, or in syslog <strong>for</strong>mat on a<br />
Windows host. Kiwi offers the Kiwi Logfile Viewer, which will monitor a<br />
logfile <strong>for</strong> changes and color code the entries as they appear in the Logfile<br />
Viewer. Kiwi Logfile Viewer can be downloaded from<br />
www.kiwisyslog.com/log-viewer-info.php.The install routine holds no surprises,<br />
so install the viewer to a directory of your choice and then execute the<br />
Log Viewer. When the viewer first opens, it will be blank.You will need to<br />
navigate to File | Open and browse to the log file. If you are using the Kiwi<br />
Syslog Daemon, the default log file is in the directory where you installed<br />
Kiwi Syslog Daemon such as syslogd/logs/SyslogCatchAll.txt.The main<br />
window will then populate with the log entries.These are the same entries<br />
that would appear in the Kiwi Syslog Daemon window. In order <strong>for</strong> the<br />
viewer to detect changes to the log file, select Edit | Tail from the viewer<br />
menu, or click the tail button across the top.You now have the messages displaying<br />
in the viewer and it is updating as new messages are received.The<br />
next step is to configure some color coding to make the important events<br />
stand out.<br />
Navigate to Options | Highlighting to access the configuration<br />
window. Click the large plus on the right side to create a new highlight<br />
trigger.The default it creates will be a red highlight. Edit the String to<br />
Match field and enter the text you wish to trigger the highlight. An example<br />
would be .emerg to trigger on all emergency priority messages.You can of<br />
course edit the text and background colors that are used <strong>for</strong> the highlighted<br />
message.The Kiwi Log Viewer window is shown in Figure 5.24.<br />
The Kiwi Log Viewer is intended to be running on a console where a<br />
human analysis can monitor it throughout the day. It lacks any advanced features<br />
or configuration but is extremely easy to install and configure.<br />
www.syngress.com
314 Chapter 5 • Managing Event Logs<br />
Figure 5.24 Kiwi Log Viewer<br />
EventLog Analyzer 4 is a Java-based application that will analyze both<br />
Windows event logs and syslog logs from a Windows host. It can be installed<br />
on a Linux host as well, but then it cannot collect event logs from a Windows<br />
host.The free version does limit your analysis to only five total hosts. It can<br />
be downloaded from http://manageengine.adventnet.com/products/<br />
eventlog/download.html?free. When you per<strong>for</strong>m the install, you will be<br />
prompted to choose from the trial edition or the free edition. In this example<br />
we are choosing the free version. After selecting the install directory, you will<br />
be prompted to choose a Web server port, which will later be used <strong>for</strong><br />
viewing reporting data.You will also be able to choose if you want to install<br />
EventLog Analyzer as a service (which is the default).<br />
After it is installed, start the program via the start menu.This will open a<br />
command prompt and execute the Java application. Once completed, it<br />
should open up your default browser to the login page.The default username<br />
and password are on the login page.They are username = admin with<br />
a password of admin. EventLog Analyzer expects to act as the syslog server<br />
process by default.This means you wouldn’t need another program to listen<br />
<strong>for</strong> incoming syslog messages.To add hosts, click Add New Host. If you<br />
www.syngress.com
want to receive syslog messages from a Linux host, select UNIX <strong>for</strong> the host<br />
operating system and enter the host name or IP address of the system you<br />
want to receive logs from. For a UNIX system (syslog), the logging should<br />
be more or less constant, but <strong>for</strong> Windows hosts (event logs) you must configure<br />
the logging interval to no shorter than every 10 minutes.The Home<br />
tab will display a list of hosts and some basic event summary in<strong>for</strong>mation as<br />
shown in Figure 5.25.<br />
Figure 5.25 EventLog Analyzer 4<br />
Managing Event Logs • Chapter 5 315<br />
EventLog Analyzer does offer some nice features, such as some pre-configured<br />
reports sorted by event severity, event process, and some trend<br />
reporting options.To configure an e-mail alert to be sent, there are two steps<br />
to complete. First, you need to click on the Settings tab, and then select<br />
Mail Server Settings. Enter your POP server and if required, any login<br />
in<strong>for</strong>mation needed to authenticate to the POP server; then click Save.<br />
www.syngress.com
316 Chapter 5 • Managing Event Logs<br />
Next, click the Alerts tab and then click Add Alert Profile on the left<br />
side of the window.The next screen shown allows you to configure the trigger<br />
<strong>for</strong> the e-mail alert.You can name the alert profile and choose whether it<br />
applies to a single host or a host group. Next, select the facility and severity you<br />
wish to trigger the alert.You can also specify a string that the log message must<br />
contain <strong>for</strong> additional granularity. Choose a criticality <strong>for</strong> the alert e-mail and<br />
enter an e-mail address. When completed, click Add Alert Profile to save the<br />
profile. Figure 5.26 shows the newly created profile on the Alerts tab.<br />
Figure 5.26 Alert Profile “Test”<br />
As you can see, we configured this alert to trigger on a kernel.critical message.<br />
On the Linux host (192.168.1.105), you can generate a test message to<br />
trigger the alert using logger –p kern.crit testmessagehere. All in all, the EventLog<br />
Analyzer has some very nice reporting capabilities.The five-host limit may or<br />
may not pose any issues in your environment. On the downside, it seems to<br />
be rather resource intensive and it only collects data on a polled interval, so it<br />
is not very well suited <strong>for</strong> time-sensitive alerting or notification.<br />
Kiwi Syslog Daemon is quite simply an amazing piece of free software.<br />
We have been using it in several of the examples as a syslog server on a<br />
Windows host, but it can do a lot more than just receive the syslog messages.<br />
To start with some basic filtering capability, notice the top of the window<br />
contains a drop-down box that defaults to Display 00 (Default). By default, all<br />
inbound logs will go to display 00; if you choose any of the other displays,<br />
they will all be empty.You can follow these steps to configure a custom filter,<br />
which will send the events that match the filter to a different display. In this<br />
way you could send all the emergency messages to a different display.<br />
1. Navigate to File | Setup and right-click Rules in the left-hand<br />
pane.<br />
www.syngress.com
2. Choose Add Rule, and then enter a name <strong>for</strong> the new rule. In this<br />
case we entered Crit_Events.<br />
3. Under your new rule, right-click Filters, click Add Filter, and then<br />
select a name <strong>for</strong> this filter.<br />
4. With the filter selected in the left pane, the right side now has new<br />
drop-down windows at the top.The Field: box enables you to<br />
choose which field to use <strong>for</strong> the filter. If you select Priority, it will<br />
enable you to filter the messages based on both the message facility<br />
and the message severity.The resultant grid enables you to highlight<br />
all combinations of facility and severity you wish to filter on. By<br />
clicking the Crit column header, and then clicking the check mark<br />
at the bottom, it will select all facilities with a severity of critical.<br />
5. Once you are satisfied with your selection, click Apply.The Priority<br />
filter configuration window is shown in Figure 5.27.<br />
Figure 5.27 Kiwi Syslog Daemon Priority Filter<br />
Managing Event Logs • Chapter 5 317<br />
www.syngress.com
318 Chapter 5 • Managing Event Logs<br />
6. Next, configure the action to take on messages that match the filter.<br />
Do this by right-clicking Actions and selecting Add Action.<br />
7. In the Action drop-down box at the top, select Display.<br />
8. Choose a display to direct the critical messages to other than the<br />
default display and click Apply.<br />
You can change the names of the displays to something more meaningful<br />
by navigating to Display in the left pane and then using the Modify<br />
Display Names drop-down box to select the display you want to modify.<br />
Enter the new name in the field to the right and click Update.<br />
Un<strong>for</strong>tunately, there are several features that are only available with the<br />
registered version, such as sending an e-mail, running an external program, or<br />
logging the message to the Windows event log based on message content<br />
filter rules. Kiwi Syslog Daemon is still a very powerful tool in its free <strong>for</strong>m.<br />
Even given the limitations of the free Kiwi Syslog Daemon you can take<br />
advantage of its filtering capabilities and some external utilities to achieve<br />
some alerting functionality anyway.<br />
As a simple example, you could configure one of the Kiwi filters to write<br />
to a file as its action. In this example, any events matching kernel.emergency will<br />
be written to a file \syslogd\logs\Email.txt. Because the default filter writes all<br />
events to \log\SyslogCatchAll.txt, the event will be recorded in both files.You<br />
will probably want to change the logging <strong>for</strong>mat to a comma-separated value<br />
to make parsing the file easier.You can change this by navigating to File |<br />
Setup and drilling down in the left pane into Rules until you get to Actions.<br />
With your custom action highlighted you will see the Log File Format dropdown<br />
box shown in Figure 5.28.There are many <strong>for</strong>mats to choose from; in<br />
this case, we chose Comma Separated Value yyy-mm-dd (CSV).<br />
After this is done, we will generate a separate email.txt file <strong>for</strong> all<br />
kernel.emergency messages that will be easy to work with in a batch file.The<br />
following batch file will demonstrate how to easily look <strong>for</strong> syslog messages<br />
and send them in an e-mail.<br />
www.syngress.com
Figure 5.28 Kiwi Log File Format<br />
@echo off<br />
if exist email.txt goto :mail<br />
exit<br />
:mail<br />
ren email.txt working.txt<br />
FOR /F "tokens=*" %%i in (working.txt) do (<br />
echo %%i > lastline.txt<br />
)<br />
FOR /F "tokens=1-6 delims=," %%i in (lastline.txt) do (<br />
blat working.txt -to recipient@any.com -f syslog@any.com -s "Syslog [%%j]<br />
^from host %%k" -server smtp.any.com<br />
)<br />
del working.txt<br />
del lastline.txt<br />
Managing Event Logs • Chapter 5 319<br />
www.syngress.com
320 Chapter 5 • Managing Event Logs<br />
As you can see, this type of powerful functionality doesn’t take a lot of<br />
work to get working.The first few lines are just checking <strong>for</strong> email.txt. If<br />
Kiwi hasn’t found any kernel.emergency messages, email.txt will not exist, in<br />
which case we just exit. If email.txt is present, we know we need to send an email<br />
so we jump to :mail. Our first task is to rename email.txt to working.txt so<br />
that if more messages are generated while the batch file is running, it won’t<br />
cause any problems.The email.txt file could contain multiple syslog messages,<br />
so we iteratively pipe each line of email.txt to a temporary file called<br />
lastline.txt. Because we are sending each line to the same file, when it’s all finished,<br />
we will only be left with the last syslog message in lastline.txt. We then<br />
use FOR to grab the facility and severity from the last syslog message in lastline.txt<br />
and place that in the subject line of our e-mail. In the body of the email<br />
we use blat.exe to send working.txt, which will have all the syslog messages<br />
generated at the time the batch file was run. As part of the final clean up, we<br />
delete working.txt and lastline.txt.<br />
Blat.exe is a free command-line SMTP program available <strong>for</strong> download<br />
from www.blat.net. Note that the line is wrapped at the caret “^” due to<br />
space limitations in the book.Those two lines should all be one line in the<br />
batch file. As <strong>for</strong> BLAT, –to is used to specify the e-mail recipient and –f will<br />
be displayed as the e-mail sender. –s specifies the subject line and, finally,<br />
–server is used to specify the SMTP server to send the e-mail to <strong>for</strong> processing.There<br />
are, of course, many ways to accomplish the same thing.The<br />
batch file also uses only the filenames, meaning they all need to be in the<br />
same directory (the Kiwi log directory); otherwise, you should use full paths<br />
<strong>for</strong> all the file references.This batch file could be scheduled to run every<br />
minute or every five minutes to provide relatively fast e-mail alerts.The<br />
Internet contains a wealth of programs <strong>for</strong> many purposes that are free to use.<br />
To provide a few examples, here are some high-quality free command-line<br />
utilities.<br />
■ Blat Command-line SMTP— www.blat.net<br />
■ Vmailer Command-line SMTP—www.virdisoftware.com/vmailer/<br />
■ Bmail Command-line SMTP—<br />
www.beyondlogic.org/solutions/cmdlinemail/cmdlinemail.htm<br />
www.syngress.com
■ sendEmail Command-line SMTP—<br />
http://caspian.dotconf.net/menu/Software/SendEmail/<br />
sendEmail has the advantage that it is available <strong>for</strong> both Windows<br />
and Linux, so you only need to learn a single set of syntax across<br />
both operating systems.<br />
■ Libwww Suite of utilities <strong>for</strong> command-line HTML<br />
Read about it here www.w3.org/Library/Distribution.html.<br />
Download it here www.idm.ru/content/view/9/8/lang,en/.<br />
Linux Log Analysis<br />
When it comes to log analysis, there are many options available <strong>for</strong> Linux systems.<br />
What you are looking <strong>for</strong> in a log analysis utility will determine which<br />
one is the best one <strong>for</strong> you to use, and in most cases no single utility will be<br />
able to do everything you might want it to.You probably can, however, find a<br />
small subset of tools that can do 99% of what you need.Two robust generalpurpose<br />
tools are swatch and logwatch.These are general purpose in that they<br />
are not specific to a particular log file <strong>for</strong>mat. Of the two, swatch is the more<br />
lightweight, being both easier to set up but also having fewer options. Swatch is<br />
intended to parse the logs in real time and to act upon what it finds inside the<br />
logs according to the configuration you specify. Logwatch has a slightly different<br />
role. Its focus is on analyzing and reporting on log files, but not in real time.<br />
Configuring Swatch<br />
Managing Event Logs • Chapter 5 321<br />
Because swatch (short <strong>for</strong> simple watcher) is relatively focused in its purpose,<br />
the setup and configuration are pretty simple.The swatch home page can be<br />
found at http://swatch.source<strong>for</strong>ge.net/. Some swatch behaviors can be set<br />
from the command line, but the rules to match must be in a configuration<br />
file. An example command line to invoke swatch is swatch -c /etc/swatch.conf –t<br />
/var/log/syslog, which tells swatch to use the configuration file (–c) at<br />
/etc/swatch.conf. If you don’t specify which file to watch using the –t option,<br />
swatch will default to /var/log/messages or /var/log/syslog, in that order. If you<br />
don’t specify a configuration file it will echo everything to the console.You<br />
can use –f to examine a file once, instead of it running continuously<br />
with the –t option.<br />
www.syngress.com
322 Chapter 5 • Managing Event Logs<br />
The real meat of what swatch can do is defined in the configuration file.<br />
If you had the following lines in your configuration file, it would cause any<br />
line containing “denied” or “Denied” to echo to the console as yellow text<br />
and sound the bell once. Everything else would be caught by /.*/ and get<br />
echoed to the console as normal text.<br />
watch<strong>for</strong> /[dD]enied/<br />
echo yellow<br />
bell 1<br />
watch<strong>for</strong> /.*/<br />
echo<br />
As you can see, configuring swatch is not difficult. Refer to the swatch<br />
man page <strong>for</strong> specifics on some of the coloring options and other functionality<br />
of swatch. Some of the key commands <strong>for</strong> security considerations and<br />
their use follow:<br />
■ —script-dir= Used on the command line,<br />
when swatch runs, it creates a temporary watcher script, which by<br />
default is written to the user’s home directory.You should redirect<br />
watcher script to a secured directory where it cannot be edited. A<br />
hacker with access to this temporary script could control what<br />
swatch reports and cover his tracks.<br />
■ exec command Used in the config file, this will cause matches to<br />
execute another command.This could be as simple as a program to<br />
send an e-mail, <strong>for</strong> example, or it could run a custom script to lock<br />
down the netfilter firewall automatically.<br />
■ Throttle hours:minutes:seconds,[use=message|<br />
regex|] This is especially valuable because it controls how<br />
often duplicates of a given message will be acted on.This way a brute<br />
<strong>for</strong>ce password cracker being run won’t overload swatch with a nonstop<br />
scrolling message, possibly filling up your logging partition.<br />
■ Threshold events:seconds,[repeat=no|yes] This is another very<br />
important one.This enables you to ignore certain matches until they<br />
surpass a given threshold; <strong>for</strong> example, threshold 4:60 will not<br />
www.syngress.com
NOTE<br />
Managing Event Logs • Chapter 5 323<br />
per<strong>for</strong>m any action unless the pattern is matched four times within a<br />
sixty-second window.This is very useful <strong>for</strong> things such as incorrect<br />
passwords.You don’t want all sorts of alarms going off because the<br />
admin mistypes a password once, but many incorrect attempts in a<br />
short time frame may be a sign of a hacker trying to compromise the<br />
account.<br />
Although the man page includes threshold, this option doesn’t seem to<br />
work as written. Various help <strong>for</strong>ums have stated that it works on<br />
Debian-based systems while others have said that it just plain doesn’t<br />
work. The threshold option did not work on my Fedora test system.<br />
Now that you have the basics down, create an example configuration.<br />
Suppose you have a mission-critical server with an IP address of<br />
192.168.1.100.You want swatch to send you an e-mail <strong>for</strong> any message containing<br />
that IP address.You don’t want to get 500 e-mails in five minutes if<br />
the server crashes, so you want a throttle such that you won’t generate more<br />
than one e-mail every five minutes at most.The following lines at the beginning<br />
of the swatch.conf would accomplish this.<br />
Watch<strong>for</strong> /192.168.1.100/<br />
exec sendemail -f Syslog@yourcompany.com -t recipient@some.com -u ALARM -s<br />
MAILsrvr.com –m "Problem with 192.168.1.100"<br />
throttle 00:05:00<br />
The –f option is the from address; –t is the to address. –u specifies the subject<br />
line and –s specifies the outbound SMTP server to use.The option –m is<br />
to specify the message body.The variable $0 will be expanded by swatch to<br />
include the entire log entry as the e-mail body.You could also use –o messagefile=/var/logs/somelog.log<br />
to create the body from a file you specify.<br />
Suppose you want to know anytime anyone is denied access to anything.<br />
You can color any message with “access denied” appearing in it with blue<br />
text.To make sure it gets your attention, you can also have each occurrence<br />
ring the system bell twice. Use the following lines to configure this.<br />
www.syngress.com
324 Chapter 5 • Managing Event Logs<br />
watch<strong>for</strong> /[Aa]ccess [Dd]enied/<br />
echo blue<br />
bell 2<br />
Finally, you have an entire range of development servers.These servers<br />
are constantly generating log entries that would be alarming if they weren’t<br />
on development boxes. Fortunately, these systems are all located in the same<br />
building, with most of the development servers residing on the<br />
192.168.123.0 segment. Further, the development team has a server naming<br />
convention that all servers start with the name DEVEL.You can use the following<br />
lines to tell swatch to ignore a message that contains both<br />
“192.168.123.” and “DEVEL” in it.<br />
Ignore /192.168.123.&DEVEL/<br />
Finally, use the following line to log everything else to the terminal using<br />
normal text.<br />
watch<strong>for</strong> /.*/<br />
echo<br />
If you read the man page, there are many color options available <strong>for</strong> highlighting<br />
text, but not all of them will work on all systems, so you will have to<br />
do a little testing to see which colors you really have available to use in your<br />
terminal. Watch<strong>for</strong> /.*/ is the default, which will trigger on everything, and is<br />
used if you don’t specify any configuration file at all. If you want to see less<br />
on the swatch screen, you could configure only the lines you want to see, and<br />
then place an ignore /.*/ at the end. If you read the man page you will<br />
notice that swatch supports using mail to send an e-mail natively. In order to<br />
use mail you need to have a local mail transfer agent (MTA) configured, such as<br />
sendmail <strong>for</strong> example. If you need to process e-mail on the host in question,<br />
you will probably need an MTA configured anyway, but if log alerts are the<br />
only e-mail you will be sending, a command-line utility such as sendEmail<br />
might be the simplest way to go.<br />
You’ll notice that <strong>for</strong> the swatch filtering we are using syntax of /somethingtosearch<strong>for</strong>/.<br />
Swatch (along with many other tools/languages) uses regular<br />
expression (regex) <strong>for</strong> the filtering syntax. In our examples the filters were<br />
very simple but regex commands can look intimidating if you need complex<br />
filtering. A good introductory primer on regex syntax and a wealth of addi-<br />
www.syngress.com
tional in<strong>for</strong>mation can be found at www.regular-expressions.info/<br />
reference.html.<br />
Configuring Logwatch<br />
Logwatch is intended to be more of a reporting tool than a live monitor.You<br />
can access the home page <strong>for</strong> logwatch at www2.logwatch.org:8080/.<br />
Basically, you run logwatch and specify the log file you wish to analyze.<br />
Logwatch has the capability to per<strong>for</strong>m some limited <strong>for</strong>matting of the output<br />
<strong>for</strong> you.As is often the case, an example should help make logwatch’s role<br />
clear.The output of logwatch —service sshd —print is shown in Figure 5.29.<br />
Figure 5.29 Output from Logwatch<br />
[root@localhost ~]# logwatch --service sshd --print<br />
################### LogWatch 7.1 (11/12/05) ####################<br />
Processing Initiated: Mon Jul 10 23:19:05 2006<br />
Date Range Processed: yesterday<br />
( 2006-Jul-09 )<br />
Period is day.<br />
Detail Level of Output: 0<br />
Type of Output: un<strong>for</strong>matted<br />
Logfiles <strong>for</strong> Host: localhost.localdomain<br />
##################################################################<br />
--------------------- SSHD Begin ------------------------<br />
SSHD Killed: 1 Time(s)<br />
SSHD Started: 1 Time(s)<br />
Illegal users from these:<br />
192.168.1.108: 4 times<br />
Users logging in through sshd:<br />
root:<br />
192.168.1.108: 7 times<br />
Managing Event Logs • Chapter 5 325<br />
www.syngress.com
326 Chapter 5 • Managing Event Logs<br />
---------------------- SSHD End -------------------------<br />
###################### LogWatch End #########################<br />
The commands told logwatch you wanted it to report on the sshd service<br />
and to print the results of the analysis to the standard output (that is, the terminal<br />
window). At first glance this might seem trivial, but logwatch can be<br />
invaluable in helping to sort through very large logs and extract the meaningful<br />
in<strong>for</strong>mation in an easy-to-understand <strong>for</strong>mat. Another command-line<br />
example is the logwatch —service sshd —print —archives —range all option.This<br />
tells logwatch to parse not only the logfile specified, but all archived files of<br />
that log family. For example, if used with the option —logfile messages,logwatch<br />
parses /var/log/messages in addition to /var/log/messages.* variations,<br />
such as /var/log/messages.1.<br />
Logwatch is a generic log analysis tool in that it can be configured to analyze<br />
other types of log files in addition to the ones it understands by default.<br />
If you attempted to run logwatch —service customapp –print, you would get an<br />
error that “logwatch does not know how to process service: customapp.”You<br />
can, however, add the capability <strong>for</strong> logwatch to report on customapp. First of<br />
all, you need to understand where logwatch stores its configuration in<strong>for</strong>mation.<br />
It uses these directory structures:<br />
/usr/share/logwatch/default.conf/ holds the original configuration<br />
files shipped with logwatch.<br />
/usr/share/logwatch/dist.conf/ holds the configuration files shipped<br />
with your specific distribution.<br />
/etc/logwatch/conf/ holds any configuration files specific to your particular<br />
system.<br />
Under these directories there are several subdirectories, all of which may<br />
not be present under all directories.<br />
/services/ is used to define the configuration files <strong>for</strong> each service.The<br />
presence of a given service file is used by logwatch to determine if it understands<br />
a service in order to report on it. For example, if you have a /services/customapp.conf<br />
file in this directory, logwatch will not give you an<br />
www.syngress.com
error when you ask it to report on customapp.The customapp.conf file in this<br />
directory will specify a log file group, which in turn will specify which log<br />
files to inspect.<br />
/logfiles/ contains log file group configuration files. Basically, these files<br />
define which log files fall into a given group.These files also define where to<br />
look <strong>for</strong> the archives of a given file. So you could use the /logfiles/custom.conf<br />
to specify which log files should be inspected when reporting on customapp.<br />
These could be multiple individual log files, such as /var/logs/custom1.log and<br />
/var/logs/custom2.log.<br />
The exact filters and configuration files you need will vary from application<br />
to application, so we could not possibly provide instruction on your specific<br />
environment. Refer to the instruction located at<br />
www2.logwatch.org:8080/tabs/docs/HOWTO-Customize-LogWatch.html<br />
<strong>for</strong> customizing your logwatch <strong>for</strong> your specific application.There is also a<br />
community of logwatch users that may have already generated the needed<br />
customization <strong>for</strong> your application if it’s a commonly available product.You<br />
can find a lot of help and discussion on logwatch on the logwatch mailing<br />
listl you can sign up at www2.logwatch.org:8080/tabs/lists/.<br />
Securing <strong>Your</strong> Event Logs<br />
Managing Event Logs • Chapter 5 327<br />
In much the same way that having event logs no one reviews is of little value,<br />
having event logs you can’t trust is also of very little value. If you are trying to<br />
reconstruct a set of events, you need to be sure that the logs have not been<br />
tampered with. Erasing the logs is typically one of the first stops a hacker<br />
makes after gaining access to a system. In this way, not only are legal repercussions<br />
more difficult to enact, but securing the system to prevent the break-in<br />
becomes all the more difficult if you don’t know how access was obtained.<br />
Most concerns around log reliability will be related to one of two areas: chain<br />
of custody and log integrity. We will look at ways to ensure both, because<br />
they are heavily interrelated, and in the process make your network more<br />
secure.<br />
www.syngress.com
328 Chapter 5 • Managing Event Logs<br />
Ensuring Chain of Custody<br />
Chain of custody simply means knowing who has had possession of an item<br />
at all times.These same principles apply to physical objects as well as to data.<br />
In the case of a physical object, it means who had possession of the object<br />
itself, or who had physical access to said object. In the case of digital data such<br />
as log files, chain of custody includes physical access to the media that stores<br />
the logs, as well as logical access to the log data.The objective is to be able to<br />
prove who had custody (or access) to the data. If you ever need to pursue<br />
legal actions against a hacker, ensuring chain of custody becomes especially<br />
important. If your log server is sitting on the network and everyone has access<br />
to the log files, the logs will likely be of minimal value in a court case.<br />
The ways one can ensure chain of custody with data are many and varied.<br />
Much like the concept of security in depth, a multitude of controls will serve<br />
better than relying on a single control or method. All log data should only be<br />
accessible to those who need it.These restrictions can be accomplished<br />
through file-level access controls, limiting which user accounts can log in to<br />
the logging server, and even network-level firewall and isolation. At the physical<br />
layer, you need to limit who can physically gain access to the logging<br />
server, through door locks, security guards, ID badges, and the like.This primarily<br />
addresses who has access to the log data.You will also want to create<br />
an audit trail <strong>for</strong> when the data is accessed in an authorized fashion.<br />
All access to log files (authorized or not) should be logged.These logs<br />
should be stored in a different location that the normal log administrators do<br />
not have access to. In all reality, you would rarely need to inspect these logs,<br />
but it is certainly better to have them available than not to. In the event that a<br />
hard drive or other storage media needs to be changed, there should be some<br />
means to document who changed it, when, and why.This is often accomplished<br />
with a chain of custody <strong>for</strong>m (similar to what is used with physical<br />
evidence in legal proceedings), which accompanies the physical medium as it<br />
is moved around. All of these measures work collectively to ensure you know<br />
who had access to the data at all times.The next step is ensuring that the data<br />
has not been altered at any point in time.<br />
www.syngress.com
Ensuring Log Integrity<br />
Managing Event Logs • Chapter 5 329<br />
The next best thing <strong>for</strong> a hacker to do if he can’t delete the logs, is to alter<br />
them. While you might think it would take something extreme, all he has to<br />
do is alter them in any obvious way, and they will lose most of their value <strong>for</strong><br />
legal proceedings.This is because, as soon as it is demonstrated that any part of<br />
the logs have been altered, the integrity of the entire log cannot be guaranteed.There<br />
are a lot of ways to ensure the integrity of a log file. Some people<br />
have advocated printing the logs to create a hardcopy and storing those in a<br />
secured location.This has mostly gone out of practice because the volume of<br />
logging in<strong>for</strong>mation has increased dramatically. Another option is to write the<br />
logs to a write-once medium, such as a recordable CD-ROM or DVD.This<br />
has the advantages that the storage capacity is reasonable and the physical<br />
media is relatively small, making secure storage cost effective.The simplest and<br />
most common means of ensuring a file’s integrity is to generate a hash value<br />
at the time the file is generated and to store this hash value on a read-only<br />
medium.<br />
A hash is the result of a mathematical computation per<strong>for</strong>med on a set of<br />
data.This result, called a hash, hash value, or message digest, is (ideally) unique<br />
and reproducible <strong>for</strong> a given input. In practical terms this is similar to a digital<br />
fingerprint <strong>for</strong> a set of data. If you were to generate a hash using the entire<br />
book “War and Peace” as input, you would get a particular hash value. Anyone<br />
else who used the same hash algorithm with “War and Peace” as input would<br />
also generate the same hash value. If any single character were altered in the<br />
entire book, such as a period being changed to a comma, the hash value<br />
would be different. A hash function is a one-way computation, meaning there<br />
is no way to derive the original input from a known hash value. In the case of<br />
a log file, this means if you were to review the log files at a later date, you<br />
could recompute the hash value using the log file as input and compare this<br />
with the original hash value that was generated when the log file was created.<br />
If the two hashes match, the log file has not been altered.<br />
There are many utilities <strong>for</strong> generating a hash value and many different<br />
algorithms that are widely used. Some algorithms are more “secure,” in that the<br />
odds of two different inputs producing the same hash value are smaller. SHA<br />
(secure hash algorithm) and MD5 (message digest 5) are very commonly used<br />
www.syngress.com
330 Chapter 5 • Managing Event Logs<br />
algorithms that are considered to be secure enough <strong>for</strong> most uses. Remember<br />
that the more automated your processes are, the less likely an error will occur,<br />
and the more reliable the log data will be in a legal setting.There are many<br />
utilities available; we will review the use of a few of the best ones below. If you<br />
are collecting your logs to a Windows server, an excellent utility is fsum from<br />
http://www.slavasoft.com/fsum/index.htm. Fsum is freeware and can be purchased<br />
<strong>for</strong> commercial use.The license agreement allows fsum to be run on<br />
only one computer at a time. We would recommend, as with all free products,<br />
that you review and understand the license agreement yourself. Fsum will run<br />
on Windows 9x, NT, 2000, and XP and can generate 13 different types of<br />
hashes. In the following example of the hash values <strong>for</strong> several common<br />
hashing algorithms, we removed some of the redundant text from subsequent<br />
examples to conserve space.<br />
C:\>fsum input.txt -md5<br />
SlavaSoft Optimizing Checksum Utility - fsum 2.5<br />
Implemented using SlavaSoft QuickHash Library <br />
Copyright (C) SlavaSoft Inc. 1999-2003. All rights reserved.<br />
; SlavaSoft Optimizing Checksum Utility - fsum 2.5 <br />
;<br />
; Generated on 11/21/06 at 12:29:09<br />
;<br />
345dd07cc1cf8ba6b9da0ffa7886e2cd *input.txt<br />
C:\>fsum input.txt -sha1<br />
; SlavaSoft Optimizing Checksum Utility - fsum 2.5 <br />
; Generated on 11/21/06 at 12:30:30<br />
345dd07cc1cf8ba6b9da0ffa7886e2cd *input.txt<br />
C:\>fsum input.txt -crc32<br />
; SlavaSoft Optimizing Checksum Utility - fsum 2.5 <br />
; Generated on 11/21/06 at 12:30:34<br />
345dd07cc1cf8ba6b9da0ffa7886e2cd *input.txt<br />
There are plenty of GUI-based hashing utilities as well, though generally<br />
the terminal-based ones are simpler to automate. If you are using Linux as<br />
www.syngress.com
your log collector, you are likely to have md5sum or sha1sum (preferred)<br />
already installed.You can also use the openSSL suite of software to generate<br />
message digests using a wider variety of algorithms. Both md5sum and<br />
sha1sum are special-purpose programs that only generate hash values using<br />
their respective algorithms. OpenSSL can generate the following hash types:<br />
MD2, MD4, MD5, rmd160, SHA and SHA1. Here are some examples of<br />
md5sum and sha1sum approaches.<br />
# md5sum /input.txt<br />
3ecb68cc0a0f5bff183bbe4d53cfe522 /input.txt<br />
# sha1sum /input.txt<br />
afd7e214ec0c04d07c27b0f3412c477406a012e1 /input.txt<br />
# openssl md5 /input.txt<br />
MD5(/input.txt)= 3ecb68cc0a0f5bff183bbe4d53cfe522<br />
# openssl sha1 /input.txt<br />
SHA1(/input.txt)= afd7e214ec0c04d07c27b0f3412c477406a012e1<br />
A regularly scheduled process to generate the hash values can be automated<br />
to coincide with the rotation of the log files themselves. For example,<br />
if you rotate your logs at midnight each night, you can create/edit the process<br />
to generate the hash of the log file once it is no longer being actively modified<br />
by the logging process.This hash can be stored with the log file, as long as<br />
it is also stored in a secure location that is separate from the log file.You don’t<br />
want anyone who has access to the log files to be able to simply generate a<br />
new hash and replace theirs <strong>for</strong> the original; this would circumvent the entire<br />
purpose <strong>for</strong> generating the hashes. As an added bonus, if desired, openSSL can<br />
also encrypt the log files from the command line, which, again, makes<br />
scripting this process relatively simple.<br />
Applying <strong>Your</strong> Knowledge<br />
Managing Event Logs • Chapter 5 331<br />
So now you know how to generate log events <strong>for</strong> custom applications and<br />
processes.You can centrally collect the log files using encryption if needed,<br />
and you can ensure that the logs files have not been tampered with.You are<br />
also armed with the tools to analyze the log files, and you can do all this <strong>for</strong><br />
free.You might be wondering just what you should do with all this newfound<br />
knowledge or what the next step <strong>for</strong> applying it should be. Whether you are<br />
www.syngress.com
332 Chapter 5 • Managing Event Logs<br />
the only person who needs to approve of a new log management policy, or<br />
whether you need to get your manager to sign off on it, the process remains<br />
largely the same—start with a plan.The tasks required to apply these strategies<br />
fall into two broad steps, develop a log management policy, and develop an<br />
implementation strategy. Both of these will likely be developed concurrently<br />
and each will affect the other.<br />
<strong>Your</strong> implementation plan will need to include an analysis of what hosts will<br />
be included in the log management scope.The numbers of hosts, their physical<br />
location, and the volume of log data they are likely to produce will all<br />
impact how you implement your logging policy.You will then need to make<br />
a decision on when and where to centrally collect the log files.The location<br />
should be strategic, accounting <strong>for</strong> communications links and other per<strong>for</strong>mance<br />
metrics.The frequency will include both how often to collect the logs<br />
and how frequently to run any analysis on the logs. Perhaps most importantly,<br />
you will need to decide what <strong>for</strong>mat the log files be processed in, Windows<br />
event log <strong>for</strong>mat or syslog <strong>for</strong>mat.You will need to choose which log management<br />
tools to use, which will likely involve some testing in a lab environment.You<br />
will need to plan <strong>for</strong> such administrative concerns as how to<br />
preserve the confidentiality of the log data both in transit and in storage.<br />
<strong>Your</strong> log management policy will be a high-level outline of how logs should be<br />
managed.This document probably won’t go into detail on how to accomplish<br />
specific objectives; it will specify only what those objectives are.The policy<br />
should address the requirements <strong>for</strong> ensuring confidentiality of log data.<br />
Remember to address confidentiality of log data both in transit and while in<br />
storage. Provisions may need to be made <strong>for</strong> off-site storage much like with<br />
server backup tapes. Bear in mind that in some cases there may be external regulations<br />
that apply to these requirements. In some cases, log file integrity may<br />
need to be addressed as well.This is especially likely if there are regulations that<br />
affect your organization, such as HIPAA.You will need to develop a strategy<br />
around event alerting as well.This could include notifying the security group if<br />
the log messages indicate a possible intrusion attempt or a different<br />
person/group if the log messages indicate a key server is having problems.The<br />
alerting hierarchy will need to be documented and the configuration of the<br />
monitoring software configured to reflect what is documented.As you can see,<br />
the policy you define will need to include management sign-off.<br />
www.syngress.com
Summary<br />
We hope you now have a good understanding of the role of system logs and<br />
the value of centralized consolidation and monitoring.There are a lot of tools<br />
available covering many aspects of log file collection, generation, import,<br />
export, and analysis. A vital Web site <strong>for</strong> anyone who is interested in log file<br />
analysis topics is www.loganalysis.org by Tina Bird. In addition to many in<strong>for</strong>mative<br />
articles on log file analysis, there are many links to a wide variety of<br />
utilities as well. After a little research, you can make an in<strong>for</strong>med decision and<br />
generate a plan <strong>for</strong> your organization’s log file archival and monitoring<br />
strategy.<br />
Solutions Fast Track<br />
Generating Windows Event Logs<br />
� If you wish to process the event logs in syslog <strong>for</strong>mat, consider using<br />
any of several products that are available to export your Windows<br />
event logs to a syslog server in syslog <strong>for</strong>mat.<br />
� Microsoft provides several command-line utilities to create and<br />
manipulate event log entries.These will enable you to create event<br />
log entries <strong>for</strong> custom applications or batch files.<br />
Generating Syslog Event Logs<br />
Managing Event Logs • Chapter 5 333<br />
� Syslog is the mostly widely implemented logging <strong>for</strong>mat and is<br />
natively understandable in virtually every non-Microsoft operating<br />
system.<br />
� The use of TCP syslog messages will enable a wider range of<br />
encryption options as compared to UDP-based syslog messages.<br />
www.syngress.com
334 Chapter 5 • Managing Event Logs<br />
Securing <strong>Your</strong> Event Logs<br />
� Remember to maintain adequate chain of custody.You need to be<br />
able to say beyond a doubt who has had access to your log files<br />
during all portions of their life cycle.<br />
� Generate a hash value of all log files when they are generated and<br />
store these in a secure read-only location.This will enable you to<br />
prove that the logs have not been tampered with if you need to in<br />
the future.<br />
Applying <strong>Your</strong> Knowledge<br />
� <strong>Your</strong> logging strategy should include considerations <strong>for</strong> centralized<br />
logging, log analysis and alerting, and maintaining confidentiality of<br />
log data.<br />
� SSL, SSH, and IPsec can all provide encryption of log messages while<br />
in transit between hosts.<br />
� Live log analysis typically aims to filter and highlight output to limit<br />
the data to only the most-relevant in<strong>for</strong>mation so that a human can<br />
judge what events are significant.<br />
� Offline log analysis is typically used <strong>for</strong> reporting metrics, incident<br />
investigation, or fine tuning the live analysis configuration.<br />
www.syngress.com
Frequently Asked Questions<br />
Q: I have many hosts at a remote office and I want to encrypt the UDPbased<br />
logs from all of them back to a central logging server; is there a simpler<br />
solution than enabling IPsec on all my hosts?<br />
A: Sure, you could accomplish this any of several ways.You could collect all<br />
the logs to a single syslog server at the remote office and then configure<br />
the secure IPsec encryption from that single server back to the central<br />
office.You could also configure a gateway device to communicate securely<br />
with the central office in tunnel mode, so that all traffic from all hosts that<br />
pass through that gateway will be encrypted. <strong>Using</strong> either option, only<br />
one system needs to be configured with IPsec.<br />
Q: What is the simplest way to generate log entries <strong>for</strong> testing purposes?<br />
A: For generating syslog events from a Windows host, Kiwi SyslogGen is<br />
indispensable.You can download it from www.kiwisyslog.com/info_sysloggen.htm.<br />
For Linux, you can simply pipe data into the log files directly,<br />
such as echo kernel.emergency >> /var/log/messages. If, <strong>for</strong> example, you had<br />
swatch running, it would then be able to trigger on kernel.emergency<br />
(assuming it was watching /var/log/messages, which it will by default).<br />
Q: How long should I keep my log files?<br />
Managing Event Logs • Chapter 5 335<br />
The following Frequently Asked Questions, answered by the authors of this book,<br />
are designed to both measure your understanding of the concepts presented in<br />
this chapter and to assist you with real-life implementation of these concepts. To<br />
have your questions about this chapter answered by the author, browse to<br />
www.syngress.com/solutions and click on the “Ask the Author” <strong>for</strong>m.<br />
A: That will depend on your business and environment. If you are in an<br />
environment where risk of a security incident is higher, such as an ISP,<br />
that will surely affect how long you should keep your logs. If you have<br />
government regulations, the retention period might be mandated to you.<br />
If your logs contain any in<strong>for</strong>mation that would fall under HIPPA, then<br />
an entirely different set of requirements becomes relevant. When deciding<br />
www.syngress.com
336 Chapter 5 • Managing Event Logs<br />
on rotation and retention periods, work closely with your legal department<br />
to ensure that you are meeting all your obligations.<br />
Q: Which hash algorithm is the best?<br />
A: As with many security questions the answer is,“it depends.”The more<br />
secure hashing algorithm tends to be more computationally intensive.This<br />
may not be noticeable with a small input file, but with a very large file,<br />
the time it takes to generate the hash can be significant.Thus, a more<br />
practical answer would be,“use the most secure hashing algorithm that<br />
you can without adversely impacting the system processes.” From a security<br />
perspective, the “risk” with a hash algorithm is that the same message<br />
digest can be produced from two different inputs. Newer algorithms and<br />
longer hashes decrease this risk. So, in order of preference, use SHA-512,<br />
SHA-256, SHA1, SHA0, and MD5. Per<strong>for</strong>m some testing and see which<br />
ones operate at an acceptable speed <strong>for</strong> your application.<br />
www.syngress.com
Testing<br />
and Auditing<br />
<strong>Your</strong> Systems<br />
Solutions in this chapter:<br />
■ Taking Inventory<br />
■ Vulnerability Scanning<br />
■ OSSTMM<br />
� Summary<br />
� Solutions Fast Track<br />
� Frequently Asked Questions<br />
Chapter 6<br />
337
338 Chapter 6 • Testing and Auditing <strong>Your</strong> Systems<br />
Introduction<br />
Sooner or later you will need to identify all the systems on your network.<br />
Despite the most stringent of usage policies, sometimes undocumented systems<br />
may be added to the network. Sometimes these systems are “test” systems<br />
that were never decommissioned. At other times you may find “rogue”<br />
systems whose mere presence on the network violates policy.There may be<br />
instances where the system is managed by a third party as part of a vendor’s<br />
service offering.The value of a full network discovery is even more apparent<br />
if you are dealing with an environment that you are not familiar with, such as<br />
a newly acquired company, or if you are new to your position. If the network<br />
has few enough hosts, this task isn’t much of a challenge. If the network is<br />
large, or spread across multiple locations, and visiting them all isn’t practical,<br />
an automated discovery may be much more practical. We will look at some<br />
generic discovery/scanning tools, as well as some that are targeted at specific<br />
services.<br />
After you have identified all the systems on your network, the next logical<br />
step is to determine the security posture of those systems. Several automated<br />
security scanning tools are available that can check <strong>for</strong> a large list of known<br />
vulnerabilities and can make this task easier. We will demonstrate the configuration<br />
and operation of some automated vulnerability scanners. We will also<br />
discuss the Microsoft Baseline Security Analyzer, which simply checks a<br />
Microsoft system and reports on any known security issues it finds. Finally,<br />
there are some <strong>for</strong>malized security testing methodologies that you can use to<br />
assess the security of a system, beyond simply running a vulnerability scanner.<br />
Taking Inventory<br />
In a perfect world, you would have 100 percent accurate and complete documentation<br />
encompassing every system that is connected to the corporate network.<br />
No one with access to the network would ever connect a system to the<br />
network without all the proper documentation and approvals to do so. Well,<br />
we all know “perfect” doesn’t exist. Perhaps you have a specific reason to do<br />
the network discovery, or maybe not. A periodic discovery is a good idea<br />
anyway, even if you don’t have any specific reason to do one. It can provide<br />
www.syngress.com
assurance that policies are being followed when you can successfully produce<br />
documented approval <strong>for</strong> all devices on your network. A host inventory can<br />
also demonstrate that your documentation matches the true state of the network<br />
and that routers and switches are where they are supposed to be. Given<br />
the fact that systems can be very hard to locate physically, especially given the<br />
increasingly smaller size of wireless access points, a network-based discovery is<br />
often more fruitful than a physical one.<br />
Locating and Identifying Systems<br />
Testing and Auditing <strong>Your</strong> Systems • Chapter 6 339<br />
There are two primary steps to per<strong>for</strong>ming a network inventory.The first step<br />
is simply to identify the existence of a system.There are a number of ways to<br />
do this; typically a combination of methods will result in the most accurate<br />
inventory. Pinging entire blocks of IP addresses will identify most systems. If<br />
the system is configured not to respond to a ping, however, it will of course<br />
be missed.This occurs most often when a personal firewall is running on the<br />
host that is blocking network pings. Even in cases where a system will not<br />
respond to a ping, the host is usually listening on some port. A more comprehensive<br />
TCP-based port scan will often reveal the presence of systems that a<br />
ping scan will not. Further, by capturing the initial output <strong>for</strong> each port you<br />
can often gather more in<strong>for</strong>mation, which can be used to identify the listening<br />
software or host. For example, if you connect to TCP port 21, and it<br />
responds with HTML headers, you could probably conclude that the system<br />
is running a Web server on the port normally used <strong>for</strong> FTP.You can inspect<br />
the DHCP scope on the DHCP servers in an attempt to identify a system<br />
that is not authorized to be on the network. Wireless systems can be identified<br />
relatively easily due to the fact that they must transmit a signal in order<br />
to communicate. Depending on the size of the network, you may even be<br />
able to take an inventory of the ports used on switches and routers, or <strong>for</strong><br />
those with a lot of time on their hands, by cross-referencing the ARP tables<br />
of the switches with a list of known hosts. In 99 percent of the cases, however,<br />
a simple ping scan of all the network IP addresses combined with a TCP<br />
and UDP scan of a few key ports will provide a very good inventory of the<br />
hosts on the network.<br />
www.syngress.com
340 Chapter 6 • Testing and Auditing <strong>Your</strong> Systems<br />
TIP<br />
A well-secured network will hinder exactly the types of inventorybuilding<br />
activities you will be per<strong>for</strong>ming. The same techniques that stop<br />
a hacker from mapping out your network will also hinder you as an<br />
admin. If you are not able to see the results you are expecting,<br />
remember that firewalls, VLANs, IPsec, and other security measures may<br />
skew your results.<br />
After you have identified the systems that exist on your network, the next<br />
step is more time consuming: determining where the system is physically<br />
located. In some cases, maybe you don’t need to, particularly if they are<br />
authorized systems, or if you can identify a means to contact the person<br />
responsible <strong>for</strong> the system in order to make the system “legal.” If you do find<br />
a rogue system, however, you will want to see where it is located and per<strong>for</strong>m<br />
other in<strong>for</strong>mation-gathering steps in an attempt to get it removed from the<br />
network or complete the needed procedures <strong>for</strong> the system to have authorized<br />
access to the network. Sometimes this process is relatively simple, such as<br />
when the system is using a host-naming convention that tells you its location<br />
and maybe even the server role, such as DALLASWEB01.somecompany.com.<br />
In other cases you may need to use the IP address and traceroute to track down<br />
the physical location based on the subnet combined with a good network<br />
map (we’ll go over an example in the next few paragraphs). In the case of a<br />
wireless system (host or access point), locating the rogue system can be particularly<br />
challenging.<br />
Remember that a network device inventory is a living document. It will<br />
take time to per<strong>for</strong>m an IP scan, track down any devices that you weren’t<br />
familiar with, and verify network access approval or seek approval <strong>for</strong> all<br />
devices. By the time you’re finished, it will probably be time to start the process<br />
over. Because the network is rarely a static entity, this type of discovery<br />
should be per<strong>for</strong>med on a regular schedule.You may have local policies that<br />
dictate how frequently the discovery should be. If these policies are not present,<br />
you should develop a process and make it a part of your normal business<br />
operations. In this way, rogue systems can be located in a minimal amount of<br />
time and you can minimize any security risk that these systems may pose.<br />
www.syngress.com
The contents of your inventory documentation will vary according to<br />
your needs, but there are some common elements. At a bare minimum you<br />
will want to know the IP address, host name, and contact in<strong>for</strong>mation <strong>for</strong> the<br />
person(s) responsible <strong>for</strong> administering the device.You could get as detailed as<br />
including hardware specifications (manufacturer, model, memory, etc.), MAC<br />
address, administrative contacts, emergency contacts, operating system type<br />
and version, and much more. Ultimately you will want to customize the documentation<br />
to your business needs. Perhaps deploying biometric authentication<br />
is a priority, in which case you might want to include a column<br />
indicating which devices have fingerprint scanners attached to them.<br />
Nmap<br />
Nmap is the most widely used general-purpose network scanner. It is available<br />
from http://insecure.org/nmap/ <strong>for</strong> Windows, Linux, MAC OS X, Sun<br />
Solaris, and several other operating systems.The operation of Nmap is largely<br />
the same whether you are running it on Windows on Linux.The most<br />
notable exception is that you will need the Windows packet capture driver,<br />
WinPcap, if you are running Nmap on Windows.<br />
NOTE<br />
Testing and Auditing <strong>Your</strong> Systems • Chapter 6 341<br />
The latest version of Nmap supports raw sockets, which means that if<br />
you are using Windows 2000, Windows XP, or Windows 2003 Server,<br />
you don’t need the WinPcap drivers. For older versions of Windows you<br />
will still need WinPcap.<br />
Nmap can scan <strong>for</strong> open ports using a variety of standardized TCP packet<br />
options, as well as using some of the options in non-standard ways.There are<br />
a large number of command-line options, which can sometimes appear confusing,<br />
but the Nmap documentation and support on the Internet are both<br />
very good. Periodically, a GUI front end will come and go, but currently<br />
there are no Windows front ends <strong>for</strong> Nmap being actively developed.<br />
NmapFE is a GUI front end <strong>for</strong> Linux and it is actively maintained by the<br />
creator of Nmap.The GUI has the benefit of enabling you to check boxes <strong>for</strong><br />
www.syngress.com
342 Chapter 6 • Testing and Auditing <strong>Your</strong> Systems<br />
various options instead of requiring you to know a more complex commandline<br />
syntax.<br />
TIP<br />
Be aware of the underlying network topology that you are working with.<br />
If you are scanning a host on the other side of a firewall it will likely<br />
severely alter your results. In some cases, even an ISP will filter out certain<br />
ports. Although this prevents those ports from being available over<br />
the Internet, they might still be available locally, and possibly still pose a<br />
security risk.<br />
If you have the Windows packet capture driver (WinPcap) installed and<br />
working properly, all that is needed to install Nmap on Windows is to extract<br />
the contents of the Zip download to a directory and run the Nmap executable.<br />
On Linux you can download and compile the source code, or install<br />
it as an RPM. When you run it with no options, you will see a lengthy help<br />
screen with a few examples. For the real treasure trove of helpful in<strong>for</strong>mation,<br />
refer to the Nmap man page located at http://insecure.org/<br />
nmap/man/. If you are com<strong>for</strong>table working on Linux or Windows, Nmap<br />
functions almost identically on either.There is, however, one difference that<br />
can be significant, which is speed. Nmap runs much faster on Linux than<br />
Windows. In a small network this may not be a consideration, but if you are<br />
scanning a large number of hosts, or ports, the difference in scan times can be<br />
significant.<br />
Let’s go through some examples of how you could make use of Nmap.<br />
Let’s suppose you want to do an initial scan of your entire company network.<br />
If your company is using the private address space 192.168.0.0 or some portion<br />
thereof, you could scan the entire class B network, sending only a ping<br />
to see if the system is “alive” with the following command line.<br />
nmap -v -sP 192.168.0.0/16<br />
This would per<strong>for</strong>m the most basic type of scan, which is a ping scan<br />
only, as specified by the use of the –sP option.You can see more in<strong>for</strong>mation<br />
by using the –v option, which tells Nmap to be more verbose; in most cases<br />
www.syngress.com
you will find the extra in<strong>for</strong>mation in<strong>for</strong>mative.This option can also be used<br />
multiple times <strong>for</strong> even more in<strong>for</strong>mation, so –v, and –vv are both valid.<br />
Because it is fairly common <strong>for</strong> a personal firewall to block ping attempts, you<br />
may have better luck if you run the scan without the –sP option. If you don’t<br />
specify a scan type, Nmap will default to a TCP SYN scan (same as –sS).The<br />
normal TCP three-way handshake consists of the initiating system sending a<br />
packet with the SYN bit set.The target host responds with a packet with the<br />
SYN and ACK bit set.The original system then sends an ACK packet back to<br />
the target. In this fashion a TCP session is established, which is followed by<br />
the desired communications.The SYN scan (-sS) will send the initial SYN<br />
packet, but when the target hose replies with a SYN ACK, Nmap never completes<br />
the three-way handshake to fully establish the session.This method is so<br />
fast and efficient that it is the default scanning method Nmap uses.<br />
If you do not specify which TCP ports to scan, Nmap will scan all TCP<br />
ports defined in the nmap-services file, which at the time of this writing is<br />
1680 of the most common ports. So let’s suppose during your ping scan of<br />
the entire network a system was identified that you didn’t recognize<br />
(192.168.1.106) and you want to find out more about it. After the ping scan<br />
you could per<strong>for</strong>m an Nmap scan with no options and see which of the most<br />
commons ports are open.The output of nmap 192.168.1.106, being a typical<br />
single-host scan with no other options specified, is shown in Figure 6.1.<br />
Figure 6.1 Nmap Results<br />
C:\Apps\Nmap>nmap 192.168.1.106<br />
Testing and Auditing <strong>Your</strong> Systems • Chapter 6 343<br />
Starting Nmap 4.11 ( http://www.insecure.org/nmap ) at 2006-09-17 14:54<br />
Central Standard Time<br />
Interesting ports on 192.168.1.106:<br />
Not shown: 1676 closed ports<br />
PORT STATE SERVICE<br />
135/tcp open msrpc<br />
139/tcp open netbios-ssn<br />
445/tcp open microsoft-ds<br />
5101/tcp open admdog<br />
MAC Address: 00:08:02:32:8A:4C (Compaq Computer)<br />
Nmap finished: 1 IP address (1 host up) scanned in 2.172 seconds<br />
www.syngress.com
344 Chapter 6 • Testing and Auditing <strong>Your</strong> Systems<br />
From these results you can see that the system has TCP ports 135, 139,<br />
and 445 open, most likely indicating a Windows host. Just to confirm your<br />
suspicions, you could use Nmap’s operating system fingerprinting feature. Any<br />
given system on the network was likely programmed slightly differently,<br />
resulting in slightly different ways of responding to network traffic. Nmap can<br />
use these subtle differences in responses (such as TCP ISN [initial sequence<br />
number] sampling,TCP options support and ordering, IPID [IP ID] sampling,<br />
and the initial window size) as clues and compare them with Nmap’s nmapos-fingerprint<br />
database. If it finds a match in the database, there is a good<br />
probability that the actual OS can accurately be identified. An example of the<br />
OS fingerprinting using the –O option in action is shown in Figure 6.2.<br />
Figure 6.2 Nmap OS Fingerprinting<br />
I:\HackApps\Nmap>nmap 192.168.1.106 -O<br />
Starting Nmap 4.11 ( http://www.insecure.org/nmap ) at 2006-09-17 15:00<br />
Central Standard Time<br />
Interesting ports on 192.168.1.106:<br />
Not shown: 1676 closed ports<br />
PORT STATE SERVICE<br />
135/tcp open msrpc<br />
139/tcp open netbios-ssn<br />
445/tcp open microsoft-ds<br />
5101/tcp open admdog<br />
MAC Address: 00:08:02:32:8A:4C (Compaq Computer)<br />
Device type: general purpose<br />
Running: Microsoft Windows 2003/.NET|NT/2K/XP<br />
OS details: Microsoft Windows 2003 Server or XP SP2<br />
Nmap finished: 1 IP address (1 host up) scanned in 2.813 seconds<br />
Nmap identified the system as either Windows 2003 Server or Windows<br />
XP with service pack 2. Further, you may notice that Nmap has identified<br />
the system as a Compaq based on the MAC address. With all this in<strong>for</strong>mation<br />
you have a pretty good idea of what type of system this rogue PC is.The next<br />
step would likely be to find out where it is physically located. Assuming you<br />
don’t recognize the subnet as belonging to a specific location, traceroute will<br />
www.syngress.com
use ICMP to try to trace each router between you and the target host. An<br />
example of traceroute output is shown in Figure 6.3.<br />
Figure 6.3 Traceroute Output<br />
I:\HackApps\Nmap>tracert 192.168.1.106<br />
Tracing route to 192.168.1.106 over a maximum of 30 hops:<br />
1 2 ms 2 ms 2 ms 192.168.102.1<br />
2 11 ms 14 ms 10 ms 10.10.10.1<br />
3 12 ms 10 ms 11 ms router1.houston.your-co.com [10.10.20.1]<br />
4 14 ms 12 ms 12 ms router2.austin.your-co.com [10.10.30.1]<br />
5 14 ms 10 ms 13 ms router3.dallas.your-co.com [10.10.40.1]<br />
6 20 ms 18 ms 17 ms router4.orlando.your-co.com [192.168.2.1]<br />
7 19 ms 20 ms 17 ms 192.168.1.106<br />
Trace complete.<br />
TIP<br />
Testing and Auditing <strong>Your</strong> Systems • Chapter 6 345<br />
Different systems may have different commands to do the same thing.<br />
For example, on Windows systems the traceroute command is tracert,<br />
while on Linux systems it is traceroute.<br />
I have edited the actual IP addresses and host names, but you can try the<br />
traceroute command to a few hosts in your network. Because it is very<br />
common to include some indication of the geographic location in the<br />
naming convention <strong>for</strong> routers, often this will tell you where the host is<br />
located. In Figure 6.3, hop #6 would lead me to believe the host was in<br />
Orlando, Florida. Assuming you had a managed switch in Orlando, you could<br />
then Telnet to the switch (in this example a Cisco 2900XL switch) and view<br />
the table of MAC addresses. Referring to our previous Nmap scan, we know<br />
the MAC address of our mystery system is 00:08:02:32:8A:4c, so we can use<br />
the following command to filter the MAC table to show only the MAC<br />
address we are interested in:<br />
www.syngress.com
346 Chapter 6 • Testing and Auditing <strong>Your</strong> Systems<br />
SWITCH#Show mac | incl 0008.0232.8A4C<br />
0008.0232.8A4C Dynamic 1 FastEthernet0/2<br />
We could now provide an exact network port (port 2 on the switch) <strong>for</strong><br />
someone who has local access to trace the cable and find the mystery<br />
machine. As you can see, Nmap has a lot of features.There are a large number<br />
of options that focus on avoiding IDS detection.There are many additional<br />
options that manipulate the TCP packets in far more unusual ways. Although<br />
these options aren’t <strong>for</strong> everyone, even if you don’t need to use these special<br />
options yourself, it is good to be familiar with them as a security professional.<br />
There are also options that specify the timeout period to be used when<br />
attempting to connect.The defaults are usually adequate, but you can use<br />
more aggressive timing if you want to speed up the scans. Although the<br />
Nmap man page is practically a necessity if you are going to be doing much<br />
scanning,Table 6.1 highlights some of the most useful command-line options,<br />
as a sort of tip sheet.<br />
Table 6.1 Nmap Options<br />
Nmap is a good general-purpose scanner that can per<strong>for</strong>m a wide variety<br />
of scans.The available output <strong>for</strong>mats can be very useful if you should need to<br />
provide reports of your scan results.You could even schedule a scan and have<br />
the output written to a file in XML, which you could then distribute via email<br />
or view on a Web site. Figure 6.4 shows part of the XML output of a<br />
sample scan of 192.168.1.100.<br />
www.syngress.com
Figure 6.4 Nmap XML Output<br />
Super Scanner<br />
Testing and Auditing <strong>Your</strong> Systems • Chapter 6 347<br />
Sometimes you want something simpler than Nmap, or maybe you want to<br />
use something that doesn’t require the WinPcap drivers to be installed in<br />
order to run it on Windows. SuperScanner doesn’t require the WinPcap<br />
drivers and doesn’t even require a setup program. All you need to do is download<br />
the program from www.foundstone.com/resources/proddesc/<br />
superscan.htm, extract the executable from the Zip file, and run it.The latest<br />
version (version 4) will run on Windows 2000 and Windows XP.The main<br />
window is shown in Figure 6.5 with some results from systems it found.<br />
www.syngress.com
348 Chapter 6 • Testing and Auditing <strong>Your</strong> Systems<br />
Figure 6.5 SuperScan V4<br />
The operation of SuperScan is rather straight<strong>for</strong>ward.To scan a subnet,<br />
simply enter the starting and ending IP address and click the -> button to<br />
add it to the scanning queue. If you enter the same IP address and starting<br />
and ending IP, you can scan a single host. A third option is to click the -><br />
button next to Read IPs from file, which will enable you to browse to a<br />
file that contains a list of IP addresses. After selecting the IPs or range of IPs<br />
to scan, click the start button at the bottom, which looks a lot like a traditional<br />
play button.The authors of the programs suggest using version 3<br />
(shown in Figure 6.6) if version 4 doesn’t work properly <strong>for</strong> you. I have<br />
included both versions because, while version 4 offers many more options, my<br />
experience has been that version 4 often returns no results after a scan while<br />
version 3 works much more reliably. One of the primary reasons to use V4<br />
over V3 is that version 3 and earlier versions support scanning only a single<br />
class C network at a time. Version 4 also offers several additional features over<br />
version 3, specifically the capability to scan noncontiguous IP address ranges,<br />
www.syngress.com
additional control of some of the scanning parameters, and some special<br />
options aimed specifically at enumerating Windows hosts. As you can see, the<br />
improvements in version 4 are significant, so if version 4 does work <strong>for</strong> you, it<br />
would probably be the preferred version to use.<br />
Figure 6.6 SuperScan V3<br />
Testing and Auditing <strong>Your</strong> Systems • Chapter 6 349<br />
As you can see, the interfaces between version 3 and version 4 are substantially<br />
different.The button used to start the scan is actually a little more<br />
clearly labeled in versions prior to version four. When you click the start scan<br />
button, the scan will commence.The scan could take some time if you have a<br />
large number of hosts or ports to check.There will be a small plus next to<br />
systems that have open (i.e., listening) ports.You can expand the plus symbol<br />
and see a list of open ports. Expanding the next plus will show any responses<br />
the scanner received when connecting to that port.<br />
SuperScan version 4 offers more control over the scanning options that are<br />
used, but the biggest difference between version 3 and version 4 is the enumeration<br />
options available <strong>for</strong> Windows hosts. Let’s take a minute to talk about<br />
what the Windows enumeration SuperScan 4 can do, and special-purpose<br />
enumeration tools in general.A definition of enumerate is “to make a concise<br />
list of the relevant points.” We can refine that definition to fit in a network<br />
www.syngress.com
350 Chapter 6 • Testing and Auditing <strong>Your</strong> Systems<br />
security context as “building a list of objects or data points pertaining to a<br />
given network host.”This could include things like running services and applications,<br />
file shares that are accessible, users and groups on a host, and so on.<br />
When it comes to Windows hosts, there is a lot of in<strong>for</strong>mation gathering that<br />
you can do and lists that can be generated. For example, if you wanted to enumerate<br />
all the shared folders on a single host, you could use the following<br />
command:<br />
net view \\192.168.1.108<br />
Shared resources at \\192.168.1.108<br />
Share name Type Used as Comment<br />
----------------------------------------------------------------------------<br />
SharedDocs Disk<br />
The command completed successfully.<br />
Many similar processes are automated <strong>for</strong> you by SuperScan. When you<br />
select the Windows Enumeration tab (shown in Figure 6.7), you are presented<br />
with various checks you can per<strong>for</strong>m in the left pane. After you choose<br />
the option you wish to use, click Enumerate and the results will populate in<br />
the right pane.<br />
Figure 6.7 Windows Enumeration in SuperScan V4<br />
www.syngress.com
The process of enumerating the shares can be done <strong>for</strong> all hosts on the<br />
entire subnet instead of a single host by checking the Shares check box on<br />
the Windows Enumeration tab, and is just one of the enumeration options<br />
SuperScan can use. By default SuperScan will per<strong>for</strong>m all of the enumeration<br />
using no credentials, but if you click Options on the Windows<br />
Enumeration tab, you can enter specific account in<strong>for</strong>mation that should be<br />
used <strong>for</strong> the connections.The NetBIOS Name Table enumeration type is the<br />
same in<strong>for</strong>mation you would get by using nbtstat –A 192.168.1.108.This<br />
shows the NetBIOS machine name (which can be different than the host<br />
name, though it rarely is), and the workgroup/domain the machine belongs<br />
to. Depending on how securely the system has been configured, you may be<br />
able to get a lot of in<strong>for</strong>mation from these enumeration techniques. If the<br />
system is very secure you will get very little in<strong>for</strong>mation. In general these<br />
checks carry little risk to the target system but as is always the case, if a service<br />
disruption is not acceptable, you should avoid running these types of<br />
checks because there is always some risk involved.<br />
SuperScan has fewer features than Nmap with the exception of the<br />
Windows enumeration options, but it is easier to use, and does not require<br />
running a Setup Wizard, any registry entries, or special network drivers.<br />
Because SuperScan doesn’t require any installation per se, and makes no<br />
changes to the registry, it can be very useful to have on a pen drive or shared<br />
network drive.This type of low-footprint tool can be very useful at times.<br />
Angry IP Scanner<br />
Testing and Auditing <strong>Your</strong> Systems • Chapter 6 351<br />
A final GUI scanner that is rapidly on the rise in popularity is Angry IP<br />
Scanner (www.angryziber.com/ipscan/). It lies somewhere between<br />
SuperScan 3 and 4 in functionality and does not require any installation.<br />
Angry IP Scanner also has the advantage that it does not need the WinPcap<br />
drivers. Although Angry IP Scanner uses a deceptively simple interface<br />
(shown in Figure 6.8), it packs a lot of features into its small file size.<br />
www.syngress.com
352 Chapter 6 • Testing and Auditing <strong>Your</strong> Systems<br />
Figure 6.8 Angry IP Scanner<br />
If you select an IP by highlighting it, and then navigate to Commands |<br />
Open Computer, you are presented with a list of handy Windows options<br />
such as In Explorer, Web Browser, Ping,Telnet, and Traceroute.There are two<br />
interesting features of Angry IP Scanner: it is an open source project and it is<br />
the only scanner covered that supports being run from the command line in<br />
addition to running from a GUI.<br />
Scanline<br />
If you happen to be looking <strong>for</strong> something even more lightweight, there is an<br />
excellent product available. Scanline, which is also available from Foundstone in<br />
its free tools section (www.foundstone.com/resources/proddesc/scanline.htm), is<br />
a command-line-only TCP scanner.This can be especially valuable if you do<br />
not have remote GUI access to the system you want to scan from. If you have<br />
only command-line access, such as from an SSH session, Scanline would be a<br />
perfect fit. <strong>Using</strong> Scanline is rather simple. Entering simply sl from the Scanline<br />
directory will result in the help screen shown in Figure 6.9.<br />
Figure 6.9 Scanline Help<br />
C:\Pers\Apps\Scanline>sl<br />
ScanLine (TM) 1.01<br />
Copyright (c) Foundstone, Inc. 2002<br />
http://www.foundstone.com<br />
www.syngress.com
sl [-?bhijnprsTUvz]<br />
[-cdgmq ]<br />
[-flLoO ]<br />
[-tu [,-]]<br />
IP[,IP-IP]<br />
-? - Shows this help text<br />
-b - Get port banners<br />
-c - Timeout <strong>for</strong> TCP and UDP attempts (ms). Default is 4000<br />
-d - Delay between scans (ms). Default is 0<br />
-f - Read IPs from file. Use "stdin" <strong>for</strong> stdin<br />
-g - Bind to given local port<br />
-h - Hide results <strong>for</strong> systems with no open ports<br />
-i - For pinging use ICMP Timestamp Requests in addition to Echo Requests<br />
-j - Don't output "-----..." separator between IPs<br />
-l - Read TCP ports from file<br />
-L - Read UDP ports from file<br />
-m - Bind to given local interface IP<br />
-n - No port scanning - only pinging (unless you use -p)<br />
-o - Output file (overwrite)<br />
-O - Output file (append)<br />
-p - Do not ping hosts be<strong>for</strong>e scanning<br />
-q - Timeout <strong>for</strong> pings (ms). Default is 2000<br />
-r - Resolve IP addresses to hostnames<br />
-s - Output in comma separated <strong>for</strong>mat (csv)<br />
-t - TCP port(s) to scan (a comma separated list of ports/ranges)<br />
-T - Use internal list of TCP ports<br />
-u - UDP port(s) to scan (a comma separated list of ports/ranges)<br />
-U - Use internal list of UDP ports<br />
-v - Verbose mode<br />
-z - Randomize IP and port scan order<br />
Example: sl -bht 80,100-200,443 10.0.0.1-200<br />
Testing and Auditing <strong>Your</strong> Systems • Chapter 6 353<br />
This example would scan TCP ports 80, 100, 101...200 and 443 on all IP<br />
addresses from 10.0.0.1 to 10.0.1.200 inclusive, grabbing banners<br />
from those ports and hiding hosts that had no open ports.<br />
www.syngress.com
354 Chapter 6 • Testing and Auditing <strong>Your</strong> Systems<br />
The same scan we per<strong>for</strong>med earlier of the 192.168.1.0 network could be<br />
per<strong>for</strong>med with the following command line:<br />
Sl 192.168.1.1-254 –n<br />
The –n options tells Scanline to ping only and not to do a port scan. If<br />
you simply specify an IP address or range, with no other options, Scanline<br />
will scan its internal list of default ports.This behavior is the same as Nmap.<br />
The Scanline list of default ports currently includes the following ports.<br />
UDP ports<br />
7 9 11 53 67-69 111 123 135 137 138 161 191 192 256 260 407 445 500 514 520<br />
1009 1024 1025 1027 1028 1030 1033 1034 1035 1037 1041 1058 1060 1091 1352<br />
1434 1645 1646 1812 1813 1900 1978 2002 2049 2140 2161 2301 2365 2493 2631<br />
2967 3179 3327 3456 4045 4156 4296 4469 4802 5631 5632 11487 31337<br />
32768-32790 43981<br />
TCP ports<br />
7 9 11 13 15 19 21 22 23 25 43 49 53 66-68 70 79 80 81 88 89 98 109 110 111<br />
113 118 119 135 139 143 150 156 179 256-259 264 389 396 427 443 445 457 465<br />
512-515 524 540 563 587 593 636 691 799 900-901 1024-1031 1080 1100 1214<br />
1243 1313 1352 1433 1494 1498 1521 1524-1525 1529 1541 1542 1720 1723 1745<br />
1755 1813 1944 2000 2001 2003 2049 2080 2140 2301 2447 2766 2779 2869 2998<br />
3128 3268 3300 3306 3372 3389 4000 4001 4002 4045 4321 4444 4665 4899 5000<br />
5222 5556 5631 5632 5678 5800 5801 5802 5900 5901 6000 6112 6346 6347 6588<br />
6666-6667 7000 7001 7002 7070 7100 7777 7947 8000 8001 8010 8080-8081 8100<br />
8383 8888 9090 10000 12345 20034 27374 30821 32768-32790<br />
The entire help file, or manual, is located on the same Foundstone page<br />
where you download Scanline.The sample output shown in Figure 6.10<br />
shows the results of a simple scan using the following syntax: sl<br />
192.168.1.115.<br />
Figure 6.10 Scanline Results<br />
C:\Pers\Apps\Scanline>sl 192.168.1.115<br />
ScanLine (TM) 1.01<br />
Copyright (c) Foundstone, Inc. 2002<br />
http://www.foundstone.com<br />
Scan of 1 IP started at Wed Aug 30 21:17:06 2006<br />
---------------------------------------------------------------------------<br />
192.168.1.115<br />
www.syngress.com
Responded in 0 ms.<br />
0 hops away<br />
Responds with ICMP unreachable: Yes<br />
TCP ports: 22 135 139 427 1025<br />
UDP ports: 137 138 500<br />
---------------------------------------------------------------------------<br />
Scan finished at Wed Aug 30 21:17:14 2006<br />
1 IP and 267 ports scanned in 0 hours 0 mins 8.34 secs<br />
Special-Purpose Enumerators<br />
Testing and Auditing <strong>Your</strong> Systems • Chapter 6 355<br />
The scanning utilities we have discussed have been general-purpose scanners<br />
even if some included specialized enumeration techniques. Although<br />
SuperScan 4 includes some special Windows enumeration options, previous<br />
version of SuperScan, Nmap, and Scanline do not. In some cases you may<br />
want to scan <strong>for</strong> very specific responses. One example would be to scan <strong>for</strong><br />
machines infected with the Back Orifice Trojan (BOPing) or to scan <strong>for</strong><br />
SNMP-enabled devices (via SNScan). Nbtscan gathers NetBIOS in<strong>for</strong>mation<br />
on a network <strong>for</strong> all devices. Both BOPing and SNScan are available from<br />
Foundstone, but there are many more examples of special purpose enumerators<br />
available on the Internet.The intended purpose of these special enumerating<br />
scanners may vary from legitimate security tools to scanning <strong>for</strong> systems<br />
to launch denial of service attacks from. As is always the case, use caution<br />
when downloading such tools from the Internet and research the source of<br />
the tool to ensure that you are not introducing a Trojan or virus into your<br />
environment.The general purpose scanners are usually intended <strong>for</strong> finding<br />
responsive systems and determining what ports they are listening on only.<br />
www.syngress.com
356 Chapter 6 • Testing and Auditing <strong>Your</strong> Systems<br />
Are You 0wned?<br />
A Word of Caution<br />
Perhaps you have been <strong>for</strong>tunate enough, or cautious enough, to never<br />
have downloaded any malicious software accidentally. One thing you will<br />
discover when searching <strong>for</strong> security software on the Internet is that it is<br />
precisely security software that is most often a security risk. Countless<br />
Internet sites like to offer up security tools to discover Trojans (or even<br />
more commonly, supposedly control the Trojans), to clean a virus, or otherwise<br />
protect you when in fact the programs you are downloading are<br />
infected with a virus, Trojan, or other malicious software. You must exercise<br />
extreme caution when scouring the Internet <strong>for</strong> security tools or you<br />
will become the next victim of unscrupulous people.<br />
My advice is to download your security tools from only the major<br />
security researchers. In this way you can be fairly sure that the software<br />
will only do what it’s supposed to, without any hidden payload. There<br />
may be times when you simply cannot find what you are looking <strong>for</strong> from<br />
one of the more mainstream security sites, in these cases you may have<br />
to visit some less well-known sites. In these instances I would recommend<br />
downloading the software to an isolated test system and only running the<br />
software after extensively testing it with a variety of anti-virus and antispyware<br />
programs. These steps should help minimize the chances of<br />
falling prey to malicious software.<br />
Table 6.2 highlights the primary features of each scanner covered in this<br />
chapter.<br />
www.syngress.com
Table 6.2 Scanner Features<br />
Locating Wireless Systems<br />
Testing and Auditing <strong>Your</strong> Systems • Chapter 6 357<br />
Some of the most difficult systems to locate are ones with no physical connection<br />
to the network, such as systems that rely on wireless connectivity.<br />
There are many reasons <strong>for</strong> doing a wireless site survey. If your company uses<br />
wireless technology you will probably want to learn what the effective network<br />
coverage is. Perhaps you don’t want the building across the street to be<br />
able to use your wireless access point. On the flip side, you could per<strong>for</strong>m a<br />
site survey to map out where your coverage is weak and needs to be<br />
redesigned. Or perhaps an employee has installed a wireless access point or<br />
repeater and such “rogue” devices are not permitted according to your company<br />
policy. If any of these are true you will want to identify that the device<br />
exists, and, if necessary, attempt to locate the physical device. Physically<br />
locating the system is more of an art than a science. A directional antenna and<br />
a little triangulation can help you get pretty close to a wireless device. A<br />
directional antenna can have as small as a 15-degree reception arc and when it<br />
comes to triangulating, the smaller the reception arc, the better.<br />
The pastime of taking a laptop computer and driving around with a<br />
wireless network card and a wireless scanning utility such as NetStumbler is<br />
called war driving.This term is derived from an even older technique in<br />
which you use a modem to dial large blocks of telephone numbers to see if<br />
www.syngress.com
358 Chapter 6 • Testing and Auditing <strong>Your</strong> Systems<br />
any computers answer the call, which is called war dialing. With the everincreasing<br />
portability and wireless access points becoming so cheap and prolific,<br />
you no longer need a car to locate them. Simply walking around with<br />
your laptop looking <strong>for</strong> wireless signals has become known as war walking.<br />
There are Web sites, and groups of people, who make it a pastime to locate<br />
unsecured (i.e. publicly accessible) wireless access points and map them so<br />
that others will know where to find free wireless access.This is one such<br />
Web site www.wigle.net/gps/gps/Map/onlinemap/<br />
?state=TX&s=Show+State where if you zoom in enough, it shows the individual<br />
SSIDs of the wireless access point.<br />
<strong>Network</strong> Stumbler<br />
NetStumbler, which is short <strong>for</strong> <strong>Network</strong> Stumbler (www.netstumbler.com),<br />
is a tool to detect wireless using 802.11a, 802.11b, and 802.11g. In addition to<br />
simply passively listening <strong>for</strong> indications of wireless devices, NetStumbler will<br />
send out various types of traffic in an attempt to solicit additional in<strong>for</strong>mation<br />
from the device. In practice, NetStumbler is very easy to use.The only real<br />
concern is making sure you are using a wireless card that NetStumbler supports.<br />
Although there are no guarantees, typically sticking with cards that use<br />
the Lucent Orinoco chipset, or Cisco cards will provide good per<strong>for</strong>mance<br />
and compatible hardware. Senao also offers a higher power card with excellent<br />
sensitivity that I have used myself very successfully. Un<strong>for</strong>tunately, there is<br />
no comprehensive list of supported cards so a little research be<strong>for</strong>e buying can<br />
really pay off here.The NetStumbler site does contain some useful in<strong>for</strong>mation<br />
on supported cards, though. When you start up NetStumbler you will<br />
see a screen similar to the one shown in Figure 6.11.<br />
If everything is working properly, NetStumbler will start up in scanning<br />
mode and hopefully produce a list of detected devices. If you aren’t getting<br />
any results and think you should be, navigate to Device at the top of the<br />
window and see if the proper network card is selected.You can change the<br />
selected card without stopping the scanning.The number of results you get<br />
will vary greatly depending on the quality of the wireless card and antenna<br />
you use.<br />
www.syngress.com
Figure 6.11 NetStumbler 802.11b<br />
Testing and Auditing <strong>Your</strong> Systems • Chapter 6 359<br />
A little research on the Internet can help you choose a good wireless network<br />
card.The Seattle Wireless (www.seattlewireless.net) Web site has many<br />
excellent articles that can help you make an in<strong>for</strong>med decision.You will need<br />
to choose which wireless card to get, whether or not you want to use an<br />
external antenna (versus the standard built-in antennas) and if so, whether you<br />
want to use an omnidirectional antenna or a directional one. If you are going<br />
to be trying to triangulate to find the devices in question, a directional<br />
antenna will make the job much easier. Also, remember when making your<br />
hardware selection that signal loss is the enemy, and <strong>for</strong> each connector<br />
between the antenna and the wireless device you are sacrificing some small<br />
amount of signal clarity. Because of this, having the proper connector on your<br />
antenna is preferable to using a “pigtail” as an adapter cable between the<br />
antenna and the wireless device.<br />
www.syngress.com
360 Chapter 6 • Testing and Auditing <strong>Your</strong> Systems<br />
TIP<br />
When trying to triangulate the location of a given wireless device, bear<br />
in mind that wireless signals can be reflected off nearby objects, such as<br />
buildings. So you might get a stronger signal from a wireless access<br />
point in the room next door from the direction of the building across<br />
the street. This could happen if the walls between you and the wireless<br />
device were very well insulated and the building across the street was<br />
particularly well suited to reflecting the wireless signal.<br />
Many wireless card manufacturers also offer a utility to monitor the signal<br />
strength of an access point.These will often show a graph of the signal<br />
strength and or signal quality.Their utilities generally require you to be associated<br />
with the access point in question, however, so their use as a war walking<br />
utility will be limited. NetStumbler packs a lot of in<strong>for</strong>mation on its results<br />
page.The general quality of the signal is indicated by the color of the circle<br />
on the left (green is good, yellow not so good).The circles with a lock<br />
symbol indicate that the wireless device is using some <strong>for</strong>m of encryption.<br />
The type of encryption is shown in the Encryption column. If NetStumbler<br />
detects an access point (green or yellow circle) but is no longer receiving any<br />
signal from the device, the circle will change to gray.The device could be<br />
gray due to ambient conditions such as whether causing a weak signal to no<br />
longer be detected, or the device could have been simply turned off.<br />
The tree view (left-hand pane) of NetStumbler includes some handy ways<br />
to sort your results.The Channels entry can be expanded to list all the channels<br />
with signals on them. Each channel can be expanded again to see what<br />
devices are using those channels.This can be useful if you are getting interference<br />
from nearby devices on the same channel you are using.This will let you<br />
quickly see what other devices are using the same channel.The Filters entry<br />
also contains some handy ways to filter the results. One of the more useful filters<br />
is the Encryption Off, which, simply enough, shows a listing of all the<br />
devices that are not using encryption.<br />
One feature you might find yourself searching <strong>for</strong> is a way to tell<br />
NetStumbler to connect to a given wireless device. Don’t look too hard<br />
because NetStumbler does not include this feature.To connect to any of the<br />
www.syngress.com
access points you discover, you will need to use the operating system utilities<br />
or another software program. Boingo is one such program <strong>for</strong> Windows<br />
(www.boingo.com). While it is not at all full featured, and it is not very good<br />
at displaying accurate signal strength, you can highlight an AP and click<br />
Connect and it will attempt to connect <strong>for</strong> you. Another tool of note is<br />
Airsnort, which can be used to passively collect encrypted packets and eventually<br />
decrypt the keys used <strong>for</strong> wireless communications.<br />
WARNING<br />
Remember to use sound judgment when dealing with wireless devices.<br />
After connecting, the owner of the device could be sniffing all of your<br />
traffic, looking <strong>for</strong> vulnerabilities to exploit, or blatantly attacking your<br />
system. Once connected, you should not make any additional connections<br />
through that wireless device or you could expose your credentials<br />
to whoever controls the access point. Even initiating an encrypted connection<br />
to a trusted device through the device would be ill advised<br />
because they could be acting as a man in the middle and intercept your<br />
credentials. None of these warnings even touch on the potential legal<br />
ramifications of using another’s wireless bandwidth. The legality of such<br />
activities may vary from one locality to another. For this reason you<br />
should seek the legal guidance of your employer be<strong>for</strong>e connecting to<br />
an unknown wireless device.<br />
Documentation<br />
Testing and Auditing <strong>Your</strong> Systems • Chapter 6 361<br />
Documentation is frequently one of the most overlooked aspects of network<br />
engineering and design. Most people don’t like to generate network diagrams<br />
and related documents. Many IT staff consider documentation a poor use of<br />
their time and would rather spend it doing “real” work.The fact is there are a<br />
lot of reasons why you need to have this documentation, and it is important<br />
that the documentation remain accurate and up to date.The types of documentation<br />
that is important will vary based on your specific business needs,<br />
but the following list represents some of the most important types of documentation<br />
from a security perspective.<br />
www.syngress.com
362 Chapter 6 • Testing and Auditing <strong>Your</strong> Systems<br />
■ <strong>Network</strong> Topology Maps<br />
■ Access Request Forms<br />
■ Business Continuity and Disaster Recovery Plans<br />
■ IT Security Policies/Standards/Procedures<br />
An additional consideration that applies to all your critical documentation<br />
is one of availability. If the network is unavailable and all your documentation<br />
is stored on a file server, you’re going to have a hard time accessing the network<br />
documentation that you need to help repair the network. Many times<br />
individuals fail to account <strong>for</strong> this during an emergency and discover they<br />
cannot access their critical documentation.This could include not being able<br />
to access your business continuity plan, network diagrams, and other critical<br />
documents.Typically, copies of the documentation should be printed out and<br />
stored in a safe location offsite, possibly at the same location where you store<br />
your offsite data backups.<br />
<strong>Network</strong> Topology Maps<br />
Most people are probably familiar with network topology maps or network<br />
diagrams.The idea is to show a graphical representation of how the various<br />
network components are connected. Oftentimes this type of documentation is<br />
generated when the initial network is installed but it is not maintained like it<br />
should be. An inaccurate network map can actually cause more problems than<br />
not having one at all, because someone may assume things are configured one<br />
way, when in fact they are configured differently. Accurate network diagrams<br />
are critical.Their real value is apparent when there are problems and you need<br />
to troubleshoot the network. When you don’t know how things are put<br />
together, any problem solving has to be preceded with an in<strong>for</strong>mation-gathering<br />
exercise that only adds unneeded delays.<br />
Or maybe the network is small enough that you know every device that is<br />
connected to it like you know the back of your hand, and you don’t need a<br />
diagram.This might work adequately most of the time but if you ever have to<br />
bring in outside help, they probably don’t know the network as well as you<br />
do, and now you have to pay <strong>for</strong> the consultant’s time just to learn how<br />
things work, be<strong>for</strong>e they can even begin to do the work you actually hired<br />
www.syngress.com
Testing and Auditing <strong>Your</strong> Systems • Chapter 6 363<br />
them to do. In this situation the lack of accurate documentation is costing<br />
you or your company real dollars, not only to pay <strong>for</strong> the outside help to<br />
learn the lay of the land, but possibly in lost revenue while the solution is<br />
delayed.These costs can get outrageous quickly if you’re not careful and these<br />
are the sort of things management will take notice of.<br />
Yet another situation where quality documentation can really be valuable is<br />
<strong>for</strong> an audit.There are the obvious types of audits, Sarbanes-Oxley, SAS70, and<br />
related types of business audits.You might not be impacted by these types of<br />
regulations and requirements.There are other audit-like scenarios that may<br />
affect you. If you are looking to partner with another business entity in such as<br />
fashion that it will require network connectivity between the two entities, the<br />
other business partner will likely require documentation related to your network<br />
infrastructure.They will want to review it to make sure it is a secure<br />
configuration. If you cannot provide them with the documentation they<br />
requested it could impede the business venture, again causing a loss of revenue.<br />
Okay, so I’ve harped on the value of good network maps enough.The<br />
next question is what exactly constitutes “good” network maps? At its most<br />
basic <strong>for</strong>m, simply having all the important data in one place and it being<br />
accurate is all that is required. Beyond that, there are other characteristics that<br />
are nice to have, such as consistency. A consistent look and feel will go a long<br />
way <strong>for</strong> being able to quickly look at the diagram and understand the in<strong>for</strong>mation<br />
it contains.This could mean a consistent set of icons or symbols, and<br />
consistent placement of key in<strong>for</strong>mation, like who the document owner is<br />
and version in<strong>for</strong>mation. While different people generating the diagrams will<br />
have a stylistic impact on their work, if these get too disparate you can end up<br />
having a lot of difficulty sorting out one document from another.<br />
You should also consider developing a stance on when it is appropriate to<br />
use logical diagrams or physical diagrams. Logical diagrams tend to be more<br />
high level and show the overall data flow and devices’ general connectivity,<br />
while a physical diagram typically includes specifics on cables, ports, and so<br />
on. Each type of diagram has its place. A physical diagram is generally of more<br />
use when it comes time to troubleshoot a connectivity issue, while a logical<br />
diagram often is clearer <strong>for</strong> nontechnical staff, such as project managers and<br />
upper management.To some degree it may just come down to personal preferences;<br />
neither type is “wrong,” and either or both types may be appropriate<br />
www.syngress.com
364 Chapter 6 • Testing and Auditing <strong>Your</strong> Systems<br />
depending on your needs. When it comes to the aesthetics of documentation<br />
consistency will likely prove to be an asset. An example of the same diagram<br />
in both a logical and physical view is shown in Figure 6.12.<br />
Figure 6.12 Logical and Physical Sample Diagram<br />
HTTP<br />
SSL<br />
DMZ<br />
SQL<br />
Remote<br />
Office 1<br />
Access Request Forms<br />
Another key piece of documentation is the access request <strong>for</strong>m.You will want<br />
documentation to demonstrate that a user <strong>for</strong>mally requested access to the<br />
network, or a particular network resource, such as a server.This documentation<br />
will also serve as a record <strong>for</strong> who approved the recourse, and <strong>for</strong> how<br />
long.This type of documentation will most often be useful <strong>for</strong> audits, to<br />
www.syngress.com<br />
1<br />
2<br />
Logical Diagram Physical Diagram<br />
Internet<br />
Remote<br />
Office 2<br />
Firewall<br />
Web Server<br />
Firewall<br />
Database<br />
Server<br />
Fe 1/1<br />
10.1.1.0 10.1.12.0<br />
10.1.1.250<br />
1.2.3.5 ser 1/0 1.2.3.6 ser 1/1<br />
ser 1/0<br />
Cisco<br />
ASA 5520<br />
Fe 1/2<br />
Internet<br />
1.2.3.4<br />
192.168.1.251<br />
10.1.12.250<br />
Fe 1/1<br />
Fe 1/24<br />
Fe 1/1<br />
Web Server<br />
DMZ 192.168.1.29<br />
Fe 0/1<br />
192.168.1.250<br />
Cisco ASA5520 10.1.99.250<br />
Fe 1/1<br />
Fe 0/1<br />
Database<br />
Server<br />
Fe 1/24<br />
10.1.99.100
demonstrate which systems and users have approved access to use the network.This<br />
category can also include the signed IT security policy (which<br />
may be a requirement to approve network access). Either of these could be<br />
important if HR needs to follow up on a matter of network usage policy<br />
breach. As with the network diagrams, these types of documents could be<br />
useful <strong>for</strong> demonstrating best practices and instilling confidence in potential<br />
business partners.<br />
Business Continuity and Disaster Recovery Plans<br />
While not purely a network security document, there are many security considerations<br />
surrounding business continuity (BC) and disaster recovery (DR)<br />
plans. For one, they will typically contain a log of highly sensitive in<strong>for</strong>mation<br />
in the plans themselves. For this reason, access to these documents should be<br />
limited to only those personnel who require access.This documentation will<br />
also serve as your first guide to walk through the processes that are outlined,<br />
and the infrastructure that is in place, and to look <strong>for</strong> any security risks.<br />
Oftentimes people neglect to secure their DR servers or leave backup tapes<br />
containing sensitive in<strong>for</strong>mation lying around without securing them. In the<br />
end, this documentation will hopefully never be useful or needed, but if it is,<br />
these are the documents that can make or break a company after a disaster<br />
occurs.<br />
IT Security Policies/Standards/Procedures<br />
Testing and Auditing <strong>Your</strong> Systems • Chapter 6 365<br />
Because this subject is the cause of much confusion, it’s worth summarizing<br />
what each of these types of documents should contain.<br />
■ Policies Policies are broad statements that are general in nature.<br />
These documents should not change often. For example, a policy<br />
statement could be “data classified as confidential or higher must be<br />
encrypted when traversing an untrusted network.”These documents<br />
rarely contain sensitive in<strong>for</strong>mation, and one company’s policies will<br />
often look very much like another’s.<br />
■ Standards These specify what method should be used to con<strong>for</strong>m<br />
to policy.They are more specific than policies. An example of a standard<br />
would be “acceptable encryption protocols are 3DES, AES(128),<br />
www.syngress.com
366 Chapter 6 • Testing and Auditing <strong>Your</strong> Systems<br />
and AES(256).”The in<strong>for</strong>mation in standards may be useful to a<br />
hacker, such as what encryption you are using, but this in<strong>for</strong>mation is<br />
typically of marginal value.<br />
■ Procedures Procedures are the most detailed documents. A procedure<br />
outlines exactly how to per<strong>for</strong>m a given activity.These are very<br />
specific and include exact instructions such as “click here” or “run<br />
this program using these options.” Because of the level of detail, procedures<br />
often make use of numbered steps and include specifics such<br />
as IP addresses and possible access accounts and passwords. While not<br />
every process will have procedures written <strong>for</strong> it, these documents<br />
often contain highly sensitive in<strong>for</strong>mation and should be safeguarded<br />
appropriately.<br />
Because some of the documentation in this category can contain sensitive<br />
in<strong>for</strong>mation they should be handled with care. Processes need to be in place<br />
to ensure the in<strong>for</strong>mation is available, and that the confidentiality of the data<br />
is maintained.The integrity of the data is sometimes overlooked but is of<br />
equal importance. Only authorized individuals should have access to modify<br />
this documentation.<br />
Vulnerability Scanning<br />
After locating all the hosts on your network, and hopefully removing or per<strong>for</strong>ming<br />
remediation on the unauthorized ones, you should determine the<br />
security status of all your systems. One of the most efficient ways of doing<br />
this is with an automated vulnerability scanner.These types of scanners typically<br />
work using varying levels of invasiveness. At the safest end of the spectrum,<br />
the devices only look <strong>for</strong> settings that might indicate a vulnerability, but<br />
they do not actually exploit the vulnerability.This approach can result in<br />
some false positives, but it is also the safest type of scanning because it caries<br />
the lowest risk of causing a service disruption on the target machine. At the<br />
opposite side of the spectrum, the scanner can actually attempt to exploit the<br />
vulnerability. Because many of the vulnerabilities are expressly designed to<br />
disrupt service, this type of scanning obviously carries a high risk along with<br />
it. It does, however, result in very few false positives and provide a very accurate<br />
indicator of the overall security of the system in question.<br />
www.syngress.com
It’s worth pointing out that a vulnerability scanner is just that, a scanner<br />
with no real intelligence. Some unscrupulous security companies will run the<br />
same scanner you can run <strong>for</strong> free, print the results, and present them to their<br />
customers along with a bill.The vulnerability scanner has to depend on the<br />
human user to configure it intelligently. And even when something is found,<br />
it is a human that must make a judgment call as to whether or not that item<br />
is truly a risk in your current environment. In some cases, further investigation<br />
will be required to determine if the findings are valid and if they represent<br />
a true risk. What follows is a discussion of Nessus, one of the best free<br />
vulnerability scanners available today.<br />
Nessus<br />
Testing and Auditing <strong>Your</strong> Systems • Chapter 6 367<br />
Nessus has been around <strong>for</strong> a long time, since 1998, in fact. It is available <strong>for</strong><br />
Linux, <strong>Free</strong>BSD, Solaris, MAX OS X, and Windows (2000, XP, and 2003).<br />
The Windows product is currently listed as beta, but it ran fine with no issues<br />
<strong>for</strong> me.You can download it from www.nessus.org/download/. While free,<br />
the most current version (Nessus 3) is no longer open source.The Nessus<br />
system comprises two components: a server and a client.The server process<br />
does the actual scanning, while the client is used to configure and run scans<br />
and to view the results of a scan. Nessus is a very feature-rich application,<br />
which can per<strong>for</strong>m more than 10,000 different types of checks via downloadable<br />
plug-ins.The licensing is relatively generous, but there are some circumstances<br />
whereby you must purchase a license. In short, you can always scan<br />
your own personal systems but <strong>for</strong> scanning third-party networks some additional<br />
licensing will be needed.There are also license options <strong>for</strong> installing<br />
Nessus on an appliance to be provided to customers and <strong>for</strong> providing Nessus<br />
as an OEM product. For full details on the licensing of Nessus, refer to the<br />
licensing FAQ located here: http://nessus.org/plugins/index.php?view=faq.<br />
You should periodically scan your hosts <strong>for</strong> vulnerabilities according to<br />
the requirements of your IT security policy.You should also per<strong>for</strong>m a vulnerability<br />
scan any time significant changes are made to your network or<br />
hosts because this could inadvertently create a security risk, either due to<br />
human error or due to an interaction between the changes and the existing<br />
security controls. A significant change could include adding a new feature like<br />
enabling terminal services, per<strong>for</strong>ming an upgrade, or installing a new service<br />
www.syngress.com
368 Chapter 6 • Testing and Auditing <strong>Your</strong> Systems<br />
pack. Basically, if significant changes have been made, you want to ensure that<br />
those changes haven’t created a security vulnerability.<br />
Running Nessus on Windows<br />
The installation of Nessus is straight<strong>for</strong>ward.You will need to select the installation<br />
target directory and accept the license agreement. For an excellent reference<br />
on Nessus see Nessus <strong>Network</strong> Auditing (<strong>Syngress</strong> Publishing, 2004).<br />
After you have successfully installed Nessus, simply click the Tenable Nessus<br />
icon, and you will see the startup screen, as shown in Figure 6.13.<br />
Figure 6.13 Windows Nessus<br />
To begin, simply click Start Scan Task and then enter the target host to<br />
scan.You can enter a single IP address, a list of IP addresses separated by<br />
commas, a hostname, or even a network range. After you enter the target(s),<br />
click Next.The next screen enables you to select the plug-ins you want to<br />
www.syngress.com
Testing and Auditing <strong>Your</strong> Systems • Chapter 6 369<br />
use.The default will be to run all plug-ins except the “dangerous” ones.The<br />
dangerous plug-ins are those that are more invasive and that run a higher risk<br />
of causing a service disruption. If you want more granular control over which<br />
specific plug-ins are executed, click Manage Policies (refer back to Figure<br />
6.13). When you are satisfied with your plug-in selection, click Next.The<br />
next screen enables you to choose where to scan from.You can use the system<br />
you are on as a client, and instruct a different machine to do the actual scanning,<br />
or you can use the system you are on as both the client and the server,<br />
in which case it will per<strong>for</strong>m the scan from the same system you configure<br />
the scan. After you have entered the in<strong>for</strong>mation <strong>for</strong> the server to use, or left<br />
the default of localhost, click Scan Now.<br />
Running all the plug-ins will take a little time to complete. After the scan<br />
has completed, your Web browser will open and display the results of the<br />
scan. A set of results from a default (that is, no dangerous plug-ins) scan of a<br />
Windows XP Professional system is shown in Figure 6.14.<br />
If you want more control of how the scan is per<strong>for</strong>med, you can select<br />
Manage Policies in the left pane, and then click Add a new policy in the<br />
right pane.You will need to choose a name <strong>for</strong> the policy and click OK. After<br />
this is done, the policy will appear in the list.You can choose either Edit<br />
Settings or Edit Plugins.The settings option enables you to configure various<br />
parameters about the scan, such as whether or not the dangerous plugins<br />
should be used, credentials to use during the scan, ping options, etc.The<br />
Edit Plugins option is simply that, it enables you to pick and choose which<br />
plug-ins you want to use.The plug-in selection window has two panes, the<br />
one on the left is <strong>for</strong> a plug-in family, such as all plug-ins related to FTP,<br />
while the pane on the right lists the individual plug-ins within the selected<br />
family, as shown in Figure 6.15.<br />
www.syngress.com
370 Chapter 6 • Testing and Auditing <strong>Your</strong> Systems<br />
Figure 6.14 Windows Nessus Results<br />
www.syngress.com
Figure 6.15 Nessus Plug-Ins (Windows)<br />
If you know you are using only Windows hosts, you could de-select entire<br />
families of plug-ins such as the highlighted Fedora Local Security Checks.<br />
Running these plug-ins when you know they will not be applicable to the<br />
system(s) being scanned will only increase your scan time, and in the case of<br />
the “dangerous” plug-ins, possibly increase the chances of causing a service<br />
disruption.<br />
Running Nessus on Linux<br />
Testing and Auditing <strong>Your</strong> Systems • Chapter 6 371<br />
Nessus operates a little differently on Linux than it does on Windows. On a<br />
Windows system, when you start Nessus, by default the client (which configures<br />
the scan parameters and views the scan results) is the same system that is<br />
doing the actual scan (the Nessus server). NessusWX is the Windows client<br />
that will enable you to connect to a remote Nessus server. In Linux, this does<br />
not have to be the case.The Nessus server process, nessusd, can be running on<br />
www.syngress.com
372 Chapter 6 • Testing and Auditing <strong>Your</strong> Systems<br />
machine A, while you use the Nessus client on machine B to configure a scan<br />
against target host C. Machine A will then per<strong>for</strong>m the scan and send the<br />
results to machine B <strong>for</strong> viewing. Because of this, the installation files <strong>for</strong> the<br />
client and server will need to be installed individually.This configuration provides<br />
additional flexibility in case you need to per<strong>for</strong>m the scan from a different<br />
system than the client. One scenario where this could be useful is<br />
illustrated in Figure 6.16. In this case, there is a firewall between your Nessus<br />
client system and the target system, but there is no firewall between the<br />
Nessus server and the target you want to scan. If you were to use system B as<br />
the client and server, many of the checks that need to be per<strong>for</strong>med would be<br />
blocked by the firewall, producing inaccurate results at best. With host B<br />
acting as a client only, and host A acting as the Nessus server, the firewall only<br />
needs to pass the Nessus client session (default TCP port 1241) and then the<br />
server could per<strong>for</strong>m the checks on system C without the firewall interfering.<br />
Figure 6.16 Nessus Client-Server Operation<br />
After the install is complete, you must create a user <strong>for</strong> the Nessus server.<br />
This is done by executing /opt/nessus/sbin/nessus-add-first-user. Enter a username<br />
and then select the authentication method (the default is to use a password).<br />
If you selected password, enter the password twice <strong>for</strong> confirmation.<br />
www.syngress.com
You will then be asked to enter any user rules.The user rules serve to restrict<br />
what hosts this user can scan with Nessus.To permit a given user to scan any<br />
hosts in 192.168.1.0 and the Nessus client system they are using but nothing<br />
else, you would enter the following rules:<br />
accept 192.168.1.0/24.<br />
accept client_ip<br />
default deny<br />
See the man page <strong>for</strong> nessus-adduser <strong>for</strong> more detailed examples. Simply<br />
type CTRL+D to exit if you do not wish to apply any rules at this time, and<br />
then press y to verify your choices. After this is completed, enter<br />
/opt/nessus/sbin/nessusd –D to start the Nessus server daemon.<br />
The Nessus client interface looks significantly different than it does on a<br />
Windows system, as shown in Figure 6.17.You will use the Nessus client to<br />
log in to the Nessus server even if both the client and the server happen to be<br />
on the same machine. Enter the Nessus user and password and click Log in.<br />
In the figure, the client and the server are the same system; this is why the<br />
Nessusd Host field contains the value localhost.You could also easily enter<br />
a remote hostname to use the Nessus server on a different system.<br />
Figure 6.17 Linux Nessus Login Screen<br />
Testing and Auditing <strong>Your</strong> Systems • Chapter 6 373<br />
www.syngress.com
374 Chapter 6 • Testing and Auditing <strong>Your</strong> Systems<br />
After you are logged in, you have access to several tabs. Select the Plugins<br />
tab to choose which types of checks to per<strong>for</strong>m. Similar to the Windows<br />
interface, the top pane lists the plug-in family, and the bottom pane lists the<br />
individual plug-ins. Enable a given plug-in or plug-in family by placing a<br />
check next to them. At the time of this writing there were a total of more<br />
than 11,000 plug-ins as part of the default Nessus package. Use the Target tab<br />
to specify which machine(s) to scan.The Credentials tab is used to provide<br />
login in<strong>for</strong>mation <strong>for</strong> SSH, SMB (Windows), and Kerberos. In some cases,<br />
Nessus will need to authenticate in order to per<strong>for</strong>m some of the checks.The<br />
Prefs tab enables you to configure various options such as SNMP community<br />
strings, HTTP logins, scan verbosity, and many more variables. When you<br />
are satisfied with your choices, simply click the Start the scan button.<br />
NOTE<br />
Several types of checks will not be fully tested by default. These are<br />
types of scans that run a higher than normal risk of causing an undesirable<br />
response from the target host. This behavior is the same as the<br />
Windows Nessus, in that the more “dangerous” plug-ins are not used by<br />
default. To enable these plug-ins, you must remove the check next to<br />
Safe Checks on the Scan Options tab.<br />
After the scan is completed, a report window should open with the<br />
results.The report window opens in a Nessus window, not in your Internet<br />
browser.The interface enables you to go from pane to pane and drill down<br />
into your results. By selecting the Subnet, you are presented with a list of<br />
hosts <strong>for</strong> that subnet in the Host pane. When you select a host, the Port pane<br />
populates and enables you to drill down on the results of a specific port.<br />
When you select a specific port you can then choose which results <strong>for</strong> that<br />
port you wish to see.The specific nature of the vulnerability will be explained<br />
in the largest pane in the lower right, as shown in Figure 6.18.<br />
www.syngress.com
Figure 6.18 Linux Nessus Scan Results<br />
After having looked at the large number of plug-ins available, you can see<br />
that Nessus is a very powerful tool <strong>for</strong> determining what vulnerabilities your<br />
systems might have. With the large number of supported operating systems<br />
and ability to check <strong>for</strong> a wide range of vulnerabilities, Nessus is a valuable<br />
tool <strong>for</strong> testing the security of your systems. As is often the case, Nessus will<br />
run faster from a Linux system than it will from a Microsoft system, but if you<br />
don’t need to scan many systems, the difference is probably not significant.<br />
The primary advantage to subscribing to Nessus is that you will receive<br />
updated plug-ins as soon as they are released. With the free “registered” version<br />
you are able to get the updated plug-ins seven days after the subscription<br />
users. If you choose not to register your Nessus software, you can get the<br />
updated plug-ins only with each new release of Nessus, so with the free version,<br />
there is some delay in getting the newest plug-ins. As a paying subscriber<br />
you can also configure scanning policies that Nessus will check; these policies<br />
can include a wide array of system settings. Even with these limitations, however,<br />
it is an excellent free vulnerability scanning tool.<br />
X-Scan<br />
Testing and Auditing <strong>Your</strong> Systems • Chapter 6 375<br />
Nessus isn’t the only game in town when it comes to vulnerability scanning.<br />
There are many offerings but most of them are commercial products. Another<br />
free vulnerability scanner is X-Scan from www.xfocus.org/programs/<br />
www.syngress.com
376 Chapter 6 • Testing and Auditing <strong>Your</strong> Systems<br />
200507/18.html. X-Scan is a Windows-only scanner that supports a couple of<br />
interesting features such as OS detection and weak password checking. <strong>Using</strong><br />
X-Scan does not require an installation, all you have to do is decompress the<br />
files to a location of your choice and run the executable.The main window<br />
(with some scan results already populated) is shown in Figure 6.19.<br />
Figure 6.19 X-Scan Results<br />
To per<strong>for</strong>m a scan of the local host, you can simply click the green “play”<br />
triangle, or navigate to File | Start. If you want to scan a different host, navigate<br />
to Config | Scan Parameter.This will open the Config window.The left<br />
pane contains a hierarchy of configuration options. Select Scan range in the<br />
www.syngress.com
left pane and enter the target host(s) in the right pane in the IP address<br />
range: field. If you want to configure some of the checks that are specific to<br />
X-Scan, open the Config window and navigate to Global Options | Modules<br />
in the left pane.The center pane will display a list of modules, while the right<br />
pane explains what the module does.These modules include some OS fingerprinting<br />
and a large number of weak password checks.<br />
By selecting Global options | Report in the left pane, you can choose<br />
what <strong>for</strong>mat to use <strong>for</strong> the scan report.The default is HTML, but you can also<br />
choose XMS or text file. If you select Global options | Others, you will<br />
find a couple of useful options.The default is to Skip host when failed to get<br />
response. By selecting Scan always, X-Scan will per<strong>for</strong>m the scan even if the<br />
system is not responsive to a ping.This can be useful in cases where you know<br />
the target host will not respond to a ping but the system is up.You can also see<br />
that the default is <strong>for</strong> the OS fingerprinting to be per<strong>for</strong>med by Nmap.The<br />
default list of ports can be edited by selecting Plug-in options | Port.<br />
If you want to choose specific plug-ins to apply, navigate to Plug-in<br />
options | NASL. If the term NASL sounds familiar that’s because it stands <strong>for</strong><br />
Nessus Attack Scripting Language. X-Scan uses the same plug-ins that Nessus<br />
uses.The default is to select all plug-ins excluding the “destructive” ones,<br />
which in Nessus are called “dangerous.” If you uncheck the Select all box, you<br />
can click Select at the top.The Select Scripts window enables you to choose<br />
which scripts to run in a familiar <strong>for</strong>mat, as shown in Figure 6.20.<br />
Figure 6.20 X-Scan Script Selection<br />
Testing and Auditing <strong>Your</strong> Systems • Chapter 6 377<br />
www.syngress.com
378 Chapter 6 • Testing and Auditing <strong>Your</strong> Systems<br />
The left pane lists broad categories <strong>for</strong> the scripts, which is the same as the<br />
Nessus plug-in family lists.The right pane lists the individual scripts. After<br />
making your selection be sure to click Select dependencies so that any<br />
scripts that are needed to support the ones you selected are enabled. After you<br />
are satisfied with your selection, click OK.The save to list file field enables<br />
you to save your lists <strong>for</strong> future use. It might be useful to save a list that<br />
applies only to Windows hosts because many of these checks are <strong>for</strong> other<br />
types of systems. After making all your configuration changes, click OK and<br />
then run the scan. By default, X-scan will open your browser to view the<br />
report results when the scan is completed. A sample HTML report is shown<br />
in Figure 6.21.<br />
Bear in mind you will need the WinPcap drivers installed in order to use<br />
X-Scan, though like many such utilities X-Scan will install WinPcap if you<br />
don’t already have it installed. When it comes to the actual checks being per<strong>for</strong>med,<br />
X-Scan uses the same Nessus plug-ins, but X-Scan also has the capability<br />
to per<strong>for</strong>m some additional checks and OS fingerprinting. Like Nessus,<br />
X-Scan also supports command-line operations, which could be a plus<br />
depending on your environment. On the down side, X-Scan does not support<br />
the client-server architecture that Nessus does. If that type of functionality is<br />
needed, you could use some type of remote access functionality to run the<br />
scans from a system more appropriately located, but this would require thirdparty<br />
software. If this capability is needed, X-Scan may not be the best tool<br />
and Nessus might be a better fit.<br />
www.syngress.com
Figure 6.21 X-Scan HTML Report<br />
Microsoft Baseline Security Analyzer<br />
Testing and Auditing <strong>Your</strong> Systems • Chapter 6 379<br />
The Microsoft Baseline Security Analyzer is a tool <strong>for</strong> checking the baseline<br />
security of supported Microsoft products. In this instance baseline means that<br />
www.syngress.com
380 Chapter 6 • Testing and Auditing <strong>Your</strong> Systems<br />
the minimum security patches have been applied (MBSA uses the updater<br />
service to check patch levels) and the minimum security settings have been<br />
checked.The MSBS is not a general-purpose vulnerability scanner like<br />
Nessus. MSBS is instead a way to check your Microsoft hosts <strong>for</strong> weak security<br />
settings, not necessarily vulnerabilities.The primary page <strong>for</strong> MBSA is<br />
www.microsoft.com/technet/security/tools/mbsahome.mspx.There are different<br />
versions of MBSA, each supporting different plat<strong>for</strong>ms. MBSA 1.2.1 is<br />
<strong>for</strong> users who have Office 2000 and Exchange 5.0 or 5.5. MBSA 2.0 supports<br />
Windows 2000 SP3 or later, Office XP, Exchange 2000, and SQL Server 2000<br />
SP4 or later. A more complete listing of supported products can be found in<br />
the article located at http://support.microsoft.com/?scid=kb;en-us;895660.<br />
The older MSBA 1.2.1 supports only a limited set of software.You can use<br />
MBSA 1.2.1 combined with EST (Enterprise Scan Tool) to obtain fairly<br />
comprehensive scanning coverage of older legacy applications.The software is<br />
relatively small and lightweight, at less than 2 MB.The installation process is<br />
simple and quick.The MBSA interface, shown in Figure 6.22, is also very<br />
straight<strong>for</strong>ward.<br />
Figure 6.22 Microsoft Baseline Security Analyzer<br />
www.syngress.com
To scan a single computer, simply click Scan a computer, enter a computer<br />
name or IP address, and then click Start Scan.The scanner will report<br />
on any settings or options on the target that are suboptimal from a security<br />
standpoint.The results of a sample scan are shown in Figure 6.23.The MBSA<br />
has marked a red “X” <strong>for</strong> any security issues it finds, including in this example<br />
not having all the disk partitions <strong>for</strong>matted as NTFS. NTFS is Microsoft’s file<br />
system <strong>for</strong>mat that allows <strong>for</strong> configuration access controls on files and<br />
folders. Fat32 is an older Microsoft file system that has no file security.<br />
Figure 6.23 Microsoft Baseline Security Scanner Results<br />
Testing and Auditing <strong>Your</strong> Systems • Chapter 6 381<br />
By default, the scan results are stored in %USERPROFILE%<br />
\SecurityScans as .mbsa files. MBSA also includes a command-line version,<br />
called mbsacli.exe.There are several useful options that can be used on the<br />
command line. Basic usage would be mbsacli /target 192.168.1.99, <strong>for</strong><br />
example.You could also use mbsacli /r 192.168.1.1-192.168.1.254 to scan a<br />
range of IP addresses. If you omit the target completely, MBSA will default to<br />
www.syngress.com
382 Chapter 6 • Testing and Auditing <strong>Your</strong> Systems<br />
the localhost as the target. By default, mbsacli this way produces text results<br />
directly to the console and creates an .mbsa report in the %USERPRO-<br />
FILE%\Security Scan\ directory.The text output can be redirected to a file,<br />
and while the output <strong>for</strong>matting is conducive to parsing the results programmatically,<br />
it is not a very good <strong>for</strong>mat <strong>for</strong> human viewing. Un<strong>for</strong>tunately, there<br />
isn’t much out there to help you manipulate the findings. Microsoft does offer<br />
the Microsoft Office Visio 2003 Connector <strong>for</strong> the Microsoft Baseline<br />
Security Analyzer (MBSA) 2.0.This tool enables you to see the results in<br />
Visio when clicking on a Visio icon.You can download the Visio connector<br />
from www.microsoft.com/technet/security/tools/mbsavisio.mspx.<br />
So let’s suppose you wanted to test all your systems regularly using MBSA<br />
and report on critical updates that are not installed.You could use the command-line<br />
version and the job scheduler <strong>for</strong> the scheduling part.Then take<br />
your text output files and the find command, such as find “Missing”<br />
, to list all missing updates.You could further pipe this into<br />
find a second time to output only the missing critical updates with find<br />
“Missing” | find “Critical”.To summarize, MBSA is a very<br />
good tool but its most glaring weakness is the lack of a good reporting mechanism.<br />
If you have only a few systems to test, however, MBSA can be a very<br />
useful tool.<br />
OSSTMM<br />
Let’s suppose that you can run vulnerability scanners and per<strong>for</strong>m network<br />
discovery, but you want to take your security assessments to the next level. If<br />
you begin to think about all the security testing that could be done, covering<br />
such broad topics as wireless security, physical security, employee education,<br />
incident response, and much more, you might feel a bit overwhelmed.The<br />
task is so large that simply figuring out where to start could be difficult, and if<br />
you do that, there is always the possibility that you might miss something critical.The<br />
OSSTMM (Open Source Security Testing Methodology Manual) is<br />
exactly what it sounds like.This is a free manual on how to per<strong>for</strong>m a security<br />
assessment. It is very detailed (version 2.0 is 120 pages) and can be downloaded<br />
from www.isecom.org/osstmm/. Even if you choose not to per<strong>for</strong>m<br />
www.syngress.com
Testing and Auditing <strong>Your</strong> Systems • Chapter 6 383<br />
all the testing that is outlined in the manual, it is an invaluable resource to<br />
help guide you on proper testing procedures and practices.<br />
In addition to covering such pretesting tasks as defining scope of the<br />
testing and the rules of engagement, it breaks the actual areas to be tested<br />
down into sections and subsections called modules. Here are summaries of the<br />
sections covered.<br />
■ In<strong>for</strong>mation Security This broad category covers such tasks as<br />
scouring the Internet <strong>for</strong> publicly available in<strong>for</strong>mation that can provide<br />
clues about nonpublic in<strong>for</strong>mation. An example of such indirect<br />
disclosure would be a job posting that specifically requires experience<br />
with F5’s BIGIP products, which would indirectly tell people what<br />
type of load balancers the company is using. It also covers the secure<br />
handling of confidential data, including personal data.<br />
■ Process Security This section includes testing verifying your procedures<br />
and attempting to gain unauthorized access via an e-mail or<br />
phone call, either through improper process (such as not verifying<br />
your identity be<strong>for</strong>e resetting an account) or while impersonating<br />
someone else.This section also includes luring authorized users to an<br />
external location (typically a virtual location such as a Web page)<br />
whereby their credentials can be compromised or other in<strong>for</strong>mation<br />
gathered.<br />
■ Internet Technology Security This section focuses more on the<br />
underlying technologies, and examines such things as the network,<br />
packet loss, routes, and route control, ISP, and bandwidth of the target<br />
organization.This section is really where the build of security testing<br />
activity takes place.This section also includes per<strong>for</strong>ming a network<br />
survey and initial investigation via IP scanning and port scanning.<br />
Some indirect disclosure issues will also be touched upon here as you<br />
learn some things about the underlying network.The handling of<br />
confidential in<strong>for</strong>mation will again be reviewed at the network level<br />
concerning encryption protocols and related technologies.This section<br />
also does the work of application vulnerability testing, route<br />
testing, access control testing, IDS testing, and testing of anti-Trojan<br />
www.syngress.com
384 Chapter 6 • Testing and Auditing <strong>Your</strong> Systems<br />
and antivirus systems. Finally, this section includes modules to address<br />
password cracking, denial-of-service testing, and a review of the organization’s<br />
security policy.<br />
■ Communication Security This section includes testing the PBX<br />
and other communications methods such as voice mail, modems, and<br />
fax machines.<br />
■ Wireless Security Because of the complexity and expertise needed<br />
to thoroughly test wireless security, wireless has its own section in the<br />
OSSTMM.This section includes such esoteric modules as testing<br />
electromagnetic radiation (EMR), which can enable a person to read<br />
what appears on a CRT monitor from outside the building, based on<br />
the EMR that is projected beyond the display screen. It also covers<br />
the more mundane testing against the wireless network itself,<br />
including both 802.11x and Bluetooth networks.The broad category<br />
would even includes wireless headsets and the security of the conversations<br />
over them, wireless hand scanners (such as in a retail store),<br />
RFID devices, and other wireless/cordless devices.<br />
■ Physical Security This section includes evaluating perimeter security,<br />
security monitoring, and access controls methods, such as gates,<br />
doors and locks. It also includes alarm response (all types of alarms,<br />
including fire, environmental, and a security incident alarm).The<br />
geographical location and ramifications thereof are also reviewed in<br />
this section.<br />
The end of the document contains multiple templates that can be used <strong>for</strong><br />
your actual testing, such as a Firewall Analysis Template and a Password<br />
Cracking Template.These templates are not procedures but are rather the type<br />
of documentation you would include with your testing, detailing exactly what<br />
was tested and how.These templates can be valuable <strong>for</strong> both ensuring that<br />
you are documenting your testing adequately and helping ensure that you do<br />
not miss any vital steps, because many of the steps have explicit sections of the<br />
template to record the specifics.<br />
The business model <strong>for</strong> the Institute <strong>for</strong> Security and Open<br />
Methodologies (ISECOM) is basically that they provide the OSSTMM <strong>for</strong><br />
www.syngress.com
Testing and Auditing <strong>Your</strong> Systems • Chapter 6 385<br />
free. However, it is a peer-reviewed and updated document. As best practices<br />
change and the manual is updated, those changes are made available to “gold”<br />
and “silver” subscribers be<strong>for</strong>e the general public.Typically, the time delay <strong>for</strong><br />
free access is a few months. Because this is a testing methodology, a few<br />
months’ delay probably will not pose any significant problems <strong>for</strong> those who<br />
want the OSSTMM <strong>for</strong> free.<br />
www.syngress.com
386 Chapter 6 • Testing and Auditing <strong>Your</strong> Systems<br />
Summary<br />
Taken as a whole, the tools and utilities covered in this chapter should<br />
empower you to locate the systems on your network using a variety of<br />
methods.The best of class utilities presented offer a broad spectrum of choices<br />
in complexity and features <strong>for</strong> discovery scanning. After all the systems are<br />
located, you can begin testing them with a vulnerability scanner to determine<br />
what their current security posture is.This enables you to build a complete<br />
and accurate picture of just how secure the systems are.The Microsoft<br />
Baseline Security Analyzer takes this one step further and reports on weak<br />
security settings <strong>for</strong> Microsoft operating systems, rather than vulnerabilities.<br />
All of this collectively gives you the in<strong>for</strong>mation you need to complete the<br />
first step of securing your network, which is in<strong>for</strong>mation gathering.<br />
Solutions Fast Track<br />
Taking Inventory<br />
� Taking an inventory of the devices on your network must be<br />
repeated regularly to ensure that the inventory remains accurate.<br />
� Nmap has more features and option than any other free scanner.<br />
Familiarize yourself with not only the options you need to use, but<br />
also the ones you might encounter as a hacker attempts to collect<br />
in<strong>for</strong>mation on your network.<br />
� Because the various scanners have different strengths and weaknesses,<br />
you should familiarize yourself with all of them and choose the<br />
appropriate one <strong>for</strong> the task.<br />
� Identifying that the wireless devices exist should be simple; it’s<br />
determining the devices’ physical location that is often difficult.<br />
� To attempt to triangulate and locate the physical devices, you will<br />
need a scanner that displays an accurate signal strength and a<br />
directional antenna.<br />
www.syngress.com
Vulnerability Scanning<br />
� Be cognizant of the invasiveness of the scans you are running and of<br />
the risks that the scan poses to the target host(s).<br />
� Consider the legal ramifications to any wireless activities you pursue<br />
and ensure you have adequate backing from your employer.<br />
� MSBA is <strong>for</strong> Microsoft products only and reports on weak security<br />
settings, all of which do not necessarily represent a security<br />
vulnerability per se.<br />
OSSTMM<br />
� OSSTMM is a manual to guide you through the process of<br />
per<strong>for</strong>ming a security assessment using the peer-accepted best<br />
practices.<br />
Frequently Asked Questions<br />
Testing and Auditing <strong>Your</strong> Systems • Chapter 6 387<br />
The following Frequently Asked Questions, answered by the authors of this book,<br />
are designed to both measure your understanding of the concepts presented in<br />
this chapter and to assist you with real-life implementation of these concepts. To<br />
have your questions about this chapter answered by the author, browse to<br />
www.syngress.com/solutions and click on the “Ask the Author” <strong>for</strong>m.<br />
Q: Does a simple port scan pose any risk to my target hosts?<br />
A: It definitely can. A simple ping scan to see which systems are alive<br />
shouldn’t pose any risk, but a more involved port scan might. If the target<br />
host has significantly more resources than the target system, you could<br />
exhaust the resources of the target system and result in an inadvertent<br />
denial of service attack. Of even higher risk are some of Nmap’s more<br />
unusual scanning options. Some of the specialized TCP flag manipulation<br />
scans carry a definite risk to the target host. Because the flag combinations<br />
can be illegal (according to the TCP specifications) the target host might<br />
not be coded well enough to handle them. Granted, in this day and age<br />
this shouldn’t happen, but these types of scans still carry a risk.<br />
www.syngress.com
388 Chapter 6 • Testing and Auditing <strong>Your</strong> Systems<br />
Q: Why are wireless access points such a big security concern? Why should I<br />
care if my users want to use someone else’s Internet bandwidth instead of<br />
mine?<br />
A: There are many reasons. If a user who is connected to your corporate network<br />
also connects to an open wireless access point and his machine is<br />
attacked and compromised, the attacker has an open backdoor into your<br />
corporate network which probably bypasses all your firewalls and security<br />
measures. Even if you set aside all the security issues, the user in question<br />
now has an outside connection that you cannot easily monitor.You no<br />
longer have visibility if that user is trafficking in trade secrets or otherwise<br />
transmitting confidential in<strong>for</strong>mation. When the user is using your company<br />
Internet connection, you have the capability to use an IDS, collect<br />
traffic statistics, take advantage of a firewall you control, and apply other<br />
security policies.<br />
Q: Can I write my own custom “plug-ins” to per<strong>for</strong>m special security checks<br />
using NASL?<br />
A: You can.There is a large body of plug-ins already available and odds are<br />
good the check you’re looking <strong>for</strong> is already available unless it is very customized.You<br />
can search the available plug-ins at http://nessus.org/plugins/index.php?view=search.The<br />
search results may include plug-ins that<br />
are not available yet except <strong>for</strong> the direct feed or registered feed customers.<br />
You can also create your own plug-ins from scratch and if they might be<br />
useful to others you can share them with the Nessus community. X-Scan<br />
also enables you to create your own plug-ins and uses the same NASL<br />
plug-ins as Nessus.<br />
www.syngress.com
<strong>Network</strong><br />
Reporting and<br />
Troubleshooting<br />
Solutions in this chapter:<br />
■ Reporting on Bandwidth Usage and Other<br />
Metrics<br />
■ Collecting Data <strong>for</strong> Analysis<br />
■ Understanding SNMP<br />
Chapter 7<br />
■ Troubleshooting <strong>Network</strong> Problems<br />
� Summary<br />
� Solutions Fast Track<br />
� Frequently Asked Questions<br />
389
390 Chapter 7 • <strong>Network</strong> Reporting and Troubleshooting<br />
Introduction<br />
It is an un<strong>for</strong>tunate fact of life that network security is only glamorous to<br />
geeks. For everyone else, seeing an IDS purr away, or watching swatch grind<br />
through gigabytes of log messages is pretty dull, and more importantly, meaningless.There<br />
will inevitably be occasions where you need to demonstrate the<br />
state of your network to a less-technical audience. In some cases you need to<br />
justify a recent expense, in other cases you may need to provide support <strong>for</strong> a<br />
proposed expense. It is at these times that some useful tools to help turn the<br />
bits and bytes into graphs can go a long way. We will discuss several such tools<br />
in this chapter, and how they can be useful in your day–to-day activities.<br />
Reporting on Bandwidth<br />
Usage and Other Metrics<br />
If you’ve ever been in a position to request approval to upgrade your Internet<br />
bandwidth, one of the first questions that often come up is,“What are we<br />
using the bandwidth <strong>for</strong> now?”You don’t want to have to admit you don’t<br />
have any idea. In these cases, some type of reporting mechanism on network<br />
traffic would come in really handy. Or maybe the Internet responsiveness is<br />
slow because your Internet connection is being saturated and you want to<br />
know what it’s being used <strong>for</strong>. A report based on the protocols and ports<br />
being used would do the job nicely.There are administrative uses <strong>for</strong> traffic<br />
statistics, but where does security fit in? Maybe the entire network has come<br />
to a crawl and you need to know why… fast.There are a lot of ways to<br />
determine the cause, but a nice graph showing that a particular workstation is<br />
generating all the traffic could help. If your reports clearly showed a particular<br />
workstation is uploading large amounts of data over a file sharing network,<br />
there could definitely be security implications. When it comes down to it,<br />
there are a number of metrics that could be useful <strong>for</strong> administering and<br />
securing your network.<br />
There are many commercial products to provide various levels of insight<br />
into your network data flows.There are also a large number of products, both<br />
commercial and free, to collect more-focused pieces of data (such as Web<br />
server statistics).The following list provides a brief summary of some of the<br />
www.syngress.com
<strong>Network</strong> Reporting and Troubleshooting • Chapter 7 391<br />
best general-purpose free offerings, with additional instructions on how to<br />
install and configure the products provided later in the chapter.<br />
■ Multi Router Traffic Grapher (MRTG) When it comes to<br />
generic network statistics using free software, MRTG is one of the<br />
most widely used.You can download it <strong>for</strong> free from<br />
http://oss.oetiker.ch/mrtg/. It will run on Unix/Linux, Windows, or<br />
Netware systems and is incorporated into many third-party applications.<br />
It derives its figures and graphs from simple network management<br />
protocol (SNMP) in<strong>for</strong>mation, so you will need to support<br />
SNMP on your devices to use MRTG or figure out some other<br />
means to get MRTG the data it needs. We will discuss SNMP concepts<br />
in more detail in the next section, so feel free to jump ahead if<br />
you are not com<strong>for</strong>table with SNMP. MRTG uses Perl<br />
(www.perl.org) on the back end <strong>for</strong> the real work, which is freely<br />
available and easy to install.<br />
■ MZL & Novatech TrafficStatistic TrafficStatistic (www.trafficstatistic.com)<br />
works a little differently than MRTG does; it gathers its<br />
data by sniffing all the network traffic. Much like an IDS, <strong>for</strong> traffic<br />
analyzers that work this way, placement within the network will be<br />
crucial to collecting the data you want to see. In a small environment,<br />
this should not be too difficult.TrafficStatistic offers only very<br />
minimal reporting data, consisting of total throughput (in, out, and<br />
combined) and a top-10 talkers (in, out, combined), and top-10 protocols<br />
(in, out, combined). If you need anything more than that, you<br />
can pay <strong>for</strong> additional plug-ins. Some of the plug-ins are rather af<strong>for</strong>dable.You<br />
can download the free version from<br />
www.trafficstatistic.com/pages/basemodules.html.TrafficStatistic<br />
might be a good option if you want something that’s very easy to<br />
install and get running and only provides the most basic of reporting<br />
data.<br />
■ PRTG Traffic Grapher This is probably the best free offering<br />
available at the time of this writing based on functionality and ease of<br />
use.You can download the free version from<br />
www.paessler.com/download/prtg. PRTG Traffic Grapher is one of<br />
www.syngress.com
392 Chapter 7 • <strong>Network</strong> Reporting and Troubleshooting<br />
the move versatile offerings and can extract statistical data from the<br />
NetFlow protocol, SNMP, and traffic sniffing.The setup is pretty<br />
painless and the graphs are well constructed by default.The limitation<br />
<strong>for</strong> the free version is that you can collect data from only three sensors,<br />
which is generous and will probably be plenty <strong>for</strong> a small<br />
environment.<br />
■ ntop Ntop (www.ntop.org) is a very powerful Web-based utility to<br />
analyze network traffic.You can run ntop on <strong>Free</strong>BSD, Linux, Solaris,<br />
SGI IRIX, AIX, and Microsoft Windows systems. Ntop does not<br />
natively include alarm and notification mechanisms; its sole purpose<br />
is the collection and reporting of traffic statistics, which it does very<br />
well.The level of detail offered by ntop exceeds that of any other<br />
utility reviewed here. Ntop is also completely free, with no restrictions<br />
or limitations.<br />
Collecting Data <strong>for</strong> Analysis<br />
As we discuss the various offerings <strong>for</strong> data analysis, a key consideration is<br />
how these products collect their data.The methods that are used will have a<br />
significant impact not only <strong>for</strong> what metrics are available <strong>for</strong> analysis, but also<br />
the analysis host’s placement within the network and resource requirements.<br />
What follows is a brief explanation of what data-collection methods are most<br />
common, along with some of their strengths and weaknesses.<br />
Sniffing data is one of the simplest methods of collecting data. Without any<br />
special configuration, sniffing the data means listening to all network traffic as<br />
it passes through the segment the host system is connected to.This technique<br />
is typically the most robust because in sniffing the traffic, the host has the<br />
capability to see every single packet. What is done with all this data is up to<br />
the analysis engine, but the focus here is that you are not grabbing select<br />
pieces of in<strong>for</strong>mation, you are collecting all the data, and then sorting through<br />
it.This method will be more processor intensive than most other methods,<br />
especially if there is a high volume of traffic.<br />
This method also requires precise placement of the host that will be collecting<br />
data, because it has no way to see the data unless it passes through the<br />
segment the host is on. Because of this, the physical location of the data-<br />
www.syngress.com
<strong>Network</strong> Reporting and Troubleshooting • Chapter 7 393<br />
collection system will likely be dictated by the network topology and location<br />
of traffic you wish to analyze. Besides resource requirements, the biggest<br />
drawback to this method is that it will collect data at the network level, with<br />
no regard <strong>for</strong> product-specific metrics. Although some analysis plat<strong>for</strong>ms can<br />
attempt to remedy this and per<strong>for</strong>m analysis on some higher-level in<strong>for</strong>mation<br />
contained in the packet, you will not be able to get the same level of<br />
upper-layer in<strong>for</strong>mation as you will with the other methods.<br />
SNMP is a protocol that is designed specifically to accommodate the<br />
management of network-enabled devices. Although this management can<br />
include making changes, in a data analysis context, SNMP is really only used<br />
to retrieve in<strong>for</strong>mation. When used this way, a network host requests certain<br />
in<strong>for</strong>mation from the SNMP-enabled device, which then sends the desired<br />
metrics in response. Alternatively, the SNMP device can be configured to<br />
send the metrics as a sort of alarm when they surpass a configured threshold.<br />
The in<strong>for</strong>mation collected is limited in that it is very focused.You can only<br />
ask a device <strong>for</strong> the specific statistics that it supports. While sniffing collects<br />
network layer data, SNMP can collect higher-layer, product-specific data that<br />
sniffing would not easily be able to gather. An example of product-specific<br />
counters is the currentAnonymousUsers and currentNonAnonymousUsers values<br />
from an IIS 6 server. Attempting to build in the logic <strong>for</strong> a sniffer to track<br />
each connection to the IIS server and monitor if that connection used<br />
authentication would be very burdensome. Instead, SNMP can provide these<br />
metrics directly from the IIS server, which is already tracking these things.<br />
SNMP can also be a chatty protocol in a large environment, contributing<br />
to network congestion. In a small environment this may not be an issue, but<br />
it’s something to be aware of.The primary benefit that SNMP has going <strong>for</strong><br />
it is that you do not need to place your data collector in the path of the data.<br />
You can place the system anywhere and then it will reach out and poll the<br />
devices (using a Get) <strong>for</strong> the desired data points.You can also configure an<br />
SNMP-enabled device to send the metrics to a collector when they reach a<br />
preconfigured threshold (via a TRAP). SNMP and sniffing provide different<br />
in<strong>for</strong>mation, which enables the two to complement each other’s capabilities.<br />
Both SNMP and sniffing will require <strong>for</strong>ethought and planning to implement<br />
mainly due to the fact that they each collect their statistics differently.<br />
www.syngress.com
394 Chapter 7 • <strong>Network</strong> Reporting and Troubleshooting<br />
NetFlow is a specially designed protocol <strong>for</strong> collecting network traffic<br />
statistics. NetFlow is primarily supported on Cisco devices, but some other<br />
manufacturers implement similar technologies, which exhibit varying levels<br />
of interoperability. NetFlow is similar in behavior to SNMP traps in that<br />
once a NetFlow-enabled device has been configured, it will then send<br />
traffic statistics back to the data collector.The difference is that while<br />
SNMP targets very specific metrics that must be supported by the SNMP<br />
device, NetFlow targets a very small subset of network traffic data. NetFlow<br />
gathers in<strong>for</strong>mation based on source and destination IP address, source and<br />
destination port number, the protocol being used, the type of service settings,<br />
and the device interface.These metrics lend themselves to gathering<br />
data on bandwidth utilization and network top talkers.This may sound like<br />
just what the doctor ordered; however, NetFlow is not supported on all<br />
devices, particularly the more economical models.This may mean that<br />
NetFlow is a less viable option <strong>for</strong> data collection in a small networking<br />
environment. If you do have network devices that can support it, a little<br />
research would be advisable to see if you can take advantage of NetFlow<br />
data.You can read more about NetFlow from here: www.cisco.com/en/<br />
US/products/ps6601/products_ios_protocol_group_home.html.<br />
NOTE<br />
RMON stands <strong>for</strong> remote monitoring, which is yet another network management<br />
protocol. RMON is a standard, described in RFC2819, which<br />
uses SNMP <strong>for</strong> its underlying functionality and an extensive set of new<br />
MIB objects <strong>for</strong> its data collection. Because it uses SNMP, RMON is<br />
vendor neutral, and RMON also takes steps to reduce network traffic<br />
where possible. While RMON support on enterprise class network analysis<br />
devices is good, it is virtually non-existent on free network analysis<br />
solutions.<br />
Understanding SNMP<br />
As you can see from the brief summaries above, a lot of network devices rely<br />
on SNMP to gather in<strong>for</strong>mation.This makes good sense, because SNMP is<br />
www.syngress.com
<strong>Network</strong> Reporting and Troubleshooting • Chapter 7 395<br />
one of the most widely used architectures <strong>for</strong> managing systems in a centralized<br />
fashion. Some basic vocabulary you should be familiar with includes the<br />
Management In<strong>for</strong>mation Base, or MIB.The MIB is basically a hierarchical treelike<br />
structure, serving as a catalog of settings that can be read or changed on<br />
the target system.The MIB consists of some portions that will be the same<br />
across all devices that support SNMP, and other portions that can be defined<br />
by individual vendors. Any specific object in the MIB can be referred to by<br />
its Object Identifier or OID, which is a numerical map to find the object in the<br />
MIB. As an example, the first highest level object in the MIB could be<br />
referred to as 1 and each of 3 objects one level lower would be 1.1, 1.2, and<br />
1.3.This pattern is continued, and due to the large number of objects, a typical<br />
OID would be 1.3.6.1.2.1.2.2.1.14.1. In addition to using the numerical<br />
<strong>for</strong>m to reference an OID, each subtree also has a corresponding name. <strong>Using</strong><br />
the previous example, 1.3.6.1 could also be referenced with<br />
.iso.org.dod.internet.The full named <strong>for</strong>m is used less often but you may<br />
encounter it. A managed device can be almost any network device that runs an<br />
agent that can translate device-specific management in<strong>for</strong>mation into an<br />
SNMP-compatible <strong>for</strong>mat.The <strong>Network</strong> Management Station is the device<br />
doing the managing, and can be referred to by many names depending on<br />
where you are reading.<br />
The basic operations the management station can per<strong>for</strong>m on the MIB<br />
objects are Get and Set.There are some variations such as GetNext, or GetBulk,<br />
but suffice it to say that what it all boils down to is using a Get to read a value<br />
in the MIB, and using Set to set the value. In the case of graphing network<br />
throughput all we are doing is a Get <strong>for</strong> relevant MIB objects.An example<br />
would be .1.3.6.1.2.1.2.2.1.14, which is interface inbound errors.Another key<br />
feature of SNMP management is the Trap. While the Get or Set operations are<br />
initiated by the management station, acting as the client to the managed<br />
device, the Trap is initiated by the managed device.An SNMP trap is basically<br />
an alert of some preconfigured condition, much like the notifications available<br />
in PRTG Traffic Grapher.Traps are sent from the managed device to the management<br />
station that was specified as a sort of alarm.<br />
If all this seems a bit confusing, don’t be alarmed. If you follow the examples<br />
below, a little hands on should help clear things up.There are also several<br />
free tools to browse a device MIB. <strong>Using</strong> one of these will probably be useful<br />
www.syngress.com
396 Chapter 7 • <strong>Network</strong> Reporting and Troubleshooting<br />
<strong>for</strong> understanding what the OIDs mean and how they are used. I would suggest<br />
using GetIf from www.wtcs.org/snmp4tpc/. It is a free MIB browser that<br />
is pretty easy to use. Once you get it installed, simply enter an IP address or<br />
host name in the Host name field, ensure that you have a read community<br />
string entered, and then click Start. I would recommend only entering a read<br />
community string to prevent you from accidentally being able to change any<br />
settings on the target device. If GetIf populates the various fields, then it is<br />
connected via SNMP. Click the MBrowser tab and look around. By<br />
expanding the plus symbols next to iso | org | dod | internet, you can<br />
browse to the desired OID. After you select the desired OID, click Start (to<br />
send a Get) and query the value.Try to locate 1.3.6.1.2.1.2.2.1.5 to see the<br />
network interface speed, <strong>for</strong> example.<br />
One final consideration concerning SNMP is that it is considered a<br />
“chatty” protocol.This is due to the process of querying multiple OIDS and<br />
receiving the responses. If you have a large SNMP infrastructure, and you are<br />
reading or writing a lot of SNMP MIB objects, the network traffic that can<br />
be generated can be significant. In a small environment, the SNMP traffic<br />
should be minimal, but it is a consideration to keep in mind.<br />
Tools & Traps…<br />
SNMP Security<br />
Be aware that SNMP has been around <strong>for</strong> a long time and as such there<br />
are three major versions. SNMP version one and version two have some<br />
considerable security flaws. The <strong>for</strong>emost is that they send their data<br />
unencrypted, which could include a whole host of data you would rather<br />
not be viewable by just anyone. A second consideration is that the limited<br />
authentication capabilities rely on a community string only to determine<br />
not only who can read the SNMP data, but who can set the SNMP values,<br />
effectively granting access to configure the SNMP-enabled device.<br />
SNMP version three mitigates many of these issues; however, it is not<br />
widely supported at this time. While SNMP v3 is often supported on the<br />
more prominent enterprise class plat<strong>for</strong>ms, support using free tools is<br />
practically non-existent. Given these facts, the best way to secure SNMP<br />
www.syngress.com<br />
Continued
<strong>Network</strong> Reporting and Troubleshooting • Chapter 7 397<br />
traffic is with a combination of access lists (where applicable) and some<br />
<strong>for</strong>m of encryption, such as IPsec.<br />
Configuring Multi Router Traffic Grapher<br />
To get started using Multi Router Traffic Grapher (MRTG) you will need to<br />
download the appropriate version <strong>for</strong> your operating system from<br />
http://oss.oetiker.ch/mrtg/. Another version, which is packaged with a few<br />
useful SNMP tools, is available from www.openxtra.co.uk/products/mrtgxtra.php.<br />
MRTG also requires Perl to function. Perl is a versatile scripting language<br />
that is in wide use. Perl is very rich in features and has modules to<br />
accomplish a variety of useful tasks.You can download ActivePerl from<br />
www.activestate.com/store/freedownload.aspx?prdGuid=81fbce82-6bd5-<br />
49bc-a915-08d58c2648ca. After you have both of these downloaded, follow<br />
these steps to configure them.<br />
1. Run the installation file <strong>for</strong> Perl.<br />
2. Choose the target installation directory.<br />
3. When prompted, allow the Installation Wizard to add Perl to the<br />
PATH environment variable and create the Perl file extension association.This<br />
way your Perl scripts can be executed without having to<br />
explicitly provide the full path to the Perl executable.<br />
4. Uncompress the MRTG Zip file to a directory of your choosing.<br />
5. From the \mrtg-2.14.7\bin\ directory, run perl mrtg. It won’t really<br />
do anything yet, because we still need to create the configuration file.<br />
This test is just to establish that Perl is in the PATH and can execute<br />
mrtg.<br />
6. From the \mrtg-2.14.7\bin\ directory, enter the following command:<br />
perl cfgmaker @ —global “WorkDir: C:\www\webroot” —output<br />
mrtg.cfg.This will create an initial configuration file.You can always<br />
use a different working directory.The working directory is where<br />
MRTG will place the HTML files, so it is typically in the directory<br />
structure of a Web server. If everything works properly, you will<br />
www.syngress.com
398 Chapter 7 • <strong>Network</strong> Reporting and Troubleshooting<br />
receive no output on the command line, but an mrtg.cfg file will<br />
have been generated in the \bin\ directory.<br />
If you get an error it probably means the community string is incorrect or<br />
the SNMP security settings are not enabling MRTG to connect. In either of<br />
those cases you can follow these steps to adjust the SNMP security settings on<br />
Windows XP.<br />
1. To edit the SNMP properties on a Windows XP system, open the<br />
Services plug-in (Start | Run | services.msc).<br />
2. Locate the SNMP service and double-click it. Click the Security<br />
tab.<br />
3. Ensure that the SNMP community strings are set correctly.<br />
4. If you do not wish to restrict which machines can use SNMP to<br />
communicate with the SNMP device, select the Accept SNMP<br />
packets from any host radio button. Otherwise, ensure that the<br />
system running MRTG is listed in the Accept SNMP packets<br />
from these hosts section and click OK.<br />
At this point you should have the mrtg file successfully created using cfgmaker.This<br />
file is only the starting point and will still require some manual<br />
editing be<strong>for</strong>e it’s really ready to use.<br />
1. You can now run MRTG using the following command from the<br />
\bin directory: perl mrtg mrtg.cfg.The first time you run the<br />
command you will get some warnings about missing log files.This is<br />
normal the first time it is run.<br />
2. Several files will be generated, the primary one being an HTML file<br />
beginning with the target host’s name/IP address. If you open this in<br />
a browser it will show the bytes in and bytes out traffic statistics.<br />
A sample of the MRTG HTML output is shown in Figure 7.1.<br />
www.syngress.com
Figure 7.1 MRTG HTML Output<br />
<strong>Network</strong> Reporting and Troubleshooting • Chapter 7 399<br />
By scheduling MRTG to run regularly, you can build a history of data<br />
points that are used to populate the graphs. MRTG can be run in daemon<br />
mode. In this mode, once you start MRTG it will not exit; it will stay running<br />
and continue to collect data.To do this requires two steps. First, edit the configuration<br />
file and add the line RunAsDaemon:Yes in the Global Properties<br />
section. Second, start MRTG using the following command from a command<br />
prompt: start /b perl mrtg mrtg.cfg.Yet another way to accumulate the<br />
needed data is to run MRTG as a Windows service using the SRVANY.exe and<br />
INSTSRV.exe Microsoft utilities. Given the wide range of options, there should<br />
be a way to execute MRTG that suits your environment.<br />
www.syngress.com
400 Chapter 7 • <strong>Network</strong> Reporting and Troubleshooting<br />
MRTG has the benefit that there are no limitations on the number of systems<br />
you can collect data from. Although throughput is the default metric, if<br />
you know the OID of the metric you wish to monitor, MRTG can collect<br />
and record historical data <strong>for</strong> that as well. Some good examples might be disk<br />
space, CPU utilization, network errors, and available memory. As an example<br />
of specifying the target OID, here is a target specification:<br />
Target[RTR]: 1.3.6.1.2.1.2.2.1.14.1&1.3.6.1.2.1.2.2.1.20.1:pass@192.168.1.25<br />
The OID <strong>for</strong>mat is &. In this example, you would be specifying a target device at IP address<br />
192.168.1.25, using the SNMP community string of “pass.”The OID to read<br />
would be 1.3.6.1.2.1.2.2.1.14.1 (input error counts) <strong>for</strong> one line on the<br />
graph, and 1.3.6.1.2.1.2.2.1.20.1 (output error counts) <strong>for</strong> the other line.The<br />
last number is the interface number. So the input error count on interface #2<br />
would be 1.3.6.1.2.1.2.2.1.14.2.The label in the brackets (in this example<br />
“RTR”) would be displayed on the graph page as a device name.<br />
As you can see, getting simple throughput graphs in an HTML page using<br />
MRTG is pretty painless. With a little work, you can configure MRTG to<br />
graph a wide range of useful in<strong>for</strong>mation. I would highly recommend doing<br />
some reading on the MRTG page with third-party documentation<br />
(http://oss.oetiker.ch/mrtg/3party.en.html).This page has many articles<br />
describing how to use MRTG in various circumstances.There are also links<br />
to many graphical utilities to help you manage your configuration files. For<br />
increased granularity in your graphs (as small as one-minute intervals) and<br />
more aesthetic graphs, check out RRDtool at http://oss.oetiker.ch/rrdtool/.<br />
Configuring MZL & Novatech TrafficStatistic<br />
While TrafficStatistic isn’t the most full-featured solution available, it is very easy<br />
to get running.TrafficStatistic collects its in<strong>for</strong>mation from network sniffing<br />
only, so you will need to place the host that is running TrafficStatistic in a location<br />
where it can see the network traffic you want to report on. Follow these<br />
steps to get TrafficStatistic running on an appropriately located host.<br />
1. Download and run the installation file from www.trafficstatistic.com.<br />
www.syngress.com
<strong>Network</strong> Reporting and Troubleshooting • Chapter 7 401<br />
2. During the setup, take note of the HTTPSrv Service port (Default<br />
7777) and the RunCPM Service Port (7778), altering them if<br />
desired. Other than that, you can simply accept the defaults.<br />
3. When the setup completes, allow it to Start the IP capture service,<br />
HTTP server service, and run the GUI monitor.<br />
4. If you have more than one network adapter listed in the Adapters<br />
pane, you will need to right-click the adapter you wish to collect<br />
data from and select Configuration.<br />
5. Ensure that Listen is checked and click OK.You have the option of<br />
specifying billing periods at this time as well.These are targeted <strong>for</strong><br />
ISPs and other providers who need statistics <strong>for</strong> certain billing<br />
periods to charge back to customers, but you could also configure<br />
them <strong>for</strong> your own reporting purposes. By default, the billing period<br />
will be from the current date with no end date.<br />
6. After you click OK you will be prompted to verify your adapter<br />
selection. Click Yes to confirm your choice.<br />
You should now be collecting data on the selected interface.The window<br />
should show several links in its default state. Click Create report, and then<br />
select Usage Development. In the next window, select the network interface<br />
you want to report on, and then click OK.The resultant report is shown<br />
below in Figure 7.2.<br />
If you are reporting on addresses that are not “private” addresses as defined<br />
in RFC1918, you might find you aren’t really interested in traffic that is local<br />
to your network, and a top-talker list that is not using Internet bandwidth<br />
may not be useful. In this case you have the capability to define the local<br />
address and tell TrafficStatistic not to use them in the reports it generates.This<br />
list doesn’t truly have to be “local,” but it does enable you to configure<br />
TrafficStatistic to not report on certain addresses.This could be handy if there<br />
are certain hosts that are high traffic as part of normal behavior and you want<br />
to exclude them from the reports altogether.To configure the list of local<br />
addresses and exclude them from the reports, follow these steps:<br />
www.syngress.com
402 Chapter 7 • <strong>Network</strong> Reporting and Troubleshooting<br />
Figure 7.2 MZL & Novatech TrafficStatistic Report<br />
1. Ensure that you have the proper network interface selected in the<br />
Adapters pane.<br />
2. Right-click the adapter and select Configuration.<br />
3. Check the box labeled Exclude traffic between local addresses.<br />
4. Click the button labeled Edit LAL (which stands fro local address list).<br />
5. Click the Add Host, Add Range, or Add Net button and enter<br />
the appropriate in<strong>for</strong>mation.<br />
6. When finished, click OK and OK again to completely finalize your<br />
changes.<br />
Note that these changes will not retroactively affect current data that has<br />
been collected.<br />
www.syngress.com
The business model that is used by the makers of the MZL & Novatech<br />
TrafficStatistic is to provide the basic monitor <strong>for</strong> free. If you want additional<br />
functionality, you can buy add-on plug-ins.The price of plug-ins varies<br />
greatly.The “Multi Optional Report” plug-in provides more-granular bandwidth<br />
reports that enable you to actually drill down and see what ports a particular<br />
host was using to generate the network traffic; it costs 50 Euro<br />
(approximately $66). If MZL & Novatech TrafficStatistic provides adequate<br />
reporting <strong>for</strong> your needs, and you have a spare machine you can place appropriately<br />
to sniff the network traffic, this might be a good fit.<br />
Configuring PRTG Traffic Grapher<br />
<strong>Network</strong> Reporting and Troubleshooting • Chapter 7 403<br />
PRTG Traffic Grapher is currently one of the best freeware options available.<br />
The same download is both the freeware version and a full-featured, timelimited<br />
trial version. PRTG is the only offering that supports data collection<br />
via sniffing, SNMP, and NetFlow.The graphs PRTG produces are very functional<br />
and a Web interface is provided that enables you to drill down into the<br />
data without having to be on the PRTG server or having to have any software<br />
installed.This means that if you want to collect data via sniffing, you<br />
don’t have to worry about providing remote access to the PRTG server; you<br />
can access the reports via any Web browser. Follow these steps to get PRTG<br />
up and running.<br />
1. Download the setup file from www.paessler.com/download/prtg and<br />
run it.<br />
2. Click Yes to confirm that you wish to install the freeware/trial version.<br />
3. Click Next.<br />
4. Select the I accept the agreement radio button to accept the<br />
license terms, and then click Next.<br />
5. Select the installation directory, and then click Next.<br />
6. On the Select Components screen you can select the defaults and<br />
then click Next.<br />
7. Choose if you wish <strong>for</strong> the Web interface to be enabled or not. If<br />
you do want the Web interface enabled, you can leave it at the<br />
www.syngress.com
404 Chapter 7 • <strong>Network</strong> Reporting and Troubleshooting<br />
defaults.The PRTG Watchdog service is a process that will monitor<br />
and restart the PRTG process if it terminates unexpectedly.You<br />
should leave this option enabled unless you have a specific reason not<br />
to. When satisfied with your selection, click Next.<br />
8. Click Finish to complete the installation and start PRTG.<br />
When you first run PRTG it will present you with a window<br />
where you can choose which version to install.The freeware edition<br />
(limited to three sensors), a trial edition (which will work <strong>for</strong> 30<br />
days), or you can purchase the commercial edition.This window is<br />
shown in Figure 7.3.You also have the option of comparing the various<br />
versions. In this example we’re looking at the freeware edition,<br />
so select the corresponding radio button (which should be the freeware<br />
version by default), click Next, and then Finish.<br />
Figure 7.3 Version Activation Screen<br />
9. During the next step you will see an empty window, with a button<br />
in the center that says Click here to add your first sensor! Click<br />
this button.<br />
10. Click Next<br />
11. Choose which data collection method you wish to use. In this context<br />
a sensor can be any of several data collection devices, including a<br />
router supporting NetFlow, a PC sniffing traffic, or any device that<br />
will support SNMP (including Windows systems). For this example I<br />
www.syngress.com
<strong>Network</strong> Reporting and Troubleshooting • Chapter 7 405<br />
am using a PC that will sniff the network traffic. If your network<br />
infrastructure devices don’t support SNMP data collection or<br />
NetFlow data, this may be your only option anyway. A final option is<br />
to make this installation a latency monitoring system. In this mode,<br />
the system will use pings to monitor the round trip time between<br />
this host and various other hosts on the network. After making your<br />
selection, click Next.<br />
12. On the next screen, enter the name of the sensor or leave the default<br />
value.<br />
13. Place a check next to the interface you wish to use and click Next.<br />
14. On the next screen you have the option of excluding certain traffic. I<br />
would suggest leaving the default of Monitor all traffic.The filters<br />
can be edited later if desired. Click Next.<br />
15. On the next screen you have the option of choosing what protocols<br />
to monitor (called channels).You can also define your own by<br />
clicking Edit Port Filter Library. For now, just click Select All<br />
and then Next. We will demonstrate creating your own “channel”<br />
shortly.<br />
16. On the next screen you can choose a grouping <strong>for</strong> you to add sensors<br />
under (with a limit of three sensors this grouping probably isn’t<br />
that critical, but if you had hundreds of devices it would be very<br />
useful).You can also select the scanning interval. Unless you have<br />
reason to do otherwise, simply leave the defaults in place and click<br />
Finish.<br />
The main PRTG Traffic Grapher console is shown in Figure 7.4.There<br />
are three panes.The leftmost is called Views and enables you to select<br />
between different layouts and to display different data.The middle one,<br />
Sensors, enables you to select different sensors to see their data.The rightmost<br />
pane is View: , and will change depending on what you<br />
select in the Views pane on the far left. While the same installation file is used<br />
<strong>for</strong> Windows XP and Windows 2000, once installed, the interfaces have slight<br />
differences.The differences are very minor and these instructions should work<br />
<strong>for</strong> either version.<br />
www.syngress.com
406 Chapter 7 • <strong>Network</strong> Reporting and Troubleshooting<br />
Figure 7.4 PRTG Traffic Grapher Application<br />
If you double-click on a given graph you will get an enlarged view that<br />
you can also use to edit the graph colors, units, and several other options. By<br />
default, the Web interface will be available on the IP of the machine you<br />
installed PRTG on, using port 8080. In this case you can open a browser to<br />
http://192.168.1.104:8080.The browser interface is shown in Figure 7.5.<br />
You should now be collecting data, which should be visible in the graphs.<br />
You might wish to customize a few features though. If you wish to disable, or<br />
modify the Web interface (and many other settings) navigate to Extras |<br />
Options. In the left pane, select Web Server as shown in Figure 7.6.<br />
Uncheck Enable Internal Webserver if you wish to disable the Web interface<br />
completely. If you plan on leaving the Web server enabled, you should<br />
place a check next to Write webserver access logfile.You should also<br />
change the Website Access Control to Limited Access. Because the<br />
sensor data and reports could contain confidential in<strong>for</strong>mation, the default of<br />
unlimited access to the Web interface is not secure.<br />
www.syngress.com
Figure 7.5 PRTG Web Interface<br />
Figure 7.6 Options (Web Server) Screen<br />
<strong>Network</strong> Reporting and Troubleshooting • Chapter 7 407<br />
After configuring the Web Server options, select Web Server | Users<br />
in the left pane.The default configuration will be to permit the PRTG<br />
administrator only. Note that this is not the local machine’s administrator<br />
account; this account is specific to PRTG.This might be all you need, but if<br />
you need to permit additional accounts click Add and enter the account<br />
in<strong>for</strong>mation followed by OK.<br />
If you want to send e-mail alerts, you will need to configure the mail<br />
server options within PRTG. Do this by navigating to Extras | Options |<br />
www.syngress.com
408 Chapter 7 • <strong>Network</strong> Reporting and Troubleshooting<br />
System | Mail Server. Enter the IP address or hostname <strong>for</strong> the SMTP<br />
server. Also enter an e-mail address, which will be the alert e-mail’s “from”<br />
address. If SMTP authentication is needed you can enter the username and<br />
password in this window as well. Once you are satisfied with your selection<br />
click OK to accept the changes.<br />
Now let’s suppose you have some custom applications, or even just some<br />
applications you want to specifically target in the reporting. Any<br />
protocols/ports that do not have a channel defined will fall in to the “other”<br />
channel.This could be applications that were designed in-house using a nonstandard<br />
protocol/port number, or a more common application that PRTG<br />
doesn’t have defined yet, such as syslog.You can add to the list of “channels”<br />
and define your own by following these steps.<br />
1. Navigate to Extras | Channel Library.The Channel Library<br />
window is shown in Figure 7.7<br />
Figure 7.7 Channel Library<br />
2. To add a specific graph entity <strong>for</strong> UDP-based syslog messages, <strong>for</strong><br />
example, click Add Filter.<br />
3. Enter a name <strong>for</strong> the channel, such as UDP_SYSLOG, <strong>for</strong> example,<br />
and click OK.The window will go back to the way it was, but the<br />
new channel name will appear in the list on the left.To edit the rules<br />
of the channel, select the channel to edit in the left pane, and then<br />
click in the right pane.<br />
www.syngress.com
TIP<br />
4. Enter Protocol[UDP] DestinationPort[514] and click OK.This<br />
adds the channel to the PRTG console but not to a specific sensor<br />
yet.<br />
Remember that the “channels” use port numbers to identify an application.<br />
The reliability of this identification depends on the application<br />
using a consistent port. There is nothing stopping someone from running<br />
a Web server on TCP23 instead of port TCP80, in which case it will<br />
show up in the graphs as Telnet traffic. Other applications, like instant<br />
messengers and file sharing applications in particular, will use a wide<br />
range of ports in an attempt to find one that will get through corporate<br />
firewalls. Creating a filter to identify these based solely on port numbers<br />
will be unreliable at best.<br />
5. Ensure that the proper sensor is selected in the Sensors pane and<br />
navigate to Edit | Edit.You’ll notice the next window is titled Edit<br />
Sensor.<br />
6. Select Channels in the left pane and click Add, as shown in Figure<br />
7.8.<br />
Figure 7.8 Edit Sensor<br />
<strong>Network</strong> Reporting and Troubleshooting • Chapter 7 409<br />
www.syngress.com
410 Chapter 7 • <strong>Network</strong> Reporting and Troubleshooting<br />
7. Select the new channel in the left pane and click OK.<br />
8. Use the Top, Up, Down, and Bottom buttons to place the<br />
channel in the order you desire.The channel matches work much<br />
like a firewall access control list in that PRTG will stop processing<br />
the list as soon as it finds a match. If there is no match it will categorize<br />
the traffic as “Other.”<br />
9. Click OK again to close the Edit Sensor window.<br />
You should now have a new channel displayed in the legend on the<br />
Graph tab.You are limited to only 254 channel definitions, though this limitation<br />
isn’t likely to pose much of an issue in a smaller environment.You<br />
should now have PRTG collecting data via sniffing.You can view the graphs<br />
from the Web page or the PRTG console.You also have defined any additional<br />
ports you want PRTG to recognize as a specific application as its own<br />
“channel.”The final configuration options I will discuss are that of configuring<br />
the alerts. Odds are good you won’t be able to sit and stare at the<br />
graphs all day and all night, so setting up some notifications might be one<br />
way to save time and energy, not to mention make you look like you have<br />
“network ESP” to your manager.To configure notifications and limits, navigate<br />
to Edit | Edit and select the Notifications & Limits tab.This tab<br />
provides the following options:<br />
■ Error Notification This will be triggered only if a sensor reports<br />
an error. Be aware that if there is a connectivity outage to the sensor,<br />
the sensor cannot report the error until connectivity is restored.<br />
■ Threshold Notification This is used to set specific upper or lower<br />
limits on a per-channel basis. An optional time span can be configured<br />
from seconds to days. If you do not specify a time span, the event will<br />
trigger as soon as the threshold is exceeded.<br />
■ Volume Notification This is similar to the threshold notification,<br />
except the volume is defined as an upper threshold and a minimum<br />
time span of one hour is required.<br />
■ Limit Line The limit line only serves to add a line to the 30-day<br />
graph.This could be useful, <strong>for</strong> example, to set the limit to 75<br />
www.syngress.com
<strong>Network</strong> Reporting and Troubleshooting • Chapter 7 411<br />
megabits on a 100-megabit network (75 percent) as a warning of<br />
when your infrastructure is reaching capacity.<br />
All the notifications have several options that can occur when triggered.<br />
You can choose to send an e-mail, per<strong>for</strong>m an HTTP Get request, execute a<br />
program/batch file, and change color of the graph background <strong>for</strong> each<br />
trigger.You can also combine multiple notification methods <strong>for</strong> a single<br />
trigger, such as changing the color of the graph background and sending an email.<br />
Given that PRTG includes a fully functional notification system, this<br />
really makes PRTG stand out among its peers as one of the best free network<br />
reporting tools available. As an example, let’s assume you have a single T1 line<br />
at work (1.5 megabits per second) and you want to send an e-mail if traffic<br />
levels <strong>for</strong> FTP exceed 1 megabit per second. Follow these steps to configure<br />
the notification.<br />
1. Select the desired sensor in the Sensors pane; then right-click and<br />
select Edit.<br />
2. Select Notifications & Limits in the left pane.<br />
3. Click the Add Threshold Notification button.<br />
4. Choose a name, such as 1Mb_FTP.<br />
5. In the Channel drop-down box, select FTP.<br />
6. In the Threshold section, select over, 1, megabit per second.<br />
7. Under Notification in the left pane, select Email.<br />
8. Place a check next to Send Email.<br />
9. In the Address field, enter the e-mail address of the e-mail recipient.<br />
10. Select the e-mail template you wish to use and click OK.<br />
11. In the Edit Sensor window, click OK to accept the changes.<br />
With the capability to execute an external program based on thresholds<br />
and volumes, the possibilities are near limitless. If you wanted to integrate<br />
your PRTG alerts into a syslog infrastructure, you could use the EXE notification<br />
method to execute a batch file that uses a command-line utility to<br />
generate a syslog message. I hope that I have demonstrated what a powerful<br />
and full-featured product PRTG is.There is very little functionality that is<br />
www.syngress.com
412 Chapter 7 • <strong>Network</strong> Reporting and Troubleshooting<br />
unavailable in the free product, and a limitation of three sensors will likely<br />
pose little problem to a smaller organization.The graphing and reporting<br />
capabilities are exceptionally robust <strong>for</strong> a free product.<br />
Configuring ntop<br />
Ntop will run on many operating systems and while the initial setup will<br />
vary, once you have ntop installed, the configuration and usage is primarily<br />
via a Web interface, so the data will be presented in a uni<strong>for</strong>m manner<br />
regardless of the underlying operating system.The ntop Web site offers multiple<br />
versions of the package <strong>for</strong> download. For Windows, they offer the<br />
source files, in which case you must compile them yourself, and they offer a<br />
pre-compiled binary distribution.The downside is that they have chosen to<br />
limit the precompiled version to capturing only the first 2000 packets, which<br />
makes it fairly useless to most people.This limitation does not exist in the<br />
Linux versions or the Windows source files. If compiling the source code is<br />
not a task your relish, you can download and install a precompiled version<br />
(meaning no 2000 packet capture limit!) of ntop from www.openxtra.co.uk,<br />
whose tagline is “network management <strong>for</strong> all.” OPENXTRA Limited has<br />
made available precompiled files <strong>for</strong> many popular packages, including<br />
Ethereal, MRTG, Net-SNMP, ntop, Windump, and Nmap. Follow these steps<br />
to install and configure the ntop package from OPENXTRA on a Windows<br />
host.<br />
1. Download the installation file and execute the file.<br />
2. Click Next on the welcome screen.<br />
3. Accept the license agreement and click Next.<br />
4. Enter a user name and organization if desired, choose whether the<br />
start menu entries will be made <strong>for</strong> all users or only the user who is<br />
running the Setup Wizard, and then click Next.<br />
5. Choose which components to install (the defaults are recommended)<br />
and the installation target directory and click Next.<br />
6. When the installation is complete, click Finish.<br />
After the installation is finished, you should have a new icon in the system<br />
tray called OPENXTRA Commander. Double-click this icon to open the<br />
www.syngress.com
<strong>Network</strong> Reporting and Troubleshooting • Chapter 7 413<br />
OPENXTRA Commander. If the NTop Service plug-in is not started, click<br />
Start in the Action column to start it. Once it is started, click the Launch<br />
action <strong>for</strong> the NTop plug-in, which will open your browser. If all is well, you<br />
will already be collecting some impressive data. If you have more than one<br />
network interface card (NIC) in the host, you may need to select the proper<br />
NIC. Do this by selecting Admin | Configure | Startup Options in the<br />
menu listing at the top of the page.You will notice that some menu entries<br />
have a small padlock icon in them; these are the Web pages that require a<br />
password to access.The default credentials <strong>for</strong> the XTRA package is user =<br />
admin, password = admin.The top of the page will contain a listing of your<br />
network interfaces.You can collect data from more than one interface if<br />
desired. If you change the selected interface, you will need to use the<br />
OPENXTRA Commander to stop and restart the NTop Service.<br />
The ntop FAQ can be a little hard to find; it’s located at www.ntopsupport.com/faq.html.<br />
Because ntop is focused only on displaying data in a<br />
<strong>for</strong>mat that is easy to drill down into, there is very little to configure once<br />
you have it working properly.There is a host of in<strong>for</strong>mation on the various<br />
screens. Any of the options under Summary can be useful. If you navigate to<br />
IP | Local | Ports Used you will see a screen similar to the one shown in<br />
Figure 7.9.This is just one of the many screens full of data that ntop provides;<br />
to include screen prints of all the available graphs and tables would require an<br />
inordinate number of pages.<br />
Many of the elements on the ntop pages are actually hyperlinked to additional<br />
pages so that you can drill down and obtain more and more detailed<br />
in<strong>for</strong>mation. Despite ntop’s lack of native support <strong>for</strong> alarms and other active<br />
actions, you can per<strong>for</strong>m several useful functions with a little customization.<br />
For example, the OPENXTRA Commander can be used to provide some<br />
handy links. By adding an appropriately configured .INI file to<br />
\OPENXTRA\Common\Plugins\, you can add entries to the Commander<br />
menu. For example, the following contents placed in an INI file would open<br />
Notepad.<br />
www.syngress.com
414 Chapter 7 • <strong>Network</strong> Reporting and Troubleshooting<br />
Figure 7.9 ntop IP Ports Used<br />
[APPLICATION]<br />
NAME=Notepad<br />
DESCRIPTION=Launch notepad<br />
ACTIONDESCRIPTION=Start<br />
VERSION=1.0.0<br />
COPYRIGHT=ESS<br />
COMMAND=notepad<br />
COMMANDARG=<br />
If you change the plug-in options, you will need to navigate to View |<br />
Plug-ins | Reload Plug-ins be<strong>for</strong>e your changes will take effect.There are<br />
also a few Perl scripts available in \OPENXTRA\NTopWin32\www\perl\.<br />
Any of these can be executed with perl from the command<br />
line. Here is a short summary of the provided Perl scripts.<br />
■ dumpFlat.pl This returns a flat listing of all the host data in ntop<br />
<strong>for</strong> the current time slice in a Perl-like <strong>for</strong>mat, and loops every<br />
minute (by default) generating current data. Usage in<strong>for</strong>mation is discussed<br />
further in this section.<br />
www.syngress.com
■ mapper.pl This script will use a host IP address to return a GIF flag<br />
of their location.This is what is used to generate the flag labels in<br />
various reports within ntop.<br />
■ remoteClient.pl This returns a Perl-like listing of all the host data<br />
in ntop <strong>for</strong> the current time slice. Usage in<strong>for</strong>mation is discussed further<br />
in this section.<br />
Being able to pull this raw data opens a host of possibilities. As a simple<br />
example, let’s suppose you wanted to produce a listing of all the hostnames<br />
that ntop currently knew about. Dumpflat.pl is configured by default to loop<br />
and dump the output on one-minute intervals. Remoteclient.pl is configured<br />
<strong>for</strong> a Perl-like output, which isn’t conducive to parsing in a DOS window.<br />
Copy the remoteClient.pl and rename it to raw.pl. Edit raw.pl and find the<br />
line that says<br />
$URL = "http://".$ntopHost.":".$ntopPort."/dumpData.html?language=perl";<br />
and change it to read<br />
<strong>Network</strong> Reporting and Troubleshooting • Chapter 7 415<br />
$URL = "http://".$ntopHost.":".$ntopPort."/dumpData.html?language=text";<br />
Now executing perl raw.pl will produce the raw data held in memory by<br />
ntop.This output is easily parsable because each host it knows about has all of<br />
its data on one line. Now the following command would parse the output from<br />
raw.pl and print the fourth field (the hostname) to the screen <strong>for</strong> each line.<br />
FOR /F "tokens=1-4 delims=|" %a in ('perl raw.pl') do @echo %d<br />
You could also use find.exe (perl raw.pl | find “192.168.1.99”) to pull out a<br />
line of data containing a known hostname or IP address. Once you have the raw<br />
data at your disposal you can per<strong>for</strong>m a wide variety of parsing options on it.<br />
In all likelihood, you will need to alter the list of defined port numbers.<br />
This serves two purposes in that it gives you greater insight into the applications<br />
being used on the network and reduces the amount of data that gets<br />
lumped into “other.” Changes to the port list will affect the output of all<br />
screens under the IP menu option.The “create your own custom port definitions”<br />
follow these steps.<br />
1. Create an application port list file in the<br />
\OPENXTRA\NTopWin32\etc\ directory, such as portlist.txt.<br />
www.syngress.com
416 Chapter 7 • <strong>Network</strong> Reporting and Troubleshooting<br />
2. Enter the applications you wish to be displayed in portlist.txt file.The<br />
following list can be placed in the portlist.txt.The <strong>for</strong>mat is name that<br />
will appear in ntop=port or portname, as defined by the OS, or a port range.<br />
The first three sections are what ntop will use if no portlist file is<br />
specified.<br />
## Default ntop portlist ##<br />
FTP=ftp|ftp-data<br />
HTTP=http|www|https|3128<br />
DNS=name|domain<br />
Telnet=telnet|login<br />
NBios-IP=netbios-ns|netbios-dgm|netbios-ssn<br />
Mail=pop-2|pop-3|pop3|kpop|smtp|imap|imap2<br />
DHCP-BOOTP=67-68<br />
SNMP=snmp|snmp-trap<br />
NNTP=nntp<br />
NFS=mount|pcnfs|bwnfs|nfsd|nfsd-status<br />
X11=6000-6010<br />
SSH=22<br />
## Default ntop Peer-to-Peer portlist ##<br />
Gnutella=6346|6347|6348<br />
Kazaa=1214<br />
WinMX=6699|7730<br />
DirectConnect=0 Dummy port as this is a pure P2P protocol<br />
eDonkey=4661-4665<br />
## Default ntop Instant Messenger ports ##<br />
Messenger=1863|5000|5001|5190-5193<br />
## Extra ports ##<br />
Syslog=514<br />
PCAnywhere=5631<br />
SQL=1433<br />
www.syngress.com
TIP<br />
<strong>Network</strong> Reporting and Troubleshooting • Chapter 7 417<br />
The Web page will display the application names in the same order as<br />
they are defined in the portlist.txt file. This means you should list the<br />
port definitions you want to see first earlier in the portlist file to keep<br />
from having to scroll the Web page to see them.<br />
3. After you have your portlist file created, navigate to Admin |<br />
Configure | Startup Options.<br />
4. Select the IP Preferences hyperlink.<br />
5. In the field TCP/UDP Protocols To Monitor, specify the full<br />
path to the portlist.txt file.<br />
6. Stop and restart the ntop process <strong>for</strong> the changes to take effect.<br />
You can restrict additional ntop pages. If you want a person to have to<br />
supply the user name and password to view any ntop pages, you can configure<br />
this by navigating to Admin | Configure | Protect URLs. Click Add<br />
URL at the bottom and then click the Add URL button without filling<br />
anything into the field.This will password protect all ntop pages.<br />
Ntop stores all of its active data in RAM, so if the system is reset, you lose<br />
all your data.There is a mechanism to store the data to disk. Be <strong>for</strong>ewarned<br />
that logging all the data to disk can consume a large amount of disk space, so<br />
it will require careful monitoring. Ntop stores the data in RRD files (roundrobin<br />
database).You can configure the RRD plug-in by navigating to<br />
Plugins | Round-Robin Databases | Describe.The active column<br />
should say Yes; if it says No, click No to toggle it to active.To help you decide<br />
which reporting tools to focus your energies on,Table 7.1 highlights the various<br />
features of the utilities we discussed.<br />
www.syngress.com
418 Chapter 7 • <strong>Network</strong> Reporting and Troubleshooting<br />
Table 7.1 Reporting Tool Features<br />
Enabling SNMP on Windows Hosts<br />
All that’s a lot to digest, so let’s enable the SNMP agent on a Windows system<br />
and see what it can do <strong>for</strong> us.To enable the SNMP agent on Windows XP,<br />
follow these steps.<br />
1. Navigate to Start | Settings | Control Panel.<br />
2. Open Add or Remove Programs<br />
3. Select Add/Remote Windows Components on the left side of<br />
the window.<br />
4. Highlight Management and Monitoring Tools, but do not check<br />
it.<br />
5. Click Details.<br />
6. Place a check next to Simple <strong>Network</strong> Management Protocol<br />
and click OK.<br />
7. Click Next and then click Finish<br />
Next you need to configure some specific SNMP settings on the<br />
Windows host. Do this by following these steps.<br />
1. Click Start | Run and enter services.msc to open the services<br />
snap-in.<br />
www.syngress.com
<strong>Network</strong> Reporting and Troubleshooting • Chapter 7 419<br />
2. Double-click the SNMP Service entry in the right pane.<br />
3. Select the Agent tab.<br />
4. Enter the Contact in<strong>for</strong>mation and the Location in<strong>for</strong>mation.<br />
These are used as identifiers <strong>for</strong> the system when viewed from the<br />
management console.<br />
5. Open your MMC.<br />
6. Select Computer Management in the left pane.<br />
7. Expand this to Computer Management | Services and<br />
Applications | Services.<br />
8. In the Service section, place a check next to the types of SNMP<br />
MIBs you want to use.<br />
9. Select the Traps tab.<br />
10. In the Community name drop-down list, enter a community<br />
name, also called a community string, and then click Add to list.A<br />
community string is very much like a password and serves to limit<br />
who can use SNMP on a given device.<br />
11. In the Trap Destinations section, click Add and enter the system<br />
you want to send traps to.This would be the SNMP management<br />
console.To use a previous example, this could be the IP address of<br />
the system running PRTG Traffic Grapher.<br />
12. Select the Security tab.<br />
13. Highlight the default community name of public and click<br />
Remove. If you leave public as a READ ONLY community, anyone<br />
will be able to read the SNMP data of your system.The default on<br />
most systems is “public” with read-only access and “private” with full<br />
control. As is always the case, you don’t want to use the defaults when<br />
it comes to passwords.<br />
14. Click Add and enter a Read Only Community Name, and click<br />
Add again.<br />
15. Repeat this process and add a community name with read/write<br />
access.<br />
www.syngress.com
420 Chapter 7 • <strong>Network</strong> Reporting and Troubleshooting<br />
16. Select the radio button next to Accept SNMP packets from<br />
these hosts and click Add.<br />
17. Enter an IP address or host name and click Add. In this example I<br />
entered the same IP as my PRTG management console.<br />
18. Click Apply and OK.<br />
<strong>Your</strong> Windows system is now ready to be managed using SNMP; all you<br />
need is a management console. In this case we can add it as an additional<br />
sensor to our PRTG system (remember the freeware version has a limit of<br />
three sensors).To add the Windows host to your PRTG console, follow these<br />
steps.<br />
1. Open the PRTG application.<br />
2. In the Sensors pane, highlight All Sensors.<br />
3. Right-click and select Add Sensor.This will start the Add Sensor<br />
Wizard.<br />
4. Click Next.<br />
5. Select SNMP as your data acquisition type and click Next.<br />
6. The default selection of Standard Traffic Sensor will enable you to<br />
see how much bandwidth is being used by the Windows system<br />
inbound and outbound.The SNMP Helper Sensor will enable you<br />
to view some more-detailed Windows-specific counters. For basic<br />
monitoring select Standard Traffic Sensor and click Next.<br />
7. In the Device Selection window, enter a name <strong>for</strong> the sensor and<br />
the IP address. Choose your SNMP version (choose the highest one<br />
your device will support). Enter the community string to use <strong>for</strong> that<br />
sensor, and then click Next. It will connect to the sensor and enable<br />
you to select which interface to monitor.<br />
8. Place a check next to the appropriate interface.<br />
9. Choose which values to monitor (Bandwidth is the default) and click<br />
Next.<br />
www.syngress.com
10. This final screen enables you to choose a group <strong>for</strong> the sensor listing<br />
and configure the scanning interval.The defaults are probably okay, so<br />
simply click Finish.<br />
You should see a new set of graphs, with bandwidth in and bandwidth<br />
out, <strong>for</strong> the newly added sensor.To add a sensor that uses the SNMP helper<br />
freeware, the steps are mostly the same.The only significant difference is that<br />
you need to run the Paessler SNMP Helper Setup.exe file on the system to<br />
be monitored.This setup file can be found in the same directory that PRTG<br />
was installed in.The setup file has no real configuration options and is very<br />
easy to install.<br />
After installing the SNMP helper, proceed with adding the sensor following<br />
the steps above, with the following changes. When you select the type<br />
of SNMP to use, simply select SNMP Helper Sensor, choose the SNMP<br />
Helper <strong>Free</strong>ware in the drop-down box, and then click Next.The PRTG<br />
console will connect to the agent and present you with a list of all the possible<br />
values you can monitor. After making your selections, click Next.<br />
Enabling SNMP on Linux Hosts<br />
<strong>Network</strong> Reporting and Troubleshooting • Chapter 7 421<br />
If you want to collect data using SNMP from a Linux host, the first step is to<br />
see if the SNMP daemon (snmpd) is already installed.You can enter chkconfig<br />
—list snmpd, which will list the snmp daemon if it is installed, and indicate<br />
which run levels it is configured to start in. If the daemon is not installed, it<br />
can be installed using whatever method is appropriate <strong>for</strong> your distribution.<br />
On Fedora Core 5, <strong>for</strong> example, all it takes is yum install net-snmp.The daemons<br />
and some utilities are included in the net-snmp package.There is also<br />
the net-snmp-utils package, which includes utilities aimed more at using<br />
SNMP, such as MIB browsers and such, but does not include the daemon.<br />
After you have snmpd installed, it needs to be configured. We will discuss<br />
two ways to configure snmpd.The current version of the daemon is very<br />
robust, which has the side effect of including a very complicated configuration<br />
file located at /etc/snmp/snmpd.conf.The simplest way to get SNMP up<br />
and running to just collect data, is to save the sample snmpd.conf file under a<br />
new name and create your own.The new snmpd.conf can contain only the<br />
single line rocommunity labcommunitystring. In this example, the read-only com-<br />
www.syngress.com
422 Chapter 7 • <strong>Network</strong> Reporting and Troubleshooting<br />
munity string would be set to labcommunitystring. Obviously, you should select<br />
a secure password of your own.This type of configuration file is quick and<br />
easy but not overly secure.<br />
You could also use the netfilter firewall and/or tcpwrappers to restrict<br />
SNMP access based on the IP address of the communicating system. Another<br />
option is to use the access control built into the SNMP daemon.To configure<br />
the snmpd access control, you will need to edit the snmpd.conf file. Granting<br />
access to the SNMP MIB requires four basic steps, which are all done in the<br />
configuration file.The example below includes a variety of configuration settings<br />
to hopefully provide a good idea of the possibilities. Add the following<br />
lines to the configuration file.<br />
## sec.name source community<br />
## -------------------------------------------------------com2sec<br />
local localhost snmplocalstring<br />
com2sec internal 10.0.0.0/8 snmpcommunitystring<br />
com2sec admin_net 192.168.1.0/24 snmpadminstring<br />
These lines serve to map a community name to a security name, thus the<br />
com2sec directive.The security name is just a name to use to reference the<br />
access you are granting.You can use whatever name you like.The source is<br />
the hosts that will use that access profile.You can also use a source of default,<br />
which will mean any IP address.The community is the community string to<br />
be used <strong>for</strong> that access. Note that there is no differentiation made between a<br />
read-only community string and a read-write community string.This is<br />
because the access that the security name will have will be defined later in<br />
the configuration file.<br />
## Access.group.name sec.model sec.name<br />
## -------------------------------------------------------group<br />
Full_Group v1 local<br />
group RO_Group v2c internal<br />
group Full_Group any admin_net<br />
The next section maps a security name into a group name using the group<br />
directive. In this case, we mapped both the local security name and the<br />
admin_net security name to the same group (Full_Group).The sec.model<br />
determines which version of SNMP (1 or 2) will be used/allowed. <strong>Using</strong> version<br />
3 requires a different configuration altogether.<br />
www.syngress.com
<strong>Network</strong> Reporting and Troubleshooting • Chapter 7 423<br />
## MIB.view.name incl/excl MIB.subtree mask<br />
## -------------------------------------------------------view<br />
all-mibs included .1<br />
view limited included .1.3.6.1.2.1.2<br />
This section defines a view, which basically defines a portion of the MIB<br />
tree.The all-mibs view includes the entire MIB tree, whereas the limited view<br />
includes only the .1.3.6.1.2.1.2 section, which consists of the network interfaces<br />
and related metrics.You can configure a given view’s MIB subtree to be<br />
included or excluded. By excluding, you can omit certain sensitive portions of<br />
the MIB tree.You can use the MIB tree name instead of the number if<br />
desired. In the example used above, you could use included .1.3.6.1.2.1.2 or<br />
you could instead use this command: included .iso.org.dod.internet.mgmt.mib-<br />
2.interfaces.The mask is an optional bit mask on the MIB tree that specifies<br />
which bits to match <strong>for</strong> the indicated access.The default (without the mask)<br />
is to match only the bits that are indicated in the view.You would most commonly<br />
use the mask to match a particular row or rows in a table. So in this<br />
example, the all-mibs view has access to .1 and everything under it.<br />
## MIB.group.name context sec.model sec.level prefix read write notif<br />
## ----------------------------------------------------------------------access<br />
Full_Group "" any noauth 0 all-mibs none none<br />
access RO_Group "" any noauth 0 limited none none<br />
The final section is where you define access <strong>for</strong> a group name to a view.<br />
The context is optional and no context,“” is the default. For SNMP v1 or v2,<br />
the sec.level needs to be noauth. Under the read and write column, you define<br />
the view.The notify column is where you would specify the capability to<br />
send traps, except the notify view is not currently implemented.<br />
After making your changes, you will need to restart the snmpd <strong>for</strong> the<br />
changes to take effect. So what does all this accomplish? The MIB is accessible<br />
<strong>for</strong>m the localhost using the snmplocalstring as the community string, which<br />
will provide read access to the entire MIB tree. Users from the 10.0.0.0/8<br />
networks, which are assumed to be the bulk of the user base, can access the<br />
MIB using the snmpcommunitystring community string, and they will have<br />
read-only access to the network interface subtree only. Hosts on the<br />
192.168.1.0/24 subnet, a network management subnet <strong>for</strong> example, can use<br />
www.syngress.com
424 Chapter 7 • <strong>Network</strong> Reporting and Troubleshooting<br />
the snmpadminstring community string to gain read-only access to the entire<br />
MIB tree.<br />
After all this configuring you might be wondering what the difference is<br />
between one version of SNMP and another. As the protocol has matured, it<br />
has gone through several changes, the majority of which revolve around security.The<br />
basic differences between one version and another are highlighted<br />
<strong>for</strong> your reference.<br />
■ SNMP v1 Included only basic functionality and sent SNMP data<br />
using clear text.<br />
■ SNMP v2 Mostly introduced security features, including two new<br />
branches of the MIB tree, 1.3.6.1.5 (security) and 1.3.6.1.6<br />
(SNMPv2). Introduced the GetBulk operation, used <strong>for</strong> requesting<br />
large amounts of data in a single request. SNMP v2 also sends in<strong>for</strong>mation<br />
using clear text.<br />
■ SNMPv3 Introduced the digest authentication protocol, which is used<br />
<strong>for</strong> data integrity, ensuring that the message that was sent is the same<br />
one that is received using MD5. Introduced the symmetric privacy protocol<br />
to ensure data confidentiality using Data Encryption Standard<br />
(DES) encryption. Note that DES is not generally considered secure<br />
by modern standards and was replaced with triple DES (3DES), and,<br />
more recently, with Advanced Encryption Standard (AES). Introduced<br />
the User-based Security Model (USM) and the View-based Access Control<br />
Model (VACM).<br />
Troubleshooting <strong>Network</strong> Problems<br />
Inevitably, sooner or later, something will go wrong on your network. In most<br />
cases you can troubleshoot the problem using standard resources such as the<br />
error message and syslog logs.There will be those rare times, however, where<br />
the standard in<strong>for</strong>mation sources just aren’t giving you enough in<strong>for</strong>mation to<br />
really know what is going on. In those cases, a network sniffer may be your<br />
only option. A sniffer will basically look at all the traffic at the network layer<br />
in its raw <strong>for</strong>m and collect it.This means you can see the data the way your<br />
network card sees it, which is very different from how the final product looks<br />
www.syngress.com
to the application. Different sniffers provide varying levels of sophistication<br />
and features.<br />
The primary difference between a commercial sniffer and a free one will<br />
be in remote management and in some cases advanced analysis options. In<br />
many cases the sniffer will require special drivers to be installed in order to<br />
sniff traffic.The sniffer’s role is mostly to simply display the data it collects. It<br />
is up to the human user to interpret the data and determine what it means in<br />
the big picture. For this reason, the analysis of sniffer output (often called<br />
traces) is typically reserved <strong>for</strong> experienced networking experts. With a little<br />
basic in<strong>for</strong>mation, however, a sniffer can often provide a quick look into the<br />
otherwise unseen background of network communications. We will explain<br />
the installation and basic use of GUI sniffers and a couple command-line sniffers<br />
as well.<br />
<strong>Using</strong> a GUI Sniffer<br />
<strong>Network</strong> Reporting and Troubleshooting • Chapter 7 425<br />
If you search on Google <strong>for</strong> a network sniffer, one of the first hits will be<br />
Ethereal. Ethereal is one of the oldest, most full-featured, and functional sniffers<br />
available <strong>for</strong> free. While Ethereal still has a Web site up at<br />
www.ethereal.com, the project has taken a new turn and is now known as<br />
Wireshark (www.wireshark.org). Wireshark has some features not found in<br />
many of the other free sniffers that are available, such as conversation<br />
reassembly and a capture display/filter syntax that is more advanced than<br />
most. Wireshark does require the WinPCap drivers, which are very simple to<br />
set up. WinPcap can be downloaded from www.winpcap.org. We walked<br />
through the installation of WinPcap in detail in Chapter 4,“Configuring an<br />
Intrusion Detection System,” so we will only cover it at a high level here.The<br />
WinPcap drivers enable a greater degree of access and control to the network<br />
communications at the packet level than is available by going through the<br />
Windows network drivers. For this reason, many third-party utilities that do<br />
heavy packet manipulation make use of WinPcap. Follow these steps to install<br />
Wireshark on a Windows system.<br />
1. Go to www.wireshark.org and download the Windows installer file.<br />
2. Run the setup executable. During the installation, you will be asked<br />
if you want to install the WinPcap drivers. Unless you already have<br />
www.syngress.com
426 Chapter 7 • <strong>Network</strong> Reporting and Troubleshooting<br />
the latest WinPcap drivers installed, leave the default checked, which<br />
will install the WinPcap drivers.<br />
3. Start Wireshark manually or allow the Setup Wizard to start<br />
Wireshark when it completes.<br />
4. If you have more than one interface, navigate to Capture |<br />
Interfaces.This will provide you a listing of interfaces Wireshark can<br />
use.<br />
5. Choose the one you wish to capture on and click Capture.<br />
You are now sniffing the network. Remember, in a switched network you<br />
will only see traffic going to or from your machine, and broadcast traffic.You<br />
will need to enable port mirroring to see all traffic going through a switch.<br />
Wireshark will show a small window with statistics on the traffic it has collected,<br />
as shown in Figure 7.10.<br />
Figure 7.10 Wireshark Traffic Statistics<br />
When you click Stop, the statistics window will close and the capture<br />
window will be populated with the data you have collected.The layout of<br />
Wireshark is similar to most packet capture programs.The top pane, or packet<br />
list pane, shows an entry <strong>for</strong> each packet, with some high-level in<strong>for</strong>mation<br />
like source and destination hosts, protocol, and some other basic in<strong>for</strong>mation.<br />
The second (middle) pane, known as the packet details pane, shows the packet<br />
contents, by header. Each header can be expanded to show more detail, which<br />
also enables you to expand the next header.The bottom pane, or packet bytes<br />
www.syngress.com
pane, shows the raw packet data in hex and ASCII (plain text).The capture<br />
console is shown in Figure 7.11.<br />
Figure 7.11 Wireshark Capture Console<br />
<strong>Network</strong> Reporting and Troubleshooting • Chapter 7 427<br />
The packets will be color coded by protocol. A useful feature of<br />
Wireshark is the conversation reassembly.You will notice packet number 12 is<br />
the initial packet on a Telnet connection. If you right-click one of the Telnet<br />
packets and select Follow TCP Stream, Wireshark will use the protocol<br />
in<strong>for</strong>mation and sequence numbers to compile a list of the packet data pertaining<br />
to that conversation. If you would rather see the packets pertaining to<br />
that conversation and not just the data, right-click on a Telnet packet and<br />
select Conversation Filter| TCP.This will change the display filter to show<br />
only the packets involved in the Telnet conversation.These can be very powerful<br />
and save a lot of time when trying to follow a conversation and see<br />
where an error might be.<br />
www.syngress.com
428 Chapter 7 • <strong>Network</strong> Reporting and Troubleshooting<br />
Many Linux distributions come with Ethereal installed by default. Ethereal<br />
is the previous version of Wireshark and in most cases will do what you want<br />
without needing to upgrade. If you want the most recent version, you can<br />
install Wireshark. Unlike Windows systems, which are pretty consistent when<br />
it comes to installing software, on Linux there are many different methods<br />
that can be used <strong>for</strong> installing software. Some are specific to that distribution,<br />
while others may be found on many different distributions. One of the most<br />
common methods <strong>for</strong> installing software from the command line is by using<br />
the RPM Package Manager (RPM). RPM is supported on distributions that<br />
are based on Red Hat Linux and its various flavors.This will include a large<br />
number of distributions including some live CDs.You can view a list of all<br />
installed packages by entering:<br />
rpm –q –a<br />
To install the Wireshark package on Linux, you need to first obtain the<br />
package file itself (from www.redhat.com/download/mirror.html, <strong>for</strong><br />
example) or use the RPMs that were included on the installation CDs <strong>for</strong><br />
your distribution. Different distributions may have packages specific to their<br />
configuration, or a given distribution may not support the newest version of a<br />
given piece of software.The first step is to research the latest version of<br />
Wireshark your Linux distribution can use and download the .RPM file.<br />
Then enter the following command to install Wireshark (<strong>for</strong> this example, it<br />
is Wireshark version 0.99.2-1):<br />
rpm –i wireshark-0.99.2-1.src.rpm<br />
If the installation is successful, you should see output similar to the following:<br />
Preparing... ########################################### [100%]<br />
1: wireshark-0.99.2-1 ########################################### [100%]<br />
You can even install a package directly from the Internet by specifying the<br />
full FTP or HTTP path as the path to the RPM as follows.<br />
rpm –i ftp://somesite.com/5/i386/RPMS/wireshark-0.99.2-1.src.rpm<br />
www.syngress.com
To uninstall the package you must use the package name, which is not the<br />
same as the name of the RPM file.To uninstall wireshark-0.99.2-1, enter the<br />
following command, using the –e switch <strong>for</strong> erase:<br />
rpm –e wireshark-0.99.2-1<br />
TIP<br />
<strong>Network</strong> Reporting and Troubleshooting • Chapter 7 429<br />
Due to the number of different methods to support software installation<br />
on the different versions of Linux, I couldn’t possibly discuss them all<br />
here. The home page <strong>for</strong> your particular distribution will be the best<br />
place to start when it comes to getting instructions on installing new<br />
software packages. As just one example, here is a brief summary of the<br />
many tools available <strong>for</strong> software installation on just Fedora Core 5. You<br />
will need to research which methods are available on the distribution<br />
you are using.<br />
■ pup GUI tool <strong>for</strong> updating software, accessed at Applications |<br />
System Tools | Software Updater.<br />
■ pirut GUI tool <strong>for</strong> managing software packages, accessed at<br />
Applications | Add/Remove Software.<br />
■ RPM Command-line tool <strong>for</strong> managing software packages.<br />
■ yum (Yellowdog Updater, Modified) command-line tool <strong>for</strong><br />
managing software packages.<br />
■ yum Extender A GUI <strong>for</strong> yum (install with yum install yumex).<br />
To make things more confusing, all the package management systems<br />
work slightly differently. Pirut and yum will automatically ensure you have<br />
the most current version of a package. Both of these will also automatically<br />
check and install any dependencies <strong>for</strong> the software you install. RPM<br />
does not include this functionality; you will need to check <strong>for</strong> dependencies<br />
manually when using rpm. Yum only works on RPM-based systems,<br />
and not all systems will have yum available or installed; there<strong>for</strong>e, it is suggested<br />
that you understand how to manage packages with RPM even if<br />
you choose not to use RPM <strong>for</strong> your day-to-day management.<br />
Wireshark offers some features that you would normally have to pay a lot<br />
of money <strong>for</strong> and that the other free sniffers don’t have. Let’s suppose you<br />
have captured some packets and you want to see the Telnet conversation.<br />
www.syngress.com
430 Chapter 7 • <strong>Network</strong> Reporting and Troubleshooting<br />
Locate any single Telnet packet, either through browsing in the main window,<br />
or by using a filter.To filter <strong>for</strong> all TCP packets with a source or destination<br />
port of 23 (Telnet), click in the Filter field and enter tcp.port == 23 followed<br />
by Apply. Although the filtering syntax looks pretty intuitive, there<br />
will be times when you don’t know what key words you need to use.You can<br />
construct the filter by clicking the Expression button.This will bring up the<br />
window shown in Figure 7.12.<br />
Figure 7.12 Wireshark Filters<br />
Navigate to TCP in the Field name pane, then expand the TCP subtree<br />
and select tcp.port. After highlighting a selection in the Field name field,<br />
select a logical operator in the Relation field, such as “==” <strong>for</strong> equals.<br />
Finally, enter the desired value (in this case 23) in the Value field.Then click<br />
OK.This will place the filter expression in the Filter field.You must then<br />
click Apply to apply the filter to the packet display.You should now have a<br />
list of only Telnet packets. If you select any one of the Telnet data packets<br />
(Wireshark will label them as such in the Info column) and right-click, you<br />
can select Follow TCP Stream. A separate window will open as shown in<br />
Figure 7.13, which displays all the data portions of the packets <strong>for</strong> that<br />
conversation.<br />
www.syngress.com
Figure 7.13 Wireshark Follow TCP Stream<br />
The complete output from the Follow TCP Stream window is included<br />
to give you an idea of what a Telnet login looks like.This also illustrates the<br />
fact that Telnet does not employ any encryption, making it an insecure choice<br />
<strong>for</strong> remote access except over trusted networks.<br />
..'..%........... ..!..".....<br />
..%........'........<br />
..'.....'..SFUTLNTVER.SFUTLNTMODE....%.......... ..!..".....<br />
.......].........<br />
..'..DISPLAY.Knoppix:0.0....'.....%....<br />
Welcome to Microsoft Telnet Service<br />
login:<br />
password:<br />
.....<br />
....xterm.<br />
.....<br />
....xterm.<br />
*===============================================================<br />
Welcome to Microsoft Telnet Server.<br />
*===============================================================<br />
C:\Documents and Settings\Eric><br />
Volume in drive C is D1P1_OS<br />
Volume Serial Number is 2037-12FA<br />
<strong>Network</strong> Reporting and Troubleshooting • Chapter 7 431<br />
www.syngress.com
432 Chapter 7 • <strong>Network</strong> Reporting and Troubleshooting<br />
Directory of C:\Documents and Settings\Eric<br />
12/08/2003 06:52 PM .<br />
12/08/2003 06:52 PM ..<br />
05/02/2005 11:30 PM My Documents<br />
05/02/2005 11:30 PM Favorites<br />
12/08/2003 06:44 PM Desktop<br />
12/08/2003 06:44 PM Start Menu<br />
12/23/2003 12:15 AM WINDOWS<br />
02/16/2006 08:46 PM .housecall<br />
06/13/2006 08:15 PM SecurityScans<br />
06/24/2006 06:43 PM .ssh<br />
09/19/2006 03:27 PM 600 PUTTY.RND<br />
09/04/2006 04:22 PM Tenable<br />
1 File(s) 600 bytes<br />
11 Dir(s) 2,719,571,968 bytes free<br />
C:\Documents and Settings\Eric><br />
I did remove some blank lines to conserve space, but other than that, this<br />
is the stream in its entirety.You can see the start of the conversation included<br />
DISPLAY.Knoppix, which was the system I was connecting from.The next<br />
line was a Welcome to Microsoft Telnet Service, which indicated the target host<br />
was a Microsoft system running the Telnet service. I was prompted <strong>for</strong> a login<br />
ID (I used eric) and a password. After the login was complete, I used the dir<br />
command to get a directory listing of the remote machine.<br />
You will notice the user name and password are not listed in the follow<br />
TCP stream output. Because Telnet is a clear text protocol, the user name and<br />
password used is available in the data portions.Telnet will send a packet <strong>for</strong><br />
each character you type, so with a user ID of “eric,” one packet will contain<br />
only an “e” <strong>for</strong> the data, another an “r,” another an “i,” and finally a “c.”To see<br />
this in the Packet Capture window, use the top pane to select a Telnet data<br />
packet. In the center packets, you can view the details <strong>for</strong> the various packet<br />
layers. At the bottom will be Telnet. Click the plus sign and it will expand to<br />
show the data portion of the packet. Figure 7.14 shows that packet #179<br />
contains the “e” <strong>for</strong> its data payload, which is the beginning of me entering<br />
my login ID.<br />
www.syngress.com
Figure 7.14 Wireshark Telnet Data<br />
You can also search <strong>for</strong> a string within the capture by navigating to Edit |<br />
Find Packet.You then have the option of searching via a display filter, hex<br />
value, or string. If you were to select String and then enter any ASCII string<br />
in the provided field, it would search the data portion of all the captured<br />
packets.This can help you quickly locate a conversation of interest, such as<br />
searching <strong>for</strong> a URL to find an HTTP conversation you want to inspect.<br />
You’ll notice that if you were to search <strong>for</strong> a string containing a Telnet user<br />
logon ID “eric,” that you would never find it, because it is sent one character<br />
at a time. If you didn’t know Telnet worked this way, you might be confused<br />
and incorrectly conclude that Wireshark did not capture your Telnet session.<br />
As you can see, analyzing sniffer data is not really something that you can just<br />
read about. Being able to get useful in<strong>for</strong>mation and troubleshoot issues from<br />
a packet capture takes experience and an understanding of the how the protocols<br />
in question behave on the network.<br />
<strong>Using</strong> a Command-Line Sniffer<br />
<strong>Network</strong> Reporting and Troubleshooting • Chapter 7 433<br />
Sometimes you need a sniffer with a little less overhead. A command-line<br />
sniffer has less to process and will place less of a load on the system you are<br />
running it on. Sometimes you might be in a situation where you only have<br />
console (command-line) access and can’t use a GUI tool. At these times a<br />
command-line sniffer might be able to provide the sneak peek into the net-<br />
www.syngress.com
434 Chapter 7 • <strong>Network</strong> Reporting and Troubleshooting<br />
work traffic you’re looking <strong>for</strong>. I will briefly explain the use of a few command-line<br />
sniffers. One of them will require the WinPcap drivers, the other<br />
does not if you are using it on a Windows 2000 or newer operating system,<br />
and the last is a Linux command-line sniffer.<br />
Windump<br />
Many Linux systems have tcpdump installed by default. Because tcpdump is<br />
so common (at least on non-Windows systems), it has been ported to<br />
Windows and is called WinDump. WinDump requires WinPcap in order to<br />
work. WinDump can be downloaded from www.winpcap.org/windump/<br />
install/.There is no setup file; the .EXE you download is the entire package.<br />
Simply download it and place the file in a directory of your choosing.The<br />
manual <strong>for</strong> WinDump is pretty much the same as <strong>for</strong> tcpdump, and is located<br />
at www.winpcap.org/windump/docs/manual.htm. Although there are far too<br />
many options to explain them all in detail, here are a few that will get you<br />
started.<br />
Windump –D lists the interfaces WinDump can see to capture on.<br />
Windump –i 2 listens on interface number 2.You could restrict the output to<br />
show traffic only to or from the host named lab2003 by entering windump –i<br />
2 host lab2003. Although the command-line syntax is relatively intuitive, there<br />
are a lot of options.The manual is very good, with some useful examples at<br />
the bottom. In our Wireshark example, we worked with a Telnet session. If we<br />
wanted to see traffic to or from host lab2003, with a source or destination<br />
port of 23 (used <strong>for</strong> Telnet), we could enter windump –I 2 –host lab2003 and<br />
tcp port 23. I opened a Telnet session with lab2003 and the partial output is<br />
shown in Figure 7.15. Note: I removed the time stamps so that every line<br />
would not wrap to the next line.<br />
Figure 7.15 Windump of Telnet Session<br />
windump: listening on \Device\NPF_{C428C1BF-C15A-460B-90D6-3A6F5DF68F22}<br />
IP server.RedHat.2714 > LAB2003.23: S 639728410:639728410(0) win 16384 <br />
IP LAB2003.23 > server.RedHat.2714: S 1106948603:1106948603(0) ack 639728411<br />
win 16384 <br />
IP server.RedHat.2714 > LAB2003.23: . ack 1 win 17520<br />
IP LAB2003.23 > server.RedHat.2714: P 1:22(21) ack 1 win 17520<br />
www.syngress.com
IP server.RedHat.2714 > LAB2003.23: P 1:4(3) ack 22 win 17499<br />
IP LAB2003.23 > server.RedHat.2714: P 22:30(8) ack 4 win 17517<br />
IP server.RedHat.2714 > LAB2003.23: P 4:28(24) ack 30 win 17491<br />
IP LAB2003.23 > server.RedHat.2714: P 30:65(35) ack 28 win 17493<br />
IP server.RedHat.2714 > LAB2003.23: P 28:31(3) ack 65 win 17456<br />
IP LAB2003.23 > server.RedHat.2714: . ack 31 win 17490<br />
IP server.RedHat.2714 > LAB2003.23: P 31:88(57) ack 65 win 17456<br />
IP LAB2003.23 > server.RedHat.2714: P 65:228(163) ack 88 win 17433<br />
IP server.RedHat.2714 > LAB2003.23: P 88:133(45) ack 228 win 17293<br />
IP LAB2003.23 > server.RedHat.2714: . ack 133 win 17388<br />
IP server.RedHat.2714 > LAB2003.23: P 133:319(186) ack 228 win 17293<br />
IP LAB2003.23 > server.RedHat.2714: P 228:419(191) ack 319 win 17202<br />
IP server.RedHat.2714 > LAB2003.23: . ack 419 win 17102<br />
IP server.RedHat.2714 > LAB2003.23: P 319:320(1) ack 419 win 17102<br />
One obvious thing you will notice is that by default WinDump shows<br />
only the high-level header in<strong>for</strong>mation, not any of the packet data.To display<br />
this data, you will need to use the –X or –XX switch. By default, WinDump<br />
will display only a certain amount of the data portion of the packet; this is<br />
determined by the “snap length.”This is set using the –s option on the command<br />
line and will default to 68 bytes if it is not set manually. WinDump’s<br />
extensive filtering options make it a good tool <strong>for</strong> those times when you need<br />
very specific in<strong>for</strong>mation.You can restrict the output using a number of<br />
parameters and end up with a very specific capture of the network traffic.<br />
ngSniff<br />
<strong>Network</strong> Reporting and Troubleshooting • Chapter 7 435<br />
ngSniff is a little less robust than WinDump/tcpdump, but can be very handy<br />
to have in your network toolkit.The primary asset of ngSniff is that if you are<br />
using Windows 2000, Windows XP, or Windows Server 2003, you don’t need<br />
to install any drivers to start capturing traffic.This makes it a much more<br />
attractive candidate when you need some quick insight into what is occurring<br />
on the network but don’t want to run any setup programs or alter the drivers.<br />
If you type ngSniff with no options, it will show you the help screen and all<br />
the options ngSniff accepts. ngSniff –list-interfaces will list the available interfaces.To<br />
limit sniffing to only traffic to or from lab2003, you can enter ngSniff<br />
–interface 0 –only-host lab2003. Here is a sample capture of an SNMP message<br />
from 192.168.1.104 to 192.168.1.99.<br />
www.syngress.com
436 Chapter 7 • <strong>Network</strong> Reporting and Troubleshooting<br />
IP HEADER 192.168.1.104 -> 192.168.1.99<br />
------------------------------------------<br />
IP->version: 4<br />
IP->ihl: 5<br />
IP->tos: 0<br />
IP->tot_len: 77<br />
IP->id: 20699<br />
IP->frag_off: 0<br />
IP->ttl: 128<br />
IP->protocol: 17<br />
IP->checksum: 13275<br />
UDP HEADER<br />
----------<br />
UDP->sport: 4337<br />
UDP->dport: 161<br />
UDP->ulen: 57<br />
UDP->checksum: 48040<br />
----- Begin of data dump -----<br />
30 2f 02 01 00 04 09 74 65 73 74 77 72 69 74 65 0/.....testwrite<br />
a0 1f 02 03 00 ee 18 02 01 00 02 01 00 30 12 30 .............0.0<br />
10 06 0c 2b 06 01 04 01 cb 00 01 01 02 03 00 05 ...+............<br />
00<br />
----- End of data dump -----<br />
.<br />
Because of its capability of being used without requiring any installation,<br />
ngSniff should have a place in your networking toolkit. I have seen it used on<br />
production systems where installing anything would have not been desirable<br />
during business hours, but we could run ngSniff from a USB pen drive and<br />
see what was happening with the application and resolve the issue very<br />
quickly. If you would like a basic GUI sniffer that does not require any installation<br />
(on Windows 2000 or newer systems), you can also try SmartSniff from<br />
www.nirsoft.net/utils/smsniff.html or IP Sniffer (part of IP Tools package)<br />
from http://erwan.l.free.fr/.<br />
www.syngress.com
Tcpdump<br />
Tcpdump is native to Linux and does not run on Windows systems.Tcpdump<br />
is installed by default on a large number of Linux/UNIX systems. Because<br />
tcpdump is so widely used, there is a wealth of support in<strong>for</strong>mation and articles<br />
on the Internet on how to use tcpdump.The syntax and usage is nearly<br />
identical to that of WinDump, which we have already discussed, so what I<br />
will do here is demonstrate how to install tcpdump on a Linux system if you<br />
find it isn’t already installed.<br />
In order to install the tcpdump package, obtain or locate the appropriate<br />
package file <strong>for</strong> your distribution. Different distributions may have packages<br />
specific to their configuration, or a given distribution may not support the<br />
newest version of a piece of software.Then enter the following command to<br />
install tcpdump (<strong>for</strong> this example it is version 3.9.4-1):<br />
rpm –i tcpdump-3.9.4-1.i586.rpm<br />
If the installation is successful, you should see output similar to the<br />
following:<br />
Preparing... ########################################### [100%]<br />
1: tcpdump-3.9.4-1 ########################################### [100%]<br />
To uninstall the package you must use the package name, which is not the<br />
same as the name of the RPM file.To uninstall tcpdump 3.9.4-1, enter the<br />
following command, using the –e switch <strong>for</strong> erase:<br />
rpm –e tcpdump-3.9.4-1<br />
<strong>Network</strong> Reporting and Troubleshooting • Chapter 7 437<br />
We hope that by this point you have some idea of the troubleshooting<br />
power a sniffer can provide.You might wonder why you wouldn’t just put<br />
Wireshark on every system in case a troubleshooting issue comes up. Consider<br />
that if a hacker manages to gain access to one of your systems; a network<br />
sniffer can be an indispensable in<strong>for</strong>mation-gathering tool <strong>for</strong> the hacker. If<br />
you provide a pre-installed and configured sniffer <strong>for</strong> the hacker to use, you<br />
might make the hacker’s job a lot easier. On top of that, installing additional<br />
software on production systems is generally something you want to minimize<br />
if at all possible. Although the WinPcap driver install has been very dependable<br />
<strong>for</strong> a while now (which wasn’t always the case), installing network drivers<br />
always carries the risk of disrupting network communications if something<br />
www.syngress.com
438 Chapter 7 • <strong>Network</strong> Reporting and Troubleshooting<br />
goes wrong.These are two very compelling reasons <strong>for</strong> using ngSniff or a<br />
comparable GUI-based sniffer that does not need to be installed on the<br />
system. In most cases these sniffers that use Windows raw sockets can be run<br />
from a pen drive or from a CD-ROM, or even run from a mapped network<br />
drive.Table 7.2 compares the features of four different sniffers.<br />
Table 7.2 Sniffer Features<br />
Additional Troubleshooting Tools<br />
Because there are so many interdependencies that are involved in making a<br />
network-based application work properly, there is no single tool to isolate and<br />
identify problems. Expensive suites of software and data collection probes<br />
attempt to make the process as automated as possible, but in most cases the<br />
key tool is the human operator. Based on the symptoms of the problem, or<br />
lacking a specific symptom, starting at the bottom and working your way up,<br />
the human per<strong>for</strong>ming the troubleshooting has to systematically use process<br />
of elimination to try to identify the problematic component, and then take<br />
steps to remedy the issue. In most cases you will not need more than the basic<br />
troubleshooting tools available with any modern operating system, such as<br />
ping, traceroute, and various commands specific to the operating system. On<br />
some occasions, some specialized software can make the task of troubleshooting<br />
much easier. A couple of my favorites are explained here.<br />
www.syngress.com
Netcat<br />
Netcat has often been described as the “Swiss Army knife” of troubleshooting<br />
tools.This is because its function is so elegantly simple that it has many uses.<br />
In essence, it establishes a communications session between two systems.You<br />
can enter nc –l –p 2222 to tell system one to listen on port 2222. On system<br />
two, the command nc 192.168.1.10 2222 would connect to system 1<br />
(assuming the IP address is 192.168.1.10) on port 2222. After the connection<br />
is established, anything typed at the console of either system is sent to the<br />
stdout of the other system. Although both ends of the session can be the<br />
netcat executable, they don’t have to be. In addition to providing a command<br />
line based method <strong>for</strong> transferring data, netcat enables you to test connectivity<br />
over arbitrary ports. By entering nc 23, you can connect to a<br />
system to verify that Telnet is listening and available. In fact, if you use the –t<br />
switch, netcat will negotiate the Telnet specifics. Although Telnet is often used<br />
in exactly the same way to test connectivity to arbitrary ports (telnet <br />
), netcat is more versatile in that it enables you to connect via TCP<br />
(the default) or UDP.<br />
There are additional functions netcat offers to aid the network troubleshooter.<br />
Netcat can be configured to create a hex dump of the session (via<br />
the –o file option). It can also be configured to execute a program when a<br />
connection is made (potentially unsafe if not used carefully), or to restart itself<br />
in listen mode after a session is terminated. Netcat can be downloaded from<br />
http://netcat.source<strong>for</strong>ge.net/; the last update was in January of 2004. A<br />
Windows version (1.1) can be downloaded from www.vulnwatch.org/<br />
netcat/. Finally, a derivative project that adds twofish encryption is known as<br />
cryptcat and is available from http://farm9.org/Cryptcat/, with versions <strong>for</strong><br />
both Linux and Windows.There is also a very similar utility called socat,<br />
which is being actively developed. Socat is very close to netcat in function<br />
but features additional capabilities. Socat can be downloaded from www.destunreach.org/socat/.<br />
Tracetcp<br />
<strong>Network</strong> Reporting and Troubleshooting • Chapter 7 439<br />
Oftentimes, the ability to know the path that network traffic is traversing is<br />
key to troubleshooting connectivity issues. In most cases you can determine<br />
www.syngress.com
440 Chapter 7 • <strong>Network</strong> Reporting and Troubleshooting<br />
this by using the traceroute utility (tracert on Windows systems). When you<br />
execute the traceroute command ICMP (Internet Control Message Protocol)<br />
is used to transmit packets to the destination with a Time to Live (TTL) value<br />
of 1, and this increases <strong>for</strong> each hop. When everything goes smoothly, each<br />
hop has to reduce the TTL by one, and when it becomes zero, the packet is<br />
dropped, and a message is sent to the receiver.The problem that often arises is<br />
that ICMP is often partially or completely filtered out by intervening routers<br />
or firewalls. In this case, you need a way to accomplish the same thing with a<br />
protocol that has a higher chance of success.<br />
In these cases, a TCP traceroute can be a life saver. It will effectively do<br />
the same thing, by manipulating the TTL values, but it uses a TCP packet and<br />
allows a user-configurable port, which almost every firewall and router will<br />
allow if it is a well-chosen port. As an example, if you picked a popular Web<br />
site and tried a trace route, you may get several instances of “request timed<br />
out,” which indicates that the hop is not responding. In most cases this means<br />
that ICMP is being filtered by a firewall. If you instead use a TCP-based<br />
traceroute utility and specify a destination port of 80, you may get better<br />
results. A good TCP-based traceroute utility <strong>for</strong> Windows is tracetcp from<br />
http://tracetcp.source<strong>for</strong>ge.net/. For Linux, a very robust utility is LFT, which<br />
stands <strong>for</strong> “layer four traceroute,” which can be downloaded from<br />
http://pwhois.org/lft/.<br />
Netstat<br />
You can use the netstat utility on Windows or Linux to see a list of network<br />
connections.The –l option (on Linux) will list only the listening ports <strong>for</strong><br />
that system. On Windows, the same functionality is provided by using the –a<br />
option (-a works on Linux as well) to list all connections. From a troubleshooting<br />
perspective, there may be times when you want to verify that a<br />
service is listening on the proper port, or identify what service is listening on<br />
a given port. While older versions of netstat cannot show you this, modern<br />
Windows systems provide the –b option, which will list the process associated<br />
with a given listening port.<br />
C:\>netstat -a -b<br />
www.syngress.com
Active Connections<br />
Proto Local Address Foreign Address State PID<br />
TCP server:4122 localhost:4123 ESTABLISHED 1988<br />
[firefox.exe]<br />
If you are running an older version of Windows, or running Linux, there<br />
are utilities to show this. For the command line on Windows NT, XP, or<br />
2000, fport from www.foundstone.com/resources/proddesc/fport.htm is very<br />
handy.The abbreviated output is shown here.<br />
I:\Internet\fport>fport<br />
FPort v2.0 - TCP/IP Process to Port Mapper<br />
Copyright 2000 by Foundstone, Inc.<br />
http://www.foundstone.com<br />
<strong>Network</strong> Reporting and Troubleshooting • Chapter 7 441<br />
Pid Process Port Proto Path<br />
1988 firefox -> 4123 TCP I:\Internet\Firefox\firefox.exe<br />
For a Windows GUI, tcpview is very powerful and can be downloaded<br />
from Microsoft at<br />
www.microsoft.com/technet/sysinternals/utilities/TcpView.mspx.Tcpview<br />
also has a command-line version called tcpvcon. In the Linux world, you can<br />
see which processes are using which ports with the lsof (list open files) utility.<br />
Although the utility can be rather complex, a quick and simple way is:<br />
lsof | grep LISTEN<br />
syslog-ng 1555 root 6u IPv4 4463 TCP *:7140 (LISTEN)<br />
This will indicate that the syslog-ng process is listening <strong>for</strong> inbound connections<br />
on TCP port 7140.<br />
www.syngress.com
442 Chapter 7 • <strong>Network</strong> Reporting and Troubleshooting<br />
Summary<br />
As you can see, there are many powerful and free solutions <strong>for</strong> network<br />
reporting and troubleshooting available. Never underestimate the power of a<br />
visual aid, be it a graph, a pie chart, or whatever. A simple graph can get the<br />
point across far more quickly than a page full of numbers. Armed with the<br />
relevant data presented in an easy-to-understand <strong>for</strong>mat you can demonstrate<br />
the need <strong>for</strong> more Internet bandwidth.You could also demonstrate how the<br />
use of Internet streaming music is consuming all the bandwidth, and that with<br />
a policy change, a bandwidth upgrade is not needed. Depending on your specific<br />
policies, you could generate reports <strong>for</strong> whichever protocols are of<br />
interest to you.You could run a sniffer to try to collect and graph statistics on<br />
your own, but having free software that will do it <strong>for</strong> you is a real time saver.<br />
Far and away I would recommend PRTG and ntop as the best free solutions<br />
<strong>for</strong> tracking usage statistics.<br />
If, despite your best ef<strong>for</strong>ts, problems do arise, there are powerful and free<br />
packet sniffing solutions available to help you troubleshoot problems at the<br />
network level. Once you have an understanding of the merits of the different<br />
products, you can select a sniffing tool that is right <strong>for</strong> the job.You can<br />
quickly see what is happening at the network packet level, and in some cases<br />
identify problems that would be virtually impossible to troubleshoot any<br />
other way.<br />
Solutions Fast Track<br />
Reporting on Bandwidth Usage and Other Metrics<br />
� Remember that with any data collection system (that is, sensor),<br />
placement is key to ensure that the system can see the proper data to<br />
analyze.<br />
� The type of data collection methods (sniffing, NetFlow, SNMP) you<br />
have available to you will have a huge impact on collector placement<br />
and on which tools you use.<br />
www.syngress.com
� SNMP can be enabled on almost any modern operating system and<br />
collect and monitor assorted usage data, including product-specific<br />
metrics.<br />
Collecting Data <strong>for</strong> Analysis<br />
� Collecting data via sniffing will require that the collector sit inline<br />
with the traffic to be analyzed.<br />
� Collecting data via SNMP enables you to place the collector<br />
independently from the devices to be monitored; however, you will<br />
only be able to gather data that is specifically supported by the<br />
sensor’s MIB.<br />
� Remember that SNMP creates its own network traffic, thus using up<br />
bandwidth.<br />
� NetFlow is more focused than sniffing or SNMP, providing<br />
in<strong>for</strong>mation focused on traffic flows and session in<strong>for</strong>mation.The<br />
downside is that NetFlow is not supported on all devices.<br />
Understanding SNMP<br />
� Different devices often support different versions of SNMP, and each<br />
version has different security capabilities.These considerations could<br />
be important depending on how you plan to implement an SNMP<br />
infrastructure. SNMP version 3 is the preferred (i.e. most secure)<br />
version to use.<br />
Troubleshooting <strong>Network</strong> Problems<br />
<strong>Network</strong> Reporting and Troubleshooting • Chapter 7 443<br />
� One of your first steps is to determine which sniffer is appropriate<br />
<strong>for</strong> the task. Consider factors such as: Do you need a GUI? How<br />
much filtering will you need to do? Is installing a driver acceptable<br />
or desirable?<br />
� There is no shortcut to becoming skilled at interpreting the results of<br />
a packet capture. It requires in-depth knowledge of the underlying<br />
www.syngress.com
444 Chapter 7 • <strong>Network</strong> Reporting and Troubleshooting<br />
network protocols, but with some basic understanding you can often<br />
find a packet sniffer useful in troubleshooting problems.<br />
Frequently Asked Questions<br />
The following Frequently Asked Questions, answered by the authors of this book,<br />
are designed to both measure your understanding of the concepts presented in<br />
this chapter and to assist you with real-life implementation of these concepts. To<br />
have your questions about this chapter answered by the author, browse to<br />
www.syngress.com/solutions and click on the “Ask the Author” <strong>for</strong>m.<br />
Q: Is there any advantage to using tcpdump over WinDump or vice versa?<br />
A: Not much, the syntax is almost identical, so functionally, it probably<br />
doesn’t matter.The only factor that would tip the scales in favor of one or<br />
the other would be that if you are sniffing a very high-volume network,<br />
the Linux system using tcpdump will likely have better per<strong>for</strong>mance than<br />
a Windows system using WinDump, so you would run less risk of dropping<br />
packets. If speed isn’t an issue, go with whichever underlying operating<br />
system you are most com<strong>for</strong>table with.<br />
Q: How do I make ntop do “x”?<br />
A: For starters, do some searching online; odds are good there is documentation<br />
out there already.There are also several mailing lists available to discuss<br />
ntop and its use. For general ntop use, refer to<br />
http://listmanager.unipi.it/mailman/listinfo/ntop. For development issues,<br />
refer to http://listmanager.unipi.it/mailman/listinfo/ntop-dev. Because<br />
ntop uses Perl on the back end, with a little Perl programming you can<br />
make it do almost anything you want, and much like a batch file, Perl has<br />
the capability to call external programs.This means you could easily create<br />
a script to regularly check the ntop data and execute a certain program<br />
(like send a syslog message or e-mail) when certain thresholds are crossed.<br />
Q: The graphs from MRTG seem very basic, is there any way to modify their<br />
appearance?<br />
www.syngress.com
<strong>Network</strong> Reporting and Troubleshooting • Chapter 7 445<br />
A: You can edit some of the images used to create the graphs.The most popular<br />
method is to configure MRTG to use RRDtool (which stands <strong>for</strong><br />
Round Robin Database tool) from http://oss.oetiker.ch/rrdtool/.This<br />
will enable the data collected by MRTG to be stored more efficiently.<br />
MRTG supports RRDtool with little additional configuration. A document<br />
on configuring MRTG to work with RRDtool can be found at<br />
http://oss.oetiker.ch/mrtg/doc/mrtg-rrd.en.html. After you have your<br />
data in the RRD database, you can use one of the other third-party<br />
scripts to generate the HTML graphs, such as the 14all script from<br />
http://my14all.source<strong>for</strong>ge.net/.<br />
www.syngress.com
Security as an<br />
Ongoing Process<br />
Solutions in this chapter:<br />
■ Patch Management<br />
■ Change Management<br />
■ Antivirus<br />
■ Antispyware<br />
■ Intrusion Detection Systems<br />
■ Vulnerability Scanning<br />
■ Penetration Testing<br />
■ Policy Review<br />
■ Physical Security<br />
■ CERT Team<br />
� Summary<br />
� Solutions Fast Track<br />
� Frequently Asked Questions<br />
Chapter 8<br />
447
448 Chapter 8 • Security as an Ongoing Process<br />
Introduction<br />
If you have successfully implemented a firewall, a network analysis and<br />
reporting system, and an intrusion detection system (IDS), I would like to tell<br />
you your job is done, and that you can head over to the coffee shop. Sadly, this<br />
isn’t true. Securing your network and systems is only the first step of an<br />
ongoing process. Without consistent and conscious ef<strong>for</strong>t, an otherwise secure<br />
infrastructure will devolve into an insecure one.This chapter will discuss the<br />
various ongoing ef<strong>for</strong>ts that are needed to maintain a secure environment.<br />
Each topic will be examined with an eye toward the security implications<br />
and security risks related to not following these procedures. Security is an area<br />
of networking where, more than any other, inaction will result in failure.The<br />
most secure system today will eventually be the biggest security risk on the<br />
network if it is not maintained adequately. Along those lines, almost every<br />
system that uses the network <strong>for</strong> communications, from wireless access points,<br />
firewalls, workstations, servers, and even the routers and switches themselves,<br />
needs regular maintenance in order to operate reliably and securely.This regular<br />
maintenance can be broken into several more specific categories, which<br />
we will discuss in detail.<br />
Patch Management<br />
Patch management is a broad category that basically means “keeping everything<br />
up to date in a controlled fashion.” A patch is a modification of software<br />
that is typically relatively small and specific in what it addresses.The changes<br />
resulting from the application of a patch are usually less significant than those<br />
of a service pack or a full incremented version release. Patch management is<br />
not applying all the latest patches the instant they are released to the public.<br />
Applying Service Pack 2 <strong>for</strong> Windows XP will enable the built-in Windows<br />
Firewall automatically.This isn’t an issue <strong>for</strong> most users, since the firewall will<br />
allow all outbound connections by default, but if you have some service running<br />
on that system that needs to listen <strong>for</strong> an inbound connection, you will<br />
suddenly find it doesn’t work after applying the patch. In this particular<br />
example, the service pack has been out <strong>for</strong> so long, most people are either<br />
already updated or, if not they are aware of the issues. Even if you didn’t<br />
www.syngress.com
Security as an Ongoing Process • Chapter 8 449<br />
know about the service pack enabling the firewall, the in<strong>for</strong>mation is so<br />
widely disseminated that you would likely be able to find the in<strong>for</strong>mation<br />
very quickly. When the patch was first released, however, this wasn’t the case,<br />
and many organizations suffered a service disruption that could have been<br />
avoided with proper patch management.<br />
A proper patch management system should include a regularly scheduled<br />
review of the patch levels of all systems (by the appropriate subject matter<br />
experts).The particular schedule you choose will be based on your environment.<br />
In a high-security environment, this process may occur as often as<br />
weekly, while in many environments a monthly process is adequate. A key<br />
component of the patch review will be to assign a priority to newly released<br />
patches.This should be done by an appropriate subject matter expert, or, if<br />
you have the luxury, a group of them.This is a relatively subjective art with<br />
no hard and fast rules, only guidelines. If a patch addresses a severe security<br />
flaw in hardware the company has deployed, it would be a very high-priority<br />
patch. If, on the other hand, the effected hardware was only deployed in a few<br />
places, and there were additional controls in place, the priority would be<br />
much lower.The priority that is assigned will dictate the deadlines <strong>for</strong> a patch<br />
to be applied.These deadlines will also need to be developed to meet your<br />
business needs but the following priorities could serve as a starting point.<br />
■ Critical These types of patches are <strong>for</strong> serious vulnerabilities that are<br />
both easy to exploit and likely to be exploited.These patches should<br />
be tested and applied as soon as possible, with a 24-hour deadline<br />
being common.<br />
■ High These high-risk patches will need to be applied with some<br />
urgency on an accelerated testing schedule.These patches could have a<br />
one-week deadline <strong>for</strong> implementation.<br />
■ Medium This is a typical vulnerability. Maybe it requires a very<br />
detailed set of circumstances to exploit, or the risk is a minor denial<br />
of service, but not a complete compromise of the affected device.The<br />
deadline <strong>for</strong> these types of patches would be your standard patch cycle,<br />
possibly monthly.<br />
www.syngress.com
450 Chapter 8 • Security as an Ongoing Process<br />
■ Low Patches that are low priority may be <strong>for</strong> minor vulnerabilities<br />
that are nearly impossible to actually exploit, or <strong>for</strong> devices that are<br />
very well secured with additional mitigating controls. While relevant<br />
to business, these types of patches may wait until the normal maintenance<br />
cycle to be applied.The maintenance cycle would mean the<br />
patch would be applied indirectly with the next software upgrade. It’s<br />
worth noting that these patches are still tracked as outstanding until<br />
they can be remediated.<br />
■ Negligible These patches do not apply to your particular hardware<br />
or configuration.These patches are generally filtered out when they<br />
are assigned their initial priority and are not tracked after that point.<br />
The patch review meetings will likely include some type of reporting to<br />
be distributed to upper management, in a <strong>for</strong>mat that is easy to digest and<br />
understand so that everyone involved can be up to date and in<strong>for</strong>med as to<br />
what the current status is.These reports should include a list of patches that<br />
are outstanding, schedules <strong>for</strong> applying the patches, and an indication of the<br />
success or failure of past patching ef<strong>for</strong>ts.This type of documentation will also<br />
be of value to auditors to show that there are processes in place and being<br />
followed <strong>for</strong> keeping the systems secure and their software up-to-date.<br />
A vital component to any patch management system is testing. It would<br />
even be reasonable to say testing was the core of patch management. Without a<br />
procedure in place to test prospective patches and ensure compatibility with<br />
the existing hardware and software, you really only have patch scheduling,<br />
which is not adequate.The testing procedure should make use of some standardized<br />
<strong>for</strong>ms, with sign-off by the person who per<strong>for</strong>med the testing, and<br />
with as much detail as is reasonable, a description of the testing that was per<strong>for</strong>med.<br />
It is important to capture and document the testing process in an<br />
ef<strong>for</strong>t to increase accountability and consistency.This will help you avoid<br />
multiple people all believing someone else tested a particular patch.<br />
Sometimes a patch will not make it through testing successfully.This may<br />
be by design; <strong>for</strong> example, if that patch disables some feature you were using.<br />
In these cases you may need to evaluate whether or not to apply the patch<br />
anyway, even though there were issues discovered during the testing process.<br />
This will basically be a judgment call on whether the problems introduced by<br />
www.syngress.com
the patch outweigh the risk posed by not implementing the patch.These<br />
types of decisions will need to be made, or at least approved, by the appropriate<br />
business representatives.The person who makes such as decision needs<br />
to have the appropriate authority <strong>for</strong> such a risk acceptance.<br />
Don’t <strong>for</strong>get that the testing procedures themselves will need to be regularly<br />
reviewed to ensure that the testing that is per<strong>for</strong>med is still adequate. As<br />
software and features change, you will need to modify the testing procedures<br />
to accommodate the new functionality. While all of these considerations are<br />
applicable regardless of what you are patching, there are some considerations<br />
that are specific to the plat<strong>for</strong>m in question.<strong>Your</strong> individual business needs<br />
will dictate the specific procedures you employ. Figure 8.1 shows a way these<br />
procedures can be implemented and incorporated into a repeatable process.<br />
Figure 8.1 Patch Management Process<br />
New patch is<br />
released<br />
· Does the patch install<br />
succesfully?<br />
· Does the patch cause any<br />
obvious operational<br />
problems ?<br />
· Does the patch cause any<br />
issues with any standard<br />
deployed software ?<br />
Is the patch<br />
relevant <strong>for</strong> our<br />
environment ?<br />
YES<br />
Security as an Ongoing Process • Chapter 8 451<br />
Assign priority<br />
to patch<br />
Determine remediation<br />
deadlines based on<br />
priority<br />
Test Patch<br />
Was the testing<br />
succesful ?<br />
YES<br />
Deploy Patch<br />
NO<br />
NO<br />
NOT<br />
ACCEPTABLE<br />
ACCEPTABLE<br />
Done<br />
Evaluate<br />
problems with<br />
patch vs . the risk<br />
of not patching.<br />
www.syngress.com
452 Chapter 8 • Security as an Ongoing Process<br />
<strong>Network</strong> Infrastructure Devices<br />
The network infrastructure includes anything that is part of the network<br />
rather than being on the network, or using the network.These are the devices<br />
that move data through the network and include routers, switches, firewalls,<br />
and bridges. All these devices will require patching sooner or later. One of the<br />
biggest considerations you have to work around when developing your patch<br />
management procedures is the patch release schedule. Obviously, you can’t<br />
patch a system if the patch isn’t out yet. In the case of network devices, particularly<br />
firewalls and other security devices, patches <strong>for</strong> security vulnerabilities<br />
are typically released very quickly and frequently.This means your patch<br />
management system will need to include a process to schedule and prioritize<br />
the testing and application of the patches. Having a set schedule <strong>for</strong> patching,<br />
<strong>for</strong> example monthly, at least <strong>for</strong> the noncritical patches, enables the business<br />
units to schedule around the patching windows and account <strong>for</strong> any outages.<br />
By distributing a patching schedule, you help minimize the impact of your<br />
patching ef<strong>for</strong>ts. If you wait a week to patch a critical hole in your Internetfacing<br />
firewall, you are gambling that the hackers don’t find your vulnerable<br />
firewall in the next week; on the other hand, if the patch is inadequately<br />
tested, you could create a service disruption if the patch causes any unexpected<br />
problems.<br />
Always keep in mind that when applying patches to infrastructure devices<br />
the potential <strong>for</strong> service disruption is high. Because all your other devices rely<br />
on the underlying network infrastructure <strong>for</strong> communication, complications<br />
at the network level can have devastating consequences. If a single server<br />
patch causes the service to quit functioning, you are without the services of<br />
that one server. If the same thing happens to a core router <strong>for</strong> the network,<br />
it’s possible that no network systems will be able to function. Because of the<br />
high potential <strong>for</strong> service disruption and the large scope of potential impact,<br />
patches to infrastructure devices should be tested extra thoroughly be<strong>for</strong>e<br />
being deployed. Although the risk that the patch will break something is generally<br />
low, you want to put particular emphasis on the testing of any optional<br />
or less-common features you may be using.<br />
www.syngress.com
Operating System Patches<br />
Operating system patches are released at different times by different vendors.<br />
In most cases, a patch will be released to address a specific security risk or to<br />
correct a bug related to particular functionality. Some vendors may have a<br />
specific schedule that they release their patches on, such as Microsoft, which<br />
releases their patches on the second Tuesday of each month. It is these release<br />
schedules and release frequencies that are the primary differences between<br />
infrastructure patches and operating system patches.<strong>Your</strong> timelines <strong>for</strong> patch<br />
review, application, and testing cycles will need to be synchronized with the<br />
vendor’s release schedule.You will also need to schedule your patch updates<br />
with your change windows (see below <strong>for</strong> change management), perhaps even<br />
devoting one change window to OS patches if the volume is significant.<br />
The processes around applying patches and the time frames <strong>for</strong> doing so<br />
also need to account <strong>for</strong> the role of the host system.The people responsible<br />
<strong>for</strong> prioritizing when patches get applied must be aware of the criticality of<br />
the services the network host provides. A server that is critical to the business<br />
might need to wait longer to receive a patch during a monthly maintenance<br />
window, while a host that is exposed to hostile attacks (such as in a DMZ)<br />
might need to receive a security patch much more quickly.These are the<br />
types of considerations that someone who is not familiar with your business<br />
operations could not take into consideration when developing a patch management<br />
strategy.To schedule these maintenance activities properly, you will<br />
need a technical understanding of the impact of the patch, be able to weigh<br />
the risk of not applying the patch, and understand the potential business<br />
impact of a service disruption.<br />
Application Patches<br />
Security as an Ongoing Process • Chapter 8 453<br />
Application patches are typically released by the application developer.The<br />
release frequency can vary drastically. Some applications almost never have<br />
updates, while others change frequently. Most often, the vendor will recommend<br />
you only apply patches to address functionality if you need that functionality<br />
or are experiencing an issue; in other words,“don’t fix it if it isn’t<br />
broken.” Because the nature of an application patch can vary so dramatically,<br />
these will need to be evaluated on a case–by-case basis in order to schedule<br />
www.syngress.com
454 Chapter 8 • Security as an Ongoing Process<br />
the patches <strong>for</strong> deployment. Unless the patch is to address a security risk,<br />
these types of updates can often wait <strong>for</strong> a regular change window to be<br />
applied. As with operating system patches, the role of the application in question<br />
may impact the scheduling and testing of the patch in question.<br />
Change Management<br />
Although change management and patch management are related, they are<br />
not the same thing. Patch management is a subset of change management and<br />
refers to applying patches specifically. Change management is much broader<br />
in that it encompasses any type of change to the existing environment.The<br />
change that is being managed could include the installation of new software<br />
or hardware, or a modification of settings with a system to alter the functionality.The<br />
objective of change management is to handle changes in a controlled<br />
fashion that minimizes risk.There are many things that can go wrong<br />
when implementing a change; however, a proper change management strategy<br />
can help mitigate many of those risks.<br />
Change Causes Disruption<br />
The biggest and most obvious risk when implementing change is that it may<br />
cause a service disruption. We are all probably familiar with this type of complication<br />
arising from a change. We applied the update and suddenly the<br />
server was unreachable.This could be a total loss of functionality, such as<br />
when the network drivers get corrupted, or a partial disruption, where only a<br />
portion of functionality is lost. In either case, the downtime can cost significant<br />
loss of revenue, or real dollars (paid to consultants or vendors) to correct,<br />
not to mention the headache involved in troubleshooting the problem.<br />
Remember that some of these risks are entirely avoidable, while others are<br />
not.There really is no way to know if a network interface card on the server is<br />
going to quit working when you reboot the server, but having a spare one on<br />
hand can really help. In some cases, the changes themselves may work perfectly,<br />
but due to a lack of proper change management, multiple changes<br />
occurring simultaneously could interfere with each other. For example, if you<br />
are upgrading the Internet connection, another technician may not be able to<br />
per<strong>for</strong>m an upgrade using software that is downloaded over the Internet.<br />
www.syngress.com
Inadequate<br />
Documentation Can Exacerbate Problems<br />
There are still more ways an inadequate change management system can<br />
cause problems. Imagine a co-worker installs a new switch, tests the connectivity,<br />
and then heads home.The next day, an entire group of systems become<br />
unavailable.You suspect that all the systems might be connected to the new<br />
switch but there is no documentation of the change.You don’t know which<br />
systems are using the new switch, or what ports they are connected to.You<br />
now have to spend precious time trying to learn what the current environment<br />
is be<strong>for</strong>e you can even begin to troubleshoot the real issue.This is an<br />
example of how the change itself might not be the cause of an outage, but<br />
without proper documentation and procedures in place, changes can still negatively<br />
impact the functioning of the network.To mitigate these risks, the best<br />
practice is to develop a change management strategy.<br />
Change Management Strategy<br />
So now that we know that change management is a necessity, how exactly<br />
does one go about implementing a change management strategy? A good<br />
change management strategy will provide you with the tools that are needed<br />
to implement and manage change effectively and safely.<strong>Your</strong> change management<br />
strategy should include the following elements:<br />
■ Change Review<br />
■ Change Scheduling<br />
■ Change Documentation<br />
Security as an Ongoing Process • Chapter 8 455<br />
The first step to implementing changes in a controlled fashion is to<br />
review and assess the changes that are needed. In some cases, this may be a<br />
relatively in<strong>for</strong>mal process conducted by a single individual. In a larger organization,<br />
this could actually be implemented by a committee and include<br />
<strong>for</strong>mal meeting minutes that are made available to upper management.You<br />
will need to find a level of sophistication that suits the needs of your organization.The<br />
purpose of this phase is to identify the changes that are needed,<br />
determine how badly they are needed, and determine what level of process<br />
www.syngress.com
456 Chapter 8 • Security as an Ongoing Process<br />
needs to be used <strong>for</strong> their implementation.You probably don’t want hours of<br />
reporting and meetings because someone wants to change their screensaver.<br />
The changes need be prioritized, which is somewhat subjective but includes<br />
consideration such as the following:<br />
■ The impact and risk of not implementing the change. Will business<br />
be impacted? Will real dollars be lost or will it only be an inconvenience<br />
<strong>for</strong> employees per<strong>for</strong>ming some processes?<br />
■ The risk that applying the change might negatively impact service.<br />
What are the odds of this change breaking something? How complex<br />
is the environment? How well documented and understood is the<br />
environment?<br />
■ The criticality of the host/system affected by the change. How key is<br />
the affected device to the business process?<br />
■ Nontechnical considerations. If the change breaks something, will the<br />
disruption be visible to the customer? Will there be a loss of customer<br />
confidence or business?<br />
All these considerations will lead to the second phase, which is scheduling.<br />
I have seen many examples where the risk of making a change was simply<br />
too high, and the decision was made to simply live with the risk.You prioritization<br />
and deadlines can probably be very similar to that of the a<strong>for</strong>ementioned<br />
patch management process.<br />
Only after you have analyzed the priority of the changes can you schedule<br />
them.Typically, a business will have more than one change window,<br />
depending on the urgency of the change. Minor changes to noncritical systems<br />
may be acceptable during any nonbusiness hours, while critical systems<br />
may only have a change window of a couple of hours each week to apply<br />
changes. A change window is the accepted time frame <strong>for</strong> implementing<br />
changes.This phase is best accomplished with multiple stakeholders working<br />
together.This allows <strong>for</strong> various initiatives to be scheduled without creating a<br />
conflict between them.The scheduling stage will work best if you can provide<br />
input and buy-in from representatives from multiple lines of business.<br />
Scheduling could also be impacted by nontechnical considerations that the<br />
technical staff may not be aware of. Perhaps a new advertising campaign is<br />
www.syngress.com
Security as an Ongoing Process • Chapter 8 457<br />
being initiated on the first of the month and traffic to the corporate Web site<br />
is expected to rise sharply. In this case, applying an operating system patch on<br />
the server the night be<strong>for</strong>e might not be a good idea. It is <strong>for</strong> these reasons<br />
that the person scheduling the changes should not work in a vacuum, but<br />
instead seek cooperation from the appropriate parties. In a smaller environment,<br />
these types of scheduling conflicts are less likely to occur, but you<br />
should be aware of the potential and take steps to avoid it. By having all the<br />
critical groups represented during the scheduling phase, or at the very least<br />
in<strong>for</strong>med of the schedule, you can minimize the risk of a scheduling conflict.<br />
Documenting changes is one of the most commonly overlooked or<br />
inadequately per<strong>for</strong>med steps.This is especially true when in the middle of<br />
a crisis and restoring functionality is the highest concern. A well-documented<br />
change is far more likely to be successful than one that is not.This<br />
is true not only because someone may need the documentation later, but<br />
also because the process of completing the required documentation may<br />
cause one to consider some facet that may have otherwise been overlooked.<br />
Although change documentation will be different <strong>for</strong> each organization,<br />
there are some elements that all change documentation should have in<br />
common.These are outlined here:<br />
■ Change Schedule The change schedule will have the time and<br />
date the change will be implemented, including when the changes<br />
will begin and end. It should also include a back-out time, which is a<br />
time after which the change either must work, or the change is<br />
undone.To continue working on an unsuccessful change after the<br />
back-out time typically requires senior management approval.<br />
■ Testing This section should include the procedures used to test the<br />
change. In some cases this may be simple; in others it may be a very<br />
detailed section requiring its own set of documentation.This section<br />
explicitly states the manner in which you will measure success of the<br />
change.This section also serves to show that the person implementing<br />
the change per<strong>for</strong>med their due diligence in testing the<br />
change, should a problem arise later.<br />
■ Backout Plan This section will detail what steps will be needed to<br />
reverse the changes. In some cases this section may seem trivial, while<br />
www.syngress.com
458 Chapter 8 • Security as an Ongoing Process<br />
in a more complicated change it may be very difficult to undo the<br />
changes. For example, if you upgrade a third-party application on a<br />
Web server, there may be no means to undo the upgrade other than<br />
to restore from tape, which will likely take a considerable amount of<br />
time.The steps involved in the back-out plan will be used to determine<br />
when the back-out threshold should be. For example, if your<br />
change window <strong>for</strong> Web servers is 1:00 A.M. to 6:00 A.M. and it will<br />
take three hours to back out the changes (by restoring the server<br />
from tape), your back-out threshold would be no later than 3:00 A.M.<br />
■ Contact List The contact list is a listing of all relevant stakeholders.<br />
This includes who will be making the changes, who will be testing<br />
the changes, and who they report to.This list should also include<br />
who should be contacted in the event of an emergency, and possibly<br />
the project manager <strong>for</strong> the ef<strong>for</strong>t. It is a good idea to also note the<br />
expected means of communication. For example, if the senior network<br />
manager expects an e-mail in his inbox after the change is successful,<br />
this should be noted as well.This helps ensure that these<br />
details are not <strong>for</strong>gotten.<br />
■ Sign-off This is one of the key sections. Not only subject matter<br />
experts but also stakeholders should provide their written approval.<br />
This could include line-of-business representatives who are not technical<br />
as well.This provides assurance that everyone who may be<br />
impacted has been represented and is in agreement with the change.<br />
All of these procedures should have a plan <strong>for</strong> dealing with emergency<br />
changes. By definition, an emergency change is a needed change that was not<br />
planned <strong>for</strong>.This often means adequate testing and planning has not been<br />
done but the risk still may be acceptable if the alternative is less desirable.<br />
These changes can occur when a system is unreachable unexpectedly, or if<br />
you are actively being attacked by a hacker.There should be alternate procedures<br />
<strong>for</strong> implementing a change that enable one to expedite the process.<br />
Emergency change procedures should be well documented. Special consideration<br />
should be given with regards to how one seeks approval <strong>for</strong> an emergency<br />
change and who has the authority to approve emergency changes.<br />
www.syngress.com
With well-established change procedures in place be<strong>for</strong>e implementing a<br />
change, you can minimize the risk caused by implementing emergency<br />
changes. If a service disruption does occur, you will also be more prepared <strong>for</strong><br />
dealing with it in a timely fashion.<br />
Antivirus<br />
In modern times, an antivirus system of one type or another is a requirement<br />
<strong>for</strong> doing business.These can be implemented on a central gateway such as a<br />
mail server, or locally on individual workstations (or more commonly, both).<br />
In any case, the antivirus software will need frequent updates to keep the<br />
virus signature database current. Because the signature file is used to identify a<br />
virus based on a small code sample, and given the rapid development of new<br />
viruses and Trojans, an out–of-date signature file is close to not having any<br />
antivirus protection at all. In most cases, new signature files will be released<br />
very frequently and generally cause little risk of a service disruption. A<br />
schedule <strong>for</strong> signature file updates should be established and approved by<br />
management. Most commonly, the complications from a new signature file<br />
will be an improper identification of a file as malicious when it isn’t, also<br />
known as a false positive. It is important that reports be generated to verify that<br />
the signatures are current on all systems, and that someone regularly reviews<br />
these reports to take action if that is not the case. If automated updates have<br />
been failing on a server <strong>for</strong> several months, there needs to be a process in<br />
place that will ensure someone notices that fact. While testing tends to be<br />
minimal when it comes to antivirus signatures, it is always a good idea to try a<br />
pilot deployment on a small subset of hosts be<strong>for</strong>e deploying any significant<br />
updates across the entire company.This is particularly true if the scanning<br />
engine itself is being updated or a new antivirus option is being implemented.You<br />
wouldn’t want your antivirus product to detect your corporate<br />
accounting program as a virus and “clean” it <strong>for</strong> you.<br />
Antispyware<br />
Security as an Ongoing Process • Chapter 8 459<br />
Antispyware software may be integrated with your antivirus software, or it<br />
may be its own independent product. In the latter case it will need to be<br />
updated, and all the same caveats that apply to antivirus will also pertain to<br />
www.syngress.com
460 Chapter 8 • Security as an Ongoing Process<br />
independent antispyware products. Because antispyware or malware products<br />
typically use signatures, like an antivirus program, these will need to be<br />
updated regularly. It is also worth pointing out that antispyware products are<br />
prone to a lot more false positives, particularly when it comes to networkrelated<br />
utilities. Because an average user doesn’t use these networking utilities,<br />
they are often flagged as malware.You will need to take this into account and<br />
provide some means to review the scan results, and preferably <strong>for</strong>m a white<br />
list of approved users and/or products in order to reduce the false positives.<br />
Intrusion Detection Systems<br />
Much of the same considerations <strong>for</strong> an antivirus solution apply <strong>for</strong> an IDS or<br />
intrusion prevention system (IPS) as well, at least if it’s signature based, such as<br />
Snort. Because the IDS/IPS uses a known sequence to identify hostile traffic,<br />
keeping the signatures current is vital.Typically, an IDS will alert you only of<br />
an intrusion, so there is little risk of failed or inadequate maintenance causing<br />
the IDS to result in a service disruption <strong>for</strong> other network traffic.These same<br />
guidelines are not true if you are using an IPS, which will take active measures<br />
to stop an intrusion. In the case of an IPS, it is critical that changes are thoroughly<br />
tested so that the IPS doesn’t inadvertently identify critical business<br />
traffic as hostile and terminate the connection. Most maintenance will be<br />
related to either updating the IDS/IPS application software itself, or the<br />
attack signatures. In all cases, adequate testing of the changes will help ensure<br />
that the changes are successful and do not adversely affect normal operations.<br />
Vulnerability Scanning<br />
Vulnerability scanning and penetration testing are often (incorrectly) used<br />
interchangeably. Vulnerability scanning is typically a passive activity.You are<br />
simply using automated software to check hosts <strong>for</strong> known vulnerabilities or<br />
risky (that is, insecure) settings.This is not a penetration test. A penetration<br />
test is an active attempt to compromise the security measures that are in<br />
place. Vulnerability scanning is not a substitute <strong>for</strong> a penetration test, but it is<br />
useful <strong>for</strong> determining the baseline of your security risks <strong>for</strong> a given system.<br />
Because the network is dynamic and ever changing, the vulnerability scanning<br />
process is never really done.The frequency of vulnerability scans will be<br />
www.syngress.com
determined by corporate policy, with consideration being given <strong>for</strong> the risk<br />
and sensitivity of the host in question. In the case of a very large network, it<br />
might take months <strong>for</strong> a complete scan of the network to finish, but in a<br />
small environment, a weekly scan is usually easy to implement.<br />
Updates to the scanning engine will occasionally need to be made. More<br />
commonly will be updates to the actual attack scripts that the scanner uses.<br />
Some scanners call these scripts plug-ins, while others call them scripts.This is<br />
what tells the scanning software how to check <strong>for</strong> a given vulnerability. If<br />
these are not current, you may not be checking <strong>for</strong> the latest risks, and thus<br />
might believe you are secure when in fact you are not. Because vulnerability<br />
scanners carry an especially high risk of causing s service disruption on the<br />
target host, any updates or changes to the scanner or the attack scripts should<br />
be thoroughly tested be<strong>for</strong>e being used on a large number of hosts.<br />
WARNING<br />
You may have noticed an emphasis on conducting a vulnerability scan<br />
carefully. This concept is repeated <strong>for</strong> good reason. Be sure to evaluate<br />
which tests are needed carefully be<strong>for</strong>e scanning a host and preferably<br />
scan a test system be<strong>for</strong>e targeting the entire network. Some of the<br />
tests can carry a very high risk of causing a service disruption. After a<br />
given set of tests has been run several times without causing any problems,<br />
the risk will be minimal; however, if changes are made to the<br />
environment, you once again are running a high risk of causing a<br />
service disruption.<br />
Vulnerability Management Cycle<br />
Security as an Ongoing Process • Chapter 8 461<br />
Because vulnerability scanning must be repeated on a regular basis, you must<br />
develop appropriate policies and procedures to accommodate this.These<br />
should include a schedule <strong>for</strong> when, and under what circumstances, a given<br />
host should be scanned.There should be a process <strong>for</strong> the appropriate parties<br />
to sign off when a system is deemed “clean,” as well as a procedure to accept<br />
a given risk in cases where it is undesirable or impossible to remediate at this<br />
time. A typical vulnerability scanning cycle would consist of the following<br />
steps (see Figure 8.2):<br />
www.syngress.com
462 Chapter 8 • Security as an Ongoing Process<br />
1. Per<strong>for</strong>m the Initial Scan This gives you a baseline of issues and is<br />
used in subsequent steps.<br />
2. Verify the Scan Results Some of the issues a vulnerability scanner<br />
finds may be false positives. In other cases they may be legitimate<br />
issues, but the issues may not be relevant because of other compensating<br />
controls the scanner cannot account <strong>for</strong>.<br />
3. Remediate Valid Issues This will include following all your<br />
change control procedures in an attempt to remove or mitigate the<br />
risk that the vulnerability scanner found.<br />
4. Rescan This last step is often skipped but it is important.This not<br />
only verifies that your remediation steps were successful, but demonstrates<br />
to management and, if needed, to auditors, that you are<br />
actively taking steps to safeguard your network.<br />
This cyclical process will be never ending in that once you have scanned a<br />
host, verified the scan results, per<strong>for</strong>med remediation <strong>for</strong> any issues, and then<br />
rescanned the host to verify your remediation ef<strong>for</strong>ts, it will be time to begin<br />
the process again.<br />
Figure 8.2 The Vulnerability Scanning Cycle<br />
www.syngress.com<br />
Rescan<br />
Scan<br />
Remediate<br />
Verify
Roles and Responsibilities<br />
As in all areas of network security, roles and responsibilities are important.<br />
This is even more so when it comes to vulnerability scanning and remediation.The<br />
roles of individuals should be clearly documented and defined, with<br />
signoff from management at the most senior level.This is <strong>for</strong> several reasons.<br />
For one, you want to ensure that when John says it’s okay to leave that drive<br />
share without any authentication, John is really qualified and authorized to<br />
speak on behalf of the business unit in question.You need to know that he<br />
understands the risks, and is able to be held accountable <strong>for</strong> any repercussions<br />
that may arise. Another reason to clearly document these roles and responsibilities<br />
is to demonstrate that there are no conflicts of interest occurring. If<br />
John is the one who will have to stay up during the maintenance window all<br />
weekend to configure the servers, it may not be appropriate <strong>for</strong> the same<br />
person to say the servers don’t need to be reconfigured.<br />
Penetration Testing<br />
Security as an Ongoing Process • Chapter 8 463<br />
Penetration testing carries many of the same concerns as vulnerability scanning<br />
but will often be per<strong>for</strong>med by a third party.This is because true penetration<br />
testing requires individuals with a high level of skill and knowledge.<br />
Few businesses have the workload or budget to have such staff full time.<br />
Instead it is very common to pay a trusted third party <strong>for</strong> penetration services.The<br />
costs of such services can be considerable. Because of this, penetration<br />
testing is typically only per<strong>for</strong>med on high-risk and/or high-criticality<br />
hosts and systems. Penetration testing when a new infrastructure is deployed<br />
isn’t really maintenance, but subsequent penetration tests will fall into that<br />
category.The criteria whereby a system/host will need to be penetration<br />
tested again should be clearly defined. In most cases the criteria will be on a<br />
scheduled basis (such as annually), or when significant changes have occurred,<br />
whichever comes first.You should work with your legal counsel to develop a<br />
consent <strong>for</strong>m that will protect you from accidental service disruptions.<br />
www.syngress.com
464 Chapter 8 • Security as an Ongoing Process<br />
Obtaining the Support of Senior Management<br />
Due to the nature of the checks, vulnerability scanning and especially penetration<br />
testing carry a high risk of causing a service disruption.There are just<br />
too many components that must work properly <strong>for</strong> everything to go<br />
smoothly. All it takes is any single process running on the target host to stop<br />
working and the system could come to a crashing halt. A little research and<br />
you can find countless stories of the overworked network admin who is<br />
testing something in an ef<strong>for</strong>t to help point out a security risk, only to lose<br />
his job <strong>for</strong> “hacking” the company resources. No matter how well your intentions<br />
may be, if you use Nessus to run a vulnerability scan against the server<br />
running the company Web site and it crashes the Web site, you will surely be<br />
in <strong>for</strong> some grief. It is <strong>for</strong> this reason that you must obtain approval from the<br />
most senior management possible be<strong>for</strong>e undertaking any of these high-risk<br />
activities.This approval should be in writing and signed by someone with the<br />
appropriate authority to do so.This may be the only thing you have to act as<br />
proof that your activities were authorized and legitimate.<br />
Clarify What You Are Buying<br />
The Latin phrase caveat emptor means “let the buyer beware.” When it comes<br />
to penetration testing this is especially true.There are a great many security<br />
consultants out there who will per<strong>for</strong>m a vulnerability scan using Nessus (<strong>for</strong><br />
free), print out the results, and hand the customer the report along with a bill.<br />
This is not a penetration test. A true penetration test requires someone who<br />
has the skill set to be a “hacker” but chooses to make a legal living out of<br />
security testing.You can get a lot more value out of your penetration testing<br />
by taking the time to sit down and talk with your prospective provider of<br />
such services. Ask <strong>for</strong> references, do your research and outline exactly what<br />
services they will be providing, in writing, prior to signing on the dotted line.<br />
There is nothing wrong with running a vulnerability scan, and there is<br />
nothing wrong if you want an expert to run the scan <strong>for</strong> you.You just need<br />
to be sure you are buying what you think you are buying. Being an educated<br />
consumer will help you obtain a better value with security services and help<br />
your organization be more secure.<br />
www.syngress.com
Policy Review<br />
Security as an Ongoing Process • Chapter 8 465<br />
You may be tired of all this maintenance, but believe it or not, even your<br />
policies need regular maintenance. As technologies change so must your policies.<br />
A new type of encryption could become available, or an established<br />
encryption algorithm could be rendered ineffective due to some new attack<br />
vector.This type of maintenance will include policies, standards, and procedures<br />
documents. Procedures are usually pretty easy to identify, but un<strong>for</strong>tunately,<br />
you will often see policies and standards used interchangeably.The following<br />
bullet points outline each of these types of documentation:<br />
■ Policies These high-level documents. do not contain details, but<br />
instead state a broad objective or requirement. A common example<br />
would be something like,“All data classified as highly confidential<br />
must be encrypted.”These documents are generated by senior staff<br />
and change infrequently. Changes to policy are usually prompted by<br />
business factors.<br />
■ Standards These documents represent the more technical requirements<br />
that are needed to meet policy. For example, a standard might<br />
state that “when data encryption is required by policy, it must be<br />
done using 3DES or AES encryption only.”These documents will<br />
change as the relevant technologies being used change.<br />
■ Procedures These documents contain the detailed, step-by-step<br />
instructions to be used <strong>for</strong> policy and standards compliance.They will<br />
specify exactly what utility to use, which radio buttons to enable, and<br />
what boxes to check.These documents may change often, depending<br />
on the technologies used. An update to a software product may completely<br />
change the procedures you have established. Different procedures<br />
may assume a different level of expertise on the part of the<br />
person per<strong>for</strong>ming the procedure, but the general rule is to make the<br />
documentation as easy to follow as possible.<br />
Each of these documents should be reviewed on a scheduled basis to<br />
ensure that they are still adequately addressing the security needs of the organization.After<br />
being reviewed and, if needed, modified, they should be submitted<br />
www.syngress.com
466 Chapter 8 • Security as an Ongoing Process<br />
to the appropriate parties <strong>for</strong> peer review and critique by the subject matter<br />
experts. When considered final, they should require written approval by senior<br />
management. In this way you can ensure that your policies don’t become outdated<br />
and lose their value.As with most changes, there should be some mechanism<br />
in place <strong>for</strong> implementing changes to policy and standards in an<br />
expedited fashion in the event of some emergency.<br />
Physical Security<br />
In many instances, physical security is overlooked, especially in a smaller organization<br />
where such concerns are often considered too unlikely to worry<br />
about. Physical security can include any security risks related to your environment.<br />
As an example, if someone were to suggest that you place your servers<br />
in your front lobby, you would probably consider them insane. However, I<br />
have seen many small businesses where the network equipment was in a<br />
closet with the door consistently propped open to provide ventilation.This is<br />
fine if you can ensure only authorized individuals have access to the area the<br />
closet is in, but this is rarely the case. Cleaning personnel and other support<br />
staff often have unrestricted access to sensitive systems. It may sound farfetched,<br />
but if one of those personnel had the know-how, how hard would it<br />
be <strong>for</strong> him or her to get to your most sensitive data? What if, instead, a bucket<br />
of cleaning water were accidentally dumped on the server that was key to<br />
your business?<br />
If you give it some careful thought, you may realize physical security is<br />
weak or nonexistent.The physical security of a site should be regularly<br />
reviewed and any weaknesses addressed. In some cases, the solution may be a<br />
simple change of process or policy; in others, some new equipment may be<br />
needed. When reviewing the physical security, consider whether or not<br />
someone can gain unauthorized physical access to networking components. Is<br />
authorized access logged or otherwise documented? Are sensitive materials<br />
being handled appropriately in all mediums? Are environmental risks being<br />
considered such as flood, fire, or temperature extremes? Are employees educated<br />
to speak up if they see something suspicious?<br />
Some physical security risks do not involve door locks or security fences.<br />
Most high-security environments mandate that any network ports that are not<br />
www.syngress.com
in use should be disabled.This is related to physical security because the<br />
intent is to prevent someone from plugging in an unauthorized device, such<br />
as a sniffer, and having access to the network.This concept of port access as a<br />
physical security concern can be extended to any type of data port, writable<br />
CD-ROM drives, infrared data ports, even to USB ports on the workstations.<br />
Any of these can offer an unauthorized individual access to data.<br />
Notes from the Underground…<br />
Security as an Ongoing Process • Chapter 8 467<br />
Know Where <strong>Your</strong> Sensitive Data Is (at All Times)<br />
If you are trying to figure out what to secure from the view of “is this<br />
server sensitive,” you are inviting problems. The correct approach is to<br />
know what data is sensitive (meaning classify all your data), and then<br />
know where that data resides at all points in its lifecycle. As an example,<br />
a business calls you, as your customer, and places a large order. They fax<br />
you their relevant tax ID and any other needed <strong>for</strong>ms. You get their payment<br />
in<strong>for</strong>mation verbally over the phone, process the order, and e-mail<br />
them a confirmation receipt.<br />
You know you need to store their payment in<strong>for</strong>mation securely so<br />
you encrypt the account details on the server’s hard drive. The e-mail<br />
receipt itself may need to be encrypted depending on what in<strong>for</strong>mation<br />
it contains, so you take that into account as well. When you’re on the<br />
phone you verify whom you are speaking to using existing account in<strong>for</strong>mation<br />
when possible. So are all your bases covered? Is the fax machine,<br />
which contains confidential in<strong>for</strong>mation, in a physically secured location<br />
or can unauthorized people walk by and see the faxed <strong>for</strong>ms? Are the<br />
server backup tapes secured? Depending on the encryption mechanism, if<br />
you can restore the entire server from tape, you might be able to access<br />
the encrypted data.<br />
The point here is to know where the sensitive data is at all times and<br />
to protect it accordingly.<br />
www.syngress.com
468 Chapter 8 • Security as an Ongoing Process<br />
CERT Team<br />
When the network is impacted by a crisis, you need a group of highly<br />
knowledgeable and skilled individuals who can react to the crisis and direct<br />
the response ef<strong>for</strong>ts.The crisis could take any number of <strong>for</strong>ms, from events<br />
such as a power outage, a virus outbreak, or a denial of service attack.This<br />
group is typically called a Computer Emergency Response Team (CERT) or a<br />
Computer Incident Response Team (CIRT).The size of this group could vary<br />
depending on the size and needs of your organization.The CERT team<br />
should meet regularly and review any outstanding security issues.This group<br />
will monitor the various security notification lists so that the organization can<br />
be aware of security issues in a timely fashion. When an issue does arise, the<br />
CERT team will meet and make an assessment of the threat and then call in<br />
the appropriate resources to deal with it.This could simply mean calling in<br />
the “IT guy,” notifying a law en<strong>for</strong>cement agency, or flying out a security<br />
expert to address the issue.<br />
Because the CERT team is responsible <strong>for</strong> halting or minimizing the<br />
damage from an emergency, it is typically backed by the highest level of management.This<br />
backing generally includes having access to significant resources<br />
if that is what is necessary to get the job done. While a small organization<br />
might not have a group of people make up the CERT team per se, you do<br />
want to consider taking some steps to be prepared.There should be a plan in<br />
place so that people know who to call if something goes wrong.The first<br />
contact person should be someone who can make a judgment call about<br />
technical issues and understand how severe the emergency truly is. Employees<br />
should be educated so that they can make an educated determination of<br />
when a computer emergency is occurring.<br />
The following is a list of some of the most widely used notification services.You<br />
may want to consider signing up <strong>for</strong> some of these so you can stay<br />
ahead of the in<strong>for</strong>mation curve. While some offer alternate means of notification,<br />
the most common one is a mailing list, in which case you will receive all<br />
the e-mails anyone sends to the list. Sorting through the e-mails can consume<br />
some time, but if you really want to be ahead of the game it’s worth it.You<br />
can be sure the hackers are using these services so they know about the new<br />
vulnerabilities as soon as possible.They are often counting on knowing about<br />
them be<strong>for</strong>e the security administrator <strong>for</strong> a company does.<br />
www.syngress.com
Security as an Ongoing Process • Chapter 8 469<br />
■ Bugtraq This is probably the largest and most well-known security<br />
mailing list.The volume can be high, but it is the cutting edge of<br />
security news.This list is not product specific, so much of it may not<br />
be relevant to your environment. Because this is a moderated list, it<br />
keeps the spam to a minimum.<br />
www.securityfocus.com/archive/1/description<br />
■ Microsoft Technical Security Notification Services This service<br />
offers various levels of in<strong>for</strong>mation using multiple channels (e-mail,<br />
RSS, and even instant messenger alerts).The scope of the notifications<br />
is of course only Microsoft products.<br />
www.microsoft.com/technet/security/bulletin/notify.mspx<br />
■ Full Disclosure This list is very similar to bugtraq in that it is not<br />
product specific, but this is an unmoderated list, which means news will<br />
hit slightly faster.The price one pays <strong>for</strong> this extra speed is that a lot<br />
of garbage gets on the list as well and not all the reported vulnerabilities<br />
are well tested or reliable.<br />
https://lists.grok.org.uk/mailman/listinfo/full-disclosure<br />
■ Security Basics This is a newbie-friendly list (many are not), so<br />
asking basic questions is accepted here.This is a good list <strong>for</strong> those<br />
just getting into network security.The list is moderated and fairly high<br />
volume. www.securityfocus.com/archive/105/description<br />
■ Firewall Wizards This is a very tightly moderated list focused on<br />
firewalls of all types.The quality of content if fairly high, so if administering<br />
a firewall is something you’re interested in I highly recommend<br />
this list. https://honor.trusecure.com/mailman/<br />
listinfo/firewall-wizards<br />
There are many more lists out there. Some are generic and contain in<strong>for</strong>mation<br />
related to any type of security issue, while others are very product<br />
specific. With a little searching you can find several that can serve not only as<br />
an early warning system <strong>for</strong> security-related news, but also as a sounding<br />
board to help you make sense of tough security questions that may arise.<br />
www.syngress.com
470 Chapter 8 • Security as an Ongoing Process<br />
Summary<br />
A secure network will stay secure only with proper maintenance.This maintenance<br />
needs to occur at many levels, such as patching software, upgrading<br />
hardware, and keeping IDS and antivirus signatures up to date. All of these<br />
upgrades and patches will need to con<strong>for</strong>m to a change management process,<br />
which is in place to ensure that changes happen in a controlled fashion,<br />
designed to minimize risk. Some <strong>for</strong>ethought should be applied to develop an<br />
appropriate response plan should a computer emergency occur. Remember,<br />
your network is much like a chain in that it is only as strong as the weakest<br />
link. If any one of these areas is neglected, you may be creating a security risk.<br />
As the network administrator, you have to secure all these avenues, whereas a<br />
hacker only needs to find one unpatched or out-of-date system to compromise<br />
your security.<br />
Solutions Fast Track<br />
Patch Management<br />
� Virtually all network devices will need to be patched at some time or<br />
another. When patches become available, evaluate if they are needed<br />
at this time or if you can wait <strong>for</strong> a bundled (such as a service pack<br />
or new kernel) release that has had time to undergo more rigorous<br />
testing.<br />
� Apply extra caution when patching core components whose<br />
malfunction could mean a loss of all network functionality.<br />
Change Management<br />
� All change carries some risk; change management is aimed at<br />
understanding and minimizing that risk.<br />
� Documenting changes is key to understanding your environment,<br />
which in turn lends itself to being able to troubleshoot the<br />
environment in the event of a service disruption.<br />
www.syngress.com
Antivirus<br />
� If you don’t keep your antivirus signatures up-to-date, you might as<br />
well not have any antivirus protection at all. Maintenance is<br />
absolutely vital <strong>for</strong> signature-based products.<br />
Antispyware<br />
� Antispyware software may be integrated with your antivirus software,<br />
or it may be its own independent product.<br />
� Because antispyware or malware products typically use signatures, like<br />
an antivirus program, these will need to be updated regularly.<br />
Intrusion Detection Systems<br />
� Keeping signatures up-to-date on a signature-based IDS is critical.<br />
� Testing any IDS is key to preventing false positives, and in the case of<br />
an IPS, adequate testing will help you avoid creating a computer<br />
emergency using the IPS.<br />
Vulnerability Scanning<br />
� Vulnerability scanning must be a regular, cyclical process.The task is<br />
never done unless you never make any change to your systems.<br />
Penetration Testing<br />
� Make sure there are no ambiguities, so that you know exactly what<br />
services you are getting <strong>for</strong> the agreed-upon fee.<br />
Policy Review<br />
Security as an Ongoing Process • Chapter 8 471<br />
� <strong>Your</strong> IT policies (and standards/procedures) will need regularly<br />
scheduled reviews, and, if needed, modifications to maintain their<br />
value and applicability.<br />
www.syngress.com
472 Chapter 8 • Security as an Ongoing Process<br />
Physical Security<br />
� Physical security can include any security risks related to your<br />
environment.<br />
� Most high-security environments mandate that any network ports<br />
that are not in use should be disabled.This prevents unauthorized<br />
users from inadvertently using the data port to attack the system, load<br />
malicious software, or transfer sensitive/confidential data.<br />
CERT Team<br />
� You should have a procedure in place to respond to computer-related<br />
emergencies, including contact procedures so that the initial discovery<br />
can be escalated properly.<br />
Frequently Asked Questions<br />
The following Frequently Asked Questions, answered by the authors of this book,<br />
are designed to both measure your understanding of the concepts presented in<br />
this chapter and to assist you with real-life implementation of these concepts. To<br />
have your questions about this chapter answered by the author, browse to<br />
www.syngress.com/solutions and click on the “Ask the Author” <strong>for</strong>m.<br />
Q: How much in<strong>for</strong>mation should penetration testers have about the target<br />
be<strong>for</strong>e they begin?<br />
A: This varies. Often, the testers will begin with no in<strong>for</strong>mation and have to<br />
gather it on their own.This would simulate what an external attacker<br />
could come up with. After an initial round of penetration testing using<br />
only the data that was gathered by the testers, follow-up testing is sometimes<br />
per<strong>for</strong>med after providing the testers with full in<strong>for</strong>mation regarding<br />
the architecture and processes in place.This second stage is to simulate the<br />
types of compromises an inside attacker who was knowledgeable about<br />
the target environment may attempt. In this way, the first penetration<br />
attempts would have a different set of obstacles.The filters on your firewalls<br />
are likely to be very different if you are coming in from the Internet<br />
www.syngress.com
Security as an Ongoing Process • Chapter 8 473<br />
than if you are internal to the organization. Although penetration testing<br />
isn’t always done this way, it does represent a very thorough way to test.<br />
Q: Should we tell other staff about a penetration test, which may “warn”<br />
employees to be extra vigilant?<br />
A: Again, this if often done both ways, with the initial intrusions serving the<br />
dual purpose of testing your security and testing your IDSes and security<br />
response. After the initial responses, everyone will know the penetration<br />
test is underway and any pretense can be dropped, with security staff only<br />
monitoring the activities and likely providing reporting of what activity<br />
was detected.<br />
Q: Do all these roles need to be different people or can they all be done by<br />
the same person?<br />
A: The best guideline is to try to avoid any potential conflict of interest. If the<br />
person who is approving the server patches is the person who is applying<br />
the server patches, he or she might have a reason to “approve” applying<br />
them at lunch, rather than waiting until the weekend so that he or she<br />
doesn’t need to come into work on the weekend. It probably won’t be<br />
possible to avoid all potential conflicts of interest in a smaller organization.<br />
In instances where it cannot be avoided, try to seek additional management<br />
signoff so that at least an additional set of eyes have approved the<br />
maintenance activity, and make sure all maintenance is well documented.<br />
Q: Where is the end of the vulnerability scanning cycle?<br />
A: There is no “end.” After the vulnerability scanning cycle has been implemented,<br />
steps 2 through 4 will be repeated <strong>for</strong>ever.<br />
www.syngress.com
A<br />
access<br />
administrative, permitting, 72<br />
controls, 137<br />
file-level controls, 147–152<br />
mandatory and discretionary<br />
controls, 173<br />
remote, 72, 86–130<br />
user, group rights, 142–147<br />
Access Control Lists. See ACLs<br />
access points (wireless), security of,<br />
388<br />
access request <strong>for</strong>ms, 362–364<br />
AccessChk utility, 151–152<br />
AccessEnum utility, 150<br />
account lockout policies, 159–160<br />
account logon events, auditing,<br />
269<br />
accounts, renaming Administrator,<br />
142–144<br />
ACID (Analysis Console <strong>for</strong><br />
Intrusion Databases), 246, 256<br />
ACLs (Access Control Lists)<br />
Cisco example, 40<br />
and Linux firewall rules, 36,<br />
40–41<br />
and screened subnets, 28<br />
active directory events, auditing,<br />
269<br />
administration<br />
NC client warnings, 124<br />
Index<br />
permitting administrative access,<br />
netfilter, 72<br />
Administrator account, renaming,<br />
142–144<br />
AES (Advanced Encryption<br />
Standard), 424<br />
alert groups, configuring (BASE),<br />
253<br />
alerts<br />
configuring Snort to send email,<br />
261<br />
PRTG Traffic Grapher, 411<br />
algorithms, encryption hash, 336<br />
analysis, collecting data <strong>for</strong>,<br />
392–394<br />
Analysis Console <strong>for</strong> Intrusion<br />
Databases (ACID), 246, 256<br />
analyzing<br />
syslog logs, 312–327<br />
Windows event logs, 277–279<br />
Angry IP Scanner, 351–352<br />
anomaly-based IDSs, 217<br />
antennas, wireless, 359<br />
antispyware software, 188–201,<br />
211, 212, 459–460<br />
antivirus protection, providing,<br />
188–201, 211, 212, 458<br />
application gateways, 26<br />
application patches, 453–454<br />
architecture, firewall, 26–31<br />
assignment of user rights<br />
Linux, 165–168<br />
475
476 Index<br />
Windows, 160–163<br />
auditing<br />
documentation and, 363<br />
policies, 160<br />
and system hardening, 138–139<br />
authentication, 137–138, 156<br />
authorization, and in<strong>for</strong>mation<br />
access, 138<br />
Automatic Updates (Windows),<br />
177–179<br />
B<br />
back doors, and system<br />
compromise, 34<br />
Back Oriface Trojan (BOPing),<br />
355<br />
bandwidth, reporting on usage,<br />
392–394, 442<br />
Barnyard (Snort add-on), 256<br />
BASE (Basic Analysis and Security<br />
Engine), running with Snort,<br />
246–254<br />
baselines, checking <strong>for</strong> Microsoft<br />
products, 379–380<br />
Basic Analysis and Security Engine<br />
(BASE), 246–254<br />
Bastille hardening script, 172–173<br />
Bird,Tina, 331–332<br />
Blat.exe SMTP program, 320<br />
Bmail SMTP program, 320<br />
Bugtraq security mailing list, 469<br />
business continuity (BC) and<br />
disaster recovery (DR) plans,<br />
365<br />
C<br />
CA certifiates, OpenVPN’s<br />
support, 100<br />
CD-ROM, installing Linux from,<br />
33–36<br />
CERT (Computer Emergency<br />
Response Team), 468–469<br />
Certificates of Authenticity (CA),<br />
100<br />
cfgmaker, 398<br />
chain of custody, ensuring, 328<br />
chains in Linux firewalls, 36–39,<br />
44<br />
change management, 454–459,<br />
470–471<br />
checkpoint firewalls, 32<br />
CIRT (Computer Incident<br />
Response Team), 468–469<br />
Cisco PX firewalls, 32, 40<br />
Clam AntiVirus program, 189–195<br />
classifying data, 135–136<br />
climate controls, costs of, 5–6<br />
commands<br />
See also specific command<br />
iptables, 46, 52–56<br />
Linux user and group<br />
administration, 167–168<br />
commercial security solutions vs.<br />
free solutions, 8–16<br />
communication, security testing,<br />
384<br />
Computer Emergency Response<br />
Team (CERT), 468–469
Computer Incident Response<br />
Team (CIRT), 468–469<br />
confidentiality of in<strong>for</strong>mation, 136<br />
configuring<br />
alert groups (BASE), 253<br />
IDSs (intrusion detection<br />
systems), 217–221, 259<br />
IPSec on Linux host, 305–311<br />
Linux firewalls, 42–56<br />
MRTG (Multi Router Traffic<br />
Grapher), 397–400<br />
MZL and Novatech<br />
TrafficStatistic, 400–403<br />
netfilter, 32<br />
ntop utility, 412–418<br />
OpenVPN, 98–108<br />
PRTG Traffic Grapher, 400–403<br />
SmoothWall Express firewall<br />
solution, 80–85<br />
Snort on Linux system, 240–254<br />
Snort on Windows system,<br />
221–239<br />
Stunnel encryption, 300–302<br />
TCP Wrappers, 187–188<br />
Windows Firewall, 85–86<br />
consulting costs and free security<br />
solutions, 4, 12<br />
contact list <strong>for</strong> change<br />
management, 458<br />
converting Windows event logs<br />
into syslog-compatible<br />
<strong>for</strong>mat, 283<br />
Index 477<br />
costs<br />
of free security solutions, 13, 19<br />
and savings of free security<br />
solutions, 2–8<br />
critical patches, 449<br />
custody, chain of, 328<br />
customization costs, 7–9<br />
D<br />
data<br />
classifying, 135–136<br />
collecting <strong>for</strong> analysis, 392–394<br />
encrypting sensitive, 201–209<br />
encrypting syslog traffic, 285–294<br />
security of sensitive, 467<br />
sniffing, 392<br />
Data Encryption Standard (DES),<br />
424<br />
“defense-in-depth” described, 24<br />
deleting rules, chains, in Linux<br />
firewalls, 44<br />
demilitarized zones. See DMZs<br />
denial-of-service (DoS) attacks,<br />
292<br />
DES (Data Encryption Standard),<br />
424<br />
Designing and Building Enterprise<br />
DMZs (<strong>Syngress</strong>), 30<br />
desktops, proving remote, 108–125<br />
destination NAT (DNAT), 49<br />
devices, network infrastructure<br />
hardening, 175–176, 210<br />
security, 452
478 Index<br />
DHCP (Dynamic Host<br />
Configuration Protocol),<br />
firewalls and, 6<br />
diagrams, network security,<br />
362–364<br />
disaster recovery (DR) plans, 365<br />
digest authentication protocol, 424<br />
disabling<br />
Fedora Core 5 firewall, 43<br />
newly created policy, 273<br />
DMZs (demilitarized zones)<br />
costs of, 9–10<br />
one-legged, 28–29<br />
true DMZs, 30–31<br />
and VPN tunnels, 87–88<br />
DNAT (destination NAT), 49<br />
DNS, dynamic, 85<br />
documentation<br />
access request <strong>for</strong>ms, 364–365<br />
and change management, 455,<br />
457<br />
IT security policies, standards,<br />
procedures, 365–366<br />
network security, 361–362<br />
syslog manual, 297<br />
domain controllers, auditing<br />
policies <strong>for</strong> clients logging<br />
into, 272–274<br />
domain policies, 154<br />
DoS (denial-of-service) attacks,<br />
292<br />
downloading security programs,<br />
tools safely, 356<br />
DTLS (Datagram TLS), 286<br />
dynamic DNS, SmoothWall<br />
support, 85<br />
Dynamic Host Configuration<br />
Protocol. See DHCP<br />
E<br />
e-mail alerts, configuring Snort to<br />
send, 261<br />
Easy Firewall Generator, 66<br />
edge firewalls, 28<br />
EFS (encrypted file system),<br />
201–208, 213<br />
enabling<br />
Fedora Core 5 firewall, 43<br />
SELinux (security-enhanced<br />
Linux), 174<br />
Windows Terminal Services,<br />
109–110<br />
encrypted file system (EFS),<br />
201–208, 213<br />
encrypting<br />
sensitive data, 201–208, 211<br />
syslog traffic, 285–311<br />
UDP-based logs, 335<br />
encryption<br />
best hash algorithm, 336<br />
EFS (encrypted file system),<br />
201–208<br />
NetStumbler’s detection of, 360<br />
SNMP versions, 424<br />
EST (Enterprise Scan Tool), 380<br />
Ethereal, 428<br />
Event Log XP, 278
event logs<br />
analyzing Windows, 277–279<br />
described, 264<br />
ensuring chain of custody, 3285-<br />
66<br />
ensuring log integrity, 329–331<br />
generating, analyzing syslog,<br />
279–327, 333<br />
generating Windows, 264–279,<br />
333<br />
securing, 327–329, 334<br />
Event Viewer (Windows), using<br />
with event logs, 264–265<br />
EventCombMT (Microsoft),<br />
275–277<br />
eventcreate.exe, 275, 285<br />
EventLog Analyzer 4, 314–316<br />
Eventlog to Syslog Utility (evtsys),<br />
283<br />
eventlog.pl, 275, 277<br />
eventquery.vbs, 275<br />
events<br />
generating syslog, <strong>for</strong> testing, 335<br />
searching <strong>for</strong> in<strong>for</strong>mation on,<br />
267<br />
evtsys (Eventlog to Syslog Utility),<br />
283<br />
exporting event logs, 278<br />
F<br />
Fedora Core 5<br />
configuring Snort on Linux<br />
system, 240<br />
firewall configuration, 43<br />
Index 479<br />
and <strong>Free</strong>NX, 120<br />
installing, 429<br />
file-level access controls<br />
Linux, 168–171<br />
Windows, 147–152<br />
File Transfer Protocol (FTP) and<br />
firewall types, 26<br />
Firestarter Linux configuration<br />
tool, 59–65<br />
firewall appliances, 32<br />
Firewall Builder tool, 66–75<br />
firewall wizards, 469<br />
firewalls<br />
See also specific firewall<br />
architectures of, 26–31<br />
blocking network pings, 339<br />
costs of, 6–7, 9–10<br />
Linux. See Linux firewalls<br />
personal, hardening, 180–188,<br />
210<br />
scanning ports through, 342<br />
types of, 24–26<br />
floppy disks, installing Linux from,<br />
35–36<br />
<strong>for</strong>ms, access request, 364–365<br />
fport utility, 441<br />
free security solutions<br />
costs of, 2–6, 19–20<br />
savings of, 6–8, 19–20<br />
“selling,” 16–18, 20<br />
vs. commercial solutions, 8–16<br />
<strong>Free</strong>NX servers, setting up,<br />
120–121
480 Index<br />
FTP (File Transfer Protocol) and<br />
firewall types, 26<br />
G<br />
generating<br />
syslog event logs, 279–327, 333<br />
syslog events (Linux), 297–298<br />
test events, 311–312<br />
Windows event logs, 264–279,<br />
333<br />
GPO (group policy object),<br />
153–156, 159<br />
Group Policy, auditing policies <strong>for</strong>,<br />
273<br />
group policy object (GPO),<br />
153–156, 159<br />
group rights<br />
Linux, 165–168<br />
Windows, 160–163<br />
groups, defining access, 142–147<br />
GUI sniffers, troubleshooting<br />
network problems using,<br />
424–433<br />
H<br />
hardening<br />
infrastructure devices, 175–176,<br />
210<br />
Linux systems, 164–175<br />
personal firewalls, 180–188, 210<br />
systems generally, 133–139, 209<br />
Windows systems, 139–163,<br />
209–210<br />
hardware<br />
costs of free security solutions,<br />
3–4<br />
IDS requirements, 218<br />
vs. software firewalls, 32<br />
hash algorithms, choosing, 336<br />
HIDS (host-based IDS), 217–218<br />
high-risk patches, 449<br />
home network routers,<br />
configuring with Linux<br />
firewall, 47–51<br />
host-based IDS (HIDS), 217–218<br />
hosts, 214<br />
HouseCall online virus scanner,<br />
196<br />
HTTP requests and firewall types,<br />
25–26<br />
HVAC (heating, ventilation and air<br />
conditioning), costs of free<br />
security solutions, 5–6<br />
I<br />
identifying and inventorying your<br />
systems, 338–341<br />
IDS Policy Manager (IDSPM),<br />
configuring, 232–239<br />
IDSs (intrusion detection systems)<br />
configuring, 217–221<br />
demonstrating effectiveness,<br />
257–258<br />
maintenance, 460<br />
management capability, 11<br />
training costs, 3–4<br />
types of, 216–217, 259
implementing firewalls, 31–86<br />
in<strong>for</strong>mation security, testing <strong>for</strong>,<br />
383<br />
infrastructure devices, hardening,<br />
175–176, 210<br />
installing<br />
Clam AntiVirus on Linux,<br />
189–193<br />
Clam AntiVirus on Windows,<br />
189–193<br />
iPig VPN solution, 93–98<br />
Linux firewalls, 31<br />
Linux options, 33–36<br />
SmoothWall Express firewall<br />
solution, 77–80<br />
Snort, 222–225<br />
Windows Terminal Services,<br />
111–112<br />
Institute <strong>for</strong> Security and Open<br />
Methodologies (ISECOM),<br />
384–385<br />
interfaces, one-legged DMZs,<br />
28–29<br />
Internet technology security,<br />
383–384<br />
intrusion detection systems. See<br />
IDSs<br />
intrusion prevention systems<br />
(IPSs), 217, 261<br />
inventorying<br />
your systems generally, 338–341,<br />
386<br />
your systems using Nmap,<br />
341–347<br />
Index 481<br />
your systems using SuperScanner,<br />
347–351<br />
ipchains, 32<br />
iPig VPN solution, 93–98<br />
IPS (intrusion prevention systems),<br />
460<br />
IPSec<br />
configuring (Linux), 305–311<br />
encrypting syslog traffic using,<br />
288–294<br />
encryption capabilities, 286<br />
<strong>for</strong> syslog encryption, 310–311<br />
and VPN tunnels, 88<br />
IPSs (intrusion prevention<br />
systems), 217, 261<br />
iptables<br />
chain and rule manipulation<br />
commands, 46<br />
command summary, 52–56<br />
configuring logging, 51–52<br />
described, 32<br />
ISECOM (Institute <strong>for</strong> Security<br />
and Open Methodologies),<br />
384–385<br />
IT (in<strong>for</strong>mation technology), 365<br />
K<br />
KDE Guarddog GUI, 76<br />
Kerio Personal Firewall, 180<br />
Kiwi Logfile Viewer, 313–317<br />
Kiwi <strong>Secure</strong> Tunnel, 287<br />
Kiwi Syslog Daemon, 313,<br />
316–320
482 Index<br />
Kiwi Syslog Message Generator,<br />
311–312<br />
KiwiSyslog, 295–297<br />
L<br />
LanManager authentication, 156<br />
layer 7 firewalls, 26<br />
Libwww HTML utilities, 321<br />
Linksys firewalls, 6–7, 28, 47<br />
Linux<br />
Clam AntiVirus, installing,<br />
189–193, 189–193<br />
configuring Snort on, 240–254,<br />
259<br />
firewalls. See Linux firewalls<br />
hosts, enabling SNMP on,<br />
421–424<br />
installing Wireshark on, 428<br />
Nessus scanner, running,<br />
371–375<br />
patching systems, 179–180<br />
reporting tool features (table),<br />
418<br />
SELinux (security-enhanced<br />
Linux), using, 173–175<br />
syslog, generating, encrypting,<br />
receiving events, 297–312<br />
syslog log analysis, 321–327<br />
systems, hardening, 164–175,<br />
209–210<br />
and tcpdump, 434<br />
user and group administration,<br />
165–168<br />
Linux firewalls<br />
configuring, 42–52<br />
Easy Firewall Generator, Firewall<br />
Builder tools, 66–75<br />
Firestarter configuration tool,<br />
59–65<br />
operation of, 36–42<br />
security level configuration,<br />
56–57<br />
versions, choosing, 32–36<br />
listening ports, changing, 109<br />
locating<br />
and inventorying your systems,<br />
338–341<br />
wireless systems, 357–358<br />
log analysis tools, 325–327<br />
log files<br />
analysis plan, implementation,<br />
331–333<br />
analysis, resources <strong>for</strong>, 333<br />
auditing, 138–139<br />
retention period of, 335<br />
logevent.exe, 275<br />
logging<br />
See also event logs<br />
configuring <strong>for</strong> Linux firewalls,<br />
51–52<br />
ensuring chain of custody, 328<br />
ensuring log integrity, 329–331<br />
options, Snort, 253–254<br />
LogMeIn Hamachi, 98<br />
logon events, auditing, 269<br />
logwatch reporting tool, 325–327
Lokkit menu <strong>for</strong> configuring<br />
netfilter firewall, 58–59<br />
Lucent Orinoco chipset, 358<br />
M<br />
MAC addresses, viewing, 345<br />
management<br />
change, 454–459, 470–471<br />
and free security solutions, 11<br />
patch, 448–451<br />
patch management, 453–454<br />
senior, support <strong>for</strong> penetration<br />
testing, 463–464<br />
Management In<strong>for</strong>mation Base<br />
(MIB), and SNMP, 395<br />
MASQUERADE command, 50,<br />
58<br />
metrics<br />
<strong>for</strong> comparing products, 13–14<br />
reporting, 390–392<br />
MIB (Management In<strong>for</strong>mation<br />
Base), and SNMP, 395<br />
Microsoft<br />
See also specific product<br />
group policy object (GPO),<br />
153–156<br />
Microsoft Application Verifier, 146<br />
Microsoft Baseline Security<br />
Analyzer (MBSA), 379–382<br />
Microsoft Malicious Software<br />
Removal Tool, 200–201<br />
Microsoft Management Console.<br />
See MMC<br />
Index 483<br />
Microsoft Office Visio 2003<br />
Connector, 382<br />
Microsoft Standard User Analyzer,<br />
146<br />
Microsoft Technical Security<br />
Notification Services, 469<br />
Microsoft Windows Defender,<br />
197–199<br />
MMC (Microsoft Management<br />
Console)<br />
collecting Windows event logs,<br />
275–277<br />
configuring Security<br />
Configuration and Analysis<br />
snap-in, 267–274<br />
hardening Windows systems,<br />
139–141<br />
MRTG (Multi Router Traffic<br />
Grapher), 391, 397–400,<br />
444–445<br />
Multi Router Traffic Grapher. See<br />
MRTG<br />
MySQL and Snort, 246–247<br />
MZL, configuring, 391, 400–403<br />
N<br />
NASL (Nessus Attack Scripting<br />
Language), 377, 388<br />
NAT (<strong>Network</strong> Address<br />
Translation)<br />
configuring <strong>for</strong> Linux firewall,<br />
48–51<br />
firewalls and, 6–7<br />
Nbtscan, 355
484 Index<br />
ncurses and Lokkit menu <strong>for</strong><br />
configuring netfilter firewall,<br />
58<br />
Nessus scanner<br />
described, 367–368, 464<br />
running on Linux, 371–375<br />
running on Windows, 368–371<br />
net-snmp-utils package, 421<br />
NetBIOS in<strong>for</strong>mation, gathering,<br />
355<br />
netcat troubleshooting tool, 439<br />
Netfilter firewall, 187<br />
netfilter Linux firewalls<br />
configuration examples, 42–57<br />
configuring, 32<br />
and Easy Firewall Generator, 66<br />
Firestarter front end, 59–65<br />
and Firewall Builder tool, 66–75<br />
operation of, 36–42<br />
NetFlow protocol, 394, 403<br />
Netgear router/firewalls, 47<br />
netstat utility, 440–441<br />
<strong>Network</strong> Address Translation. See<br />
NAT<br />
network analysis tools, 15–16<br />
network-based IDS (NIDS),<br />
217–221<br />
network interfaces, renaming, 100<br />
network resources, basic<br />
hardening, 133–139<br />
network scanners<br />
Angry IP Scanner, 351–352<br />
Nmap, 341–347, 341–347<br />
Scanline scanner, 352–355<br />
special-purpose enumerators,<br />
355–357<br />
SuperScanner, 347–351<br />
networks<br />
documentation, diagrams,<br />
361–362<br />
infrastructure device security, 452<br />
inventorying your systems,<br />
338–341<br />
perimeter protection, 24<br />
troubleshooting problems,<br />
424–438<br />
Virtual Private <strong>Network</strong>s. See<br />
VPNs<br />
nGenius Per<strong>for</strong>mance Manager<br />
(Netscout), 15–16<br />
NGsniff, 281<br />
ngSniff sniffer, 435–436<br />
NIDS (network-based IDS),<br />
217–221<br />
Nmap network scanner, 341–347,<br />
377<br />
NmapFE, 341–342<br />
Novatech TrafficStatistic,<br />
configuring, 391, 400–403<br />
NTLast event log analyzer, 279<br />
ntop utility, 392, 412–418, 444<br />
NTsyslog, 283–284<br />
NX Client, 132<br />
O<br />
Object Identifier (OID), and<br />
SNMP, 395–396, 400
objects, auditing access, 270<br />
OID (Object Identifier), and<br />
SNMP, 395–396, 400<br />
Oinkmaster (Snort add-on),<br />
254–257<br />
one-legged DMZs, 28–29<br />
open source software, 8<br />
OpenSSH<br />
generating new certificate and<br />
key using, 303–305<br />
port <strong>for</strong>warding with, 299<br />
OpenSSL, generating message<br />
digests using, 331<br />
OpenVPN, configuring, 98–108<br />
OPENXTRA Commander,<br />
412–414<br />
operating system patches, 453<br />
operating systems, hardening,<br />
134–139<br />
organizational units (OUs)<br />
auditing policies, 272<br />
and group policy objects<br />
(GPOs), 153–156<br />
OSSTMM (Open Source Security<br />
Testing Methodology<br />
Manual), 382–385<br />
overwriting event logs, 274<br />
P<br />
packets, and packet-filtering<br />
firewalls, 25<br />
password policies, 139<br />
patch management<br />
generally, 448–451, 470<br />
Index 485<br />
network infrastructure devices,<br />
452<br />
operating system, application<br />
patches, 453–454<br />
patching Linux systems, 176–177<br />
patching Windows systems,<br />
177–179<br />
<strong>for</strong> protected hosts, 214<br />
penetration testing, 463–464,<br />
472–473<br />
per<strong>for</strong>mance of free security<br />
solutions, 14<br />
permissions, Windows, 149–151<br />
personal firewalls, hardening,<br />
180–188<br />
physical security<br />
ongoing, 466–467<br />
policies <strong>for</strong>, 136<br />
testing <strong>for</strong>, 384<br />
ping scanning<br />
detecting risky ports, 387<br />
inventorying hosts on network,<br />
339<br />
PIX firewalls (Cisco), 32<br />
PKI (public key infrastructure),<br />
and OpenVPN, 100, 105–106<br />
planning<br />
business continuity (BC) and<br />
disaster recovery (DR) plans,<br />
365<br />
change management backout,<br />
457–458<br />
plug-ins, writing custom security,<br />
388
486 Index<br />
PNAT (port NAT), 50<br />
point-to-point tunneling protocol<br />
(PPTP), 89–90<br />
policies<br />
account lockout, 159–160<br />
audit, 160<br />
auditing changes to, 270<br />
domain, 154<br />
firewall. See specific firewall<br />
and hardening systems, 135–137<br />
IT security, 365<br />
maintenance and review,<br />
465–466<br />
password, 139<br />
policy groups, Firestarter Linux<br />
configuration tool, 63–65<br />
port <strong>for</strong>warding<br />
configuring SmoothWall, 83–84<br />
OpenSSH, 303–305<br />
SSH functionality, 132<br />
port NAT (PNAT), 50<br />
ports<br />
changing listener, 109<br />
inventorying your systems, 339<br />
risky to target hosts, 387<br />
scanning through firewalls, 342<br />
PPTP (point-to-point tunneling<br />
protocol), 89–90<br />
privacy and wireless systems, 361<br />
privileges, auditing user rights, 270<br />
procedures<br />
IT security, 365–366<br />
and policy review, 465<br />
process security, testing <strong>for</strong>, 373<br />
products<br />
See also specific product<br />
metrics <strong>for</strong> comparing, 13–14<br />
programming languages<br />
NASL (Nessus Attack Scripting<br />
Language), 377, 388<br />
Perl, 397<br />
proposals <strong>for</strong> selling free security<br />
solutions, 17–18<br />
protocols. See specific protocols<br />
PRTG Traffic Grapher, 391–392<br />
public key infrastructure. See PKI<br />
PuTTY, and SSH, 128–130<br />
R<br />
Racoon daemon (Linux), 307–308<br />
RealVPC, 113<br />
Red-Hat-based Linux, security<br />
level configuration, 56–57<br />
regular expression (regex) filtering<br />
syntax, and swatch, 324<br />
remote access<br />
permitting administrative access,<br />
netfilter, 72<br />
providing secure, 86–130<br />
remote desktops, providing,<br />
108–125<br />
remote monitoring (RMON)<br />
protocol, 394<br />
remote shell, providing, 125–130<br />
removing malicious software,<br />
200–201
enaming<br />
Administrator account, 142–144<br />
network interfaces, 100<br />
reporting<br />
on bandwidth usage, 390–392,<br />
442<br />
and free security solutions, 11–12<br />
Novatech TrafficStatistic,<br />
400–403<br />
retention<br />
configuring event lo, 274<br />
of log files, 335<br />
review of security policies,<br />
465–466<br />
rights, user. See user rights<br />
RMON (remote monitoring)<br />
protocol, 394<br />
roles and responsibilities,<br />
vulnerability scanning, 463<br />
routers<br />
configuring home, with Linux<br />
firewall, 47–51<br />
hardening, 175–176<br />
RRDtool (Round Robin<br />
Database tool), 445<br />
rules<br />
creating Snort to trigger <strong>for</strong><br />
specific traffic, 262<br />
deleting in Linux firewalls, 44<br />
in Linux iptables, 40–42<br />
rulesets, saving <strong>for</strong> netflter, 52<br />
runas.exe tool, 145<br />
Index 487<br />
S<br />
savings and costs of free security<br />
solutions, 2–8, 19–20<br />
Scanline scanner, 352–355<br />
scanners<br />
Nessus, 367–375<br />
NetStumbler, 358–361<br />
network. See network scanners<br />
online virus, 196, 212<br />
X-Scan, 375–379<br />
scanning<br />
<strong>for</strong> vulnerabilities, 366–367, 387,<br />
473<br />
vulnerability, 366–372, 460–463<br />
scheduling, and change<br />
management, 455–456<br />
screened subnets, 27–28<br />
scripting languages, 397<br />
scripts<br />
Bastille hardening, 172–173<br />
ntop utility, 414–415<br />
scanning, 461<br />
Seattle Wireless Web site, 359<br />
secedit.exe utility, 158<br />
<strong>Secure</strong> Shell (SSH), using,<br />
126–130<br />
securing<br />
event logs, 327–331, 334<br />
IDSs (intrusion detection<br />
systems), 217–221<br />
network perimeter, 24<br />
security
488 Index<br />
assessments, per<strong>for</strong>ming, 382–385<br />
of free security solutions, 14<br />
and network documentation,<br />
361–362<br />
network infrastructure devices,<br />
452<br />
as ongoing process, 448<br />
patch management, 448–451<br />
physical, 466–467<br />
policy review, 465–466<br />
remote access. See remote access<br />
<strong>for</strong> sensitive data, 467<br />
SNMP (Simple <strong>Network</strong><br />
Management Protocol),<br />
396–397<br />
solutions, free. See free security<br />
solutions<br />
Windows documentation <strong>for</strong><br />
hardening systems, 152–153<br />
Security Configuration and<br />
Analysis snap-in, audit policy<br />
configuration, 267–274<br />
Security Templates snap-in,<br />
156–157<br />
SELinux (security-enhanced<br />
Linux), using, 173–175<br />
selling free security solutions,<br />
16–18, 20<br />
Senao wireless cards, 358<br />
sendEmail SNMTP program, 321<br />
sensitive data, security, 201–208,<br />
211, 467<br />
servers<br />
inventorying your systems,<br />
338–341<br />
iPig VPN solution, 93–98<br />
securing logging, 292<br />
service level agreements (SLAs), 7<br />
Service Pack 2 <strong>for</strong> Windows XP,<br />
and patch management, 448<br />
set group ID (SGID) bit, 169–171<br />
set user ID (SUID), 169–171<br />
shell, remote, 125–130<br />
Simple Mail Transfer Protocol<br />
(SMTP), 26<br />
Simple <strong>Network</strong> Management<br />
Protocol. See SNMP<br />
SLAs (service level agreements), 7<br />
SmoothWall Express firewall<br />
solution, 76–85<br />
SMTP (Simple Mail Transfer<br />
Protocol) and firewall types,<br />
26<br />
SNARE utility, 283–284, 286<br />
SNAT (source NAT), 49, 50<br />
sniffers, 425–433<br />
features (table), 438<br />
ngSniff, 435–436<br />
tcpdump, 437–438<br />
troubleshooting network<br />
problems using commandline,<br />
433–438<br />
troubleshooting network<br />
problems using GUI,<br />
424–433<br />
Wireshark, 425–433
sniffing data generally, 392–394<br />
SNMP (Simple <strong>Network</strong><br />
Management Protocol)<br />
described, 394–397, 443<br />
devices, 393<br />
enabling on Windows hosts,<br />
418–421<br />
Multi Router Traffic Grapher,<br />
configuring, 397–400<br />
MZL and Novatech<br />
TrafficStatistic, configuring,<br />
400–403<br />
ntop utility, configuring, 412–418<br />
PRTG Traffic Grapher,<br />
configuring, 403–412<br />
security, 396–397<br />
traps, configuring, 297<br />
versions of, 424<br />
Snort IDS (intrusion detection<br />
system)<br />
and Basic Analysis and Security<br />
Engine (BASE), 246–254<br />
configuring on Linux system,<br />
240–254, 259<br />
configuring on Windows<br />
systems, 221–239, 259<br />
configuring to send e-mail alerts,<br />
261<br />
creating rule to trigger <strong>for</strong><br />
specific traffic, 262<br />
Oinkmaster and other add-ons,<br />
254–257<br />
and SmoothWall firewall, 84–85<br />
training costs, 3<br />
Index 489<br />
using GUI front end, 231–232<br />
Snort Intrusion Detection and<br />
Prevention Toolkit (<strong>Syngress</strong>),<br />
217–221<br />
Snortsnarf log analyzer, 257<br />
SNScan, 355<br />
software<br />
antivirus, antispyware systems,<br />
188–201, 212, 459–460<br />
commercial vs. free security<br />
solutions, 8–16<br />
costs of, 7–8<br />
“free,” 21<br />
free security solutions. See free<br />
security solutions<br />
IDS/IPS, 460<br />
removing malicious, 200–201<br />
vs. hardware firewalls, 32<br />
source NAT (SNAT), 49, 50<br />
spyware, and antispyware software,<br />
188–201, 212, 458–459<br />
Squil (Snort add-on), 256–257<br />
SSH (<strong>Secure</strong> Shell)<br />
enabling using SmoothWall,<br />
80–81<br />
and Linux security level<br />
configuration, 56–57<br />
and OpenSSH, 304<br />
port <strong>for</strong>warding, 305<br />
<strong>for</strong> syslog encryption, 310<br />
using, 126–130<br />
SSL (<strong>Secure</strong> Sockets Layer)<br />
encryption, 286–287
490 Index<br />
and OpenVPN, 98<br />
<strong>for</strong> syslog encryption, 310<br />
and VPNs, 88<br />
standards<br />
IT security, 365–366<br />
policy review, 465<br />
stateful inspection firewalls, 25<br />
strategies <strong>for</strong> change management,<br />
455–456<br />
Stunnel, sending logs over SSLencrypted<br />
tunnel, 299<br />
subnets, screened, 27–28<br />
su.exe utility, 145<br />
SUID (set user ID) bit, 169–171<br />
SuperScanner network scanner,<br />
347–351<br />
swatch (simple watcher),<br />
configuring, 321–325<br />
switches, hardening, 175–176<br />
symmetric privacy protocol, 424<br />
syslog<br />
encrypting traffic, 285–294<br />
generating, analyzing event logs,<br />
279–327<br />
and Linux firewall logging,<br />
51–52<br />
syslog-ng, 298–300, 299, 311–312<br />
system events, auditing, 270<br />
systems<br />
antivirus, antispyware systems,<br />
188–201<br />
hardening generally, 133–139,<br />
209<br />
hardening Linux, 164–175<br />
hardening Windows, 139–163,<br />
209–210<br />
inventorying your, 338–341<br />
patching, 176–180<br />
scanning with Angry IP Scanner,<br />
351–352<br />
scanning with Nmap, 341–347<br />
scanning with Scanline, 352–355<br />
scanning with SuperScanner,<br />
347–351<br />
special-purpose enumerators,<br />
355–357<br />
wireless. See wireless systems<br />
T<br />
tables in Linus firewalls, 36<br />
targets in Linus firewalls, 38<br />
TCP (Transmission Control<br />
Protocol) and server<br />
configuration, 25<br />
TCP ports, scanning, 343–344<br />
TCP traceroute command, 440<br />
TCP Wrappers, configuring,<br />
187–188<br />
tcpdump, 434, 444<br />
tcpview utility, 441<br />
templates<br />
<strong>for</strong> security assessments, 384<br />
Security Templates snap-in,<br />
156–157<br />
testing<br />
and change management, 457<br />
downloaded software, 356
free security solutions, 14<br />
patches, 450–451<br />
penetration, 463–464, 472–473<br />
syslog events, 335<br />
time policies, creating <strong>for</strong> netfilter,<br />
75<br />
TLS (Transport Layer Security),<br />
286<br />
tools<br />
See also specific tool<br />
downloading safely, 356<br />
network scanners. See network<br />
scanners<br />
troubleshooting, 438–441<br />
topology, network maps, 362–364<br />
traceroute, 344–345<br />
traceroute command, 440<br />
tracetcp tool, 439–440<br />
traffic<br />
enabling syslog, 285–294<br />
permitting to, from Linux<br />
firewall, 44–46<br />
TrafficStatistic<br />
configuring, 400–403<br />
described, 391<br />
training costs of free security<br />
solutions, 3<br />
Transmission Control Protocol. See<br />
TCP<br />
Transport Layer Security (TLS),<br />
286<br />
troubleshooting<br />
Index 491<br />
BASE (Basic Analysis and<br />
Security Engine), 205<br />
investigating event logs, 267<br />
network problems, 424–438,<br />
443–444<br />
tsclient, 112<br />
tunnels<br />
Kiwi <strong>Secure</strong> Tunnel, 287<br />
VPN, configuring, 87–93<br />
Turtle Firewall Project, 76<br />
two-factor authentication, 138<br />
U<br />
UltraVNC, 113–119<br />
updates<br />
See also patch management<br />
SmoothWall firewall, 81–83<br />
and vulnerability scanning, 461<br />
USB drives, installing Linux from,<br />
35<br />
User-based Security Model<br />
(USM), 424<br />
user rights<br />
assignment of Linux, 165–168<br />
assignment of Windows, 160–163<br />
auditing, 270<br />
users, defining access, 142–147<br />
USM (User-based Security<br />
Model), 424<br />
V<br />
versions, choosing Linux, 32–36<br />
Virtual <strong>Network</strong> Computing<br />
(VNC), 109, 113–119
492 Index<br />
virtual tunnel networks. See VPNs<br />
virus, antivirus systems, 212, 458<br />
viruses, antivirus systems, 188–201<br />
Vmailer SMTP program, 320<br />
VNC (Virtual <strong>Network</strong><br />
Computing), 109, 113–119<br />
VPN concentrators, 87–93<br />
VPNs (Virtual Private <strong>Network</strong>s)<br />
costs of, 7<br />
providing secure remote access,<br />
86–89<br />
vulnerability scanning, 366–367,<br />
387, 460–463, 473<br />
W<br />
war driving, 357–358<br />
Web sites, open source software,<br />
12–13<br />
Windows<br />
analyzing event logs, 277–279<br />
Clam AntiVirus, installing,<br />
189–193<br />
collecting event logs, 275–277<br />
and EFS, 201–208<br />
hosts, enabling SNMP on,<br />
418–421<br />
IPSec policy, 310–311<br />
Microsoft Windows Defender,<br />
usin, 197–199<br />
Nessus scanner, running,<br />
368–371<br />
patching systems, 177–179<br />
reporting tool features (table),<br />
418<br />
Snort configuration on, 221–239,<br />
259<br />
syslog log analysis, 282–293,<br />
312–321<br />
systems, hardening, 139–163,<br />
209–210<br />
using as VPN concentrator,<br />
89–93<br />
X-Scan scanner, running,<br />
375–379<br />
Windows 2000, configuring<br />
Windows host as VPN<br />
endpoint, 90–93<br />
Windows Firewall<br />
configuring, 85–86, 180–186,<br />
213<br />
configuring Linux firewall and,<br />
46–47<br />
and patch management, 448<br />
Windows packet capture driver.<br />
See WinPcap<br />
Windows Server 2003 Resource<br />
Kit Tools, 275<br />
Windows Server Update Services<br />
(WSUS), 178–179<br />
Windows Terminal Services,<br />
providing remote desktops<br />
using, 109–113<br />
Windows XP<br />
adjusting SNMP security<br />
settings, 398<br />
configuring Windows Firewall,<br />
85–86<br />
enabling remote desktop<br />
functionality, 109–110
Firewall Builder configuring<br />
Linux netfilter example,<br />
66–75<br />
Service Pack 2, and patch<br />
management, 448<br />
WinDump sniffer, 147, 434–435,<br />
444<br />
WinPcap, 224–225, 341, 378, 425,<br />
434<br />
wireless systems<br />
access points, security of, 388<br />
detecting with NetStumbler,<br />
358–361<br />
locating, 357–358<br />
security testing, 384<br />
Wireshark sniffer, using, 425–433<br />
Index 493<br />
WSUS (Windows Server Update<br />
Services), 178–179<br />
X<br />
X-Scan scanner, 375–379<br />
X Window System, providing<br />
remote desktops using,<br />
119–125<br />
X.Org foundation, 119–120<br />
Y<br />
yum (Yellowdog Updater,<br />
Modified), 179, 429<br />
Z<br />
ZoneAlarm, 180