iPhone-6-Disassemble-Guide
Create successful ePaper yourself
Turn your PDF publications into a flip-book with our unique Google optimized e-Paper software.
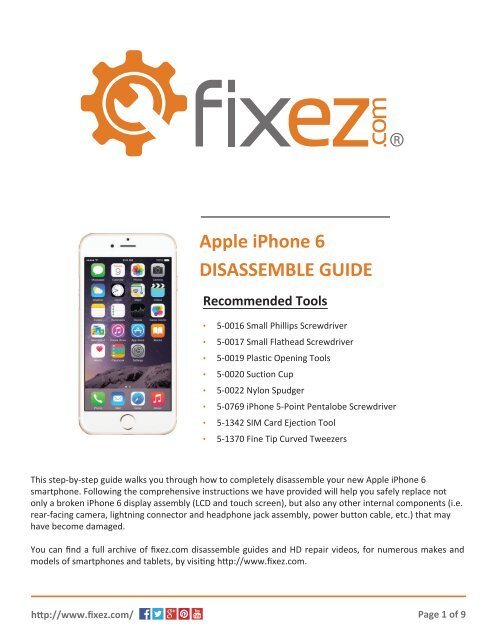
Apple <strong>iPhone</strong> 6<br />
DISASSEMBLE GUIDE<br />
Recommended Tools<br />
• 5-0016 Small Phillips Screwdriver<br />
• 5-0017 Small Flathead Screwdriver<br />
• 5-0019 Plastic Opening Tools<br />
• 5-0020 Suction Cup<br />
• 5-0022 Nylon Spudger<br />
• 5-0769 <strong>iPhone</strong> 5-Point Pentalobe Screwdriver<br />
• 5-1342 SIM Card Ejection Tool<br />
• 5-1370 Fine Tip Curved Tweezers<br />
This step-by-step guide walks you through how to completely disassemble your new Apple <strong>iPhone</strong> 6<br />
smartphone. Following the comprehensive instructions we have provided will help you safely replace not<br />
only a broken <strong>iPhone</strong> 6 display assembly (LCD and touch screen), but also any other internal components (i.e.<br />
rear-facing camera, lightning connector and headphone jack assembly, power button cable, etc.) that may<br />
have become damaged.<br />
You can find a full archive of fixez.com disassemble guides and HD repair videos, for numerous makes and<br />
models of smartphones and tablets, by visiting http://www.fixez.com.<br />
http://www.fixez.com/<br />
Page 1 of 9
<strong>iPhone</strong> 6 – <strong>Disassemble</strong> <strong>Guide</strong><br />
1.<br />
First, there are two Pentalobe screws located on the<br />
bottom of the <strong>iPhone</strong> 6, next to the lightning port, that<br />
need to be removed.<br />
Utilize the 5-point Pentalobe screwdriver and remove<br />
the screws from the<br />
smartphone.<br />
2.<br />
Next, place a suction cup on the display assembly near,<br />
but not on top of, the home button. Pull up on the<br />
suction cup until there is room to insert the plastic<br />
opening tool in the seam between the display assembly<br />
and the rear case of the <strong>iPhone</strong> 6.<br />
Utilizing both tools separate the display assembly from<br />
the rear case to take a peek inside the new Apple<br />
smartphone.<br />
3.<br />
Once you have separated the display assembly from the<br />
rear case, the metal cover that secures the LCD and front<br />
panel/digitizer cables will be easily accessible.<br />
Locate and remove the five small Phillips screws (#00)<br />
that secure the metal cover (marked with orange<br />
circles). Gently lift up and remove the metal cover from<br />
the <strong>iPhone</strong> 6.<br />
http://www.fixez.com/<br />
Page 2 of 9
<strong>iPhone</strong> 6 – <strong>Disassemble</strong> <strong>Guide</strong><br />
4.<br />
Now, using the fine tip curved tweezers or spudger pry<br />
up and disconnect the four connections located under<br />
the metal cover (marked with orange rectangles).<br />
The connections are for the display assembly (LCD and<br />
touch screen), home button assembly and front-facing<br />
camera assembly.<br />
Home Button Assembly<br />
5.<br />
Locate and remove the two small Phillips screws (#00)<br />
that secure the home button assembly and metal<br />
bracket to the display assembly (marked with orange<br />
circles).<br />
Use a heat gun or a blow dryer to soften the adhesive<br />
that secures the home button assembly in place, and<br />
then with the fine tip curved tweezers peel up and<br />
remove the home button assembly from the <strong>iPhone</strong> 6.<br />
The rubber gasket around the home button is easy to<br />
tear, be careful.<br />
Earpiece Speaker and Front-Facing Camera Assembly<br />
6.<br />
Locate and remove the three small Phillips screws (#00)<br />
that secure the metal bracket that protects and secures<br />
the earpiece speaker in place (marked with orange<br />
circles).<br />
http://www.fixez.com/<br />
Page 3 of 9
<strong>iPhone</strong> 6 – <strong>Disassemble</strong> <strong>Guide</strong><br />
7.<br />
Once the metal bracket is removed, lift up and remove<br />
the earpiece speaker from the <strong>iPhone</strong> 6. Next, use the<br />
fine tip curved tweezers to remove the front-facing<br />
assembly from the smartphone.<br />
Display Assembly (LCD and Touch Screen Digitizer)<br />
8.<br />
First, locate and remove the seven small Phillips screws<br />
(#00) that secure the LCD shield to the display assembly<br />
(marked with orange circles).<br />
Now, use a heat gun or blow dryer to soften the<br />
adhesive that secures the home button connector<br />
(marked with orange arrow). Carefully lift the<br />
connector from the adhesive securing it down, and<br />
then remove the LCD shield.<br />
SIM Card Tray<br />
9.<br />
Use the SIM card ejection tool or a paper clip to remove<br />
the SIM card tray from the <strong>iPhone</strong> 6.<br />
http://www.fixez.com/<br />
Page 4 of 9
<strong>iPhone</strong> 6 – <strong>Disassemble</strong> <strong>Guide</strong><br />
Battery<br />
10.<br />
Locate and remove the two small Phillips screws (#00)<br />
that secure the protective metal cover over the battery<br />
connection (marked with orange circles).<br />
Next, use the fine tip curved tweezers or the spudger<br />
to disconnect the battery connection under the<br />
protective metal cover.<br />
11.<br />
There is adhesive that secures the battery to the rear<br />
case of the <strong>iPhone</strong>. Use the pull tabs on the bottom of<br />
the battery to CAREFULLY remove the battery from the<br />
smartphone.<br />
If pulled correctly it will eliminate the troubles of using<br />
a heat gun or blow dryer to soften the adhesive<br />
securing the battery in place and coaxing it out with the<br />
spudger or plastic pry tool.<br />
Rear-Facing Camera and Antenna<br />
12.<br />
Locate and remove the two Phillips screws (#00) that<br />
secure the metal protective cover over the rear-facing<br />
camera (marked with orange circles).<br />
Now, use the fine tip curved tweezers to disconnect the<br />
rear-facing camera’s cable (marked with an orange<br />
rectangle) and remove it from the <strong>iPhone</strong> 6.<br />
http://www.fixez.com/<br />
Page 5 of 9
<strong>iPhone</strong> 6 – <strong>Disassemble</strong> <strong>Guide</strong><br />
13.<br />
Next, locate and remove the six Phillips screws (#00)<br />
that secure the protective cover over the power and<br />
volume button cable connections and antenna (marked<br />
with orange circles).<br />
14.<br />
Now, lift and remove the antenna from the <strong>iPhone</strong> 6.<br />
Motherboard<br />
15.<br />
First, locate and remove the five Phillips screws (#00) that<br />
secure the motherboard to the rear case of the <strong>iPhone</strong> 6<br />
(marked with closed orange circles).<br />
Next, locate and release the three wafer connections for<br />
the power button cable, volume buttons cable and<br />
lightning port connector assembly (marked with orange<br />
rectangles).<br />
Now, locate and release the coaxial connection that is next<br />
to the lightning port connection (marked with an open<br />
orange circle).<br />
Last, locate the single standoff located on the left of where<br />
the rear-facing camera used to be. You will need the<br />
flathead screwdriver to remove it (marked with open<br />
green circle). You can now carefully maneuver the<br />
motherboard out of the <strong>iPhone</strong> 6.<br />
http://www.fixez.com/<br />
Page 6 of 9
<strong>iPhone</strong> 6 – <strong>Disassemble</strong> <strong>Guide</strong><br />
Volume Buttons Cable<br />
16.<br />
Locate and remove the three Phillips screws (#00) that<br />
secure the volume buttons cable to the side of the<br />
<strong>iPhone</strong> 6 (marked with orange circles).<br />
Using a heat gun or blow dryer, soften the adhesive<br />
holding the ribbon cable in place and then remove the<br />
volume buttons cable from the <strong>iPhone</strong>.<br />
Power Button Cable<br />
17.<br />
Locate and remove the three Phillips screws (#00) that<br />
secure the power button cable to the side of the<br />
<strong>iPhone</strong> 6 (marked with orange circles).<br />
Using a heat gun or blow dryer, soften the adhesive<br />
that secures the ribbon cable in place and then remove<br />
the power button cable from the <strong>iPhone</strong>.<br />
Vibrator Assembly<br />
18.<br />
Locate and remove the two Phillips screws (#00) that<br />
secure the vibrator assembly in place above the lightning<br />
port assembly (marked with orange circles).<br />
You can now remove the vibrator assembly from the<br />
<strong>iPhone</strong> 6.<br />
http://www.fixez.com/<br />
Page 7 of 9
<strong>iPhone</strong> 6 – <strong>Disassemble</strong> <strong>Guide</strong><br />
Loudspeaker<br />
19.<br />
Locate and remove the four Phillips screws (#00) that<br />
secure the loudspeaker in place (marked with orange<br />
circles).<br />
You can now lift the loudspeaker up and out of the<br />
phone 6.<br />
Lightning Port and Headphone Jack Assembly<br />
20.<br />
Locate and remove the nine Phillips screws (#00) that<br />
secure the lightning port and headphone jack assembly<br />
to the bottom of the rear case of the <strong>iPhone</strong> 6 (marked<br />
with orange circles).<br />
The lightning port and headphone jack assembly is<br />
held in place with a small amount of adhesive. Use a<br />
heat gun or blow dryer to soften the adhesive and then<br />
remove the assembly from the <strong>iPhone</strong> 6.<br />
http://www.fixez.com/<br />
Page 8 of 9
<strong>iPhone</strong> 6 – <strong>Disassemble</strong> <strong>Guide</strong><br />
Breakdown<br />
1<br />
2<br />
3<br />
7<br />
4<br />
6<br />
8<br />
5<br />
9<br />
10<br />
11<br />
12<br />
13<br />
14 15<br />
1. <strong>iPhone</strong> 6 Loudspeaker<br />
2. <strong>iPhone</strong> 6 Volume Buttons Cable<br />
3. <strong>iPhone</strong> 6 Vibrator Assembly<br />
4. <strong>iPhone</strong> 6 Front-Facing Camera and Sensor Cable<br />
5. <strong>iPhone</strong> 6 SIM Card Tray<br />
6. <strong>iPhone</strong> 6 Antenna<br />
7. <strong>iPhone</strong> 6 Lightning Connector and Headphone Jack Assembly<br />
8. <strong>iPhone</strong> 6 Power Button Cable<br />
9. <strong>iPhone</strong> 6 Battery<br />
10. <strong>iPhone</strong> 6 Home Button Assembly<br />
11. <strong>iPhone</strong> 6 Motherboard<br />
12. <strong>iPhone</strong> 6 Rear-Facing Camera<br />
13. <strong>iPhone</strong> 6 Earpiece Speaker<br />
14. <strong>iPhone</strong> 6 Rear Case<br />
15. <strong>iPhone</strong> 6 Display Assembly and LCD Shield<br />
Notice/Warning:<br />
FIXEZ.COM DOES NOT ACCEPT ANY LIABILITY FOR DAMAGE, OR INJURY CAUSED, WHILE YOU ARE FOLLOWING<br />
OUR DISASSEMBLE GUIDES. WE MAKE NO REPRESENTATIONS, WARRANTIES, OR CONDITIONS OF ANY KIND,<br />
EXPRESS OR IMPLIED. UTILIZING THESE GUIDES TO HELP ASSIST YOU IN REPAIRING YOUR MOBILE DEVICES<br />
WILL VOID YOUR WARRANTY. FIXEZ.COM STRICTLY PROHIBITS ALTERING OR MODIFYING OUR DISASSEMBLE<br />
GUIDES FOR COMMERCIAL USE, REPRODUCTION, OR PUBLICATION.<br />
http://www.fixez.com/<br />
Page 9 of 9


