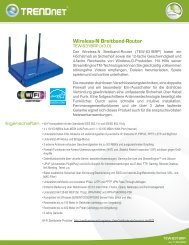
TEW-648UBM - TRENDnet
TEW-648UBM - TRENDnet
TEW-648UBM - TRENDnet

Create successful ePaper yourself
Turn your PDF publications into a flip-book with our unique Google optimized e-Paper software.
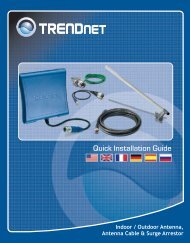
Guide d'installation rapide<br />
<strong>TEW</strong>-<strong>648UBM</strong><br />
1.01
Table of Contents<br />
Français 1<br />
1. Avant de commencer 1<br />
2. Installation du matériel 2<br />
3. Utilisation de l’adaptateur sans fil 5<br />
Troubleshooting 6<br />
Wireless Tips 7<br />
Version 09.08.2010
ENGLISH<br />
FRANÇAIS<br />
DEUTSCH<br />
ESPAÑOL<br />
РУССКИЙ<br />
1. Avant de commencer<br />
Configuration du système<br />
�USB port: 2.0 ou 1.1<br />
�Lecteur de CD-ROM<br />
Contenu de l'emballage<br />
�<strong>TEW</strong>-<strong>648UBM</strong><br />
�Un CD-ROM avec le pilote et les l'utilitaires<br />
�Guide d´installation rapide en plusieurs<br />
langues<br />
SE supportés Microprocesseur Mémoire<br />
Windows 7 (32/64-bit)<br />
Windows Vista (32/64-bit)<br />
Windows XP (32/64-bit)<br />
1GHz ou superieur<br />
800MHz ou superieur<br />
300MHz ou superieur<br />
1<br />
1GB RAM ou superieur<br />
512MB RAM ou superieur<br />
256MB RAM ou superieur
2. Installation du matériel<br />
Important ! N'INSTALLEZ PAS l'adaptateur USB dans l'ordinateur avant qu'on ne vous<br />
le demande.<br />
1. Insérez le CD-ROM avec l'utilitaire et le<br />
pilote dans le lecteur de CD-ROM de votre<br />
ordinateur et cliquez ensuite sur Install Utility<br />
(Installer l'utilitaire)<br />
2. Cliquez sur Run Autorun.exe<br />
(Windows 7/Vista uniquement).<br />
3. Cliquez sur Install Utility.<br />
4. Cliquez ensuite sur Next (Suivant) . Et suivez<br />
les instructions de l'écran de l'assistant<br />
d'installation (InstallShield Wizard<br />
instructions).<br />
2<br />
ENGLISH<br />
FRANÇAIS<br />
DEUTSCH<br />
ESPAÑOL<br />
РУССКИЙ
ENGLISH<br />
FRANÇAIS<br />
DEUTSCH<br />
ESPAÑOL<br />
РУССКИЙ<br />
5. Cliquez sur Install this driver software<br />
anyway (Installer le pilote de ce logiciel de<br />
toute façon). (Windows 7/Vista).<br />
6. Cliquez sur Continue Anyway (Continuer<br />
malgré tout). (Windows XP).<br />
7. Cliquez ensuite sur Terminer (Finish).<br />
8. Branchez l’adaptateur sans fil à un port USB<br />
disponible sur votre ordinateur.<br />
9. Enlevez le CD-ROM contenant le gestionnaire<br />
et les utilitaires de votre lecteur de CD-ROM.<br />
Remarque : Pour Windows 7/Vista, les pilotes s'installeront automatiquement.<br />
Poursuivez avec la partie 3 : Utilisation de l'adaptateur sans fil. Pour Windows XP<br />
poursuivez avec l'étape 10.<br />
3
Windows XP<br />
10. L'assistant nouveau matériel détecté<br />
apparaîtra, sélectionnez Non et cliquez<br />
ensuite sur Next (Suivant).<br />
11. Sélectionnez Install the software<br />
automatically (Recommended) (Installer le<br />
logiciel automatiquement) ( Recommandé) et<br />
cliquez sur Next (Suivant).<br />
12. Cliquez sur Continue Anyway<br />
(Continuer malgré tout).<br />
13. Cliquez sur Terminer (Finish).<br />
L'installation est maintenant complète<br />
4<br />
ENGLISH<br />
FRANÇAIS<br />
DEUTSCH<br />
ESPAÑOL<br />
РУССКИЙ
ENGLISH<br />
FRANÇAIS<br />
DEUTSCH<br />
ESPAÑOL<br />
РУССКИЙ<br />
3. Utilisation de l’adaptateur sans fil<br />
1. Dans le coin inférieur droit de l'écran, doublecliquez<br />
sur l'icône wireless configuration<br />
utility.<br />
2. Cliquez sur Site Survey (Etude du site).<br />
Sélectionnez le SSID correspondant à votre<br />
point d'accès sans fil et cliquez sur<br />
Connexion.<br />
3. Si le cryptage est activé sur votre point<br />
d'accès, sélectionnez le type<br />
d'Authentification, le mode de cryptage,<br />
saisissez la clé de cryptage et cliquez sur<br />
Appliquer.<br />
La configuration sans fil est à présent terminée.<br />
Si vous désirez des informations détaillées sur la configuration et les paramètres avancés du<br />
<strong>TEW</strong>-<strong>648UBM</strong>, veuillez consulter la rubrique Dépannage, le guide de l'utilisateur sur<br />
CD-ROM ou le site Internet de <strong>TRENDnet</strong> sur http://www.trendnet.com.<br />
Enregistrez votre produit<br />
Afin d’être sûr de recevoir le meilleur niveau de service clientèle et le meilleur support<br />
possibles, veuillez prendre le temps d’enregistrer votre produit en ligne sur:<br />
www.trendnet.com/register Nous vous remercions d’avoir choisi <strong>TRENDnet</strong>.<br />
5
Trouble Shooting<br />
1. I inserted the Utility & Driver CD-ROM into my computer's CD-ROM Drive and the<br />
installation menu does not appear automatically. What should I do?<br />
1. For Windows 7, if the installation menu does not appear automatically, click on the<br />
Windows Icon on the bottom left hand corner of the screen, click the “Search programs<br />
and files” box, and type D:\Autorun.exe, where “D” in “D:\Autorun.exe” is the letter<br />
assigned to your CD-ROM Drive, and then press the ENTER key on your keyboard.<br />
2. For Windows Vista, if the installation menu does not appear automatically, click on the<br />
Windows Icon on the bottom left hand corner of the screen, click on the “Start Search”<br />
box, and type D:\Autorun.exe, where “D” in “D:\Autorun.exe” is the letter assigned to your<br />
CD-ROM Drive, and then press the ENTER key on your keyboard.<br />
3. For Windows XP, if the window does not appear automatically, click Start, click Run and<br />
type D:\Autorun.exe where “D” in “D:\Autorun.exe” is the letter assigned to your CD-ROM<br />
Drive, and then press the ENTER key on your keyboard.<br />
2. I completed all the steps in the quick installation guide, but my Wireless USB Adapter is<br />
not connecting to my access point. What should I do?<br />
1. Verify that the SSID matches your wireless router or access point's SSID.<br />
2. Please check with your network administrator for security key in order to access a secured<br />
wireless access point or router. Please refer to the User's Guide for more information<br />
regarding wireless network security.<br />
3. Check your TCP/IP properties to ensure that Obtain an IP address automatically is<br />
selected.<br />
4. Double-click the Wireless Configuration Utility icon, click Site Survey and then click<br />
Refresh to check if there are any available wireless networks listed.<br />
3. Windows is unable to recognize my hardware. What should I do?<br />
1. Make sure your computer meets the minimum requirements as specified in Section 1 of<br />
this quick installation guide.<br />
2. You must complete the installation of the Wireless Configuration Utility (as described in<br />
Section 2) before connecting the Wireless USB Adapter to your computer.<br />
3. Connect the Wireless USB Adapter to a different USB port on your computer.<br />
4. I cannot open the Wireless Configuration Utility. What should I do?<br />
Access your device manager to make sure the adapter is installed properly. If you see a networking<br />
device with a yellow question mark or exclamation point, you will need to reinstall the device and/or<br />
the drivers.<br />
1. To access the device manager on Windows 7, click on the Windows icon on the bottom<br />
left-hand corner, click Computer, click System Properties and then click Device<br />
Manager.<br />
2. To access the device manager on Windows Vista, right-click Computer, click Properties<br />
and then click Device Manager.<br />
3. To access the device manager on Windows XP, right-click My Computer, click Properties,<br />
click the Hardware tab, and then click Device Manager.<br />
If you still encounter problems or have any questions regarding the <strong>TEW</strong>-<strong>648UBM</strong>, please refer to<br />
the User's Guide included on the Utility & Driver CD-ROM or contact <strong>TRENDnet</strong>'s Technical<br />
Support Department.<br />
6
Wireless Tips<br />
The following are some general wireless tips to help minimize the impact of interference within an<br />
environment.<br />
Assign your network a unique SSID<br />
Do not use anything that would be identifying like “Smith Family Network”. Choose<br />
something that you would easily identify when searching for available wireless networks.<br />
Do not turn off the SSID broadcast<br />
The SSID broadcast is intended to be on and turning it off can cause connectivity issues.<br />
The preferred method of securing a wireless network is to choose a strong form of encryption<br />
with a strong and varied encryption key.<br />
Note: after setting up the SSID, encryption type and encryption key/passphrase, please<br />
make a note of them for future reference. You will need this information to connect your<br />
wireless computers to the wireless router/access point.<br />
Change the channel<br />
Most wireless access points and routers are defaulted to channel 6. If you have a site survey<br />
tool that will display the channels you can plan your channel selection around neighboring<br />
access points to minimize interference from them. If your site survey tool does not display<br />
the channel try using channels 1 or 11.<br />
Change the channel bandwidth<br />
If you are using 802.11n you should be securing the network with WPA2 security.<br />
Note: Due to Wi-Fi certification considerations if you choose WEP, WPA or WPA2-TKIP<br />
encryption this device may operate in legacy wireless mode (802.11b/g). You may not get<br />
802.11n performance as these forms of encryption are not supported by the 802.11n<br />
specification.<br />
Avoid stacking hardware on top of each other to prevent overheating issues<br />
Maintain enough free space around the hardware for good ventilation and airflow. There<br />
should also be plenty of free space around the antennas to allow the wireless signal to<br />
propagate. Please also make sure that the wireless hardware is not placed in any type of<br />
shelving or enclosures.<br />
There are a number of other environmental factors that can impact the range of wireless<br />
devices.<br />
1. Adjust your wireless devices so that the signal is traveling in a straight path, rather than at<br />
an angle. The more material the signal has to pass through the more signal you will lose.<br />
2. Keep the number of obstructions to a minimum. Each obstruction can reduce the range of<br />
a wireless device. Position the wireless devices in a manner that will minimize the amount<br />
of obstructions between them.<br />
7
3. Building materials can have a large impact on your wireless signal. In an indoor<br />
environment, try to position the wireless devices so that the signal passes through less<br />
dense material such as dry wall. Dense materials like metal, solid wood, glass or even<br />
furniture may block or degrade the signal.<br />
4. Antenna orientation can also have a large impact on your wireless signal. Use the wireless<br />
adapter's site survey tool to determine the best antenna orientation for your wireless<br />
devices.<br />
5. Interference from devices that produce RF (radio frequency) noise can also impact your<br />
signal. Position your wireless devices away from anything that generates RF noise, such<br />
as microwaves, HAM radios, Walkie-Talkies and baby monitors.<br />
6. Any device operating on the 2.4GHz frequency will cause interference. Devices such as<br />
2.4GHz cordless phones or other wireless remotes operating on the 2.4GHz frequency<br />
can potentially drop the wireless signal. Although the phone may not be in use, the base<br />
can still transmit wireless signals. Move the phone's base station as far away as possible<br />
from your wireless devices.<br />
If you are still experiencing low or no signal consider repositioning the wireless devices or installing<br />
additional access points. The use of higher gain antennas may also provide the necessary<br />
coverage depending on the environment.<br />
8
Certifications<br />
This equipment has been tested and found to comply with FCC and CE Rules.<br />
Operation is subject to the following two conditions:<br />
(1) This device may not cause harmful interference.<br />
(2) This device must accept any interference received. Including interference that may<br />
cause undesired operation.<br />
Waste electrical and electronic products must not<br />
be disposed of with household waste. Please<br />
recycle where facilities exist. Check with you Local<br />
Authority or Retailer for recycling advice.<br />
NOTE: THE MANUFACTURER IS NOT RESPONSIBLE FOR ANY RADIO OR TV<br />
INTERFERENCE CAUSED BY UNAUTHORIZED MODIFICATIONS TO THIS<br />
EQUIPMENT. SUCH MODIFICATIONS COULD VOID THE USER’S AUTHORITY TO<br />
OPERATE THE EQUIPMENT.<br />
ADVERTENCIA<br />
En todos nuestros equipos se mencionan claramente las caracteristicas del adaptador de alimentacón<br />
necesario para su funcionamiento. El uso de un adaptador distinto al mencionado puede producir<br />
daños fisicos y/o daños al equipo conectado. El adaptador de alimentación debe operar con voltaje y<br />
frecuencia de la energia electrica domiciliaria existente en el pais o zona de instalación.
Product Warranty Registration<br />
Please take a moment to register your product online.<br />
Go to <strong>TRENDnet</strong>’s website at http://www.trendnet.com/register<br />
Copyright ©2010. All Rights Reserved. <strong>TRENDnet</strong>.