Anbauhilfe User Manual - Wunderlich America
Anbauhilfe User Manual - Wunderlich America
Anbauhilfe User Manual - Wunderlich America

Create successful ePaper yourself
Turn your PDF publications into a flip-book with our unique Google optimized e-Paper software.
News, Downloads und Informationen<br />
www.wunderlich.de<br />
<strong>Anbauhilfe</strong> <strong>User</strong> <strong>Manual</strong><br />
Artikel: Sturzbügel R 1150 R<br />
Bestellnummer: 8160106, -830, -104<br />
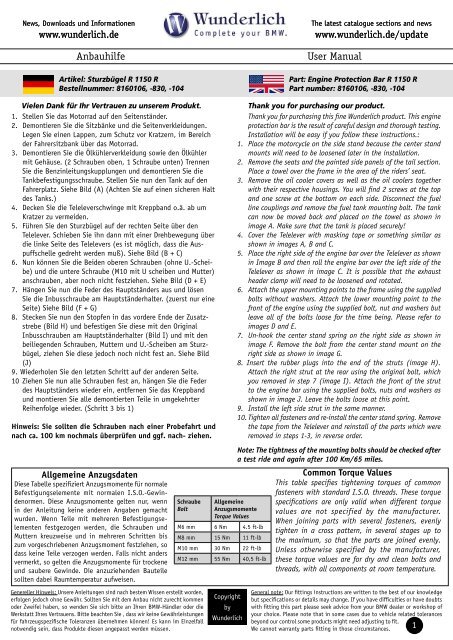
Allgemeine Anzugsdaten<br />
Diese Tabelle spezifiziert Anzugsmomente für normale<br />
Befestigungselemente mit normalen I.S.O.-Gewindenormen.<br />
Diese Anzugsmomente gelten nur, wenn<br />
in der Anleitung keine anderen Angaben gemacht<br />
wurden. Wenn Teile mit mehreren Befestigungselementen<br />
festgezogen werden, die Schrauben und<br />
Muttern kreuzweise und in mehreren Schritten bis<br />
zum vorgeschriebenen Anzugsmoment festziehen, so<br />
dass keine Teile verzogen werden. Falls nicht anders<br />
vermerkt, so gelten die Anzugsmomente für trockene<br />
und saubere Gewinde. Die anzuziehenden Bauteile<br />
sollten dabei Raumtemperatur aufweisen.<br />
Schraube<br />
Bolt<br />
Allgemeine<br />
Anzugsmomente<br />
Torque Values<br />
M6 mm 6 Nm 4.5 ft-lb<br />
M8 mm 15 Nm 11 ft-lb<br />
M10 mm 30 Nm 22 ft-lb<br />
M12 mm 55 Nm 40,5 ft-lb<br />
The latest catalogue sections and news<br />
www.wunderlich.de/update<br />
Vielen Dank für Ihr Vertrauen zu unserem Produkt. Thank you for purchasing our product.<br />
1. Stellen Sie das Motorrad auf den Seitenständer.<br />
2. Demontieren Sie die Sitzbänke und die Seitenverkleidungen.<br />
Legen Sie einen Lappen, zum Schutz vor Kratzern, im Bereich<br />
der Fahrersitzbank über das Motorrad.<br />
3. Demontieren Sie die Ölkühlerverkleidung sowie den Ölkühler<br />
mit Gehäuse. (2 Schrauben oben, 1 Schraube unten) Trennen<br />
Sie die Benzinleitungskupplungen und demontieren Sie die<br />
Tankbefestigungsschraube. Stellen Sie nun den Tank auf den<br />
Fahrerplatz. Siehe Bild (A) (Achten Sie auf einen sicheren Halt<br />
des Tanks.)<br />
4. Decken Sie die Teleleverschwinge mit Kreppband o.ä. ab um<br />
Kratzer zu vermeiden.<br />
5. Führen Sie den Sturzbügel auf der rechten Seite über den<br />
Telelever. Schieben Sie ihn dann mit einer Drehbewegung über<br />
die linke Seite des Telelevers (es ist möglich, dass die Auspuffschelle<br />
gedreht werden muß). Siehe Bild (B + C)<br />
6. Nun können Sie die Beiden oberen Schrauben (ohne U.-Scheibe)<br />
und die untere Schraube (M10 mit U scheiben und Mutter)<br />
anschrauben, aber noch nicht festziehen. Siehe Bild (D + E)<br />
7. Hängen Sie nun die Feder des Hauptständers aus und lösen<br />
Sie die Inbusschraube am Hauptständerhalter. (zuerst nur eine<br />
Seite) Siehe Bild (F + G)<br />
8. Stecken Sie nun den Stopfen in das vordere Ende der Zusatzstrebe<br />
(Bild H) und befestigen Sie diese mit den Original<br />
Inbusschrauben am Hauptständerhalter (Bild I) und mit den<br />
beiliegenden Schrauben, Muttern und U.-Scheiben am Sturzbügel,<br />
ziehen Sie diese jedoch noch nicht fest an. Siehe Bild<br />
(J)<br />
9. Wiederholen Sie den letzten Schritt auf der anderen Seite.<br />
10 Ziehen Sie nun alle Schrauben fest an, hängen Sie die Feder<br />
des Hauptständers wieder ein, entfernen Sie das Kreppband<br />
und montieren Sie alle demontierten Teile in umgekehrter<br />
Reihenfolge wieder. (Schritt 3 bis 1)<br />
Hinweis: Sie sollten die Schrauben nach einer Probefahrt und<br />
nach ca. 100 km nochmals überprüfen und ggf. nach- ziehen.<br />
Genereller Hinweis: Unsere Anleitungen sind nach bestem Wissen erstellt worden,<br />
erfolgen jedoch ohne Gewähr. Sollten Sie mit dem Anbau nicht zurecht kommen<br />
oder Zweifel haben, so wenden Sie sich bitte an Ihren BMW-Händler oder die<br />
Werkstatt Ihres Vertrauens. Bitte beachten Sie , dass wir keine Gewährleistungen<br />
für fahrzeugspezifische Toleranzen übernehmen können! Es kann im Einzelfall<br />
notwendig sein, dass Produkte diesen angepasst werden müssen.<br />
Copyright<br />
by<br />
<strong>Wunderlich</strong><br />
Part: Engine Protection Bar R 1150 R<br />
Part number: 8160106, -830, -104<br />
Thank you for purchasing this fine <strong>Wunderlich</strong> product. This engine<br />
protection bar is the result of careful design and thorough testing.<br />
Installation will be easy if you follow these instructions.:<br />
1. Place the motorcycle on the side stand because the center stand<br />
mounts will need to be loosened later in the installation.<br />
2. Remove the seats and the painted side panels of the tail section.<br />
Place a towel over the frame in the area of the riders’ seat.<br />
3. Remove the oil cooler covers as well as the oil coolers together<br />
with their respective housings. You will find 2 screws at the top<br />
and one screw at the bottom on each side. Disconnect the fuel<br />
line couplings and remove the fuel tank mounting bolt. The tank<br />
can now be moved back and placed on the towel as shown in<br />
image A. Make sure that the tank is placed securely!<br />
4. Cover the Telelever with masking tape or something similar as<br />
shown in images A, B and C.<br />
5. Place the right side of the engine bar over the Telelever as shown<br />
in Image B and then roll the engine bar over the left side of the<br />
Telelever as shown in image C. It is possible that the exhaust<br />
header clamp will need to be loosened and rotated.<br />
6. Attach the upper mounting points to the frame using the supplied<br />
bolts without washers. Attach the lower mounting point to the<br />
front of the engine using the supplied bolt, nut and washers but<br />
leave all of the bolts loose for the time being. Please refer to<br />
images D and E.<br />
7. Un-hook the center stand spring on the right side as shown in<br />
image F. Remove the bolt from the center stand mount on the<br />
right side as shown in image G.<br />
8. Insert the rubber plugs into the end of the struts (image H).<br />
Attach the right strut at the rear using the original bolt, which<br />
you removed in step 7 (image I). Attach the front of the strut<br />
to the engine bar using the supplied bolts, nuts and washers as<br />
shown in image J. Leave the bolts loose at this point.<br />
9. Install the left side strut in the same manner.<br />
10. Tighten all fasteners and re-install the center stand spring. Remove<br />
the tape from the Telelever and reinstall of the parts which were<br />
removed in steps 1-3, in reverse order.<br />
Note: The tightness of the mounting bolts should be checked after<br />
a test ride and again after 100 Km/65 miles.<br />
Common Torque Values<br />
This table specifies tightening torques of common<br />
fasteners with standard I.S.O. threads. These torque<br />
specifications are only valid when different torque<br />
values are not specified by the manufacturer.<br />
When joining parts with several fasteners, evenly<br />
tighten in a cross pattern, in several stages up to<br />
the maximum, so that the parts are joined evenly.<br />
Unless otherwise specified by the manufacturer,<br />
these torque values are for dry and clean bolts and<br />
threads, with all components at room temperature.<br />
General note: Our fittings instructions are written to the best of our knowledge<br />
but specifications or details may change. If you have difficulties or have doubts<br />
with fitting this part please seek advice from your BMW dealer or workshop of<br />
your choice. Please note that in some cases due to vehicle related tolerances<br />
beyond our control some products might need adjusting to fit.<br />
We cannot warranty parts fitting in those circumstances. 1
News, Downloads und Informationen<br />
www.wunderlich.de<br />
Artikel: Sturzbügel R 1150 R<br />
Bestellnummer: 8160106, -830, -104<br />
A B<br />
C D<br />
E<br />
G<br />
Genereller Hinweis: Unsere Anleitungen sind nach bestem Wissen erstellt worden, erfolgen<br />
jedoch ohne Gewähr. Sollten Sie mit dem Anbau nicht zurecht kommen oder Zweifel haben,<br />
so wenden Sie sich bitte an Ihren BMW-Händler oder die Werkstatt Ihres Vertrauens.<br />
Bitte beachten Sie , dass wir keine Gewährleistungen für fahrzeugspezifische Toleranzen<br />
übernehmen können! Es kann im Einzelfall notwendig sein, dass Produkte diesen angepasst<br />
werden müssen.<br />
H<br />
Copyright<br />
by<br />
<strong>Wunderlich</strong><br />
F<br />
I<br />
The latest catalogue sections and news<br />
www.wunderlich.de/update<br />
Part: Engine Protection Bar R 1150 R<br />
Part number: 8160106, -830, -104<br />
General note: Our fittings instructions are written to the best of our knowledge but<br />
specifications or details may change. If you have difficulties or have doubts with fitting<br />
this part please seek advice from your BMW dealer or workshop of your choice. Please<br />
note that in some cases due to vehicle related tolerances beyond our<br />
control some products might need adjusting to fit. We cannot warranty 2<br />
parts fitting in those circumstances.<br />
J