Hunter Residential Sprinkler System / Irrigation system design guide - Calgary irrigation
Residential Irrigation Service and Design Guide for underground sprinklers. Learn how to design, install, service, repair and winterize your underground sprinkler system. Irrigation Calgary. Lawn irrigation. Underground sprinklers Calgary
Residential Irrigation Service and Design Guide for underground sprinklers. Learn how to design, install, service, repair and winterize your underground sprinkler system. Irrigation Calgary. Lawn irrigation. Underground sprinklers Calgary

Create successful ePaper yourself
Turn your PDF publications into a flip-book with our unique Google optimized e-Paper software.
SYSTEM INSTALLATION<br />
Installing the Valve Manifolds<br />
Assembling PVC:<br />
1. Refer to the valve manifold detail on the <strong>Residential</strong><br />
<strong>System</strong> Overview.<br />
2. Maintain at least a 15 cm clearance between valves for<br />
future maintenance.<br />
3. Provide a 8 cm long or longer capped stub-out for<br />
future additions.<br />
4. Install the valve manifolds onto the main line.<br />
1. Place solvent on inside<br />
of fitting and outside<br />
of pipe.<br />
Assembling Poly Pipe:<br />
2. Slip pipe into fitting and<br />
wipe off excess solvent.<br />
Installing the Lateral Lines<br />
If you can only devote a day or two at a time to installing<br />
this <strong>system</strong>, and the installation is in an area that is<br />
currently landscaped, lay out all zones and install one zone<br />
at a time using the following steps:<br />
1. Lay Out <strong>System</strong>: Using the plot plan and small sprinkler<br />
flags, mark the location of the sprinklers and their zone<br />
valve. Make adjustments as necessary for complete<br />
head-to-head coverage. If it appears that you will<br />
need to revise the plan (add a head), recheck the<br />
l/min numbers to make sure you are within the<br />
<strong>system</strong>’s <strong>design</strong> capacity. See page 5.<br />
2. Using marking spray paint, mark the locations for the<br />
lateral lines.<br />
1. Place clamp over pipe,<br />
then insert barb fitting.<br />
2. Tighten clamp around<br />
pipe and fitting.<br />
3. Trenching: Check local codes. If there are no established<br />
codes for sprinkler lateral line depth in your area, dig<br />
the trenches 15 cm to 20 cm deep. If you are installing<br />
poly pipe, you may want to use a pipe puller, which may<br />
be available at your local rental yard.<br />
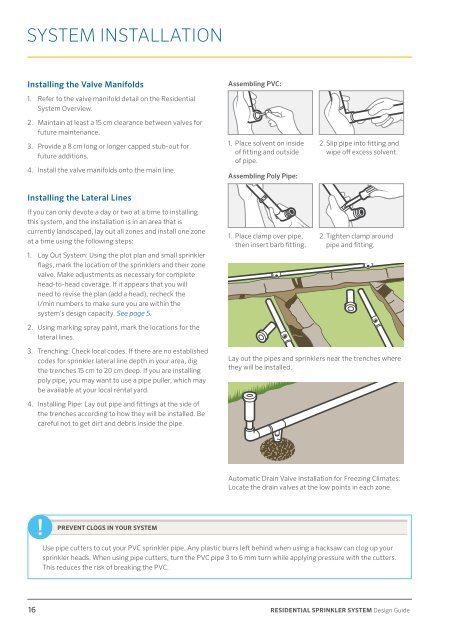
Lay out the pipes and sprinklers near the trenches where<br />
they will be installed.<br />
4. Installing Pipe: Lay out pipe and fittings at the side of<br />
the trenches according to how they will be installed. Be<br />
careful not to get dirt and debris inside the pipe.<br />
Automatic Drain Valve Installation for Freezing Climates:<br />
Locate the drain valves at the low points in each zone.<br />
PREVENT CLOGS IN YOUR SYSTEM<br />
Use pipe cutters to cut your PVC sprinkler pipe. Any plastic burrs left behind when using a hacksaw can clog up your<br />
sprinkler heads. When using pipe cutters, turn the PVC pipe 3 to 6 mm turn while applying pressure with the cutters.<br />
This reduces the risk of breaking the PVC.<br />
16 RESIDENTIAL SPRINKLER SYSTEM Design Guide