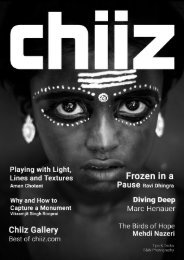
Chiiz Volume 1 : Pushkar Photography
Chiiz is first of its kind publication devoted to descriptive Photography. Drawing on the requirements of a photo enthusiast, Chiiz features photographers and their unique and incisive stories from across the globe. With the EXIF details of every capture, we try to give the reader a perspective that helps him/her understand the shot better and recreate it. Photographers from around the world have been featured showcasing their outstanding work in different genres of photography.
Chiiz is first of its kind publication devoted to descriptive Photography. Drawing on the requirements of a photo enthusiast, Chiiz features photographers and their unique and incisive stories from across the globe. With the EXIF details of every capture, we try to give the reader a perspective that helps him/her understand the shot better and recreate it.
Photographers from around the world have been featured showcasing their outstanding work in different genres of photography.

You also want an ePaper? Increase the reach of your titles
YUMPU automatically turns print PDFs into web optimized ePapers that Google loves.
TIPS AND TRICKS:<br />
HYPERLAPSE<br />
Prateek Kashyap<br />
prateek@chiiz.com<br />
An adventure seeker by heart, his passion<br />
for photography was ignited in the Great<br />
Himalayas. Clicking clear frames and<br />
solving the mysteries of life, he just<br />
wants to spend his time as a confused<br />
photographer.<br />
What is Timelapse ?<br />
It is an exposure technique which is used in<br />
photography to create a shot where the movement is<br />
processed by the lapsing of the time.<br />
What is Hyperlapse ?<br />
Hyperlapse is also one of the exposure technique<br />
which is used in photography to create a shot in a<br />
time-lapse sequences with an interval between each<br />
exposure in which there is a gradual movement in the<br />
position of the camera.<br />
Gears required in making of a Hyperlapse:<br />
• Tripod<br />
• Timer Remote<br />
• ND Filters<br />
1.Hyperlapse formula - Assumptions :<br />
We need to shoot a subject from one point to another<br />
with a distance of ‘ a ‘ inches in between.<br />
Calculated time for covering ‘ a ‘ distance is ‘ X ‘<br />
seconds.<br />
FPS ( Frame Per Seconds ) of the camera is ‘ YZ ‘<br />
Now,<br />
X * YZ = XYZ shots ( Required )<br />
a / XYZ = b , Here ‘ b ‘ = distance we need to move<br />
between every shot<br />
This will allow you to create an accurate movement of<br />
both the subject and camera in Hyperlapse.<br />
to get relatively wide angle view.<br />
6.Smoother Touch : Use one or 1/15th second of<br />
shutter speed. Make sure your shutter speed is slow<br />
enough to capture motion blur. This will make the final<br />
video much smoother.<br />
7.Filters : To get long exposures use ND filters.<br />
Post Processing :<br />
1.Shoot Raw : In order to manipulate the image<br />
sequences you are shooting.<br />
2.Editing Softwares: Use Adobe Lightroom or Capture<br />
One for best results.<br />
3.Import all of the photos into Lightroom. Choose<br />
one photo and adjust it in the Develop module before<br />
applying the settings to the rest of the images by using<br />
the synchronization command.<br />
4. Next, export all of the photos at full size.<br />
5.In order to smooth the exposures use the softwares<br />
like LR Timelapse.<br />
6.Import the files into AfterEffects as a .JPEG<br />
sequence and compose/crop your images here<br />
according to video frame size.<br />
7.Use the warp stabilizer to quickly correct any<br />
trembling or misalignment in the sequence. Now you<br />
can export the final video file.<br />
CREATIVE ADVICE: Try adding a zoom in or zoom out<br />
blur experiments to your shot as you move.<br />
‘Rob and Jonas are experts in hyperlapse and they<br />
have been doing this for over 2 years. This technique<br />
produces some amazing results and it is not at all hard<br />
to pursue. You can check out their tutorial from start to<br />
finish, including how to process images in Lightroom<br />
and After Effects, on this link. https://www.chiiz.com/<br />
blog/<br />
NOTE: FOR SAMPLE VIDEOS AND DETAILS,<br />
please VISIT blog.chiiz.com<br />
2. Prefer a steady tripod :<br />
So that the legs won’t shift when you move it around<br />
and they keep the camera on an even plane and it’s<br />
easier to do on a tripod with liveview on at eye level.<br />
3.Aligning your camera between shots :<br />
What matters most is where you are pointing the<br />
camera; keep it in level and keep the same point in<br />
focus. A small rectangle shows up on the LCD when<br />
your camera is at manual focus. This will help you in<br />
making a reference point in the frame of your camera.<br />
4.Timer Remote : To get consistency in intervals.<br />
5.Wide View : To prevent unnecessary distortion in<br />
your images use a focal length of 25mm to 30mm and<br />
92 Vol.1