

IT00011 - IT Assets Disposal Policy v1.1 - Des 2017

You also want an ePaper? Increase the reach of your titles
YUMPU automatically turns print PDFs into web optimized ePapers that Google loves.
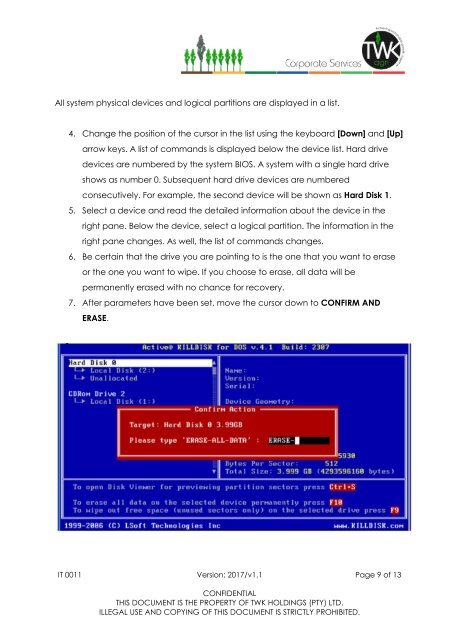
All system physical devices and logical partitions are displayed in a list.<br />
4. Change the position of the cursor in the list using the keyboard [Down] and [Up]<br />
arrow keys. A list of commands is displayed below the device list. Hard drive<br />
devices are numbered by the system BIOS. A system with a single hard drive<br />
shows as number 0. Subsequent hard drive devices are numbered<br />
consecutively. For example, the second device will be shown as Hard Disk 1.<br />
5. Select a device and read the detailed information about the device in the<br />
right pane. Below the device, select a logical partition. The information in the<br />
right pane changes. As well, the list of commands changes.<br />
6. Be certain that the drive you are pointing to is the one that you want to erase<br />
or the one you want to wipe. If you choose to erase, all data will be<br />
permanently erased with no chance for recovery.<br />
7. After parameters have been set, move the cursor down to CONFIRM AND<br />
ERASE.<br />
<strong>IT</strong> 0011 Version: <strong>2017</strong>/<strong>v1.1</strong> Page 9 of 13<br />
CONFIDENTIAL<br />
THIS DOCUMENT IS THE PROPERTY OF TWK HOLDINGS (PTY) LTD.<br />
ILLEGAL USE AND COPYING OF THIS DOCUMENT IS STRICTLY PROHIB<strong>IT</strong>ED.