
Create successful ePaper yourself
Turn your PDF publications into a flip-book with our unique Google optimized e-Paper software.
Published by Tuttle Publishing, an imprint of Periplus Editions (HK) Ltd.<br />
www.tuttlepublishing.com<br />
Copyright © 2011 by Michael G. LaFosse and Richard L. Alexander. These origami models may not be<br />
used for commercial purposes without written permission from the authors.<br />
All rights reserved. No part of this publication may be reproduced or utilized in any form or by any<br />
means, electronic or mechanical, including photocopying, recording, or by any information storage and<br />
retrieval system, without prior written permission from the publisher.<br />
Library of Congress Cataloging-in-Publication Data<br />
LaFosse, Michael G.<br />
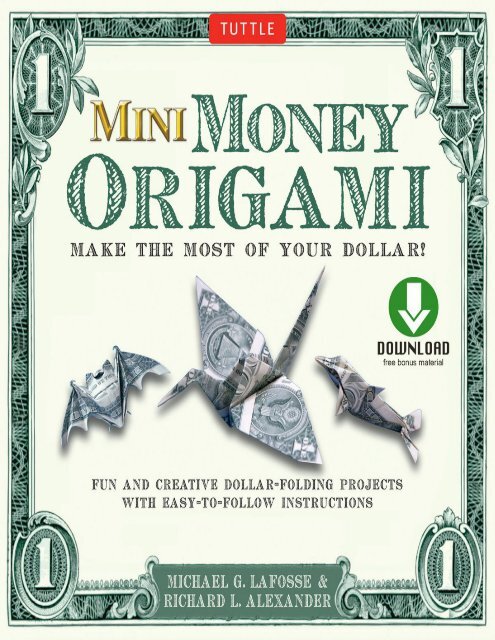
<strong>Mini</strong> money origami / by Michael G. LaFosse & Richard L. Alexander.<br />
p. cm.<br />
ISBN 978-0-8048-4230-3<br />
ISBN 978-1-4629-1728-0 (ebook)<br />
1. <strong>Origami</strong>. 2. <strong>Money</strong> in art. I. Alexander,<br />
Richard L., 1953- II. Title.<br />
TT870.L234245 2011<br />
736’.982--dc22<br />
2011004773<br />
ISBN 978-0-8048-4230-3<br />
Distributed by:<br />
North America, Latin America & Europe<br />
Tuttle Publishing<br />
364 Innovation Drive<br />
North Clarendon,<br />
VT 05759-9436 U.S.A.<br />
Tel: 1 (802) 773-8930<br />
Fax: 1 (802) 773-6993<br />
info@tuttlepublishing.com<br />
www.tuttlepublishing.com<br />
Japan<br />
Tuttle Publishing<br />
Yaekari Building, 3rd Floor<br />
5-4-12 Osaki<br />
Shinagawa-ku<br />
Tokyo 141 0032<br />
Tel: (81) 3 5437-0171<br />
Fax: (81) 3 5437-0755<br />
sales@tuttle.co.jp<br />
www.tuttle.co.jp<br />
Asia Pacific<br />
Berkeley Books Pte. Ltd.<br />
61 Tai Seng Avenue #02-12
Singapore 534167<br />
Tel: (65) 6280-1330<br />
Fax: (65) 6280-6290<br />
inquiries@periplus.com.sg<br />
www.periplus.com<br />
First edition<br />
19 18 17 16 15 1502HW<br />
8 7 6 5 4 3<br />
Printed in Hong Kong<br />
TUTTLE PUBLISHING ® is a registered trademark of Tuttle Publishing, a division of Periplus Editions<br />
(HK) Ltd.
Contents<br />
<strong>Origami</strong> Symbols Key<br />
Introduction<br />
Three-Dollar Bird Base<br />
Three-Dollar Japanese Crane<br />
Four-Pointed Star<br />
Heart Locket<br />
Dolphin<br />
Happy, Good-Fortune Bat<br />
Dollar Bill Folding Tips
How to Download the Bonus Material of this Book.<br />
1. You must have an internet connection.<br />
2. Click the link below or copy paste the URL to your web browser.<br />
http://www.tuttlepublishing.com/mini-money-origami-kit-downloadablecd-content<br />
For support email us at info@tuttlepublishing.com.
<strong>Origami</strong> Symbols Key<br />
Our diagrams use the standard origami notations that are shown here. If you<br />
are new to origami notation, please be encouraged that the project diagrams<br />
are complete and clear. However, your ability to easily interpret them will<br />
take time, like learning to read any foreign language. Studying from both the<br />
video lessons and the diagrams will help you to learn to read origami<br />
instructions much more quickly.<br />
Obverse (Front)<br />
Reverse (Back)<br />
Fold in Front<br />
Fold and Unfold
Fold to the Back<br />
Move or Push<br />
Fan Fold<br />
Repeat Here<br />
Turn Over
Introduction<br />
<strong>Money</strong> origami is more popular than ever, thanks to the panoply of designs<br />
and the wonderful folding quality of the dollar bill. Many people like to give<br />
cash gifts or tips in folded money. While the classic folds still fascinate,<br />
money-fold enthusiasts are always looking for fresh ideas. Therefore, we’re<br />
pleased to offer this unique collection, and we hope you will get a kick out of<br />
these delightful new models. This kit also debuts our ingenious new Three-<br />
Dollar Bird Base (page 6) that you may use as a launching pad for your own<br />
financial fiddling.<br />
Our first <strong>Money</strong> <strong>Origami</strong> kit was our response to a glut of books on the<br />
market that were just too complicated. The folks at Tuttle Publishing allowed<br />
us to include video lessons on a disc, enabling scores of beginners to find<br />
folding success. Naturally, we have included video lessons with this kit, as<br />
well. We recommend that you first watch the selected lesson all the way<br />
through once or twice, without trying to fold along. When you are ready to<br />
fold along with the video demonstration, use the pause button to stop the<br />
lesson while you copy each fold. Repeat as needed in order to accomplish<br />
any folding sequence that is difficult for you.<br />
Enjoy this <strong>Mini</strong> <strong>Money</strong> <strong>Origami</strong> treat while we work up the next set of fun<br />
folds, and remember: if you spend money without folding it first, you haven’t<br />
gotten the full enjoyment from your hard-earned cash!<br />
We hope you enjoy the original origami butterfly designs presented in this<br />
kit!
—<strong>Origami</strong>do Studio,<br />
Richard Alexander & Michael LaFosse
Designed by Richard L. Alexander<br />
The classic Japanese “Bird Base” is folded from a single uncut<br />
square. It’s a versatile design that is the basis of many models—<br />
and not just birds. Adapting this base to money typically produces<br />
a stubby model with limited potential for elegance. However, our<br />
Three-Dollar Bird Base—integral to the following two designs—<br />
produces impressive, elegant models. Try this base with other<br />
familiar models.<br />
1 For bill number one, begin with the reverse side facing right-side up.<br />
Valley-fold the left and right short edges to the top edge.
2 Valley-fold the same two short edges down to meet the 45-degree folded<br />
edges formed in step one.<br />
3 Move the folded flaps down and turn the model over, left to right.<br />
4 Your model should look like this. Fold in half, right to left.
5 Valley-fold the top, long edge to meet the 45-degree angled crease.<br />
Unfold. You can make Step 6 easier if you flex this fold back and forth a few<br />
times.<br />
6 A) Push the top right corner in, using the creases formed in Step 5 as a<br />
guide. B) Rotate the model so that the bottom right corner is at the top.
7 This completes the first unit, but you will need two of these, so fold a<br />
second unit from bill number two.<br />
8 For the third bill, begin with the obverse side of the bill facing right-side<br />
up. Valley-fold in half, edge to edge both ways, unfolding after each fold.<br />
Turn over, left to right.
9 Valley-fold diagonal 45-degree creases, crossing at the center, unfolding<br />
after each.<br />
10 Study the lettermarked creases and look ahead at the next step for the<br />
shape. Use the existing creases to mountain and valley-fold the bill and<br />
collapse it into shape.<br />
11 Valley-fold the indicated ends of the bill to meet at the middle.
12 Unfold. You can make Step 13 easier if you flex these folds back and<br />
forth.<br />
13 Use the existing creases to push the ends into the bill.<br />
14 Begin assembly by inserting one of the two first bills into the third bill<br />
as shown. Complete assembly by adding the second copy of your first two<br />
bills on the other side and in the same manner.
15 Fold the front flap all the way up. Repeat with the other flap, behind.<br />
Take care as you co-fold the bills. The more you fold them, the more they<br />
lock together.<br />
16 The completed Three-Dollar Bird Base. You can now fold many<br />
origami classics from this three-dollarbill version of the Bird Base. This kit<br />
demonstrates the Japanese Crane and the Four-Pointed Star. Enjoy!
Base designed by Richard L. Alexander Crane, Traditional Japanese<br />
This classic origami model is usually folded from a single, uncut<br />
square. It is one of the most impressive and beloved of all<br />
traditional origami, and has become an international symbol of<br />
peace. The crane has been folded from a single dollar bill; but the<br />
resulting model is small, and the bill’s thickness hinders crisp,<br />
clean folding. This crane, from Richard’s Three-Dollar Bird Base,<br />
is large and elegant.
1 Begin with a Three- Dollar Bird Base (see page 6). Be sure that the split<br />
end is at the bottom. Valley-fold the bottom left and right edges of the front<br />
layers to meet at the split. Turn over and repeat behind.
2 Your model should look like this. Move the right-side top layer to the<br />
left. Repeat behind to make the layering even again.
3 Your model should look like this. Valley-fold the pointed, narrow bottom<br />
flap up to the top. Repeat behind.
4 Move the left-side top layer to the right. Repeat behind to make the<br />
layering even again.
5 Valley-fold the front flap down as far as it will go, flat. Repeat behind.<br />
6 Swivel each of the two middle points outward. Bring the bottom flaps up<br />
level for the wings.
7 Inside-reverse fold the top portion of one of the middle points, forming<br />
the bill.
8 The Japanese Crane.
Base designed by Richard L. Alexander Star, Traditional<br />
This classic star is a showy and festive way to present a gift of cash<br />
during the holiday season. Despite its appearance, only three bills<br />
are required to complete this model. Now that you know how many<br />
bills it takes to make one, show this star to someone and ask them<br />
to guess. Many will say, “four!” Here is your chance to suggest an<br />
“even” trade!
1 Begin with a Three-Dollar Bird Base (see page 6). Move the rightside top<br />
layer to the left. Repeat behind to make the layering even again.
2 Your model should look like this. Valley-fold the pointed bottom flap up<br />
to the top. Repeat behind.<br />
3 Valley-fold the bottom left and right front corners to meet edgewise in<br />
the middle, forming triangular flaps. Repeat behind.
4 Begin to open the star by grasping the large front flap while holding the<br />
bottom triangular flaps tightly in place, and then pull down. Do this while<br />
using your other hand to simultaneously move the same flaps at the back.<br />
5 Once the star is partially open, you can move the other two points<br />
downward. Flatten the center area to complete the star.
6 The Four-Pointed Star.
Designed by Michael G. LaFosse<br />
There are numerous paper money hearts, thanks to its relatively<br />
easy shape, and our fondness for expressing love in so many ways.<br />
This design locks closed, and can be fitted with a small, flat<br />
keepsake, such as a picture, note, commemorative coin or postage<br />
stamp. The reverse side of the heart presents George Washington<br />
wearing a hat!<br />
1 Begin with the obverse side facing up. Valley-fold in half, short edge to<br />
short edge. Unfold.
2 Valley-fold the left and right short edges to meet at the center crease.<br />
3 Unfold and turn over, left to right.<br />
4 Valley-fold to move the two outermost creases to meet at the center<br />
crease.
5 Your bill should look like this. Turn over, left to right.<br />
6 Valley-fold the indicated right edge to the left.
7 A) Valley-fold the bottom right corner to the crease, forming a large<br />
triangular flap. B) Valley-fold the smaller left corner to the same crease. C)<br />
Valleyfold the top right corner over to form a small triangular flap, somewhat<br />
smaller than flap B.<br />
8 Your bill should look like this. Return the indicated center flap to the<br />
right. Repeat Steps 6–8 on the other side.
9 Valley-fold the top front edge down, along with the left and right layers<br />
immediately behind. The fold should be made at the level of the bottom<br />
edges of the two little triangular flaps at the outer top corners of the heart.<br />
Look ahead to the next step for the shape.<br />
10 Here we see Step 9 in progress. Carefully notice which layers have<br />
been moved down. Squash the indicated pockets flat, forming two triangles<br />
that meet in the middle.
11 Mountain-fold the indicated corners tightly behind the portrait of<br />
George Washington, locking the heart.<br />
12 This view is of a heart, with George Washington wearing a hat with<br />
large mouse ears! You can fold the triangular flaps at the top to the other side<br />
to make this side the preferred display side. Leave the triangular flaps on this<br />
side and turn it over to see a classic heart.
13 You can unlock the heart by unfolding the triangular flaps from the<br />
bottom of the heart.<br />
14 Pull open.
15 The open Heart Locket. Place a small, flat item inside and lock it back<br />
up! This makes a great little keepsake.
Designed by Michael G. LaFosse and Richard L. Alexander<br />
Who doesn’t love dolphins’ playful intelligence, gentle demeanor,<br />
and smiling faces? There are many origami dollar-bill sea<br />
creatures, and many are difficult to fold, but Michael’s clever<br />
design produced a wonderfully interesting tail, as well as a shapely<br />
front, complete with pectoral flippers. Make a splash by folding a<br />
whole pod of these to delight your next group of joyful partygoers.<br />
Before you begin, find out about wet-folding at the end of the<br />
booklet!
1 Begin with a single dollar, obverse side, right side up. A) Valley-fold in<br />
half, short edge to short edge. Unfold. B) Valleyfold the left and right halves<br />
of the top edge to meet at the center crease.<br />
2 Unfold. Turn over, left to right.<br />
3 Valley-fold the left and right halves of the bottom edge to meet at the<br />
center crease. Turn over, left to right.
4 Valley-fold the left and right folded edges to meet at the center crease.<br />
Allow the layers from the back to move to the front.<br />
5 Your paper should look like this. Turn over, bottom to top.<br />
6 Valley-fold the left and right bottom edges of the kite-shaped area to<br />
meet at the center. Unfold.
7 Use the existing creases to fold the free, horizontal edge into a pointed<br />
flap. The bottom edges of the kite will meet at the center again.<br />
8 One at a time, valley-fold and unfold the left and right edges of the<br />
pointed flap. The edges should be aligned to be horizontal.
9 Form the dorsal fin by folding the pointed flap in half, while folding the<br />
entire model in half. Use the creases that you installed in Step 8 to make the<br />
fin stand vertically above the dolphin’s back.<br />
10 Valley-fold the indicated flaps up on each side of the model. Follow<br />
the thicker, folded edge at the back with your creases.
11 Valley-fold the indicated corner of the flap down, making a crease that<br />
spans the back corner and the large bottom corner. Unfold. Repeat behind.<br />
12 Make the flaps trim: A) Valleyfold the top edge to the crease formed in<br />
Step 11. B) Fold the flap down using the existing crease from Step 11. Repeat<br />
behind.
13 Mountain-fold the bottom corners in to slim the belly. Valley-fold the<br />
tail flukes down on each side.<br />
14 Lift the flukes up, level, forming the tail. Valley-fold the middle of the<br />
head corner down. Mountain and valley-fold the large bottom corners to form<br />
a crimp on each side of the model. Look ahead at the next step for the shape.<br />
15 Your model should look like this. Valley-fold up the pectoral flippers,<br />
bringing with it the bottom edge leading to the end of the head. Repeat on the<br />
other side.
16 Head detail: Valley-fold the top edge of the head down, narrowing the<br />
rostrum (beak). Mountain-fold the edges under the rostrum to further narrow<br />
the paper. Valley-fold the fin down at a forward angle.<br />
17 Notice in this diagram that an eye has been suggested with a small<br />
deflection of the paper, where the back of the rostrum meets the front of the<br />
head.
18 The completed Dolphin. You can further enhance the form by gently<br />
curving the edges of the flippers, flukes, body and rostrum.
Designed by Michael G. LaFosse<br />
Michael’s Happy, Good-Luck Bat has become one of the most<br />
cherished gifts from the <strong>Origami</strong>do Studio, whether framed sets of<br />
five red bats, or as earrings or pins. This Good-Fortune version,<br />
adapted to the dollar bill, is sure to be a crowd-pleaser as well. The<br />
sculpted body and wings look best when folded from great paper,<br />
and the dollar bill contains some of the best fiber used today. If you<br />
haven’t already looked ahead, check out the last page of the<br />
booklet for information on wet-folding!
1 Begin with a single dollar, obverse side, right side up. A) Valley-fold in<br />
half, short edge to short edge. Unfold. B) Valley-fold the left and right halves<br />
of the top edge to meet at the center crease.<br />
2 Turn over, left to right.<br />
3 A) Valley-fold the bottom corners up, making the edges meet the edge of<br />
the large triangle above. B) Valleyfold the bottom left and right edges up,<br />
flush with the bottom edge of the large triangle.
4 Valley-fold the bottom center corners down.<br />
5 Tuck the bottom edges inside the large triangle.<br />
6 Valley-fold each of the three corners to meet at the middle of the bottom<br />
edge of the triangle. Unfold.
7 Valley-fold up the exposed triangle flaps. These will become the feet.<br />
8 A) Valley-fold the long edges of the triangle flaps down to the bottom<br />
edge. Unfold. B) Valley-fold the short edges of the triangle flaps down to the<br />
bottom edge. Unfold.<br />
9 Use the valley creases to fold both long and short edges to the bottom,
folding the free corner of each triangle in half, pointed away from the vertical<br />
center.<br />
10 Valley-fold in half, left corner to right.<br />
11 Notice the intersection of two creases, marked with the “X” arrow.<br />
Fold the front flap to the left, placing the indicated intersection upon the left<br />
edge. Be sure to make the fold end at the bottom left corner.
12 Valley-fold the flap to the right, folding along the vertical left edge.<br />
13 A) The triangle flap will have a 45-degree angled crease across its<br />
middle. Move this crease to meet the left edge and valley-fold. B) Move the<br />
right edge of the triangle flap to the left edge with a valley-fold.
14 Valley-fold the longest edge of the triangle flap to its opposite edge.<br />
Repeat Steps 11–14 on the other side to pleat the other wing.<br />
15 Pull the paper open.<br />
16 Your paper should look like this. Notice the feet are in the front.<br />
Valley-fold the top corner down to the middle of the bottom edge, between<br />
the feet.
17 Valley-fold the same corner up above the top edge. Notice the crease<br />
ends, marked in red. Place them upon the top edge to get the correct level for<br />
this fold.<br />
18 Close-up: Mountain-fold the indicated left and right short edges<br />
behind, forming the forearms. Valleyfold the top corner to a point just below<br />
the horizon line of the folded edge behind.<br />
19 Valley and mountain-fold a small amount of paper from the corner of<br />
the triangle flap, forming the upper lip and nose.
20 Push the bottom ends of the indicated pleats to mountain and<br />
valleyfold a scalloped edge at the bottom of the wing. Repeat with the other<br />
wing.<br />
21 Use the existing creases to fanfold the wings closed.<br />
22 Mountain-fold from the upper wing corner down to the body crease,<br />
highlighted in red. Valley-fold the upper wing corner to touch the ear corner.<br />
Do this to both sides to make the body three-dimensional.
23 Your model should look like this.<br />
24 Close-up of the head: Mountain-fold along the ear-lines, down to the<br />
mouth corners and across the lip line. Valley-fold the ear corners flat over the<br />
top of the head. This will make the head 3-D and make flaps for the ears.<br />
25 Twist the ears, back edges toward the front, to shape them to face<br />
forward. Insert a toothpick or other narrow tool into the mouth to open it. Use<br />
a scooping, left to right motion to form the lower lip, with the mouth open in<br />
a smile.
26 Curl the top corners of the wings inward for the bat’s thumbs. Pull<br />
open the wings and add graceful curves along the edges.<br />
27 The Happy, Good-Fortune Bat.
Dollar Bill Folding Tips<br />
Use crisp new bills for best results, and try “wet-folding” your money! Wetfolding<br />
will make it easier to fold dollar bills, which are rather thick and stiff.<br />
Once the bill dries, the finished model will keep its shape much better than<br />
bills that were folded dry. Only add the slightest amount of water. Use a<br />
lightly moistened paper towel to gently wipe both sides of the bill. Wetfolding<br />
the dolphin and the bat will give you wonderful and lasting results.
![[Jeremy_Shafer]_Origami_Ooh_La_La__Action_Origami_opt](https://img.yumpu.com/60057821/1/184x260/jeremy-shafer-origami-ooh-la-la-action-origami-opt.jpg?quality=85)