You also want an ePaper? Increase the reach of your titles
YUMPU automatically turns print PDFs into web optimized ePapers that Google loves.
<strong>HMDX</strong> Audio<br />
Service Center<br />
1.800.466.3342<br />
8:30 am – 7:00 pm (EST)<br />
M – F<br />
Mail To: <strong>HMDX</strong> Audio<br />
Service Center<br />
43155 W. Nine Mile Road<br />
Suite 3<br />
Novi, MI 48375<br />
e-mail:<br />
cservice@hmdx<strong>audio</strong>.com<br />
ONE YEAR LIMITED WARRANTY<br />
<strong>HMDX</strong> Audio sells its products with the intent that they are free of defects in manufacture and<br />
workmanship for a period of one year from the date of original purchase, except as noted below.<br />
<strong>HMDX</strong> Audio warrants that its products will be free of defects in material and workmanship under normal<br />
use and service. This warranty extends only to consumers and does not extend to Retailers.<br />
To obtain warranty service on your <strong>HMDX</strong> Audio product, mail the product and your dated sales receipt<br />
(as proof of purchase), postpaid, to the following address:<br />
<strong>HMDX</strong> Audio<br />
Service Center<br />
43155 W. Nine Mile Road, Suite 3<br />
Novi, MI 48375<br />
No COD's will be accepted.<br />
<strong>HMDX</strong> Audio does not authorize anyone, including, but not limited to, Retailers, the subsequent consumer<br />
purchaser of the product from a Retailer or remote purchasers, to obligate <strong>HMDX</strong> Audio in any way<br />
beyond the terms set forth herein. This warranty does not cover damage caused by misuse or abuse;<br />
accident; the attachment of any unauthorized accessory; alteration to the product; improper installation;<br />
unauthorized repairs or modifications; improper use of electrical/power supply; loss of power; dropped<br />
product; malfunction or damage of an operating part from failure to provide manufacturer’s recommended<br />
maintenance; transportation damage; theft; neglect; vandalism; or environmental conditions; loss of use<br />
during the period the product is at a repair facility or otherwise awaiting parts or repair; or any other<br />
conditions whatsoever that are beyond the control of <strong>HMDX</strong> Audio.<br />
This warranty is effective only if the product is purchased and operated in the country in which the<br />
product is purchased. A product that requires modifications or adoption to enable it to operate in any<br />
other country than the country for which it was designed, manufactured, approved and/or authorized, or<br />
repair of products damaged by these modifications is not covered under this warranty.<br />
THE WARRANTY PROVIDED HEREIN SHALL BE THE SOLE AND EXCLUSIVE WARRANTY. THERE<br />
SHALL BE NO OTHER WARRANTIES EXPRESS OR IMPLIED INCLUDING ANY IMPLIED WARRANTY OF<br />
MERCHANTABILITY OR FITNESS OR ANY OTHER OBLIGATION ON THE PART OF THE COMPANY WITH<br />
RESPECT TO PRODUCTS COVERED BY THIS WARRANTY. SI PRODUCTS SHALL HAVE NO LIABILITY FOR<br />
ANY INCIDENTAL, CONSEQUENTIAL OR SPECIAL DAMAGES. IN NO EVENT SHALL THIS WARRANTY<br />
REQUIRE MORE THAN THE REPAIR OR REPLACEMENT OF ANY PART OR PARTS WHICH ARE FOUND TO BE<br />
DEFECTIVE WITHIN THE EFFECTIVE PERIOD OF THE WARRANTY.<br />
NO REFUNDS WILL BE GIVEN. IF REPLACEMENT PARTS FOR DEFECTIVE MATERIALS ARE NOT AVAILABLE,<br />
SI PRODUCTS RESERVES THE RIGHT TO MAKE PRODUCT SUBSTITUTIONS IN LIEU OF REPAIR OR<br />
REPLACEMENT.<br />
This warranty does not extend to the purchase of opened, used, repaired, repackaged and/or resealed<br />
products, including but not limited to sale of such products on Internet auction sites and/or sales of such<br />
products by surplus or bulk resellers. Any and all warranties or guarantees shall immediately cease and<br />
terminate as to any products or parts thereof which are repaired, replaced, altered, or modified, without<br />
the prior express and written consent of <strong>HMDX</strong> Audio.<br />
This warranty provides you with specific legal rights. You may have additional rights which may vary from<br />
state to state. Because of individual regulations, some of the above limitations and exclusions may not<br />
apply to you. For more information regarding our product line in the USA,<br />
please visit: www.hmdx<strong>audio</strong>.com<br />
©2011 <strong>HMDX</strong> Audio, all rights reserved. <strong>HMDX</strong> Audio® is a registered trademark of<br />
<strong>HMDX</strong> Audio and its affiliated companies.<br />
IB-HXB312<br />
Register<br />
Please Take A Moment Now<br />
Your Product At:<br />
www.hmdx<strong>audio</strong>.com<br />
Your valuable input regarding this<br />
product will help us create<br />
the products you will<br />
want in the future.<br />
El manual en español empieza<br />
a la página 13<br />
<strong>FLOW</strong><br />
<strong>Alarm</strong> <strong>Clock</strong><br />
Instruction Manual and<br />
Warranty Information HX-B312
<strong>Alarm</strong> <strong>Clock</strong> Buttons and Parts:<br />
(Fig. 1) (Fig. 2)<br />
12/24 Hour<br />
<strong>Clock</strong> Function<br />
Daylight Savings<br />
Time<br />
Time Zone<br />
DC Jack<br />
1 M S<br />
zz z<br />
Aux In<br />
Video Out<br />
Jack<br />
2<br />
(Fig. 3)<br />
Power<br />
Menu<br />
Shuffle<br />
Last Track<br />
Repeat<br />
Snooze<br />
USB Charging<br />
Port<br />
zz z<br />
Power 1 M S<br />
2<br />
Dock Eject<br />
zz z<br />
<strong>Alarm</strong> 1 <strong>Alarm</strong> 2<br />
Source<br />
Next/Last<br />
Track<br />
2<br />
Memory<br />
Mute<br />
Dimmer<br />
Nightlight<br />
iPad Stabilizer Dock Drawer<br />
Next Track<br />
Volume Up<br />
Volume Down<br />
Source Nightlight<br />
Snooze<br />
Play/Pause<br />
Preset Memory Up<br />
Play/Pause<br />
Preset Memory Down<br />
Volume/<br />
<strong>Clock</strong> & <strong>Alarm</strong> Set<br />
<strong>FLOW</strong>: The perfect way to charge and play your iPad, iPhone, and iPod at your bedside<br />
Thank you for purchasing <strong>HMDX</strong> Flow <strong>Alarm</strong> <strong>Clock</strong> for iPad, iPhone and iPod. This product, along with the entire<br />
<strong>HMDX</strong> Electronics lineup, connects high-tech innovation with design to provide you with years of dependability<br />
and enjoyment. Experience the freedom in choosing and customizing how you want to begin each morning.<br />
Wake-up refreshed with the ease and versatility of the Flow <strong>Alarm</strong> Dock from <strong>HMDX</strong> Electronics.<br />
<strong>FLOW</strong> <strong>Alarm</strong> Dock Main Features<br />
• Simple docking to charge and play your iPad/iPhone/iPod<br />
• Autoset clock<br />
• Dual <strong>Alarm</strong> with gradual wake<br />
• Digital tune radio with station presets<br />
• Superior speaker quality with passive subwoofers for enhanced bass<br />
• Built-in nightlight feature<br />
• Remote Control for your convenience<br />
• Battery backup to keep clock and alarm time during power outage<br />
Remote Control Battery<br />
The battery is already installed. Simply pull tab out to activate battery power. To replace remote battery, open the<br />
battery door by pressing the two tabs together. Remove the old battery and replace with the same battery type.<br />
Replacing Backup Battery if needed<br />
This alarm clock is equipped with a battery backup feature (batteries included and already installed) to keep the<br />
clock time during power outage. Note: <strong>Alarm</strong> will not sound when unit is only in backup battery mode.<br />
1. Open battery compartment door located on the bottom of the unit.<br />
2. Please make sure the AC adaptor is connected. Otherwise all settings may be lost during battery replacement.<br />
3. Insert proper replacement battery, checking that the polarity (“+” and “–“ ends of the battery) matches the<br />
drawing near the battery compartment. Close the compartment door.<br />
Battery Precautions<br />
• Use only the size and type of batteries specified.<br />
• When installing batteries, observe proper +/- polarities. Incorrect installation of battery may cause damage to<br />
the unit.<br />
• Do not mix different types of batteries together (e.g., alkaline with carbon-zinc or old batteries with new ones).<br />
• If the unit is not going to be used for a long period of time, remove batteries to prevent damage due to possible<br />
battery leakage.<br />
• Do not dispose of batteries in fire. Batteries may explode or leak.<br />
This product contains small parts that may present a choking hazard for young children.<br />
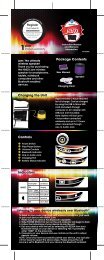
Getting Started<br />
Unpack the unit carefully. Remove all the accessories from the display carton. Do not<br />
remove any labels or stickers on the bottom of the unit and adaptor. Before setting up the<br />
unit, verify that the following accessories are present:<br />
• Instruction manual x 1<br />
• AC power adaptor x 1<br />
• Main unit x1<br />
• Remote control x 1<br />
• 3.5mm <strong>audio</strong> cable x 1<br />
3
Power Source<br />
This unit is supplied with an AC adaptor; take the following steps to connect the adaptor.<br />
1. Unwind the power cord of the AC adaptor to its full length.<br />
2. Connect the DC plug of the AC adaptor to the DC Jack (Figure 1).<br />
3. Plug the AC adaptor to the AC outlet (110v – 240v AC. 60 Hz). Connecting this system to any other power<br />
source may cause damage to the system. For sufficient ventilation, keep other objects at least 4 inches away<br />
from the unit.<br />
4. To switch the unit off completely, withdraw the AC adaptor from the wall outlet.<br />
Volume Control<br />
To adjust the volume, press the “+” and “-” controls on the unit or on the remote control.<br />
iPad/iPhone/iPod Operation<br />
Listening to Music from your iPad/iPhone/iPod (Figure 2)<br />
1. Press the POWER button, located on top of the unit to turn the speaker ON.<br />
2. Press the EJECT button to eject the dock drawer.<br />
3. Carefully fit iPad/iPhone/iPod onto the docking pin. Note: The docking pin slides forward and backward. Once<br />
the device is docked, be sure to adjust the docked device so it’s resting against the drawer for support.<br />
Please Note:<br />
• If docking an iPad, be sure to pull up the stabilizing support on the drawer to give added support<br />
and stability to the unit and the iPad when docked.<br />
• To avoid damage, do not force the device onto the docking pin<br />
WARNING: The dock connector is designed for Apple iPad, iPhone, and iPod devices. Attempting to<br />
attach a non-iPad/iPhone/iPod music player will damage or destroy your device and/or the product.<br />
4. Press the SOURCE button on the unit or on the remote control until the iPod icon appears on the display.<br />
5. Press the PLAY/PAUSE button on the unit or the remote control to play and again to pause<br />
6. To skip forward and backward through tracks, press the FORWARD and REVERSE buttons on the unit or the<br />
remote control.<br />
7. To repeat tracks or albums press the repeat button.<br />
8. To shuffle songs, press the shuffle button.<br />
9. To turn the unit OFF, press the POWER button. Note: For your convenience, your device will continue charging<br />
on the dock while the unit is plugged in, even if the power is turned off.<br />
Sending Movies & Videos from your iPad/iPhone/iPod to an external video source<br />
(Figures 1-3)<br />
1. Press the POWER button, located on top of the unit or on the remote control.<br />
2. Press the Eject button to open the dock drawer.<br />
3. Fit iPad/iPod/iPhone carefully onto the docking pin.<br />
Please Note:<br />
• If docking an iPad, be sure to pull up the stabilizing support on the drawer to give added support<br />
and stability to the unit and the iPad when docked.<br />
• To avoid damage, do not force the device onto the docking pin<br />
WARNING: The dock connector is designed for Apple iPad, iPhone, and iPod devices. Attempting to<br />
attach a non-iPad/iPhone/iPod music player will damage or destroy your device and/or the product.<br />
4. Connect a standard AV cable (not included) to the back of the unit and connect the other end to the external<br />
video source (TV, projector, etc.)<br />
5. Select the desired video or movie on the device and press play on the device.<br />
6. Once the video begins playing, press and hold the PLAY/PAUSE button on the unit or the remote.<br />
4<br />
• If playing from the iPad, the video will stop playing on your device and will return to the opening screen of the<br />
video. Press play on the iPad screen and the video will be sent to the external video source.<br />
• If playing from the iPhone or iPod touch, the video will stop playing on your device and will return to the main<br />
movie/video list on your device. Press the desired video again from the list on your iPhone/iPod touch and the<br />
video will be sent to the external video source.<br />
7. To return your movie or video back to your iPad/iPhone/iPod, press and hold the PLAY/PAUSE button again on<br />
the unit or the remote.<br />
8. The screen of your device will then show the movie/video homescreen. Press PLAY on the iPad, or for iPhone/<br />
iPod, select the video from the video list and the video will stop playing on the external video source and will<br />
resume play on your device.<br />
Listening to a non-docking iPod or other portable <strong>audio</strong> devices (Figures 2 & 3)<br />
1. Using the 3.5mm <strong>audio</strong> cable (included), plug in the device via the AUX IN input located on the back of the unit.<br />
2. Plug the other end of the <strong>audio</strong> cable into the LINE OUT or headphone jack of the device.<br />
3. Press the POWER button located on top of the dock or on the remote control.<br />
4. Press the SOURCE button on the unit or on the remote control until the AUX icon appears on the display.<br />
5. Press play on the connected device.<br />
NOTE: You may need to adjust the volume on the device to achieve proper volume.<br />
6. Press the POWER button to turn unit off.<br />
Listening to the Radio/Station Presets (Figures 2 & 3)<br />
Note: For best reception, fully extend the wire antenna. DO NOT strip, alter or attach to other<br />
antennas.<br />
1. Press the POWER button located on top of alarm clock or on the remote control.<br />
2. Press the SOURCE button on the unit or on the remote control until the RADIO icon appears on the display.<br />
3. Use the FORWARD and REVERSE buttons on the top of the unit or on the remote control to select desired<br />
station. A short press of the FORWARD or REVERSE buttons will adjust the frequency 1 MHZ. A long press of<br />
the FORWARD or REVERSE buttons will do an autoscan to find the next available station.<br />
4. Press the POWER button to turn unit off.<br />
To set station presets<br />
1. While in radio mode, use FORWARD and REVERSE buttons to select desired station.<br />
2. Press and hold the M button on the top of the unit or MENU on the remote control for station presetting mode.<br />
The “PRESET” icon will begin flashing.<br />
3. Use the FORWARD and REVERSE buttons on the unit or M+/M– on the remote to set the station to<br />
the desired preset number (0-9)<br />
4. Press M on the unit or MENU on the remote again to set the station and exit station presetting mode.<br />
To recall station from preset memory<br />
1. Quickly press the M button on the top of the unit or MENU on the remote control.<br />
2. Use the FORWARD and REVERSE buttons on the unit or M+/M– on the remoteto toggle through<br />
the preset stations<br />
Setting <strong>Clock</strong> Time<br />
AUTOSET CLOCK<br />
The Flow alarm clock is equipped with an autoset clock, meaning the clock will automatically set itself when<br />
plugged in. Please note: the clock will automatically default to Eastern Standard Time, but can be adjusted by<br />
pressing the TIME ZONE button on the back of the unit.<br />
5
MANUALLY SETTING THE CLOCK (Figures 2 & 3)<br />
1. Make sure the unit is plugged in but powered off. Press and hold the M button located on the unit. The hour will<br />
begin flashing. Use the FORWARD and REVERSE button on the unit or the M+ and M- buttons on the remote<br />
control to set the hour, paying attention to the PM indicator.<br />
2. Press the clock button again and the minute will begin flashing. Use the FORWARD and REVERSE buttons on<br />
the speaker or the M+ and M- buttons on the remote control to set the minute.<br />
3. Press the clock button again to set the day of the week, using 7 for Sunday, 1 for Monday, 2 for Tuesday, 3 for<br />
Wednesday, 4 for Thursday, 5 for Friday, and 6 for Saturday. The Flow allows you to set a 7 day, 5 day,<br />
2 day alarm (see SETTING THE ALARM section for detailed instructions). For instance, setting a<br />
5 day alarm means it will go off at the same time Monday through Friday, which is why properly<br />
setting the day of the week is important.<br />
4. To set the time zone, press the TIME ZONE button on the back of the unit repeatedly until the desired time zone<br />
is set. Use the chart below for setting the proper time zone:<br />
A1. AST A3. CST A5. PST A7. HST<br />
A2. EST A4. MST A6. AKST<br />
DAYLIGHT SAVINGS TIME (Figure 1)<br />
The Flow alarm clock is equipped with a simple DST button to adjust the clock for Daylight Savings. Press the DST<br />
button on the back of the unit to adjust the clock back one hour. Press again to adjust clock forward one hour.<br />
12/24 HOUR FUNCTION (Figure 1)<br />
To adjust the clock from 12 hr. format to 24 hr. format, press the 12/24 button located on the back of the unit.<br />
Press again to return to 12 hr. clock format.<br />
Setting and Using the <strong>Alarm</strong>s<br />
SETTING ALARM 1 or ALARM 2 (Figures 2 & 3)<br />
1. Make sure the unit is plugged in, but powered off.<br />
2. Press and hold the desired alarm button (alarm 1 or alarm 2) located on the top of the unit. The hour will begin<br />
flashing.<br />
3. Use the FORWARD and REVERSE buttons on top of the unit or M+/M– on the remote to adjust the hour,<br />
paying attention to the PM indicator.<br />
4. Press the alarm button again and the minute will begin flashing. Use the FORWARD and REVERSE buttons<br />
again on the unit or M+/M– on the remote to adjust the minute.<br />
5. Press the alarm button again to select the source. The Flow can be set to Beep, Radio, or iPod/iPhone/iPad.<br />
Use the FORWARD and REVERSE buttons on the unit or M+/M– on the remote to select which source you<br />
want to wake to—Beep, Radio, Apple Device. Please note: If you set the source to Apple Device and your<br />
device is not docked, the alarm will default to Beep. If you do not select your source when prompted to do so,<br />
the alarm will also default to Beep.<br />
6. Press the alarm button again and use the FORWARD and REVERSE on the unit or M+/M– on the remote to<br />
select a 7, 5, 2, day alarm setting. 7-day will sound at the same time 7 days a week, 5-day will sound at the<br />
same time Monday through Friday, 2-day will sound at the same time Saturday and Sunday.<br />
7. Press the alarm button again to exit <strong>Alarm</strong> Setting mode.<br />
6<br />
TURNING OFF THE ALARM / SNOOZE OPERATION (Figures 2 & 3)<br />
The Flow alarm clock is equipped with gradual wake, which means that the alarm begins soft and slowly gets<br />
louder over the course of two minutes. This will ensure a non-jarring wakeup.<br />
1. To turn off the alarm, press any button on the top of the unit except SNOOZE.<br />
2. Press the snooze button located on the top of the unit or on the remote control and the alarm will sound again<br />
in nine minutes.<br />
Please note: You may only press the Snooze button during the <strong>Alarm</strong> mode for one hour (7 times).<br />
After the seventh time, the alarm will turn off and will not sound again until the next set time.<br />
SLEEP MODE (Figures 2 & 3)<br />
1. Press the power button to turn the unit on.<br />
2. Use the SOURCE button to select the desired source that you would like to fall asleep to.<br />
3. Press the SNOOZE (Zzz) button until the desired sleep time (5, 10, 20, 30, 40, 50, 60, 70, 80, or 90 minutes)<br />
is shown on the LCD.<br />
4. After 5 seconds, the sleep time will confirm and the SLEEP icon will appear on the display. The unit will remain<br />
playing in the elected source until the set SLEEP time and then the unit will automatically turn OFF.<br />
Dimmer Control<br />
Press the SNOOZE button to adjust the backlight intensity of clock display. This can be done at power off stage.<br />
Additional Features<br />
Nightlight<br />
Press the Nightlight button on top of the unit or on the remote control to turn the nightlight on. Press again to turn<br />
it off.<br />
USB Charging Port (Figure 3)<br />
Please note:<br />
• This USB port is for charging only. It cannot be used to play music through the unit.<br />
• In order to use the USB charging feature, you must have the proper cord to connect to your device with a USB<br />
connector on the other end.<br />
To charge your device using the USB charging port (located on the back of the unit):<br />
1. Connect the USB end of the device’s cable into the USB port on the back of the unit<br />
2. Connect the other end of the cord to your device to begin charging<br />
3. If your device is not charging, disconnect both ends of the charging cable, then reconnect to the device and<br />
the USB charging port.<br />
This equipment has been tested and found to comply with the limits for a Class B digital device, pursuant to Part<br />
15 of the FCC Rules. These limits are designed to provide reasonable protection against harmful interference in a<br />
residential installation. This equipment generates, uses and can radiate radio frequency energy and, if not installed<br />
and used in accordance with the instructions, may cause harmful interference to radio communications. However,<br />
there is no guarantee that interference will not occur in a particular installation. If this equipment does cause<br />
harmful interference to radio or television reception, which can be determined by turning the equipment off and on,<br />
the user is encouraged to try to correct the interference by one or more of the following measures:<br />
• Reorient or relocate the receiving antenna.<br />
• Increase the separation between the equipment and receiver.<br />
• Connect the equipment into an outlet on a circuit different from that to which the receiver is connected.<br />
• Consult the dealer or an experienced radio/TV technician for help.<br />
7