

Web_Designer_UK__May_2018

Create successful ePaper yourself
Turn your PDF publications into a flip-book with our unique Google optimized e-Paper software.
Developer tutorials<br />
Intoday’swebdevelopmentworld,buildinga<br />
modern,complexwebsitewhichsupportsa<br />
variety of devices, both old and new, often<br />
constitutes a lot of work. Much of this work<br />
involves small, repeated tasks such as minifying<br />
JavaScript, optimising images, or compiling SASS.<br />
Whilethesetypesoftasksare useful, they also have to<br />
be performed again and again every time the code is<br />
changed. Understandably, this quickly grows repetitive,<br />
and eventually, it can be tempting to just ditch them<br />
altogether and spare yourself the headaches.<br />
Thankfully, this is an issue we can solve. The solution<br />
comes in the form of Gulp, a popular task runner which<br />
enablesustoautomatethesetypesofmundane,timeconsuming<br />
tasks through the use of Node.js streams,<br />
leaving us free to focus on the important stuff.<br />
In this tutorial, we’re going to create a basic build<br />
system using Gulp, which compiles and optimises a small<br />
projectanditsassets.Togetstarted,downloadthe<br />
project files from Filesilo and open ‘website-template’ in<br />
your favourite text editor. Then in Terminal, CD into<br />
‘website-template’ and run ‘npm install’ to install the initial<br />
project dependencies. Let’s begin.<br />
1. Install Gulp<br />
WefirstneedtoinstallGulpasaprojectdependency,and<br />
then its command line interface (gulp-cli), by running the<br />
commands below in Terminal. The latter will enable<br />
Terminal to recognise any commands beginning with<br />
‘gulp’, making it possible for us to actually run the tasks<br />
we’ll be building in this tutorial.<br />
npm install gulp-cli -g<br />
npm install gulp -D<br />
2. Create gulpfile.js<br />
Gulp searches for tasks in a JavaScript file called ‘gulpfile.<br />
js’. Let’s create one in the ‘website-template’ directory, and<br />
then in it, copy the contents of ‘support-files/step-2.txt’<br />
from the Filesilo package. This gives us a basic structure<br />
so we can organise our code.<br />
Thefirstthingweneedtodointhegulpfileisimport<br />
Gulp itself as a dependency. This can be done by adding<br />
the code below under the “Set Dependencies” header.<br />
We’lluseanES6constdeclarationforthisandother<br />
imports since we won’t be needing to reassign them.<br />
const gulp = require(‘gulp’);<br />
3. Project directory structure<br />
When building a gulpfile, it’s worth remembering that<br />
we may want to reuse it in future projects. These<br />
projects may all have different directory structures,<br />
whichmeanswewouldthenhavetogothrougheach<br />
Gulp task and edit the paths accordingly. Let’s spare<br />
our future-selves this inconvenience and declare our<br />
directory structure in reusable variables which can<br />
be easily changed. Add the declarations below under<br />
the Options header.<br />
const dev = ‘dev’;<br />
const dist = ‘dist’;<br />
const htmlDev = `${dev}/html`;<br />
const htmlDist = dist;<br />
const imgDev = `${dev}/img`;<br />
const imgDist = `${dist}/img`;<br />
const sassDev = `${dev}/sass`;<br />
const sassDist = `${dist}/css`;<br />
const jsDev = `${dev}/js`;<br />
const jsDist = `${dist}/js`;<br />
const dataDev = `${dev}/data`;<br />
4. Minify variable<br />
Next, again under the Options header, create a new<br />
variable called ‘minify’ and set its value to ‘true’. This will<br />
be used by some Gulp tasks to tell them if they should<br />
minify the compiled code.<br />
What minification does is remove all unnecessary<br />
characters such as whitespace and line breaks from the<br />
code without changing any of its functionality. This in<br />
turn, reduces its filesize, making it load a little faster in<br />
our end user’s browser.<br />
const minify = true;<br />
5. IF statements and file renaming<br />
By having a minify boolean in our build system which can<br />
be changed, we thus have to account for two differing<br />
scenarios in our Gulp tasks: One where we want Gulp to<br />
minify our code; and one where we don’t.<br />
To help us define this logic, we will install two new<br />
dependencies. The first is called gulp-if, and enables us<br />
to integrate simple ternary operators into our Gulp<br />
streams. The second is called gulp-rename, and simply<br />
enables us to rename files. Run the command below in<br />
Terminal to install these:<br />
npm install gulp-if gulp-rename -D<br />
Then import them into our gulpfile by adding this code<br />
under the Set Dependencies header:<br />
const rename = require(‘gulp-rename’);<br />
const gulpif = require(‘gulp-if’);<br />
6. Creating our first Gulp task<br />
As our Gulp tasks run, files will be taken from the<br />
specified ‘dev’ directory, processed, and then deposited<br />
into the specified ‘dist’ directory. To make sure no leftover<br />
files from previous builds can break things, we should<br />
delete any existing ‘dist’ directory first. To do this, we’ll<br />
build our very first Gulp task. We’ll require another<br />
dependency called ‘del’, which can be installed using<br />
the command below.<br />
npm install del -D<br />
Then add it to our list of dependency imports.<br />
const del = require(‘del’);<br />
Now, beneath the task’s header, let’s use the ‘gulp’ object<br />
we defined back in Step 2 and call its ‘task()’ method. This<br />
It’s just JavaScript<br />
Remember, Gulp is running on JavaScript, so we<br />
can use all the usual suspects like conditional<br />
statements and loops to enhance our tasks. A<br />
very simple example is using ‘console.log’ to<br />
print feedback, but we’ll also be using more<br />
complex ‘map’ functions soon enough.<br />
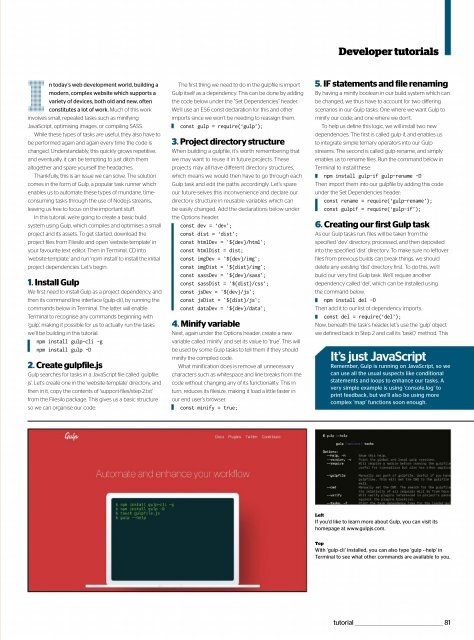
Left<br />
If you’d like to learn more about Gulp, you can visit its<br />
homepage at www.gulpjs.com.<br />
Top<br />
With ‘gulp-cli’ installed, you can also type ‘gulp --help’ in<br />
Terminal to see what other commands are available to you.<br />
tutorial _________________________________________________ 81