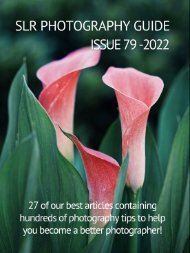
Photography Assignment Sheets
A sampler from our new product, '100 Photography Assignment Sheets' that you can learn more about over at https://www.slrphotographyguide.com/photo-assignments/
A sampler from our new product, '100 Photography Assignment Sheets' that you can learn more about over at https://www.slrphotographyguide.com/photo-assignments/

Create successful ePaper yourself
Turn your PDF publications into a flip-book with our unique Google optimized e-Paper software.
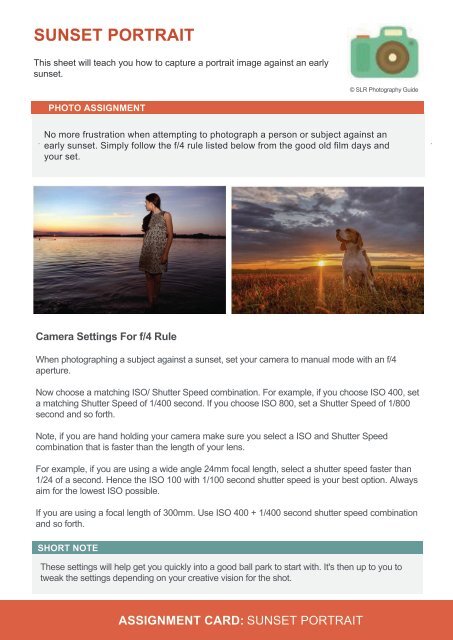
SUNSET PORTRAIT<br />
This sheet will teach you how to capture a portrait image against an early<br />
sunset.<br />
© SLR <strong>Photography</strong> Guide<br />
PHOTO ASSIGNMENT<br />
No more frustration when attempting to photograph a person or subject against an<br />
early sunset. Simply follow the f/4 rule listed below from the good old film days and<br />
your set.<br />
Camera Settings For f/4 Rule<br />
When photographing a subject against a sunset, set your camera to manual mode with an f/4<br />
aperture.<br />
Now choose a matching ISO/ Shutter Speed combination. For example, if you choose ISO 400, set<br />
a matching Shutter Speed of 1/400 second. If you choose ISO 800, set a Shutter Speed of 1/800<br />
second and so forth.<br />
Note, if you are hand holding your camera make sure you select a ISO and Shutter Speed<br />
combination that is faster than the length of your lens.<br />
For example, if you are using a wide angle 24mm focal length, select a shutter speed faster than<br />
1/24 of a second. Hence the ISO 100 with 1/100 second shutter speed is your best option. Always<br />
aim for the lowest ISO possible.<br />
If you are using a focal length of 300mm. Use ISO 400 + 1/400 second shutter speed combination<br />
and so forth.<br />
SHORT NOTE<br />
These settings will help get you quickly into a good ball park to start with. It's then up to you to<br />
tweak the settings depending on your creative vision for the shot.<br />
ASSIGNMENT CARD: SUNSET PORTRAIT
CONTRASTING LIGHT<br />
This sheet will teach you how to handle bright subjects against dark<br />
backgrounds and vice versa. The more you practice seeing tonalities in<br />
a scene, the easier it will become to quickly select camera settings.<br />
© SLR <strong>Photography</strong> Guide<br />
PHOTO ASSIGNMENT<br />
When using the camera's default metering mode (Matrix Metering or Evaluative<br />
Metering mode), the camera divides the entire frame into multiple segments, takes a<br />
meter reading from each segment and averages it out, giving more emphasis to the<br />
center of the frame.<br />
Therefore as a photographer, you need to take the average tonality of the entire<br />
frame and over expose the image if the average is on the brighter side, or under<br />
expose if the average tonality is on the darker side.<br />
Example #1 - Tiger<br />
There are more darker tones in this image than lighter ones.<br />
Therefore you'll need to under-expose the shot by -1 or -2 when<br />
using Matrix / Evaluative metering mode.<br />
Example #2 - Bird<br />
Same as above, there are more darker tones in this image than<br />
lighter ones. Therefore you'll need to under-expose the shot by<br />
-1 or -2 when using Matrix / Evaluative metering mode.<br />
Example #3 - Zebra<br />
The overall tonality of this scene is even throughout. Therefore<br />
there is no reason to under or over expose the shot. The<br />
camera should do a great job on exposing the image<br />
automatically when using Matrix or Evaluative metering.<br />
Example #4 - Eagle<br />
The overall tonality of this scene is brighter in tones. Therefore to<br />
bring out the details in the Eagle's darker feathers, you'll need to<br />
over-expose the shot by +1 or +2 when using Matrix / Evaluative<br />
metering mode.<br />
ASSIGNMENT CARD: CONTRASTING LIGHT
MOON<br />
This assignment sheet will teach you how to capture all the<br />
phases of the Moon.<br />
© SLR <strong>Photography</strong> Guide<br />
PHOTO ASSIGNMENT<br />
As with all night sky photography, these settings are a basic starting point from which<br />
you may need to tweak your settings after taking a couple of test shots. If you find a<br />
test shot too dark, increase your ISO or lower your aperture f/number. If you find it too<br />
bright, decrease your ISO or increase your aperture f/number.<br />
When using a tripod, your lens vibration reduction / image stabilization should always<br />
be turned off. Otherwise in searching for vibration, your lens may actually cause<br />
movement, creating images that are less sharp than they otherwise would be.<br />
Other Settings To Try:<br />
Bright Moon<br />
- Shutter Speed 1/500 sec<br />
- Aperture f/5.6<br />
- ISO 400-800<br />
Crescent Moon<br />
- Shutter Speed 1 sec<br />
- Aperture f/5.6<br />
- ISO 400-800<br />
Full Moon 1/250sec, f/11, ISO 250<br />
Gibbous Moon 1/125sec, f/11, ISO 250<br />
Quarter Moon 1/60sec, f/11, ISO 250<br />
Wide Crescent 1/30sec, f/11, ISO 250<br />
Thin Crescent 1/15sec, f/11, ISO 250<br />
Earthshine 2sec, f/2.8, ISO 250<br />
- Use a tripod and remote release, or<br />
set a 2 second Self Timer to trigger the<br />
image.<br />
- Use Manual Mode.<br />
SHORT NOTE<br />
The brighter the moon, the faster your shutter speed needs to be. If you find an image too dark,<br />
increase your ISO or lower your aperture f/number. If you find it too bright, decrease your ISO or<br />
increase your aperture f/number.<br />
ASSIGNMENT CARD: MOON
FIREWORKS<br />
This assignment sheet will teach you how to capture fireworks. What<br />
you'll need: Camera and wide angle lens, tripod, cable release or<br />
remote timer.<br />
© SLR <strong>Photography</strong> Guide<br />
PHOTO ASSIGNMENT<br />
Arrive early to scout out your location. Think about the wind direction. If you’re<br />
downwind from the display, the air will quickly become filled with smoke haze, which<br />
is not ideal. If you can, try and position yourself upwind to avoid this.<br />
Manually set the focus for your scene before it gets dark. Focus on infinity or on an<br />
object in the distance. Once the fireworks begin, you’ll be ready to start shooting. If<br />
you have an issue mid-show, turn autofocus back on and shoot a distant well-lit<br />
object, then turn it back to manual focus again.<br />
Method 1<br />
- ISO 200<br />
- Aperture f/8<br />
- Shutter Speed 2 seconds<br />
- Ignore the exposure line<br />
Take a test shot. If the results<br />
are too bright increase the<br />
aperture number to f/11, if too<br />
dark decrease aperture to f/5.6<br />
or f/4<br />
Method 2<br />
- ISO 200<br />
- Aperture f/11<br />
- Ignore the exposure line<br />
Instead of choosing a shutter<br />
speed, set the camera to Bulb (B)<br />
which allows you to keep the<br />
shutter open as long as you want.<br />
The longer you keep it open, the<br />
more bursts you will capture in a<br />
single shot.<br />
1. Use a sturdy tripod and cable release or wireless remote to trigger the shutter<br />
2. Set camera to 'Manual Mode' (Method 1) or 'Bulb' Mode (Method 2)<br />
3. Turn your onboard Flash OFF if you have one<br />
4. Turn OFF Autofocus and Image Stabilisation / Vibration Reduction<br />
5. Image Quality - RAW<br />
6. White Balance - AUTO<br />
7. Drive Mode - Single Shot<br />
8. Focus Manually on infinity<br />
SHORT NOTE<br />
When shooting with longer shutter speeds you need to use a tripod and remote release for<br />
sharp images. Sometimes when shooting on manual mode you need to ignore the exposure<br />
line and decide for yourself what shutter speed works best.<br />
ASSIGNMENT CARD: FIREWORKS
100 PHOTOGRAPHY<br />
ASSIGNMENT SHEETS<br />
NEW <strong>Photography</strong> <strong>Assignment</strong>s, covering everything you can imagine.<br />
Learn More https://www.slrphotographyguide.com/photo-assignments/<br />
LIGHT PAINTING<br />
This sheet will teach you how to blend light painting techniques along<br />
with a Milky Way landscape.<br />
ASSIGNMENT<br />
CSLRPholograpGuoe<br />
=f'>El--<br />
--··-··-=<br />
-<br />
=--=-· ..-......... ,,,,.,.. .......<br />
The purpose of light painting is to give recognizable detail to the landscape<br />
foreground so you only need to make one exposure. One shot makes post<br />
processing easier, as you don't have to combine separate exposures for the sky and<br />
foreground. Your light source can be something as simple as a flashlight, headlamp,<br />
flashlight app on your mobile phone, car headlights. i.e anything that gives off light.<br />
First step is to take test shots of the landscape with ambient light to make sure<br />
you've exposed correctly for the sky and stars. Once you have a good night time<br />
exposure, start light painting the scene, but don't change the camera settings.<br />
Camera Settings<br />
Manual Mode<br />
Shutter Speed 20-30 seconds<br />
Aperture: Wide open f/2 .8-f/4<br />
ISO 1600-3200<br />
Take a test shot to expose for the<br />
Milky Way or Stars first.<br />
Once you are happy with the results,<br />
then bring in the light painting.<br />
=0<br />
<br />
" -<br />
1 . Use a tripod and remote release<br />
2. Set camera to Manual Mode<br />
3. Tum off Image Stabilisation/ Vibration Reduction<br />
4. Image Quality- RAW<br />
5. White Balance- Daylight/ Sunny<br />
6. Drive Mode- Single Shot<br />
7. Focus Manual<br />
HOW DID YOU GO?<br />
• Did you have fun experimenting with different light positions?<br />
• Were you able to capture the night sky and light painting on the foreground?<br />
ASSIGNMENT CARD: LIGHT PAINTING