Cypress South November 2019

Create successful ePaper yourself
Turn your PDF publications into a flip-book with our unique Google optimized e-Paper software.
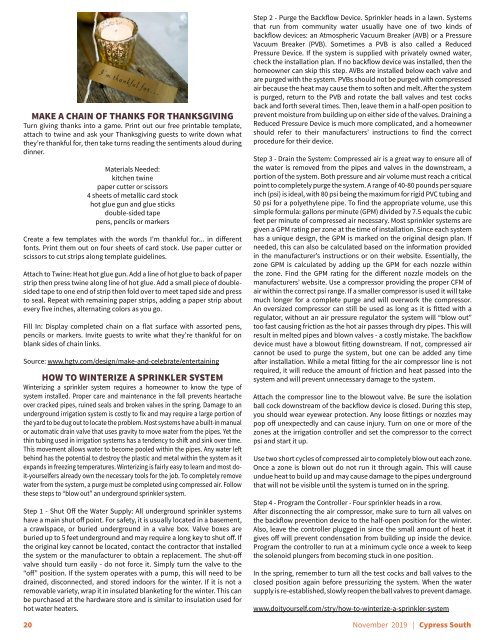
MAKE A CHAIN OF THANKS FOR THANKSGIVING<br />
Turn giving thanks into a game. Print out our free printable template,<br />
attach to twine and ask your Thanksgiving guests to write down what<br />
they’re thankful for, then take turns reading the sentiments aloud during<br />
dinner.<br />
HOW TO WINTERIZE A SPRINKLER SYSTEM<br />
Winterizing a sprinkler system requires a homeowner to know the type of<br />
system installed. Proper care and maintenance in the fall prevents heartache<br />
over cracked pipes, ruined seals and broken valves in the spring. Damage to an<br />
underground irrigation system is costly to fix and may require a large portion of<br />
the yard to be dug out to locate the problem. Most systems have a built-in manual<br />
or automatic drain valve that uses gravity to move water from the pipes. Yet the<br />
thin tubing used in irrigation systems has a tendency to shift and sink over time.<br />
This movement allows water to become pooled within the pipes. Any water left<br />
behind has the potential to destroy the plastic and metal within the system as it<br />
expands in freezing temperatures. Winterizing is fairly easy to learn and most doit-yourselfers<br />
already own the necessary tools for the job. To completely remove<br />
water from the system, a purge must be completed using compressed air. Follow<br />
these steps to “blow out” an underground sprinkler system.<br />
Step 1 - Shut Off the Water Supply: All underground sprinkler systems<br />
have a main shut off point. For safety, it is usually located in a basement,<br />
a crawlspace, or buried underground in a valve box. Valve boxes are<br />
buried up to 5 feet underground and may require a long key to shut off. If<br />
the original key cannot be located, contact the contractor that installed<br />
the system or the manufacturer to obtain a replacement. The shut-off<br />
valve should turn easily - do not force it. Simply turn the valve to the<br />
“off” position. If the system operates with a pump, this will need to be<br />
drained, disconnected, and stored indoors for the winter. If it is not a<br />
removable variety, wrap it in insulated blanketing for the winter. This can<br />
be purchased at the hardware store and is similar to insulation used for<br />
hot water heaters.<br />
20<br />
Materials Needed:<br />
kitchen twine<br />
paper cutter or scissors<br />
4 sheets of metallic card stock<br />
hot glue gun and glue sticks<br />
double-sided tape<br />
pens, pencils or markers<br />
Create a few templates with the words I’m thankful for... in different<br />
fonts. Print them out on four sheets of card stock. Use paper cutter or<br />
scissors to cut strips along template guidelines.<br />
Attach to Twine: Heat hot glue gun. Add a line of hot glue to back of paper<br />
strip then press twine along line of hot glue. Add a small piece of doublesided<br />
tape to one end of strip then fold over to meet taped side and press<br />
to seal. Repeat with remaining paper strips, adding a paper strip about<br />
every five inches, alternating colors as you go.<br />
Fill In: Display completed chain on a flat surface with assorted pens,<br />
pencils or markers. Invite guests to write what they’re thankful for on<br />
blank sides of chain links.<br />
Source: www.hgtv.com/design/make-and-celebrate/entertaining<br />
Step 2 - Purge the Backflow Device. Sprinkler heads in a lawn. Systems<br />
that run from community water usually have one of two kinds of<br />
backflow devices: an Atmospheric Vacuum Breaker (AVB) or a Pressure<br />
Vacuum Breaker (PVB). Sometimes a PVB is also called a Reduced<br />
Pressure Device. If the system is supplied with privately owned water,<br />
check the installation plan. If no backflow device was installed, then the<br />
homeowner can skip this step. AVBs are installed below each valve and<br />
are purged with the system. PVBs should not be purged with compressed<br />
air because the heat may cause them to soften and melt. After the system<br />
is purged, return to the PVB and rotate the ball valves and test cocks<br />
back and forth several times. Then, leave them in a half-open position to<br />
prevent moisture from building up on either side of the valves. Draining a<br />
Reduced Pressure Device is much more complicated, and a homeowner<br />
should refer to their manufacturers’ instructions to find the correct<br />
procedure for their device.<br />
Step 3 - Drain the System: Compressed air is a great way to ensure all of<br />
the water is removed from the pipes and valves in the downstream, a<br />
portion of the system. Both pressure and air volume must reach a critical<br />
point to completely purge the system. A range of 40-80 pounds per square<br />
inch (psi) is ideal, with 80 psi being the maximum for rigid PVC tubing and<br />
50 psi for a polyethylene pipe. To find the appropriate volume, use this<br />
simple formula: gallons per minute (GPM) divided by 7.5 equals the cubic<br />
feet per minute of compressed air necessary. Most sprinkler systems are<br />
given a GPM rating per zone at the time of installation. Since each system<br />
has a unique design, the GPM is marked on the original design plan. If<br />
needed, this can also be calculated based on the information provided<br />
in the manufacturer’s instructions or on their website. Essentially, the<br />
zone GPM is calculated by adding up the GPM for each nozzle within<br />
the zone. Find the GPM rating for the different nozzle models on the<br />
manufacturers’ website. Use a compressor providing the proper CFM of<br />
air within the correct psi range. If a smaller compressor is used it will take<br />
much longer for a complete purge and will overwork the compressor.<br />
An oversized compressor can still be used as long as it is fitted with a<br />
regulator, without an air pressure regulator the system will “blow out”<br />
too fast causing friction as the hot air passes through dry pipes. This will<br />
result in melted pipes and blown valves - a costly mistake. The backflow<br />
device must have a blowout fitting downstream. If not, compressed air<br />
cannot be used to purge the system, but one can be added any time<br />
after installation. While a metal fitting for the air compressor line is not<br />
required, it will reduce the amount of friction and heat passed into the<br />
system and will prevent unnecessary damage to the system.<br />
Attach the compressor line to the blowout valve. Be sure the isolation<br />
ball cock downstream of the backflow device is closed. During this step,<br />
you should wear eyewear protection. Any loose fittings or nozzles may<br />
pop off unexpectedly and can cause injury. Turn on one or more of the<br />
zones at the irrigation controller and set the compressor to the correct<br />
psi and start it up.<br />
Use two short cycles of compressed air to completely blow out each zone.<br />
Once a zone is blown out do not run it through again. This will cause<br />
undue heat to build up and may cause damage to the pipes underground<br />
that will not be visible until the system is turned on in the spring.<br />
Step 4 - Program the Controller - Four sprinkler heads in a row.<br />
After disconnecting the air compressor, make sure to turn all valves on<br />
the backflow prevention device to the half-open position for the winter.<br />
Also, leave the controller plugged in since the small amount of heat it<br />
gives off will prevent condensation from building up inside the device.<br />
Program the controller to run at a minimum cycle once a week to keep<br />
the solenoid plungers from becoming stuck in one position.<br />
In the spring, remember to turn all the test cocks and ball valves to the<br />
closed position again before pressurizing the system. When the water<br />
supply is re-established, slowly reopen the ball valves to prevent damage.<br />
www.doityourself.com/stry/how-to-winterize-a-sprinkler-system<br />
<strong>November</strong> <strong>2019</strong> | <strong>Cypress</strong> <strong>South</strong>