

installation guide & owners manual - American Beauty Equipment
installation guide & owners manual - American Beauty Equipment
installation guide & owners manual - American Beauty Equipment

Create successful ePaper yourself
Turn your PDF publications into a flip-book with our unique Google optimized e-Paper software.
f,OnHER HOUI',T<br />
IT IS U\LAWFUL TO NSTAI-L THIS TJI\IT<br />
WITHOUT FIRST OBTAINING A PERMIT<br />
FROM THE LOCAI, ELf,CTRICAL<br />
INSPECTION AUTSORJTY.<br />
Installation Instructions<br />
INSTALLATION INSTRUCTION FOR ALL<br />
HEATING UNITS<br />
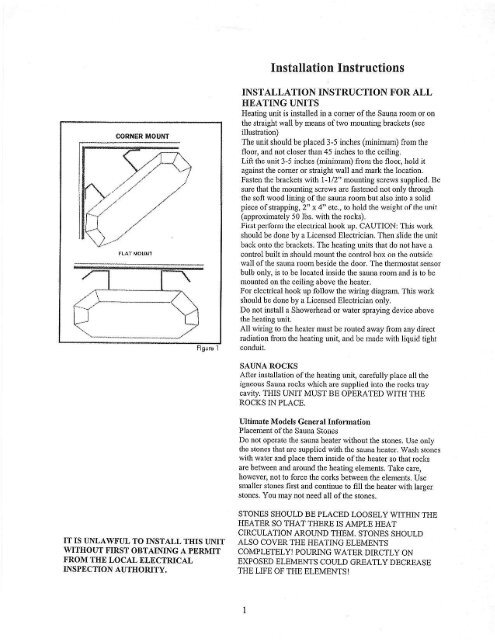
Heating unit is installed in a comer ofthe Sauna room or on<br />
the snargbt wallbl mean" oflwo mounrL'lg brackers (see<br />
ilhsAadon)<br />
The unit should be placed 3-5 inches (minimum) from the<br />
floor, and not closer than 45 inches to th€ ceiling.<br />
Lift thc uDn 3'5 tuohes (minnr r, from th€ floo! hold it<br />
against the comer or straight wall and nark the location.<br />
Faslen the brackets with 1-112" molnting screws supplied. Be<br />
sure that the mounting screws are fasiened not only thoush<br />
the soft wood liniry ofthe sauna room but also into a solid<br />
piece ofstrappine,2" x4" eto., to hoid the weighi ofthe unn<br />
(approximately 50 lbs. with the rocks).<br />
First pelform tlre olectrical hook up. CAUTION: Tlis wurk<br />
slrculd be done by a Licensed Electrician. Then slide ihe unit<br />
back onto the brackets. The heating unih that do noi have a<br />
control built in shou)d mount the controlbox on tle orrtcide<br />
wall of the sauna room beside the door. Tbe thermostat sensor<br />
bulb only, is to be located inside the sauna room and is to be<br />
mounted on the ceiiing above the hcatcr.<br />
For electrical hook up follow Xhe wiring diagam. This work<br />
should be done by a Licensed Electician only,<br />
Do not ilNtall a Showerhead or water spraying device above<br />
the heating unit.<br />
All wiring to dle hater must b€ routed away from any direct<br />
radiation ftom the heating unit, andbe made with liquid tight<br />
cooduit,<br />
SAUNA ROCI$<br />
After <strong>installation</strong> ofth€ heating unit, oaretullyptace aU the<br />
iSneou, Sale rock whioh are suppliod into the rocks tray<br />
cavity, THIS UNIT MUST BB OPEMTED WITH THE<br />
ROCKS IN PLACE,<br />
Ultimate Models General Informrtion<br />
Placement ofthe Saura Sio e$<br />
Do not operate the sauna heatd without the siones. Use only<br />
the stones that orc supplicd with thc sauna h€ater. Wash sto,rcs<br />
with waier and place dlem inside ofthe heater so that rocks<br />
are between and around the heating elements. Take carc,<br />
however, not to force the corls betw€en the elements. Use<br />
snraller stones first and coftnuo to fill the heater with larg€r<br />
stones. You rnay not need all ofthe slones,<br />
STONDS SHOULD BE PLACED LOOSELY WITHIN THE<br />
HEATER SO T}IAT THLRE IS AMPI E HEAT<br />
CIRCULATION AROUND TIIEM. STONES SHOULD<br />
ALSO COVER THE HEATING ELEMENTS<br />
COMPLETELY! POIJRING WATER DIRCTIY ON<br />
EXPOSED ELEMENTS COULD GREATLY DECREASE<br />
THE LITD OF THE ELXMENTS I