Intermediate Blackboard Tips for Students: Using the ... - Terri Senft
Intermediate Blackboard Tips for Students: Using the ... - Terri Senft
Intermediate Blackboard Tips for Students: Using the ... - Terri Senft

You also want an ePaper? Increase the reach of your titles
YUMPU automatically turns print PDFs into web optimized ePapers that Google loves.
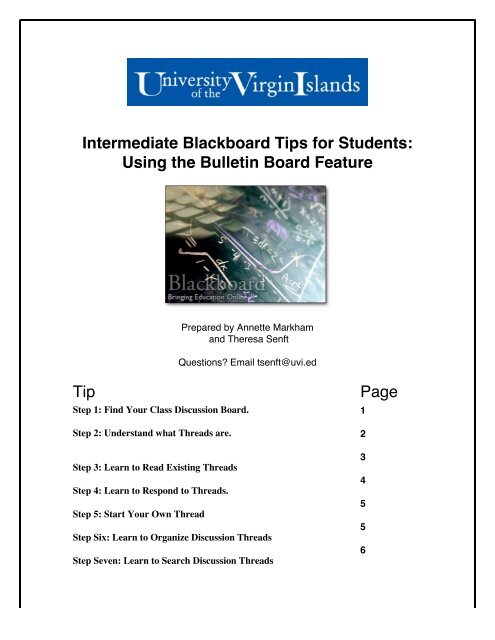
<strong>Intermediate</strong> <strong>Blackboard</strong> <strong>Tips</strong> <strong>for</strong> <strong>Students</strong>:<br />
<strong>Using</strong> <strong>the</strong> Bulletin Board Feature<br />
Prepared by Annette Markham<br />
and Theresa <strong>Senft</strong><br />
Questions? Email tsenft@uvi.ed<br />
Tip Page<br />
Step 1: Find Your Class Discussion Board. 1<br />
Step 2: Understand what Threads are. 2<br />
Step 3: Learn to Read Existing Threads<br />
Step 4: Learn to Respond to Threads.<br />
Step 5: Start Your Own Thread<br />
Step Six: Learn to Organize Discussion Threads<br />
Step Seven: Learn to Search Discussion Threads<br />
3<br />
4<br />
5<br />
5<br />
6
STEP 1: Find Your Class Discussion Board.<br />
Since <strong>the</strong>re are a number of ways to set up a discussion board, it might take a moment<br />
or two be<strong>for</strong>e you find <strong>the</strong> one <strong>for</strong> your <strong>Blackboard</strong> course. From <strong>the</strong> main course<br />
page, look on <strong>the</strong> left hand menu <strong>for</strong> <strong>the</strong> words “Discussion,” “Communication,” or<br />
“Tools.” Click through to find this icon:<br />
Once you find your Bulletin Board, you’ll probably find it already has a few entries.<br />
Below is a screen shot of a sample Bulletin Board.<br />
STEP 2: Understand what threads are.<br />
If you look at <strong>the</strong> screen shot above, you will see that this Bulletin Board features two<br />
conversations, called threads. The first thread is called “If you don’t know how to<br />
upload.” The o<strong>the</strong>r is called “This is a Sample Message.”<br />
At this point, you have three choices:<br />
1. Read threads without responding to any<br />
2. Respond to an existing thread<br />
3. Add new thread to <strong>the</strong> Bulletin Board<br />
Although <strong>the</strong>se choices make confuse at first, <strong>the</strong>y have analogues in everyday<br />
conversation. “Reading threads” is simply listening to what o<strong>the</strong>rs are saying.<br />
“Responding to a thread” is similar to agreeing, disagreeing, or adding your own<br />
reflections to something already under discussion. “Adding a new thread” is just that:<br />
proposing a brand new topic <strong>for</strong> <strong>the</strong> group to discuss. In everyday conversation, we call<br />
2
adding a new thread, “changing <strong>the</strong> subject.” To sum: Do you want to listen, to join in, or<br />
do you want to change <strong>the</strong> subject entirely? It’s up to you.<br />
STEP 3: Learn to Read Existing Threads<br />
Because it’s a good idea to read what o<strong>the</strong>rs have said be<strong>for</strong>e jumping in, let’s begin by<br />
checking responses to <strong>the</strong> existing threads on <strong>the</strong> Bulletin Board. You can see responses<br />
to <strong>the</strong> thread by clicking <strong>the</strong> “Expand All” option on <strong>the</strong> top of <strong>the</strong> screen. Your next<br />
screen would look like <strong>the</strong> one below:<br />
In <strong>the</strong> screen shot above, <strong>the</strong> phrases that begin, “Re: If you don’t…” are called<br />
responses to <strong>the</strong> thread. To read threads and <strong>the</strong>ir responses click on <strong>the</strong> hyperlinks. If<br />
you clicked on <strong>the</strong> thread called “If you don’t know how to upload,” <strong>for</strong> example, you’d<br />
be taken to a screen that looks like this:<br />
You can follow <strong>the</strong> trajectory of <strong>the</strong> conversation by going to “Thread Detail” at <strong>the</strong><br />
bottom of <strong>the</strong> page. Note that responses are arranged in chronological order.<br />
3
STEP 4: Learn to Respond to Threads.<br />
Now that you’ve mastered reading threads, it’s time to start replying. It’s simple: click<br />
<strong>the</strong> reply button located to <strong>the</strong> right of each thread.<br />
When you hit “reply,” you are taken to a page that looks <strong>the</strong> one below (minus <strong>the</strong><br />
annotations.) Type in your response, add an attachment if you desire, and press submit.<br />
4
Step 5: Start Your Own Thread<br />
\Once that you’re com<strong>for</strong>table reading and replying to threads, it’s time to change <strong>the</strong><br />
subject, and introduce a thread of your own. To do this, you simply return back to first<br />
page of <strong>the</strong> Bulletin Board and click <strong>the</strong> button marked “Add New Thread.”<br />
You’ll see a page that looks like this:<br />
Fill in your message (don’t <strong>for</strong>get a subject line!), attach any documents you’d like,<br />
preview using <strong>the</strong> “preview” button, when you are satisfied, press “submit.”<br />
Step Six: Learn to Organize Your Discussion Threads<br />
Sometimes, you remember who said something in a discussion, but cannot remember<br />
when it was said, or what it was referencing. To help, you can organize discussion<br />
threads according to date, author or subject, using <strong>the</strong> pull down menu, as shown below.<br />
5
Step Seven: Learn to Search Your Discussion Threads<br />
You can now search within individual discussion threads by using <strong>the</strong> “Search” feature,<br />
which can be found below <strong>the</strong> “Expand” and “Collapse” boxes at <strong>the</strong> top right of <strong>the</strong><br />
discussion thread menu.<br />
Choose<br />
“Search”<br />
Choose “search” and you will reach a page that looks like this:<br />
6